DIY Storage Bench (with Hidden Robot Vacuum)
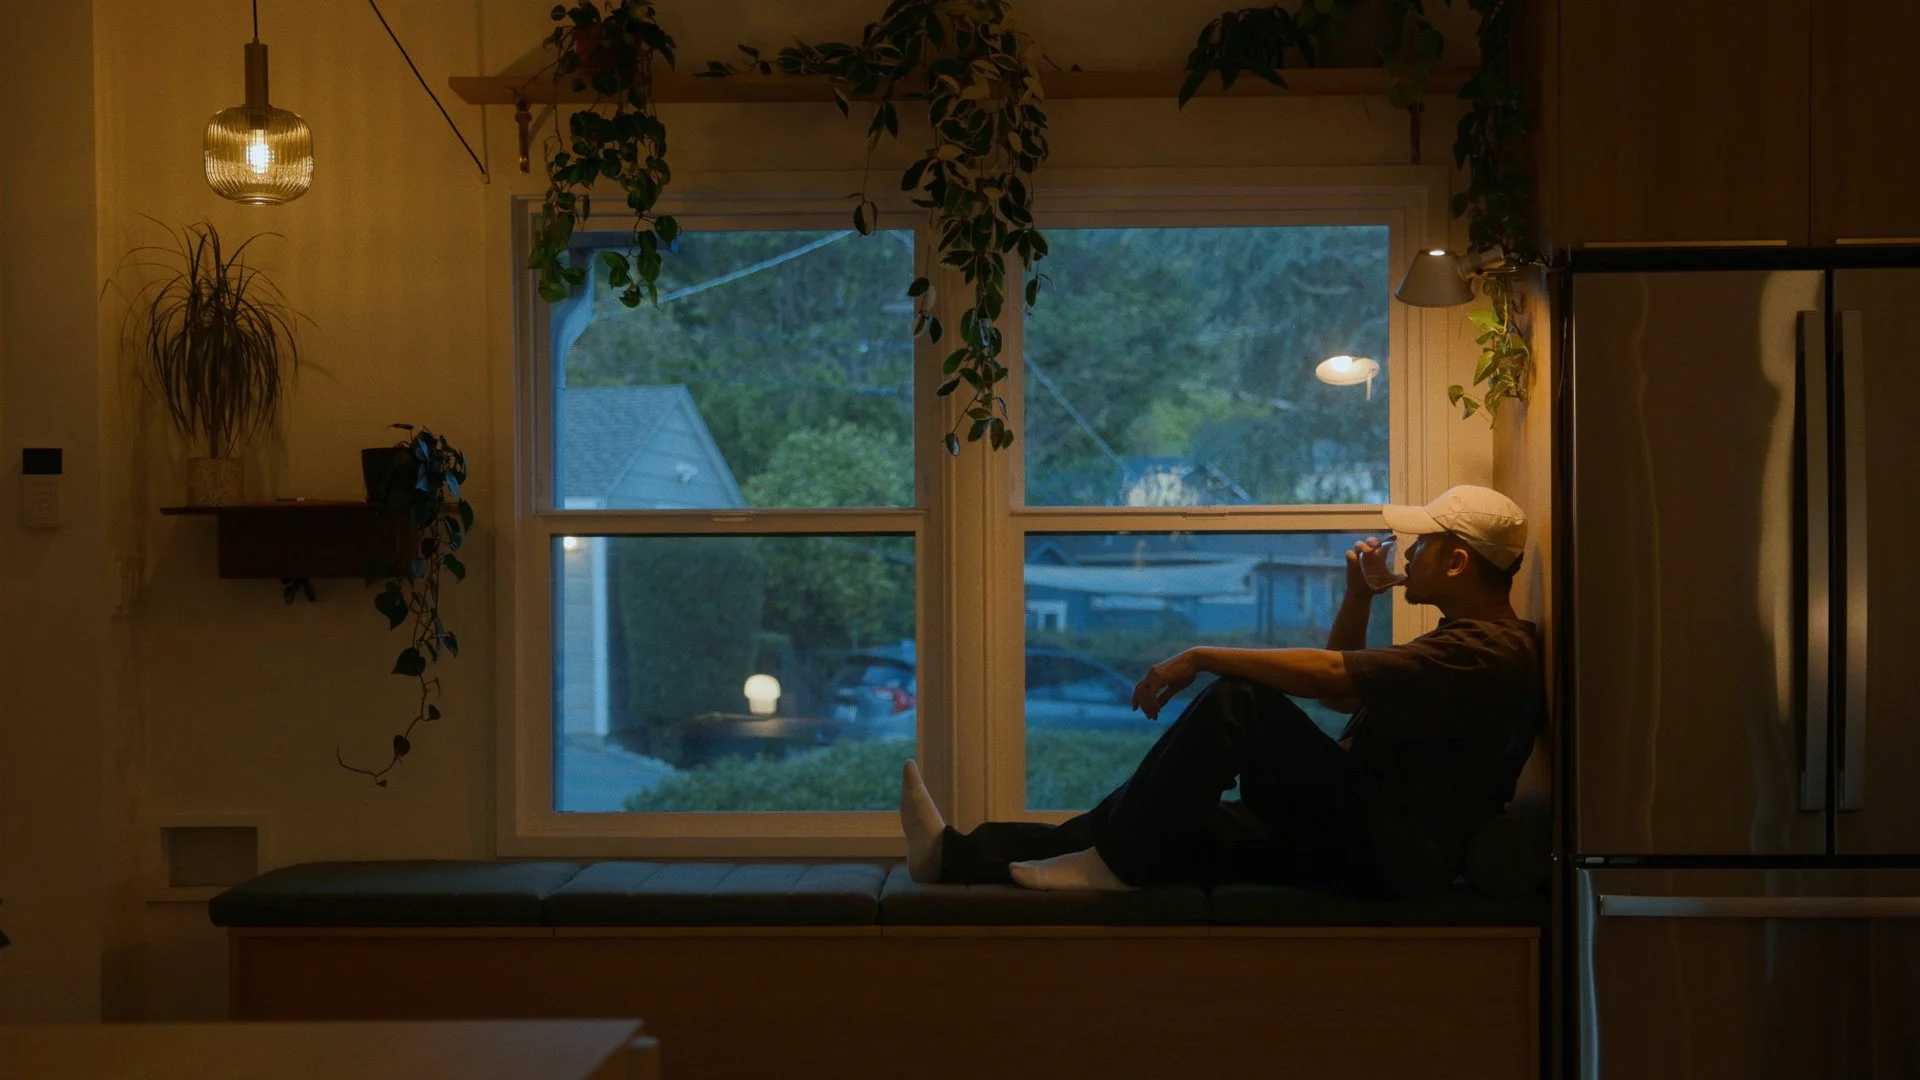
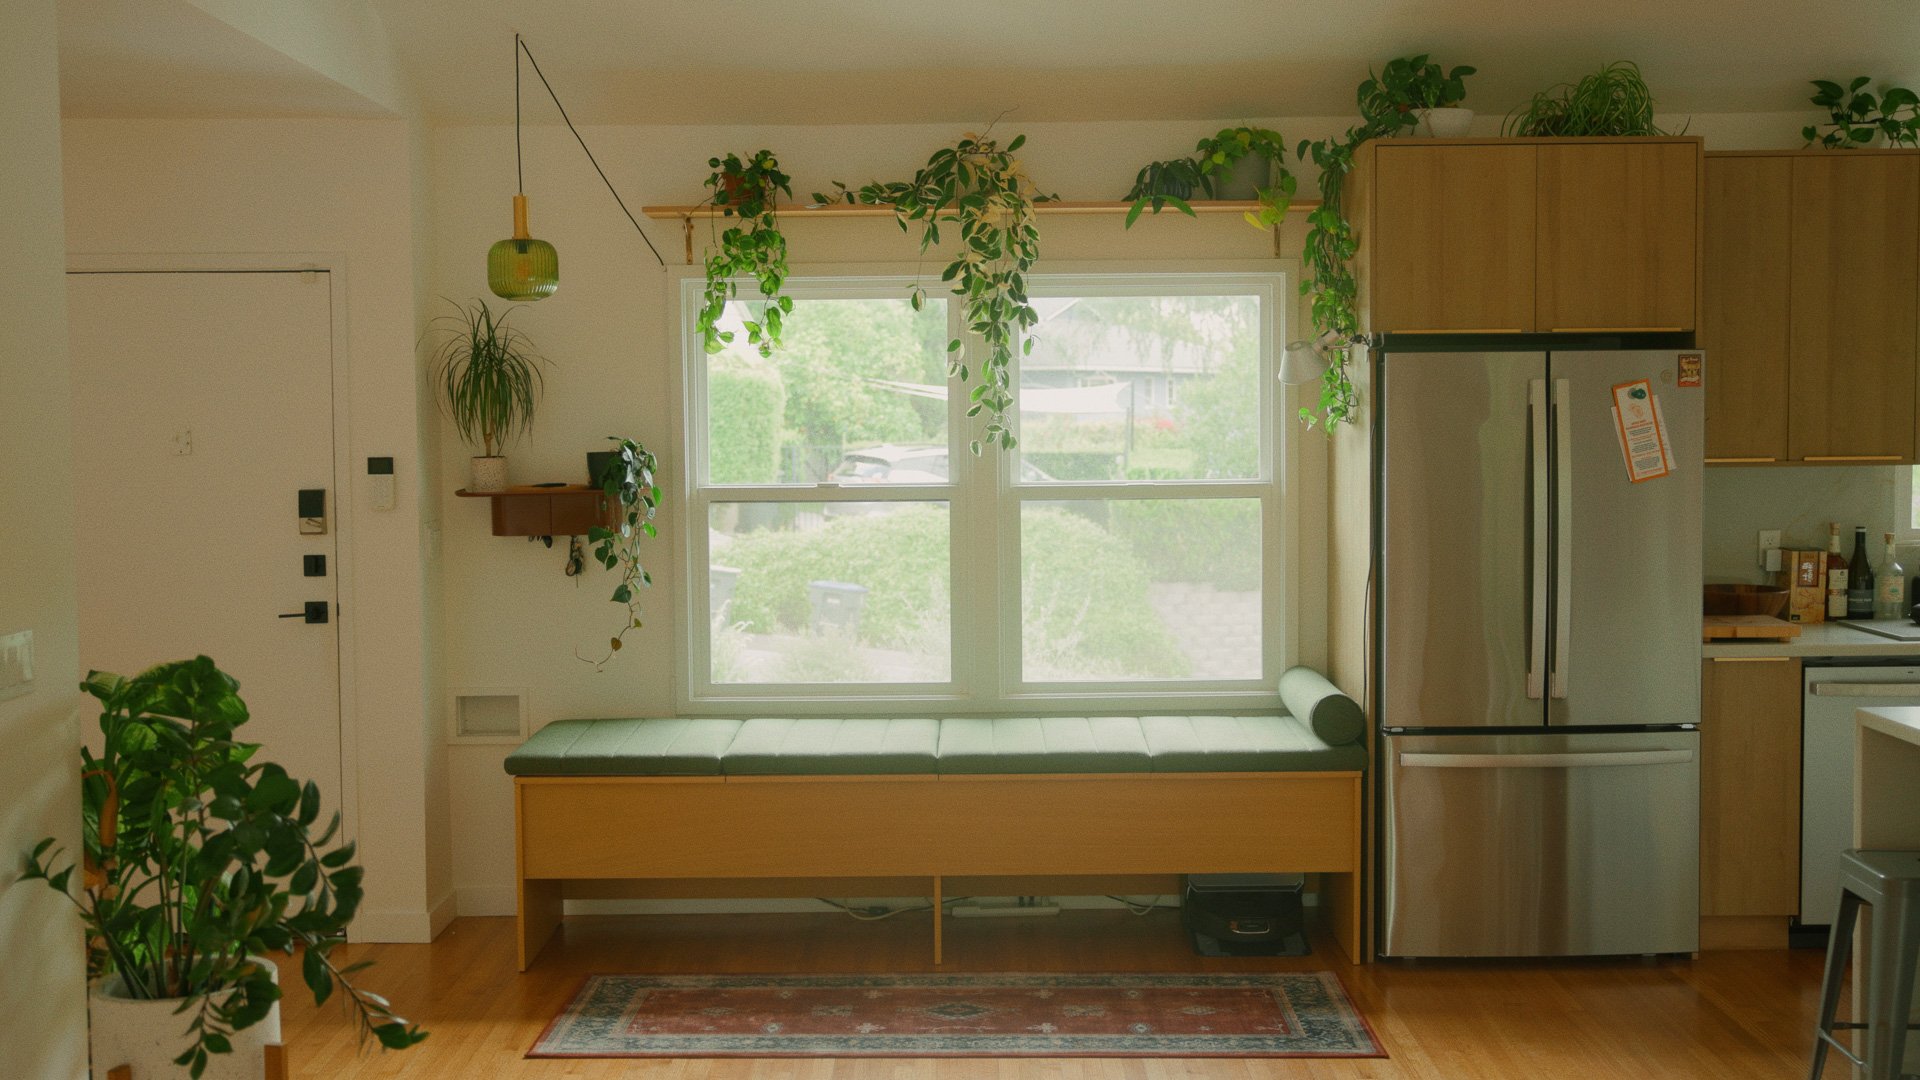
At the end of last year, we moved into a traditional American home from the 1940s. Our entryway was a blank slate, and it became the first big project we wanted to take on. It’s the first and last space you experience every time you walk through the door, and it sets the tone for the home.
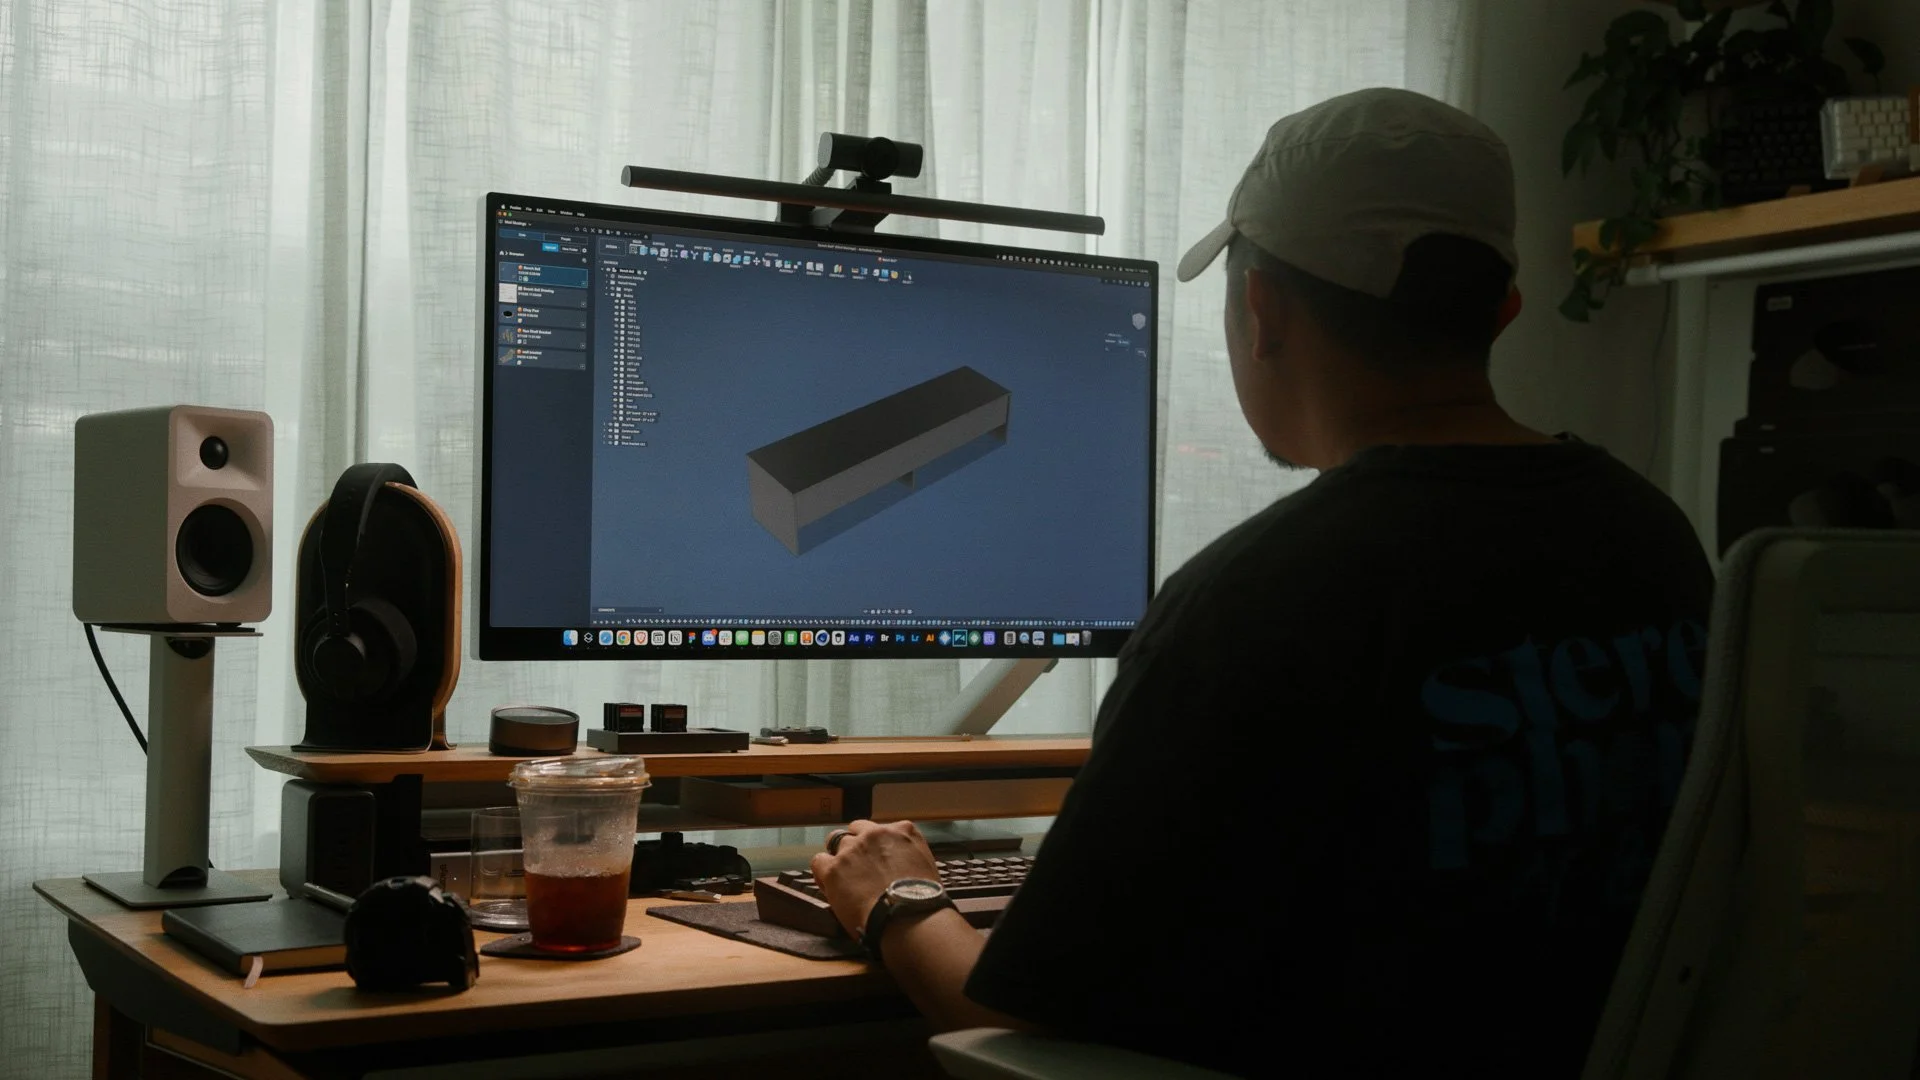
I designed and built a custom storage bench from scratch, then styled the corner to feel calm, cozy, and highly functional. This post is the detailed companion to the YouTube video, with a step-by-step breakdown of the design decisions, build process, and the products I used.
Some of the links included in this post are my affiliate links, for which I receive a small commission at no extra cost. Thanks for supporting my content.
Quick specs
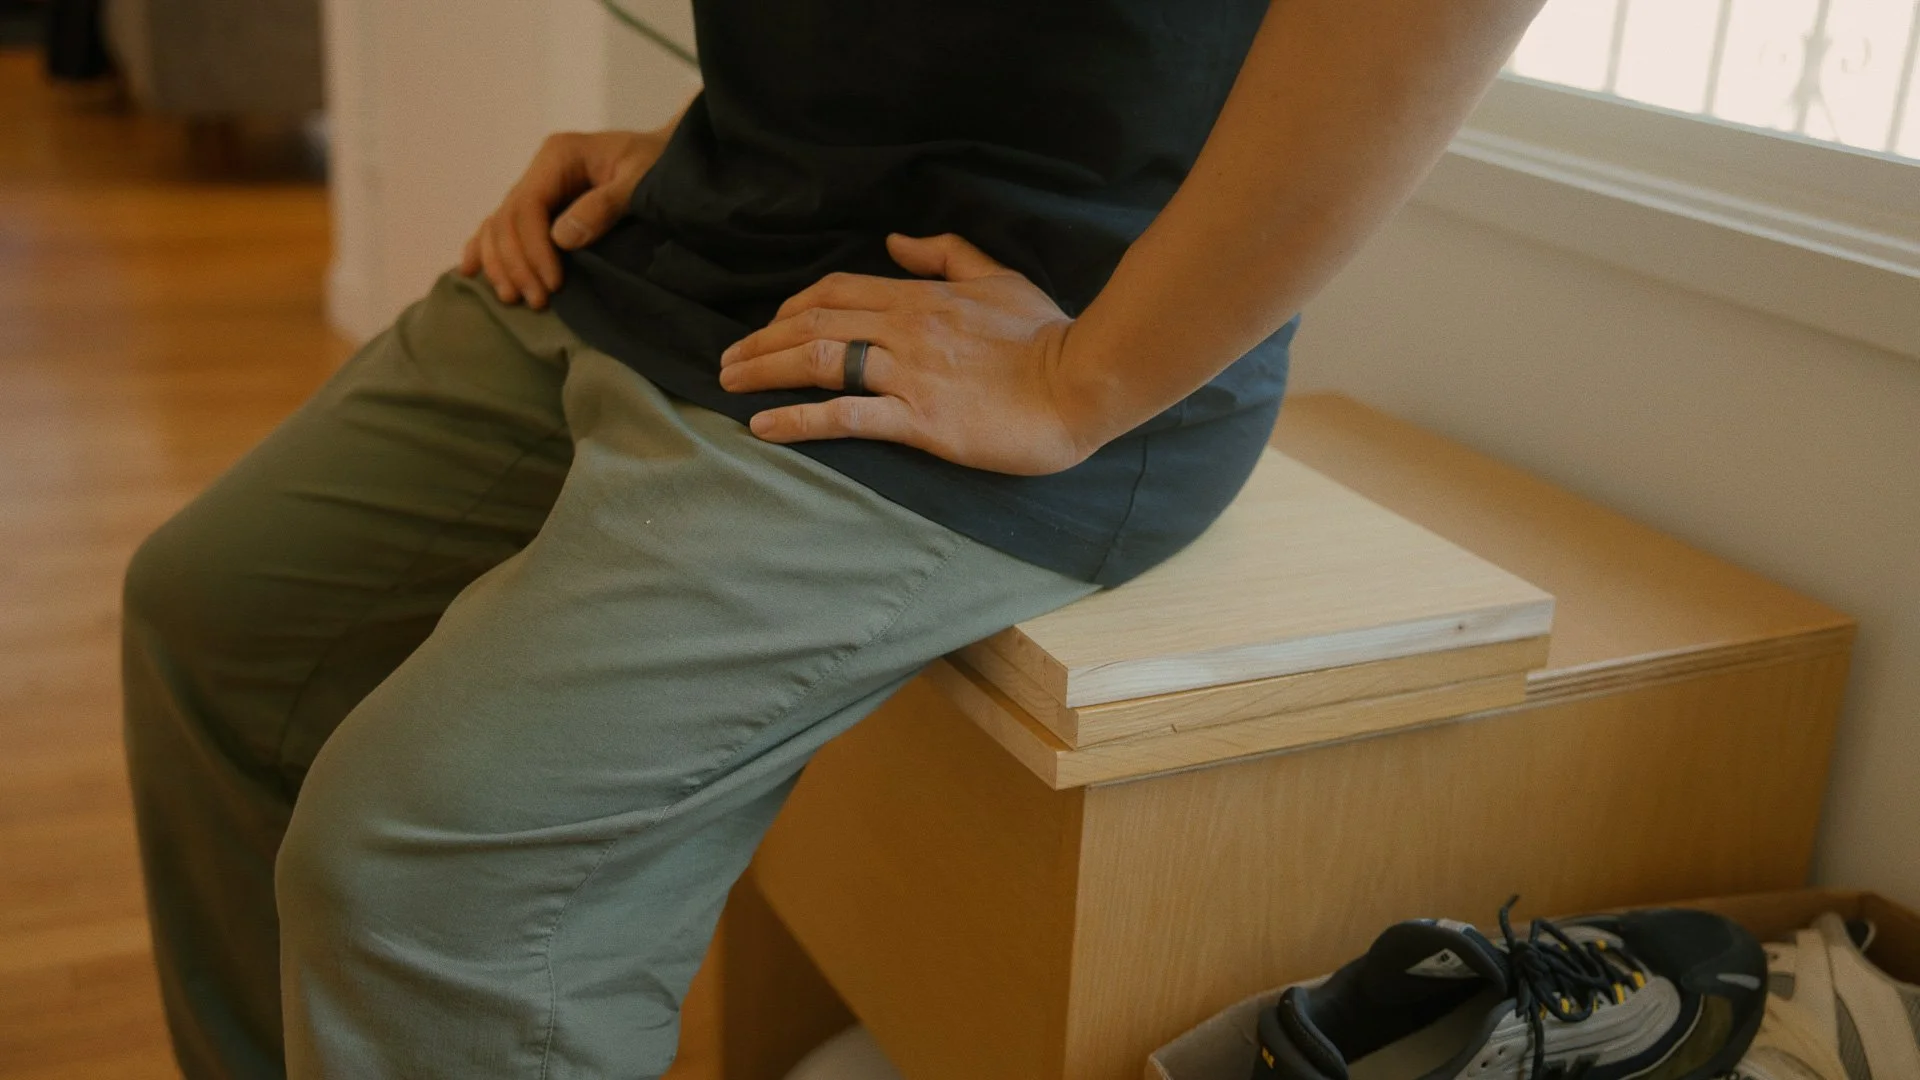
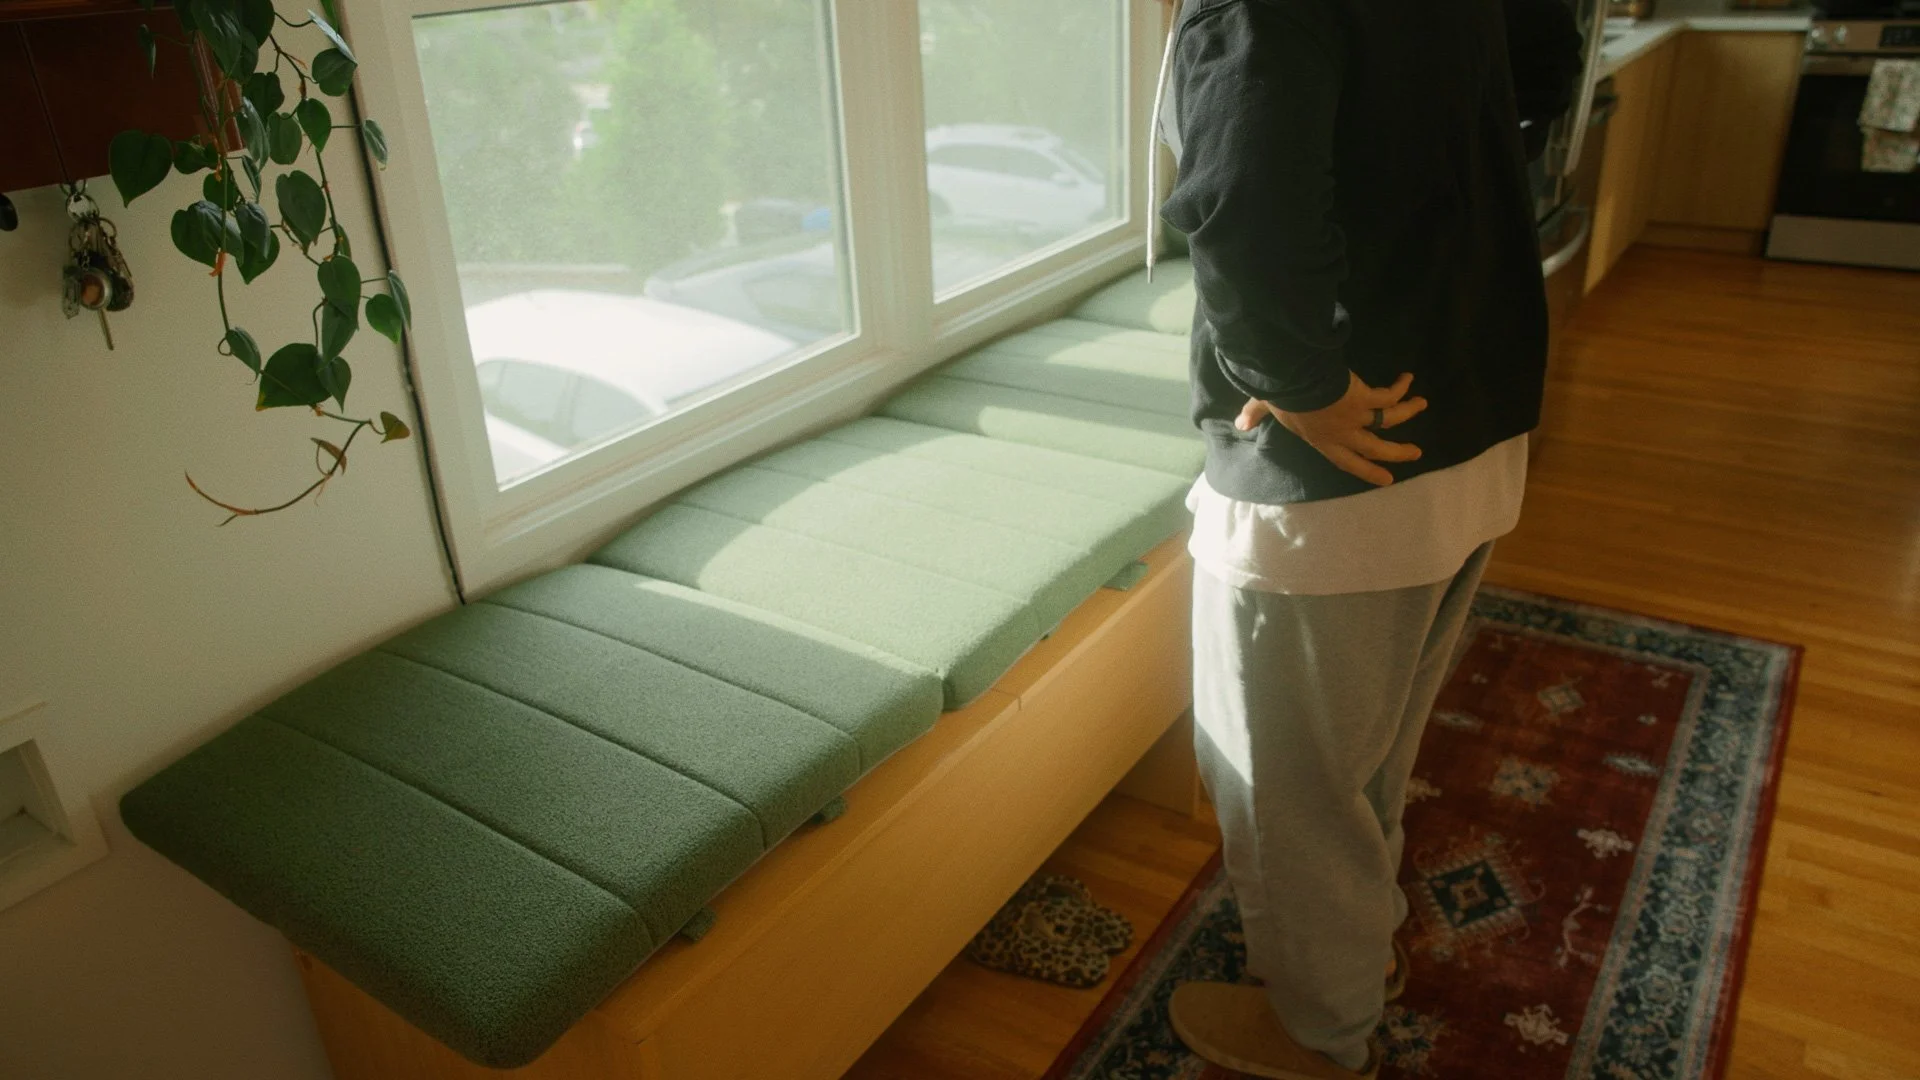
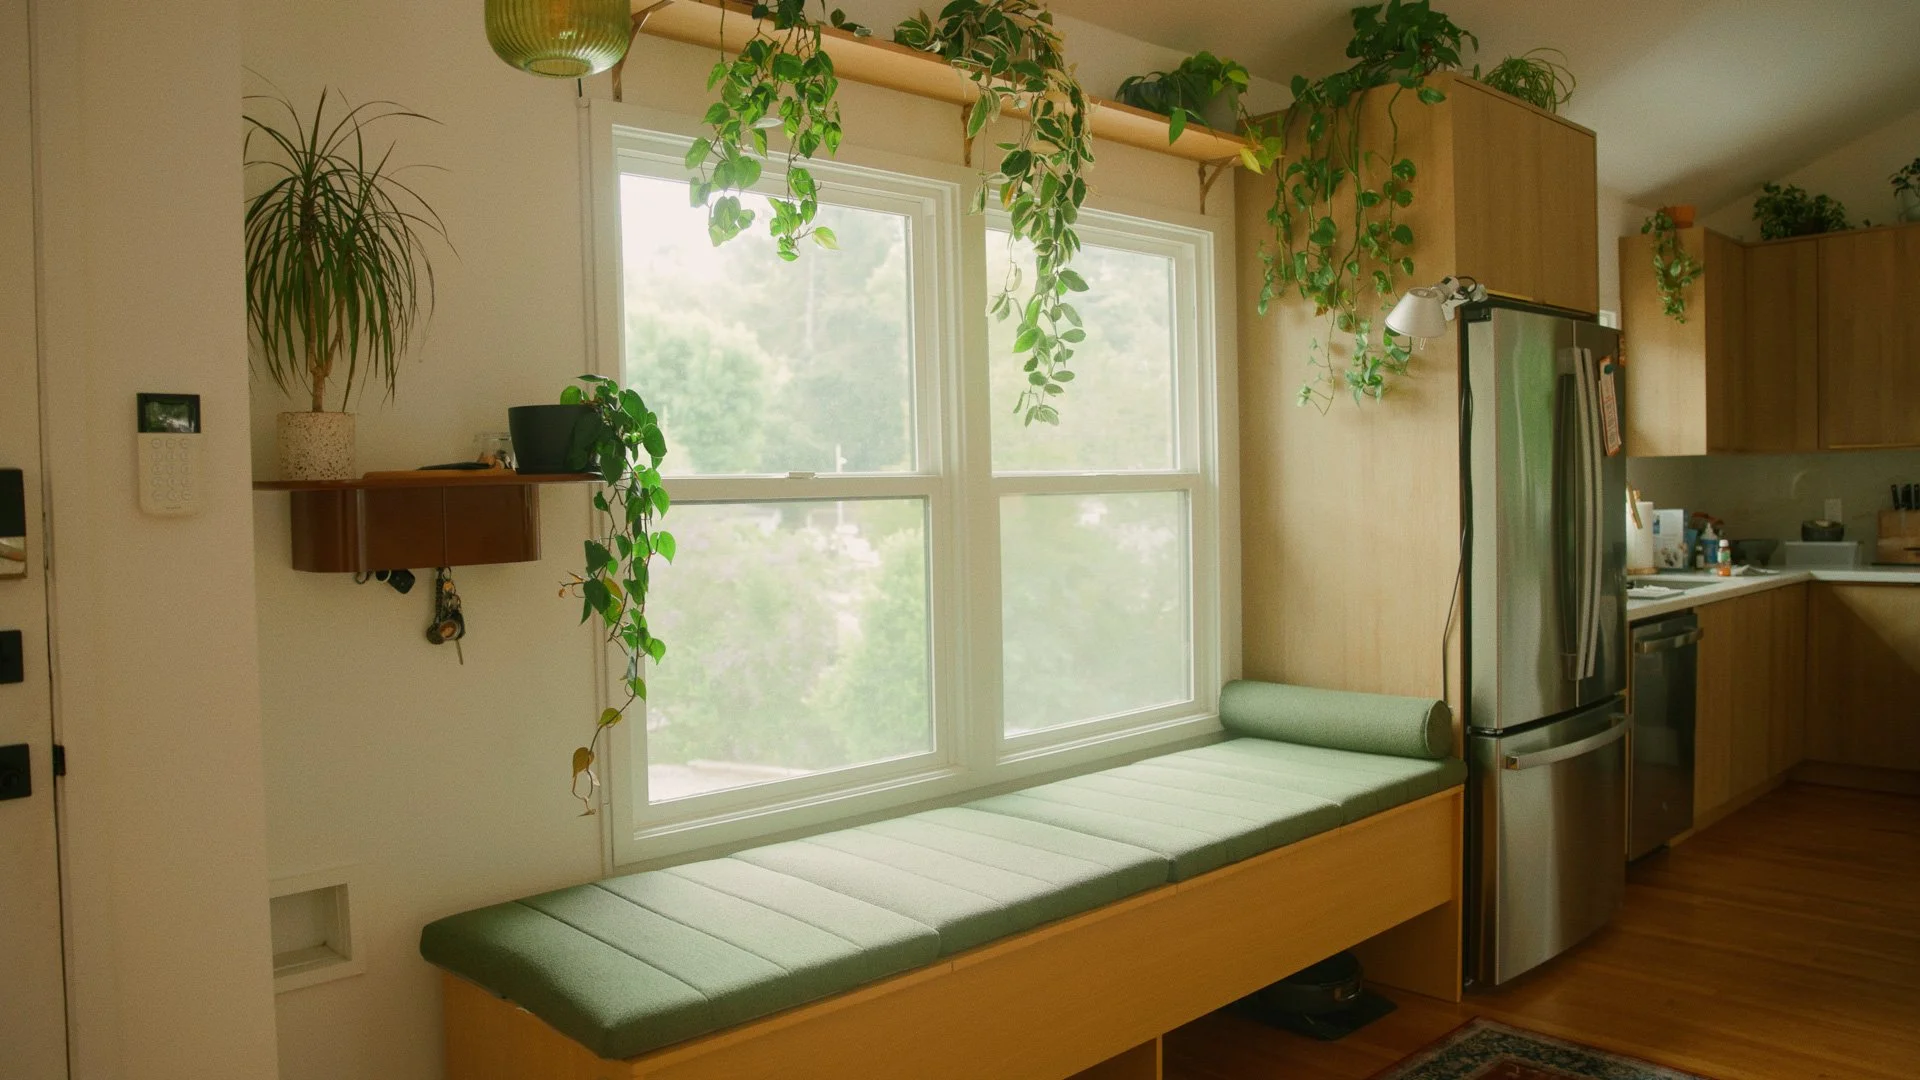
Bench size: 8 ft long × 2 ft deep × ~20 in tall (final height adjusted for vacuum clearance +2.5 in)
Material: Reclaimed lumber-core white oak plywood (from my old studio worktable)
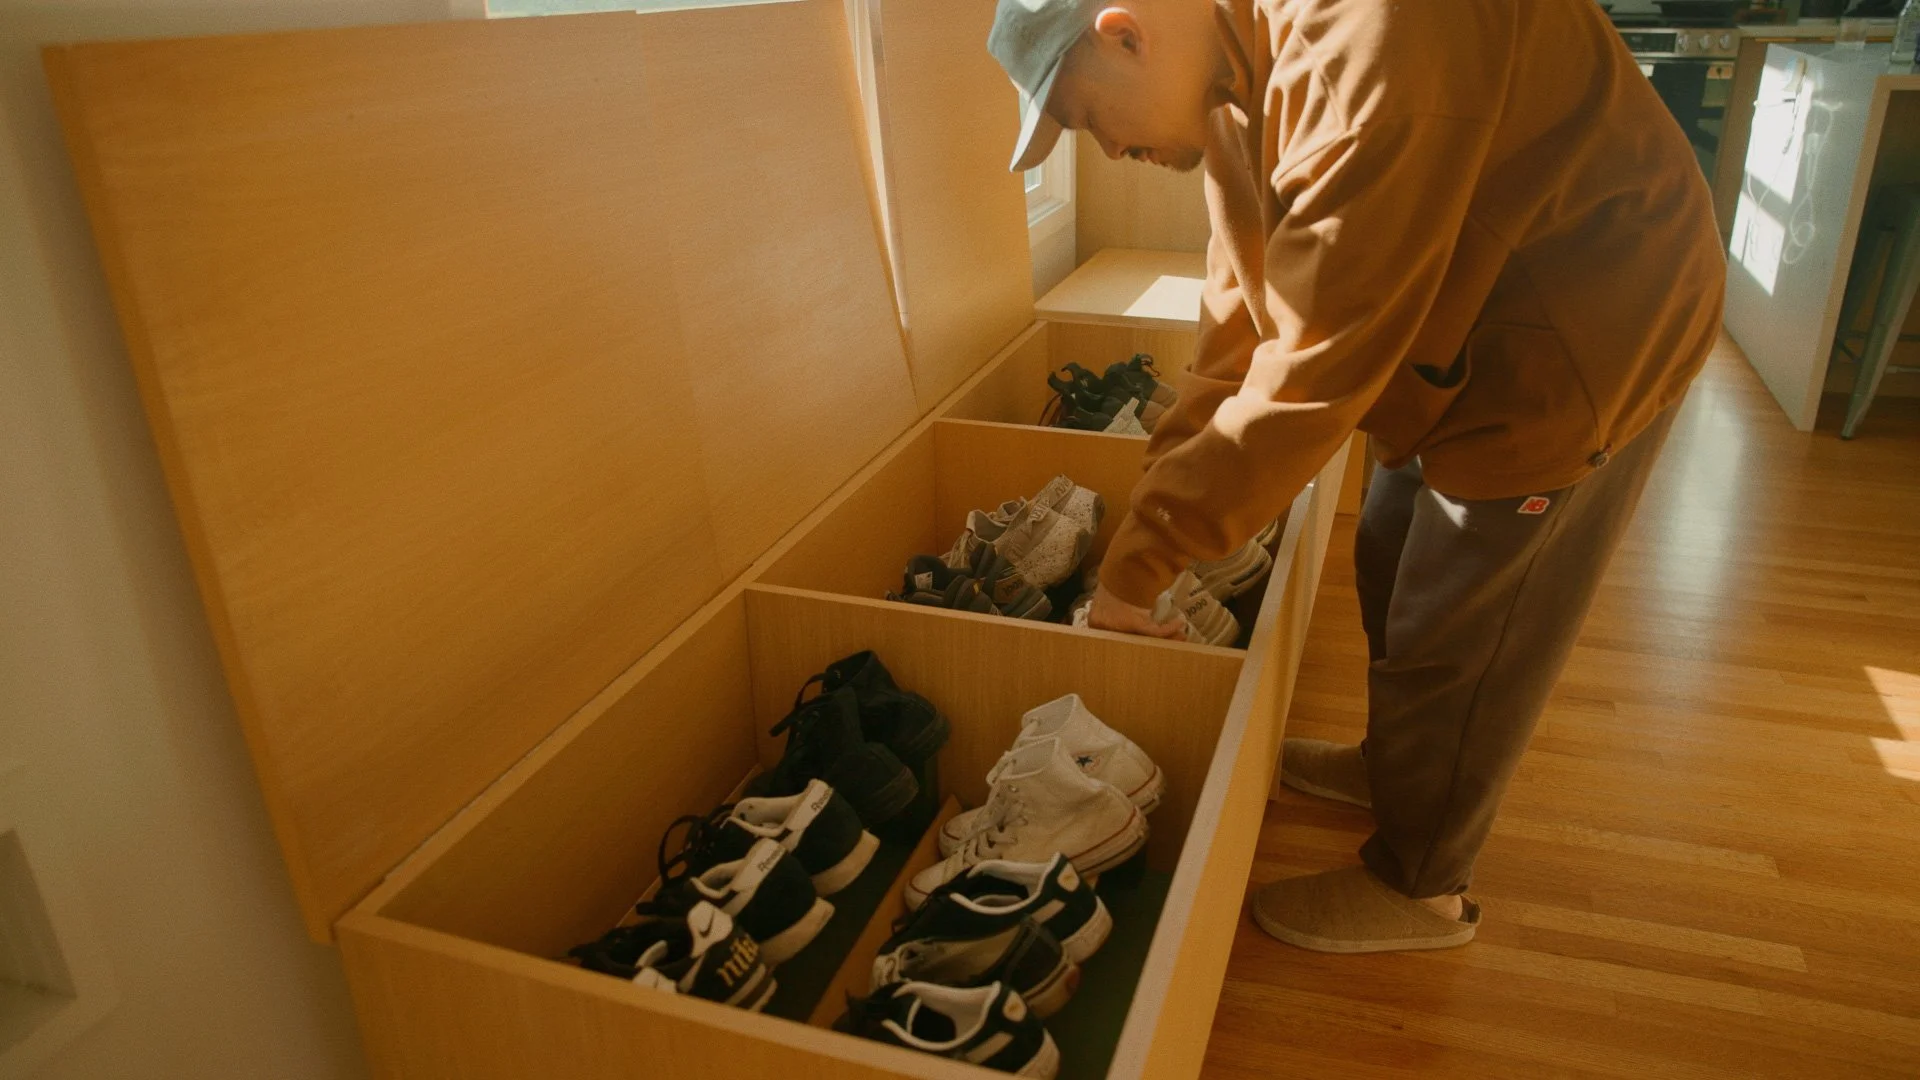
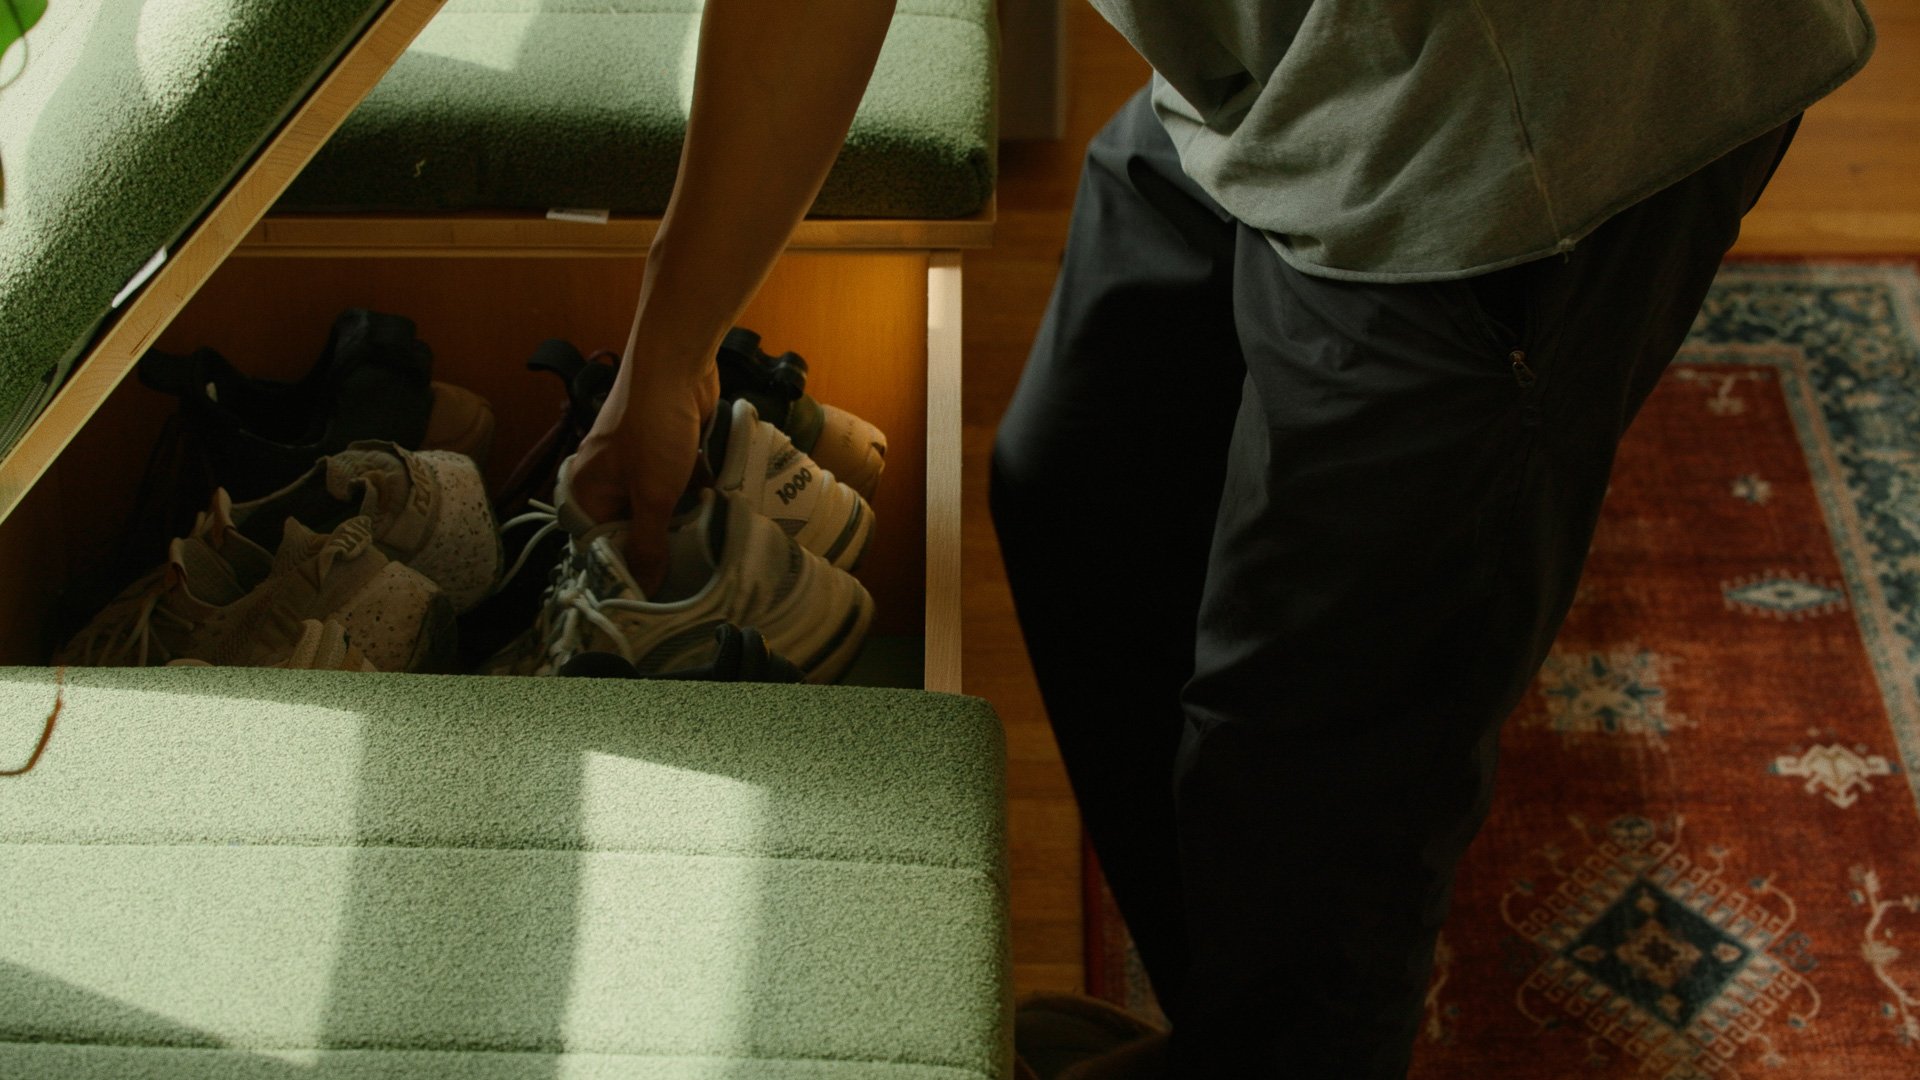
Layout: 4 compartments (3 for shoes, 1 open bay for robot vacuum)
Joinery: Pocket hole screws (plus edge banding for exposed ply edges)
Finish: Water-based top coat (low-ambering)
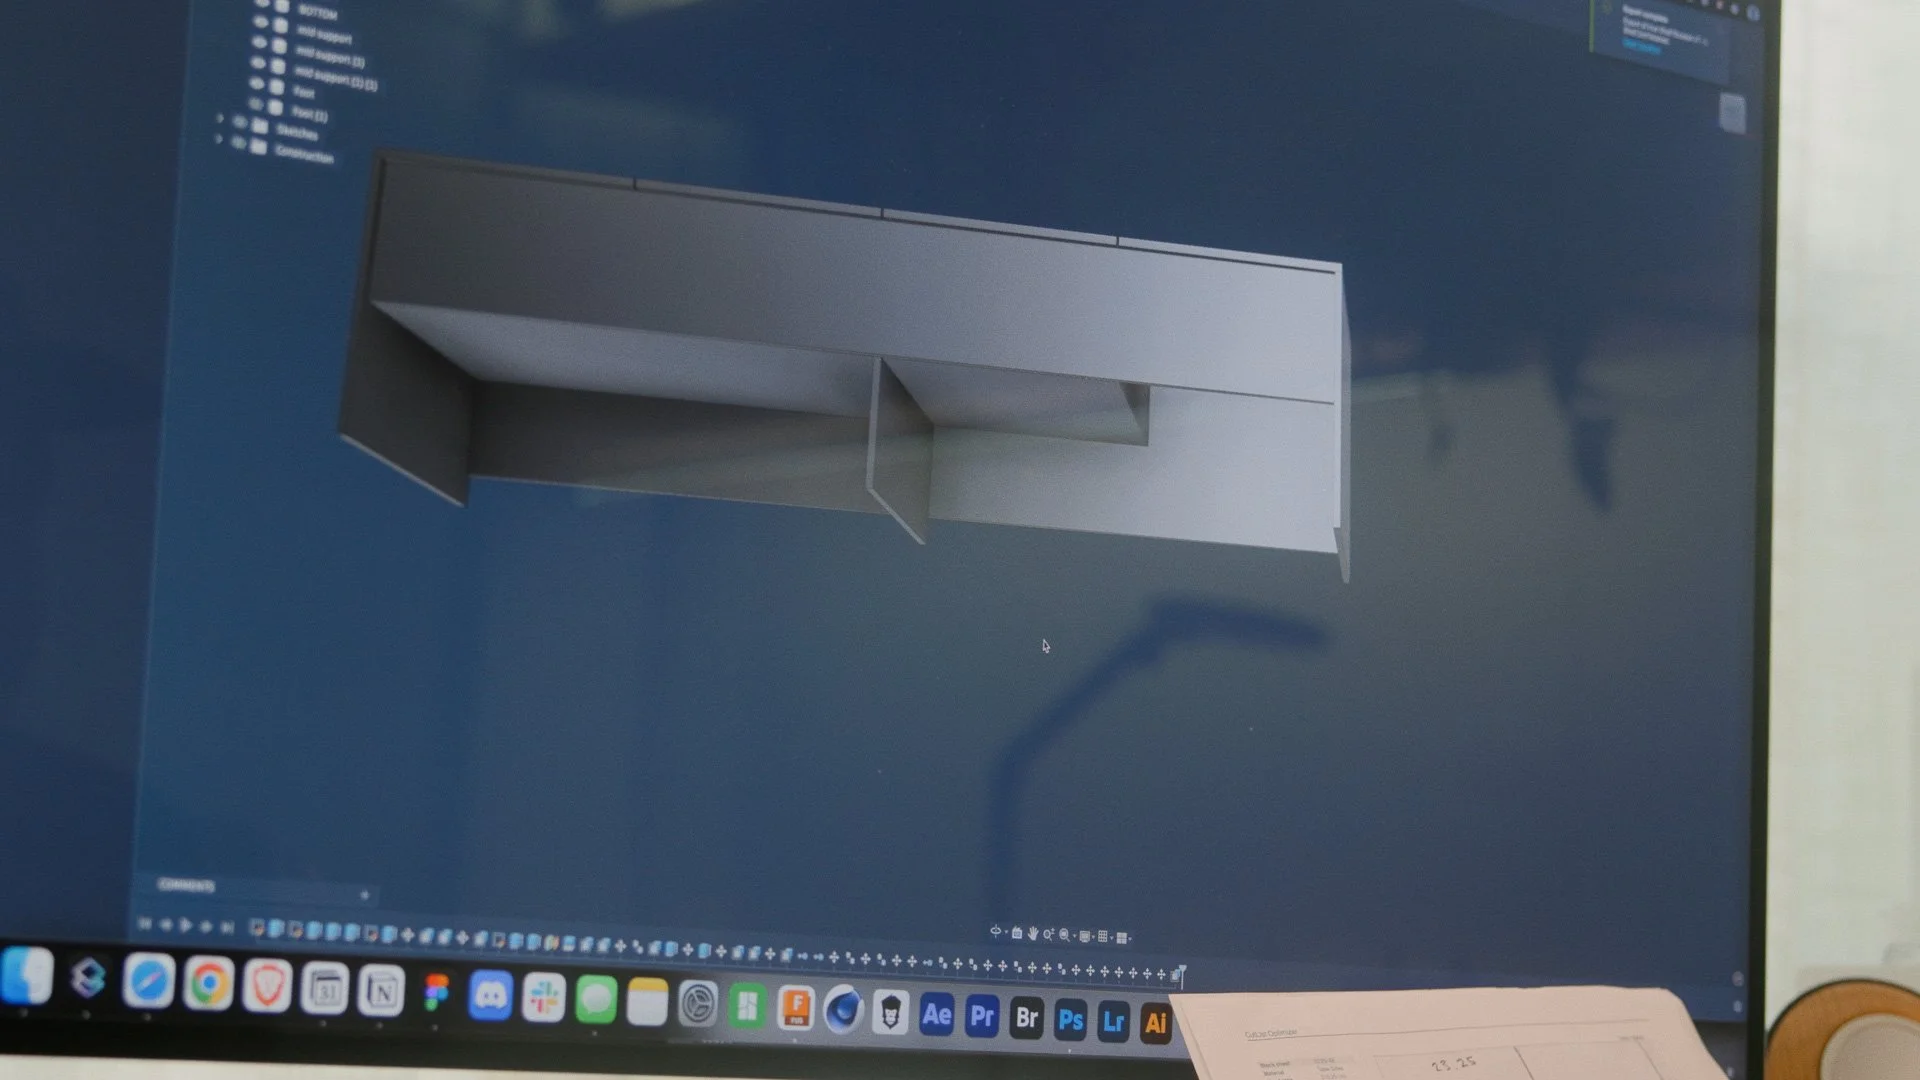
The Bench Design
Over the last few years of making furniture for my own spaces, I keep coming back to the same design language: mostly white oak plywood, clean lines, and subtle depth details that add strength without looking heavy. This bench is an evolution of that same approach.
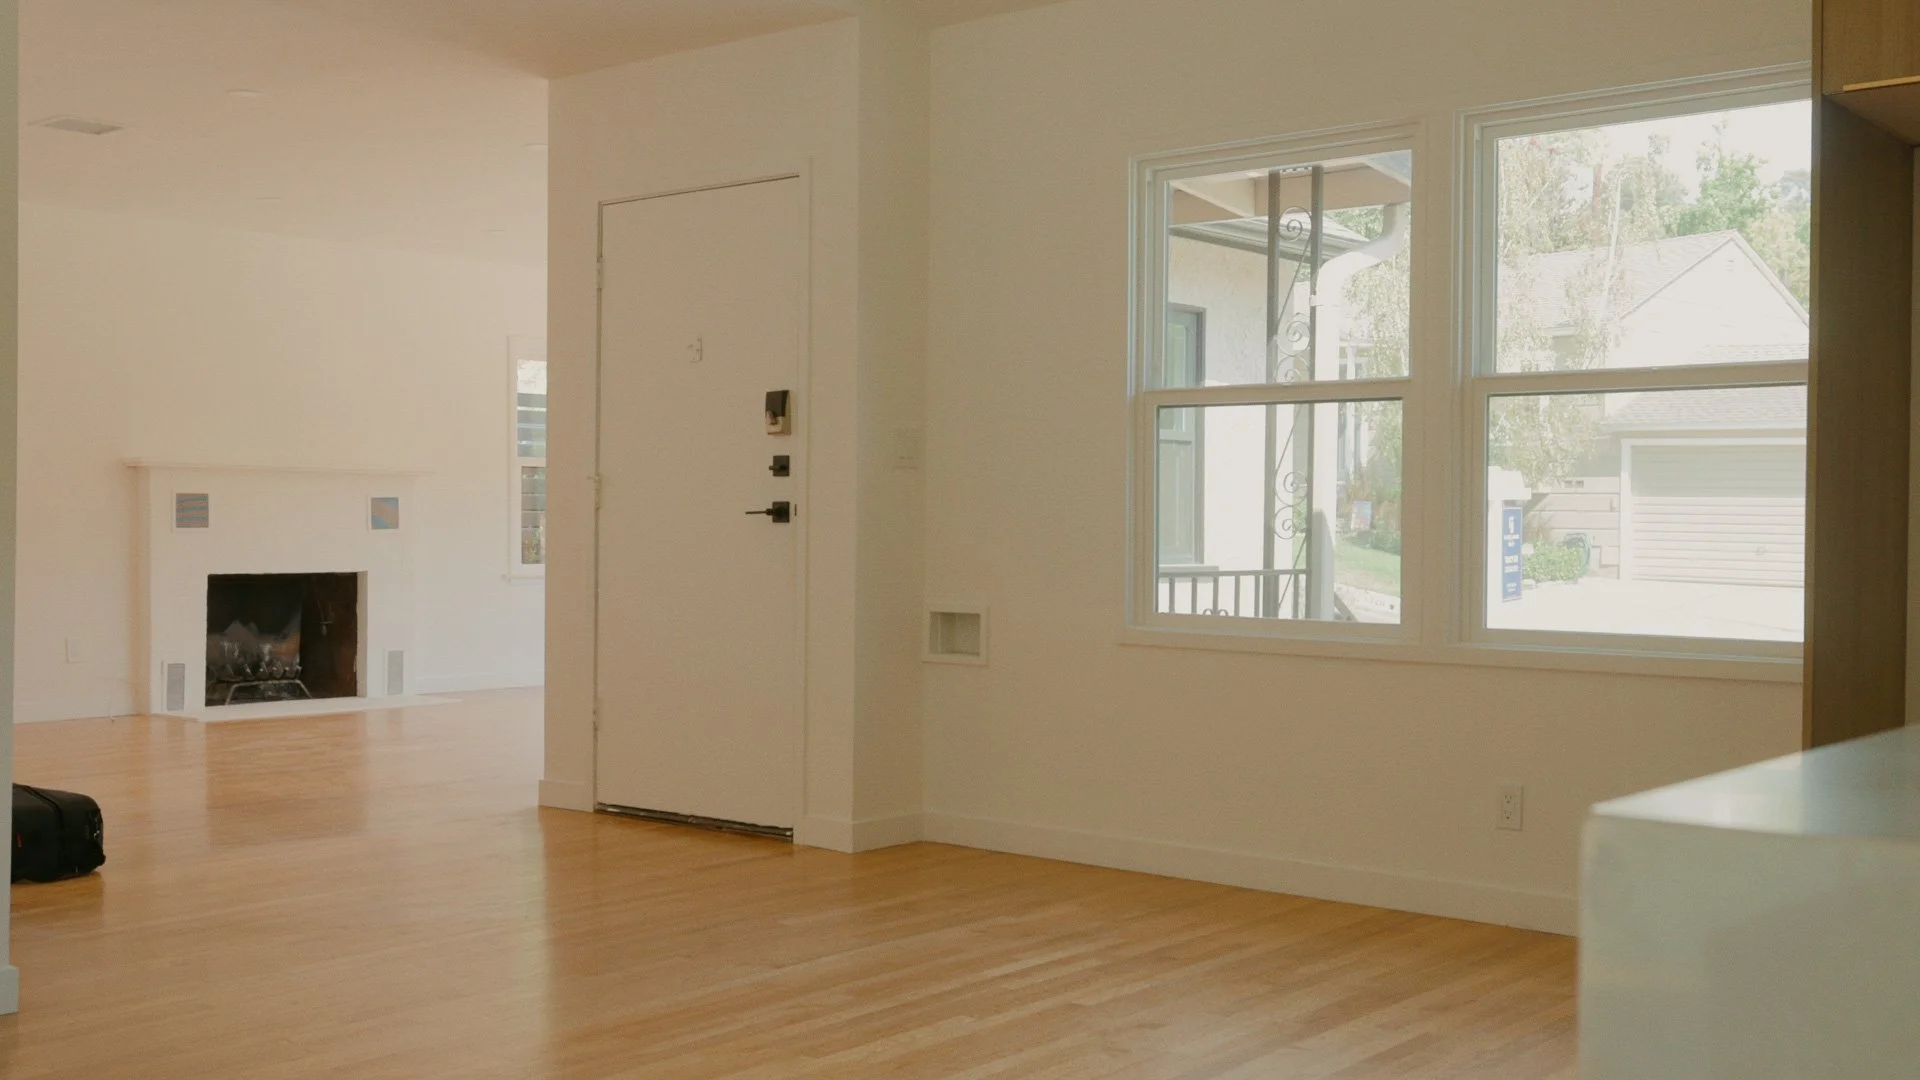
Empty entrway of our 1940s home
Goals
Store our shoes (between the two of us, it adds up fast)
Create a comfortable place to sit and put shoes on
Add a catch-all spot for keys and everyday items
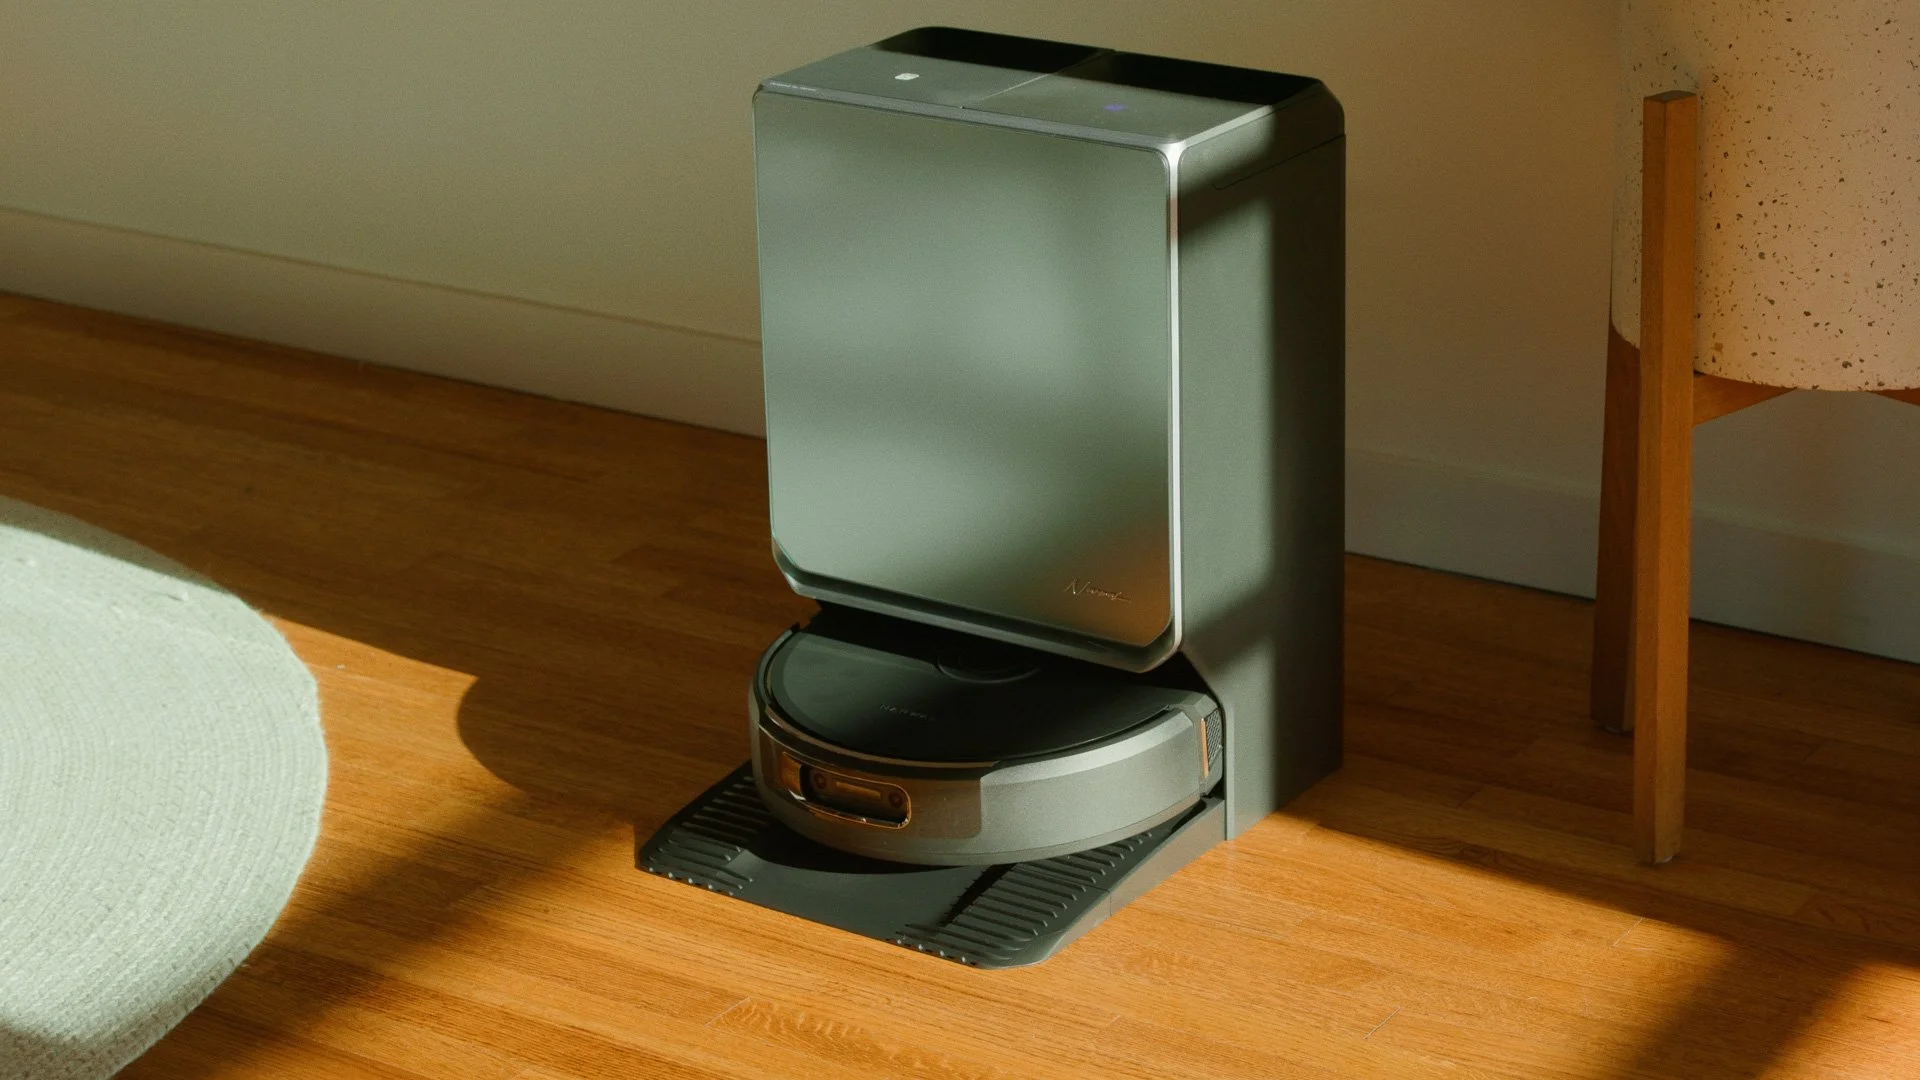
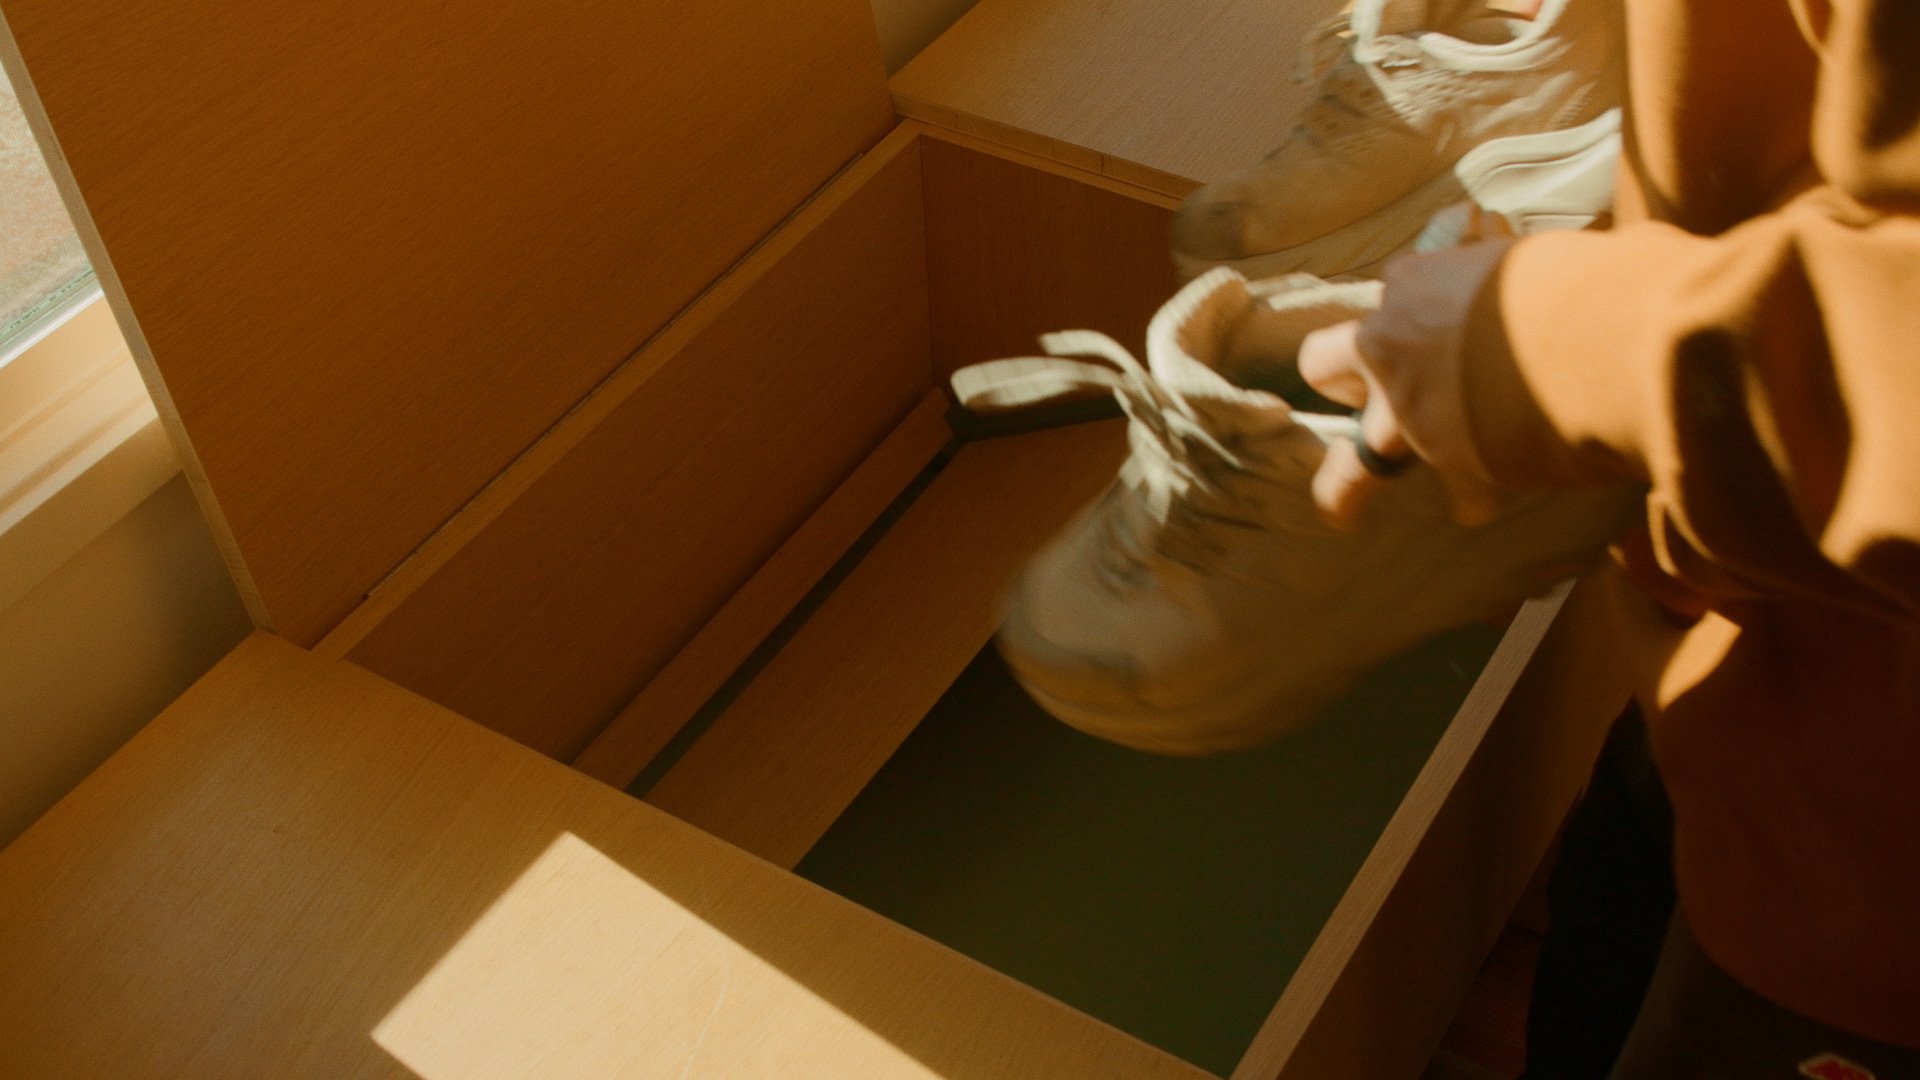
Hide the robot vacuum while keeping it easy to access
Design challenges (constraints)
Repurpose material from my old studio worktable instead of buying new plywood
Integrate a robot vacuum bay with enough clearance for docking, charging, and a bit of cable management
Style and light the space to feel cozy and inviting
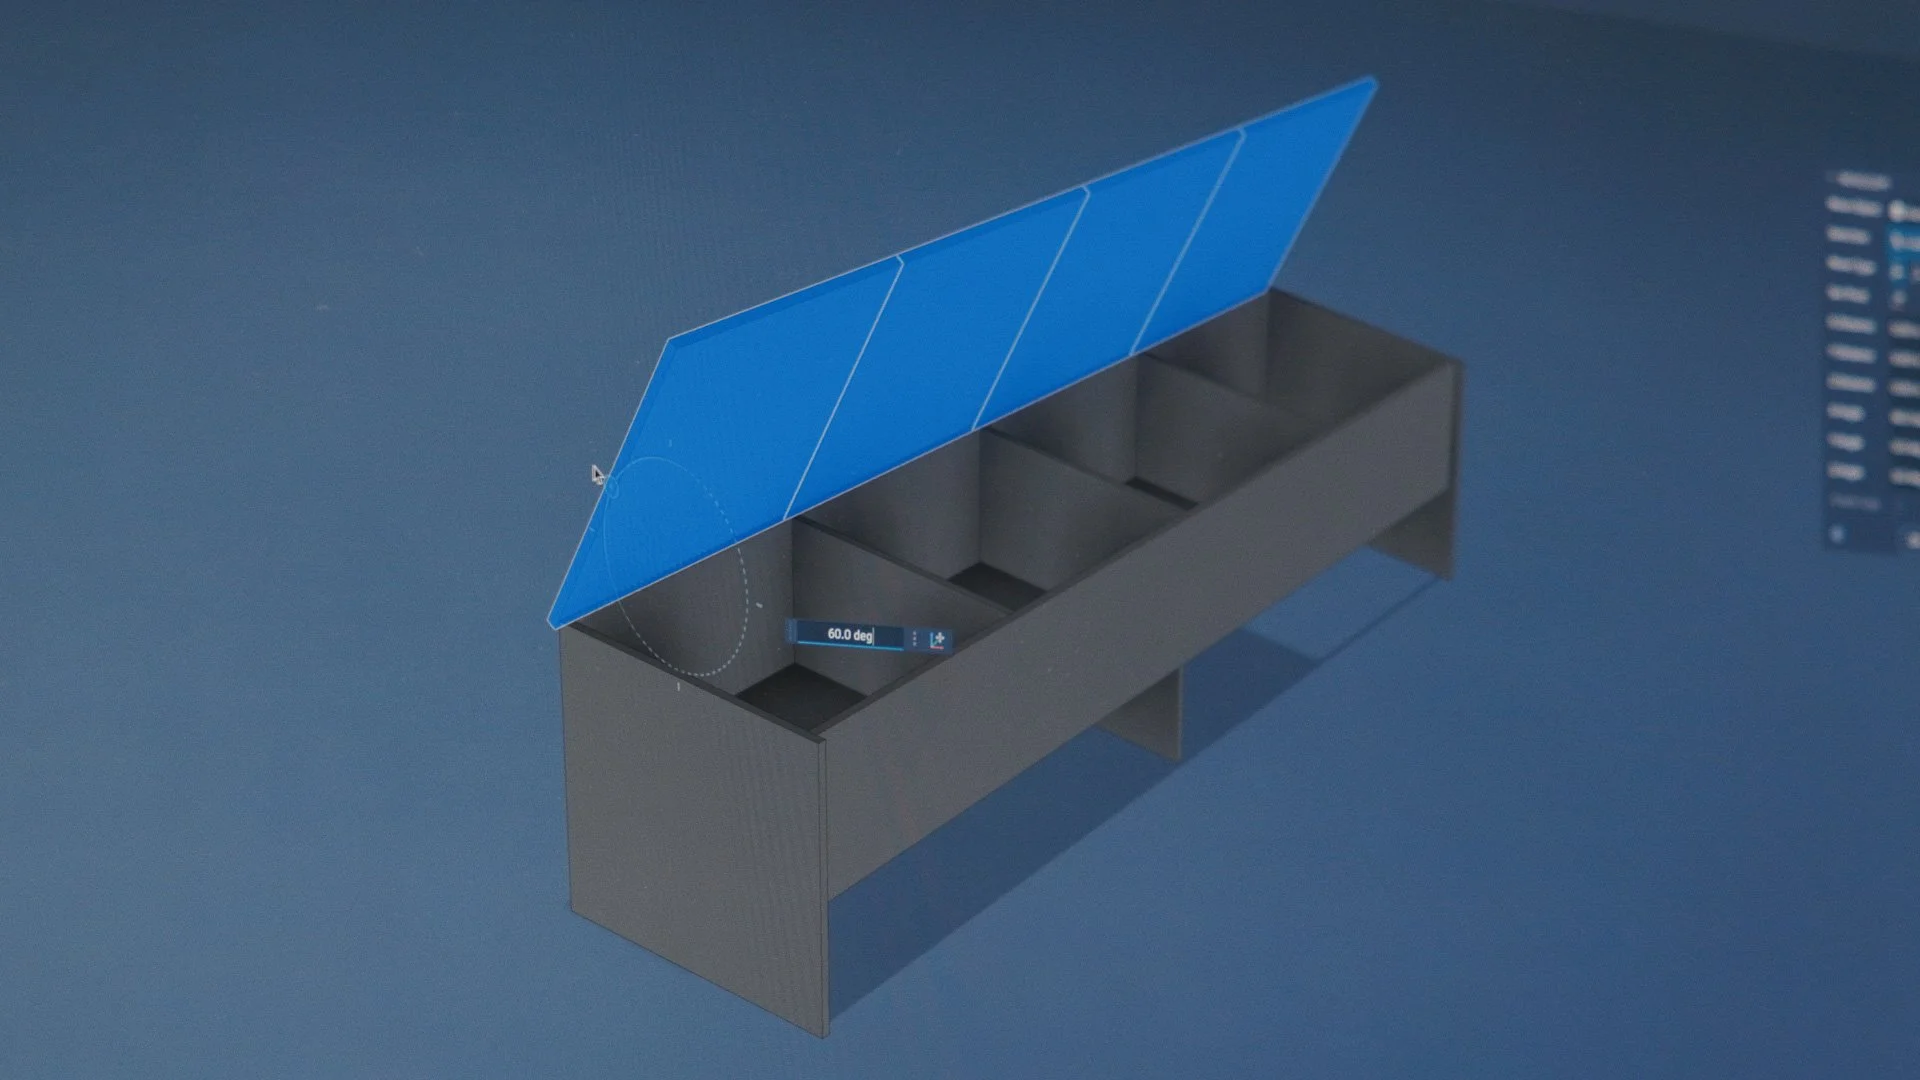
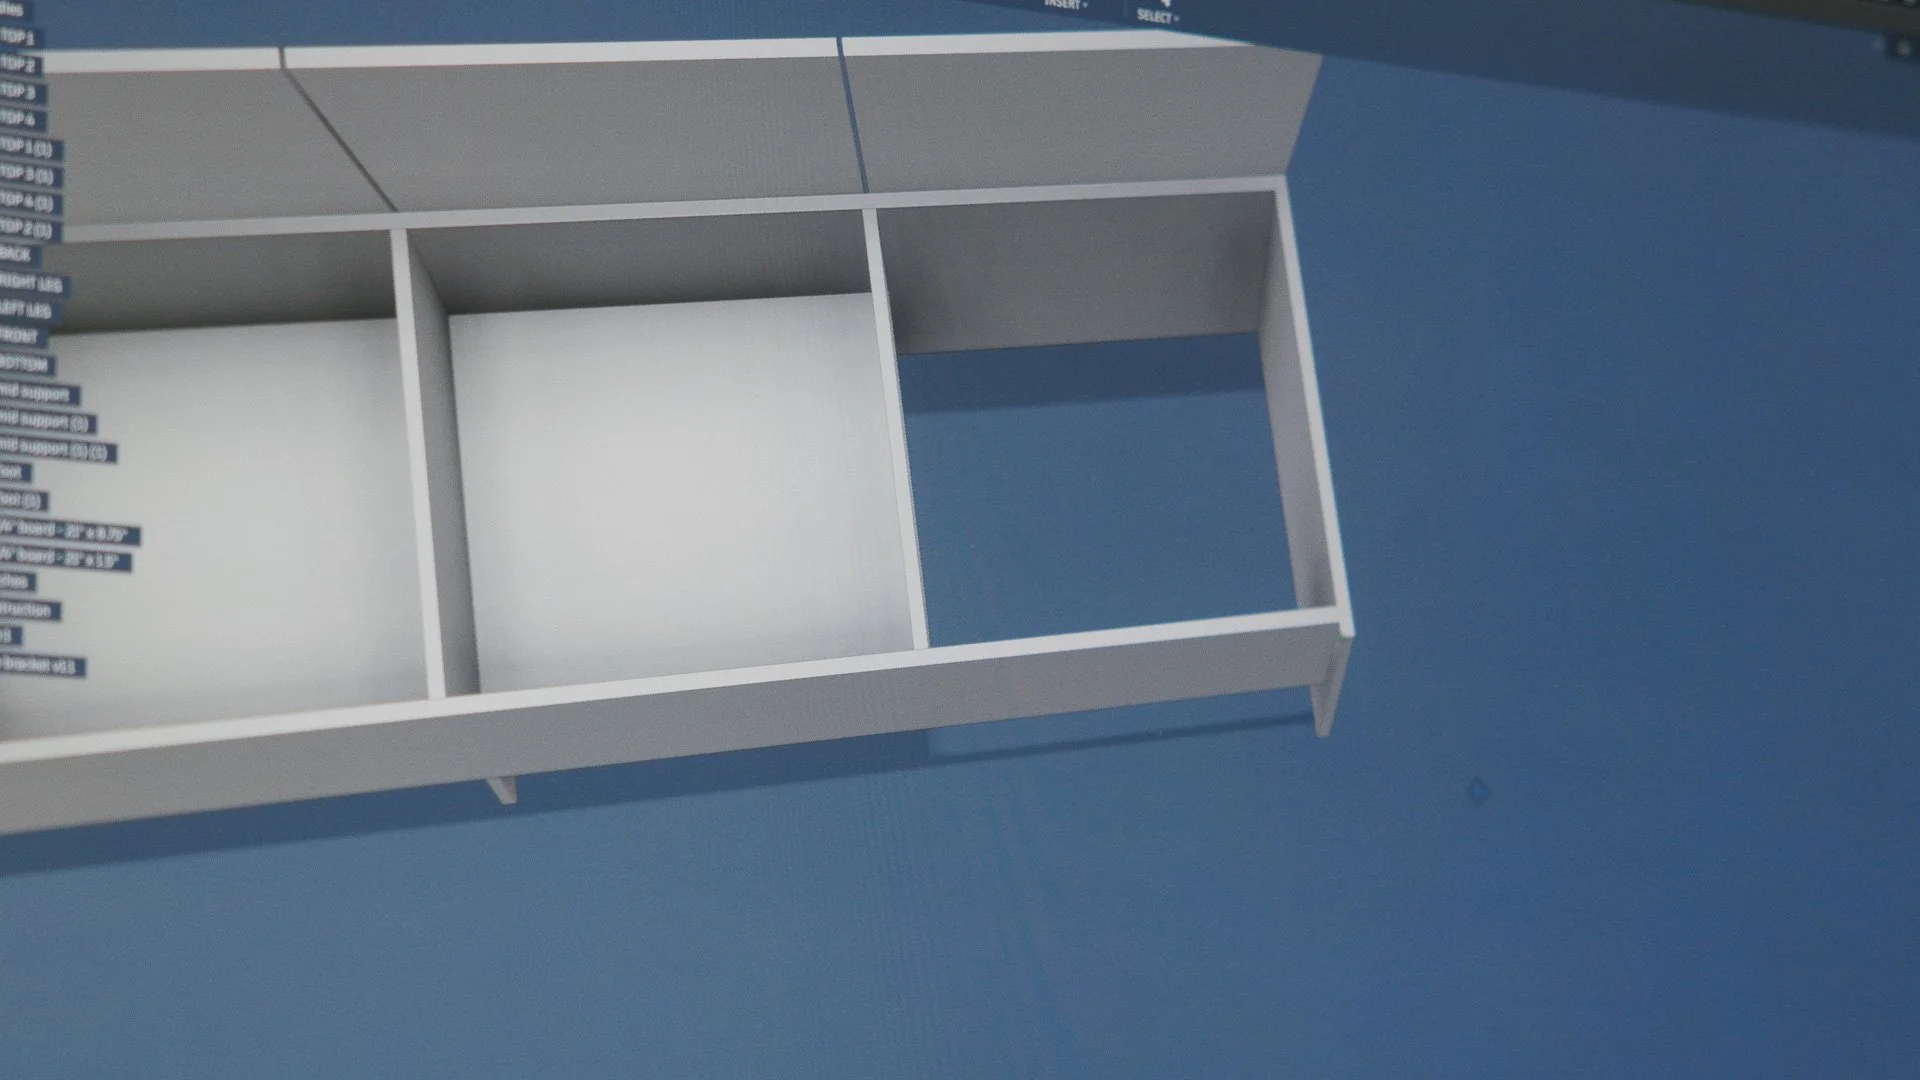

Layout
Inside, I split the bench into four compartments: three for shoes, and one open bay for the vacuum so it can dock, deploy, and still be easy to access.
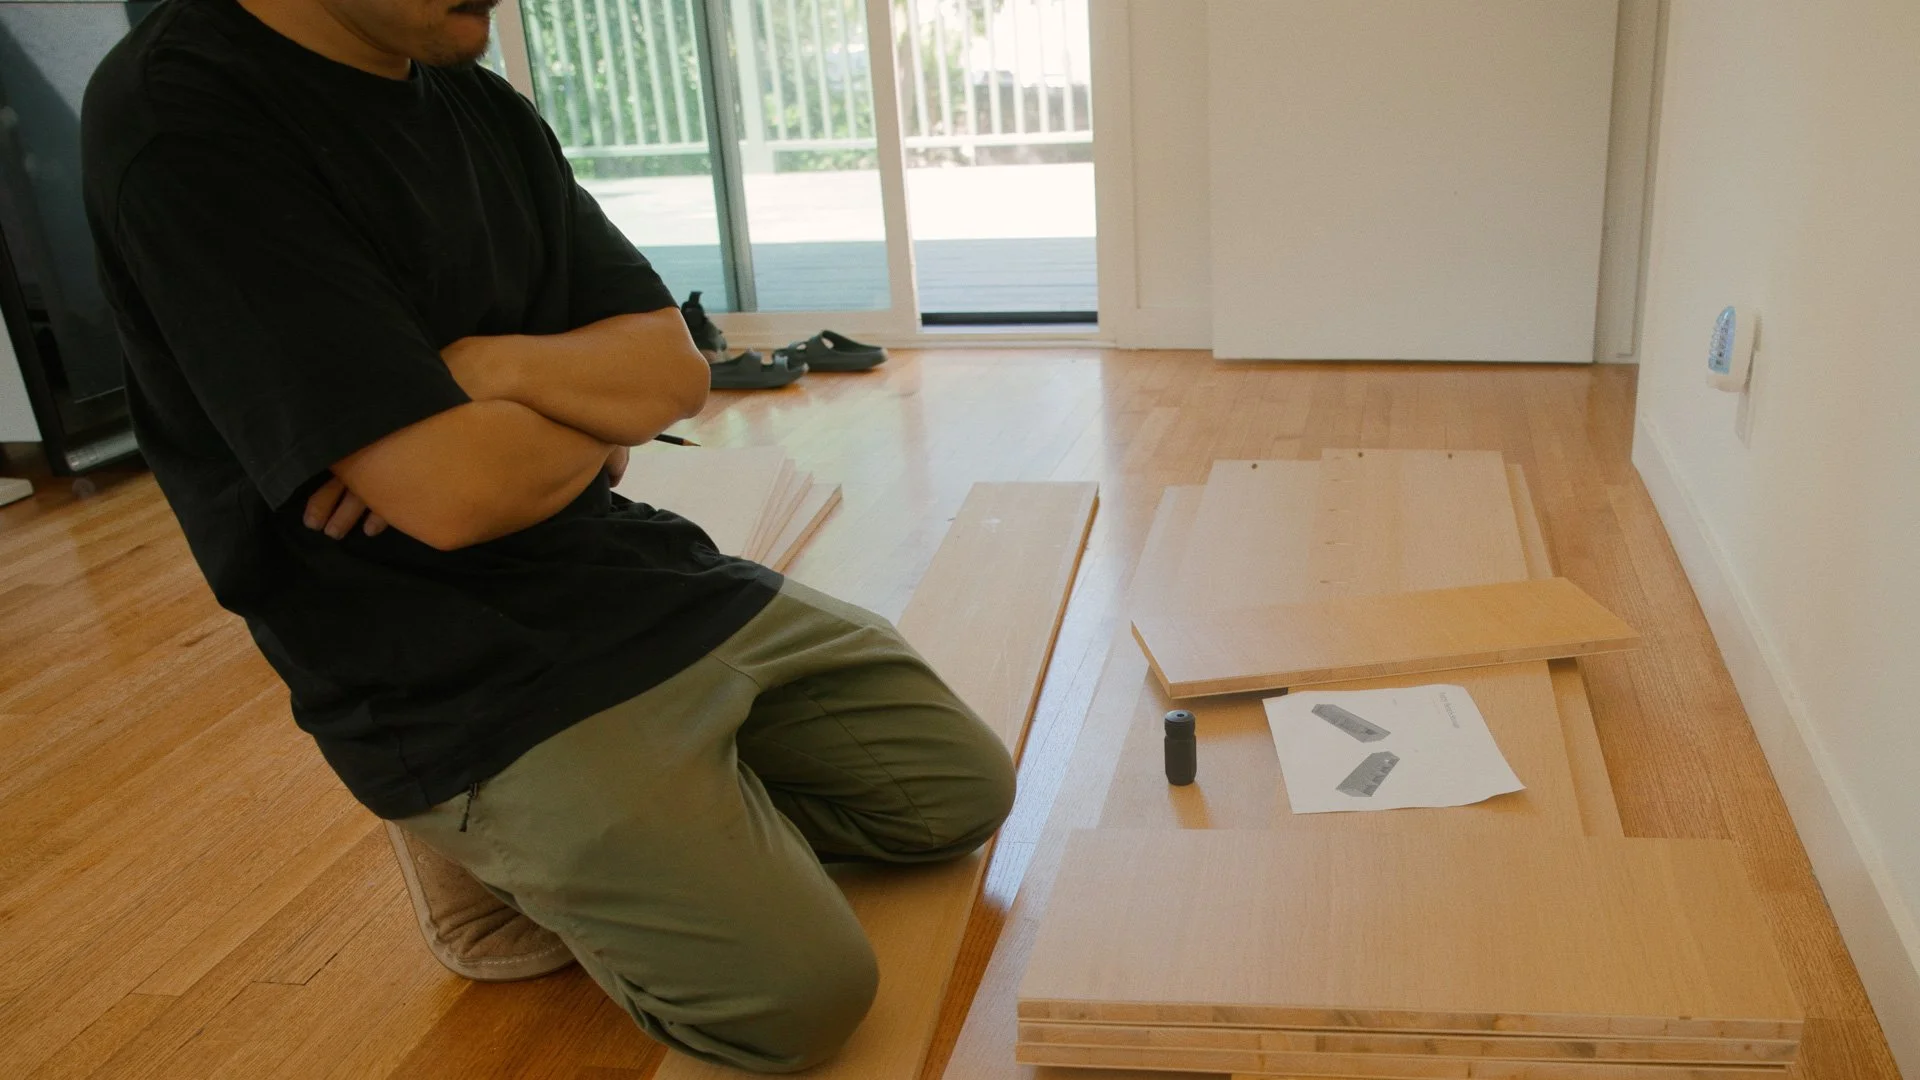
Repurposing the Old Worktable (the Puzzle to Solve)
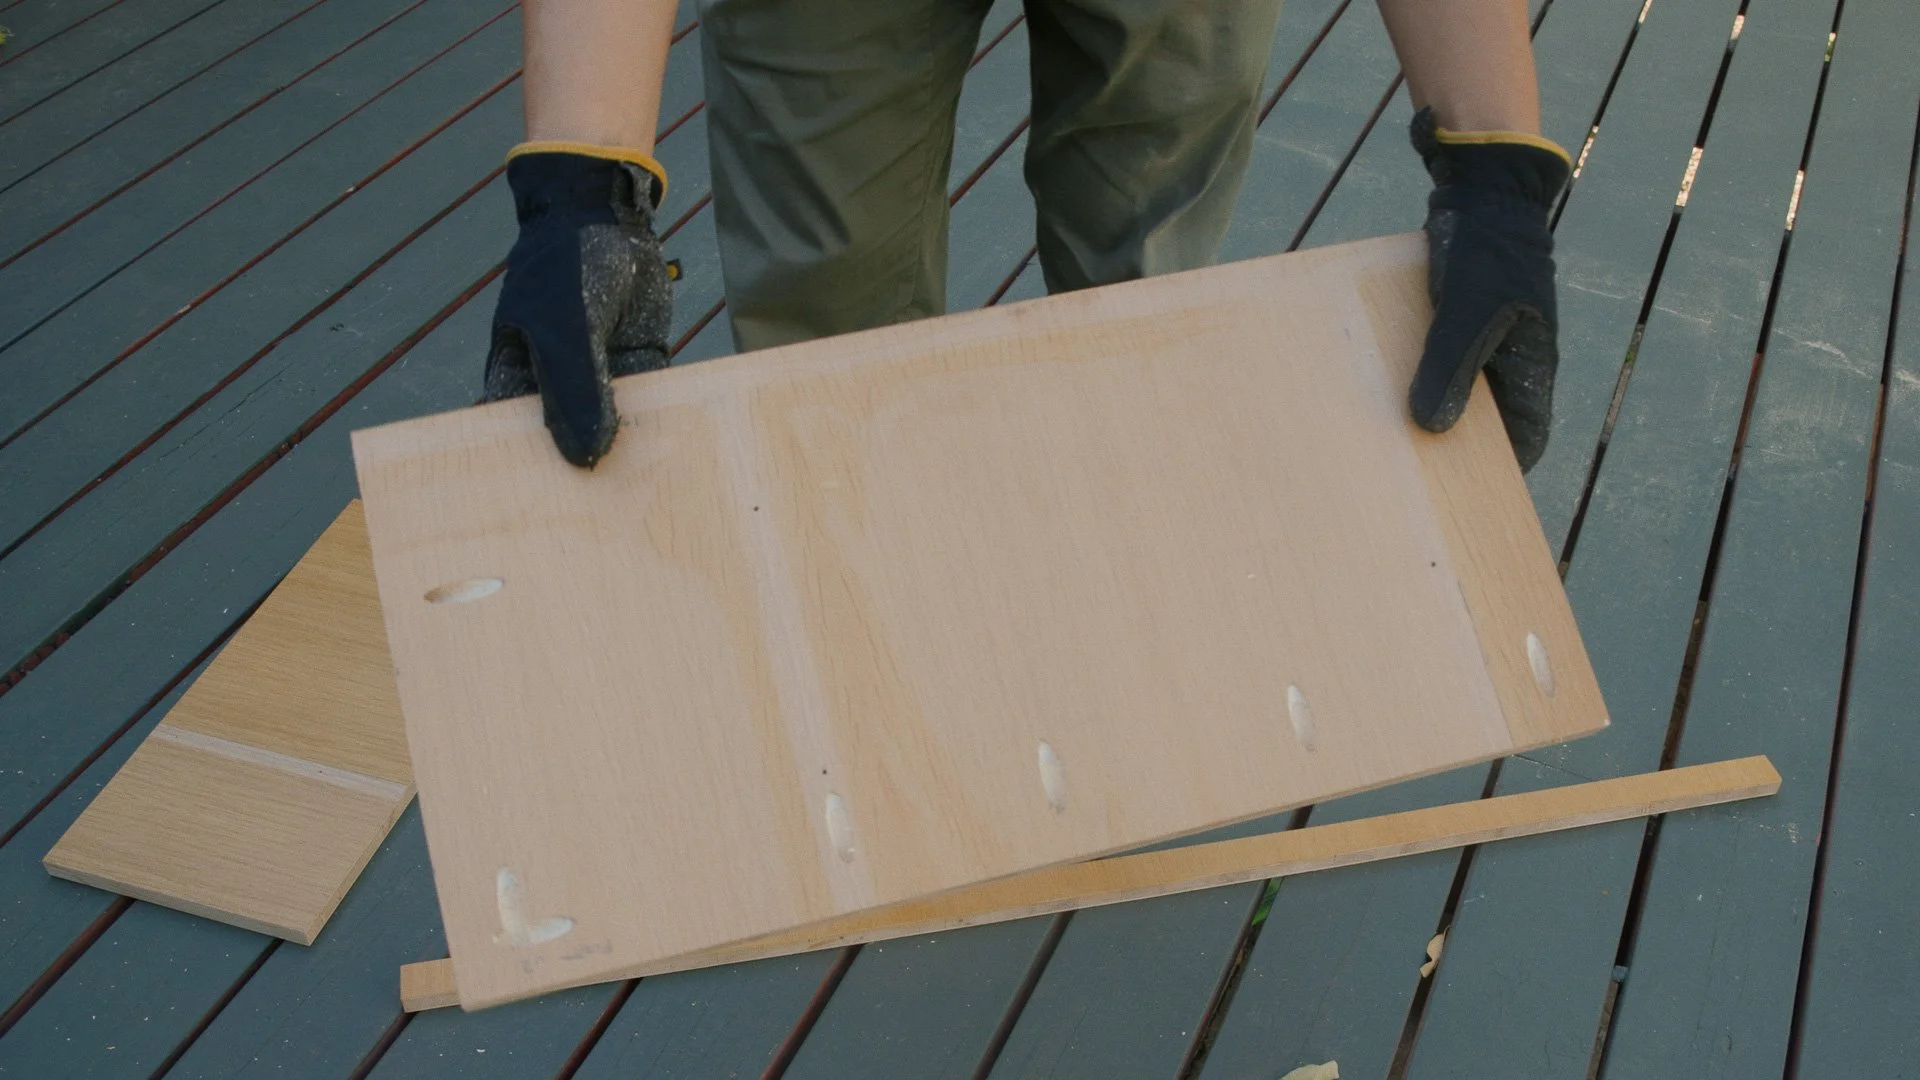
One of the main constraints I set for this project was to repurpose material from my old studio worktable. It was made from lumber-core white oak plywood, and because it was assembled with pocket-hole screws, I could disassemble it pretty easily.
But repurposing material isn’t “free wood.” It’s a puzzle to solve.
The reclaimed sheets come with history: pocket holes, screw locations, worn edges, and imperfections.
You do not start with perfectly fresh 4×8 panels anymore.

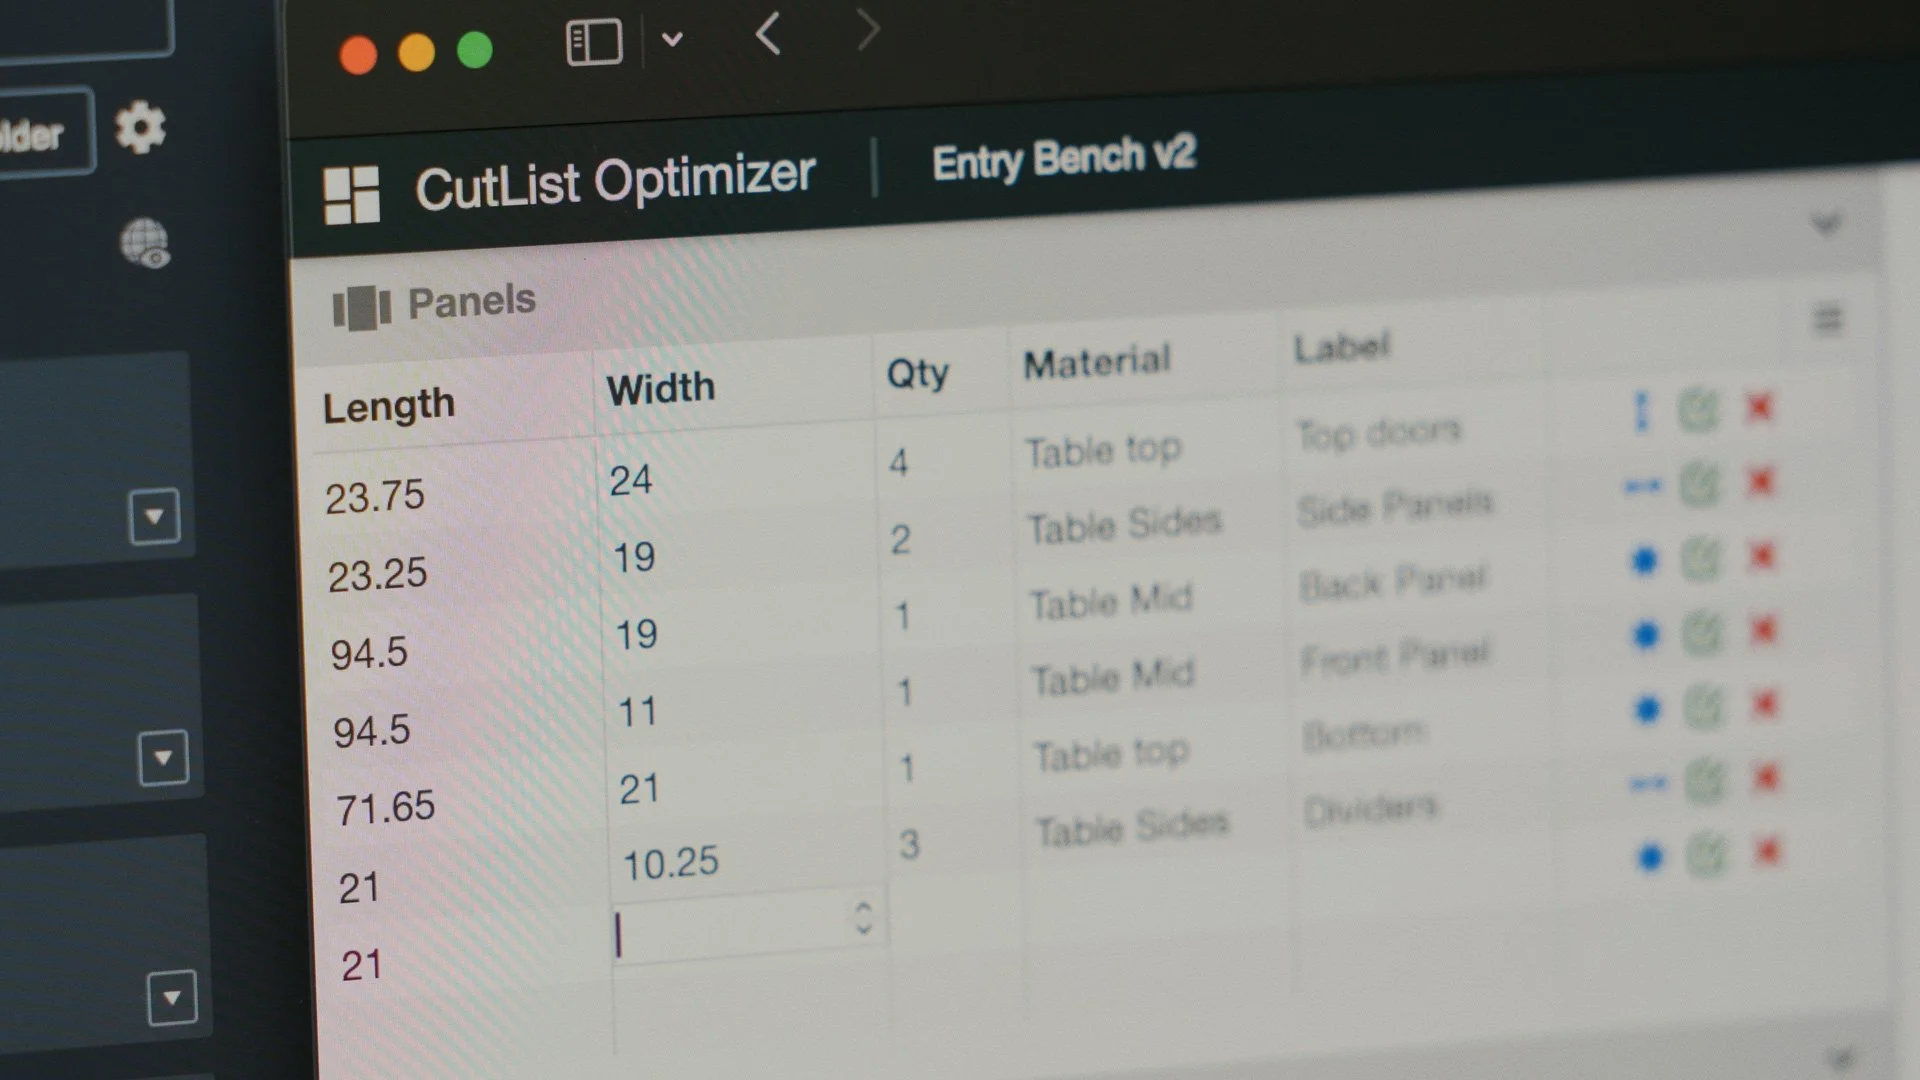
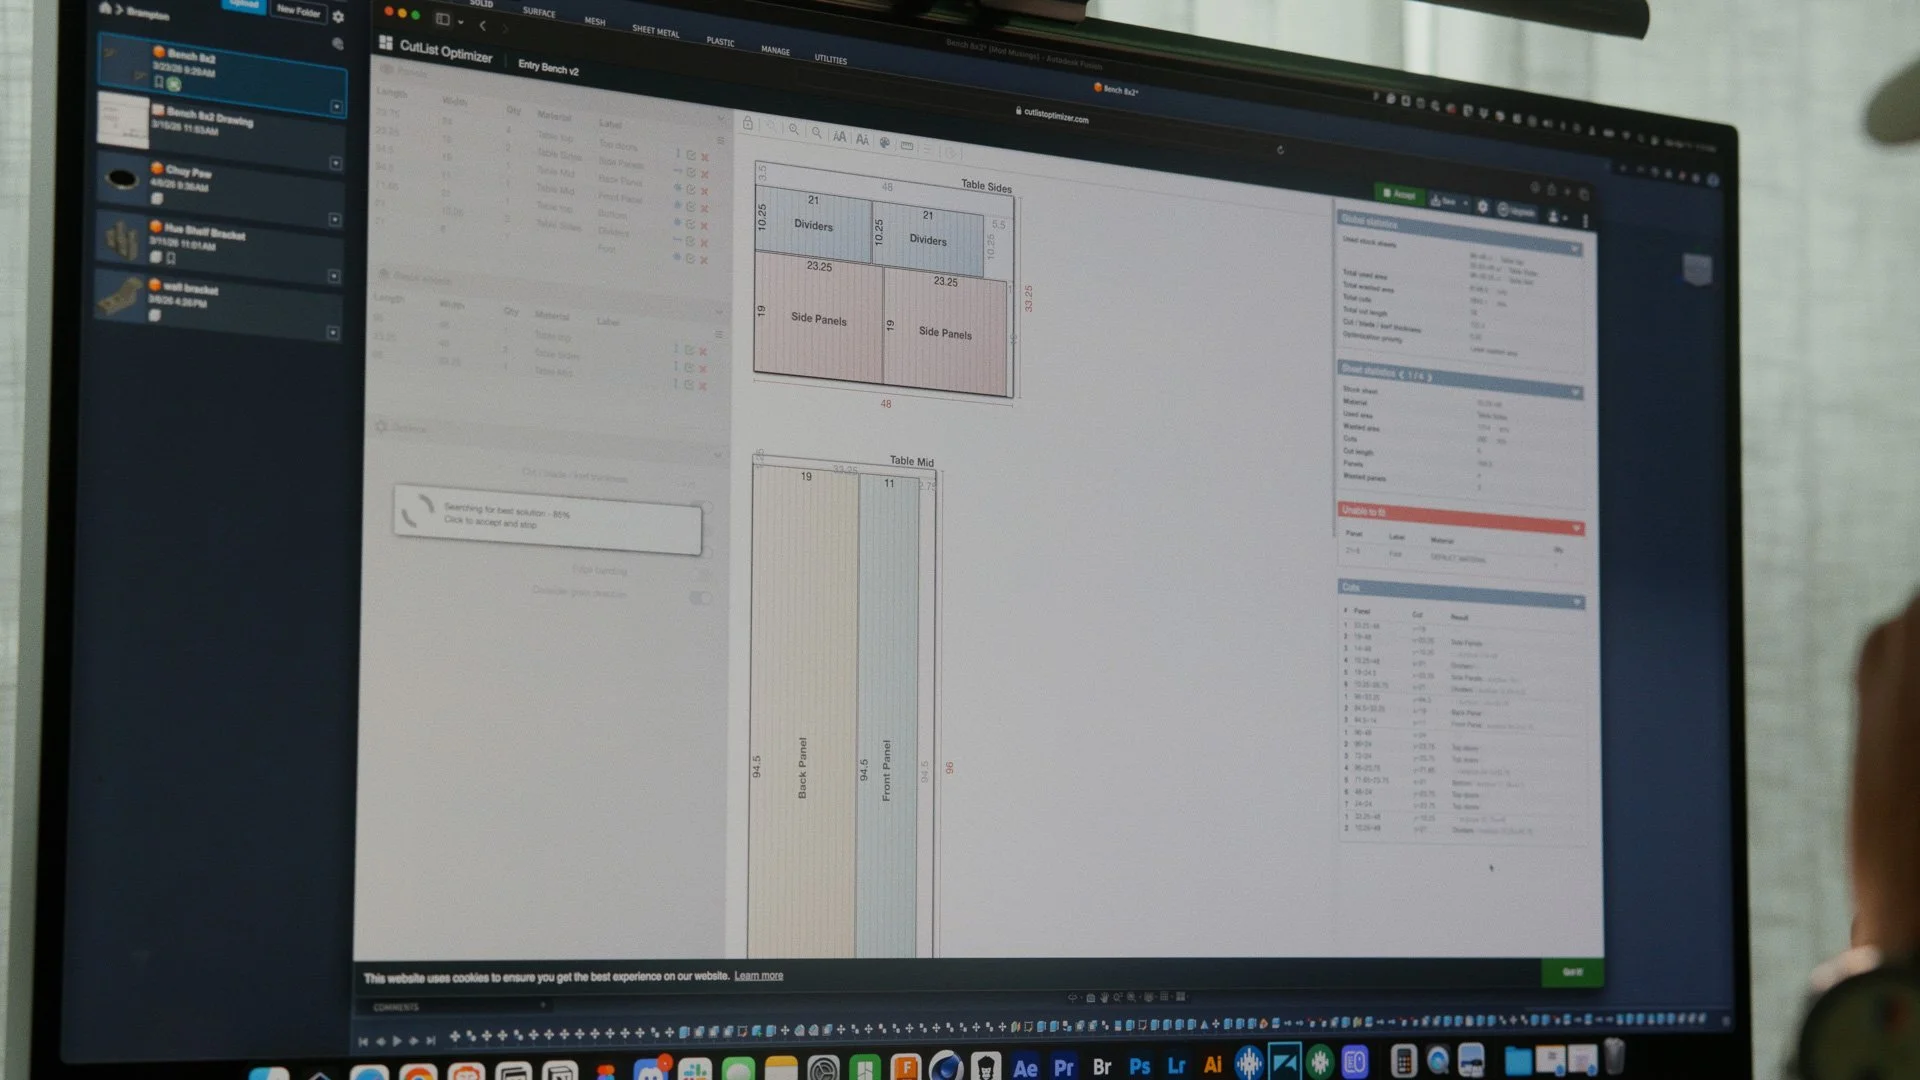
So I measured what pieces I had left and ran those usable dimensions through Cut List Optimizer to see if the bench design would fit. It didn’t, at least not at first.
I went back into the design and tweaked dimensions until everything fit within the reclaimed footprint. Anything to avoid buying more wood.
Tools / software used
Cutting the Panels (and Why I Upgraded my Saw)
I used to break down plywood with a circular saw and a track adapter. It worked, but over time, I noticed I had to constantly recalibrate it. The adapter would slip, and the cuts would drift.
With more home projects on the horizon, I invested in a Makita plunge saw and track.
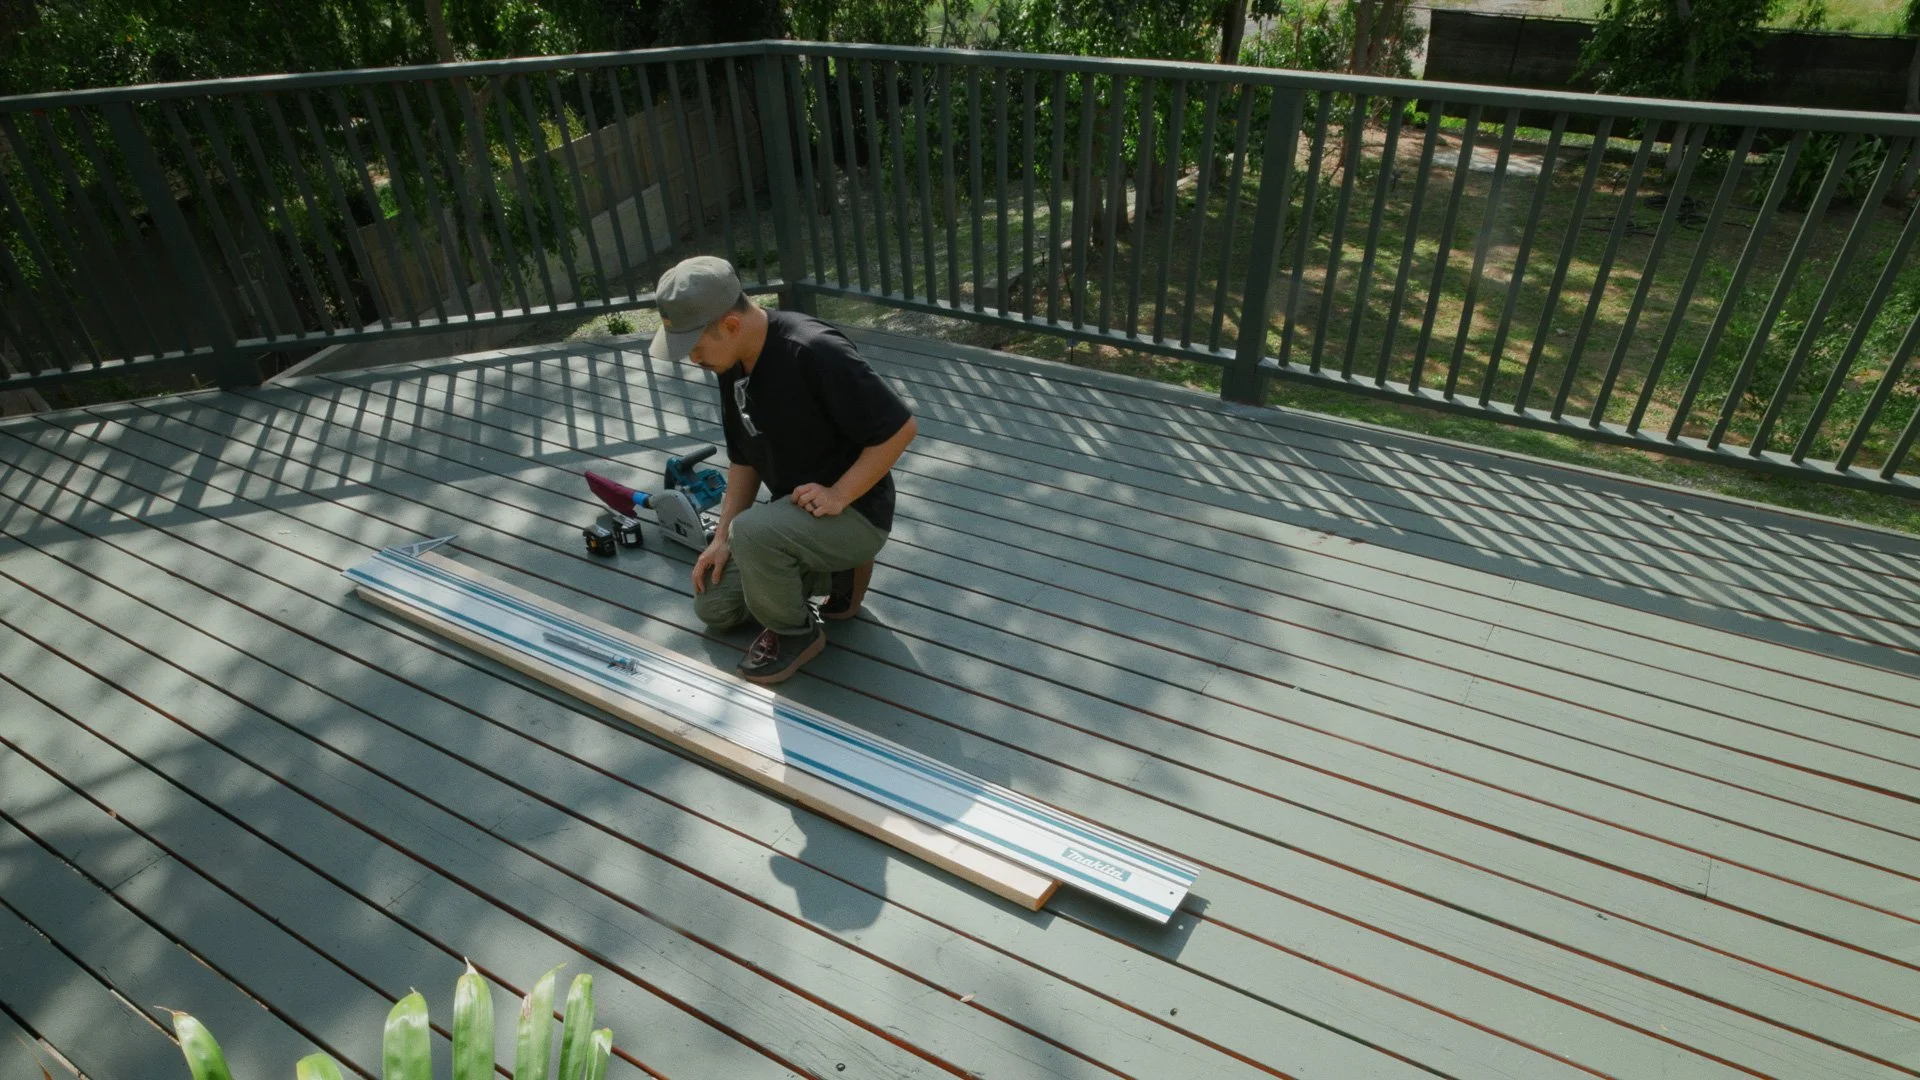
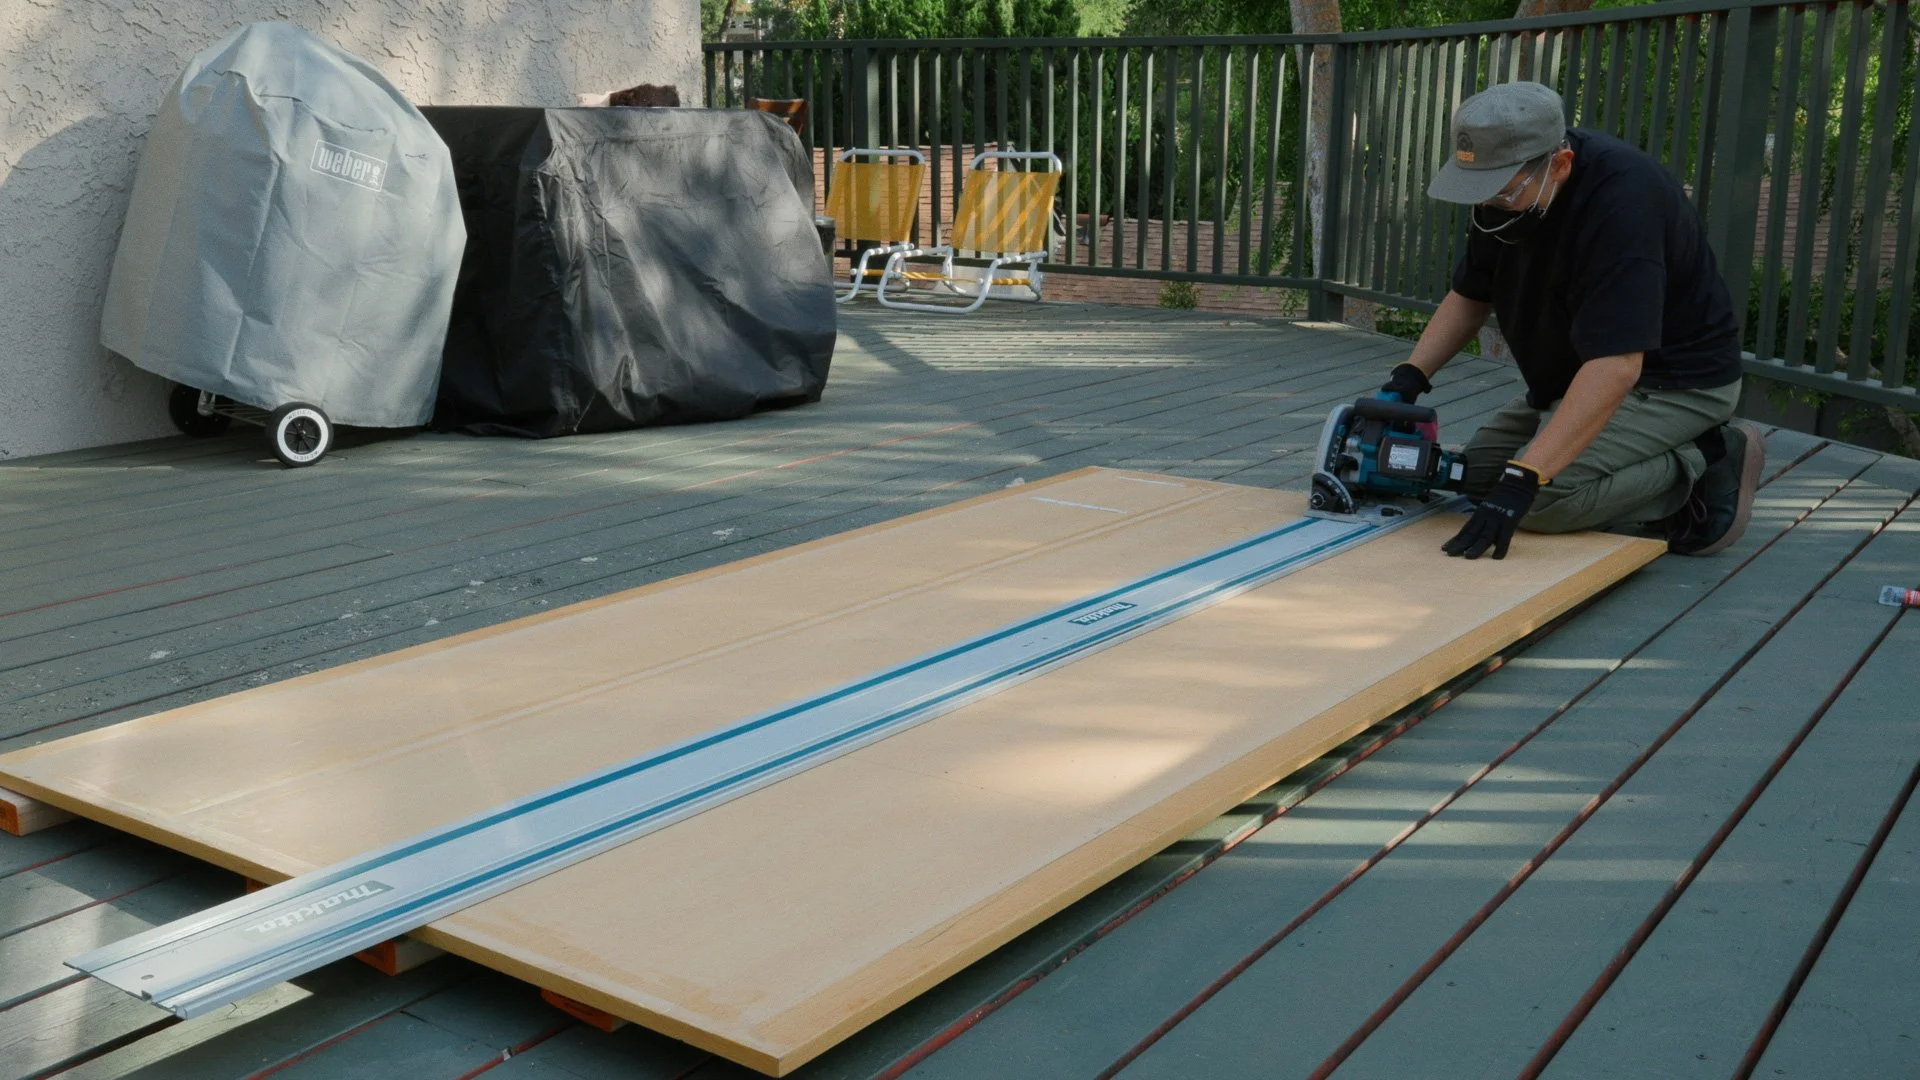
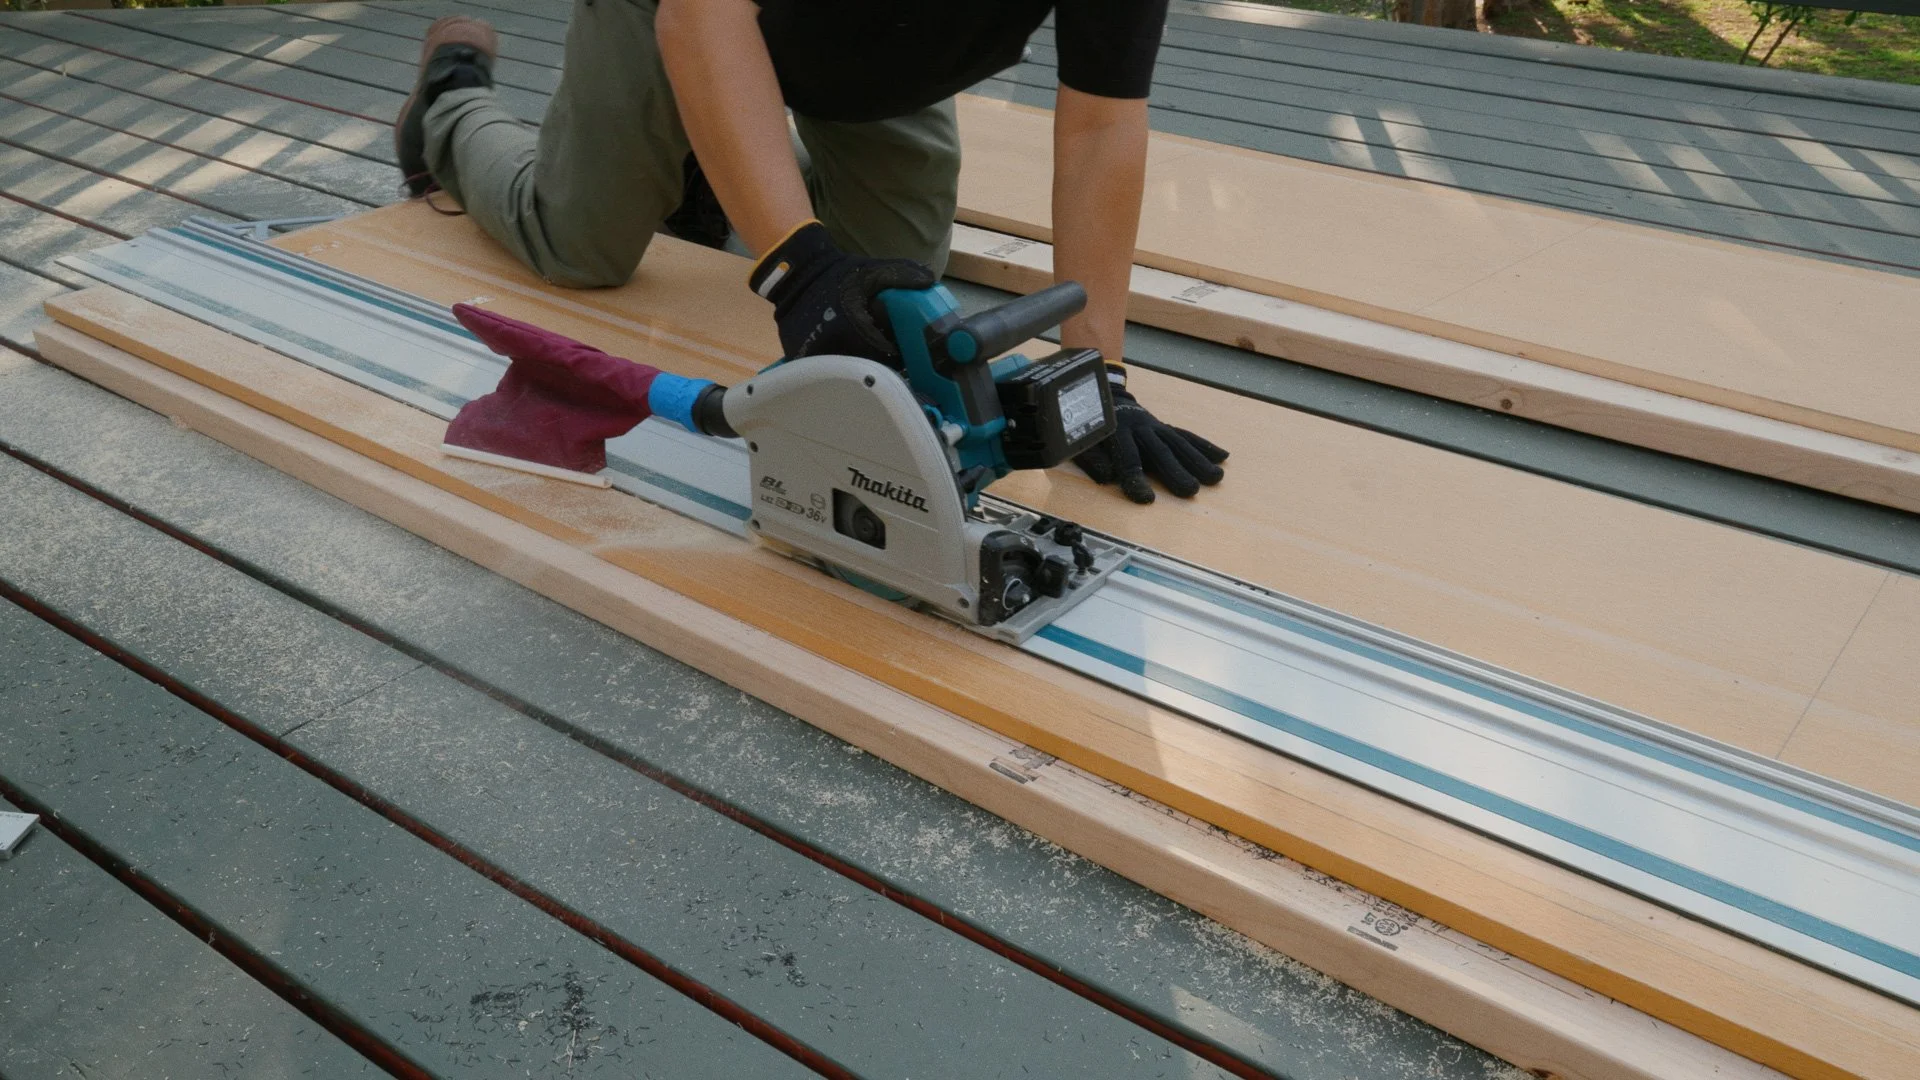
After the first few cuts, the difference was obvious:
Cleaner cuts
More consistent results
Less time fighting the tool, which matters when you are trying to stay precise across a long build
From there, it was the usual rhythm:
Measure twice, cut once… then measure again for assurance
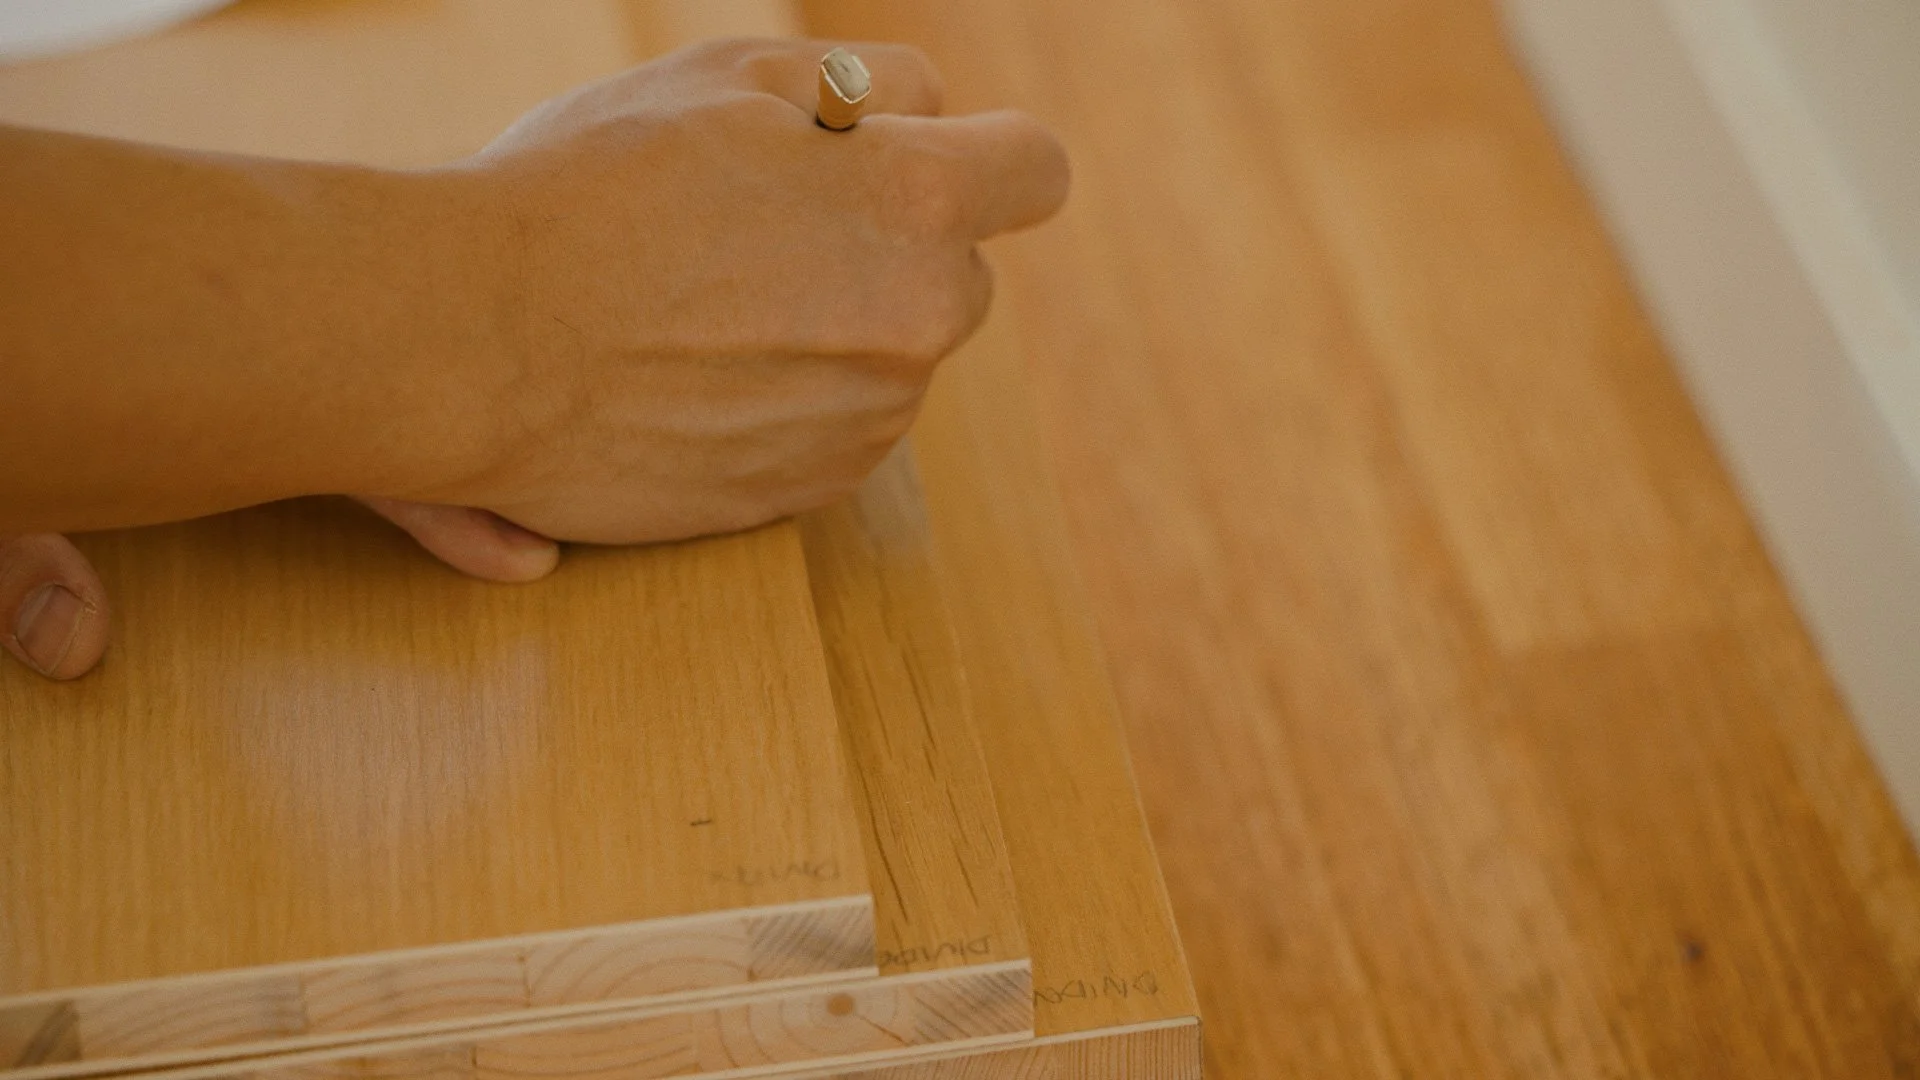
Label parts as I go (future me always appreciates this)
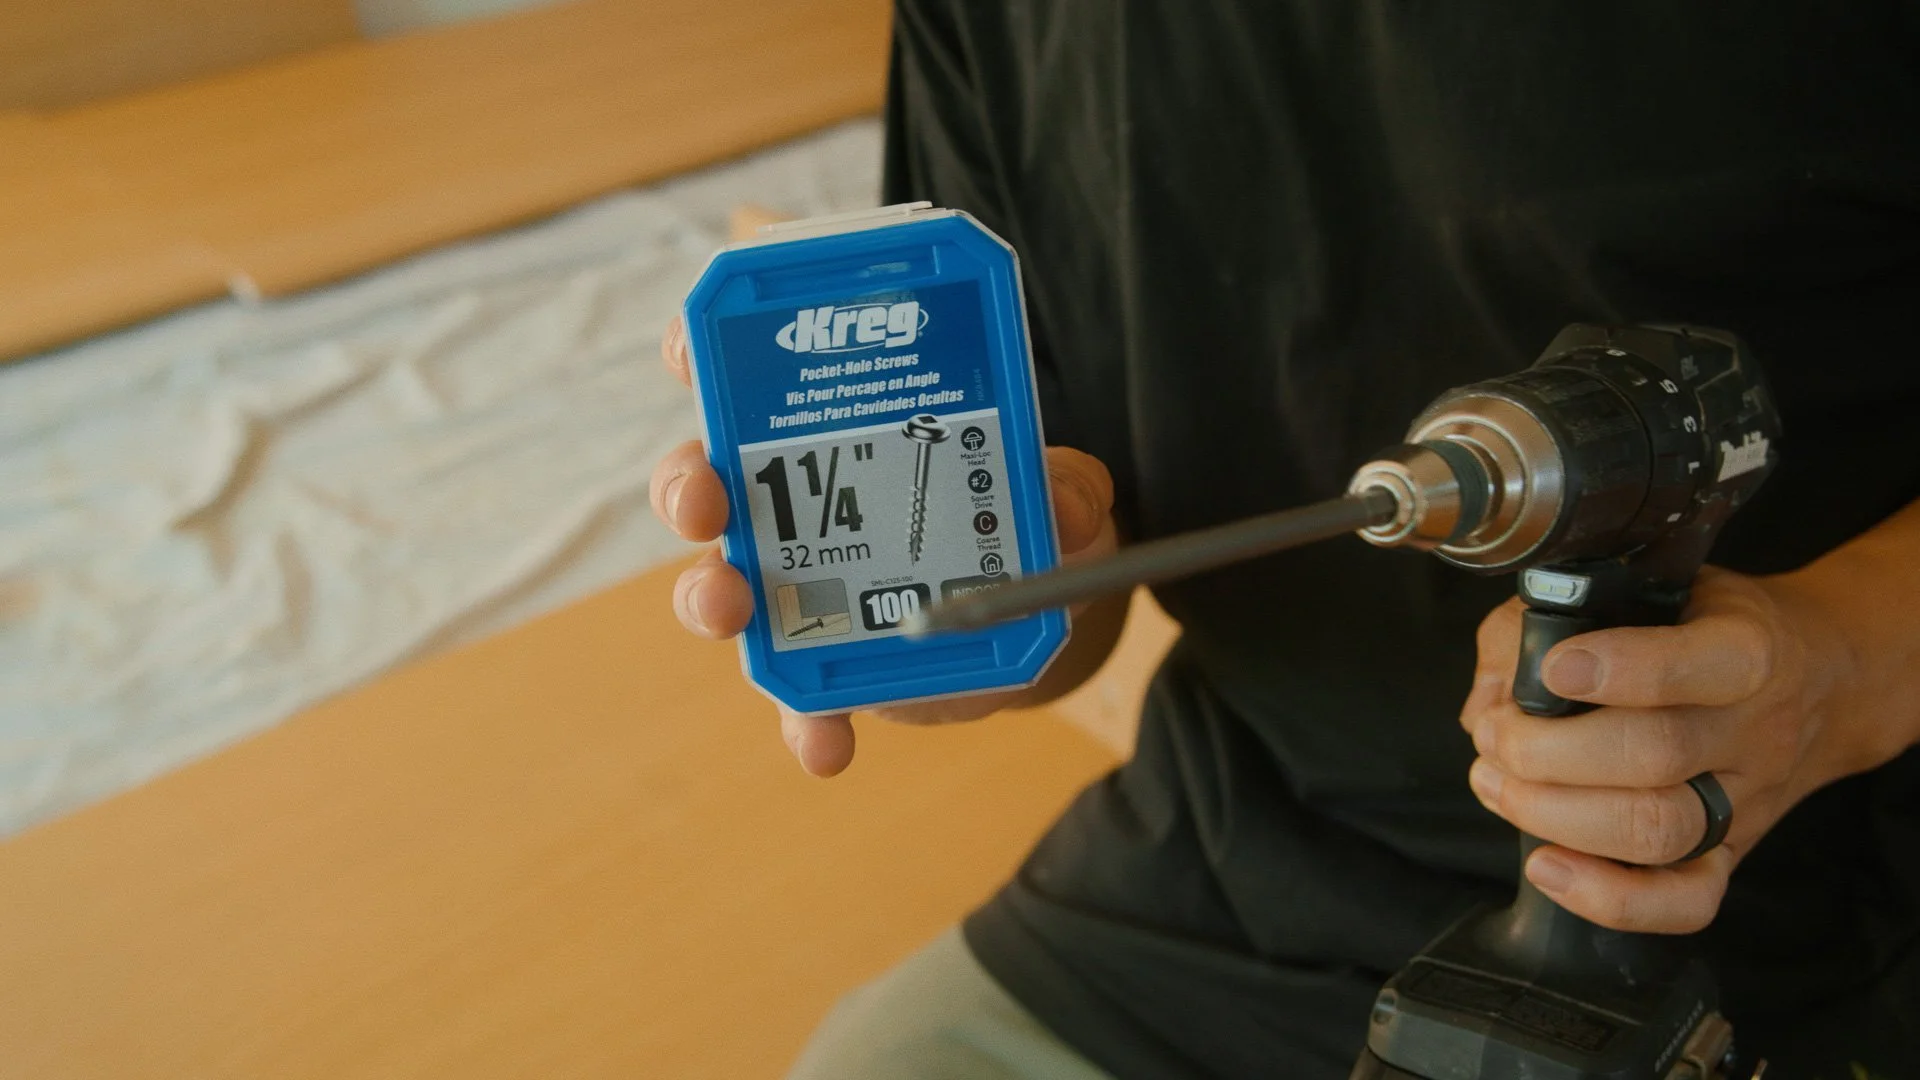
Drill pocket holes before assembly
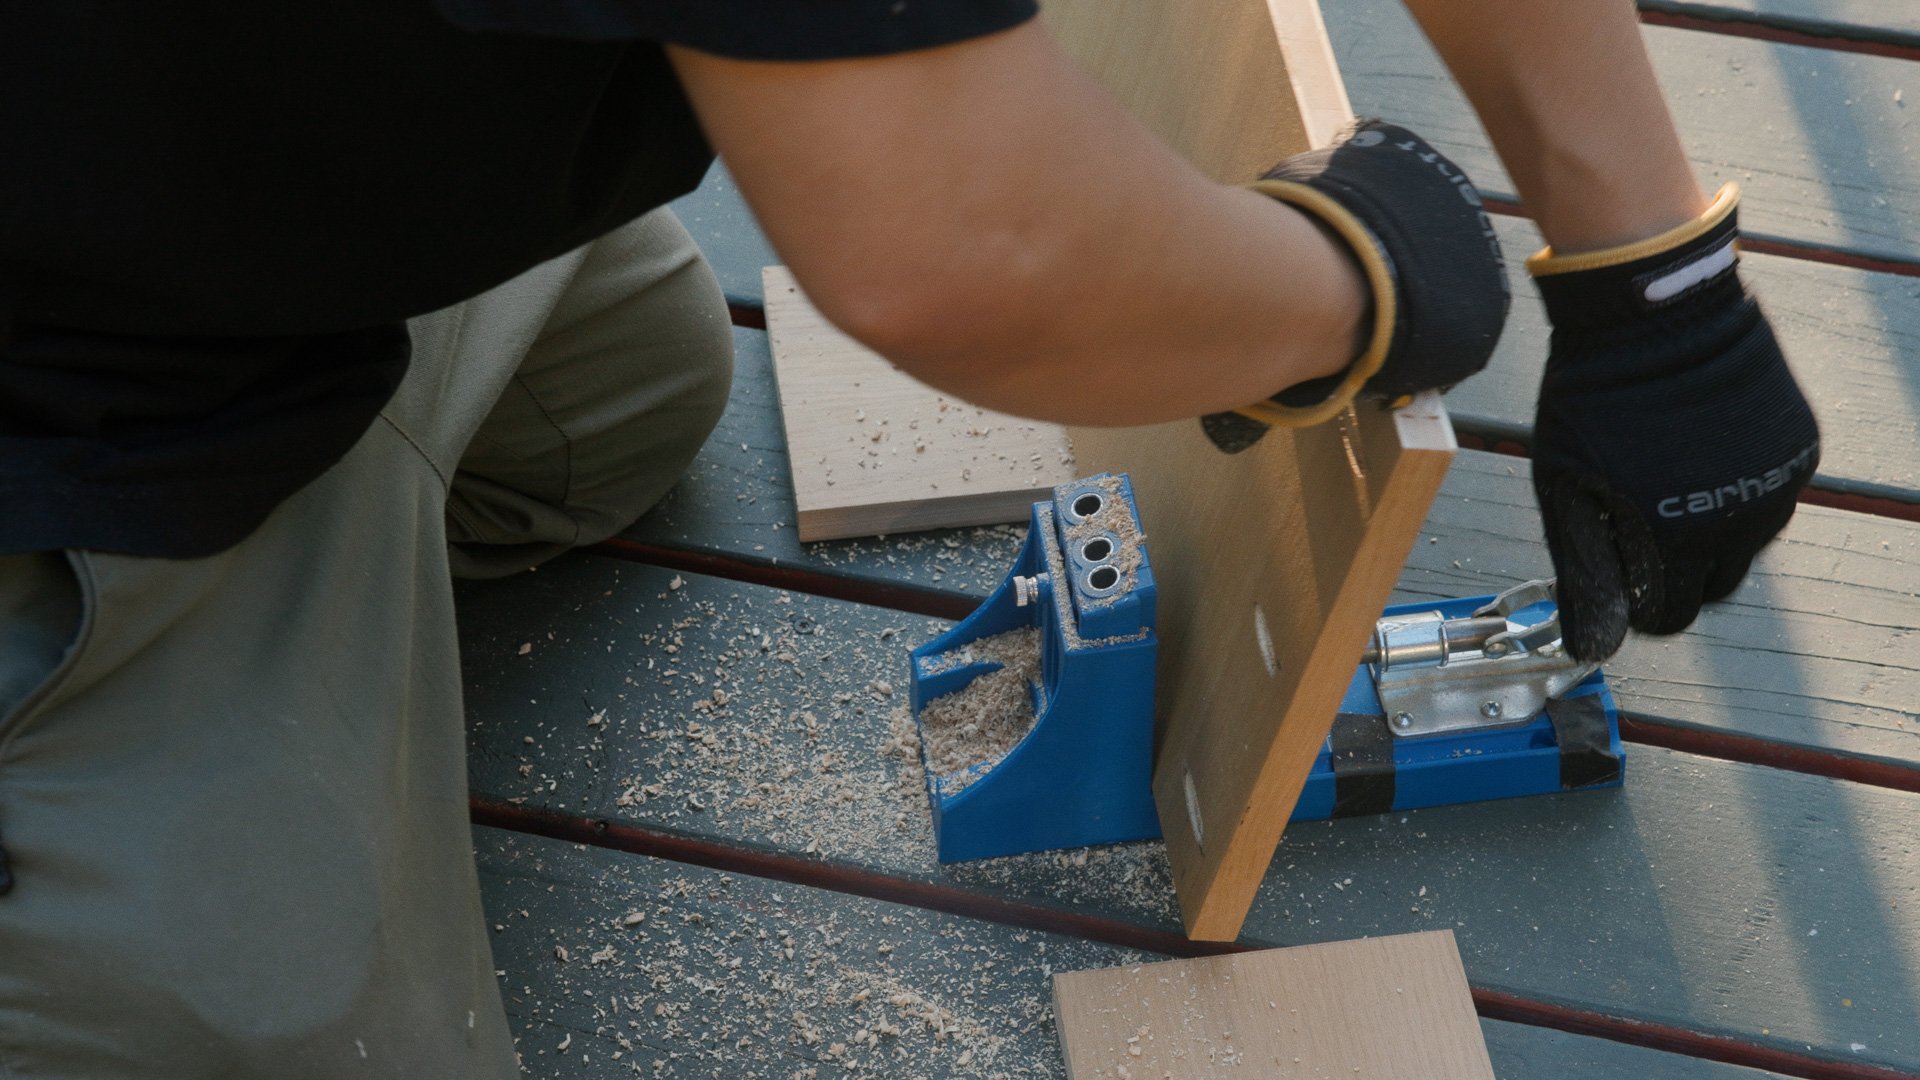
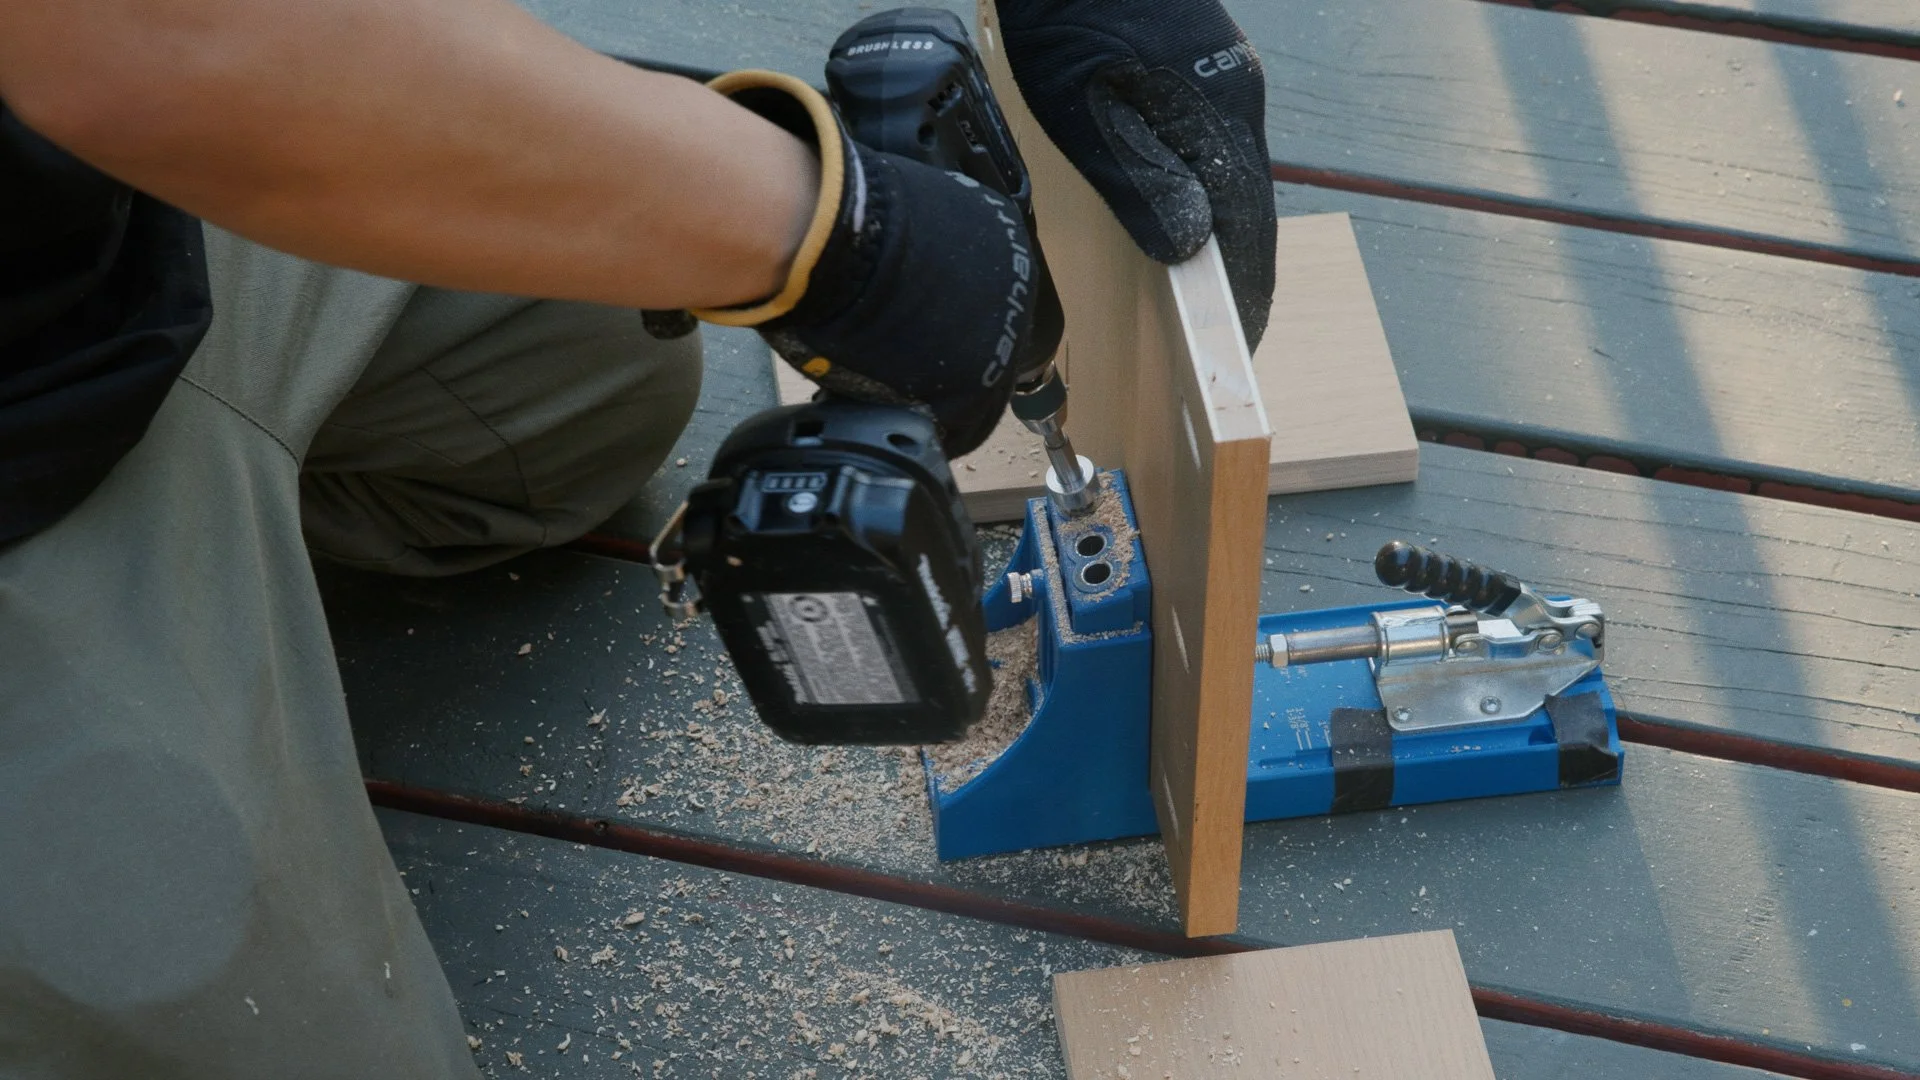
Pocket-hole joinery, in plain language
Pocket holes are angled pilot holes that let you drive a screw from the inside of one panel into another. As the screw tightens, it pulls the joint together like an internal clamp. It is fast, strong, and clean, and it’s great for this kind of plywood cabinet-style construction.
Products used
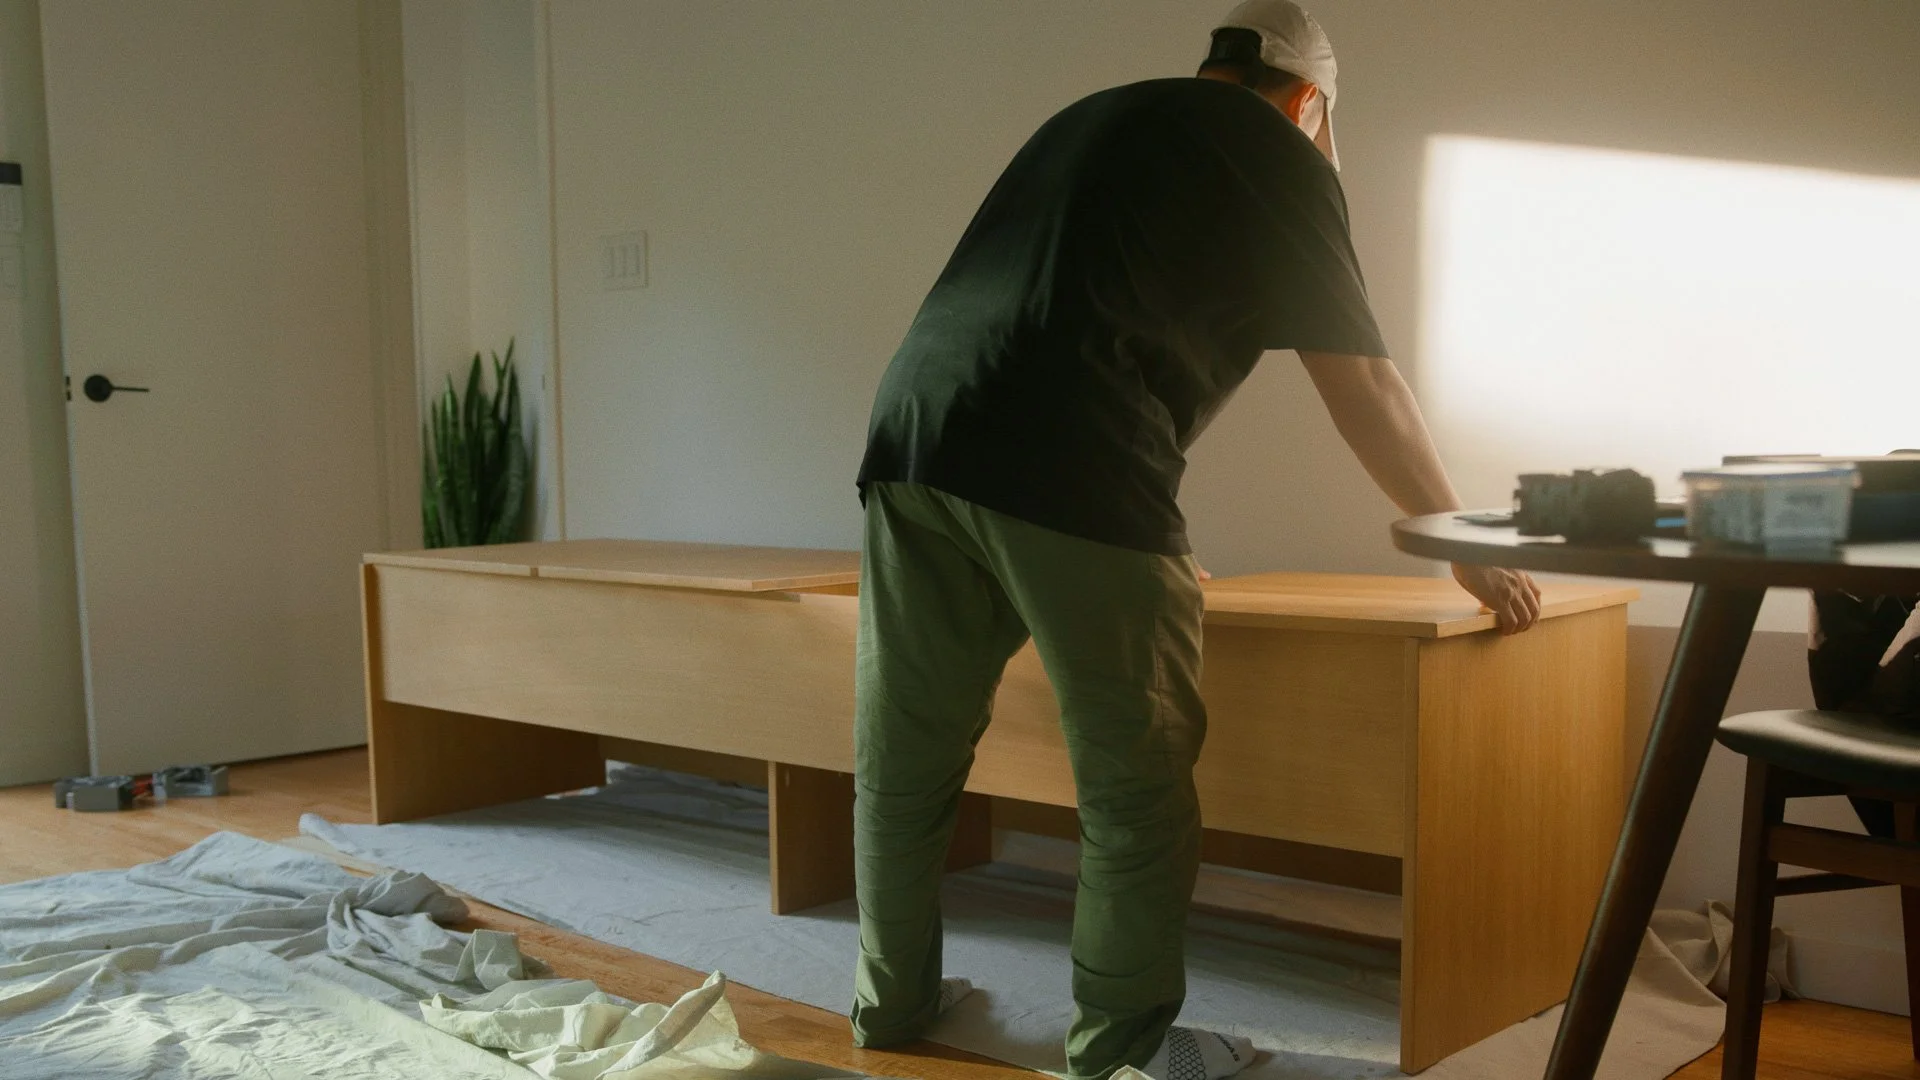
The Height Problem
Then the vacuum arrived, and I immediately noticed something was off. It looked a little taller than I imagined.
I measured it, then measured the design.
Two inches.
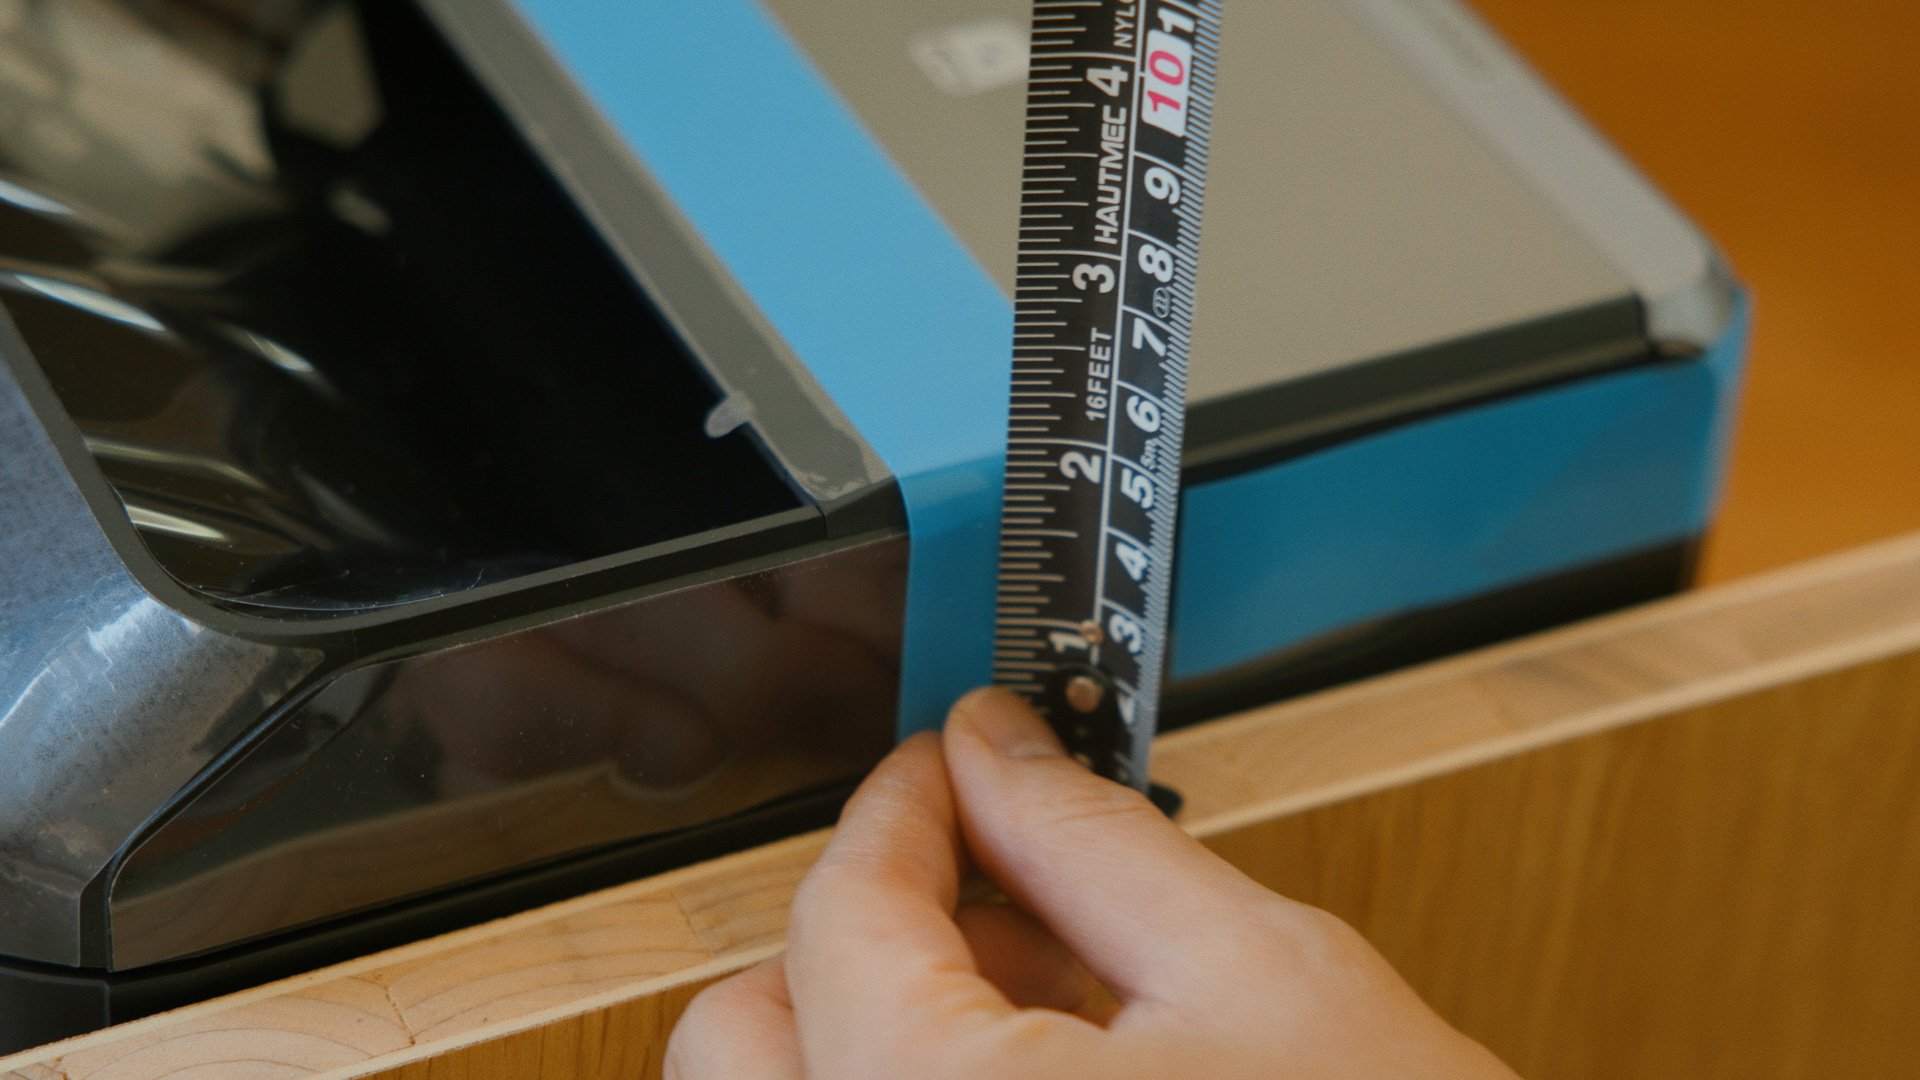
The bench was about two inches too short for the clearance I needed, and the worst part is I had already cut most of the wood.
After a brief freakout, I went back into the design and found the simplest fix with the least impact on what I’d already cut.
The fix
Believe it or not, I still had a few big pieces of offcuts from my worktable. So I increased the height of the legs by about 2.5 inches.
Enough clearance for the vacuum
A little extra room underneath for cables
The tradeoff is the seat ended up slightly taller than I would normally choose, but at that point I was choosing “it works” over “perfect.”
Products used
Narwal Flow 2 robot vacuum ( video sponsor)
Sanding + Edge Banding (the “furniture” step)
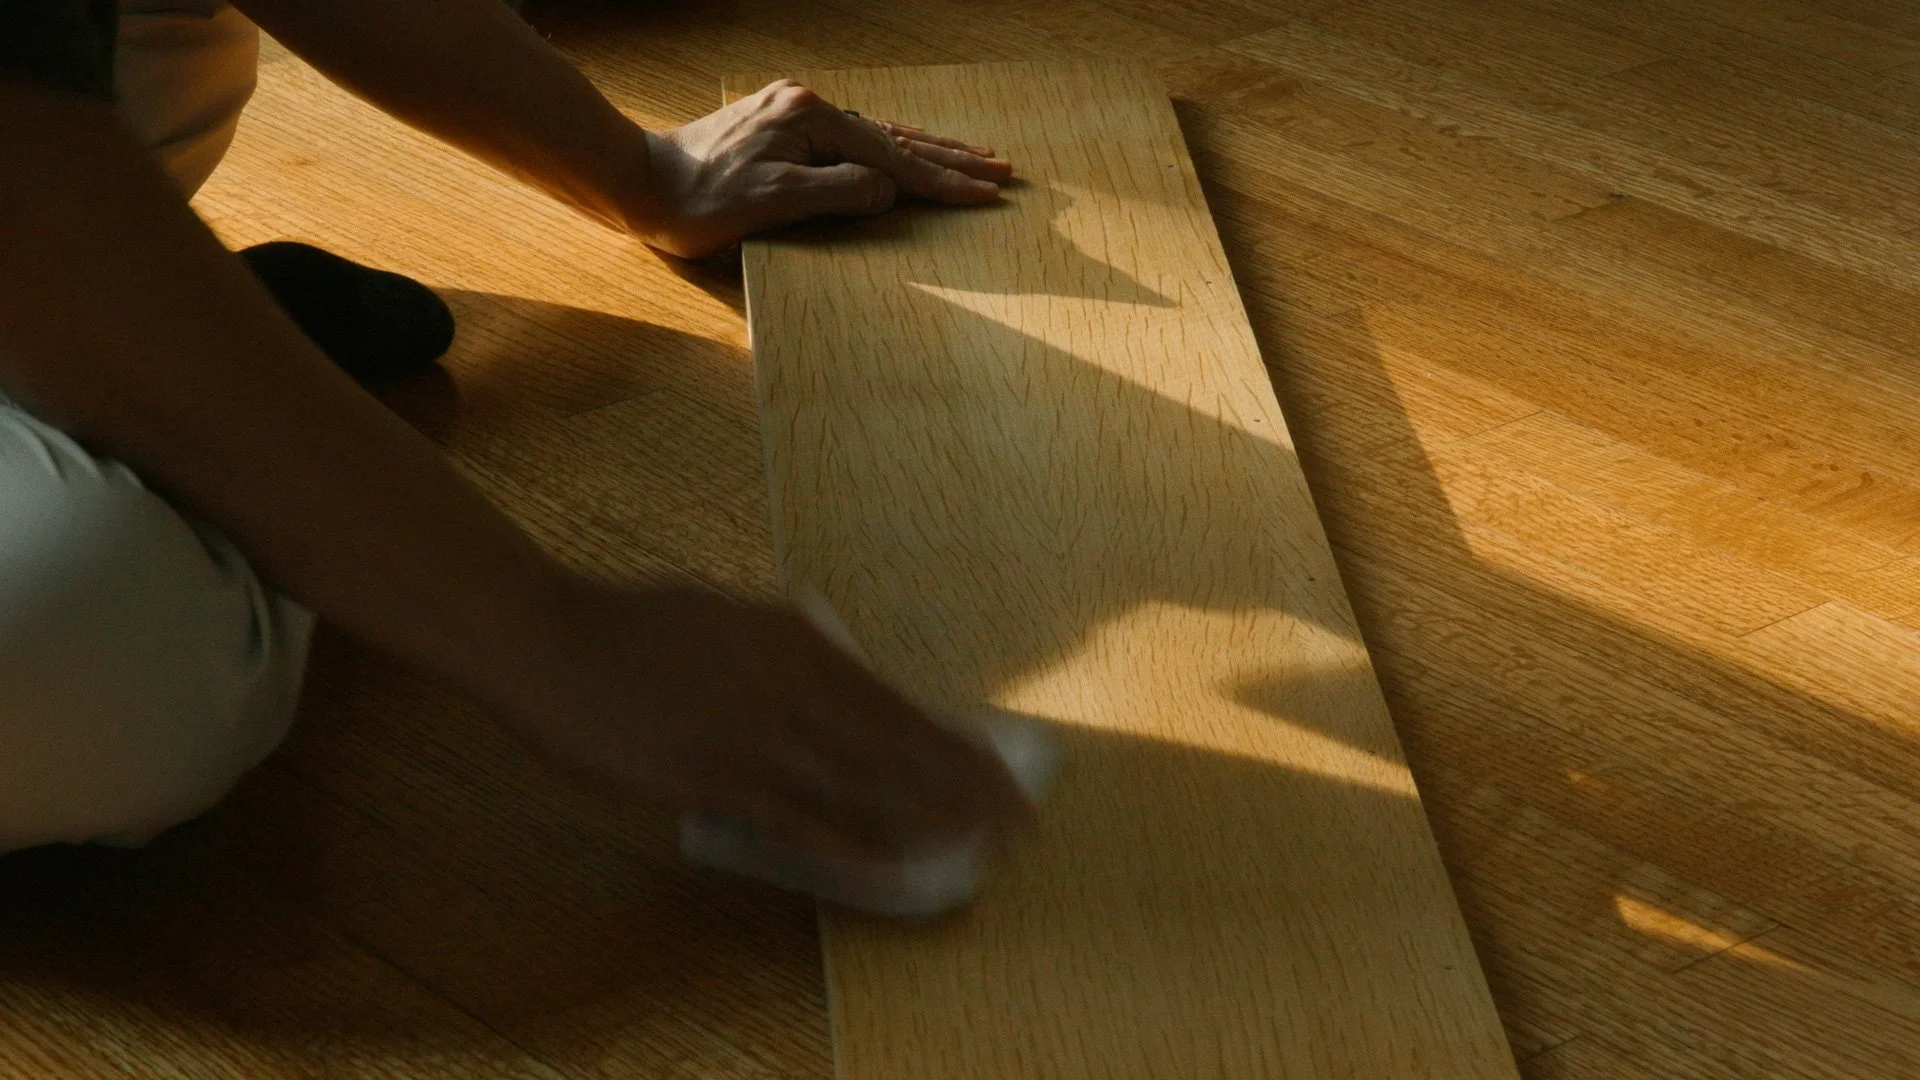
Before assembly, I prepped every piece. Reclaimed panels always have surprises: old pocket holes, rough edges, scuffs, and imperfections. I sanded down problem areas until everything felt consistent.
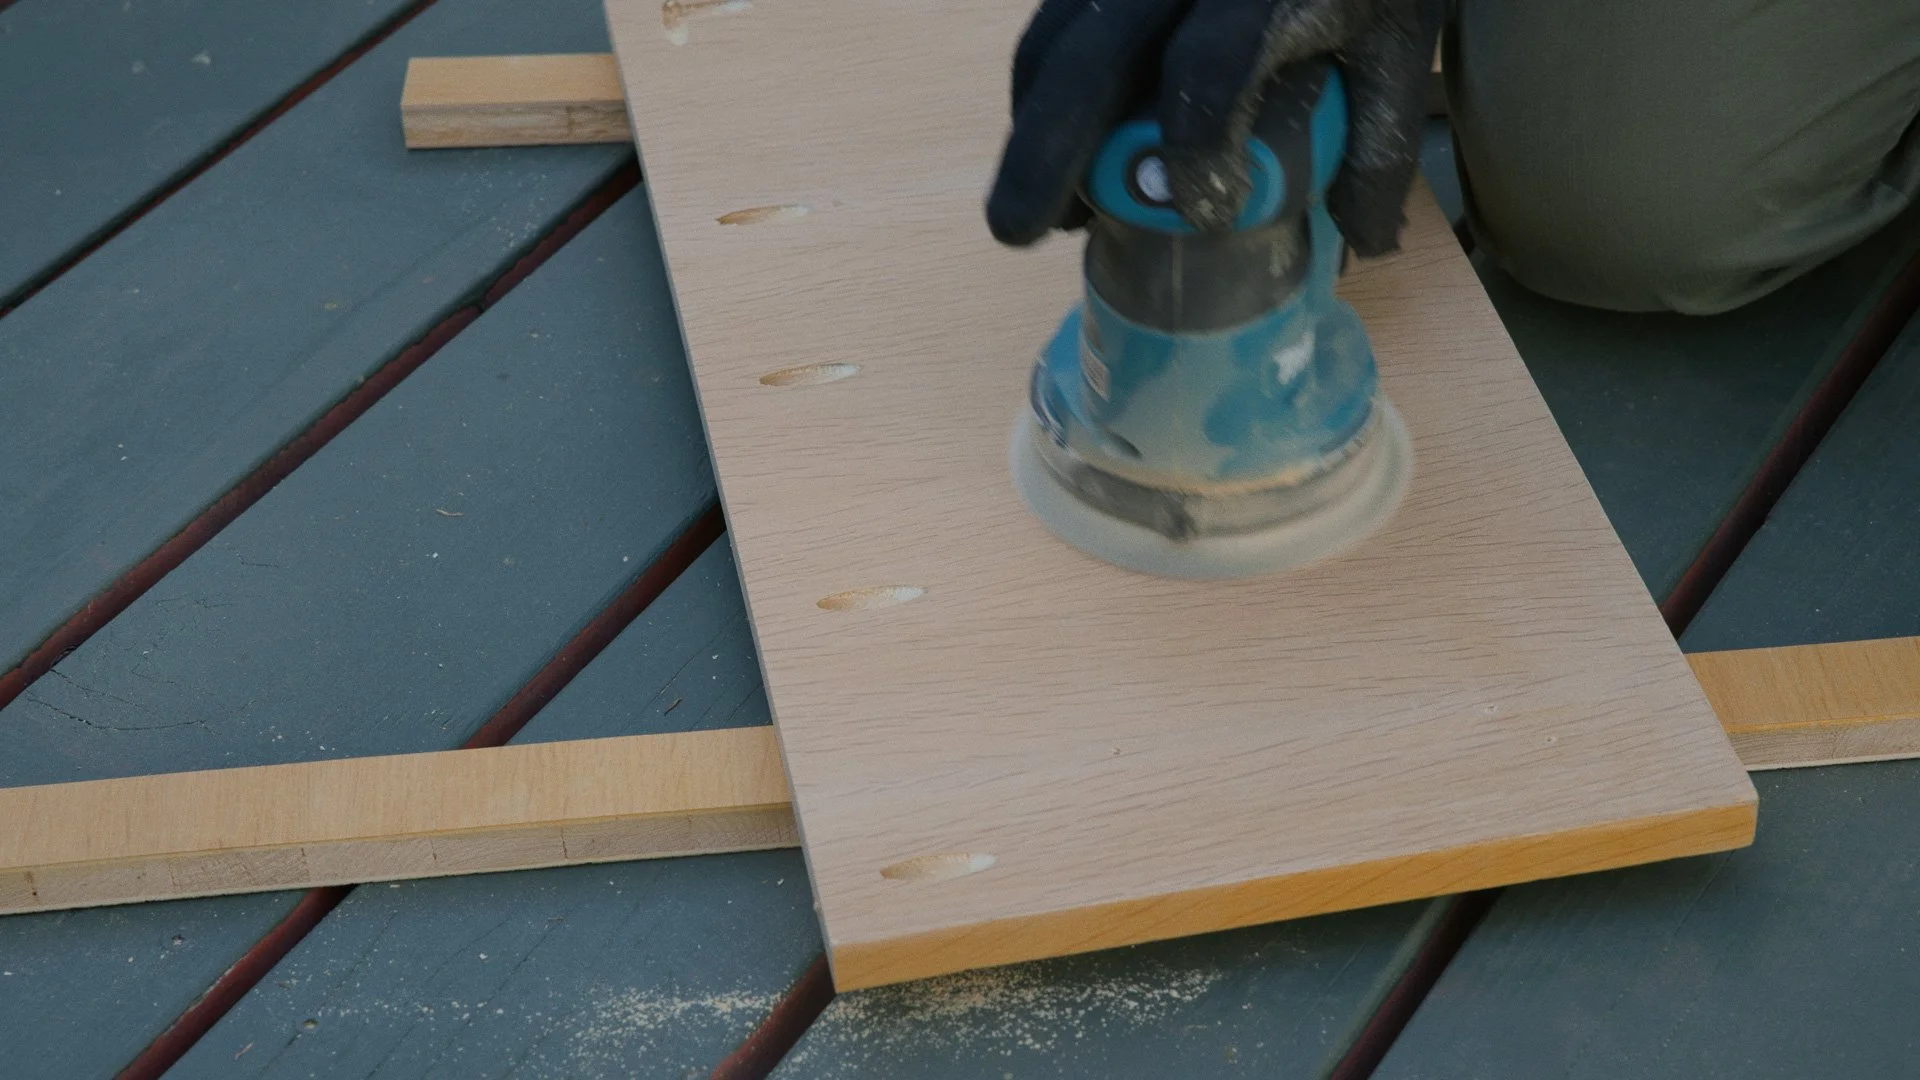
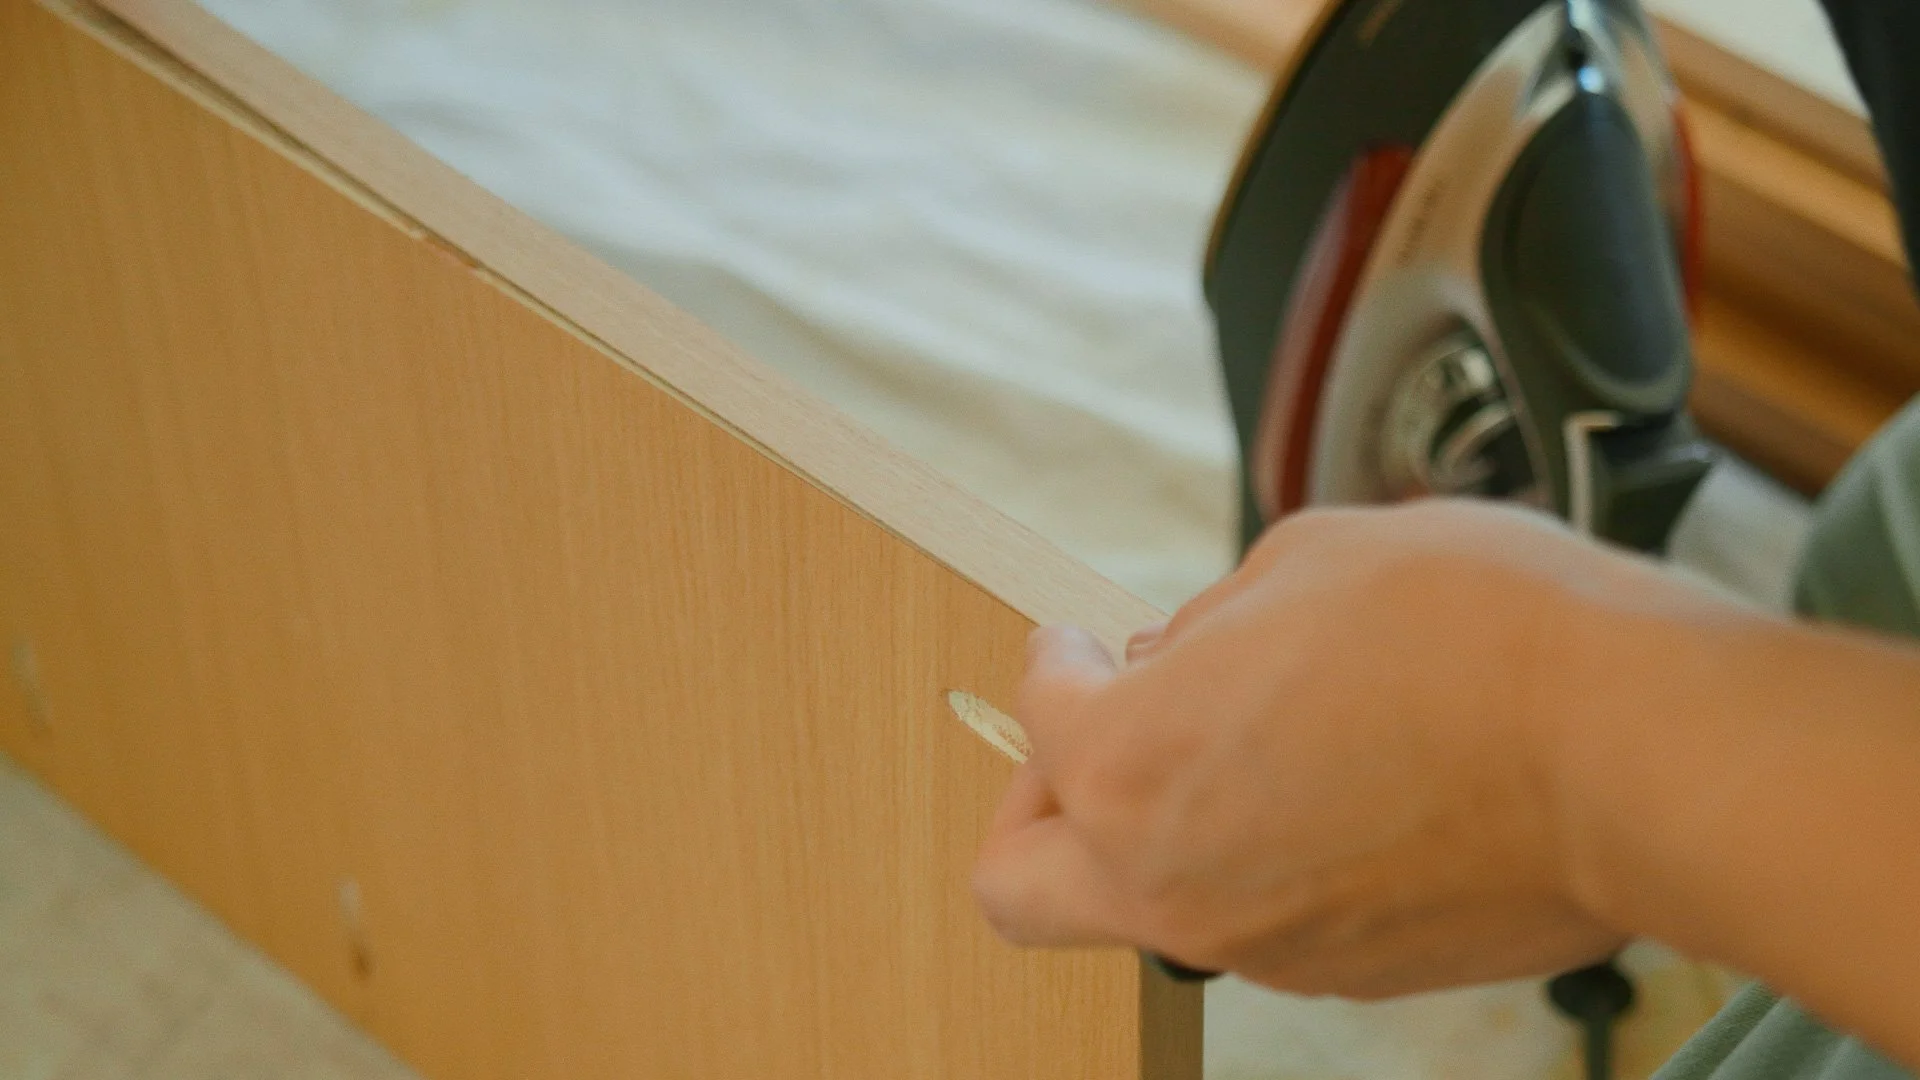
Then I edge-banded the exposed plywood edges.
Edge banding is one of those small details that changes how the whole piece reads. It’s the difference between a “plywood project” and “finished piece of furniture.”
How I did it
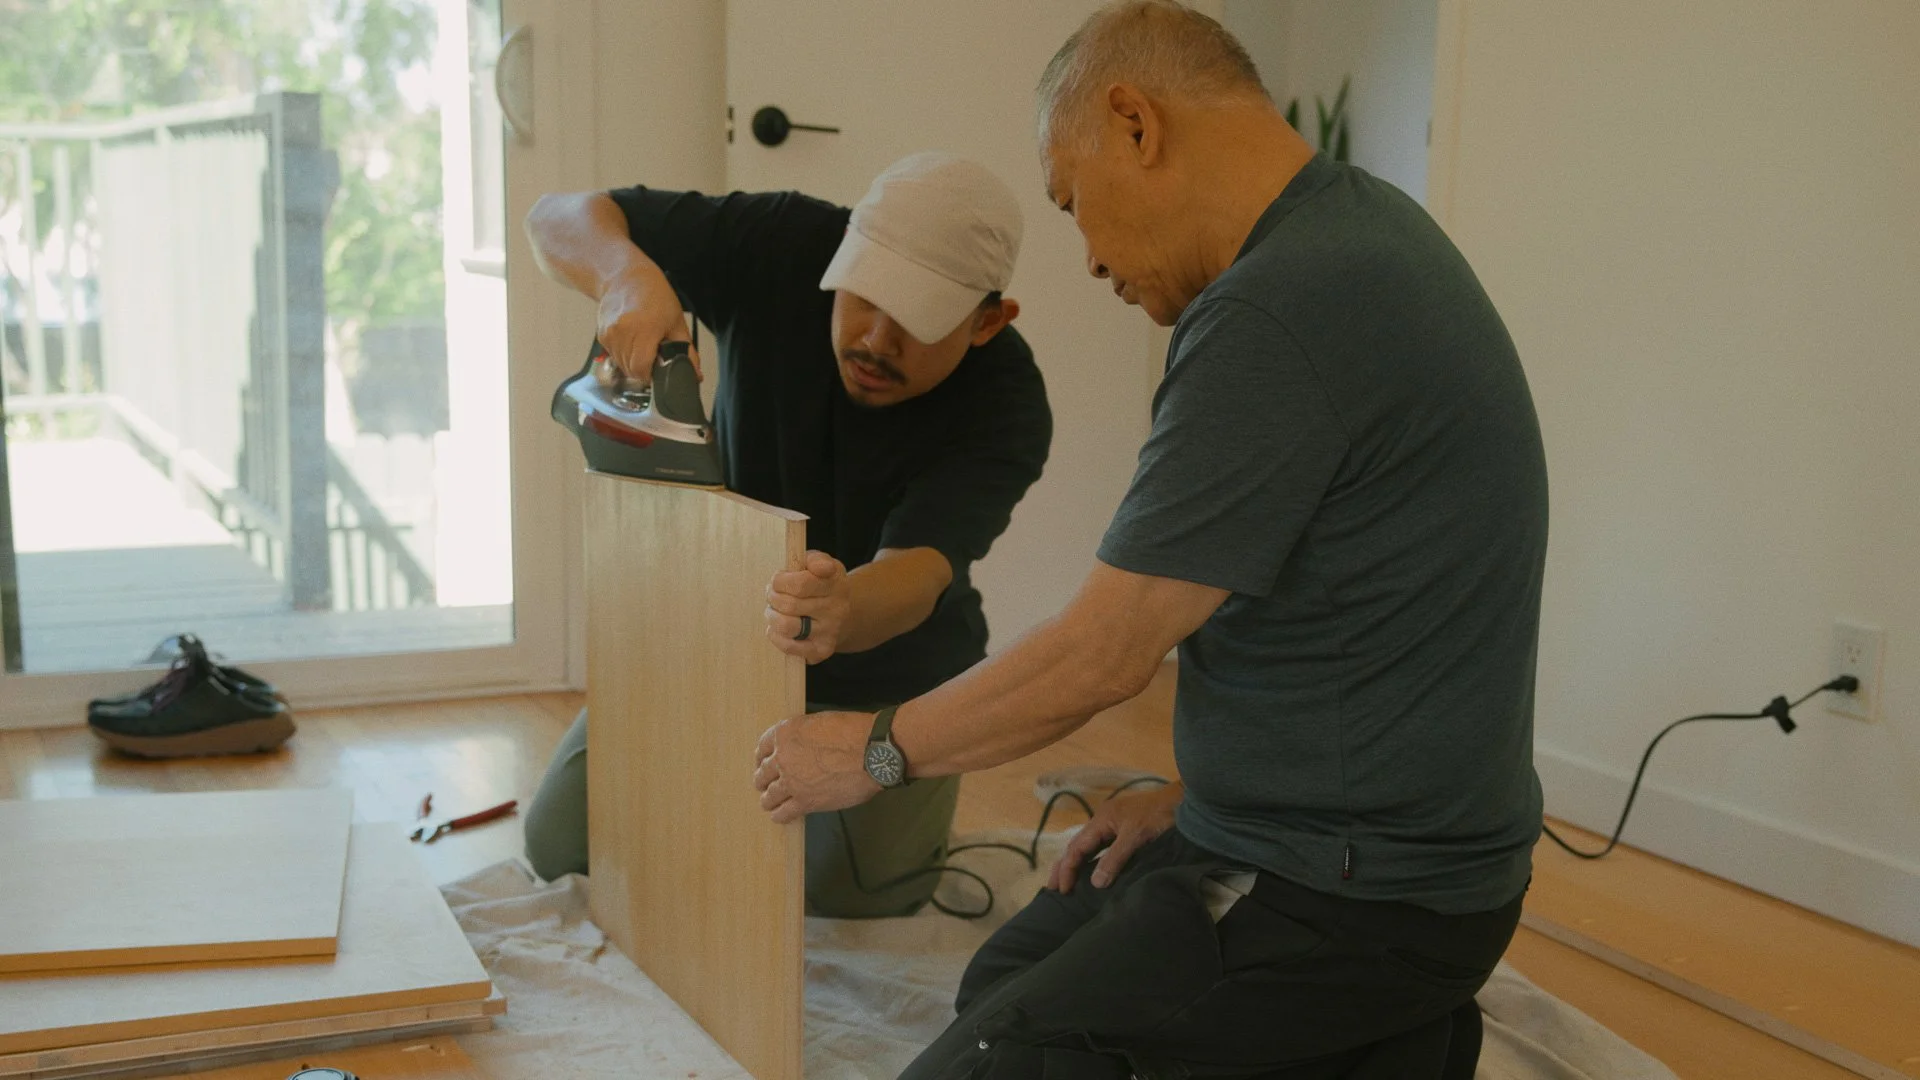
I used iron-on white oak veneer edge banding.
The adhesive activates with heat, so a regular household iron works.
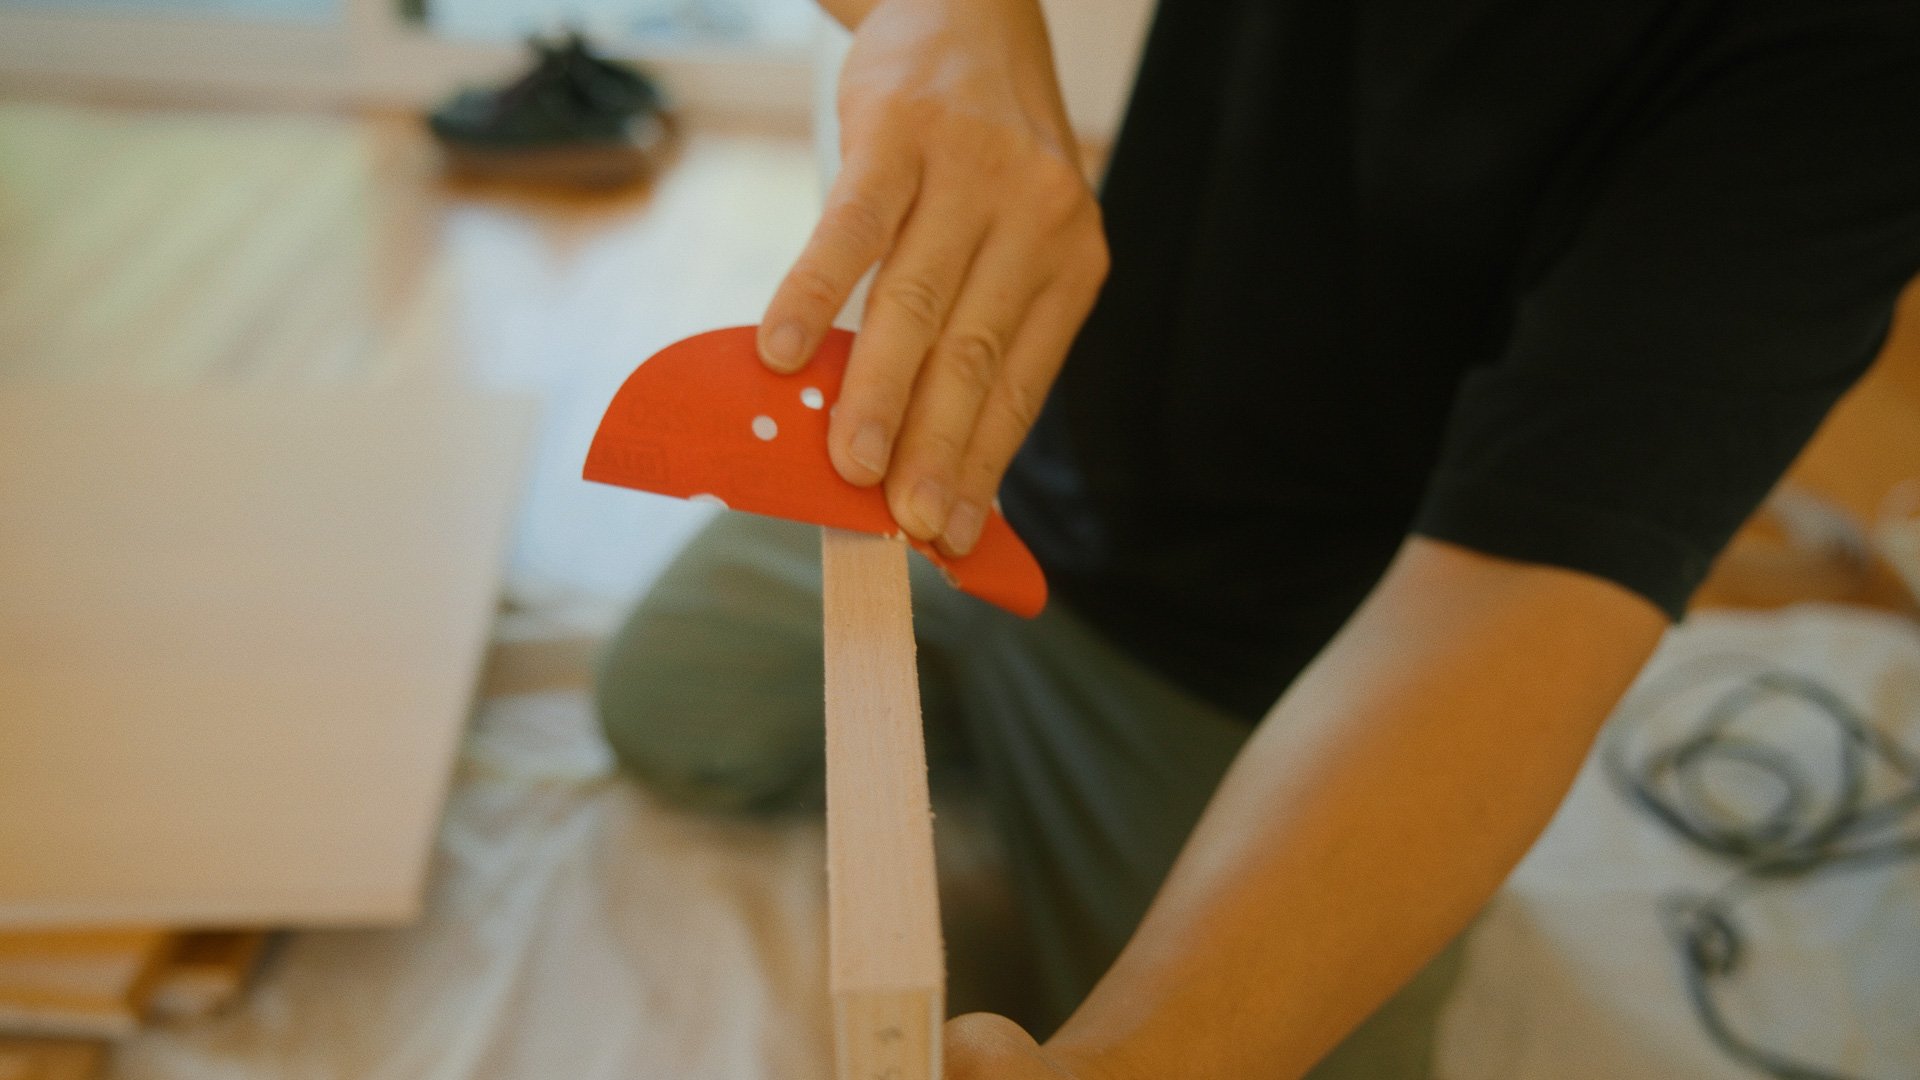
Once applied, I trimmed it flush and lightly sanded the edge to soften it.

Products used
White oak edge banding (iron-on veneer)
Household iron (for activating the adhesive)
Flush Cut Trimmer (to cut the ends)
Edge Cutter (optional to trim off the edges, you can use a utility knife instead)
Finishing the Wood
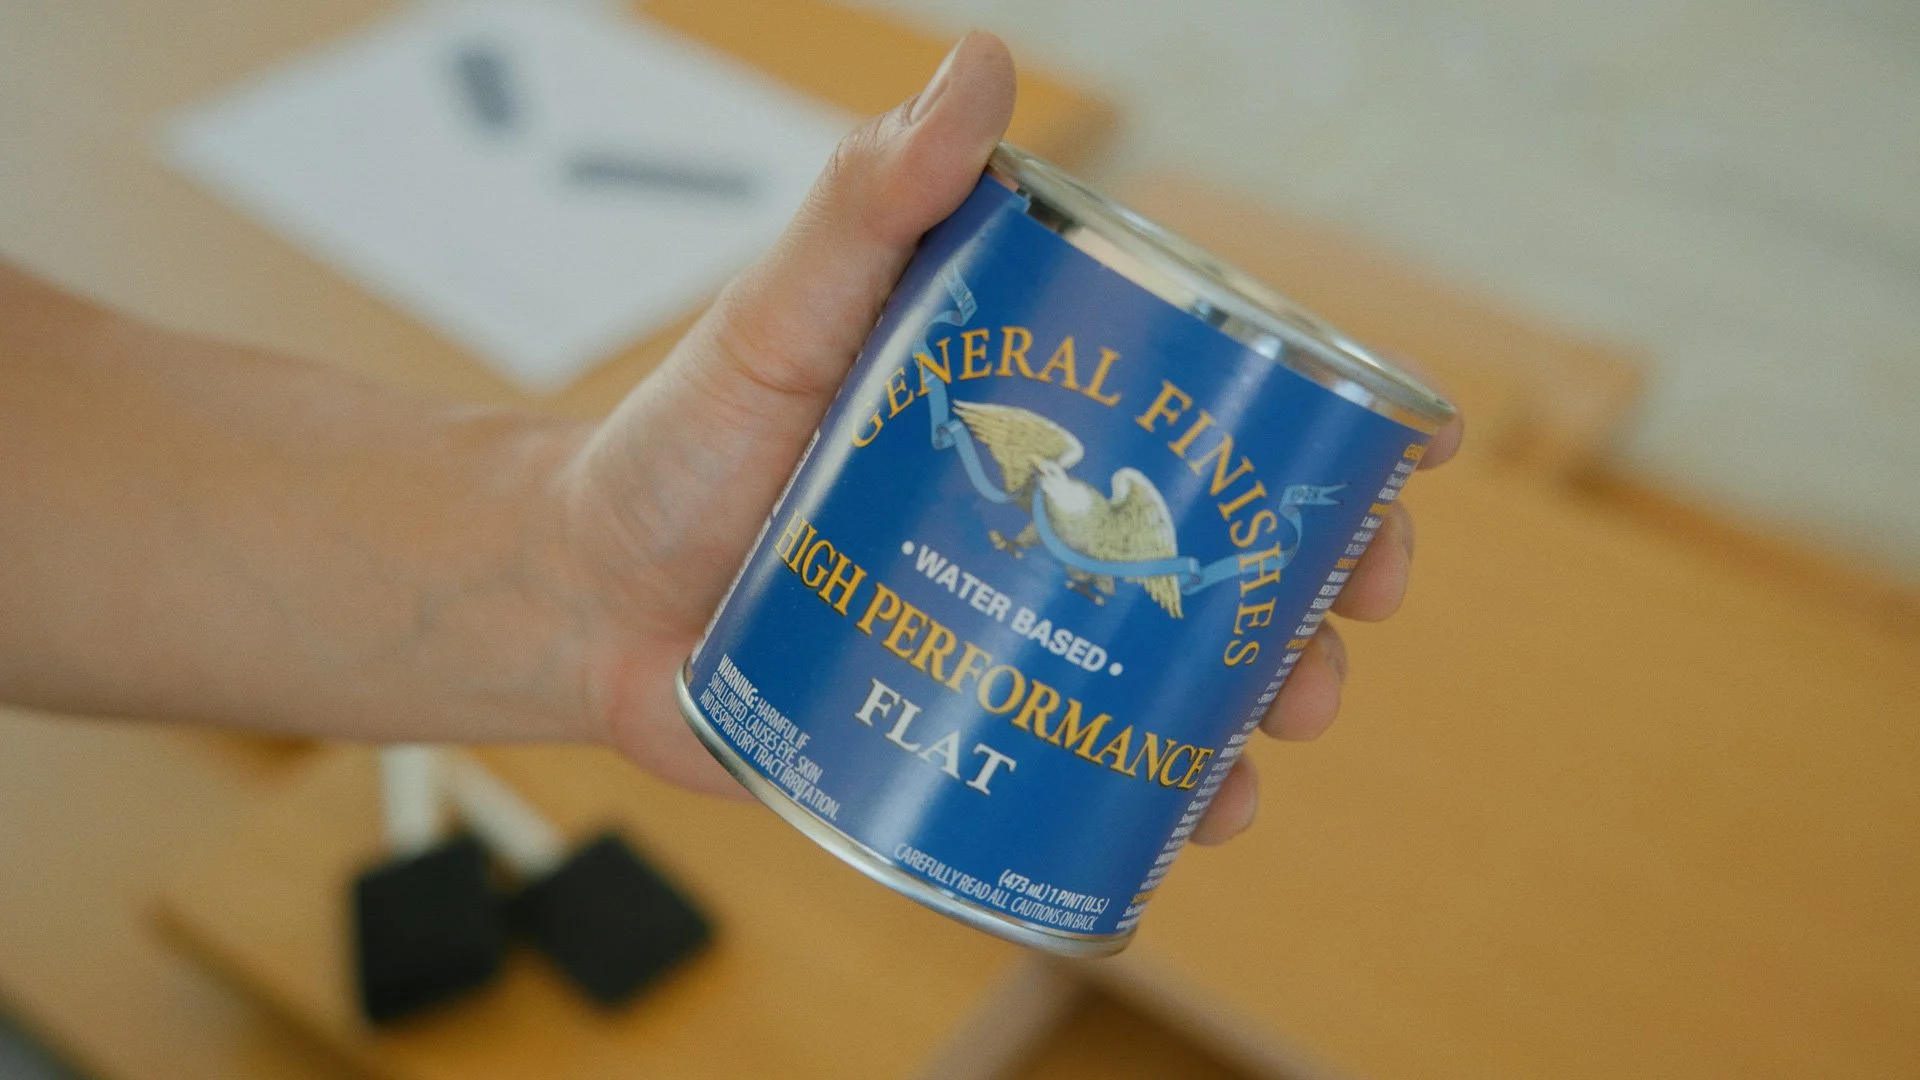
I wanted a protective finish that wouldn’t amber over time. For the bench panels, I used a water-based top coat (the same one I used on the original worktable).
Process
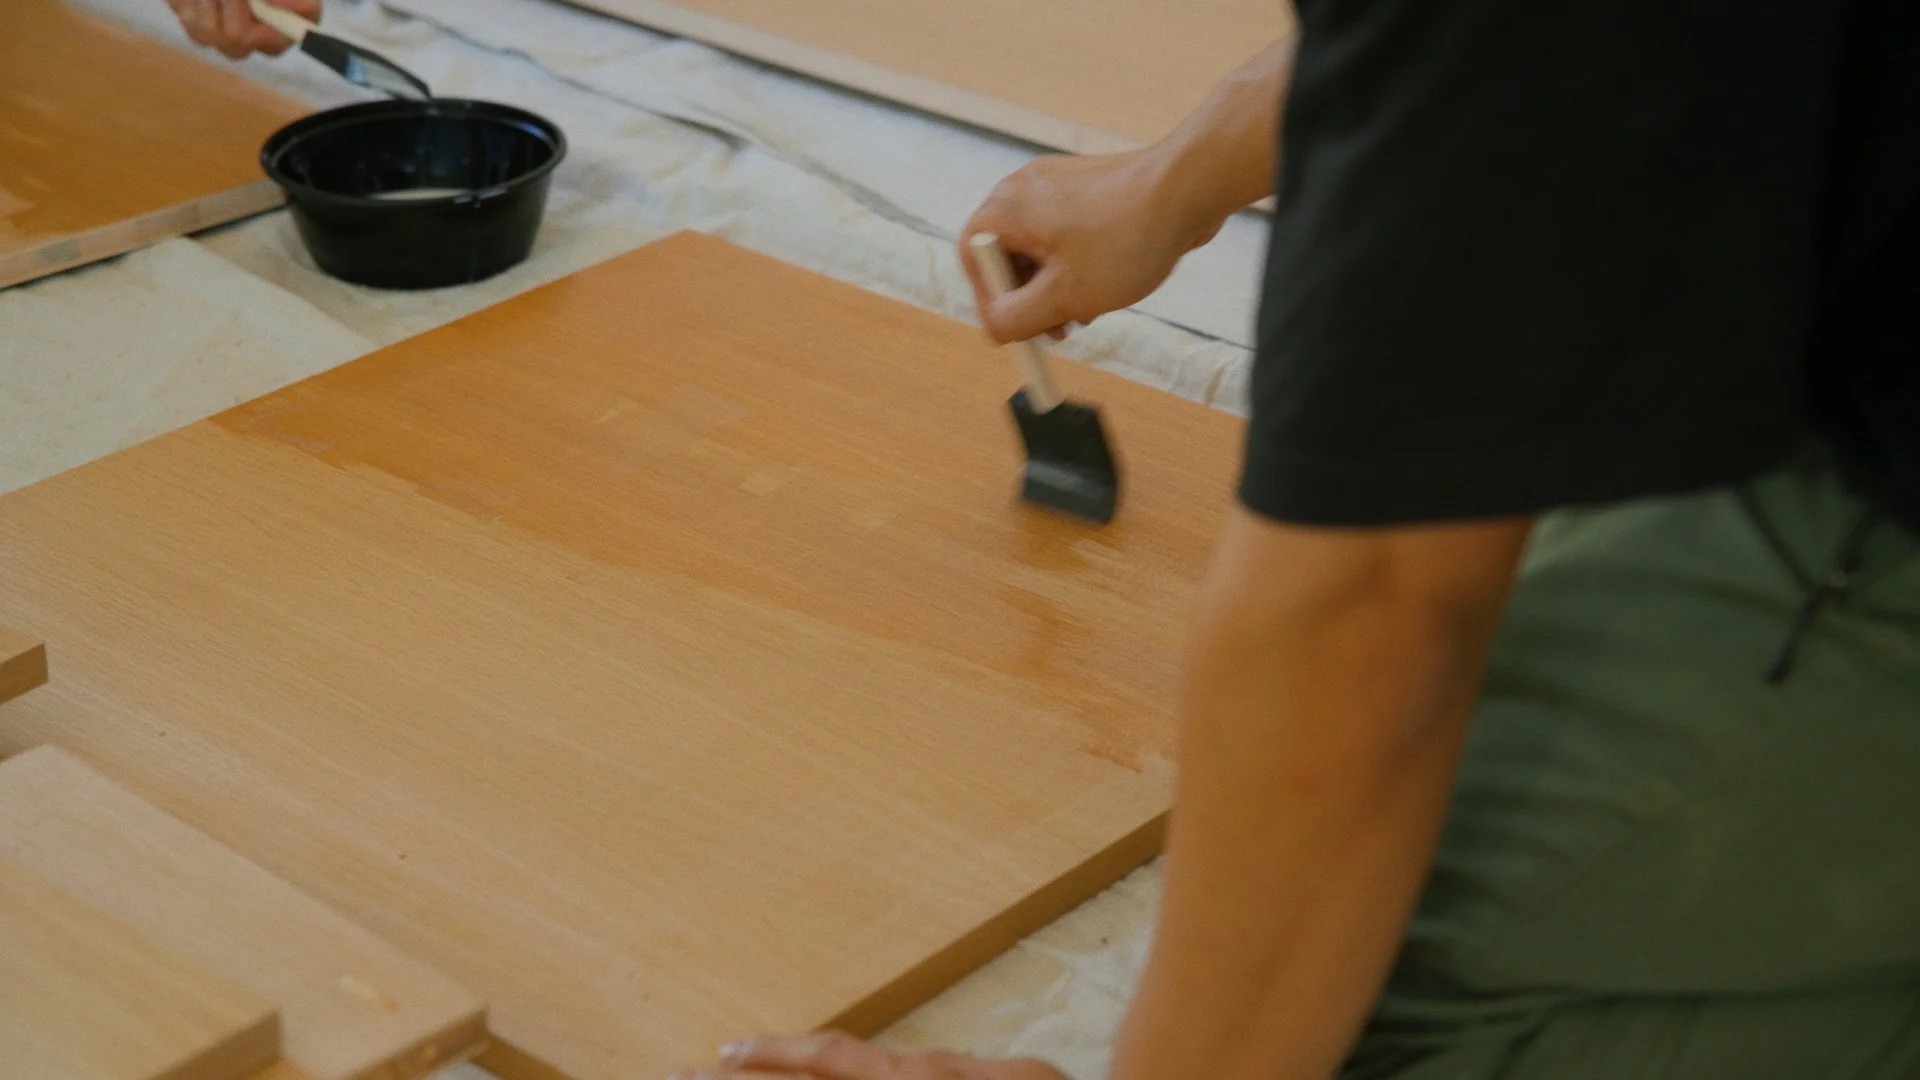
Thin coats with a foam brush
Dry time between coats (I waited 60 minutes in 72°F weather)
Let everything cure overnight before assembly
Products used
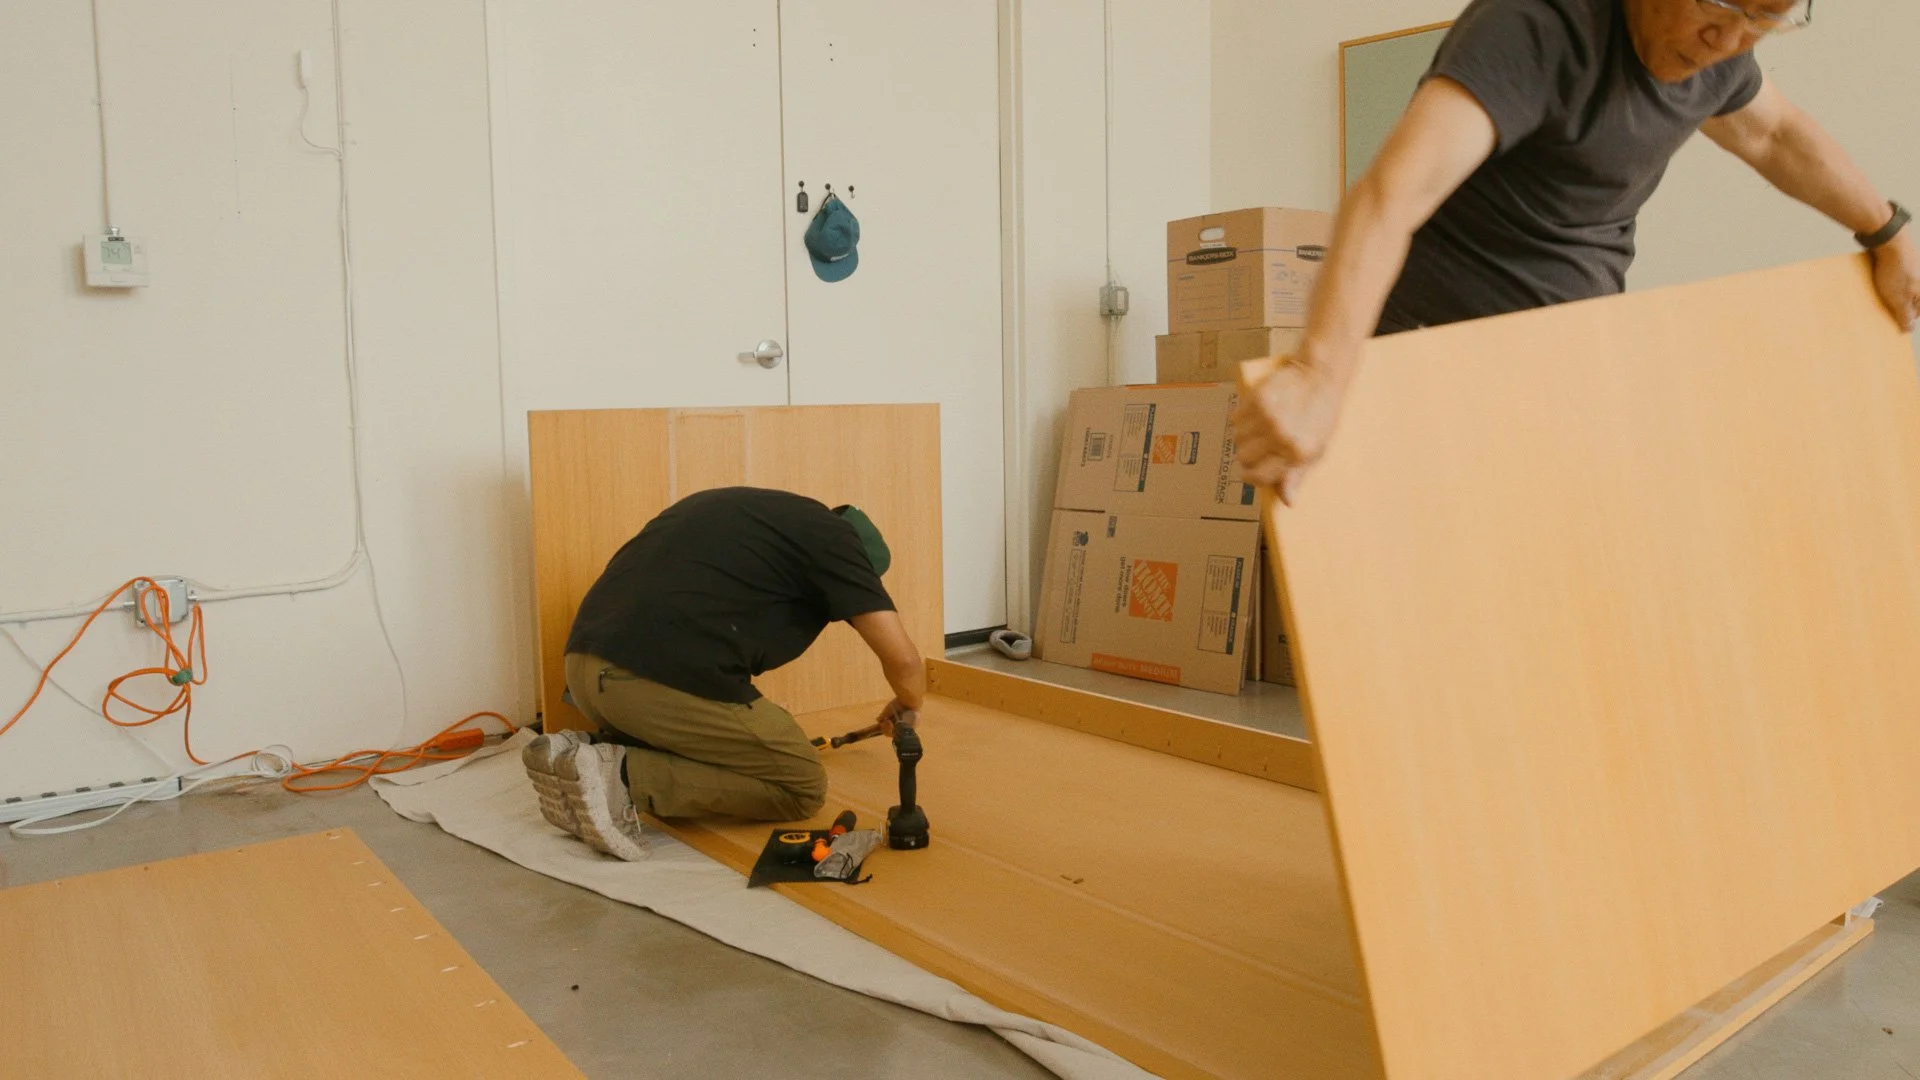
Pocket Hole Assembly
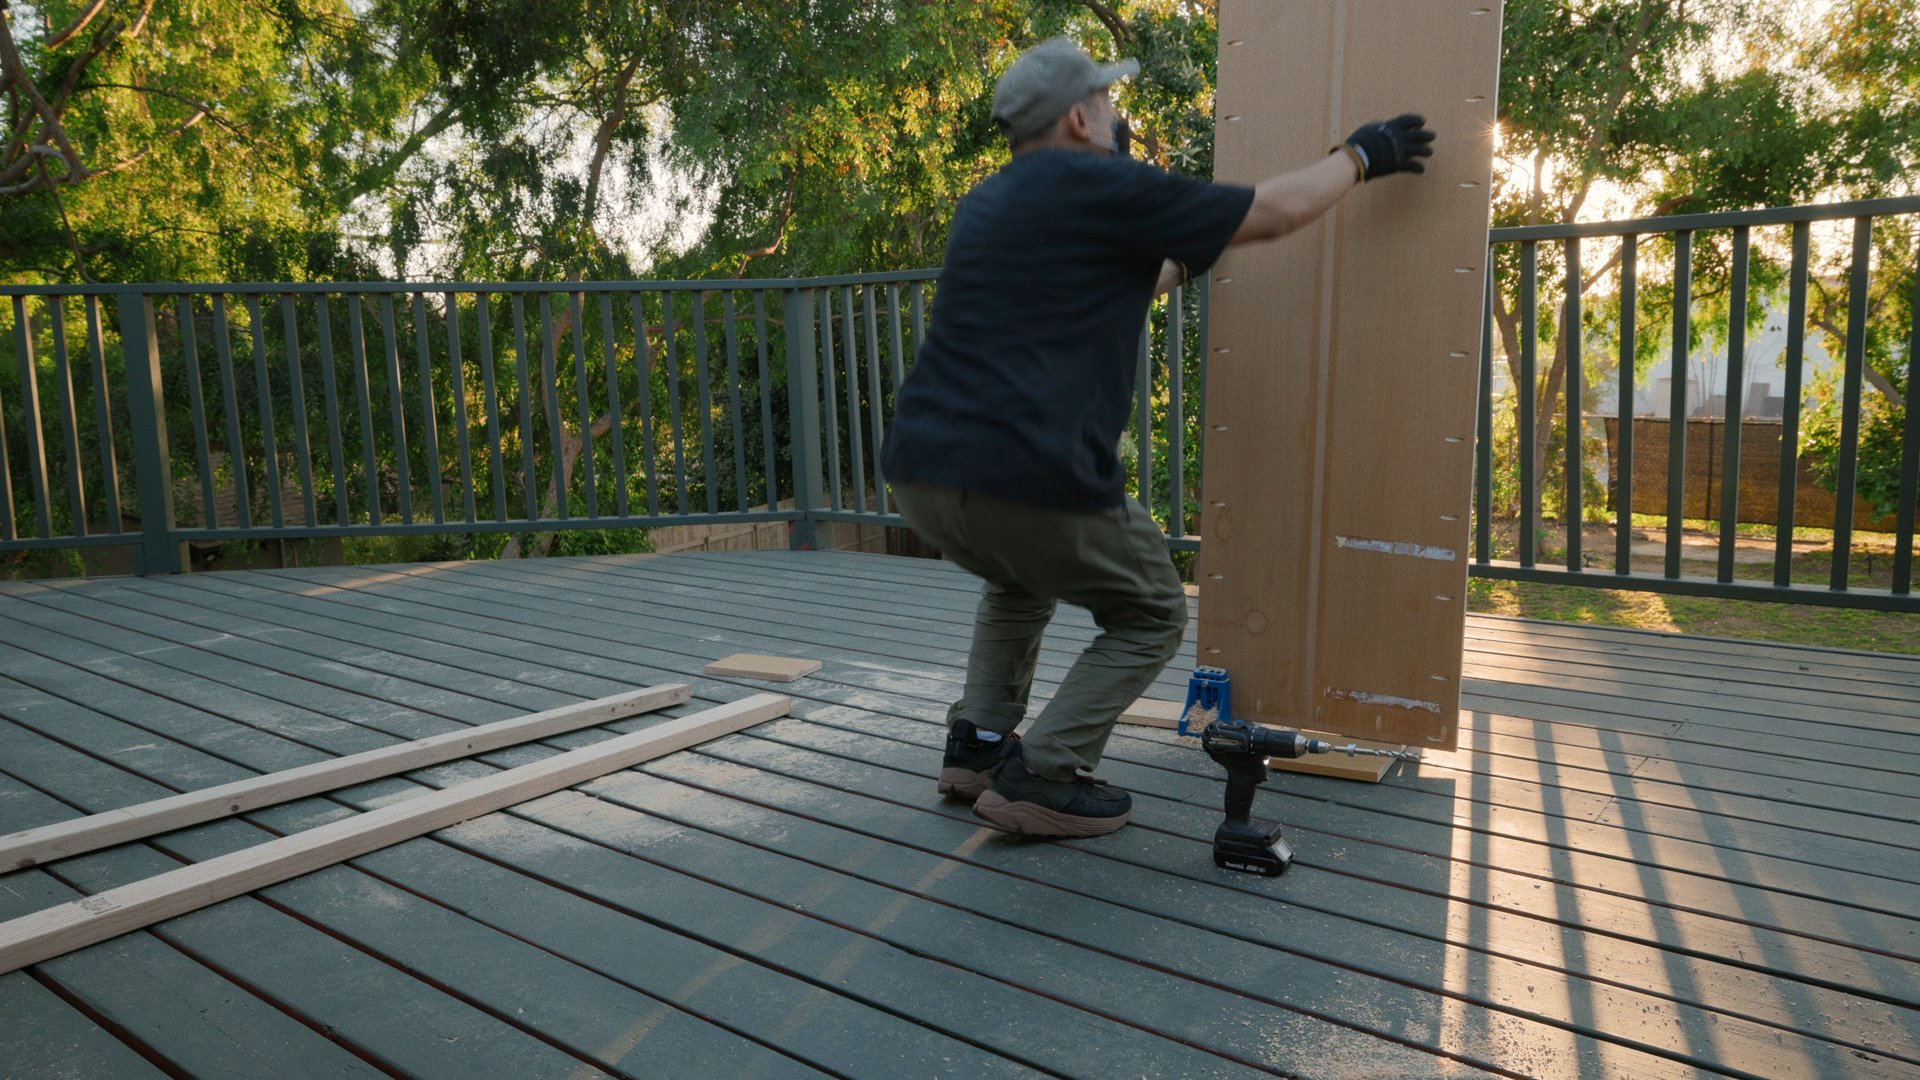
Assembly was mostly pocket-hole joinery, clamps to keep everything aligned, and a lot of checking that things stayed square.
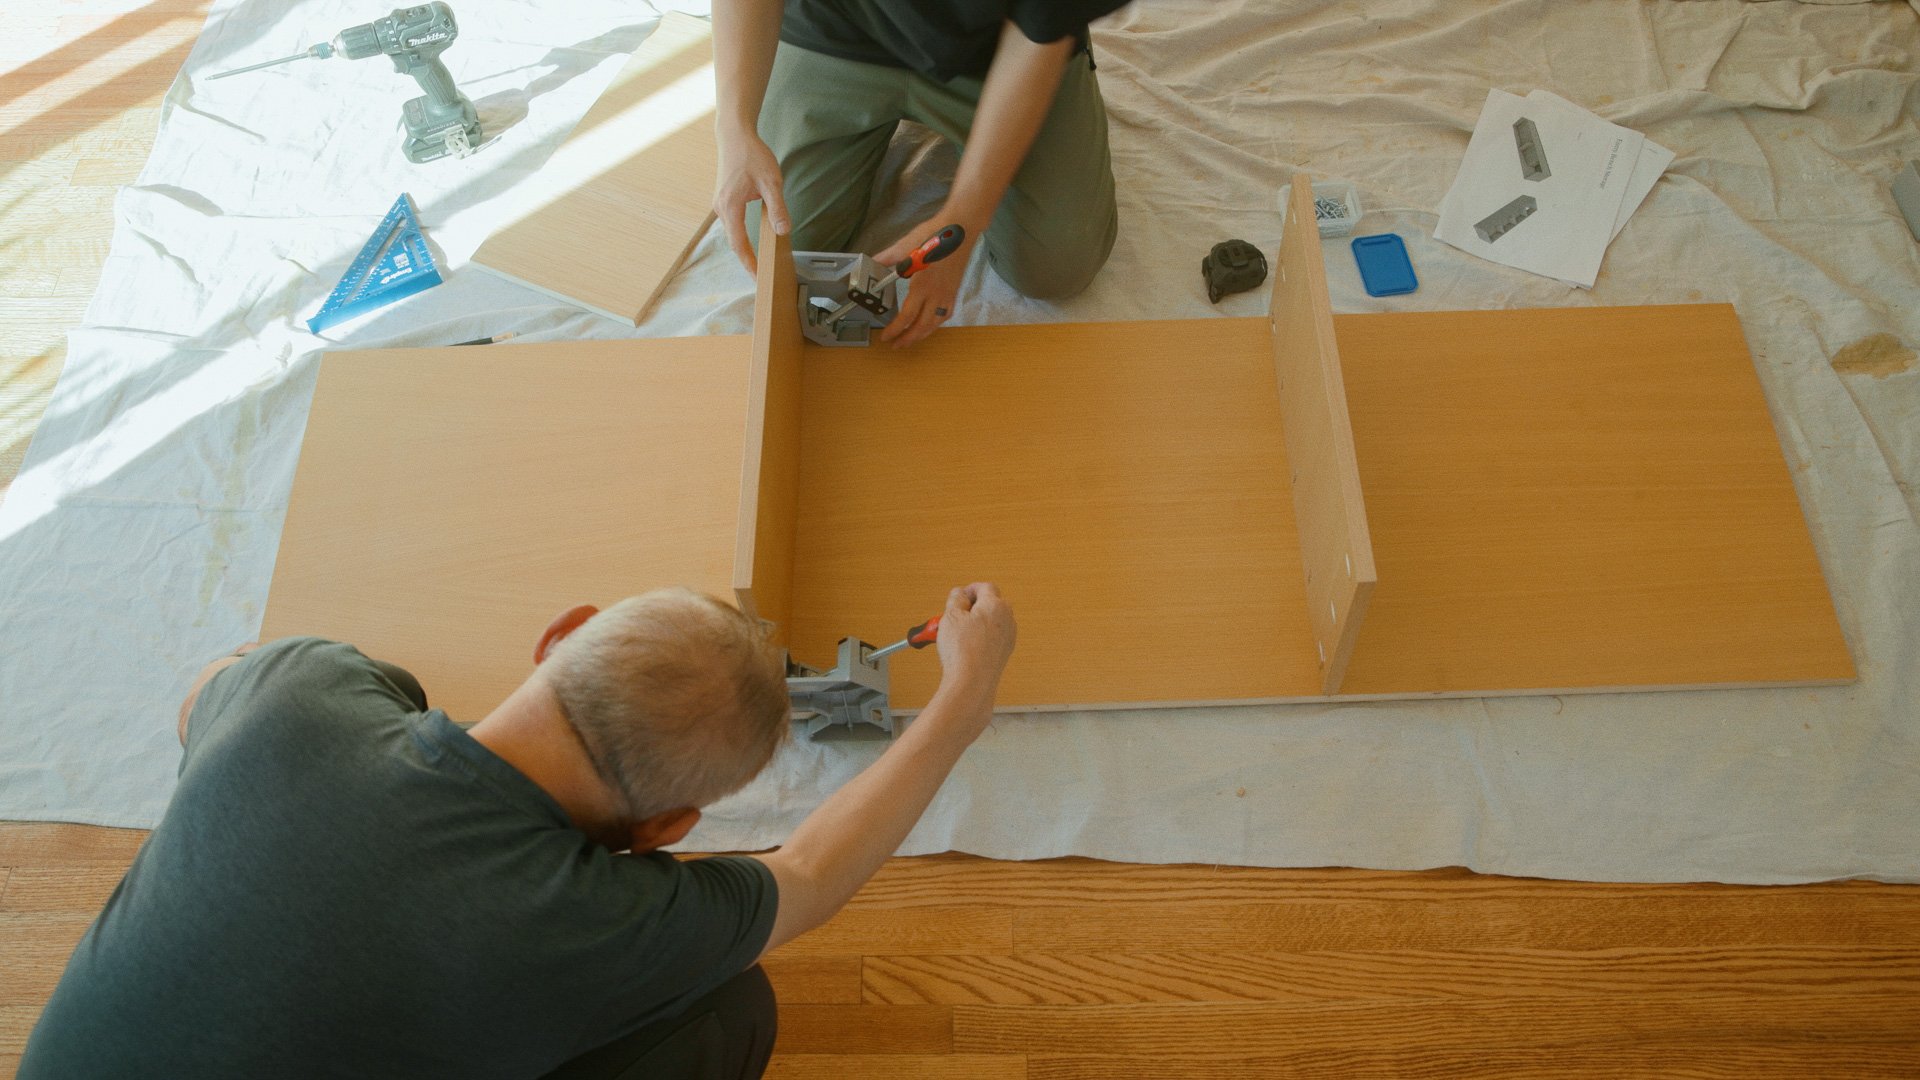
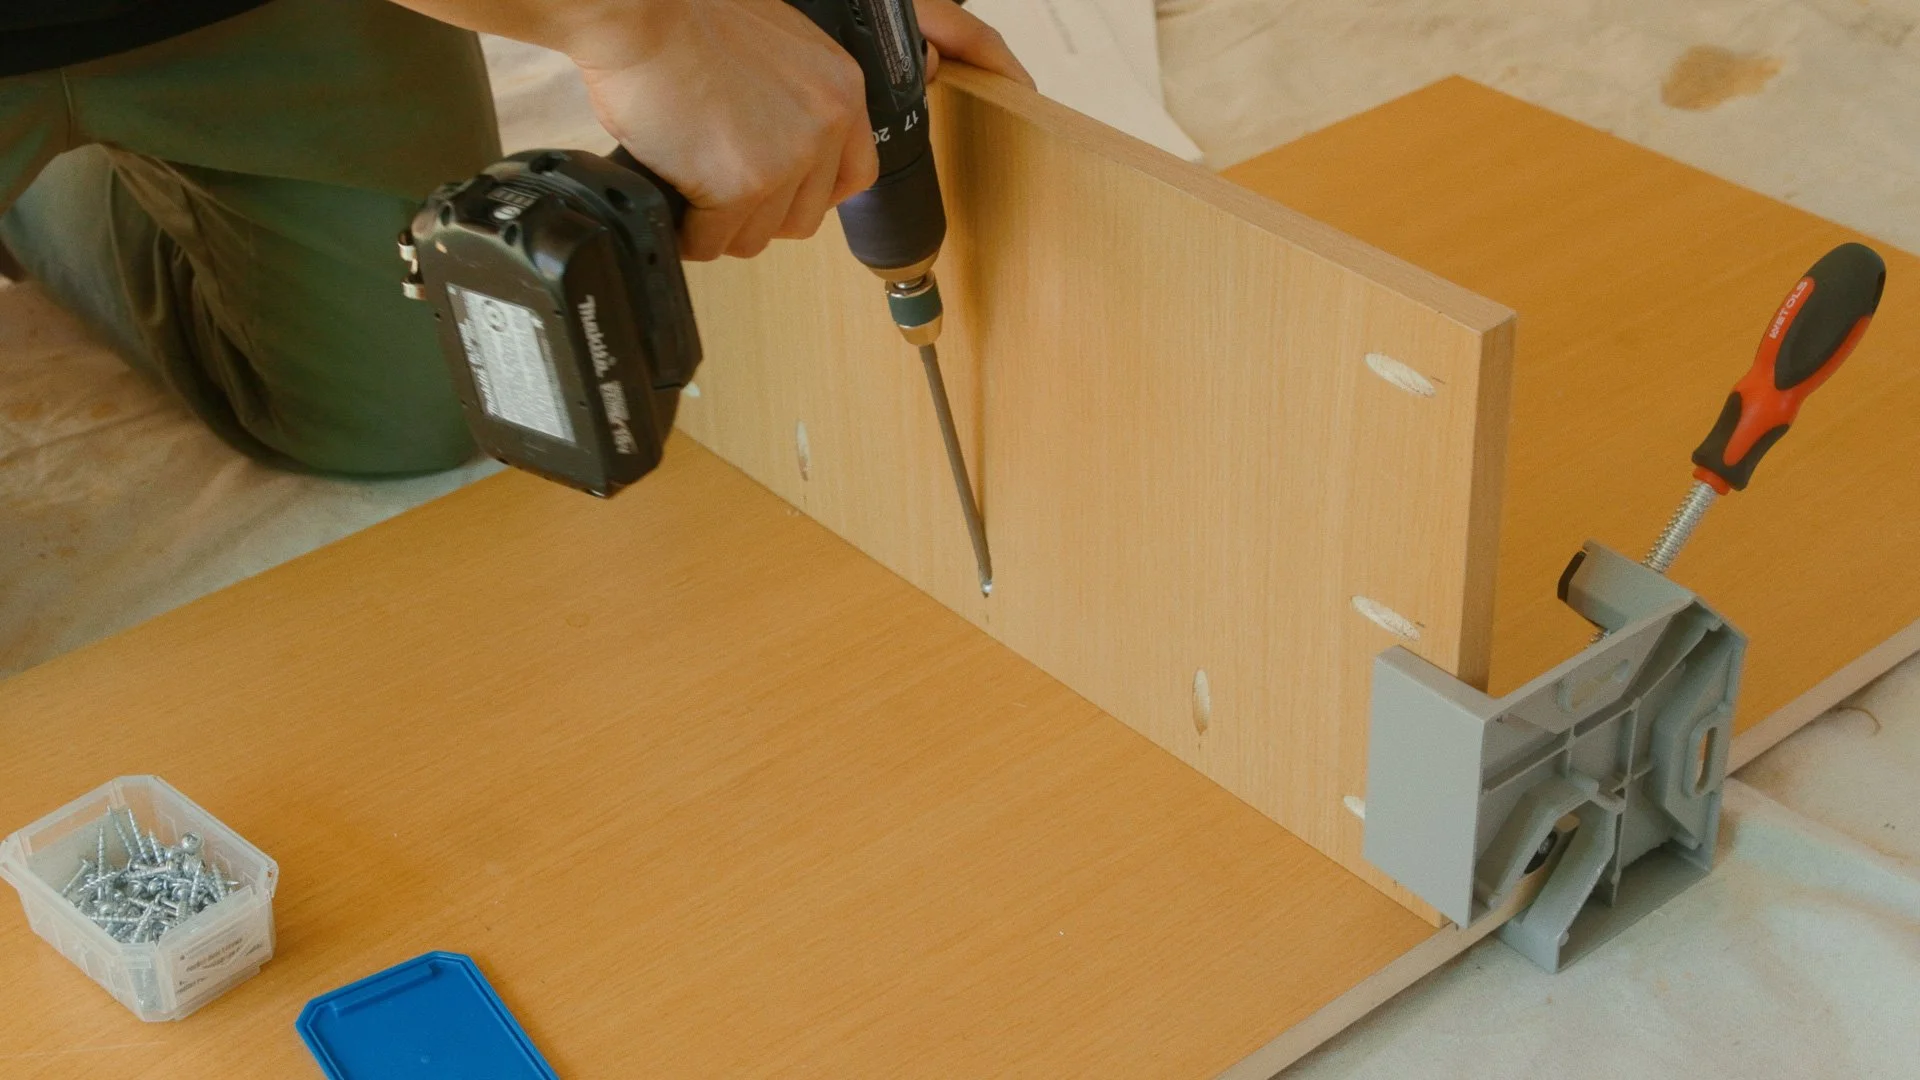
Because the parts are big and there are long spans, clamps and alignment checks make a huge difference here. The goal is to keep the structure square so the doors fit cleanly later.
As with many of my builds, my dad came by to help. I’ve learned a lot from him over the years, and I don’t take those moments for granted.
Products used
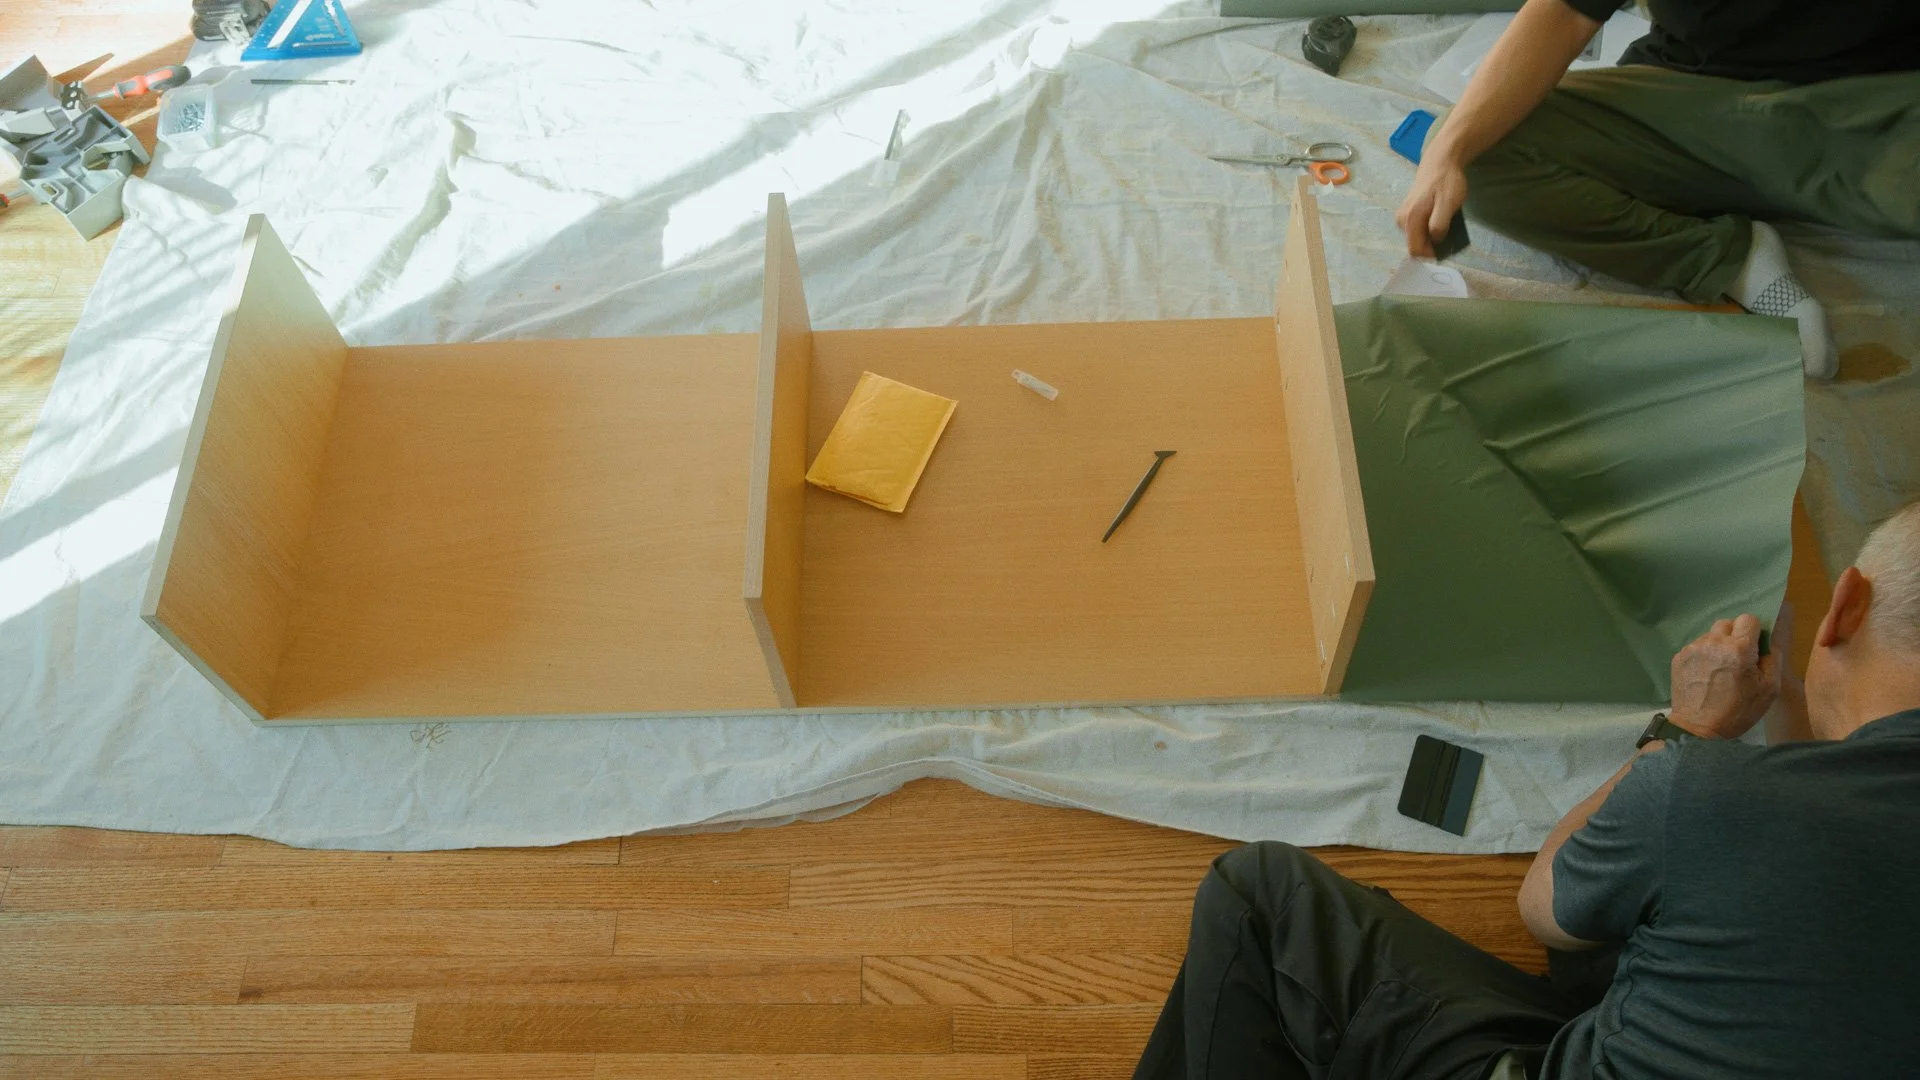
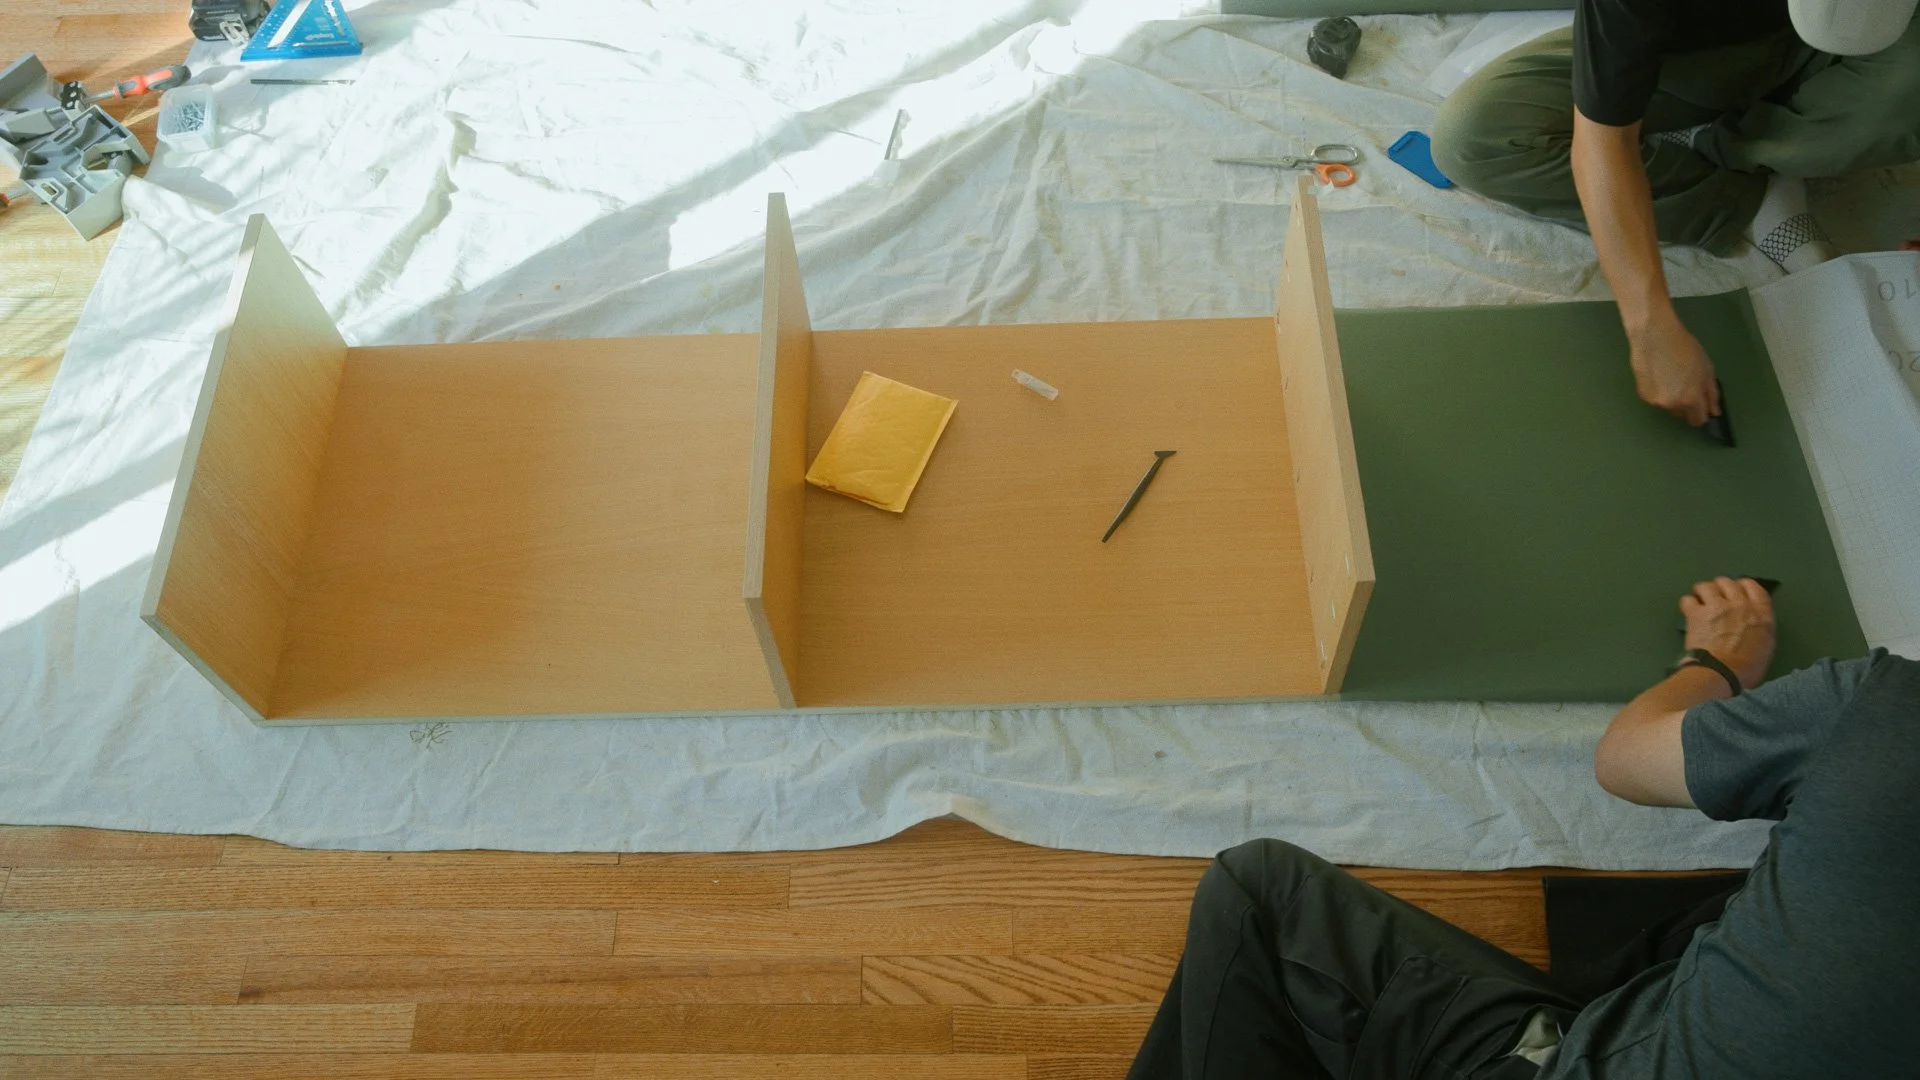
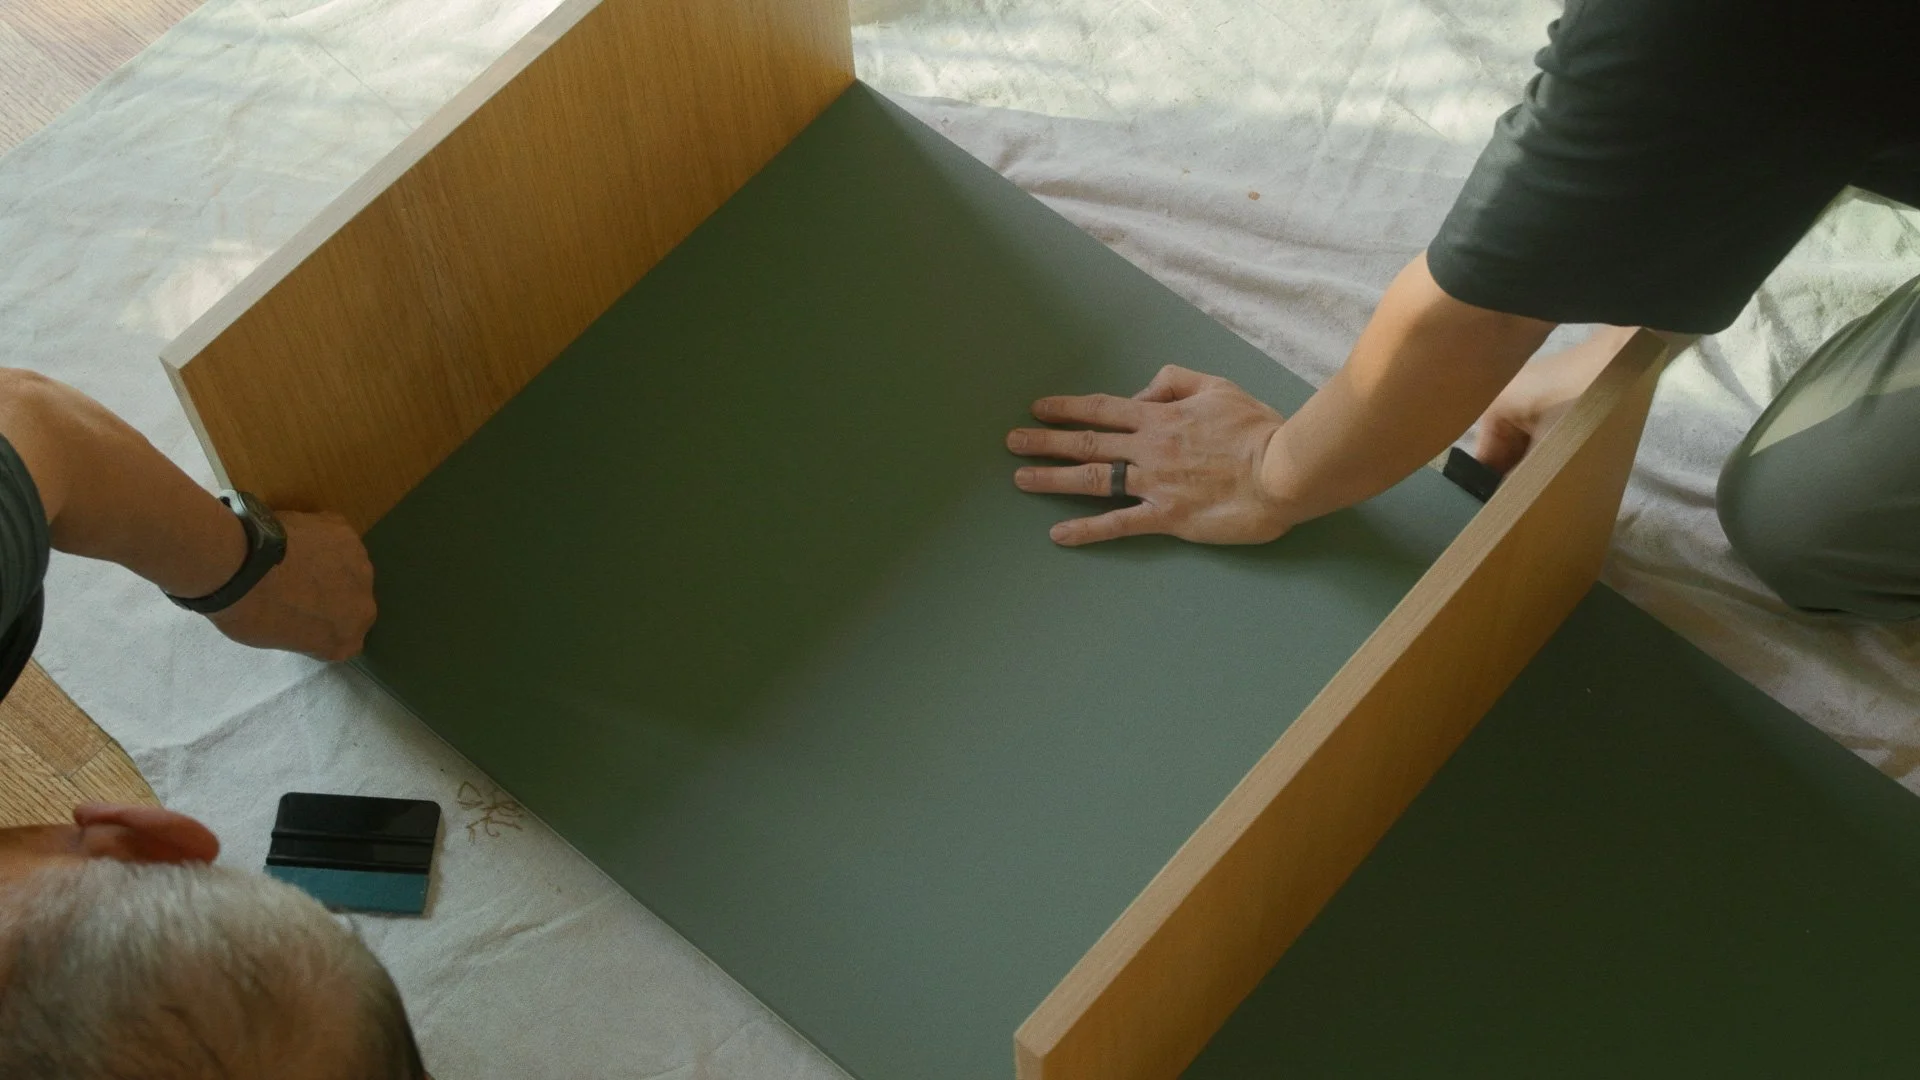
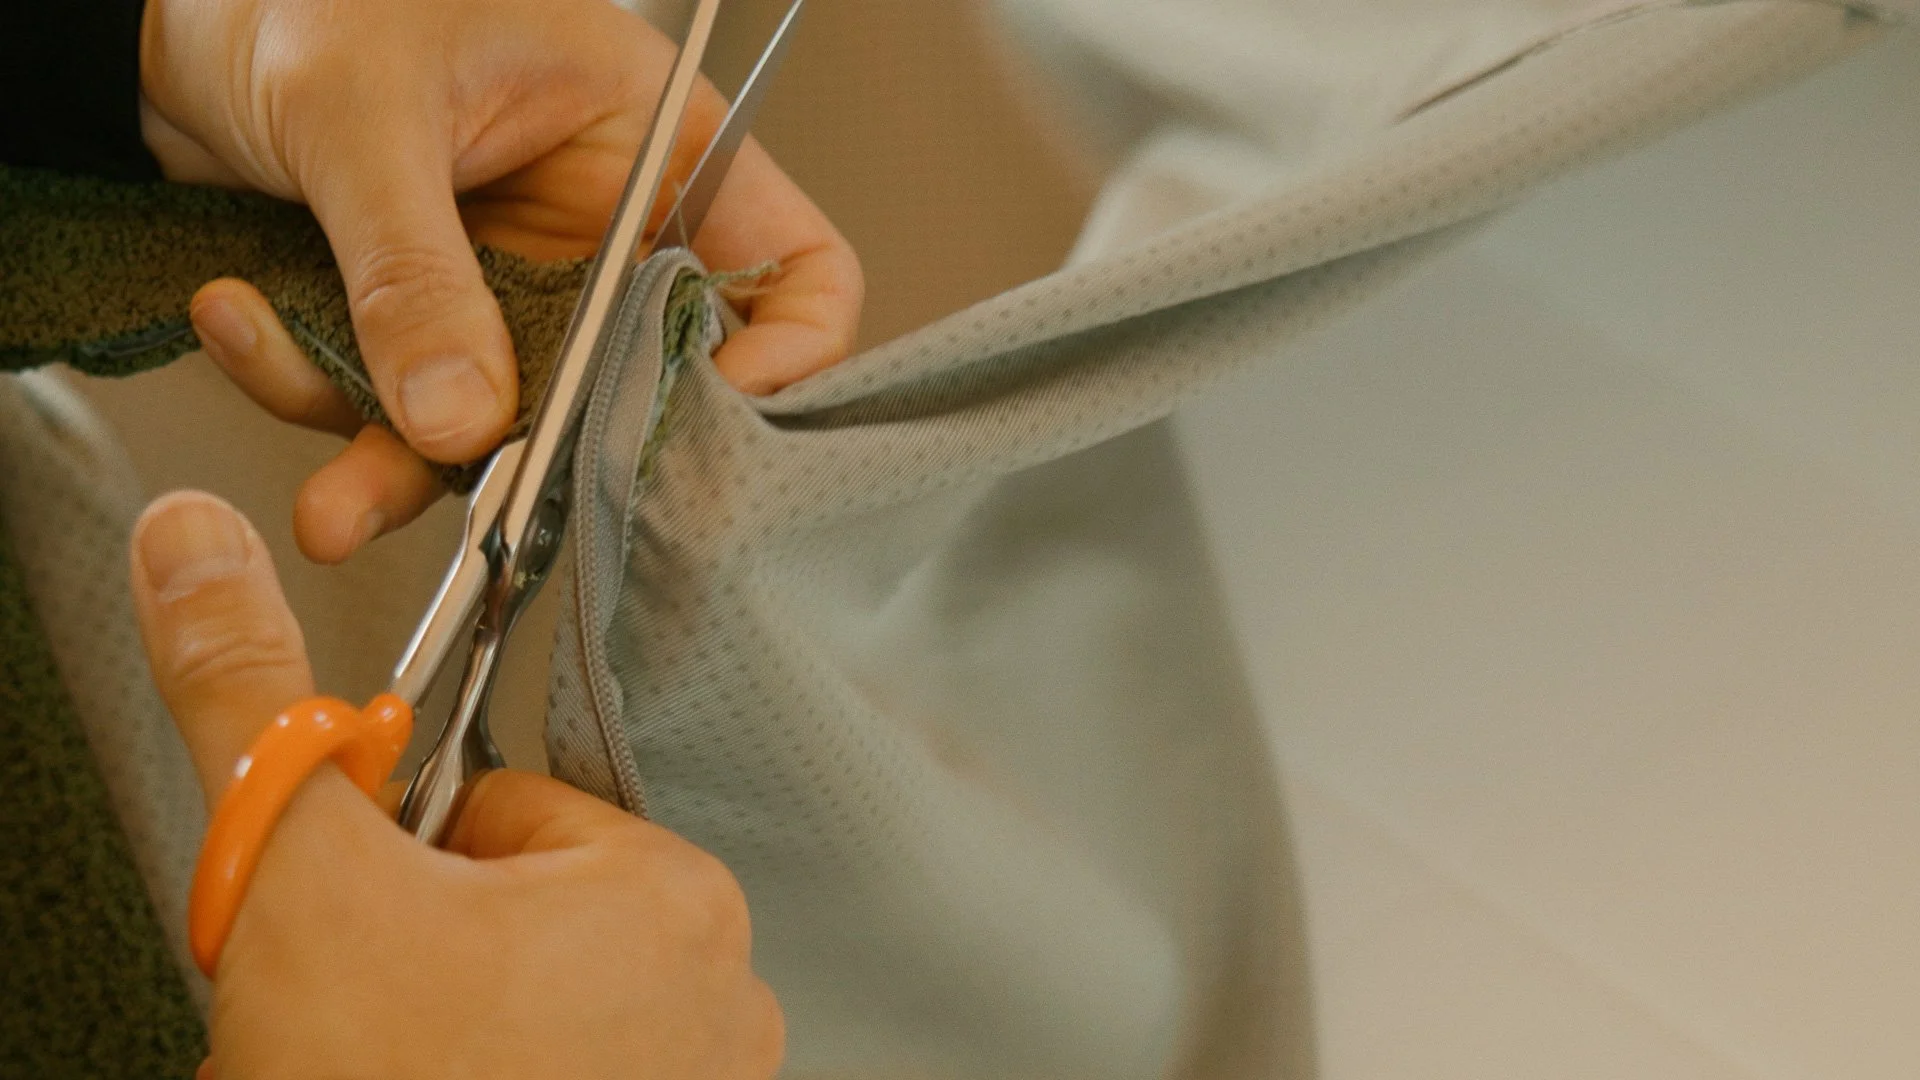
Lining the Compartments with Vinyl
Once the bench was assembled, we realized something obvious: shoes were going to destroy the inside.
My wife had the idea to line the compartments with adhesive vinyl to make everything:
easier to wipe down
more durable
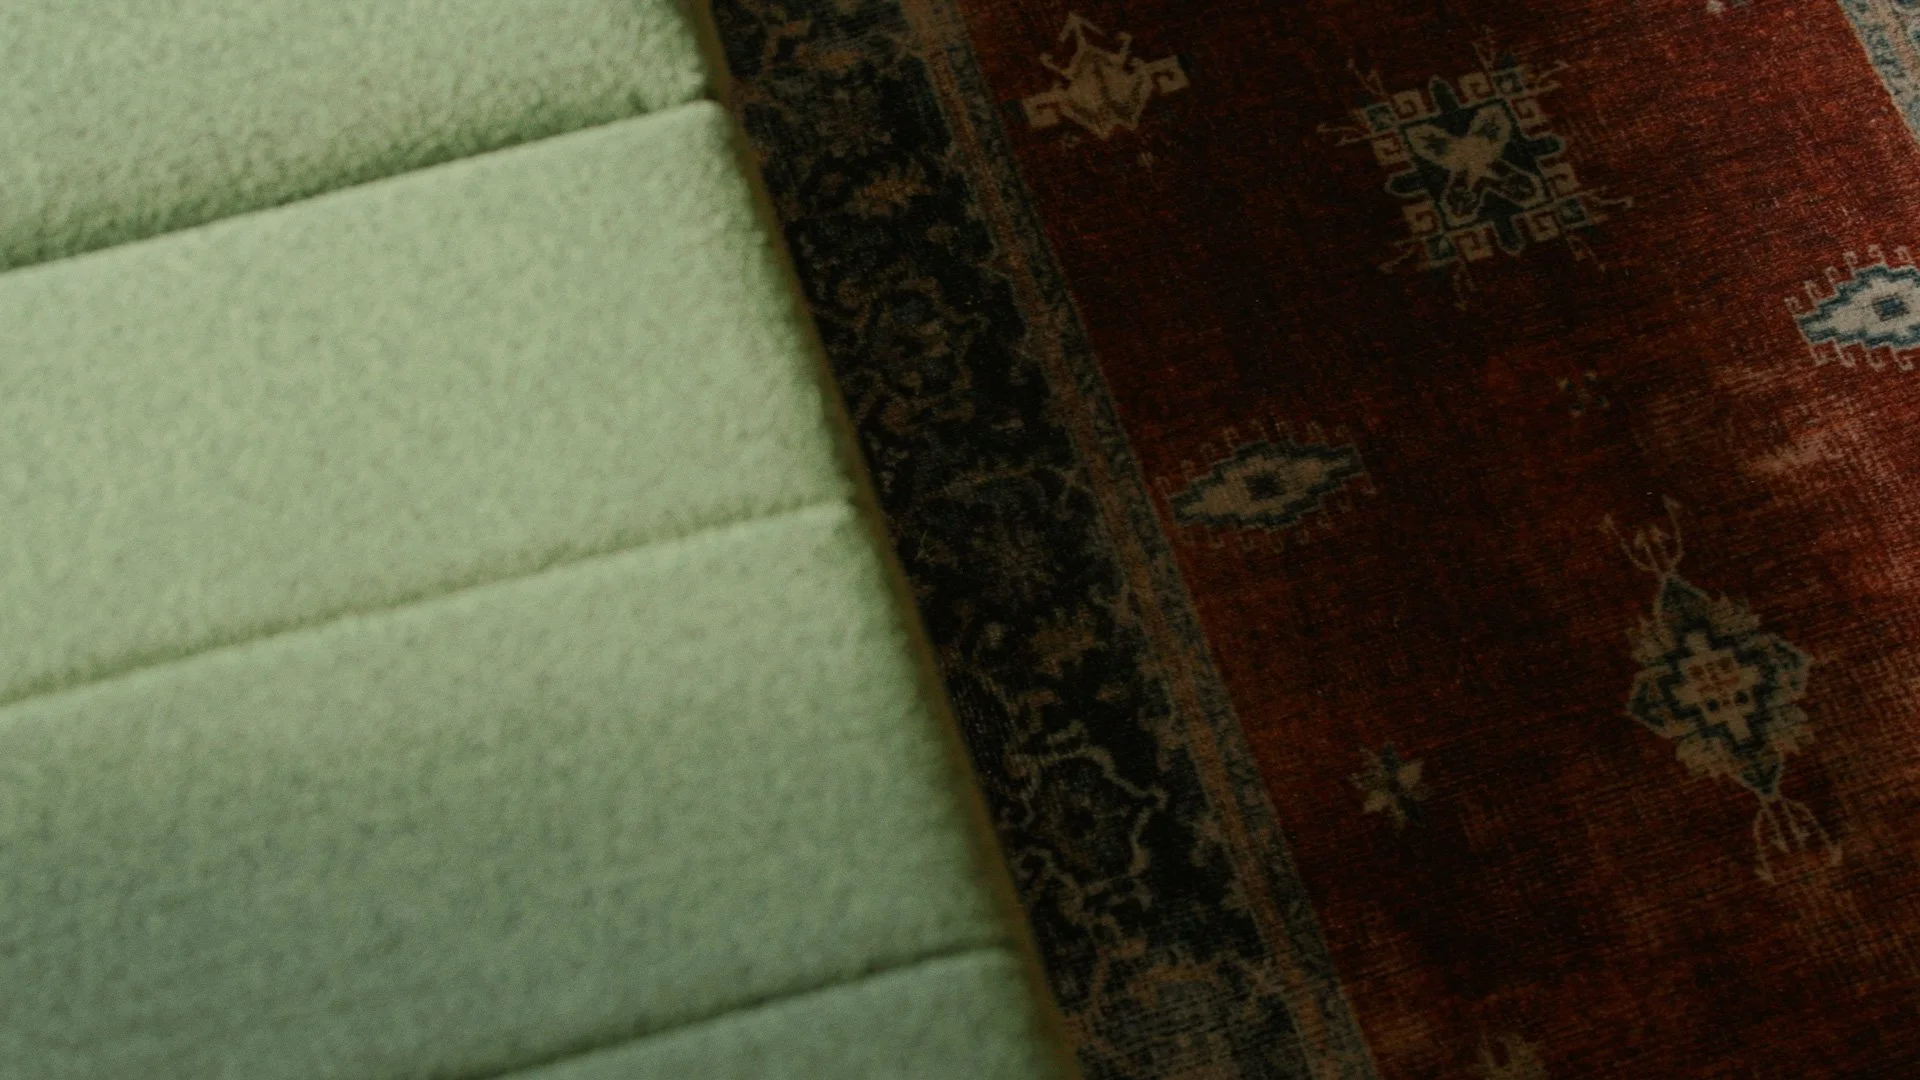
and honestly, a little more fun (the sage green color made me happy)
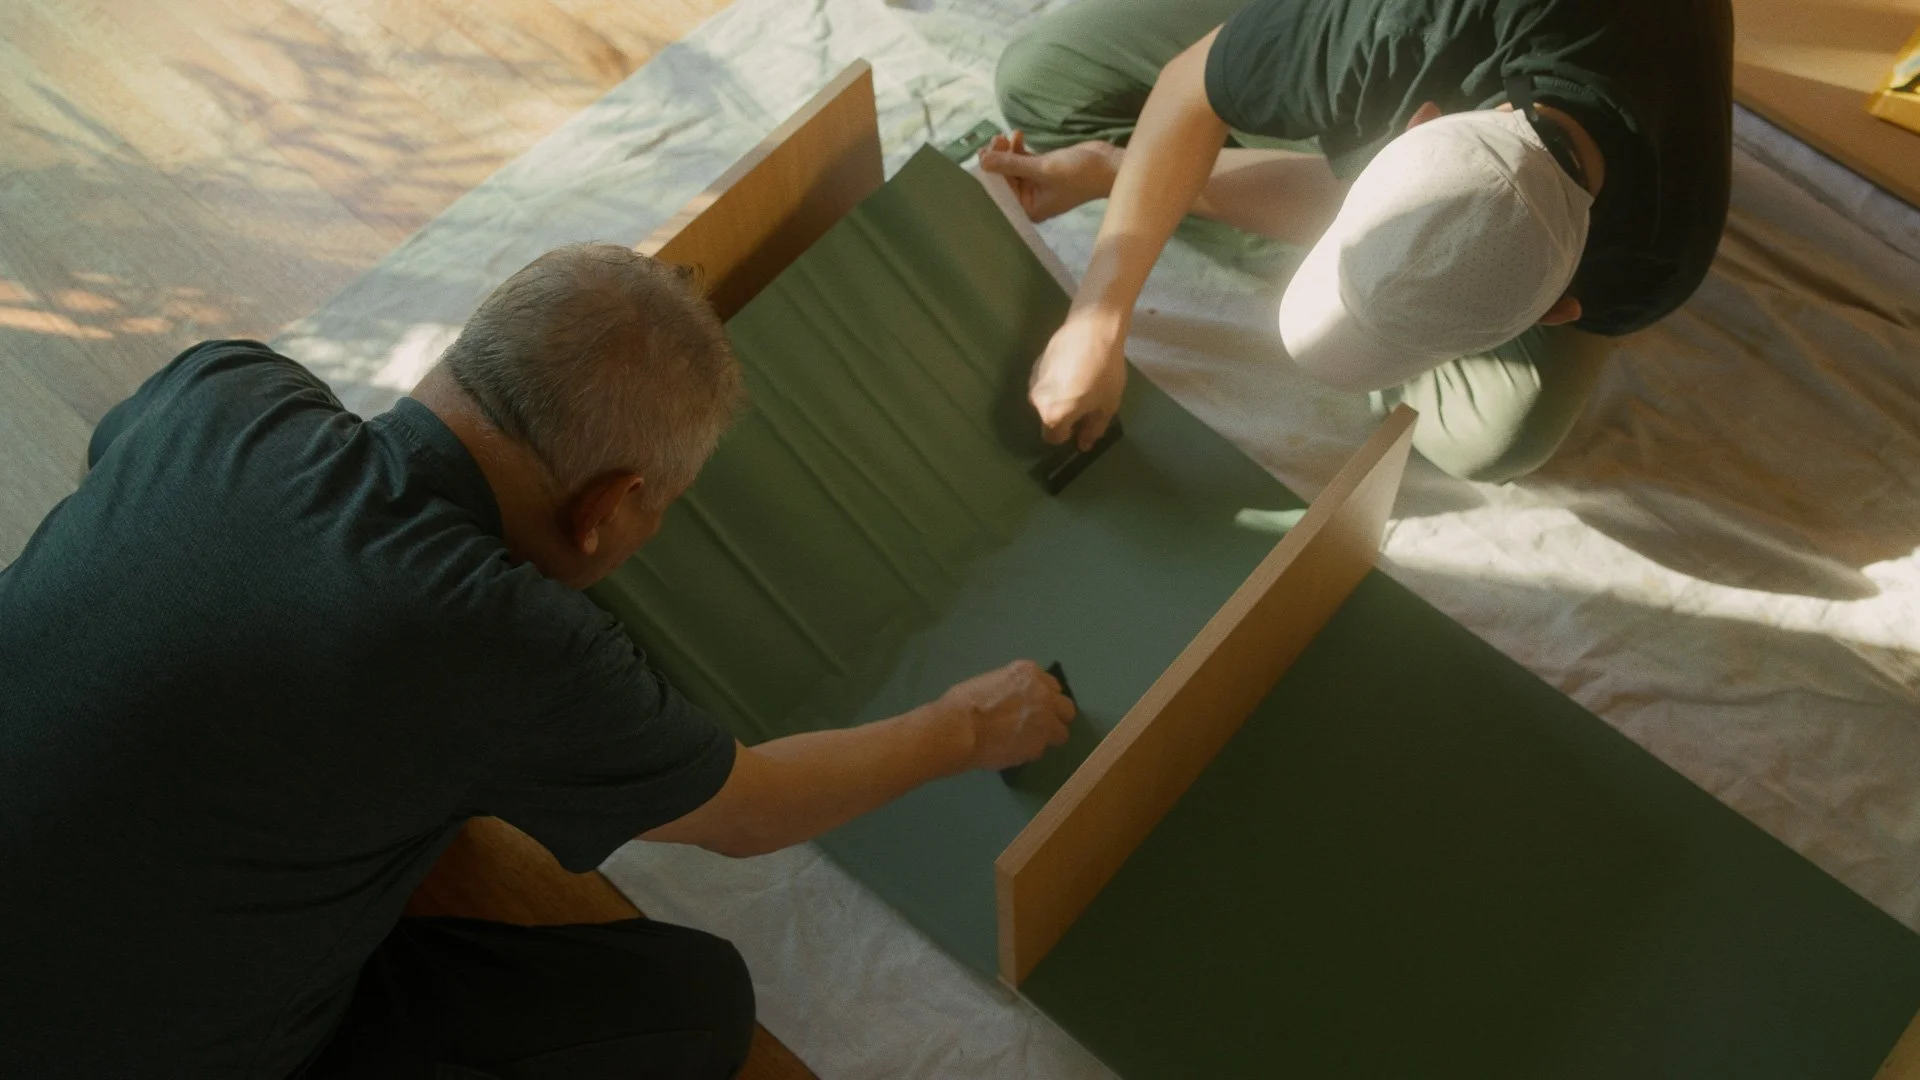
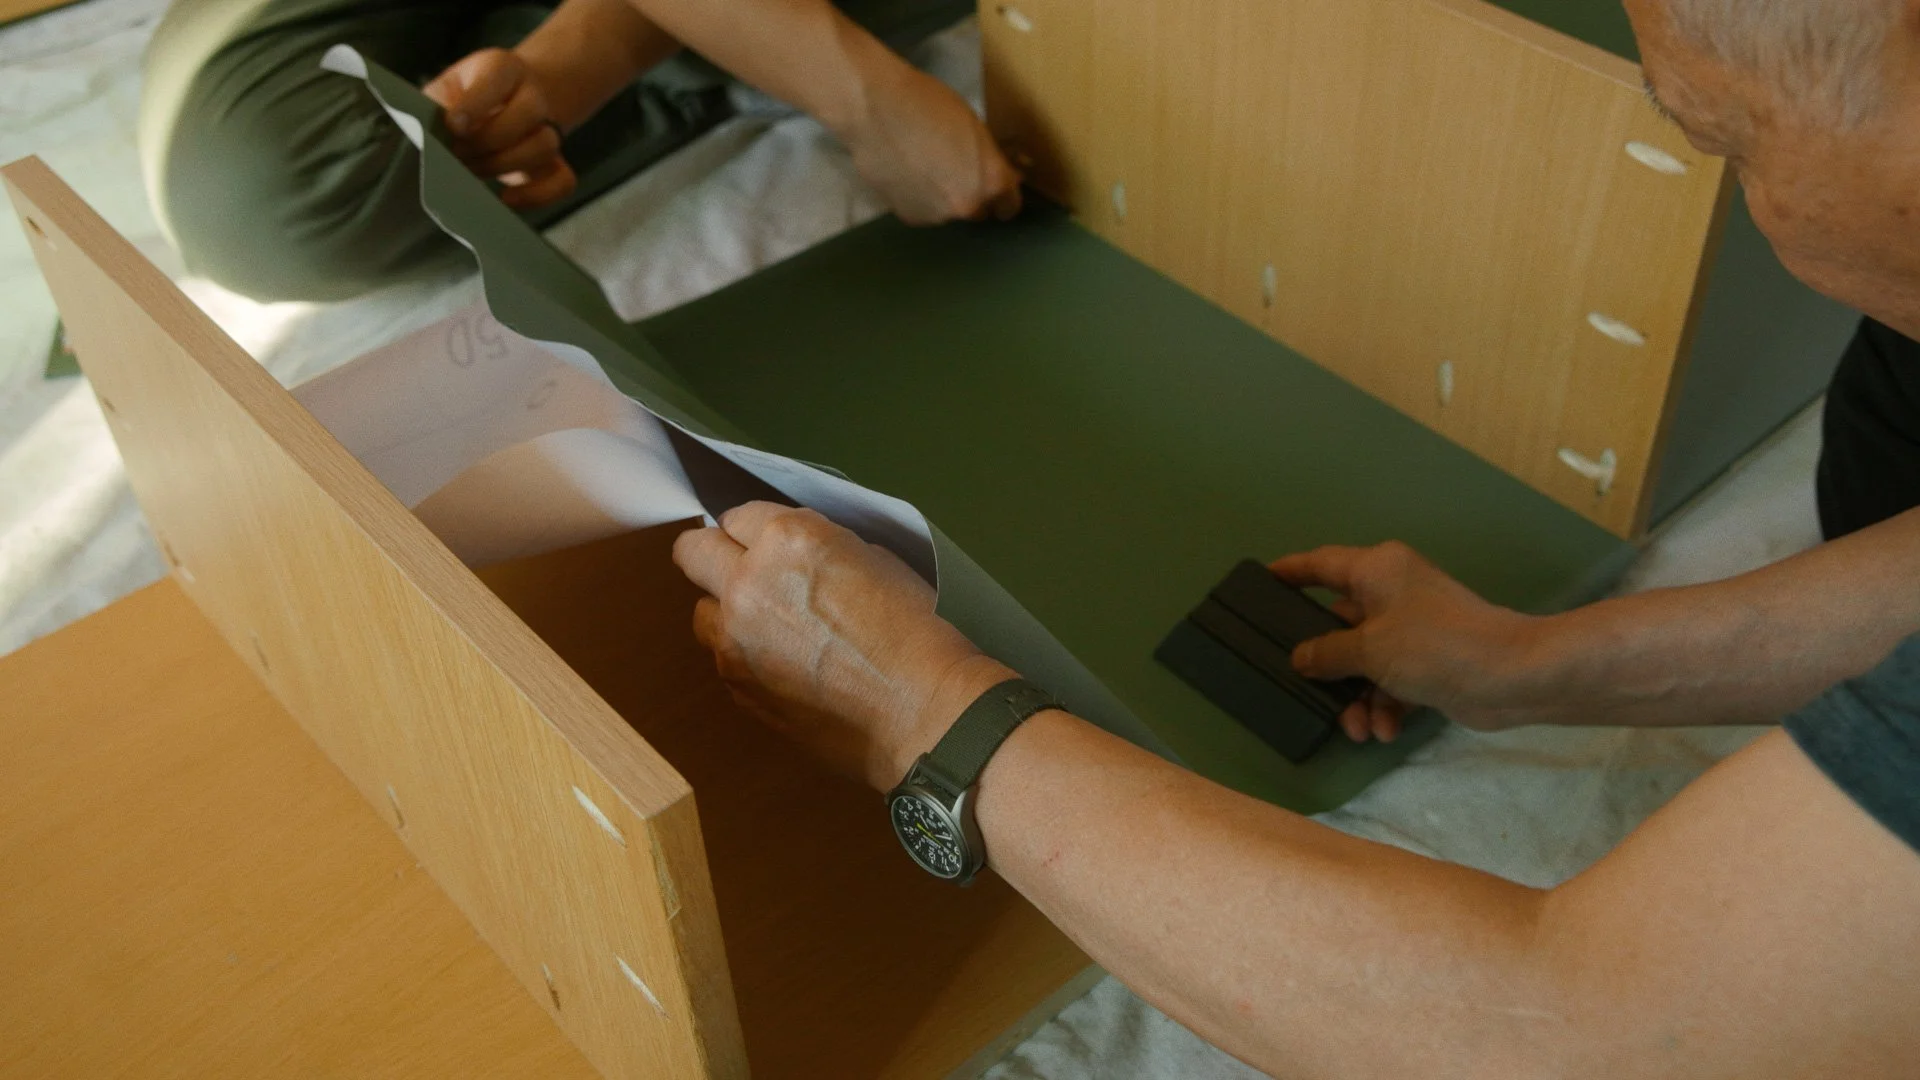
I’d never used vinyl like this before, and the first attempt went badly. Wrinkles, bubbles, and then I tore it. We started over, went slower, and the second attempt worked.
What I learned
This vinyl is surprisingly forgiving. If you work slowly, you can lift and reapply areas to correct mistakes without totally ruining the sheet.
Products used
Utility knife (My everyday knife is the Keen by Studio Neat)
Doors + Hinges (Dealing with Tiny Tolerances)
I used 20-inch piano hinges to connect the doors onto the bench. I like piano hinges here because the continuous design helps prevent skewing over time. Instead of a couple of hinges pulling slightly differently, the load is distributed across the entire length.
The doors are only about 1/8 inch apart, so placement really matters.
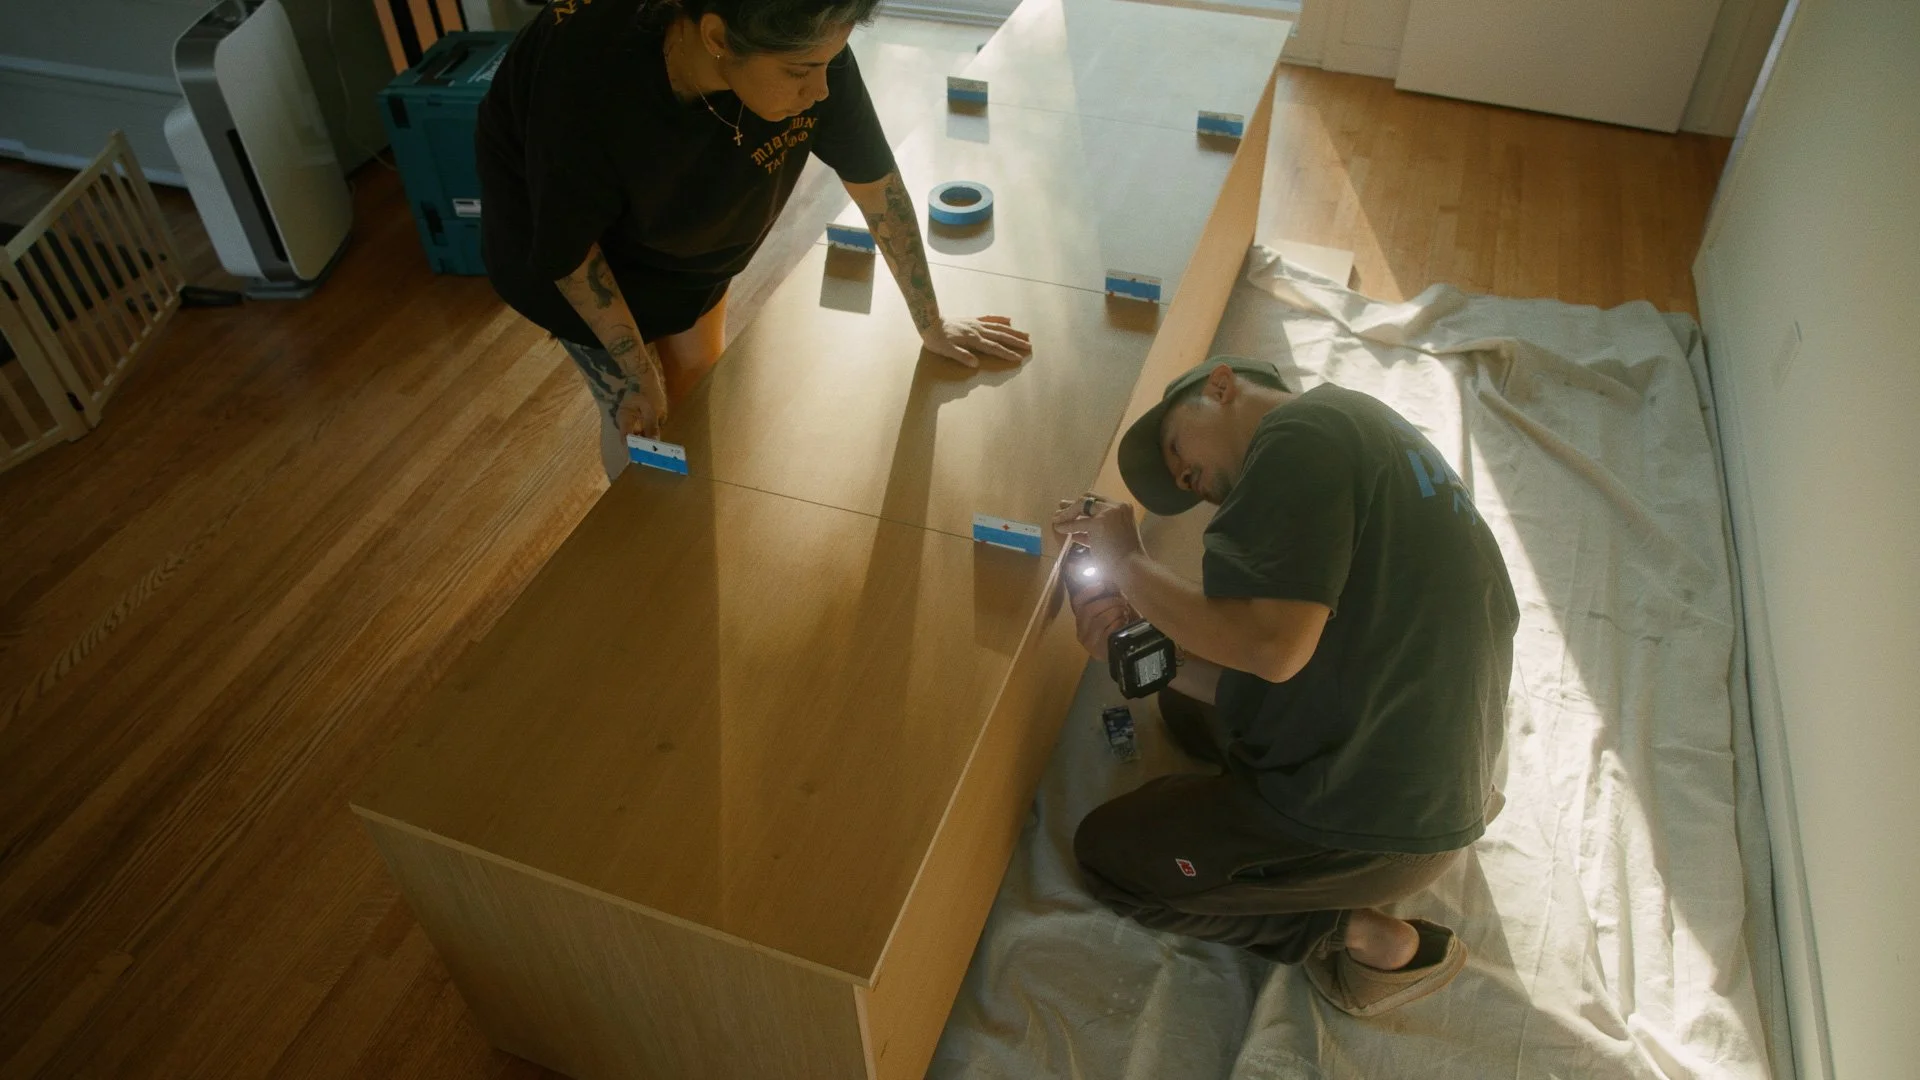

The playing card trick
To keep the gaps consistent while installing, we used a stack of 10 playing cards as spacers.
Products used
20-inch piano hinges (screws not included)
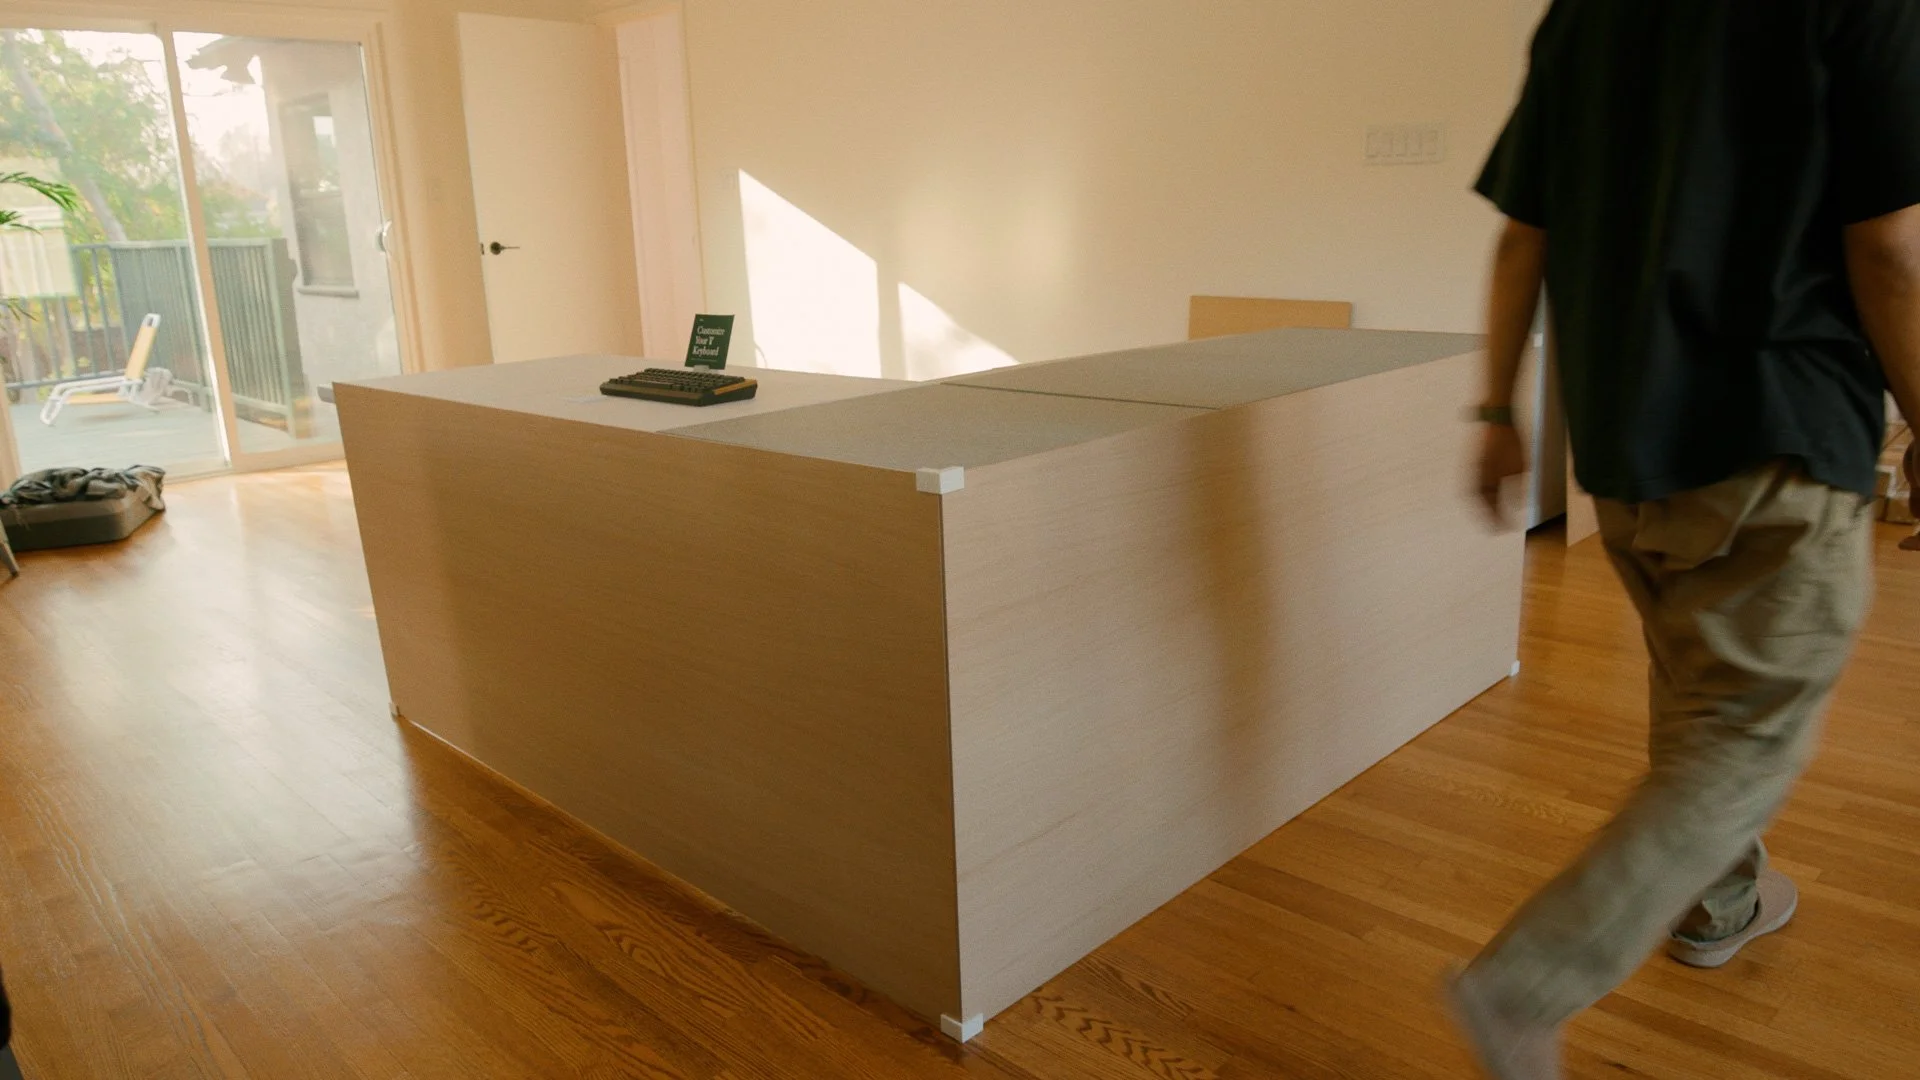
Leveling the Bench
Once the bench was moved into the entryway, everything looked great until I noticed it wasn’t level. One corner had a wobble.
I added foam grip feet under the corners and middle, and double-stacked one corner to level it out. Not glamorous, but it solved the problem.
Products used
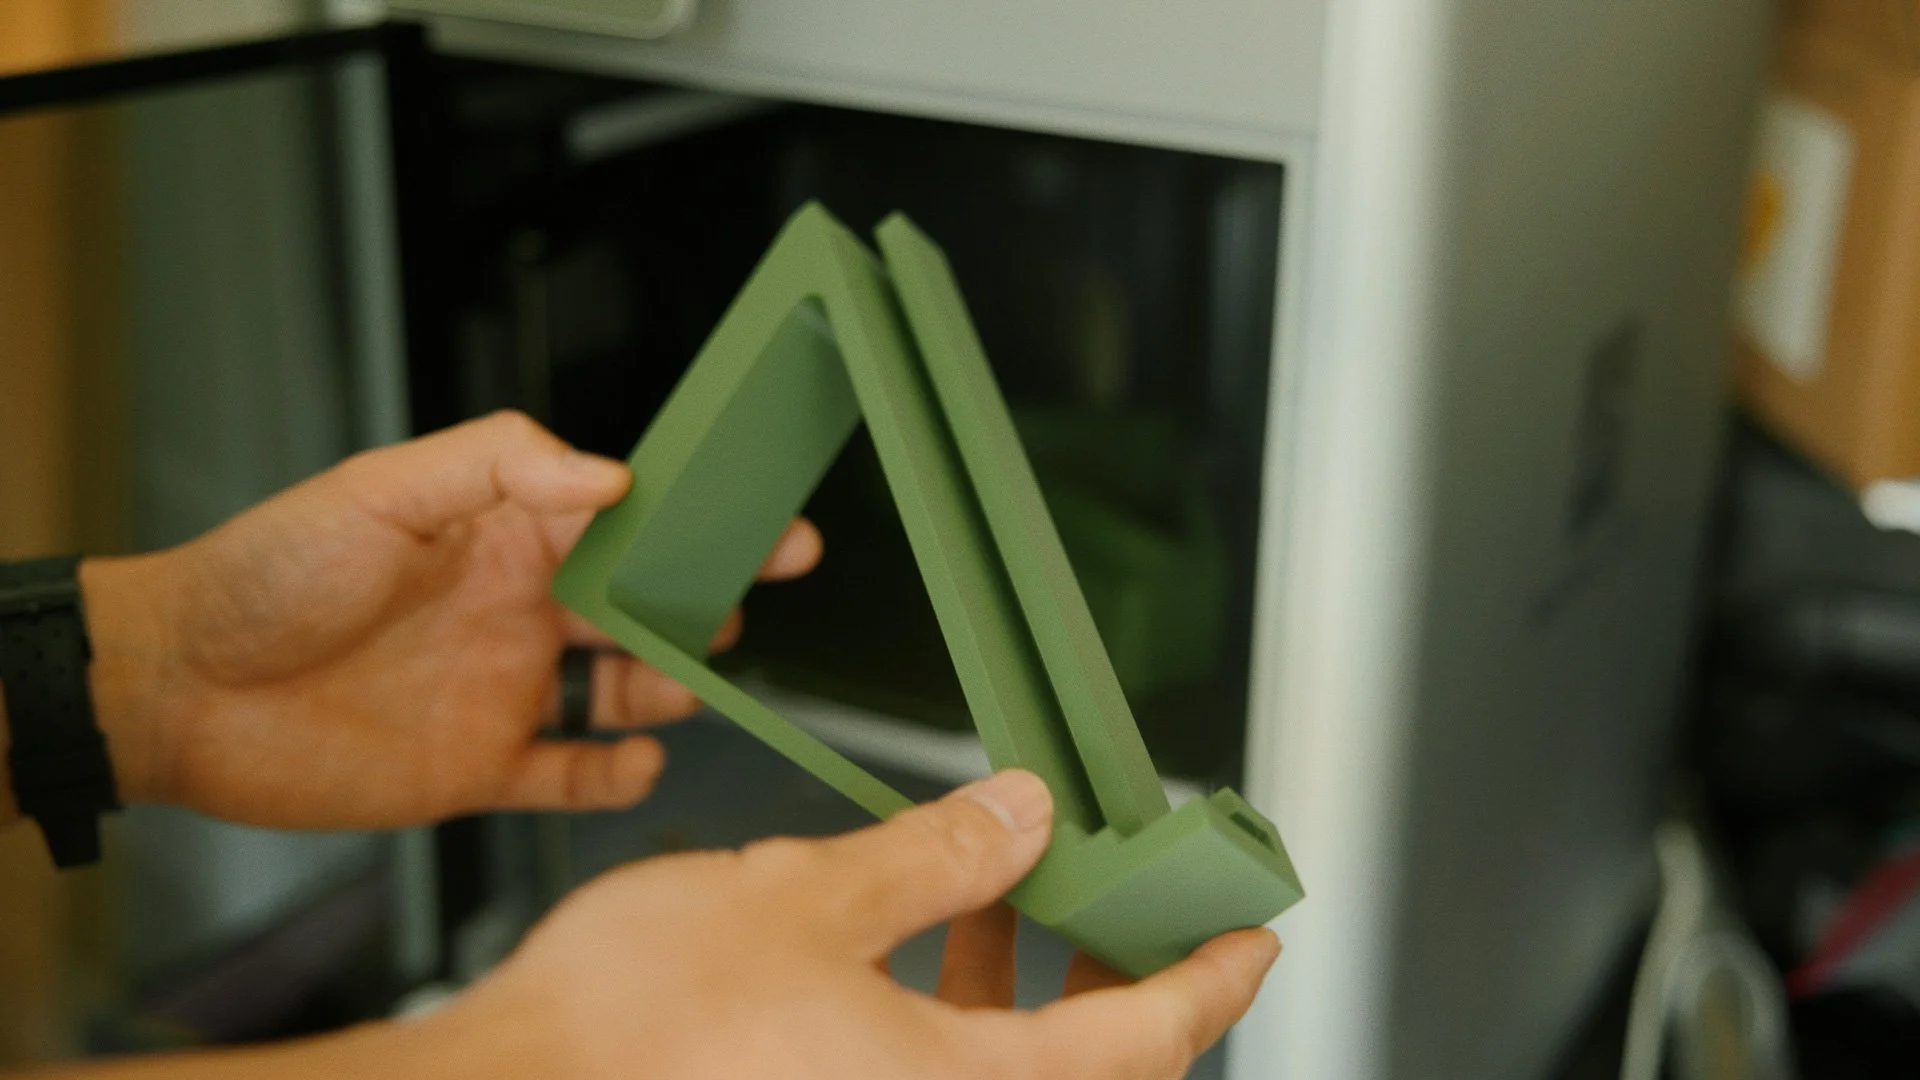
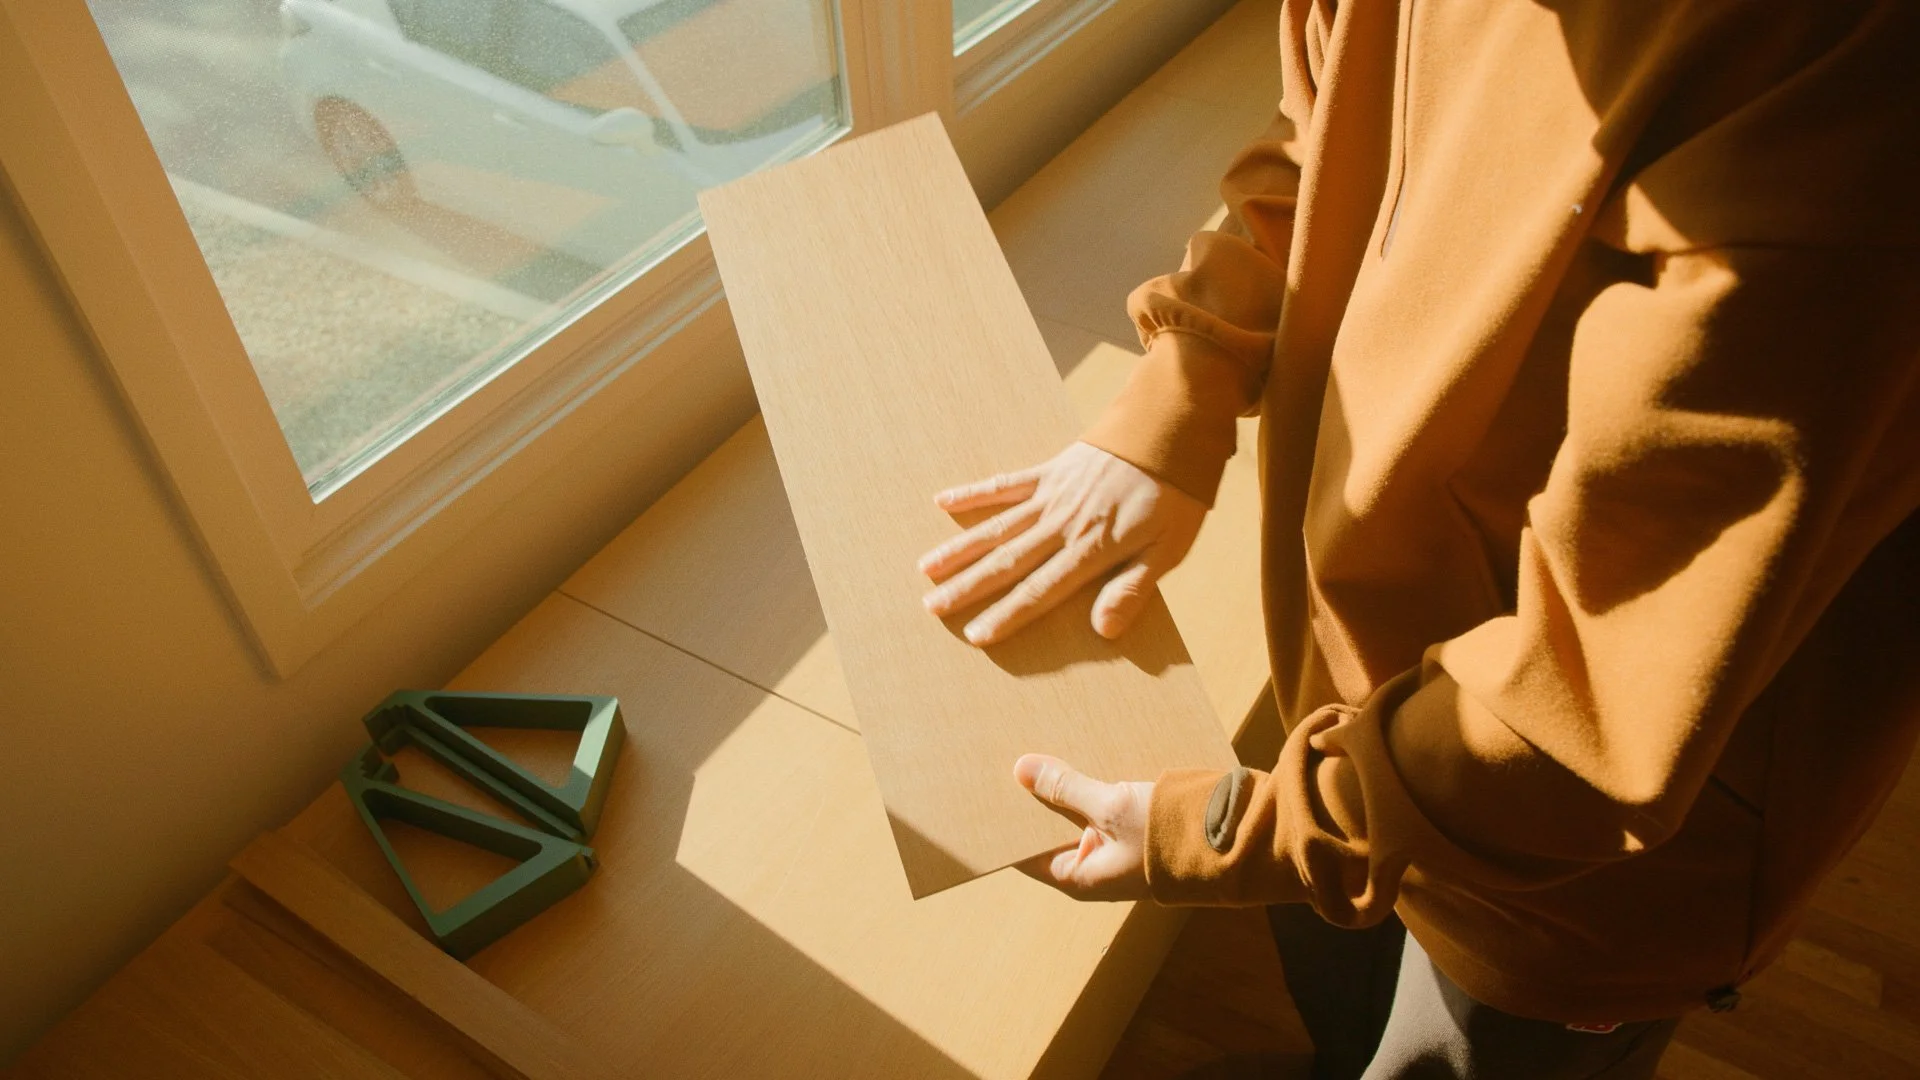
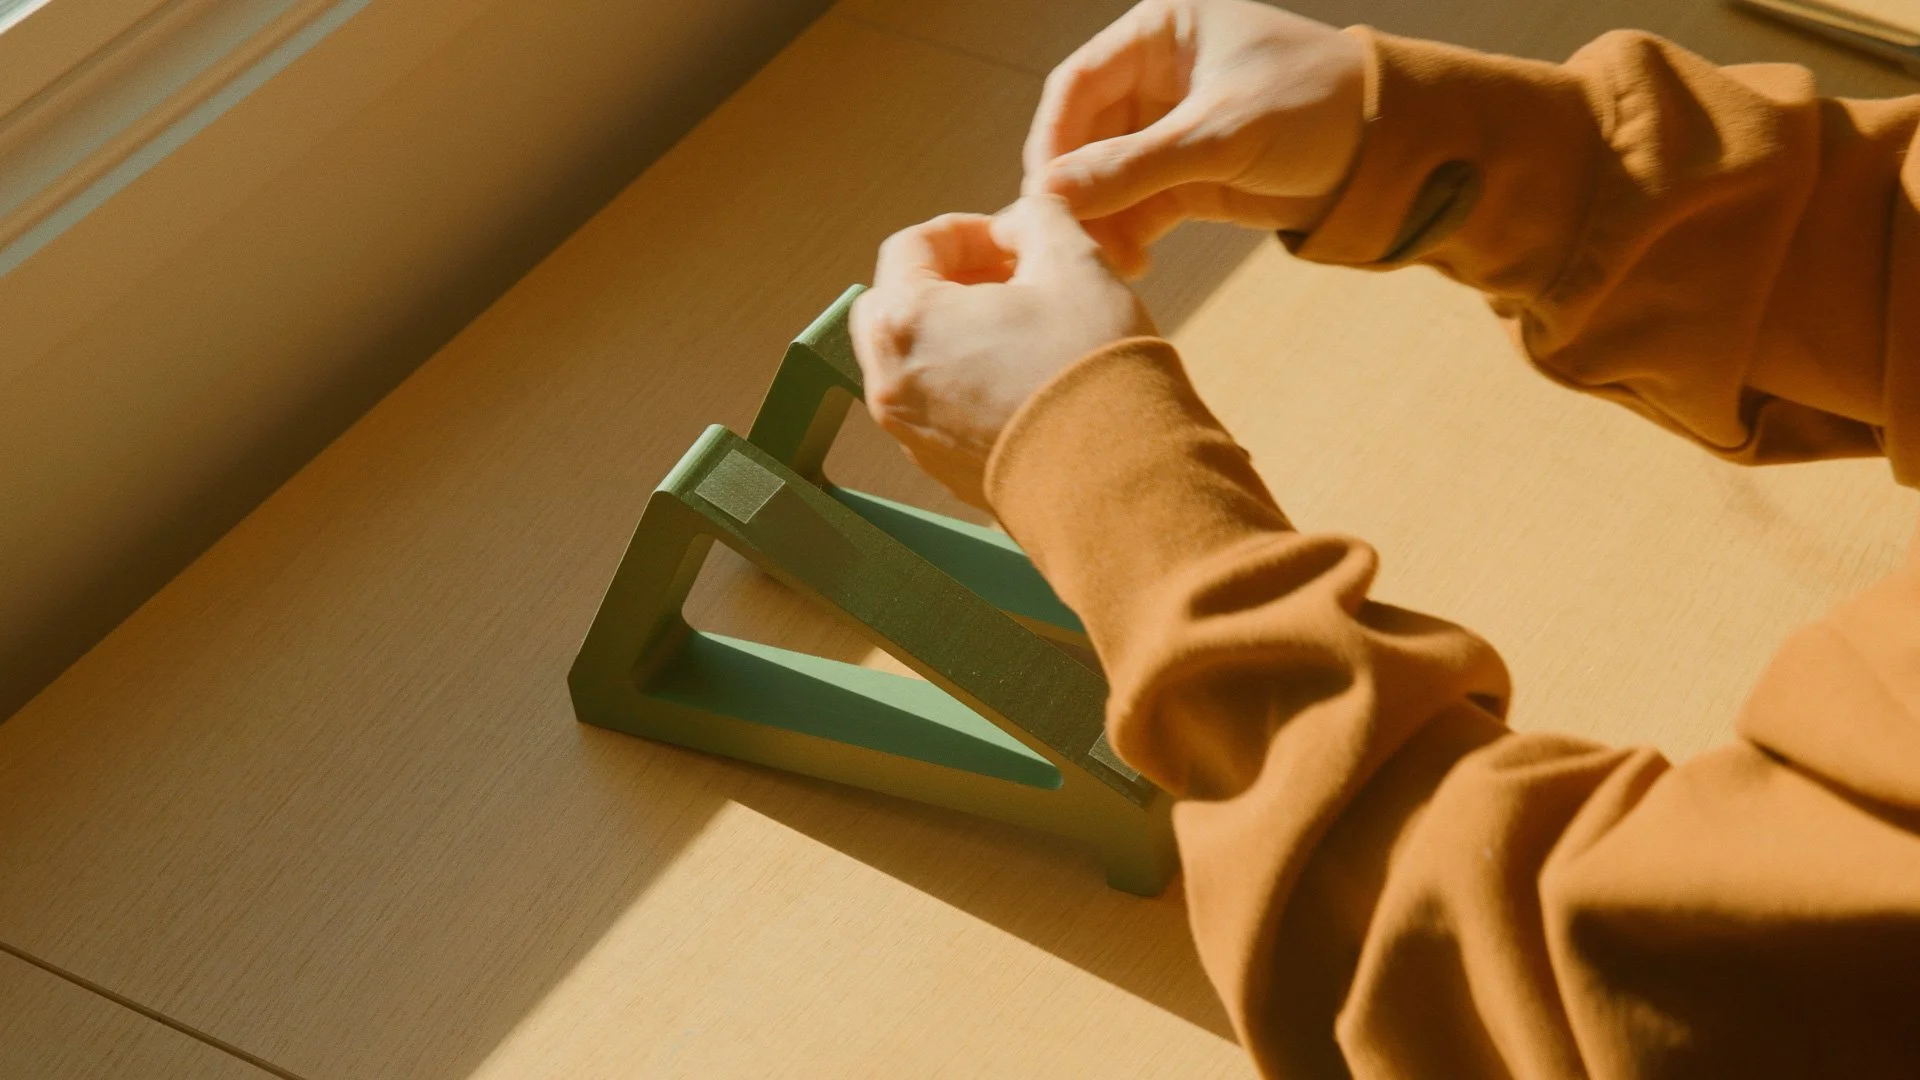
Designing Shoe Racks
After we started loading shoes in, I realized the compartments weren’t optimized. We could store shoes, but there was wasted volume.
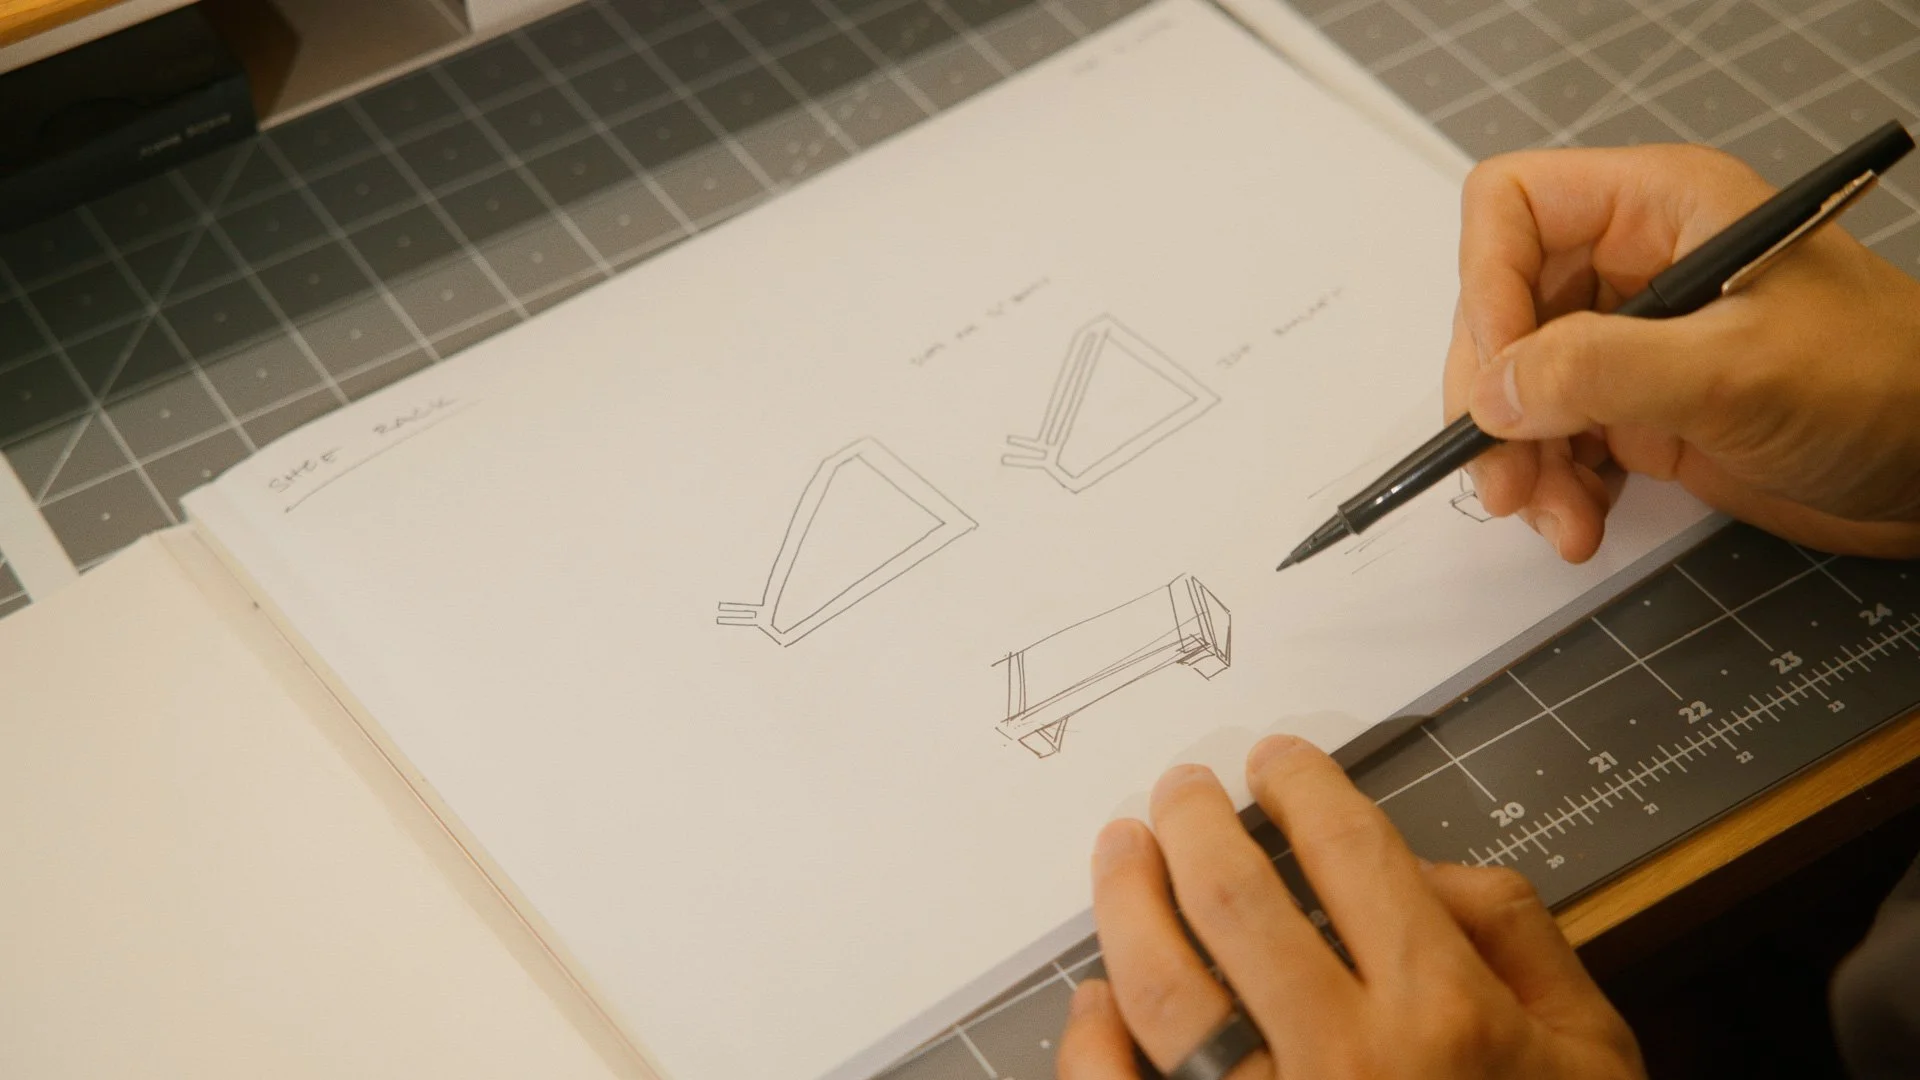
So I designed angled shoe racks using:
3D printed brackets
quarter-inch panels
The bracket idea came from a completely different project: earlier this year, I built a vendor booth for Mode Designs and created tension-fit brackets to hold panels without fasteners.
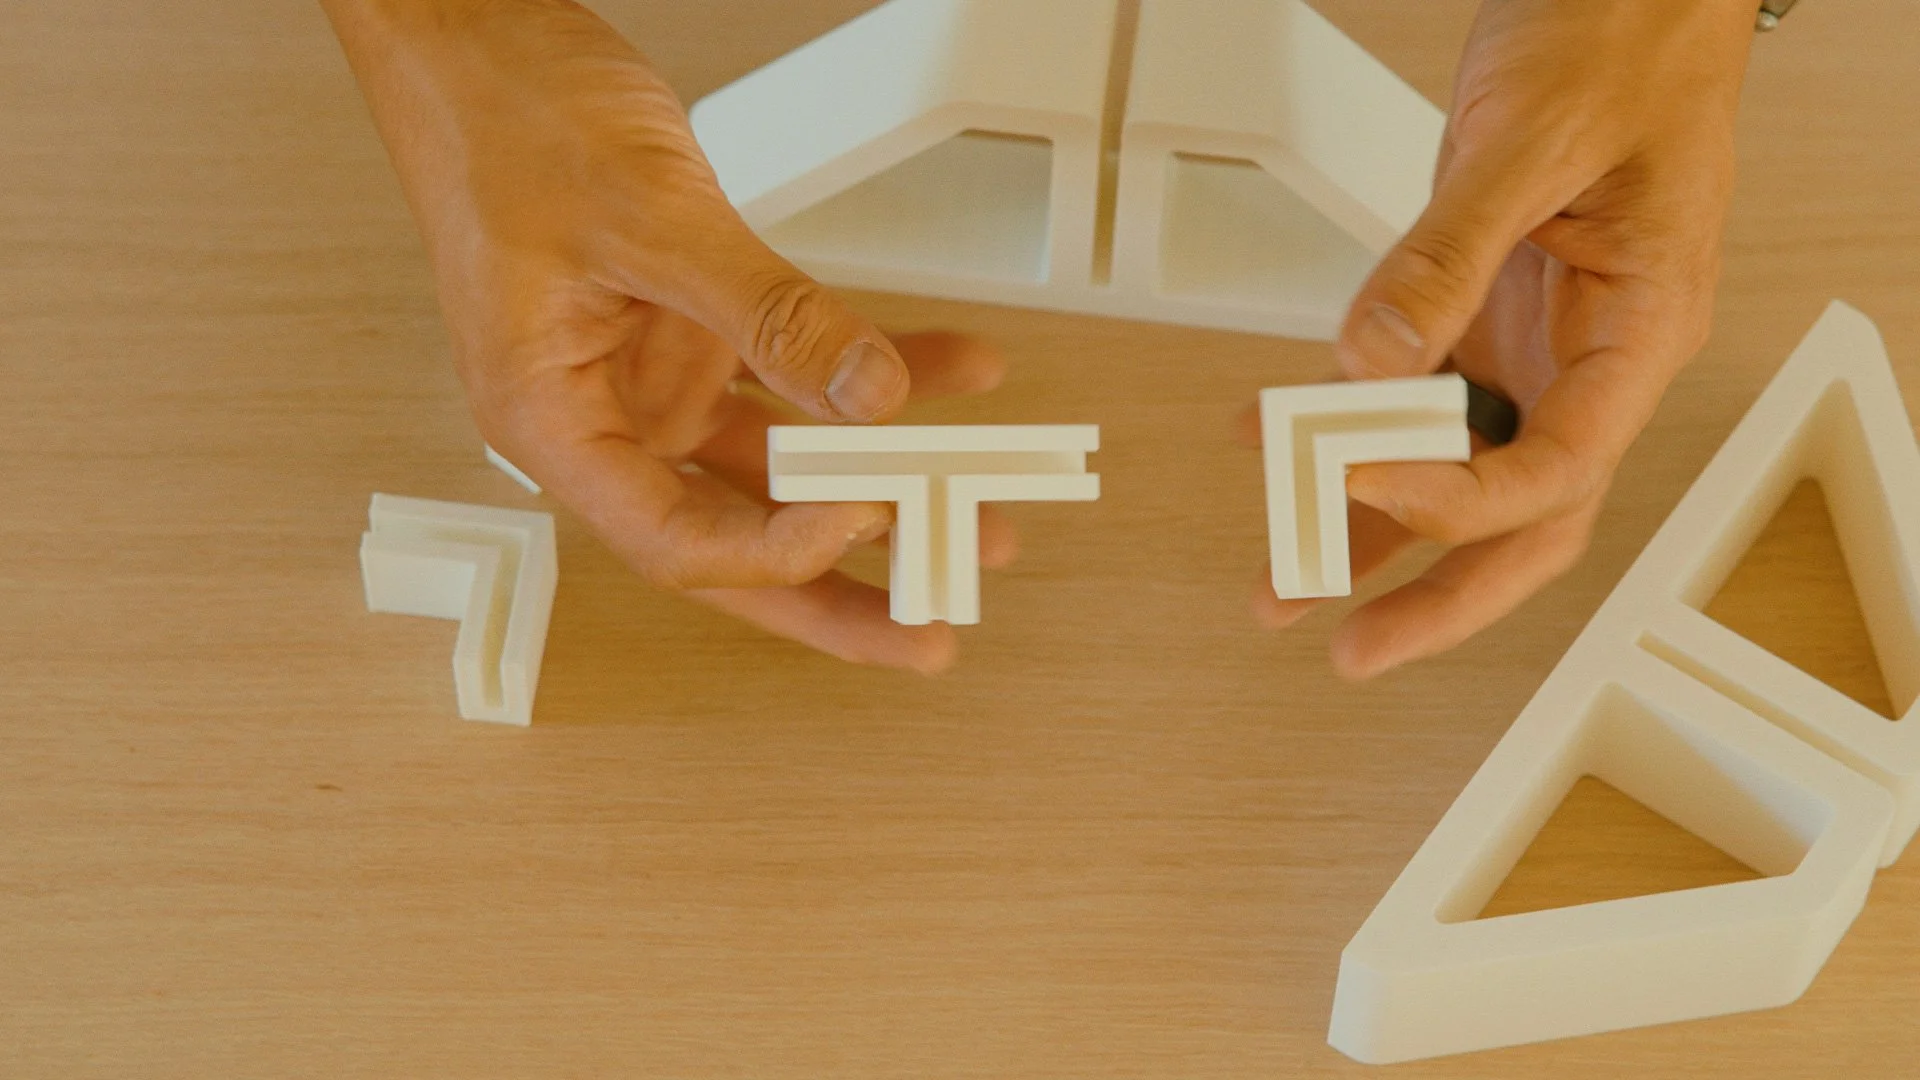
Iteration details (what changed between prototypes)
The first bracket prototype felt a little loose and needed more support.
The panels needed to be about an inch longer to better use the full depth.
After a few iterations, I printed the final set in a dark green PLA.
For the panels, I wanted a quick, durable finish that was easy to apply.
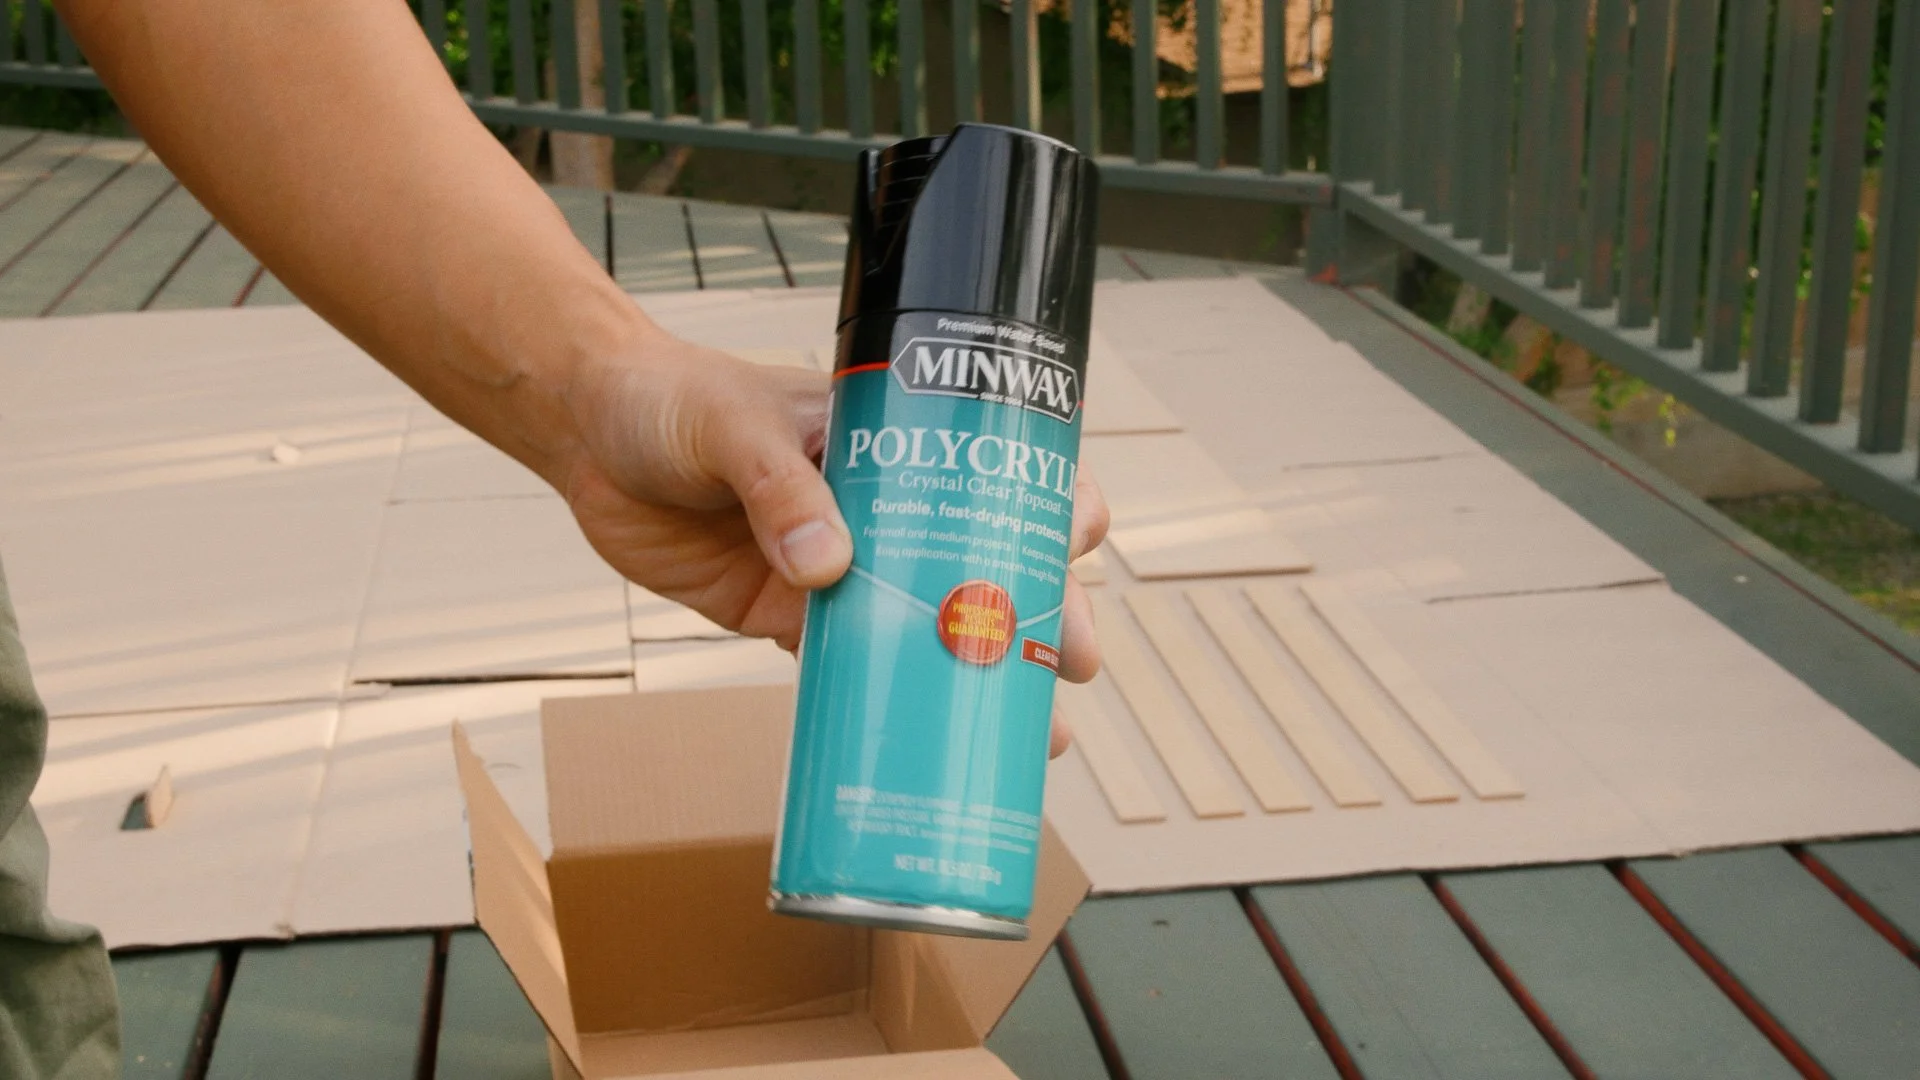
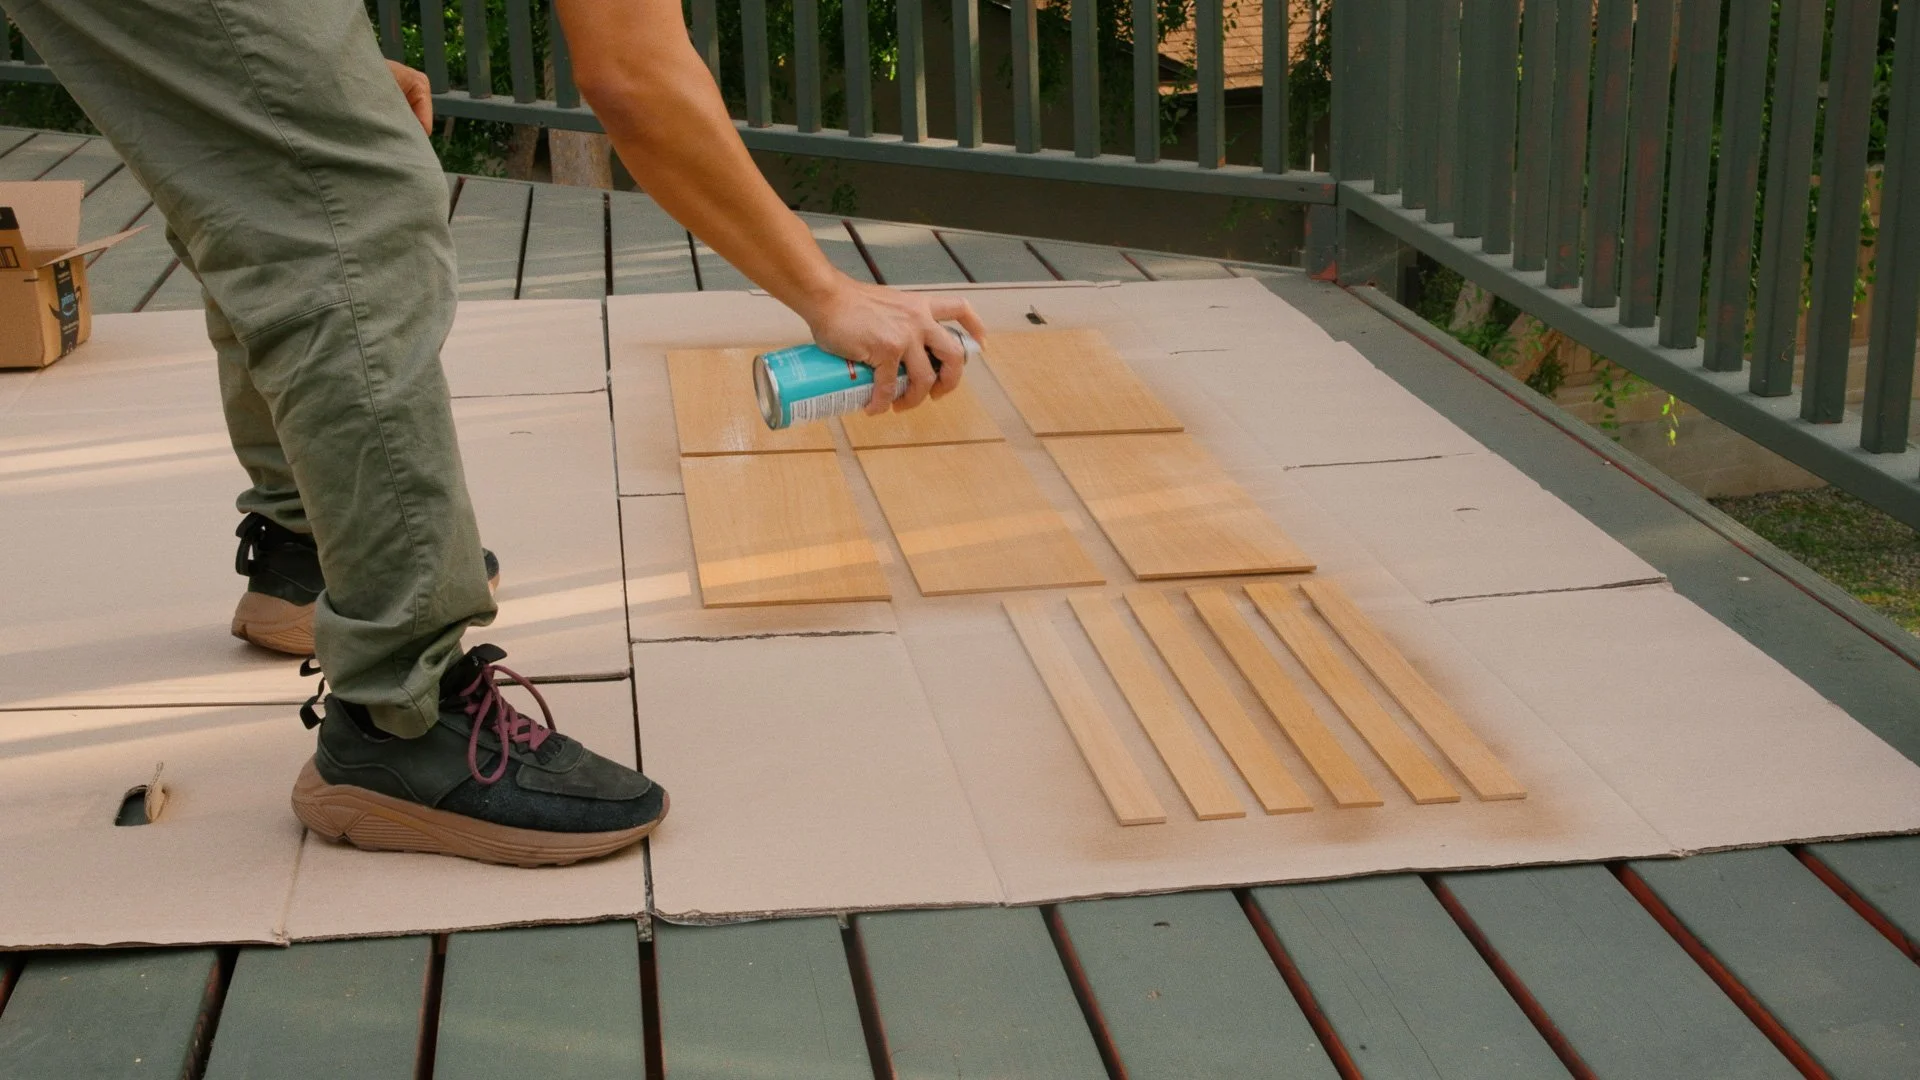
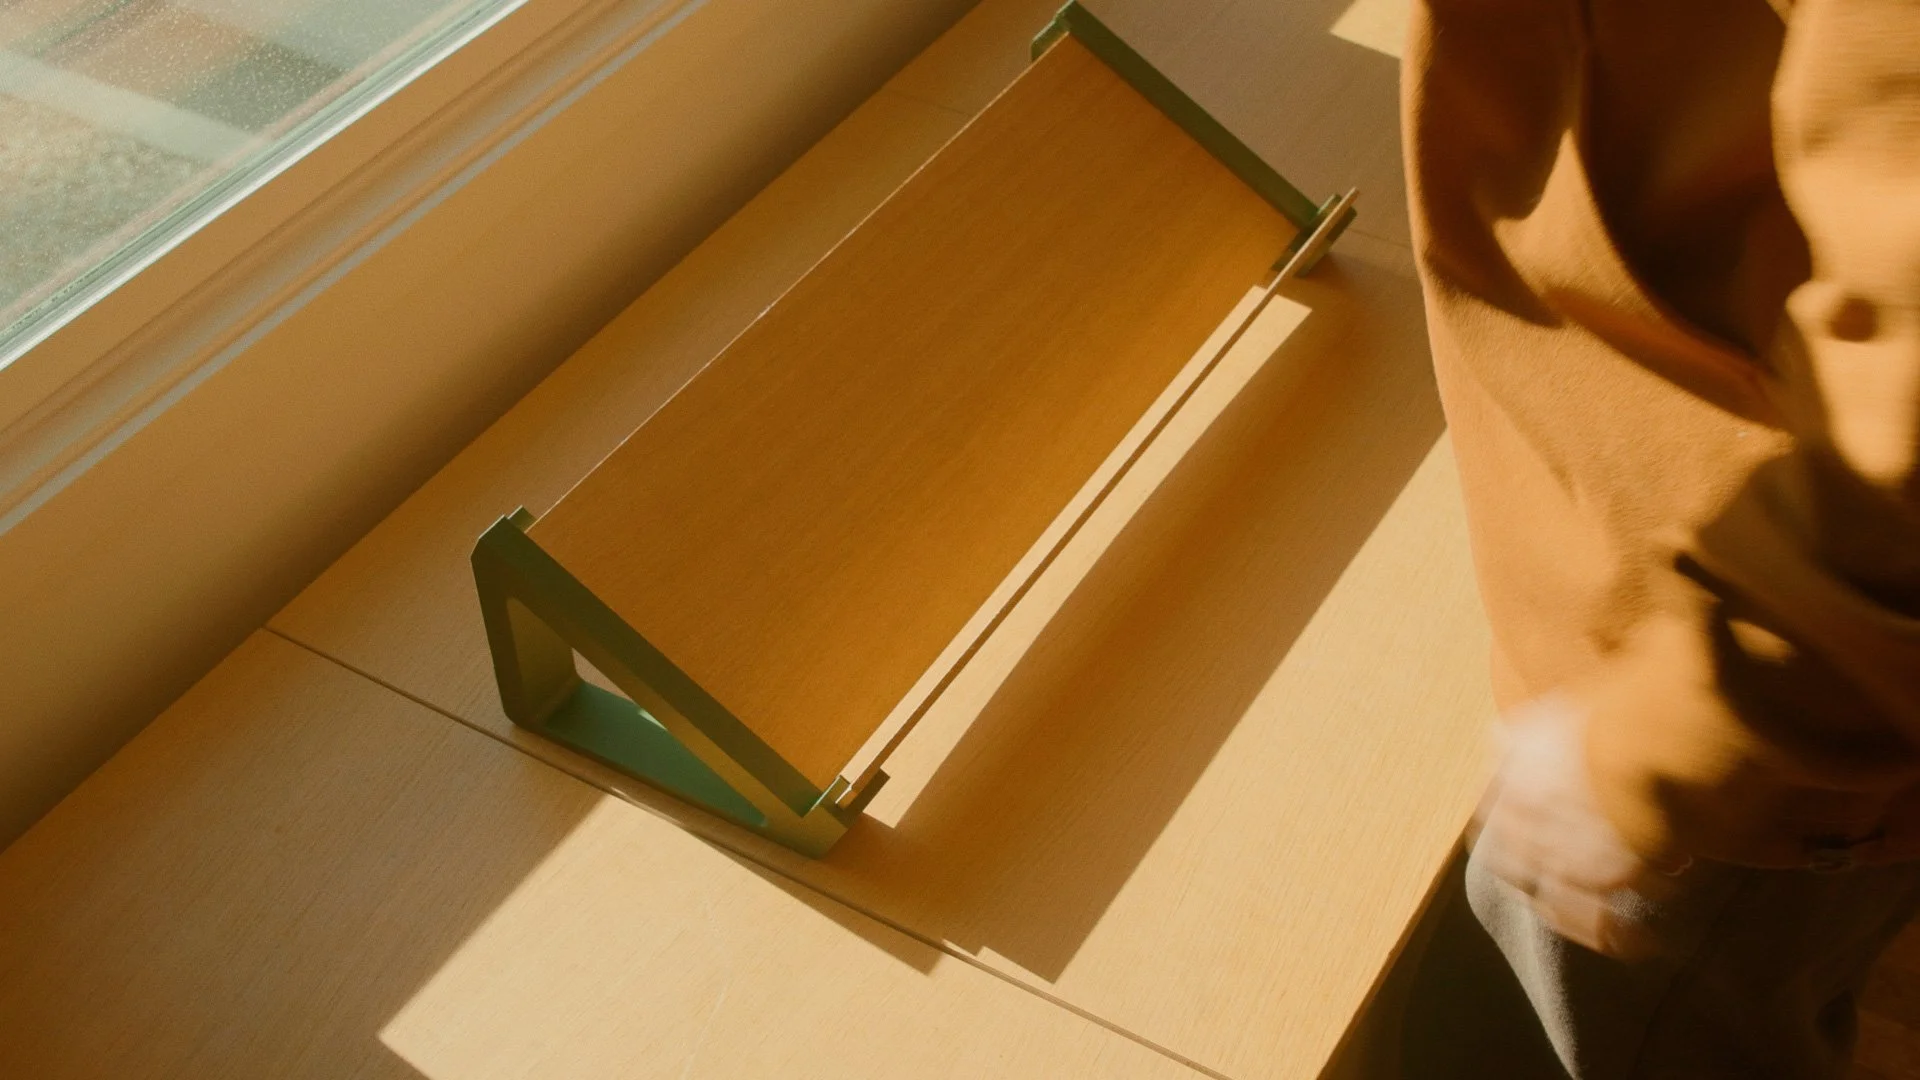
Finish choice
I used Minwax Polycrylic spray because it’s water-based, dries fast, and is easy to touch up if these get scuffed.
Products used
Bambu Lab X1C (3D printer)
1/4” White Oak panels
PLA filament (dark green)
Cushions (the Custom-Order Lesson)
Because the bench is a non-standard size, I ordered custom cushions. When they arrived, they were bigger than the measurements I provided. They didn’t fit the doors, and they had straps I wasn’t expecting.
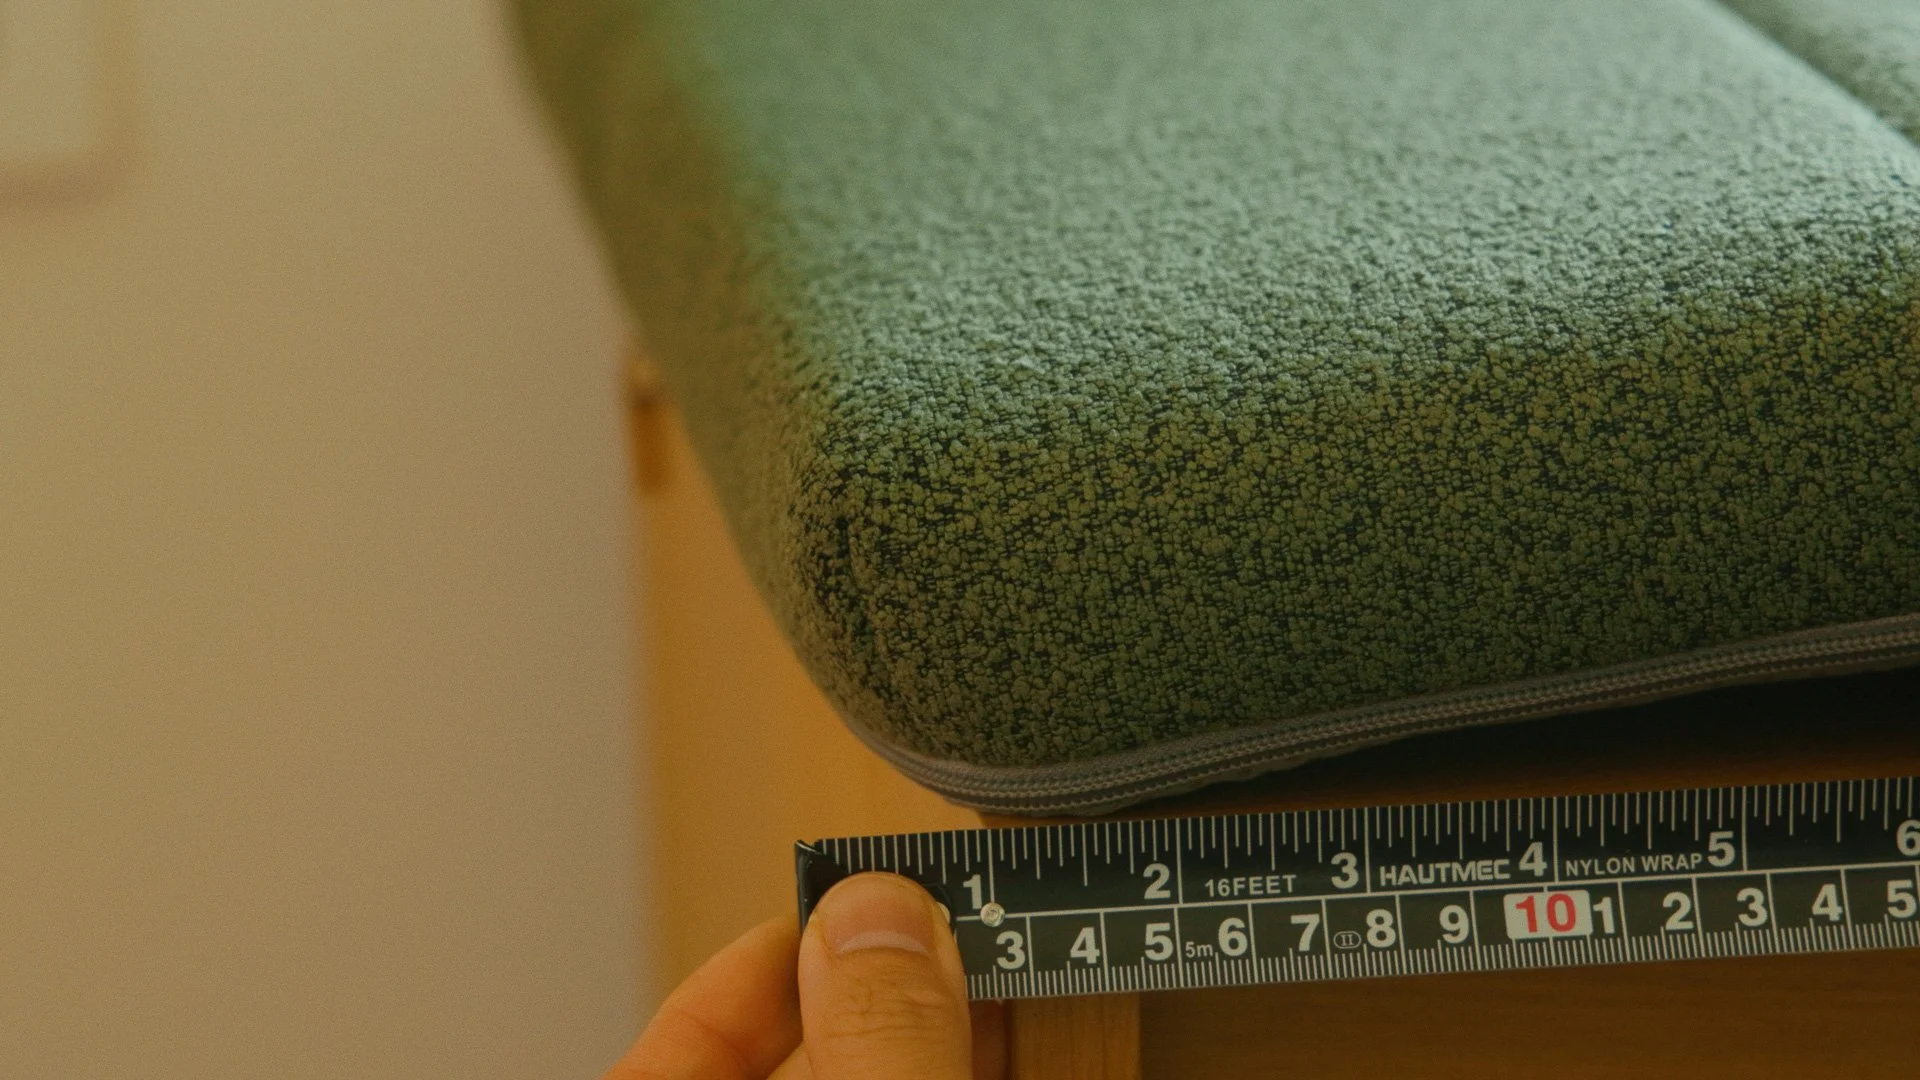
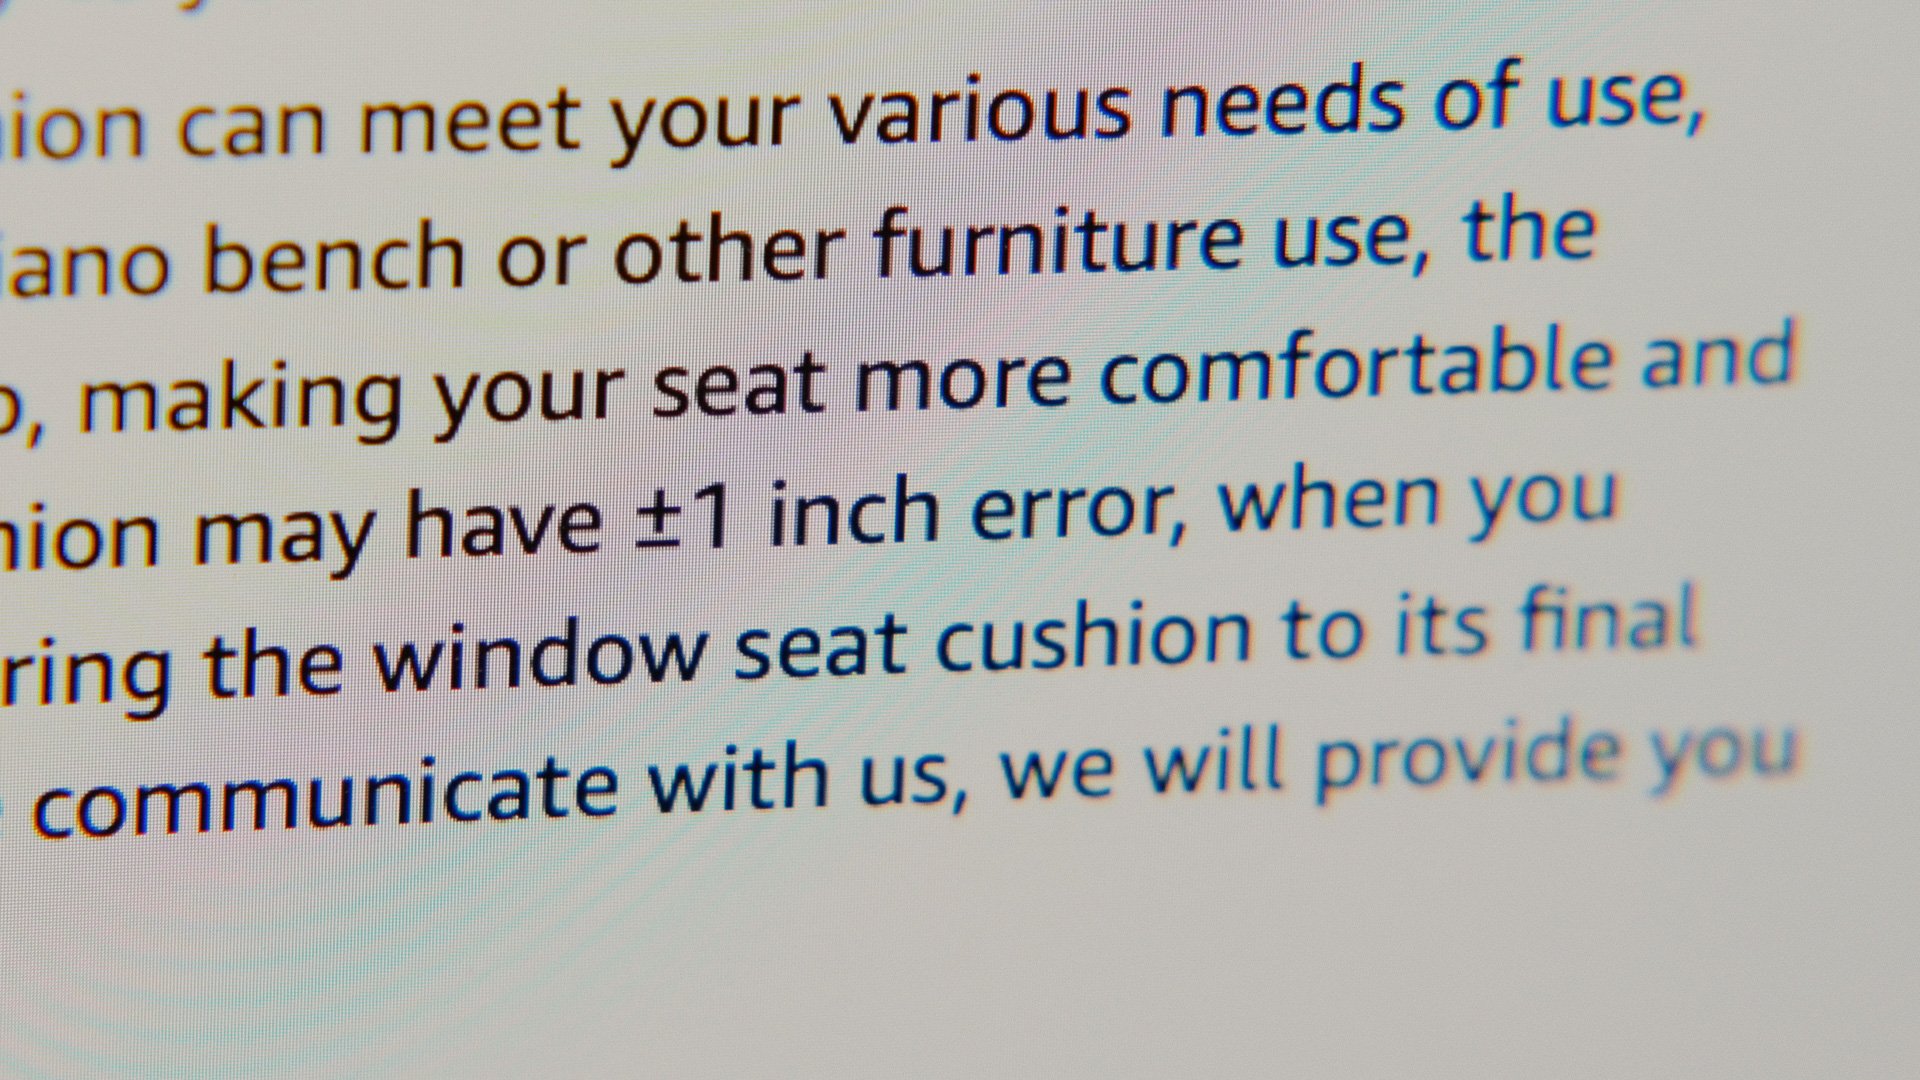
After going back and forth with the vendor, I realized I missed the fine print. Their custom cushions have a margin of error of +/-1 in.
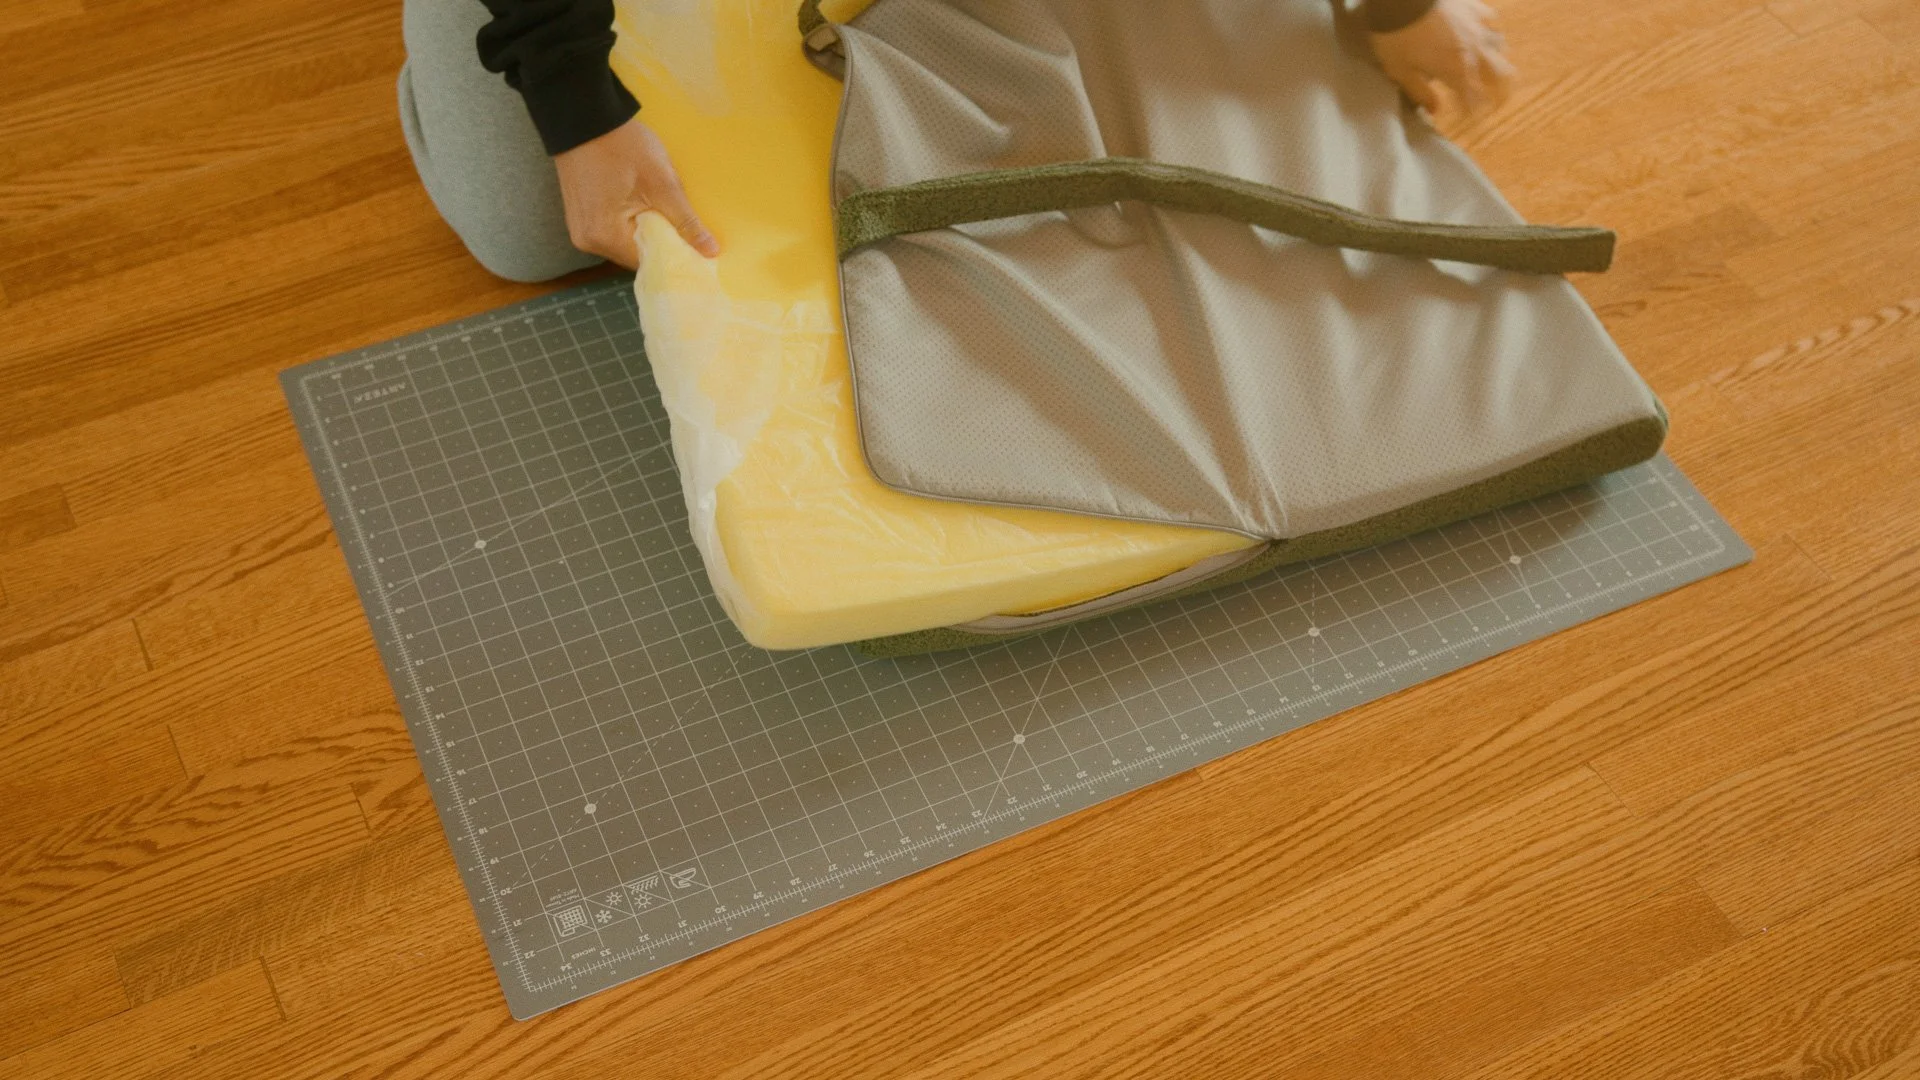
I was stuck with them. It became clear that the best option was to make it work.
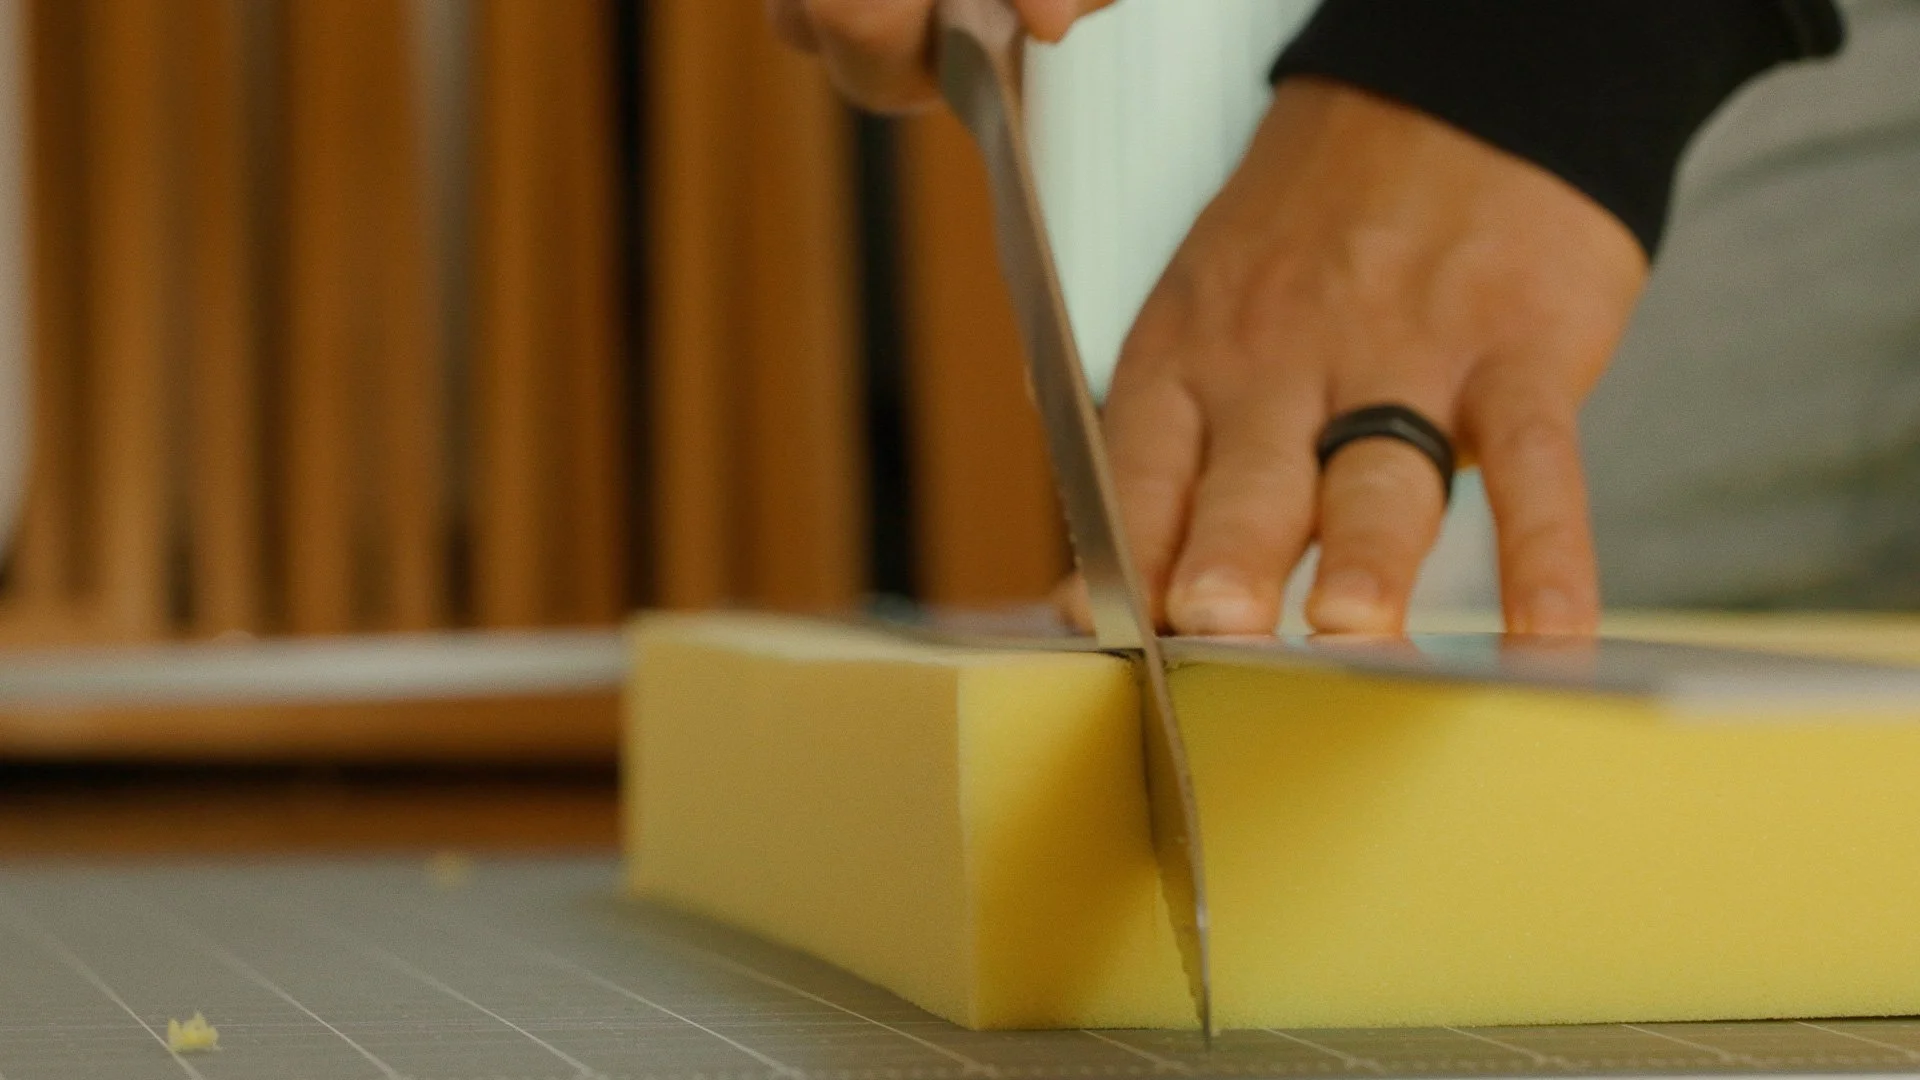
What I did
I learned that trimming upholstery foam is easiest with a bread knife, so that’s what I used. I trimmed the foam down gradually, removed the straps, and test-fit everything until the doors could open again. Not perfect, but functional.
Products used
Custom cushions (read the fine print!)
Bread knife (for trimming foam)
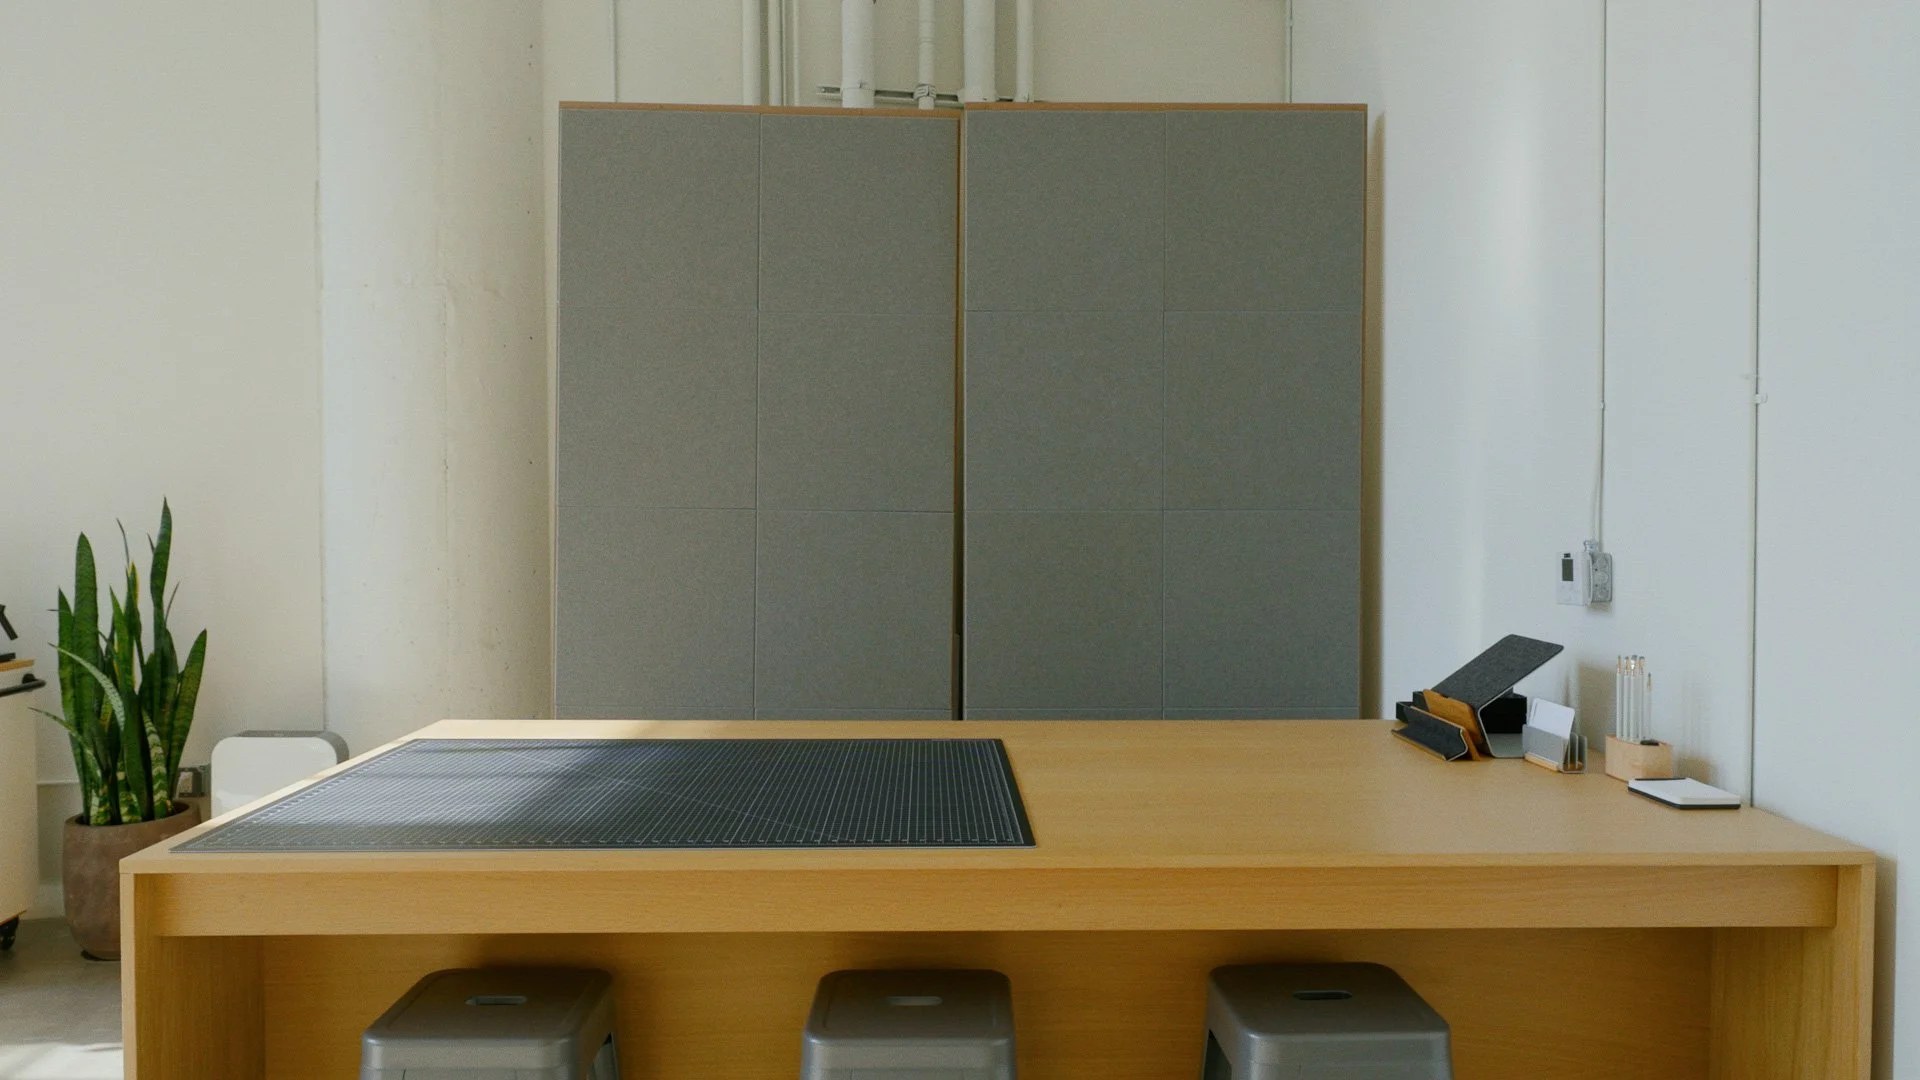
Styling and Lighting the Entryway
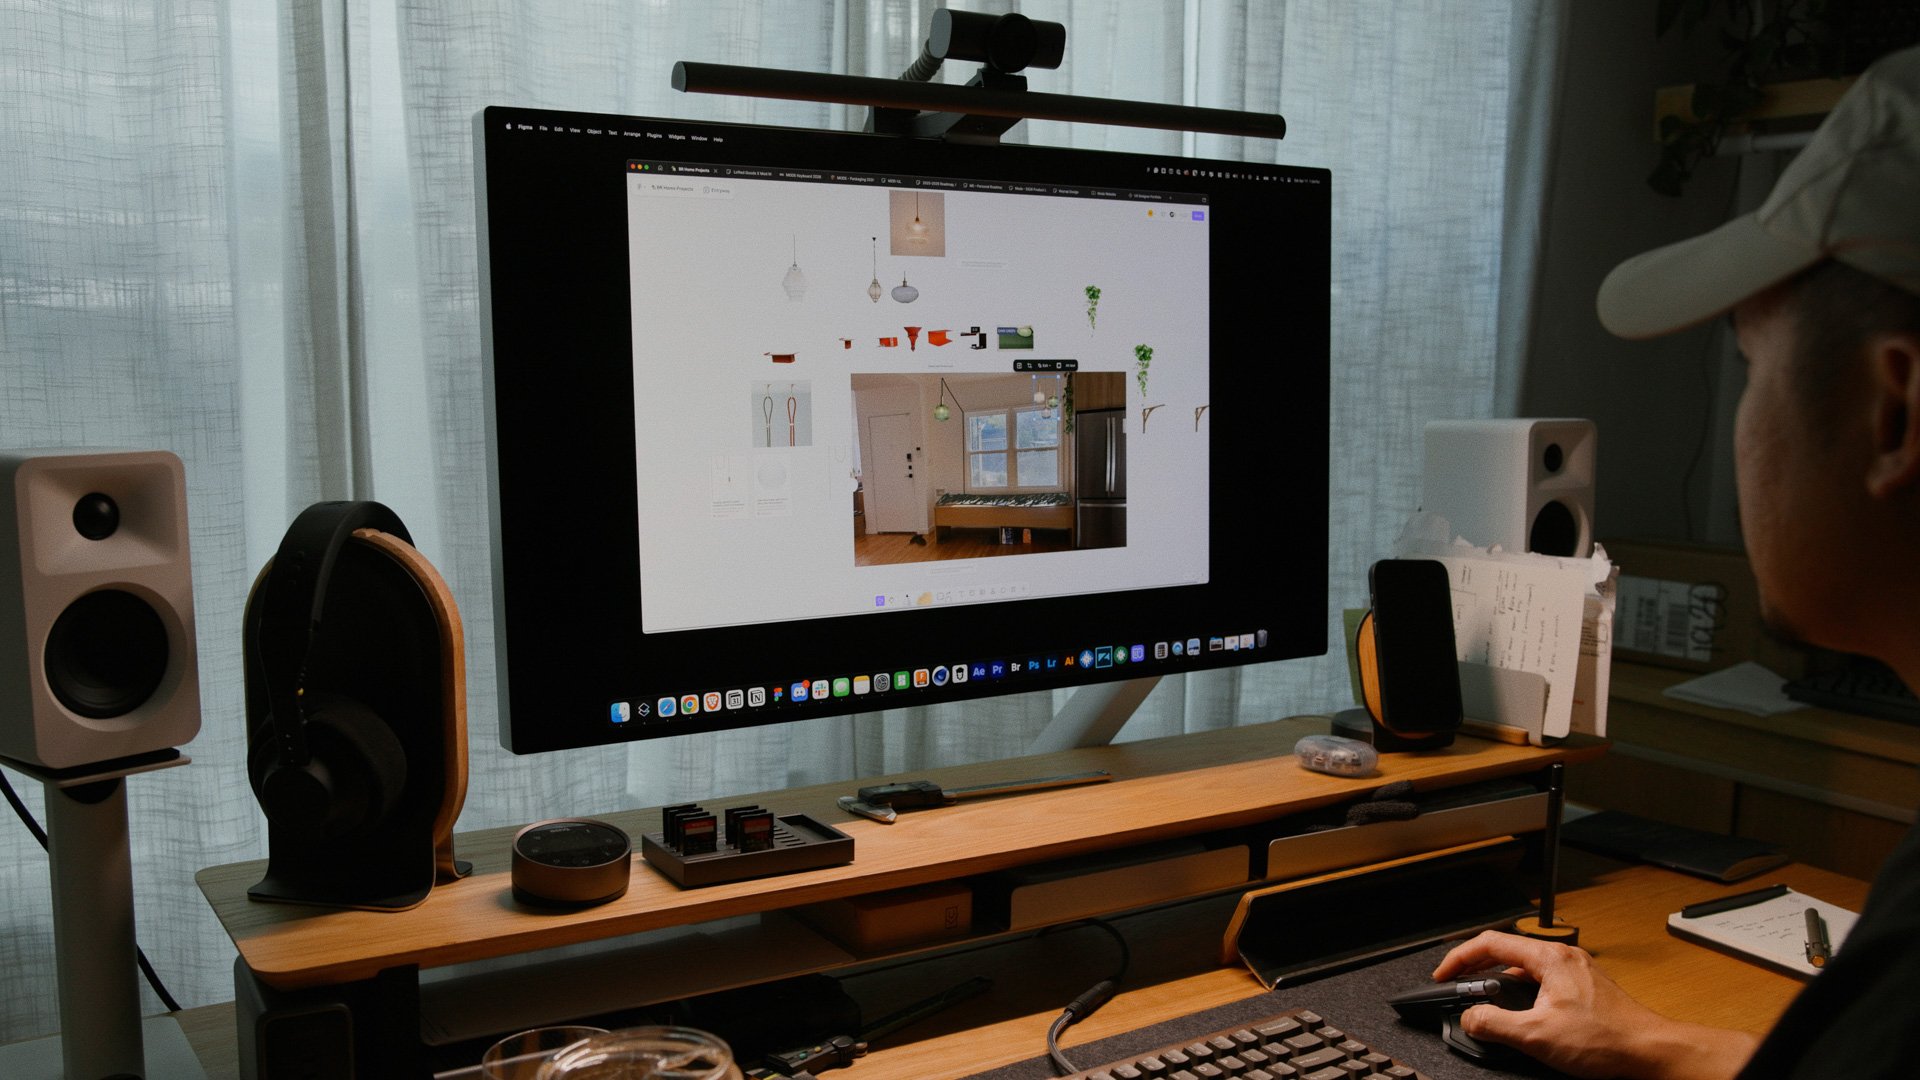
To help me visualize options, I made a mood board in Figma.
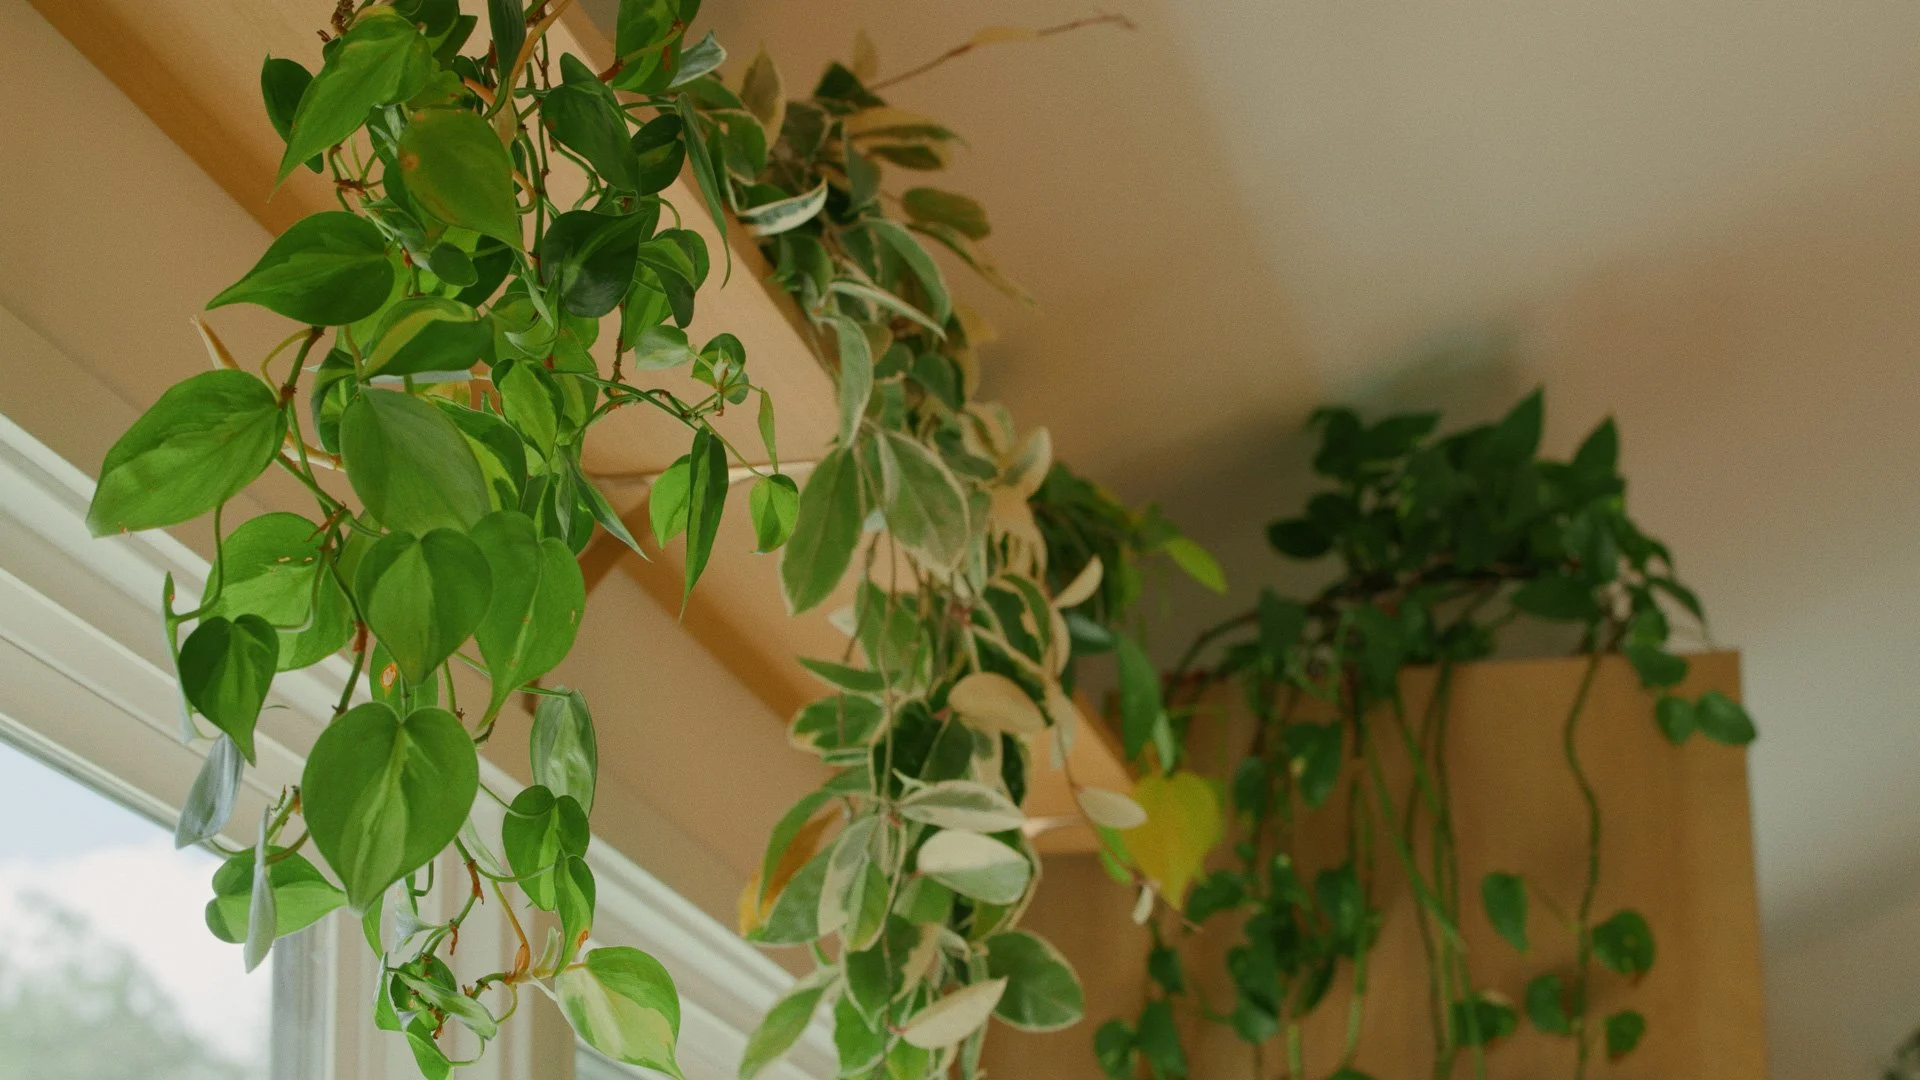
Our home palette is already forming on its own: natural white oak, deep greens, and a lot of plants. To balance that, I leaned into warm accent colors and brass.
Catch-all
We mounted a brick-red shelf near the entry as the landing zone for keys, wallets, and everyday items. On top, I added a Craighill Cloud Tray to catch my wallet and pocket items.

Lighting plan
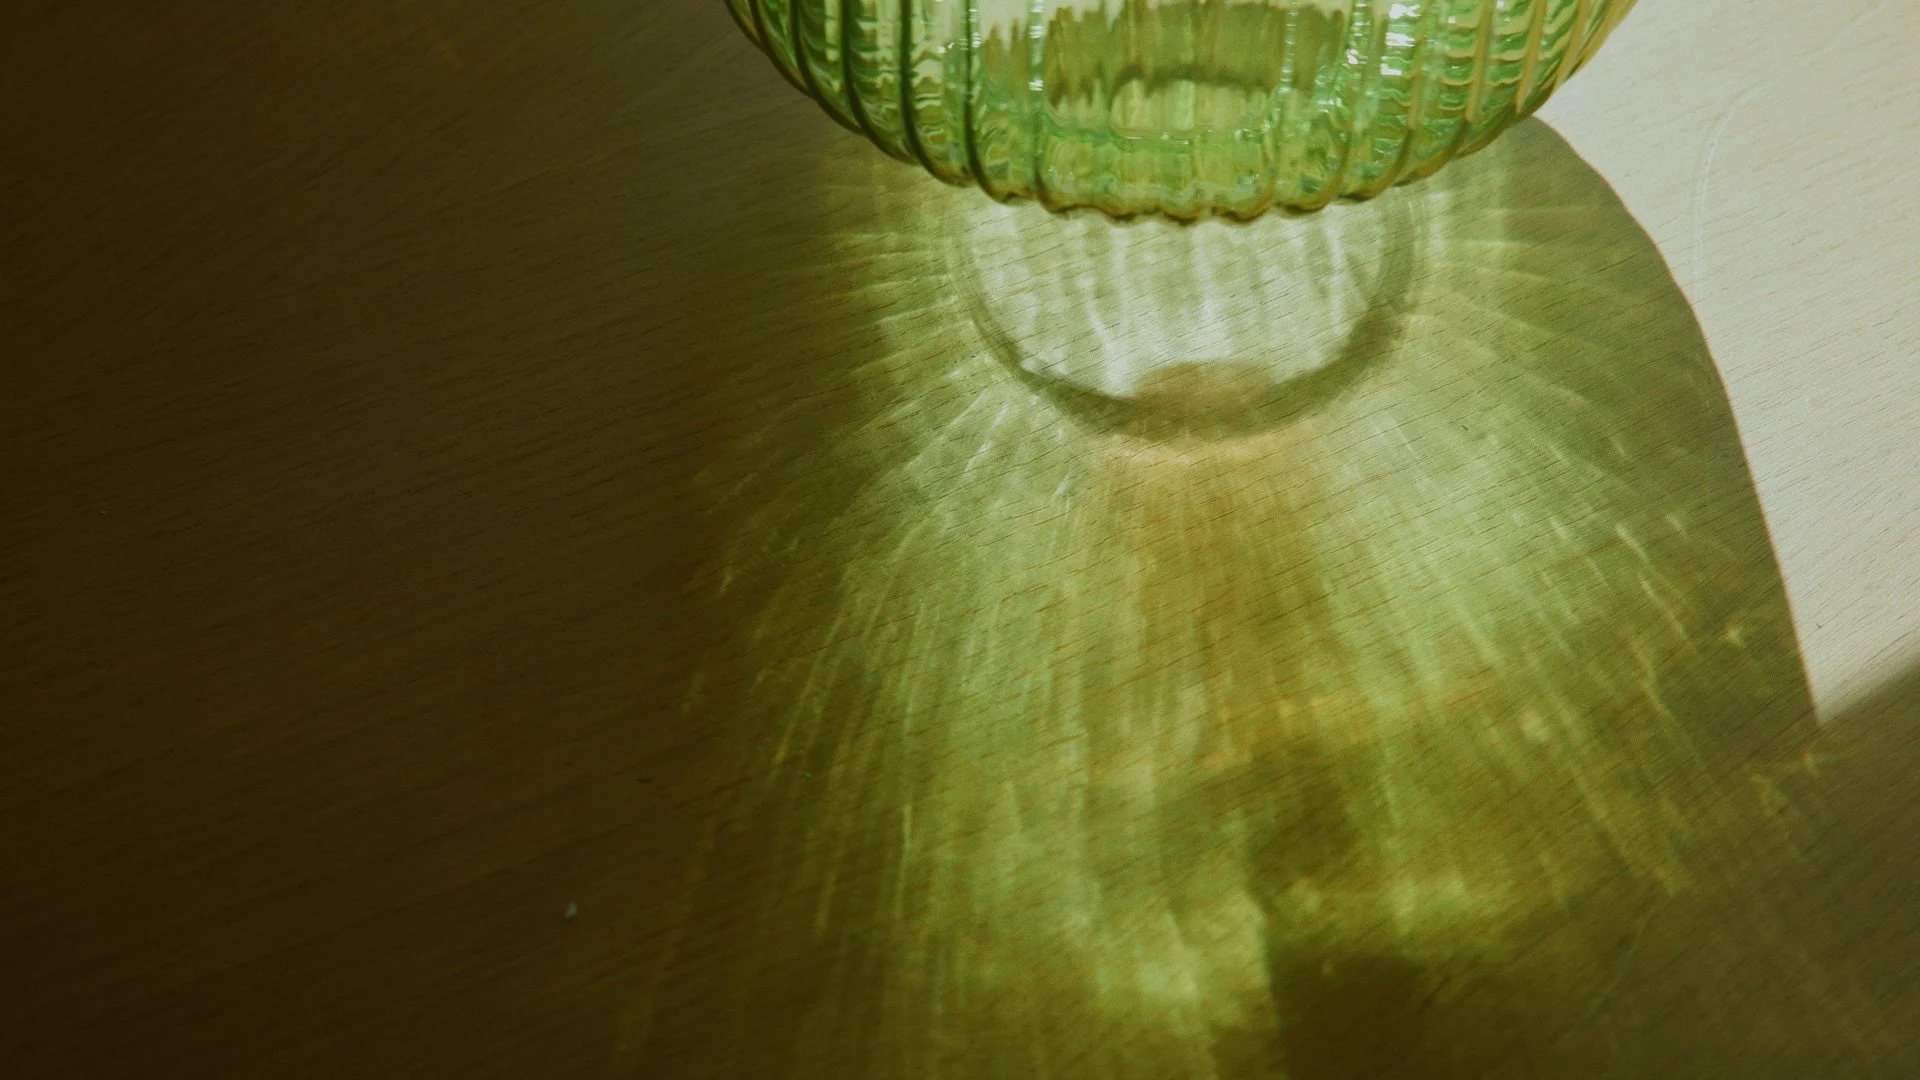
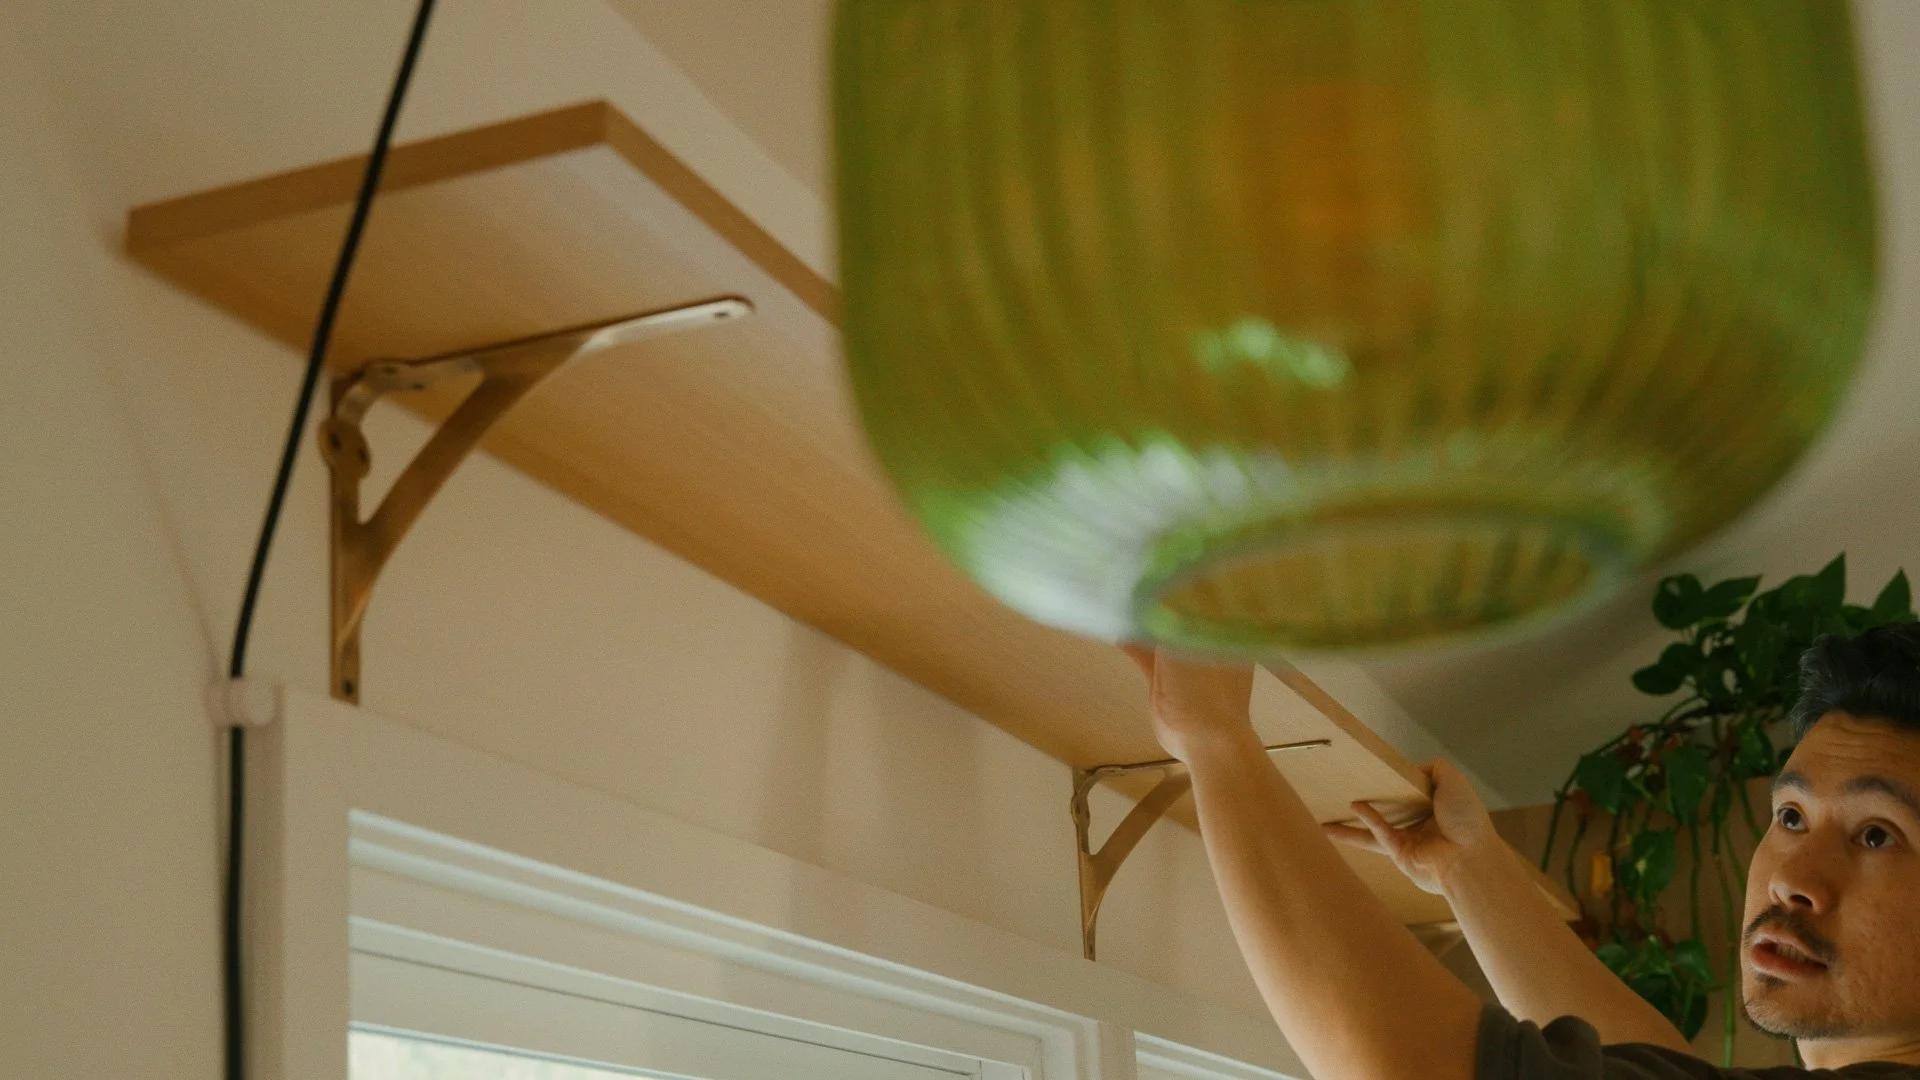
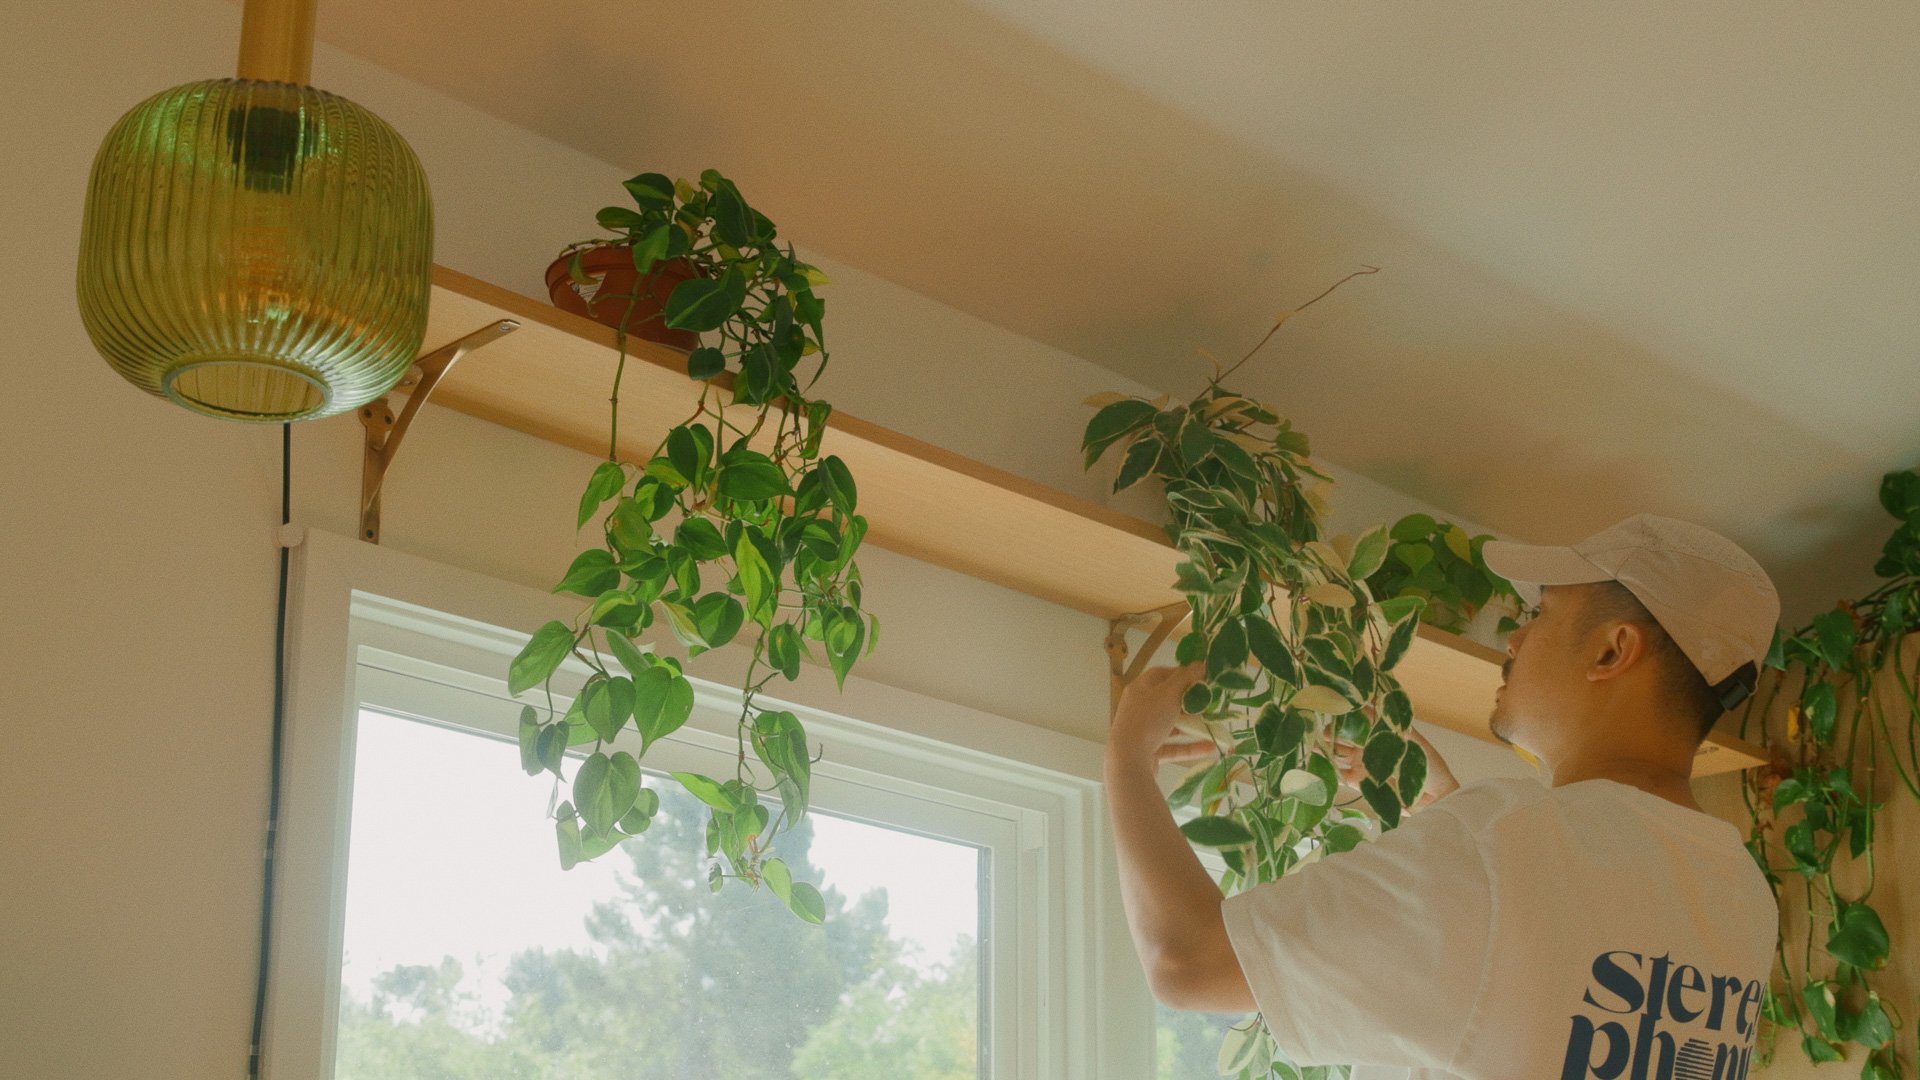
This corner gets great natural light in the morning, but we wanted it to feel warm and cozy at night. We found a reeded green glass pendant with brass fixtures. It has more vintage character than I normally choose, but in a 1940s home, it makes perfect sense.
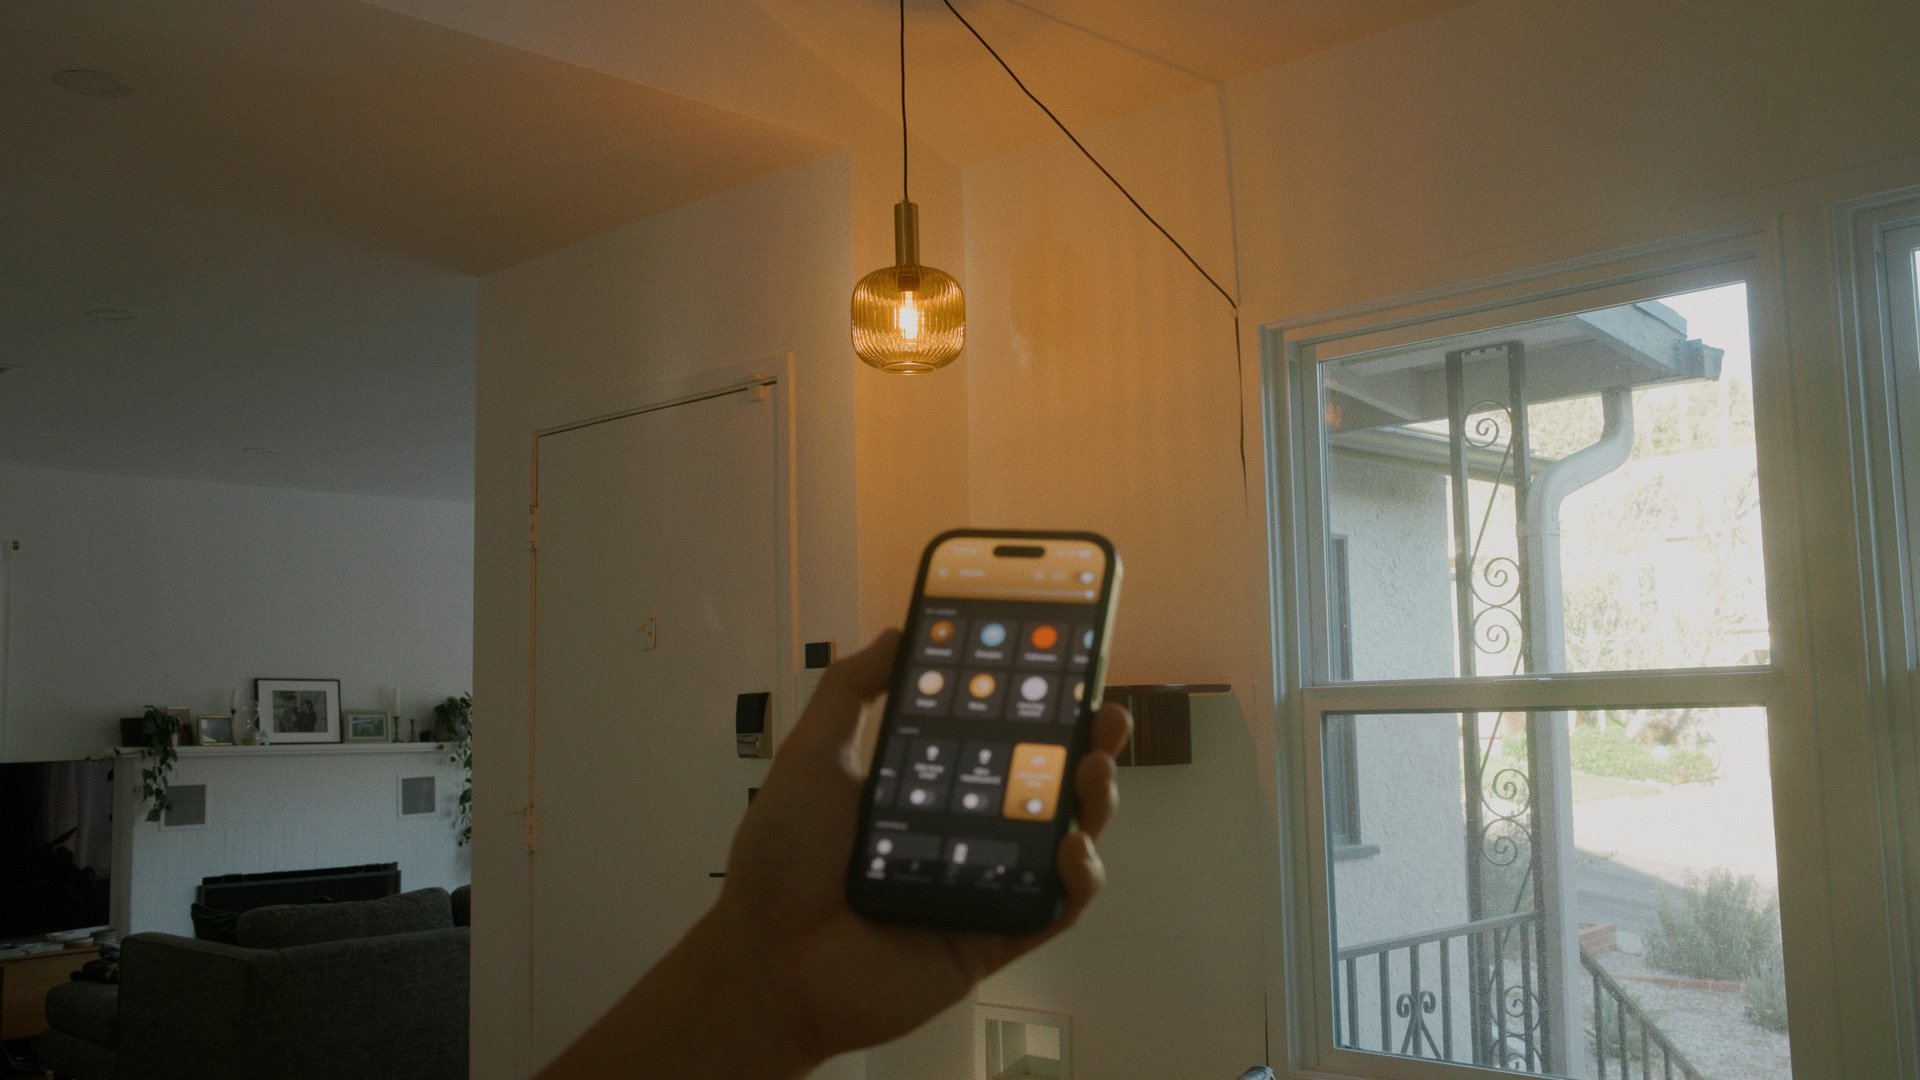
Since the rest of the house is on Philips Hue, we added Hue bulbs so everything stays programmable and consistent.
To get more focused light on the bench, I added a Tolomeo clip light from Artemide.
Products used
HAY Korpus shelf (brick red)
Craighill Little Cloud Tray (cork)
Reeded green glass pendant lamp (brass finish)
Philips Hue bulb (E26)
White swag hooks (to hang lamp)
Cable channel (to hide lamp cable)
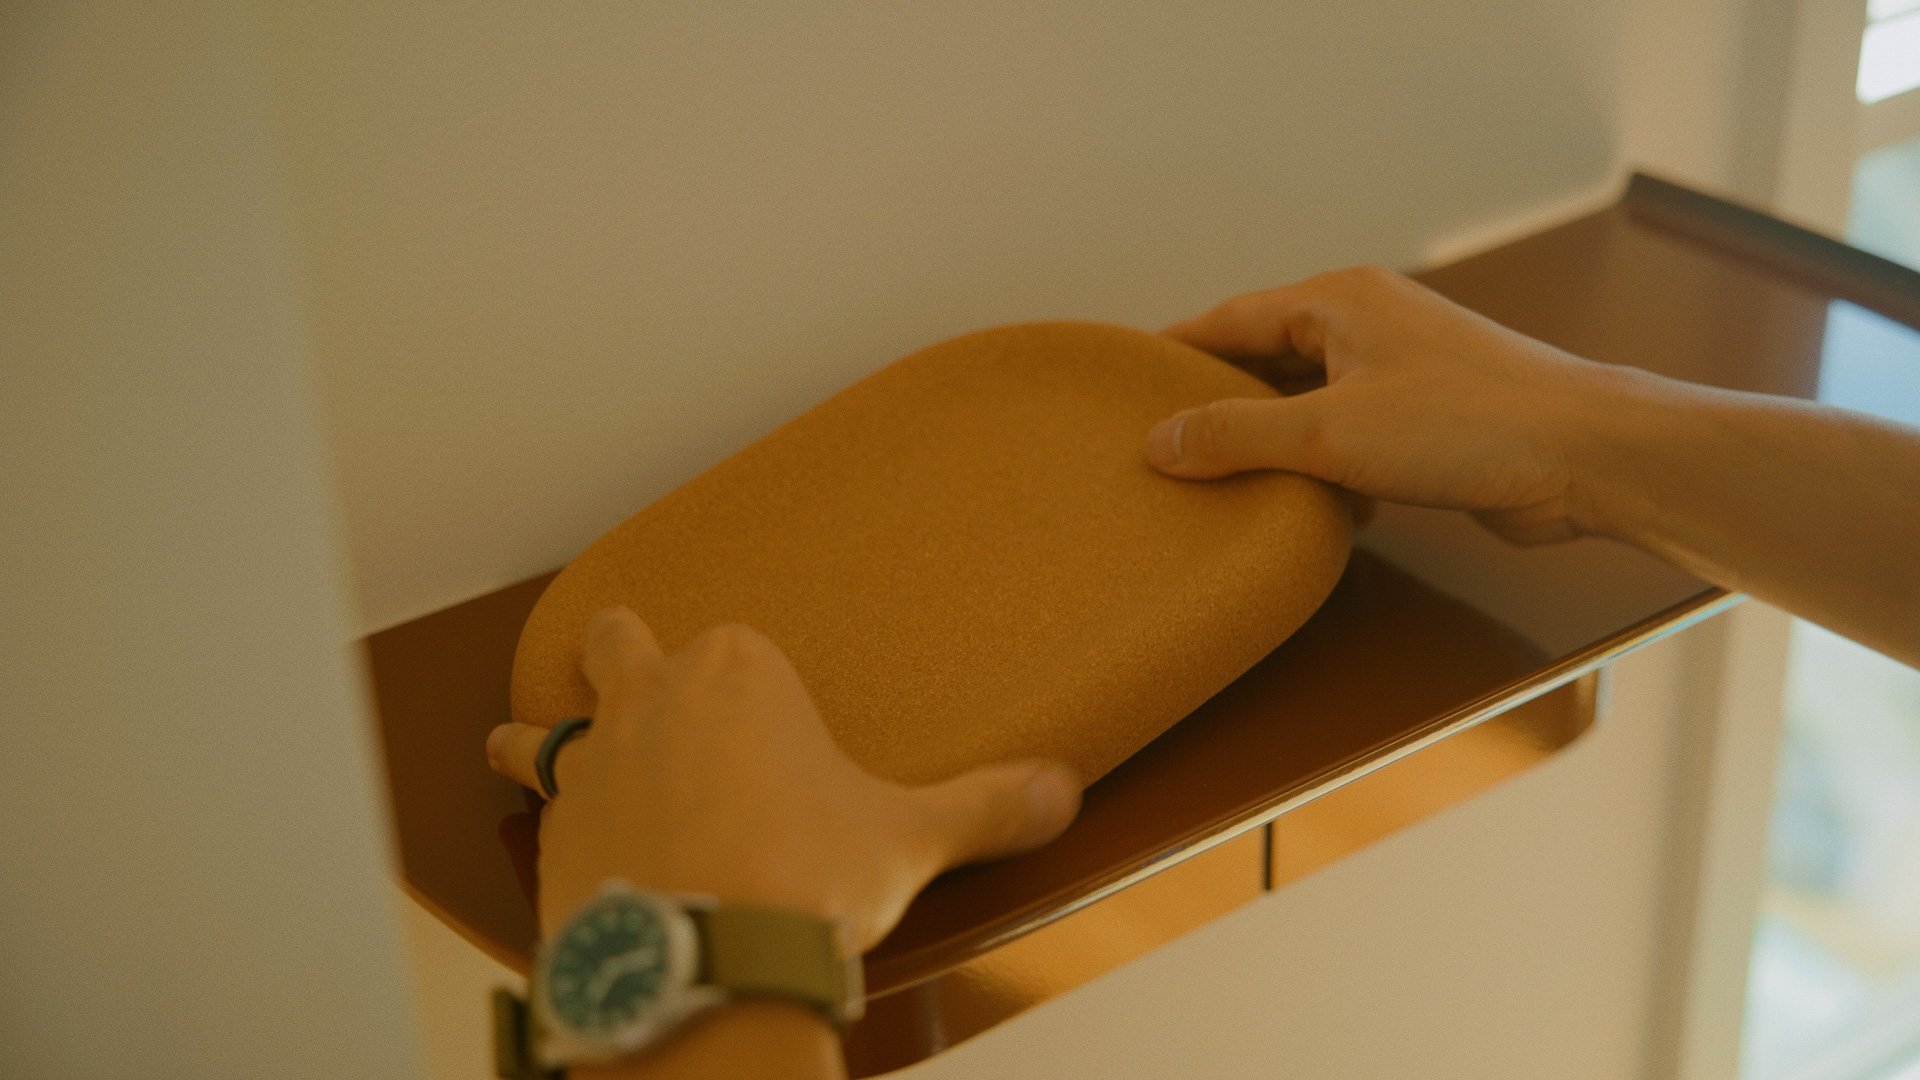
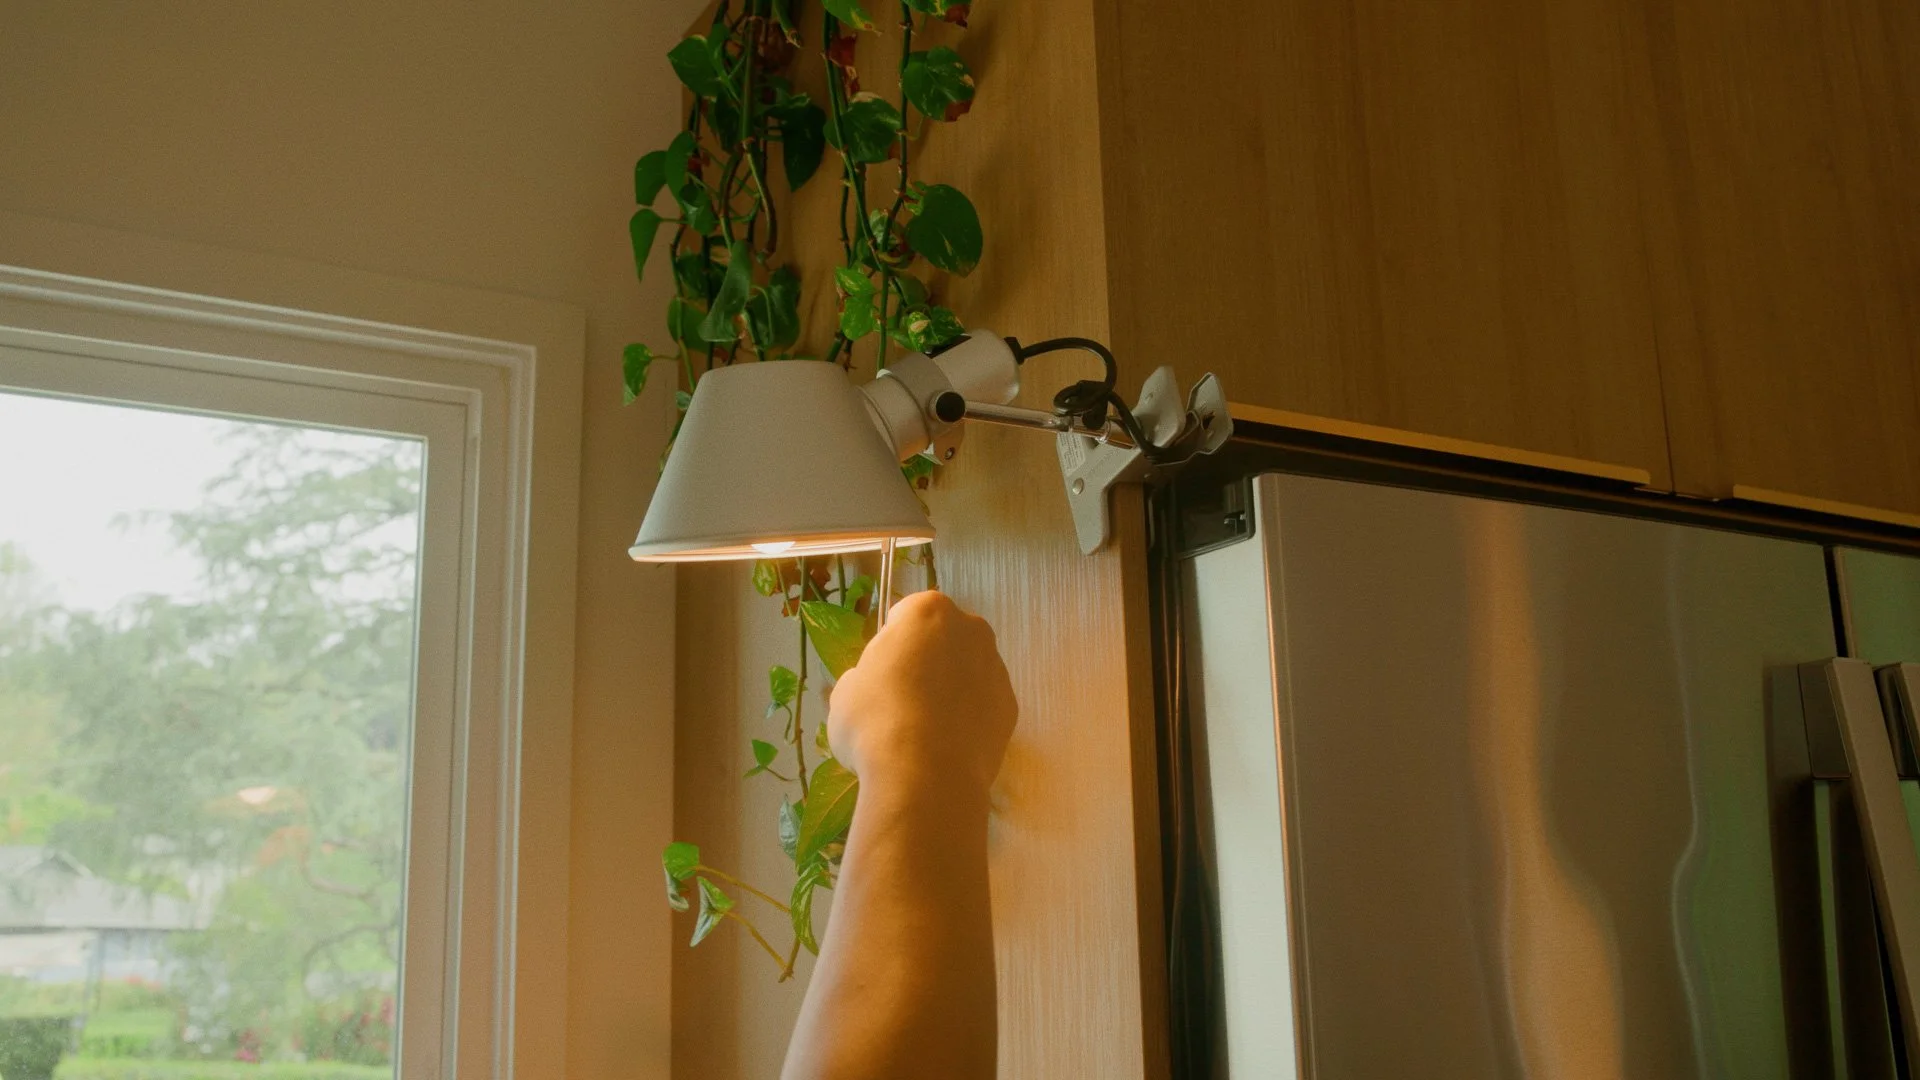
Overhead Shelf + Plants
After the space came together, it still felt like it was missing one last layer. I already knew I wanted more plants here, but I didn’t know where to put them. Then I remembered I still had a few long offcuts from the studio worktable. Then I mounted it with beautiful antique brass brackets, using a laser level to keep everything aligned.
What I built
I turned one offcut into an overhead shelf:
Trim it down
Edge-band it
Sand it
Finish it to match
Products used
3/4 in white oak plywood
The Chuy Badge
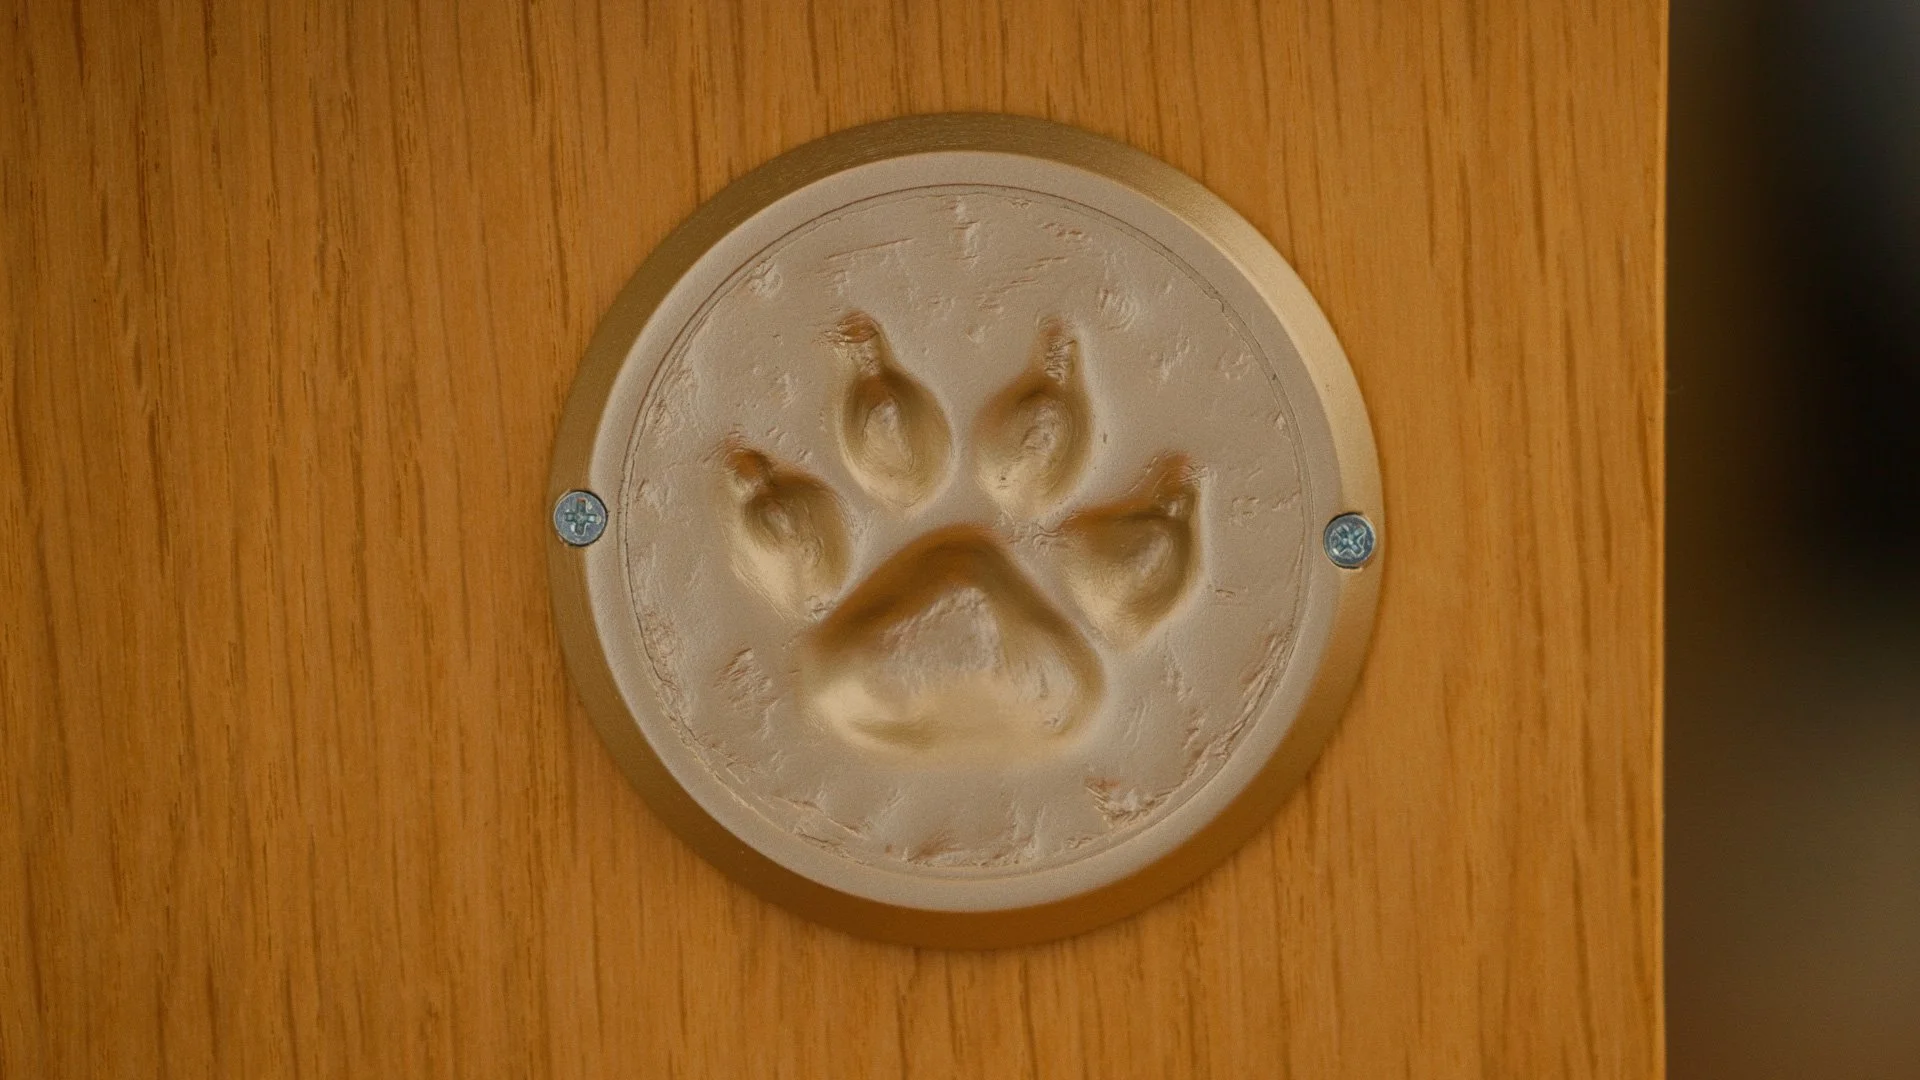
The last part of this project turned out to be the most important.
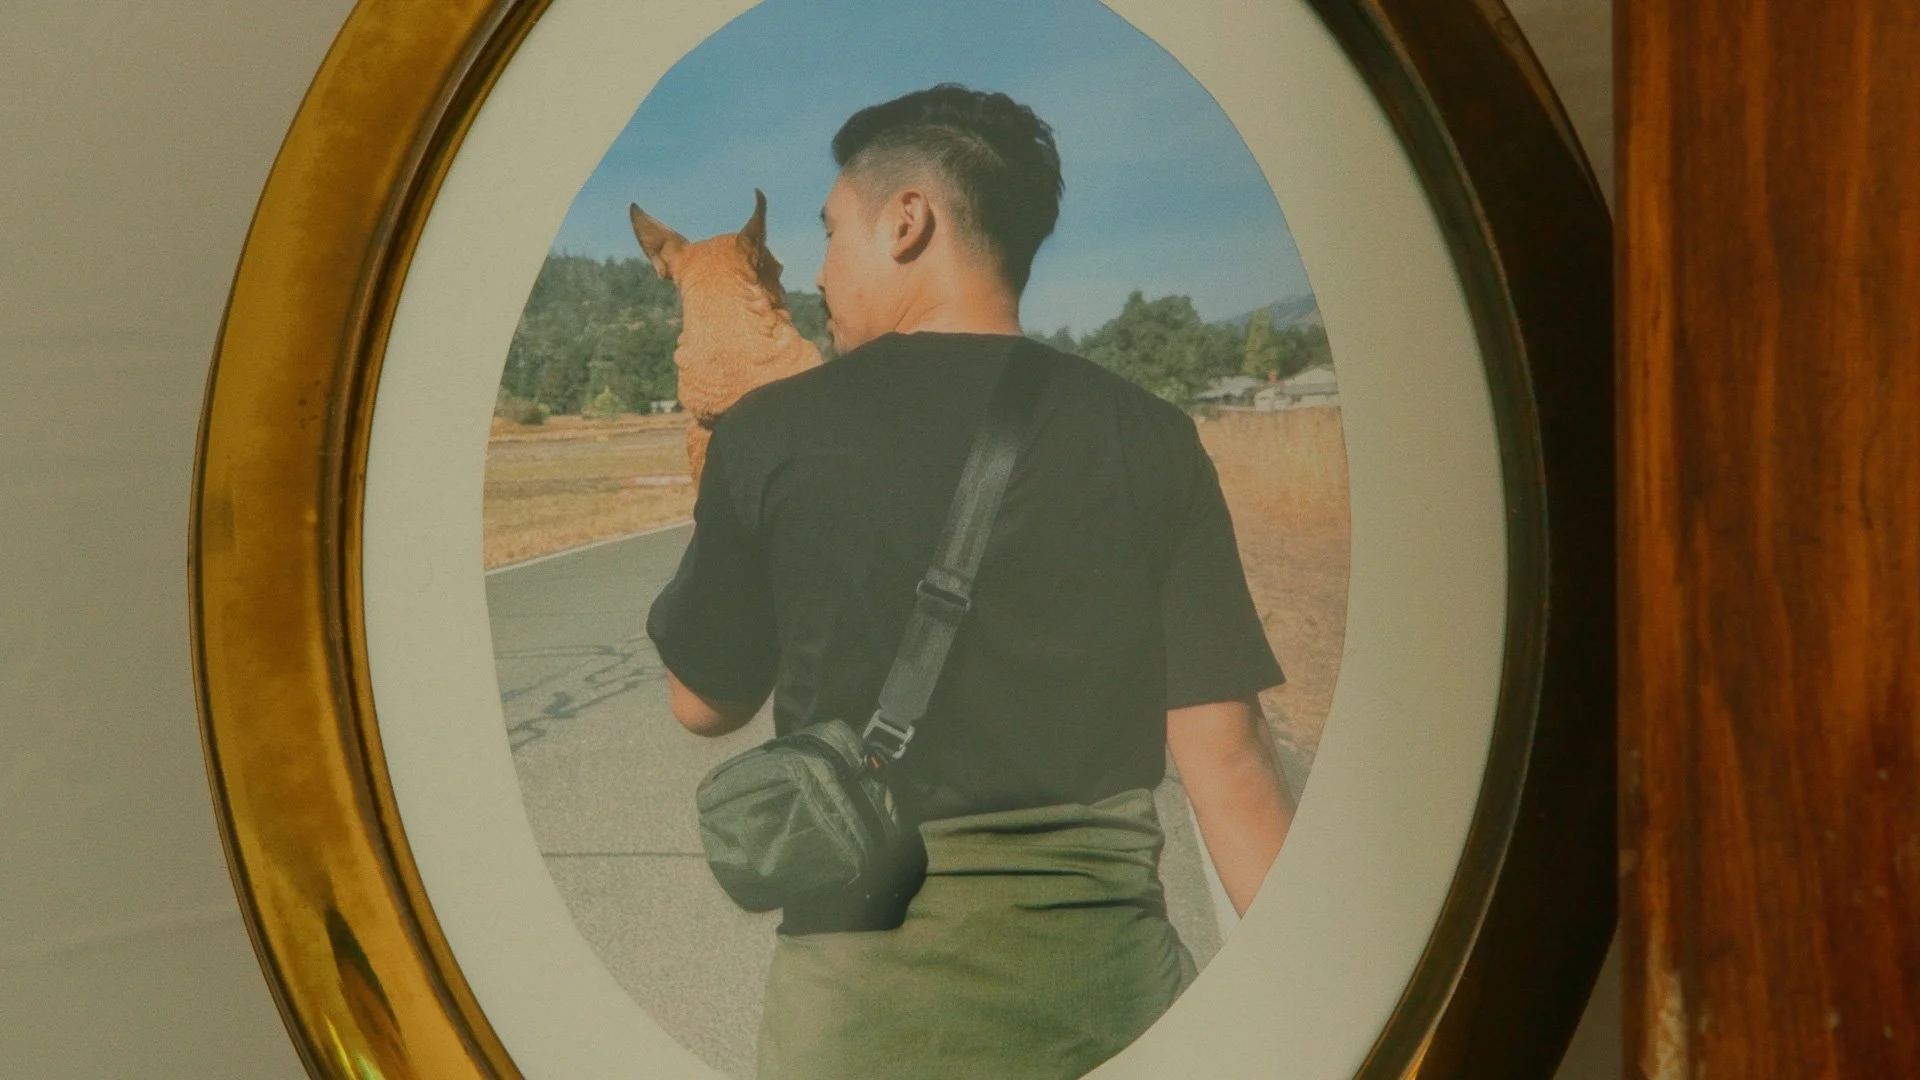
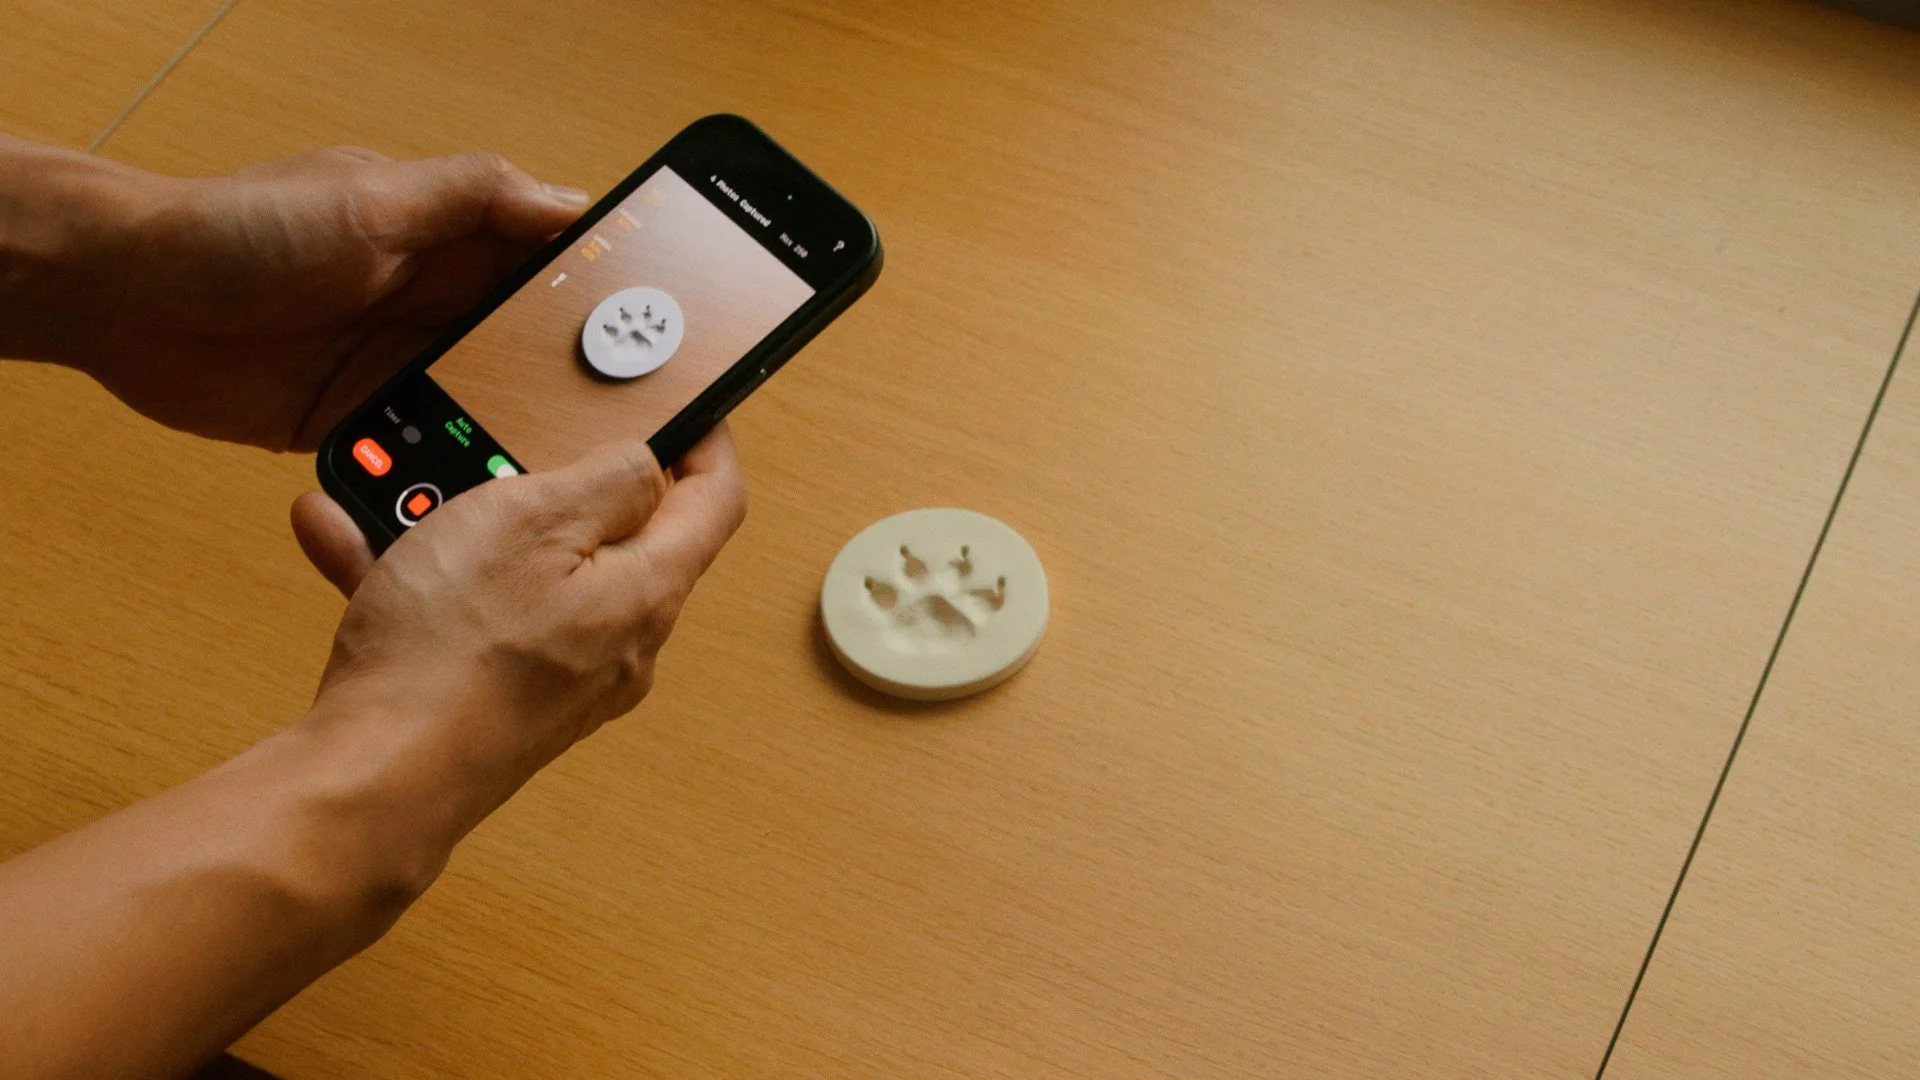
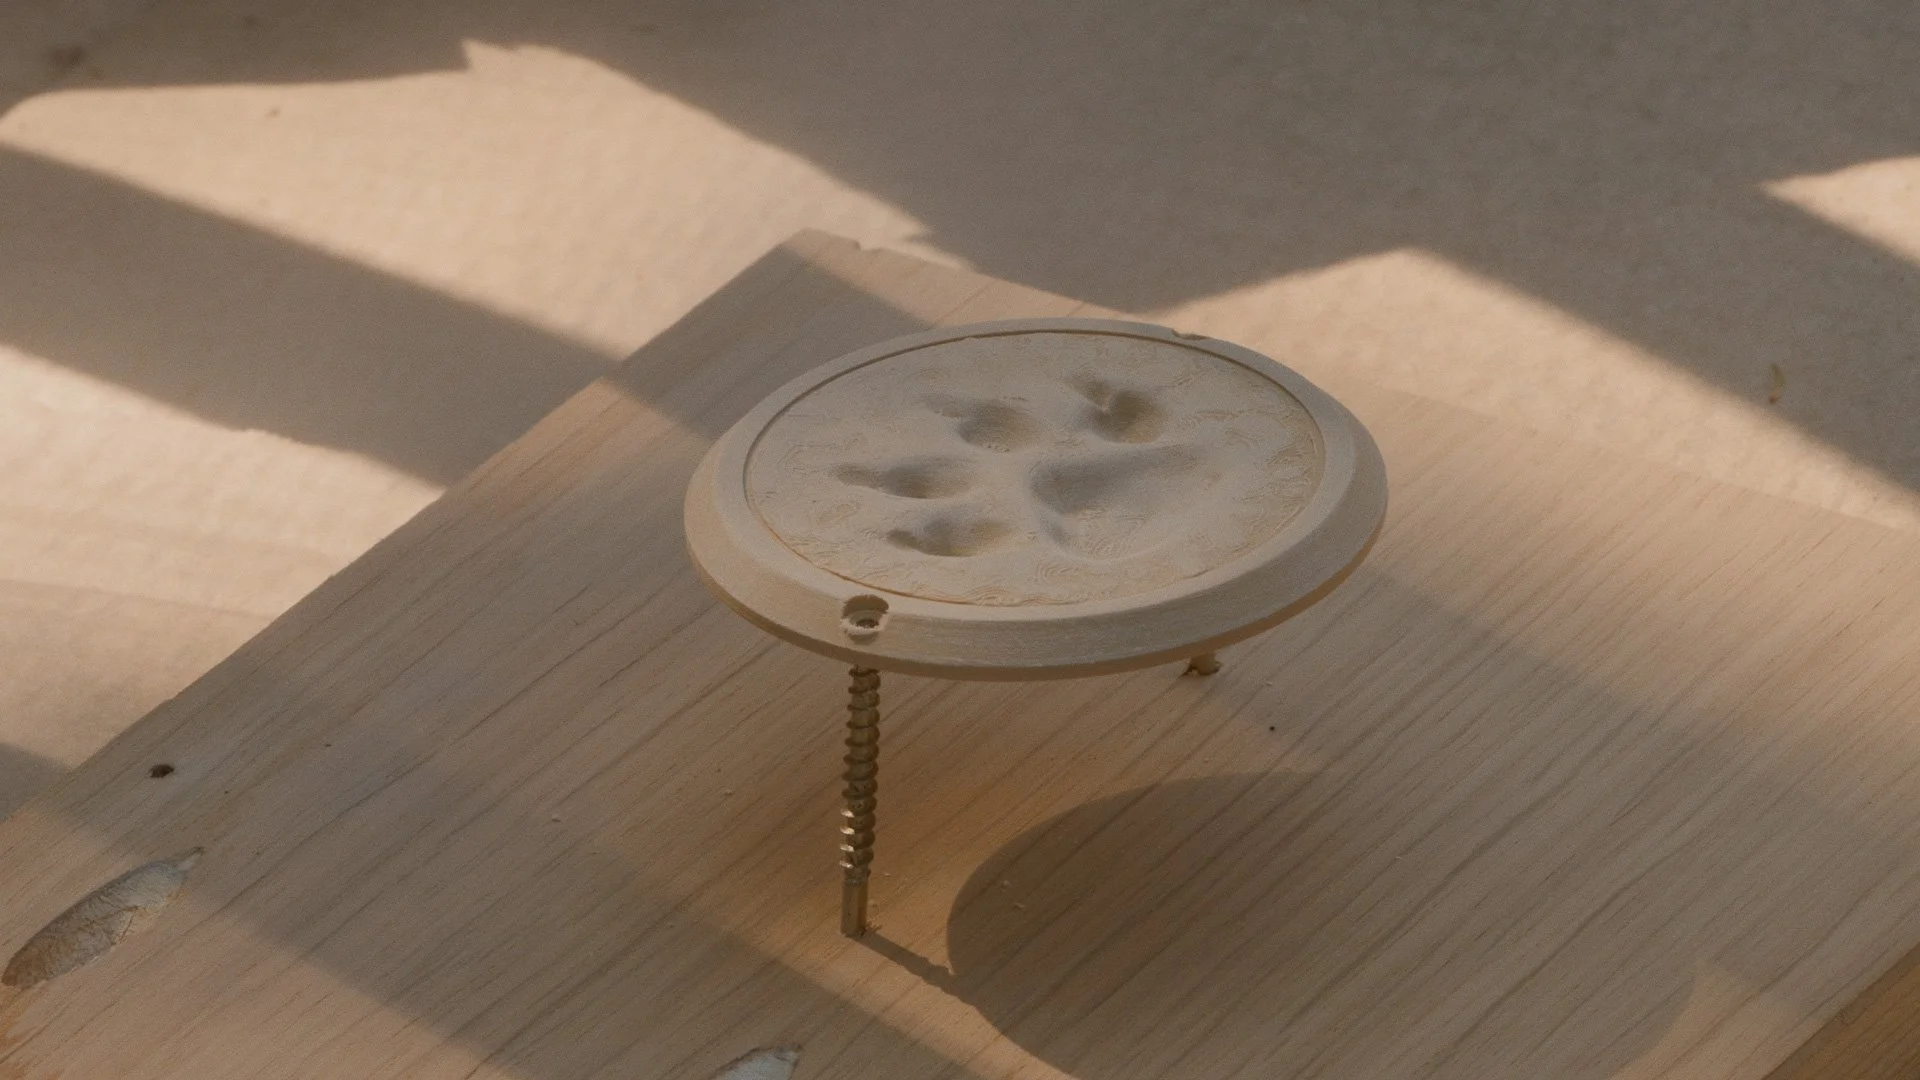
During the build, my dog of sixteen years, Chuy, passed away. When we received his ashes, they came with his paw print. I wanted to incorporate it into the bench, but I didn’t want to risk damaging the original.
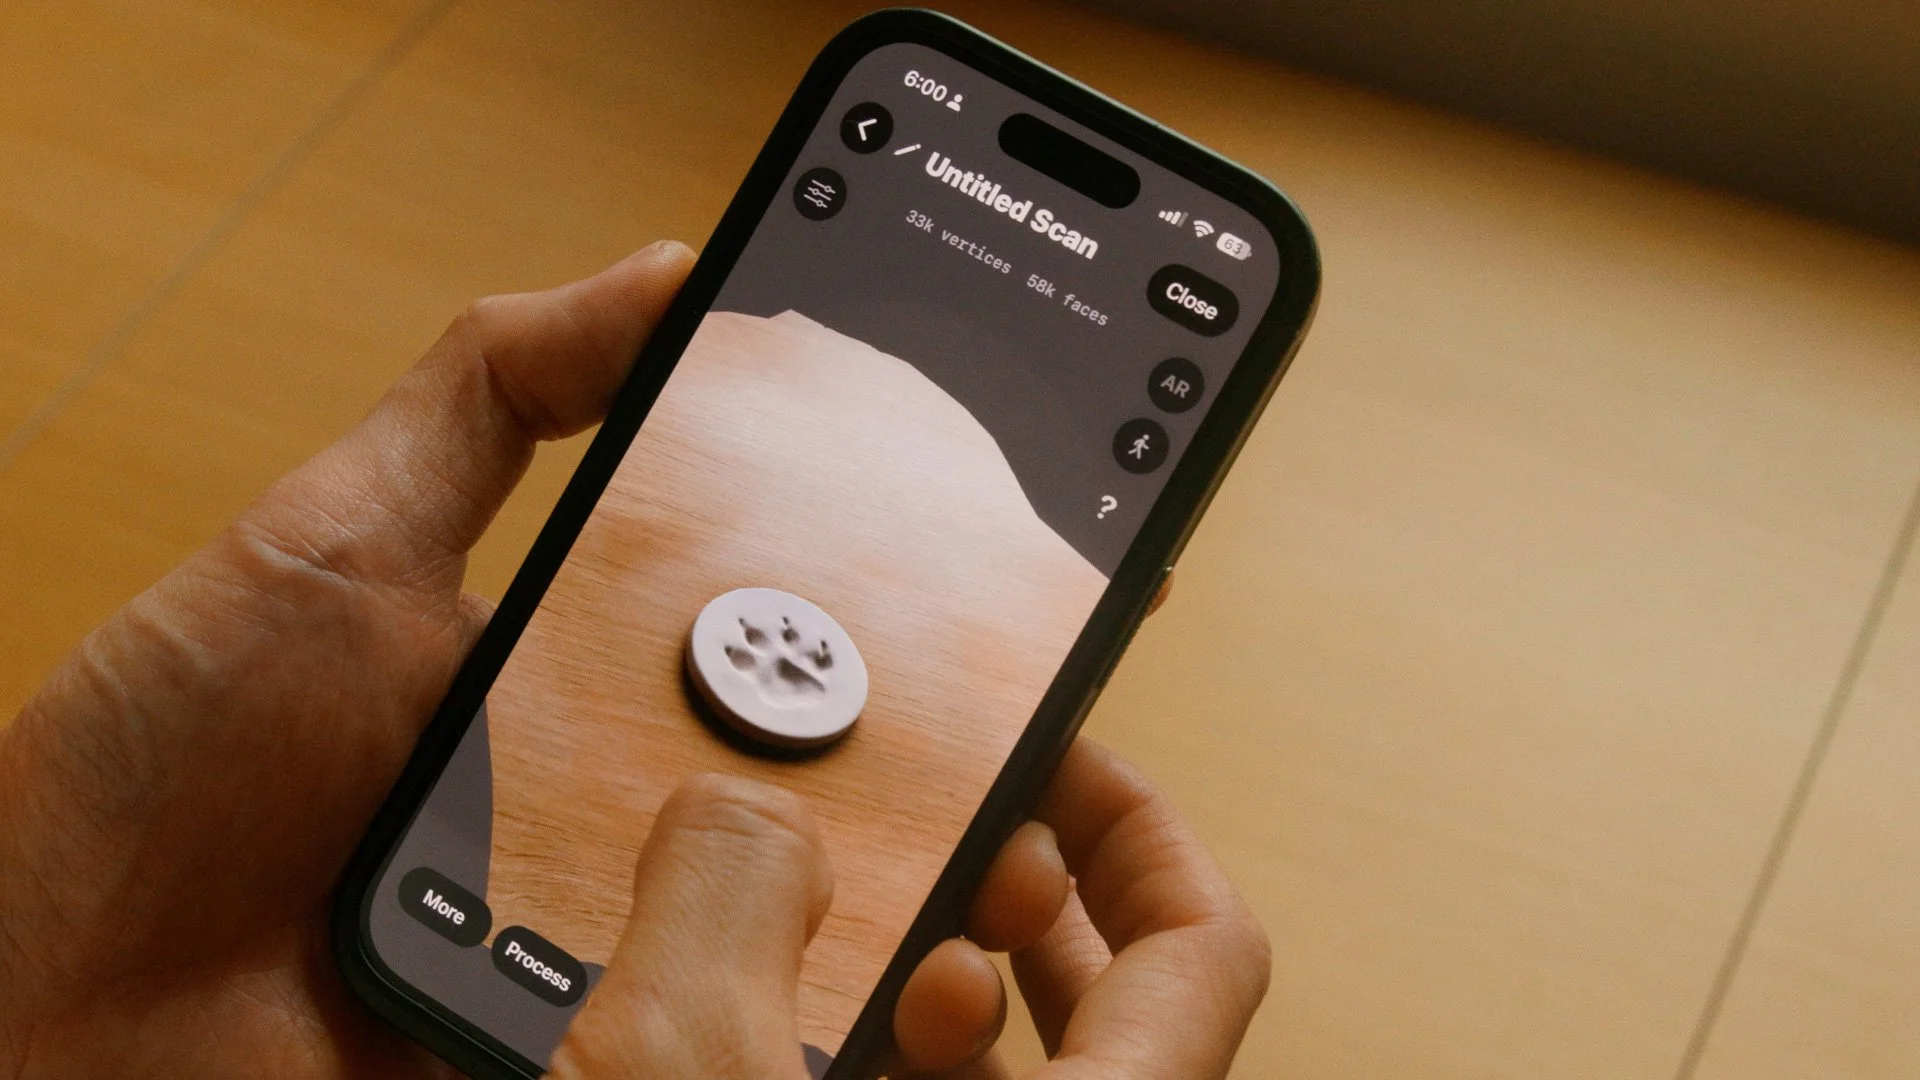
So I 3d scanned it.
The approach
I tried a few approaches, and photogrammetry gave me the best results.
Photogrammetry involves taking many (50+) overlapping photos from different angles, then letting software stitch them into a 3D model. At this scale, it meant keeping lighting consistent across a lot of shots.
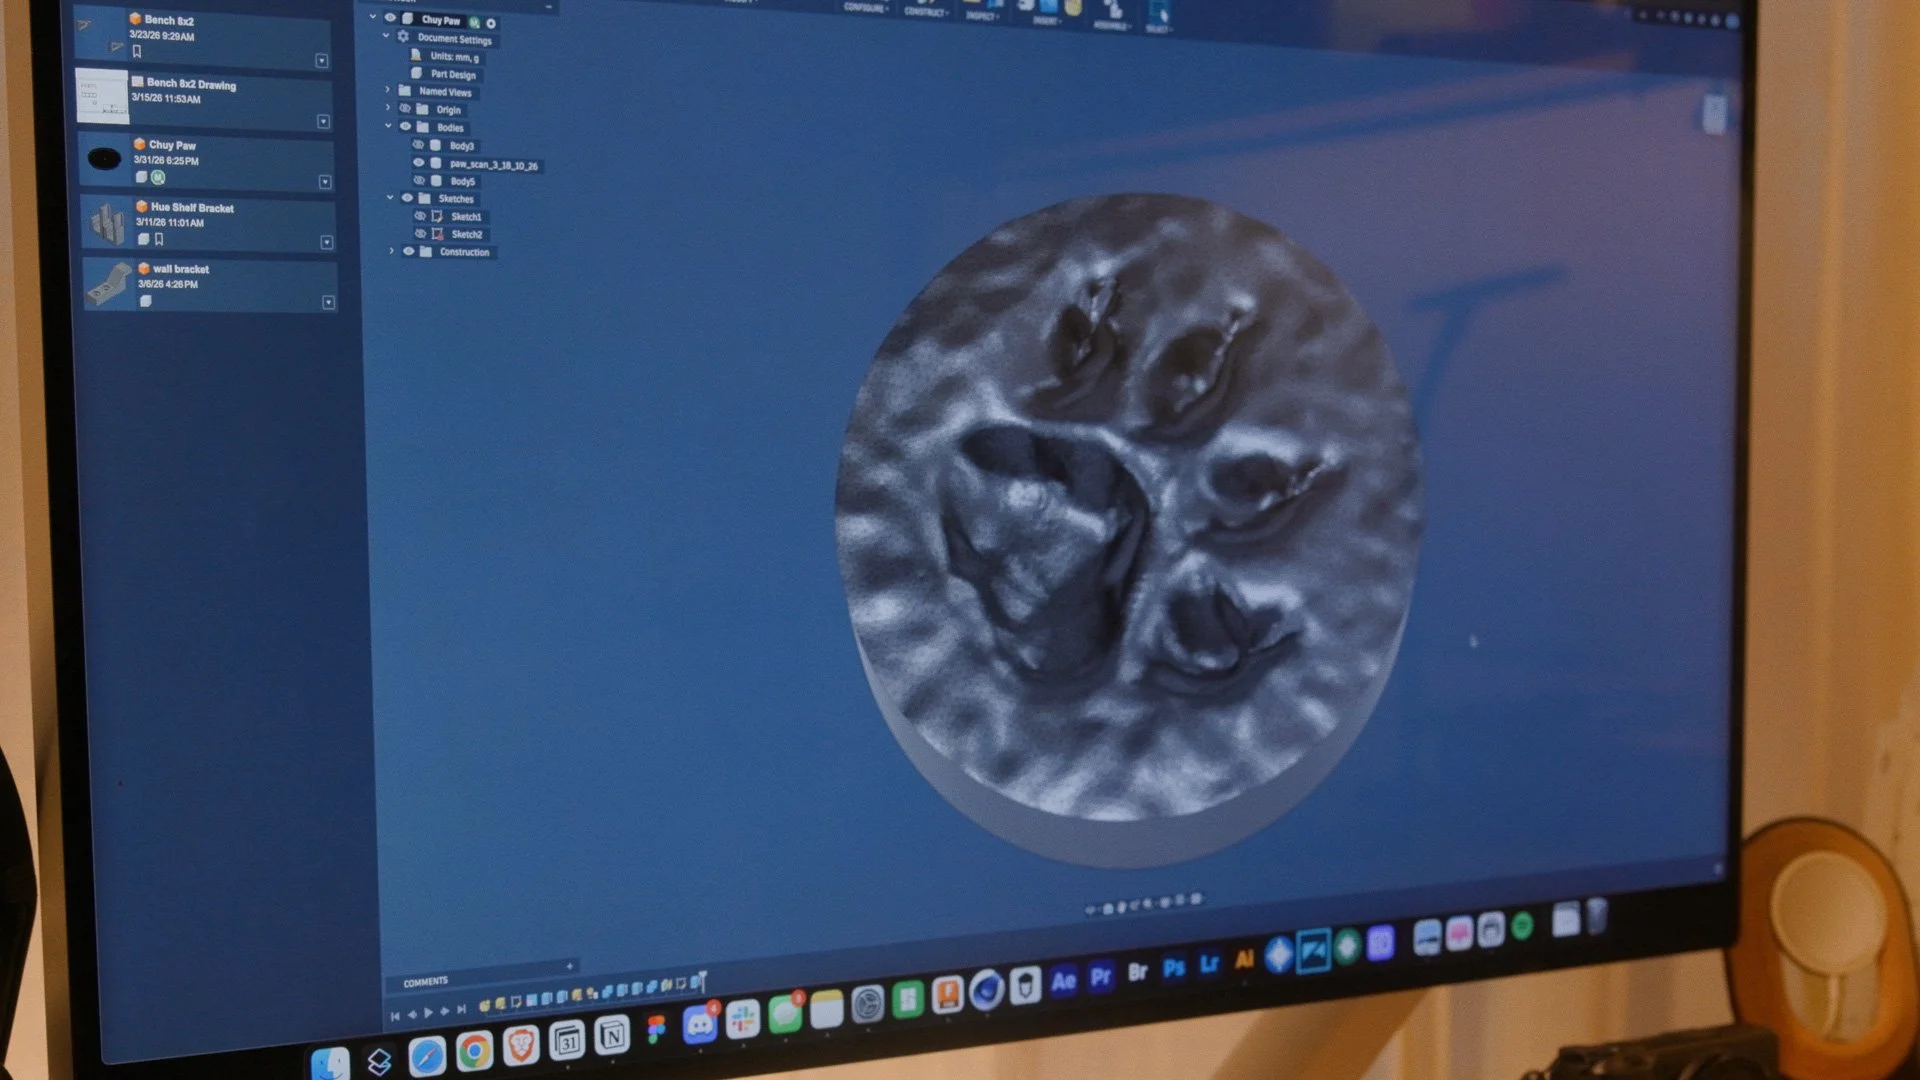
From there, I brought the model into Fusion 360, cleaned it up, and turned it into a badge I could 3D print.
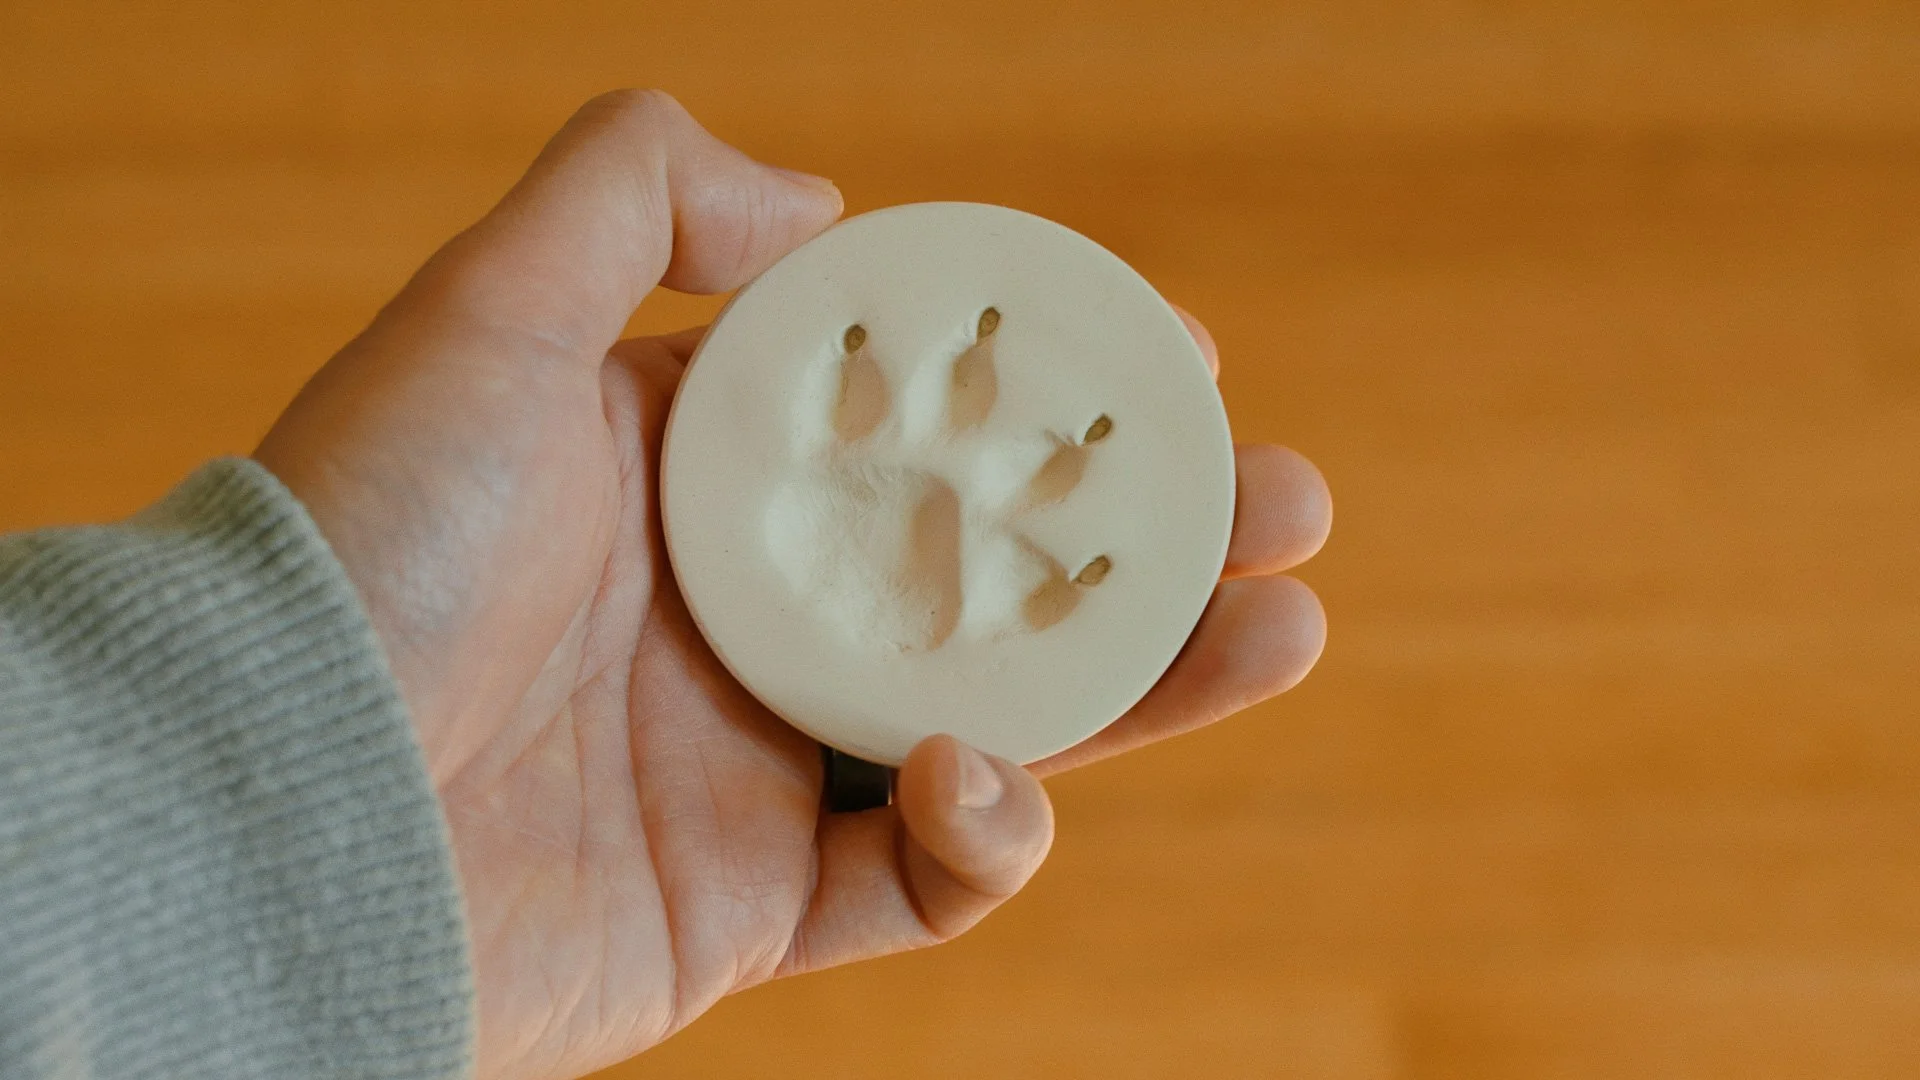
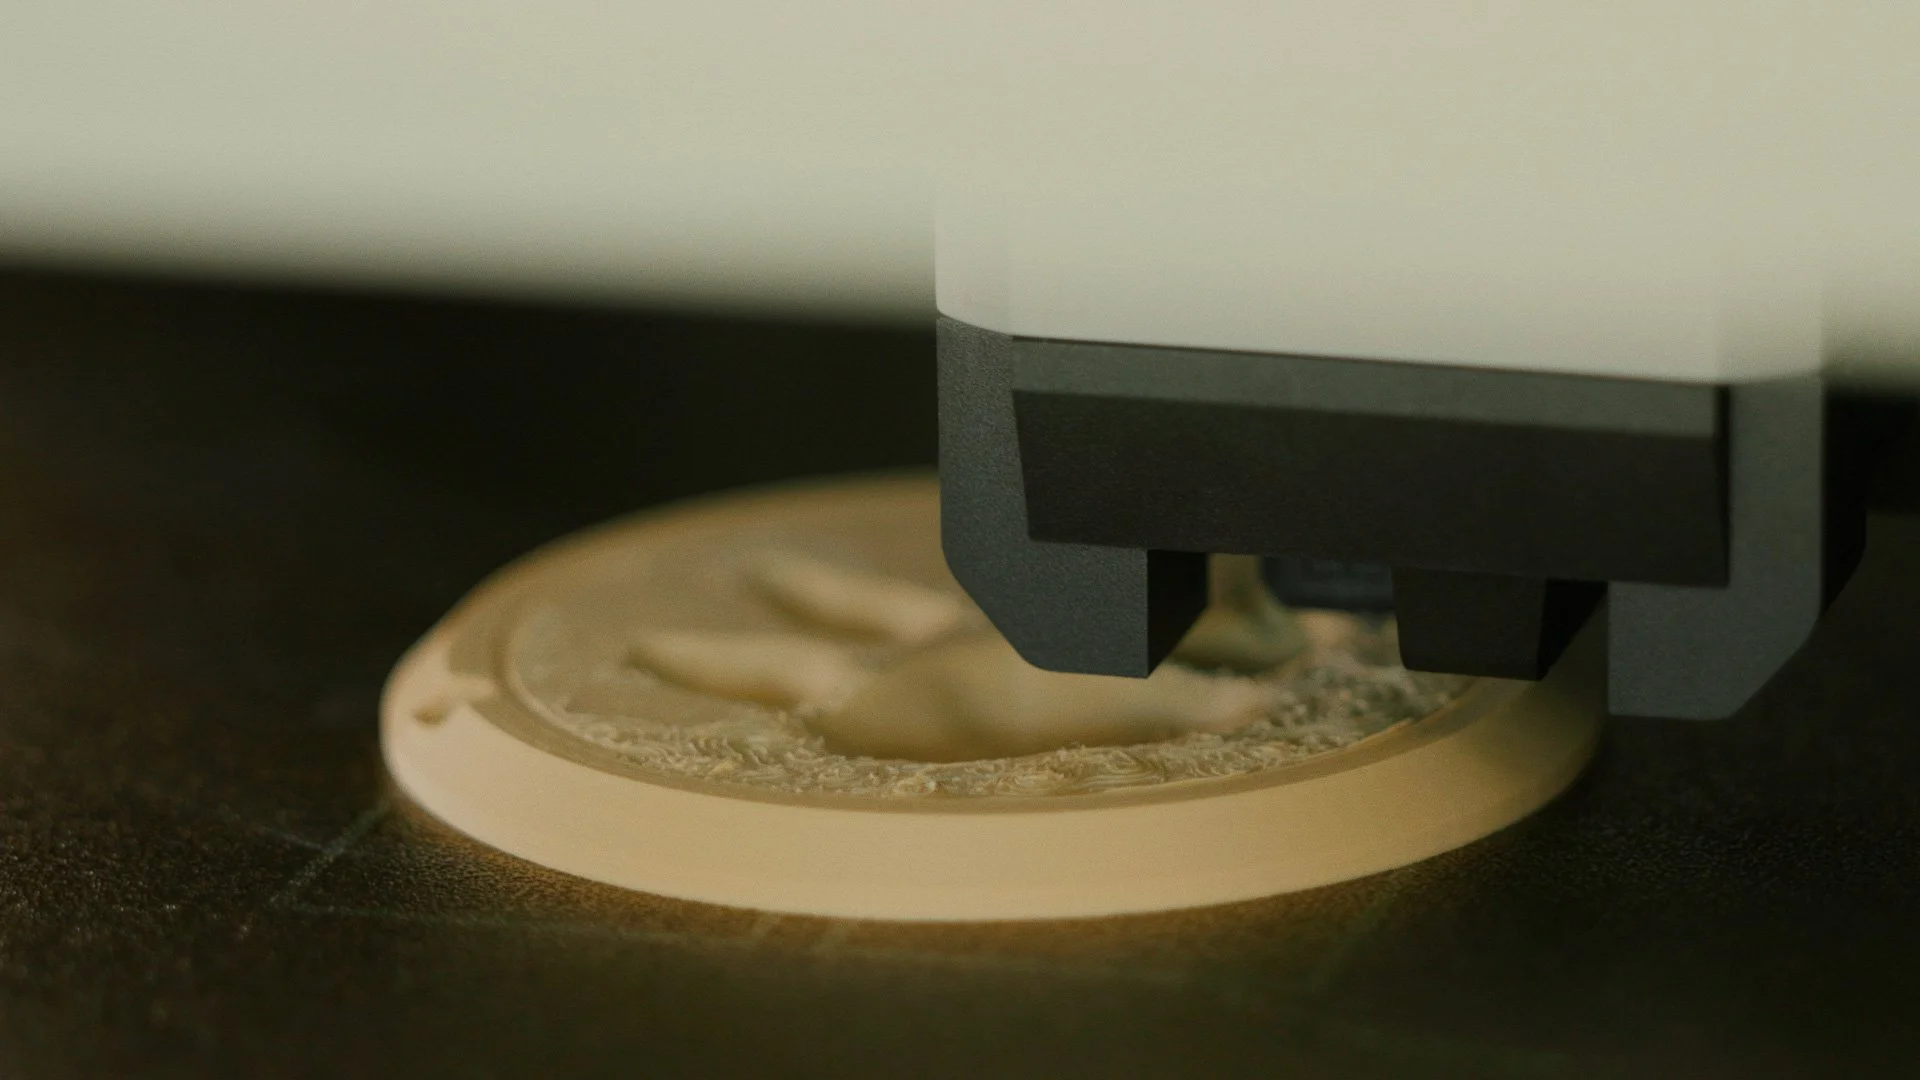
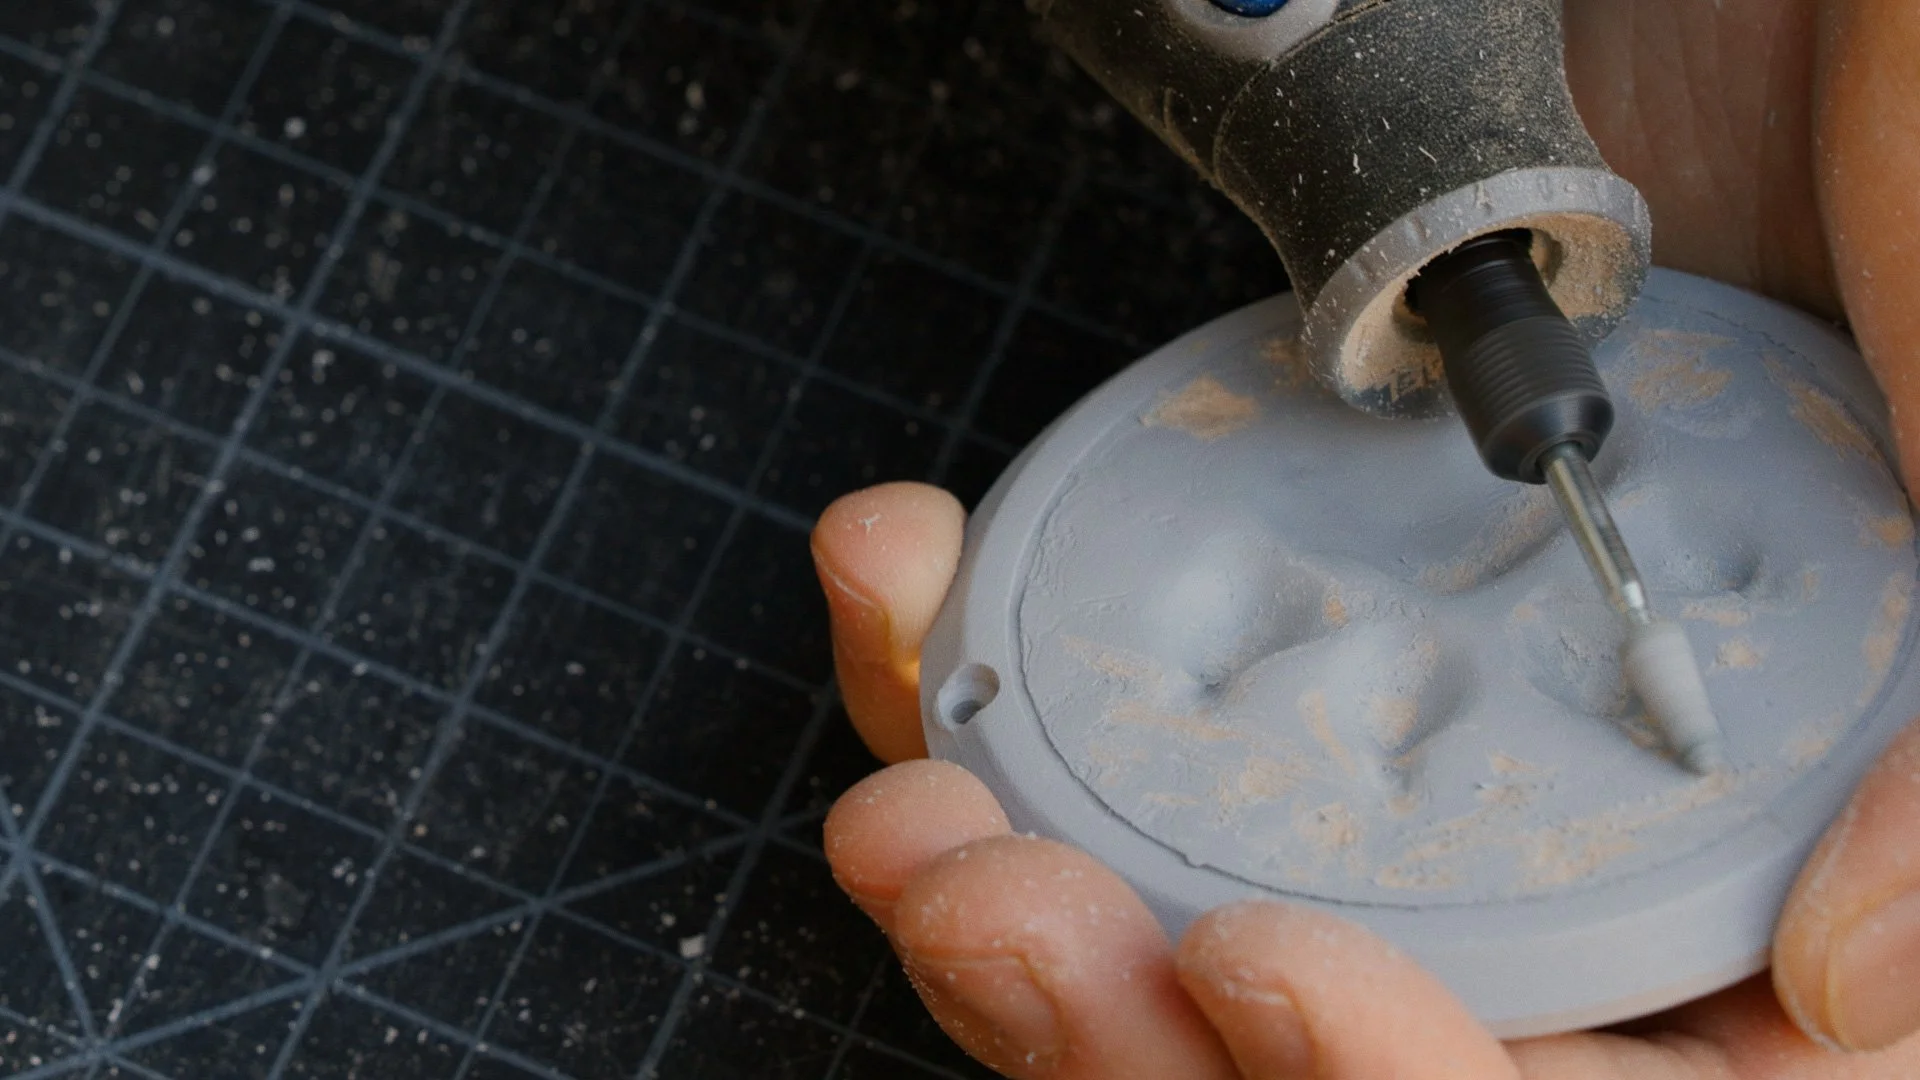
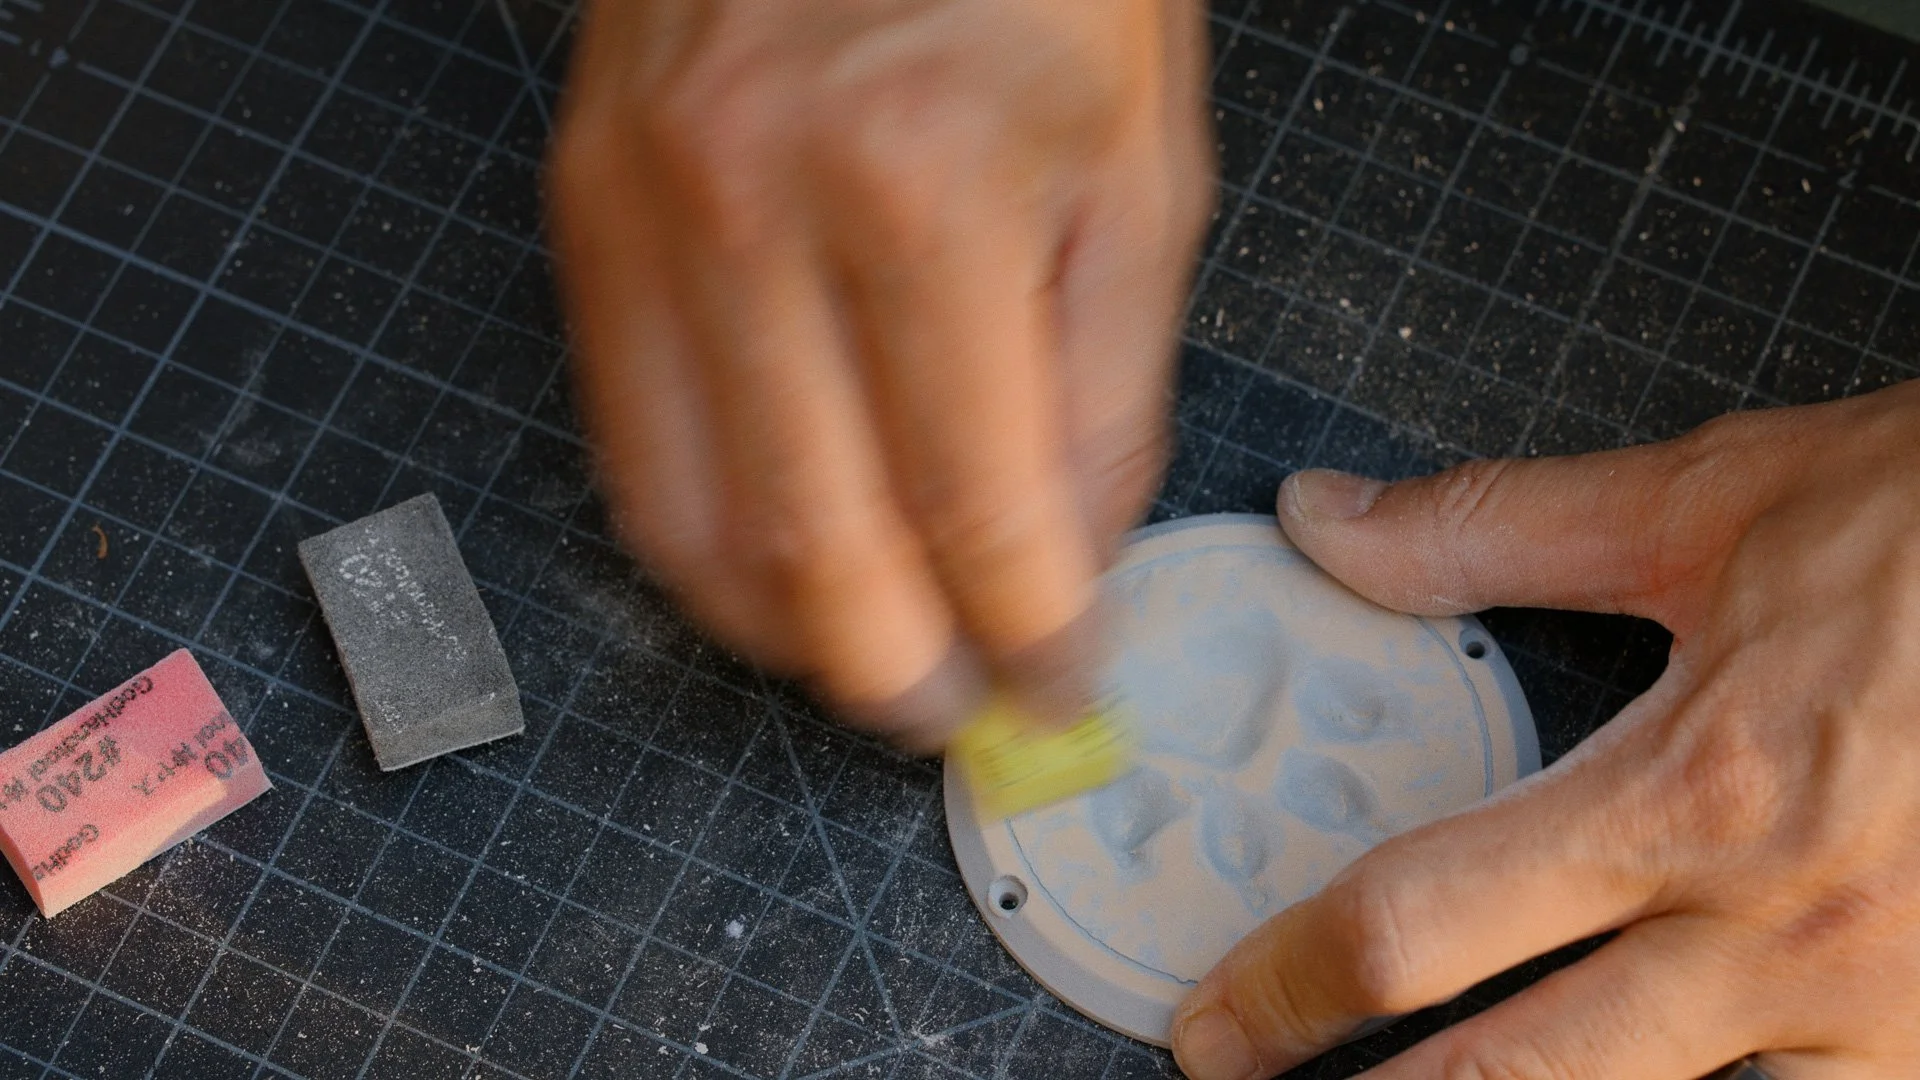
Finishing the 3D Printed Badge
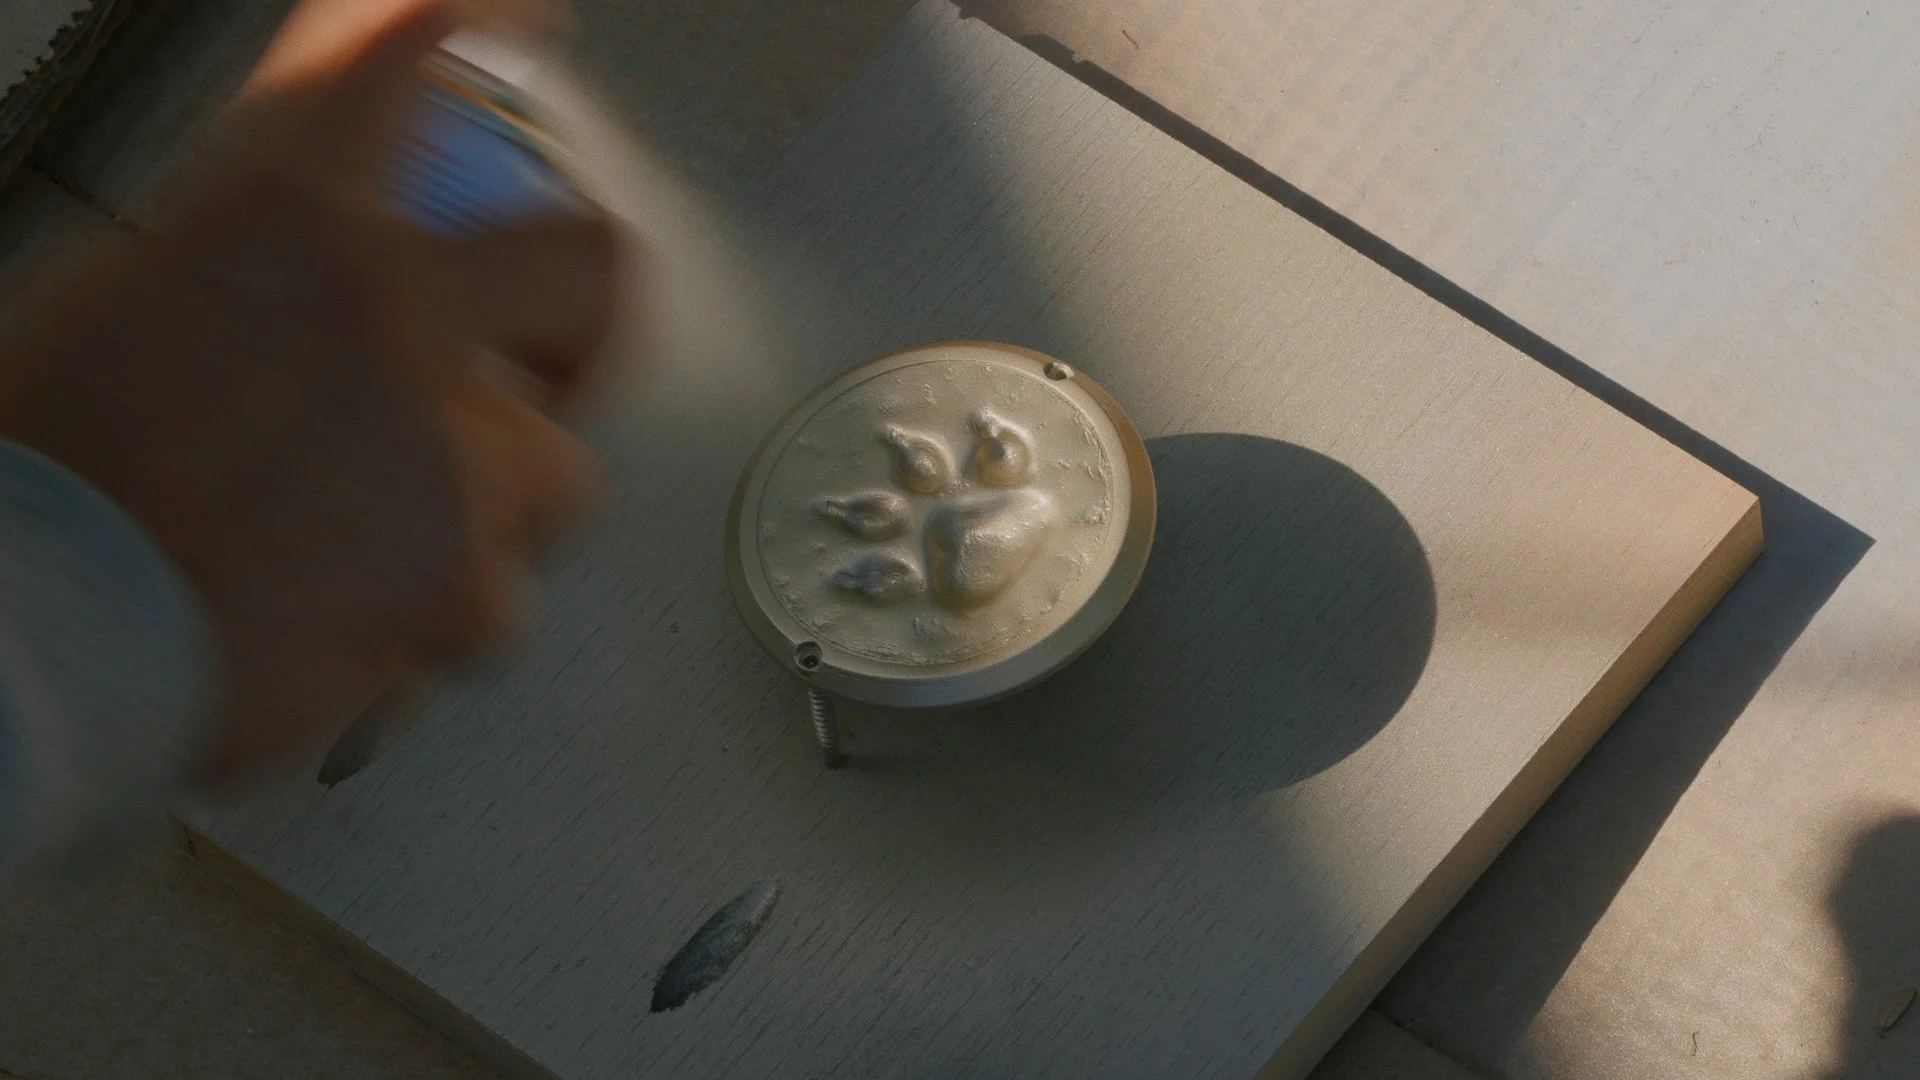
Finishing this type of 3D print (with lots of visible layer lines) takes a lot of work and patience. Print, sand, prime, sand, prime. Again and again.
The results still weren’t perfect, but nothing in life is. I finished the badge with a subtle metallic gold spray and installed it on the side of the bench. Now, every time we walk through the door, it’s there.
Products used
Bambu Lab XC1 Printer (they have new ones now)
3D scanning app (photogrammetry mode)
Fusion 360
Dremel (for cleanup)
Summary
In the end, this entryway bench became more than a storage solution. It was a full design-and-build exercise: repurposing an old worktable into clean, functional cabinetry, solving real constraints (hello, robot vacuum clearance), and finishing the corner with thoughtful lighting and styling so it feels calm every time we walk in the door.
Parting Advice
This project taught me a few things:
Measure everything twice, then measure it again.
Read the fine print before ordering anything custom.
When you mess something up, don’t spiral. Focus on the next problem in front of you.
Now that the entryway has a foundation, I’m excited to keep building on this momentum with future home projects that bring the same mix of practicality, warmth, and quiet details to the rest of the house.