Designing a DJ Desk & Updating my Office
Earlier in the year I completed updating my home office to accommodate, what I thought would be a temporary working from home situation. 6 months later, this situation has become a permanent one. So I decided to make the most of it, and do a full makeover of the back half of my office. This included building a very unique standing desk that transformed into a DJ booth.

Back of the office, before the remodel.

Back of the office, After the remodel.
Watch a video tour of the whole process.
Quick note: Some of the links provided below are affiliate links, which I receive a small commission for at no extra cost to you. Shopping through those links is the easiest way to support my content. Thank you.
Goals
Kicking off this project, my main goals in mind were to create more flat surface to work on, expand my storage, and find a nice way to display my collectibles. I also missed my standing desk at work, and wanted to make that part of the setup.

The Plan
Recently, my wife Belinda and I, built out her art studio from scratch. I really loved the idea of her long flowing desk. So I wanted to incorporate that into the design of my space, by creating a wood desk that extended onto this IKEA shelf, that I already had in the room. Since I needed extra storage, I planned to add two overhead long shelves that extended the width of the room.

How I build and design my spaces in 3d
I use Maxon Cinema 4D as my 3d software, but that’s because it’s what I know. If you want to do this yourself Sketchup is easy to learn and free. It’s also better suited for this type of work. Regardless of software, here are the main steps I take:
Measure out the room and create the floor plan in the exact measurements.
Start blocking in your pieces, one at a time. Here I started with furniture I had, then created the pieces that I needed to build.
Measure out any equipment you’ll use. I designed my DJ table specifically for the dimensions of my turntables and mixer, leaving extra room for future devices (and potential mistakes).
Figure out how many sheets of wood I need to buy. I do this by laying out all of my pieces, on top of the factory sizes that wood comes in. For plywood it’s usually 4’x8’. For solid wood, you can call your lumber yard. Make sure you leave gaps around your cuts, if you plan to do clean cuts at home. Alternatively, most lumber yards can do the cuts for you (just don’t make it too complicated for them).
Prep & Paint
I began by prepping the work area. Taking down artwork, shelves, and finding a new home for my plywood cabinet. I patched up all the holes in the wall and put on a fresh coat of paint.


Building the shelves

The first part of the build were the long shelves I wanted to install on my walls. I took a trip to Home Depot and bought two 9ft x 1ft, solid Red Oak boards.
Belinda sanded these boards down with 220 grit sandpaper, and I coated them with my favorite oil-wax finish, Osmo Polyx-Oil.


To mount these shelves on the wall, I used heavy duty steel brackets, which I screwed into my studs with the cabinet screws. These support a lot of weight, in case I choose to load these with heavy items in the future.

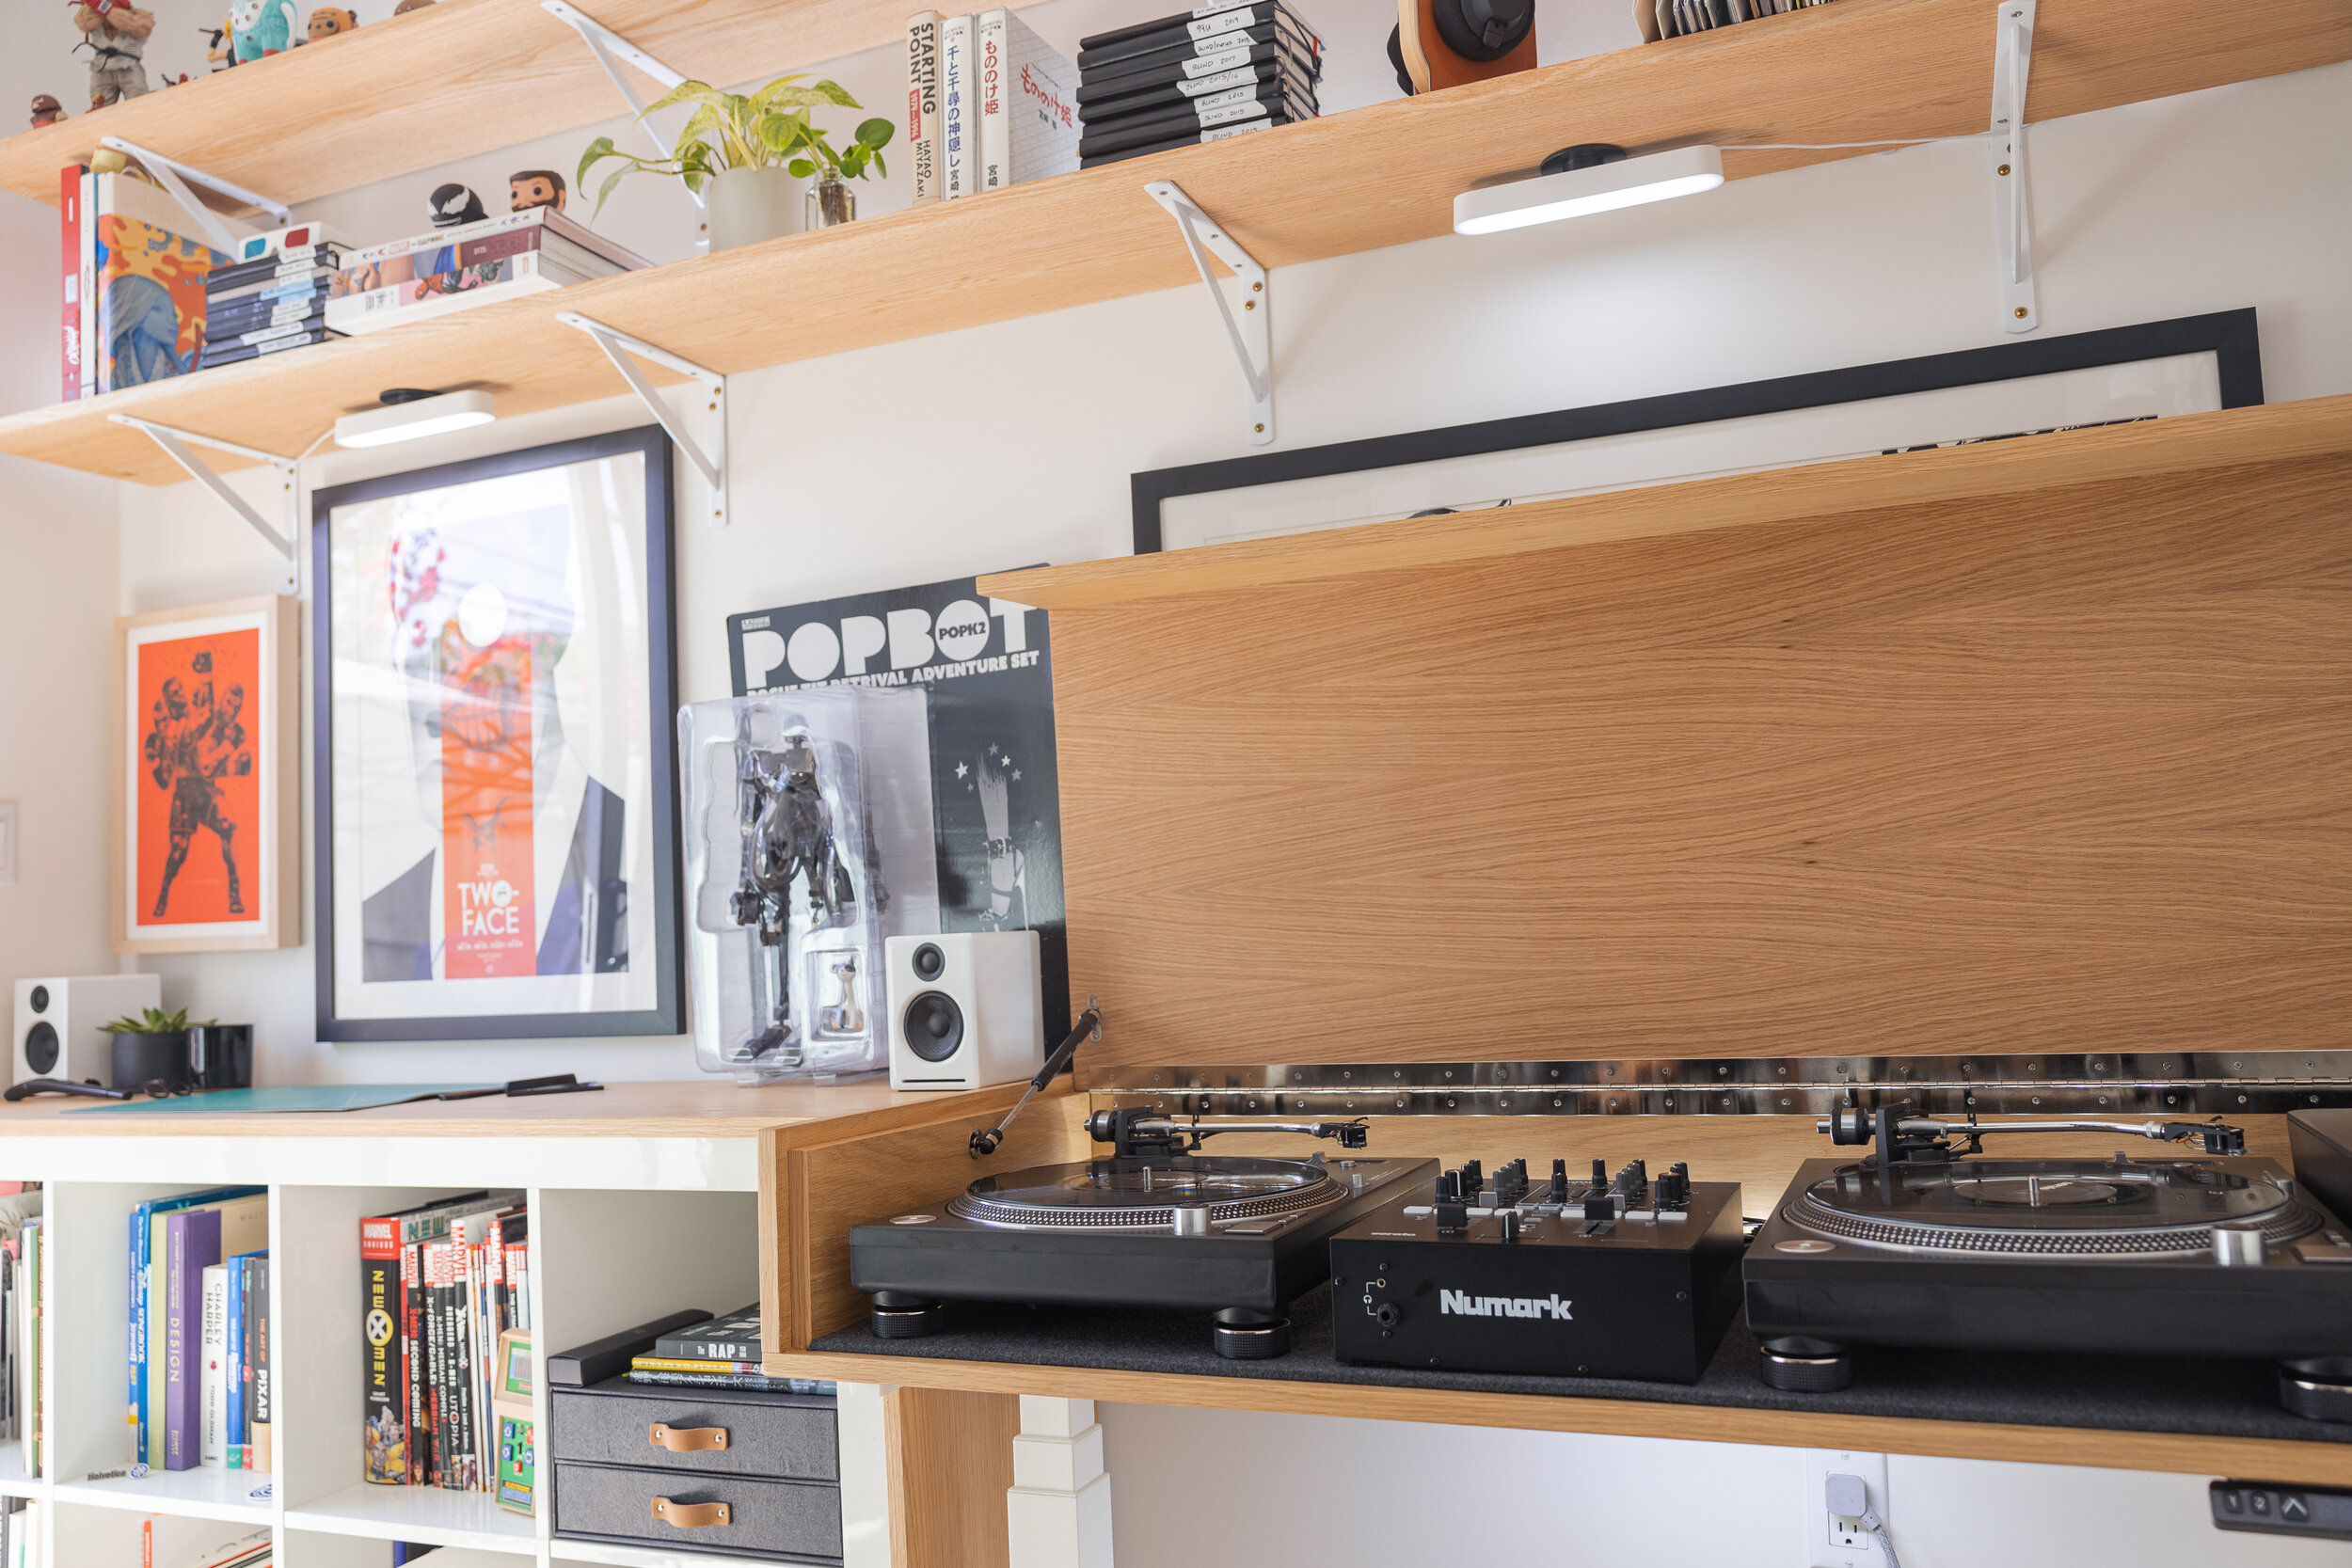
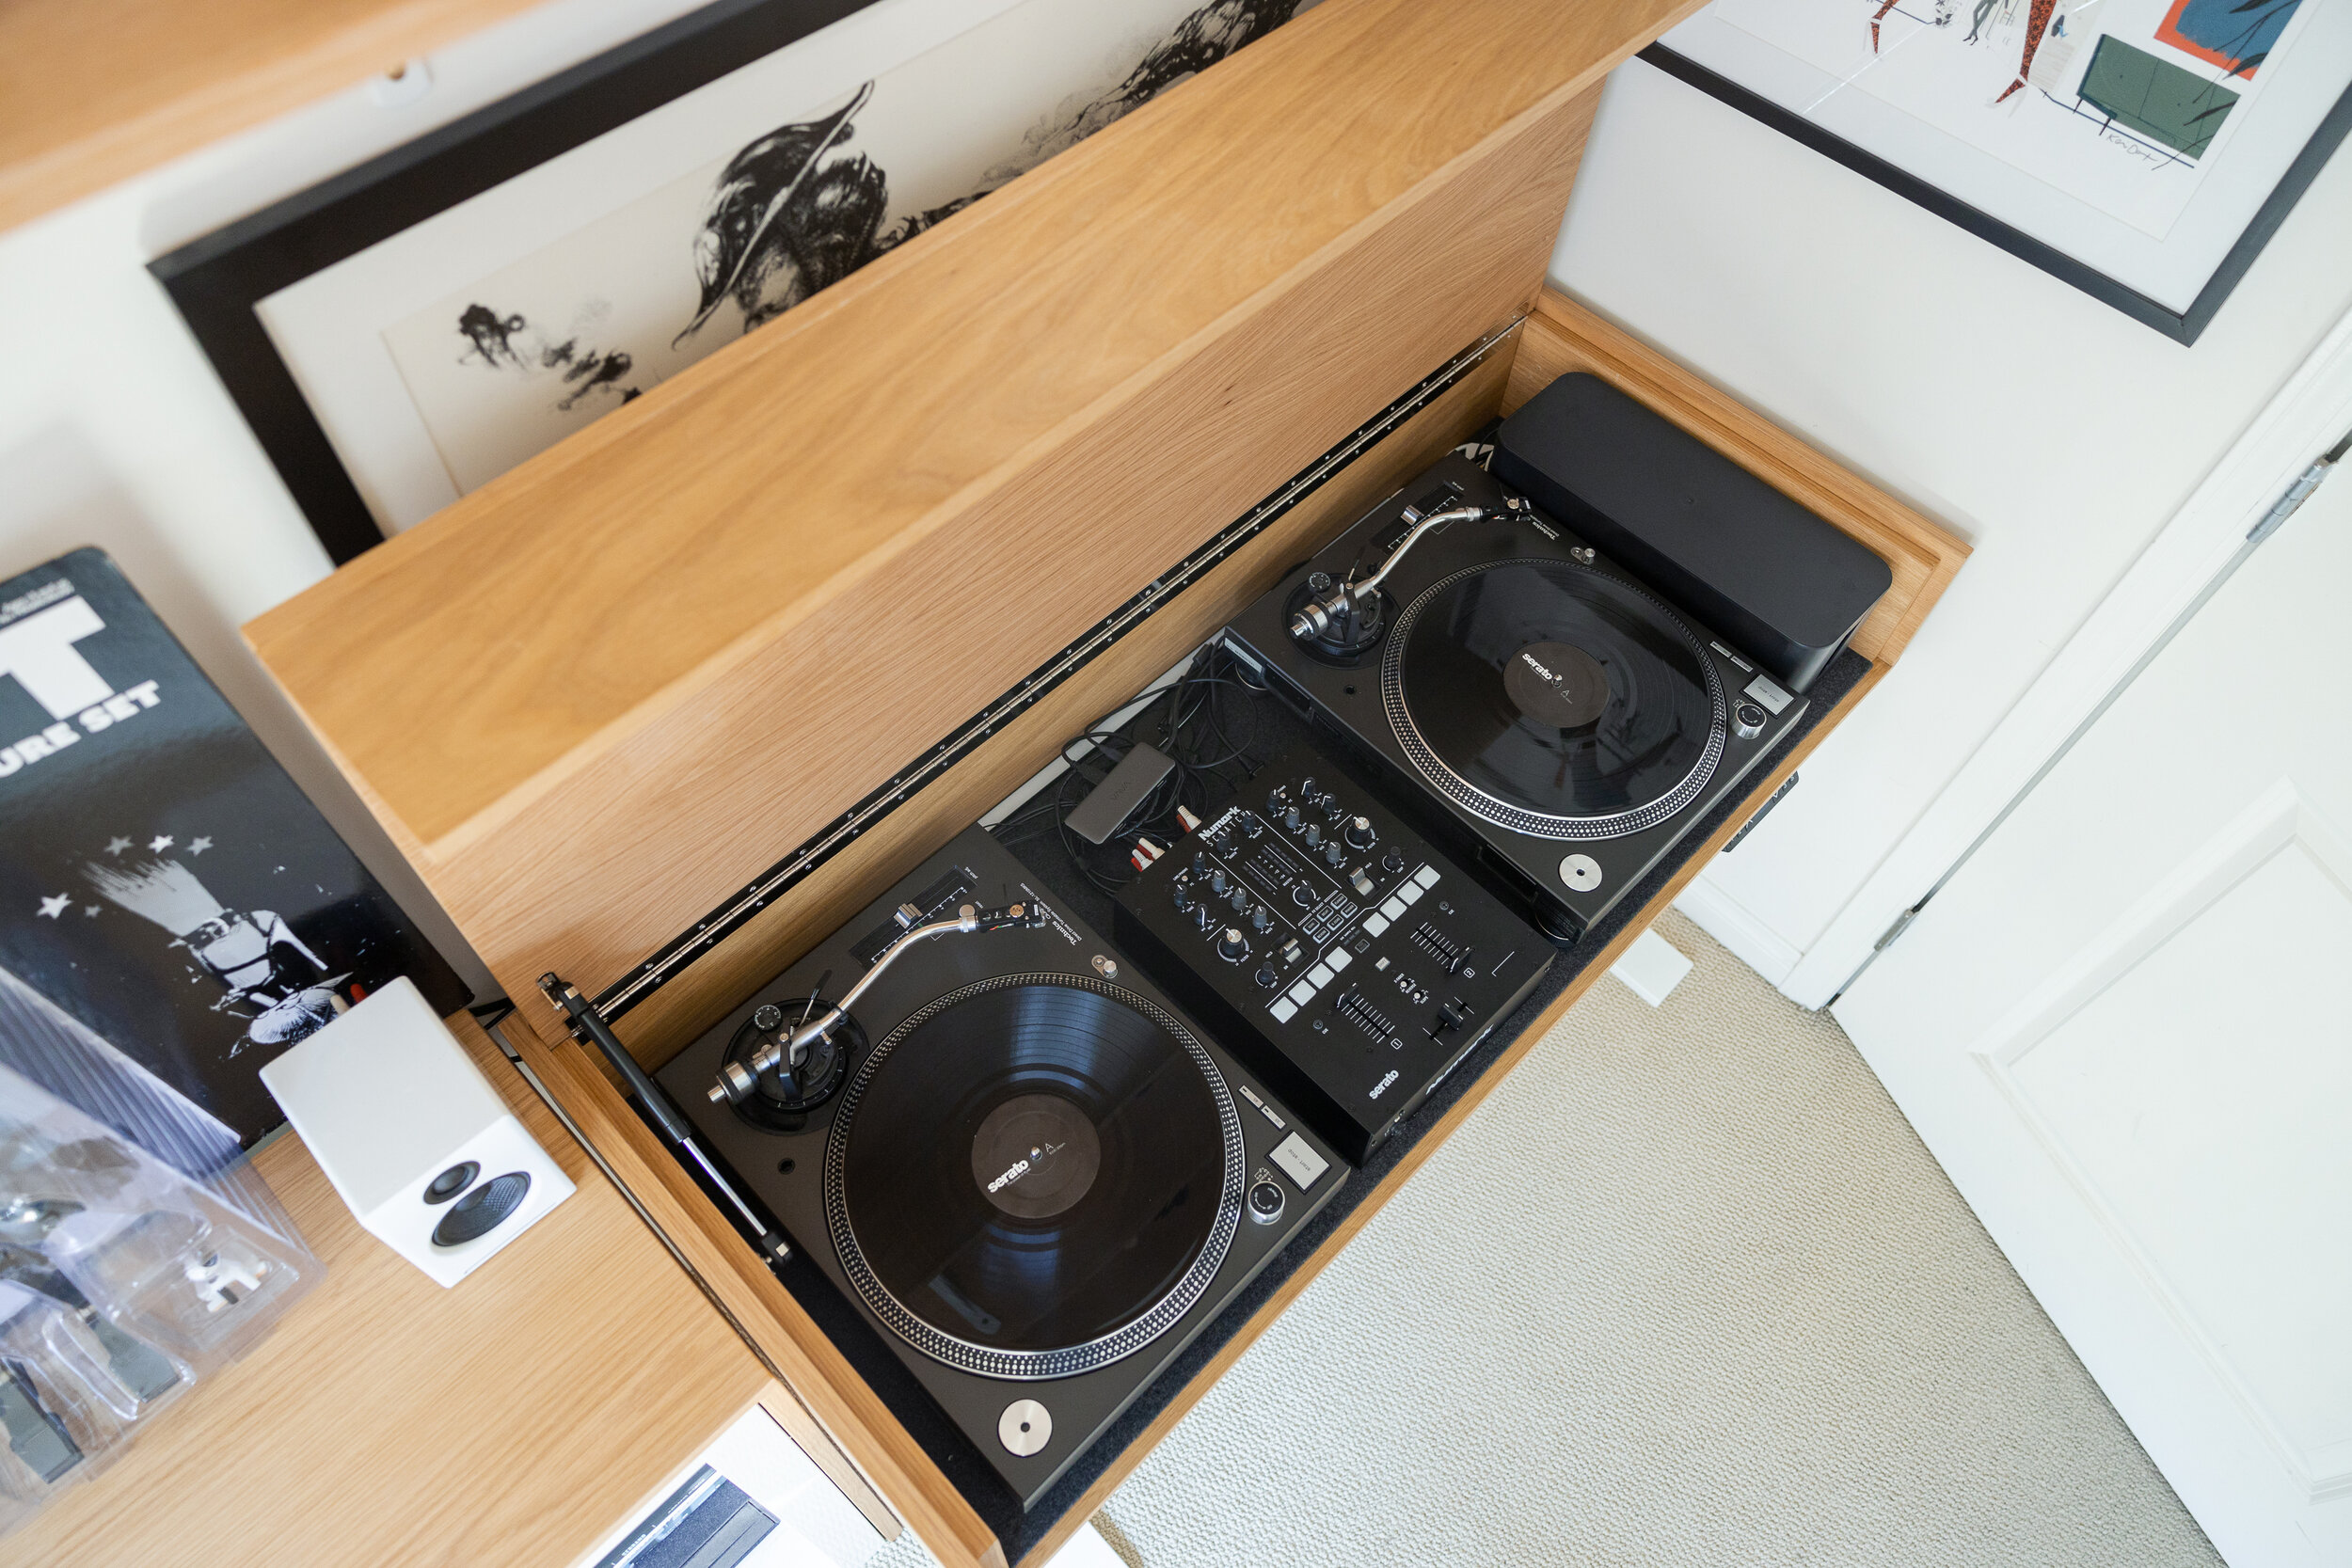
Creating the DJ Desk
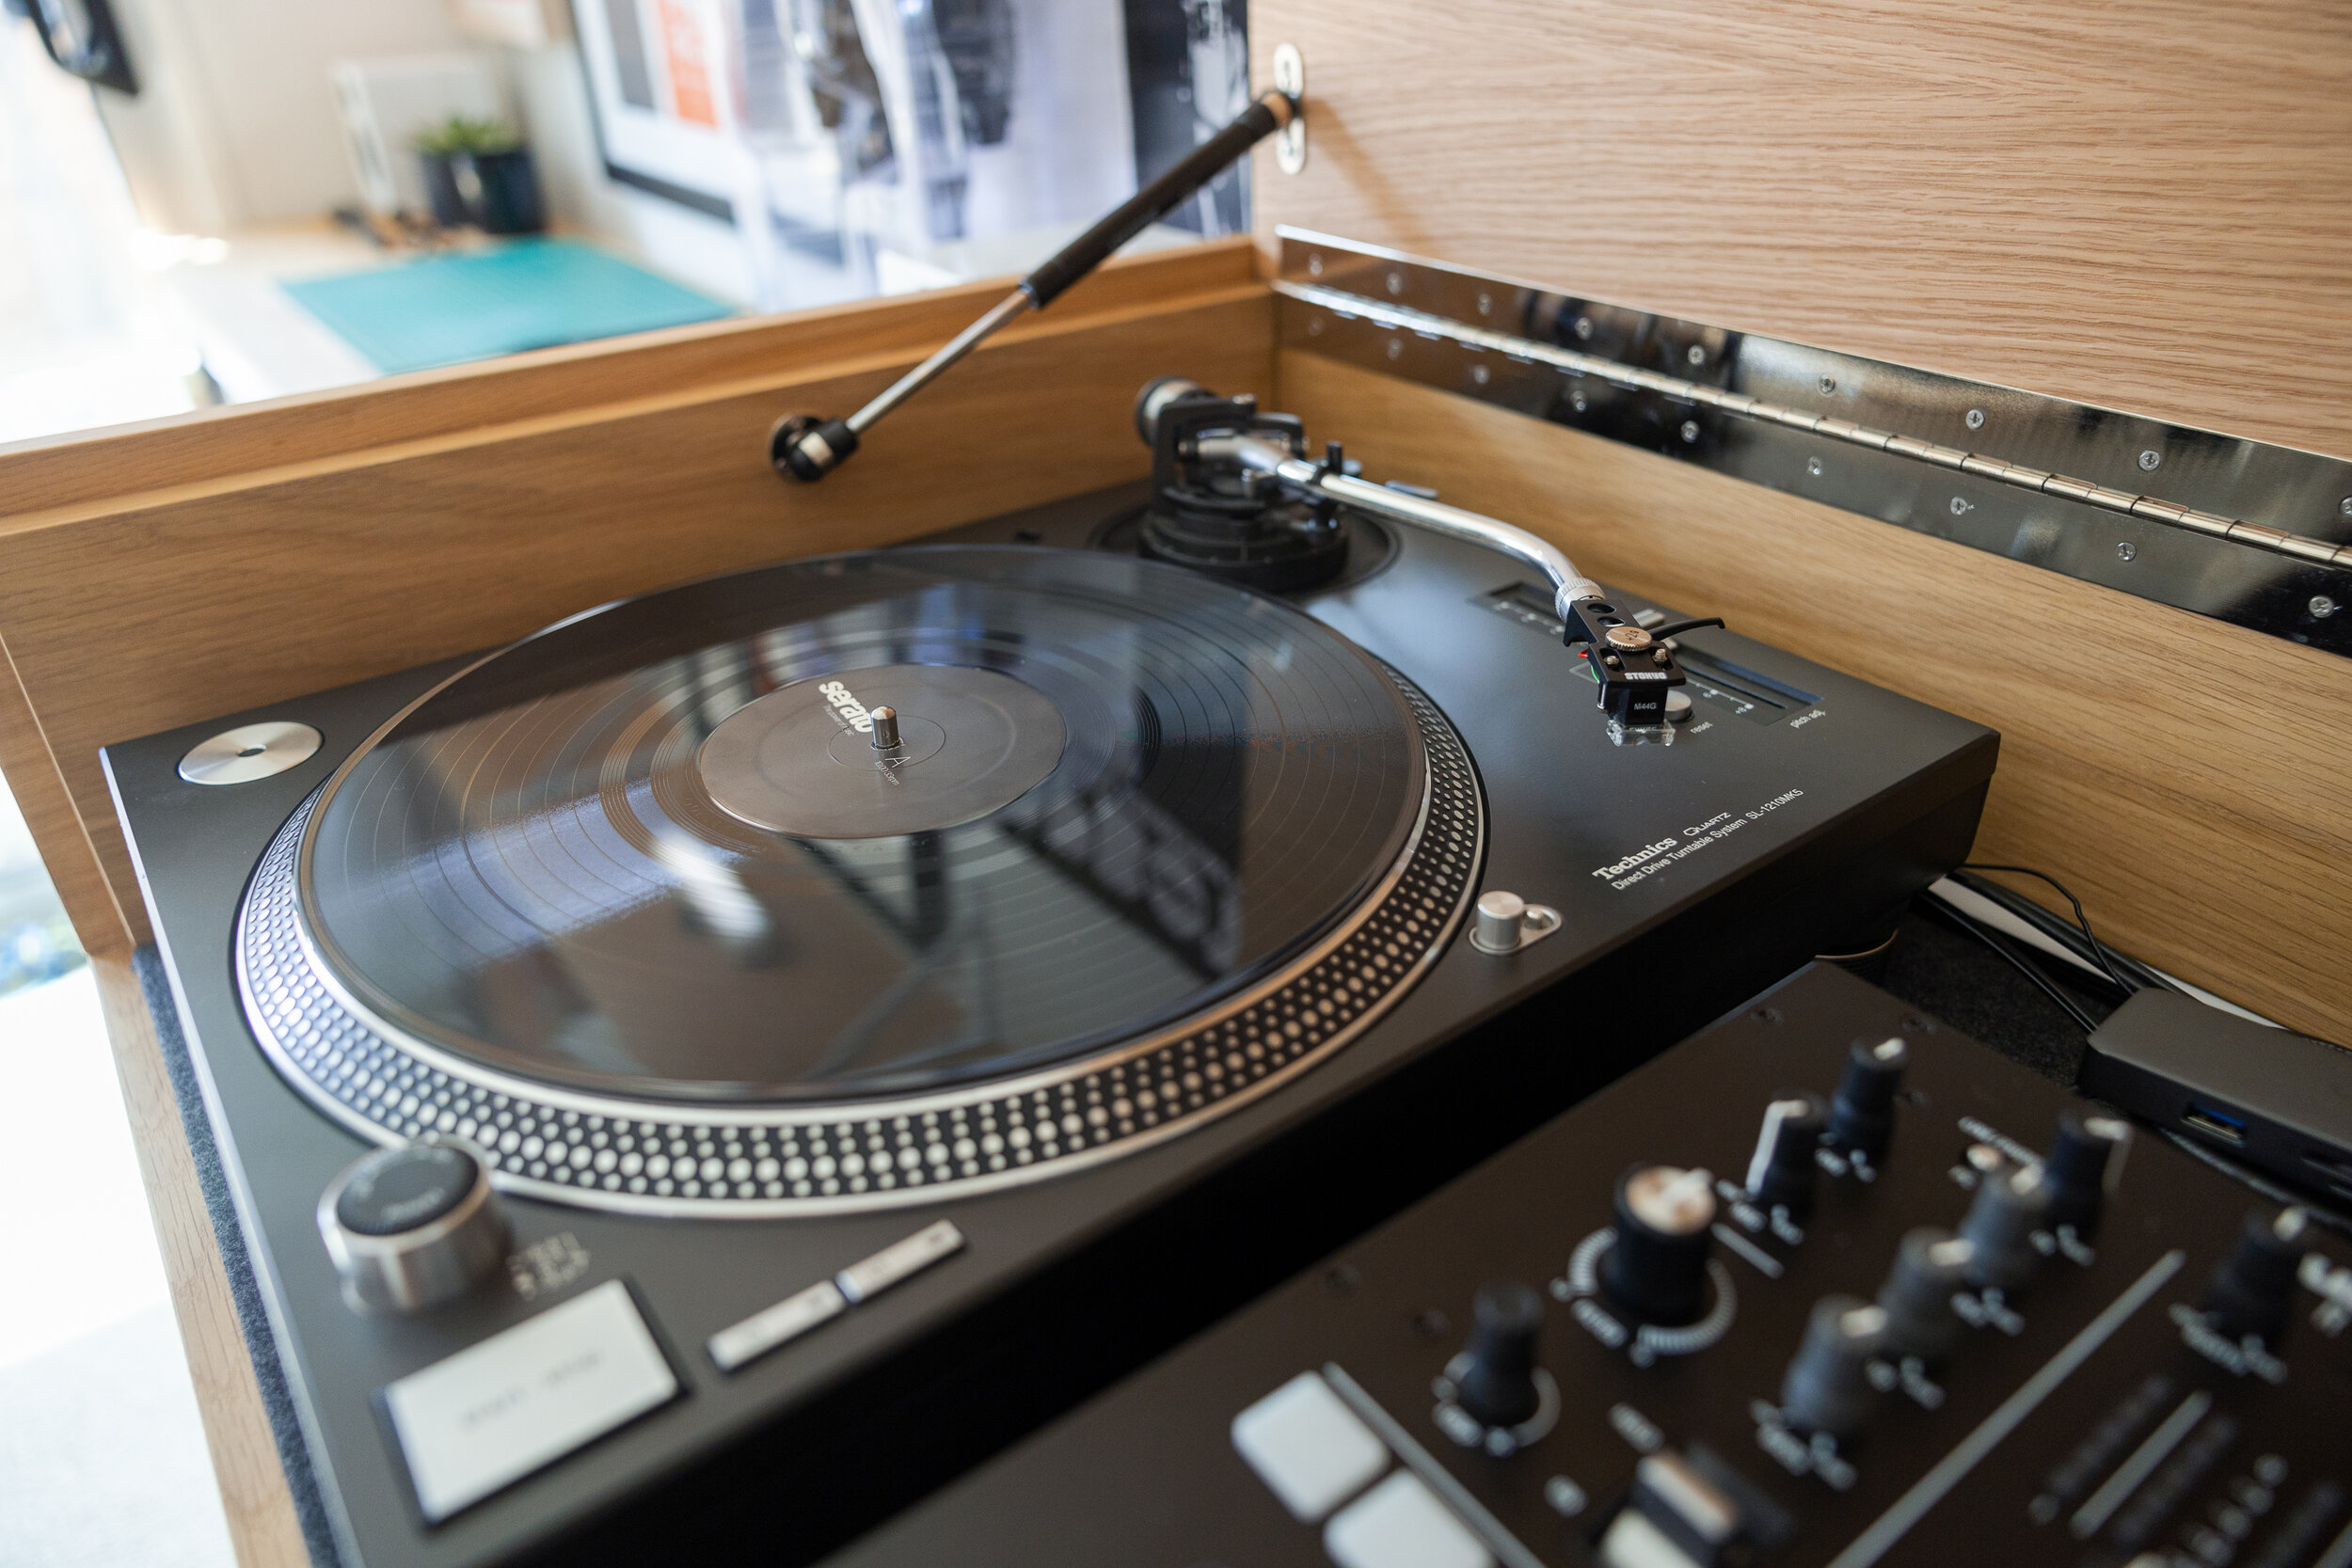
One of the things I brought home from work was my DJ gear, which I stored at the office for whenever we had parties. DJing is a fun therapeutic hobby of mine which I started back in 1999. And I wanted to incorporate it as a fun aspect to my office. So I designed something that would work as a variable standing desk, and double up as a DJ booth to hold my turntables and mixer.
The top half of the desk was basically a box (51”W x 22”D x 7”H) that was big enough for my DJ gear. I designed it so the top would work as a lid, that I could add a hinge to, and lift when I wanted to access it.
Tools, Supplies, Equipment
Hinge & Cover
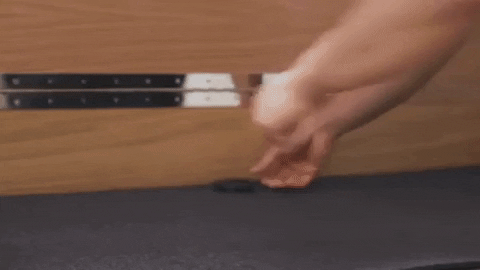
With the general structure build, I moved onto installing a 48” continuous piano hinge. To hold the heavy (20 lbs) lid up, I installed a single gas strut lid support. This held up the lid in the open position.


Legs
I bought Direction height adjustable motorized legs that fit my build perfectly. Because this desk was more narrow than a usual desk (51”W x 22”D x 7”H) , I had to get legs that could support this smaller size and weight.

Felt Lining
I loaded in all of my DJ gear into the desk, but I wasn't satisfied with the aesthetic of the design. Something was missing. Then I came up with this idea to include some kind of lining inside the desk. Belinda and I went to a few fabric stores to look at options, and eventually ended up going with the grey wool felt, that matched my Grovemade desk pad, on the other side of my office.

Heres the process we took to install the felt lining inside the desk:
Cut down to size (20”x48”), a piece of thin 1/4” plywood we had lying around. We also used a drill bit to cut a grommet hole into it. Then sanded it down smooth.
Went to the fabric store to buy the right material. We ended finding many great options at Moods Fabric. We picked up a dark grey wool felt, and an adhesive bonding web.
Trim down the adhesive and fabric with 1”+ excess to wrap around the top side of the 1/4” plywood we cut down.
Put the adhesive between the plywood and fabric, then use a hot iron with a lot of steam, to fuse them together. The heat and moisture activates the adhesive and fuses everything together. Be careful that your iron doesn’t touch the adhesive directly, or it will melt on your iron.
Fit it inside the desk (I didn’t do anything to attach to the desk, in case I wanted to change it later). Then I added a circular grommet, to run all of my cables through to keep it clean, for when I installed my DJ gear.
This was the very first time doing this (and I’m sure there are better ways to do it), but this was a solution we found during our process.

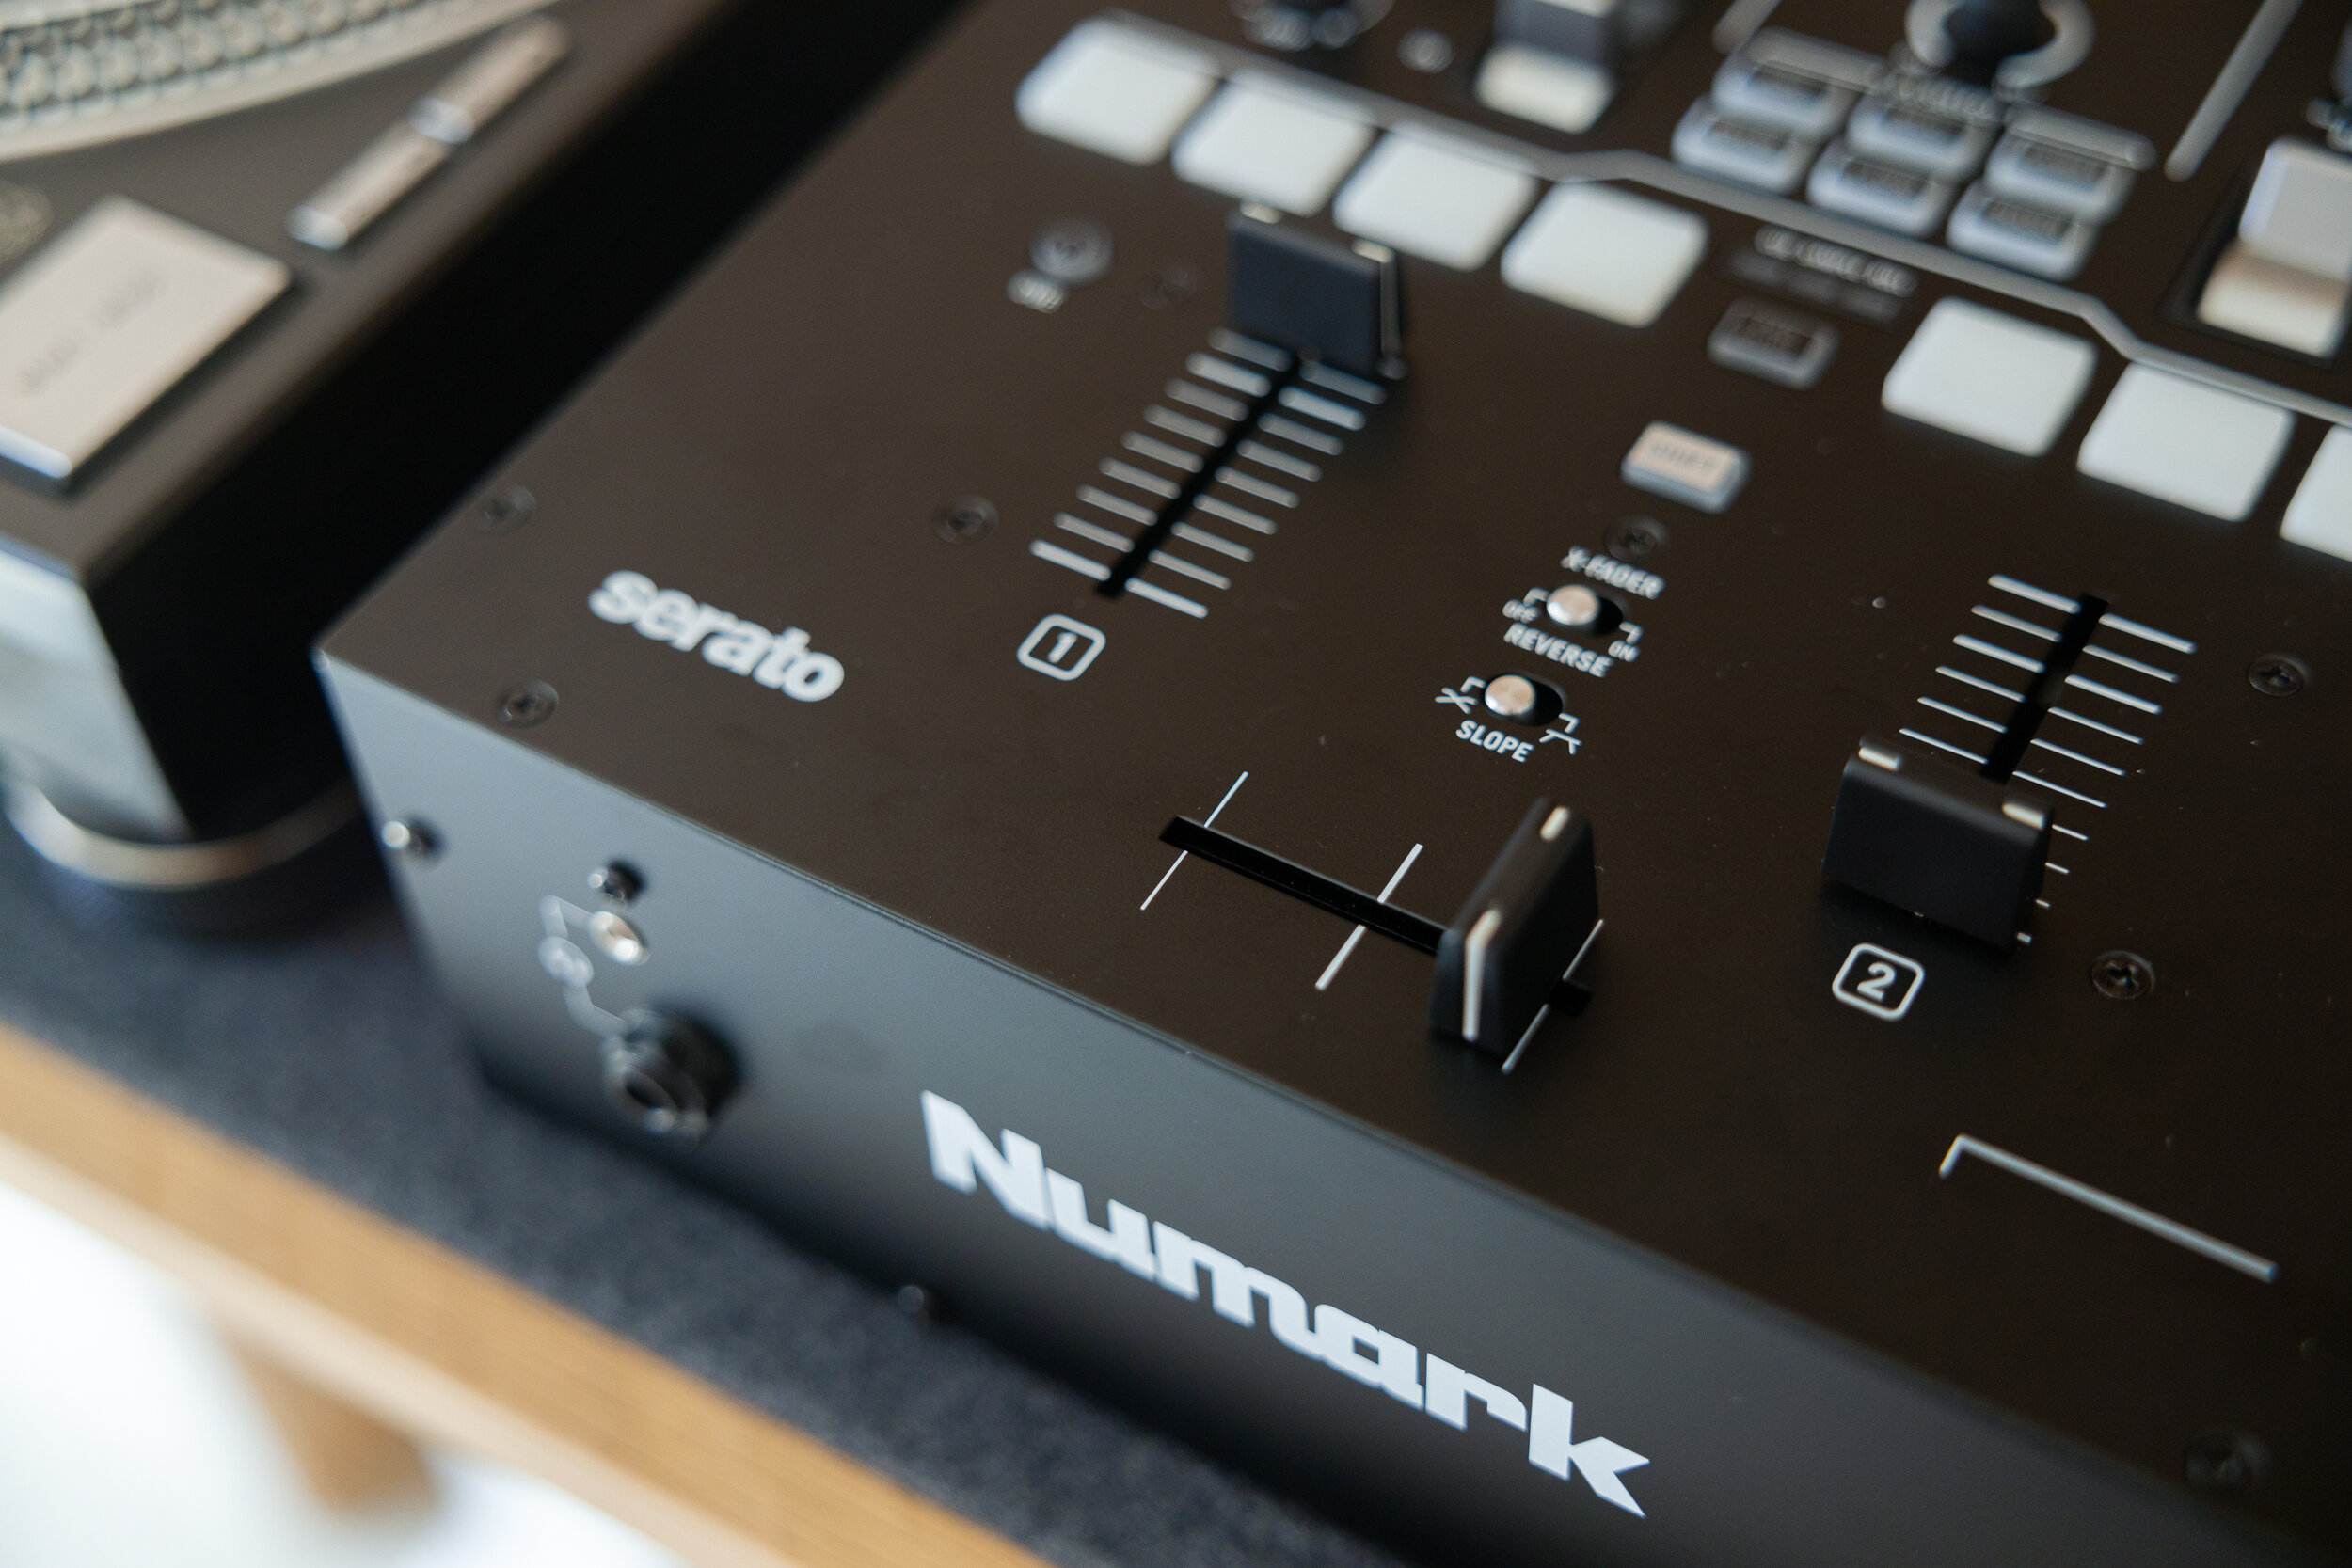
DJ Equipment
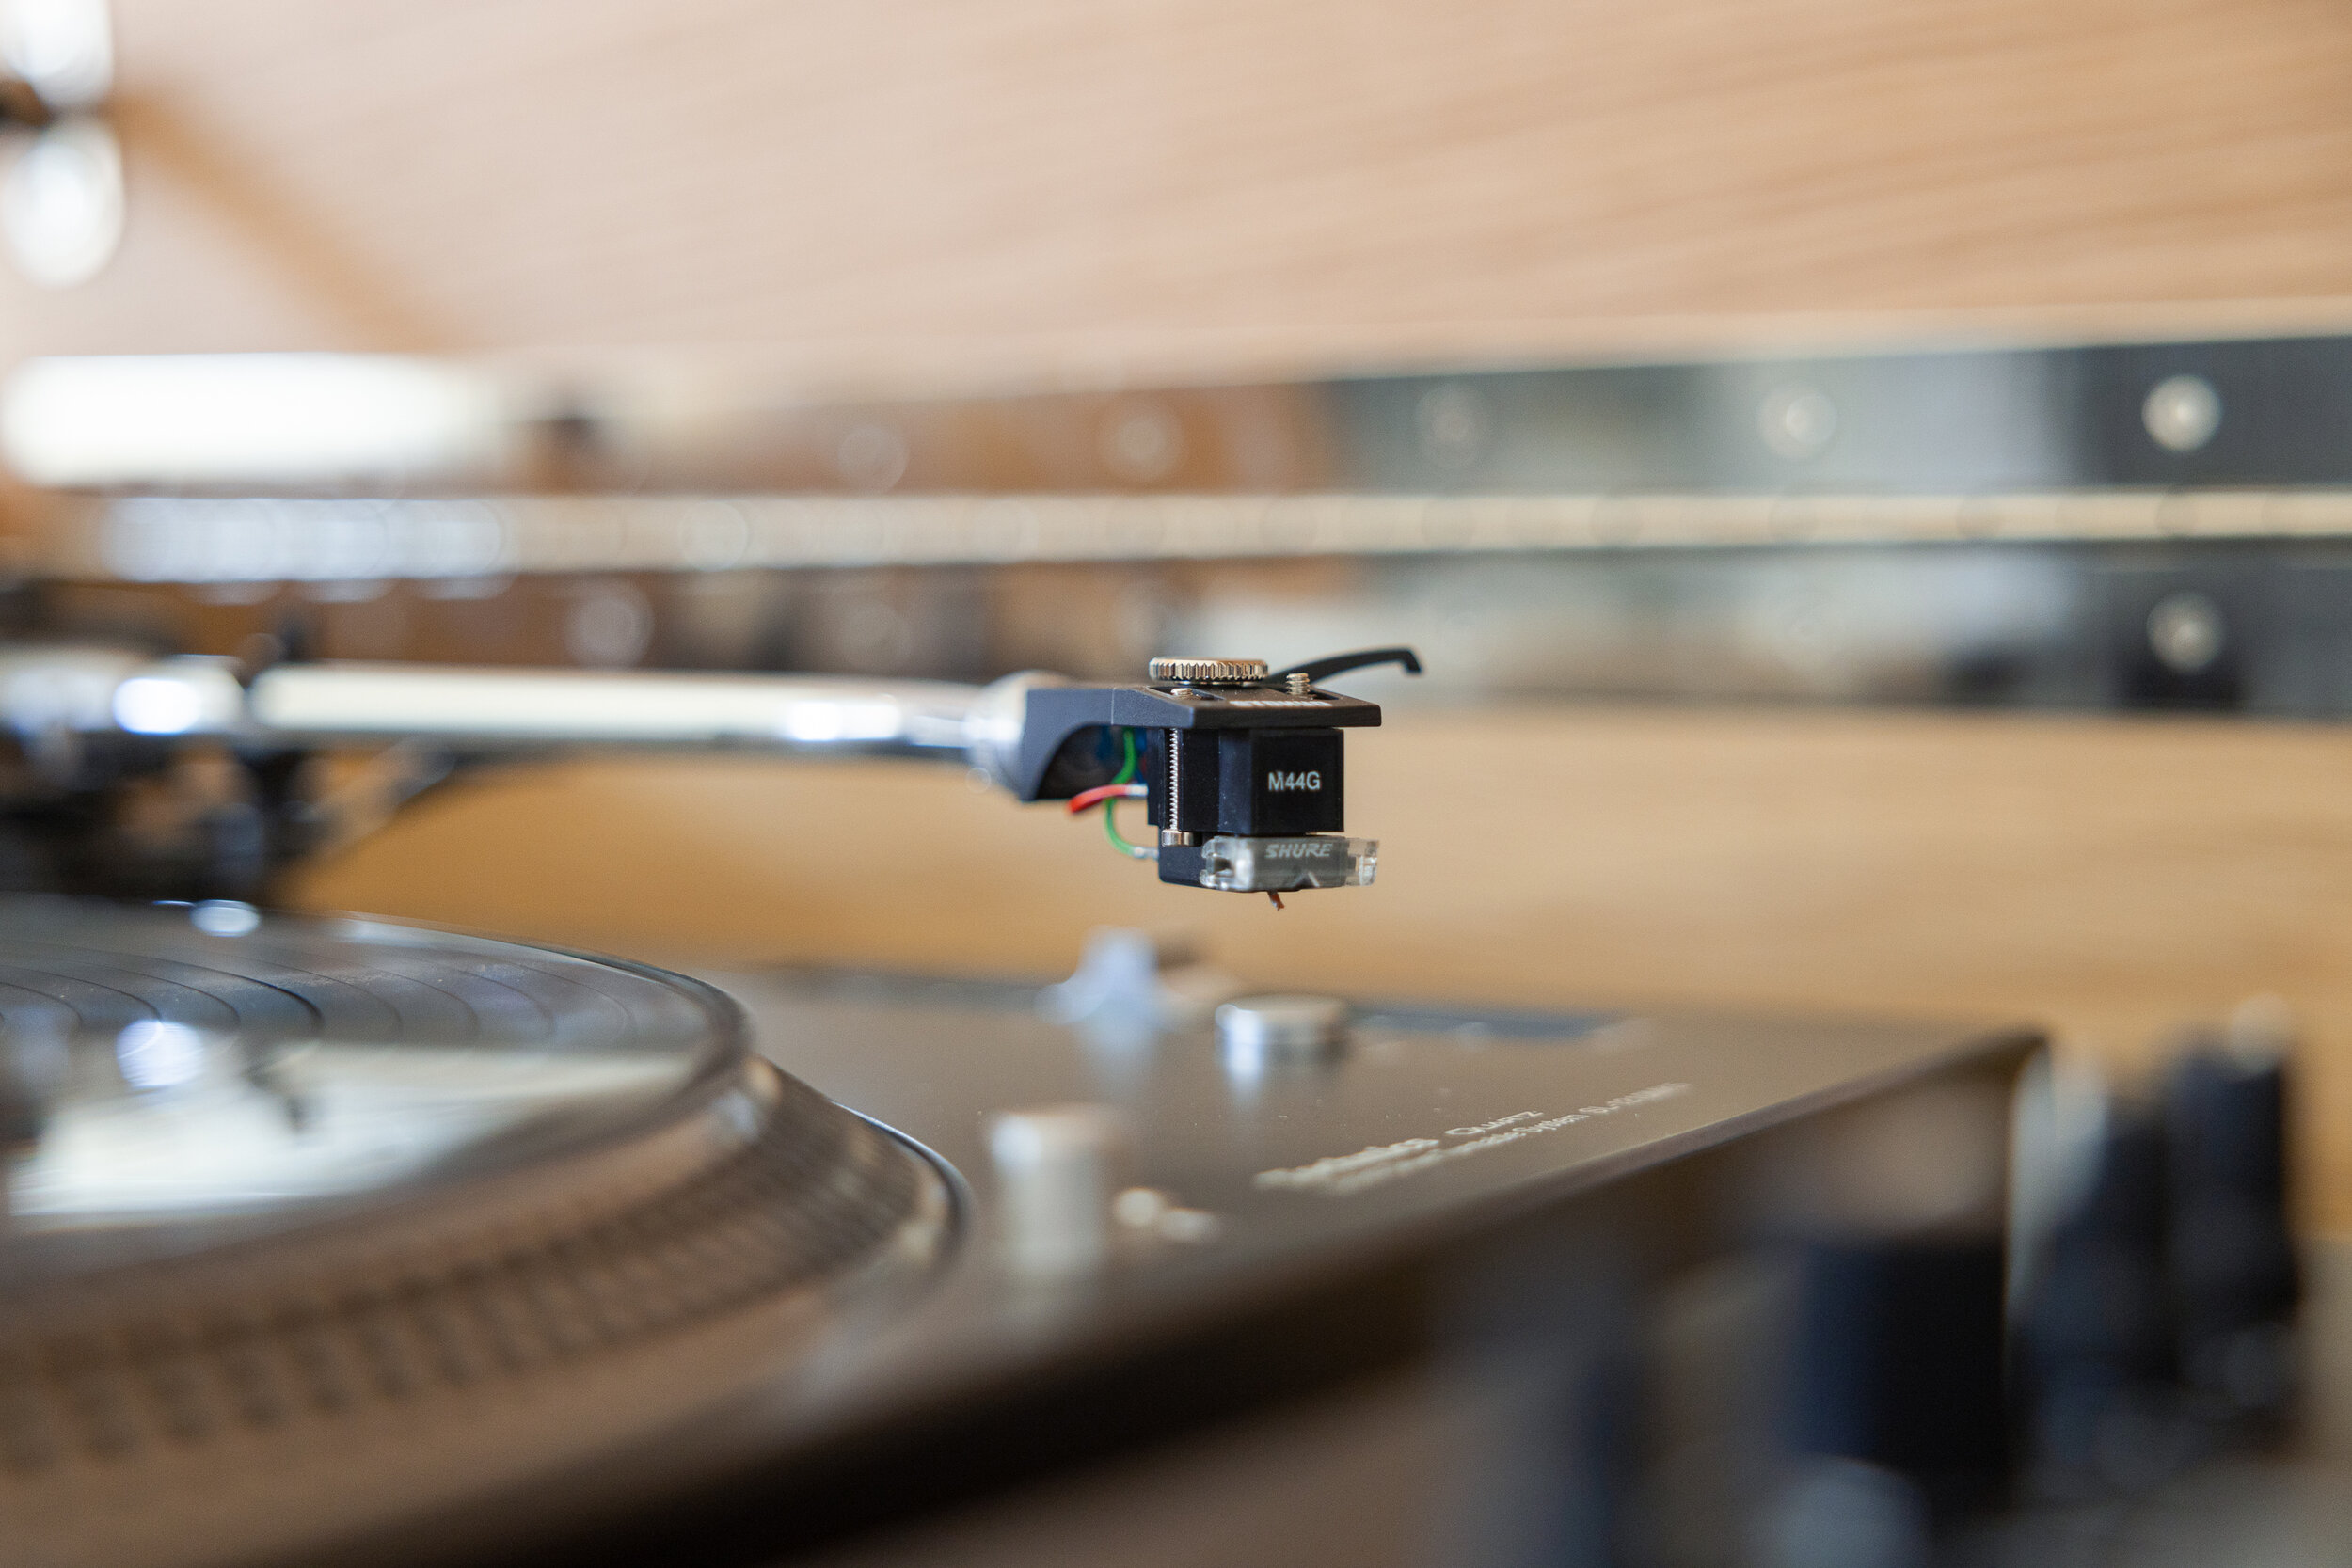
With the desk built, I went ahead and installed my DJ gear inside the desk. I own a pair of Technics –classic DJ turntables– and my recently upgraded Numark Scratch mixer into the desk.


Cable Management

There are a lot of cables needed to power and connect the devices, so I spent some time organizing to hide them from sight. I used cable ties and channels to route my wires, and a cable box to store my surge protector and power bricks.
Hacking my IKEA Kallax
With the desk complete, I moved onto customizing this IKEA bookshelf I already owned. I wanted it to feel like I had one, long continuous surface to work on and wanted to match the long horizontal shelves above. I created a wood frame out of the same White Oak Plywood as my desk, using Gorilla glue and a few pocket hole screws.
Supplies

I'll be honest, my build for this was pretty flimsy, because I didn't want to glue it directly onto the IKEA bookshelf (commitment issues). If you want something more sturdy and permanent, here's a link to a great tutorial by Modern Builds for this IKEA hack.

Lighting
One key upgrade I wanted to do to this part of the office is improve the lighting. Since I'm already in the Phillips Hue ecosystem, I invested in a few light strips, and play lights. I installed them on the shelves, and inside the DJ booth, so everything looked well lit at night. The awesome thing about this setup is that I can customize and save various color schemes, if I ever want to shift the mood in my space.
Lights

Styling
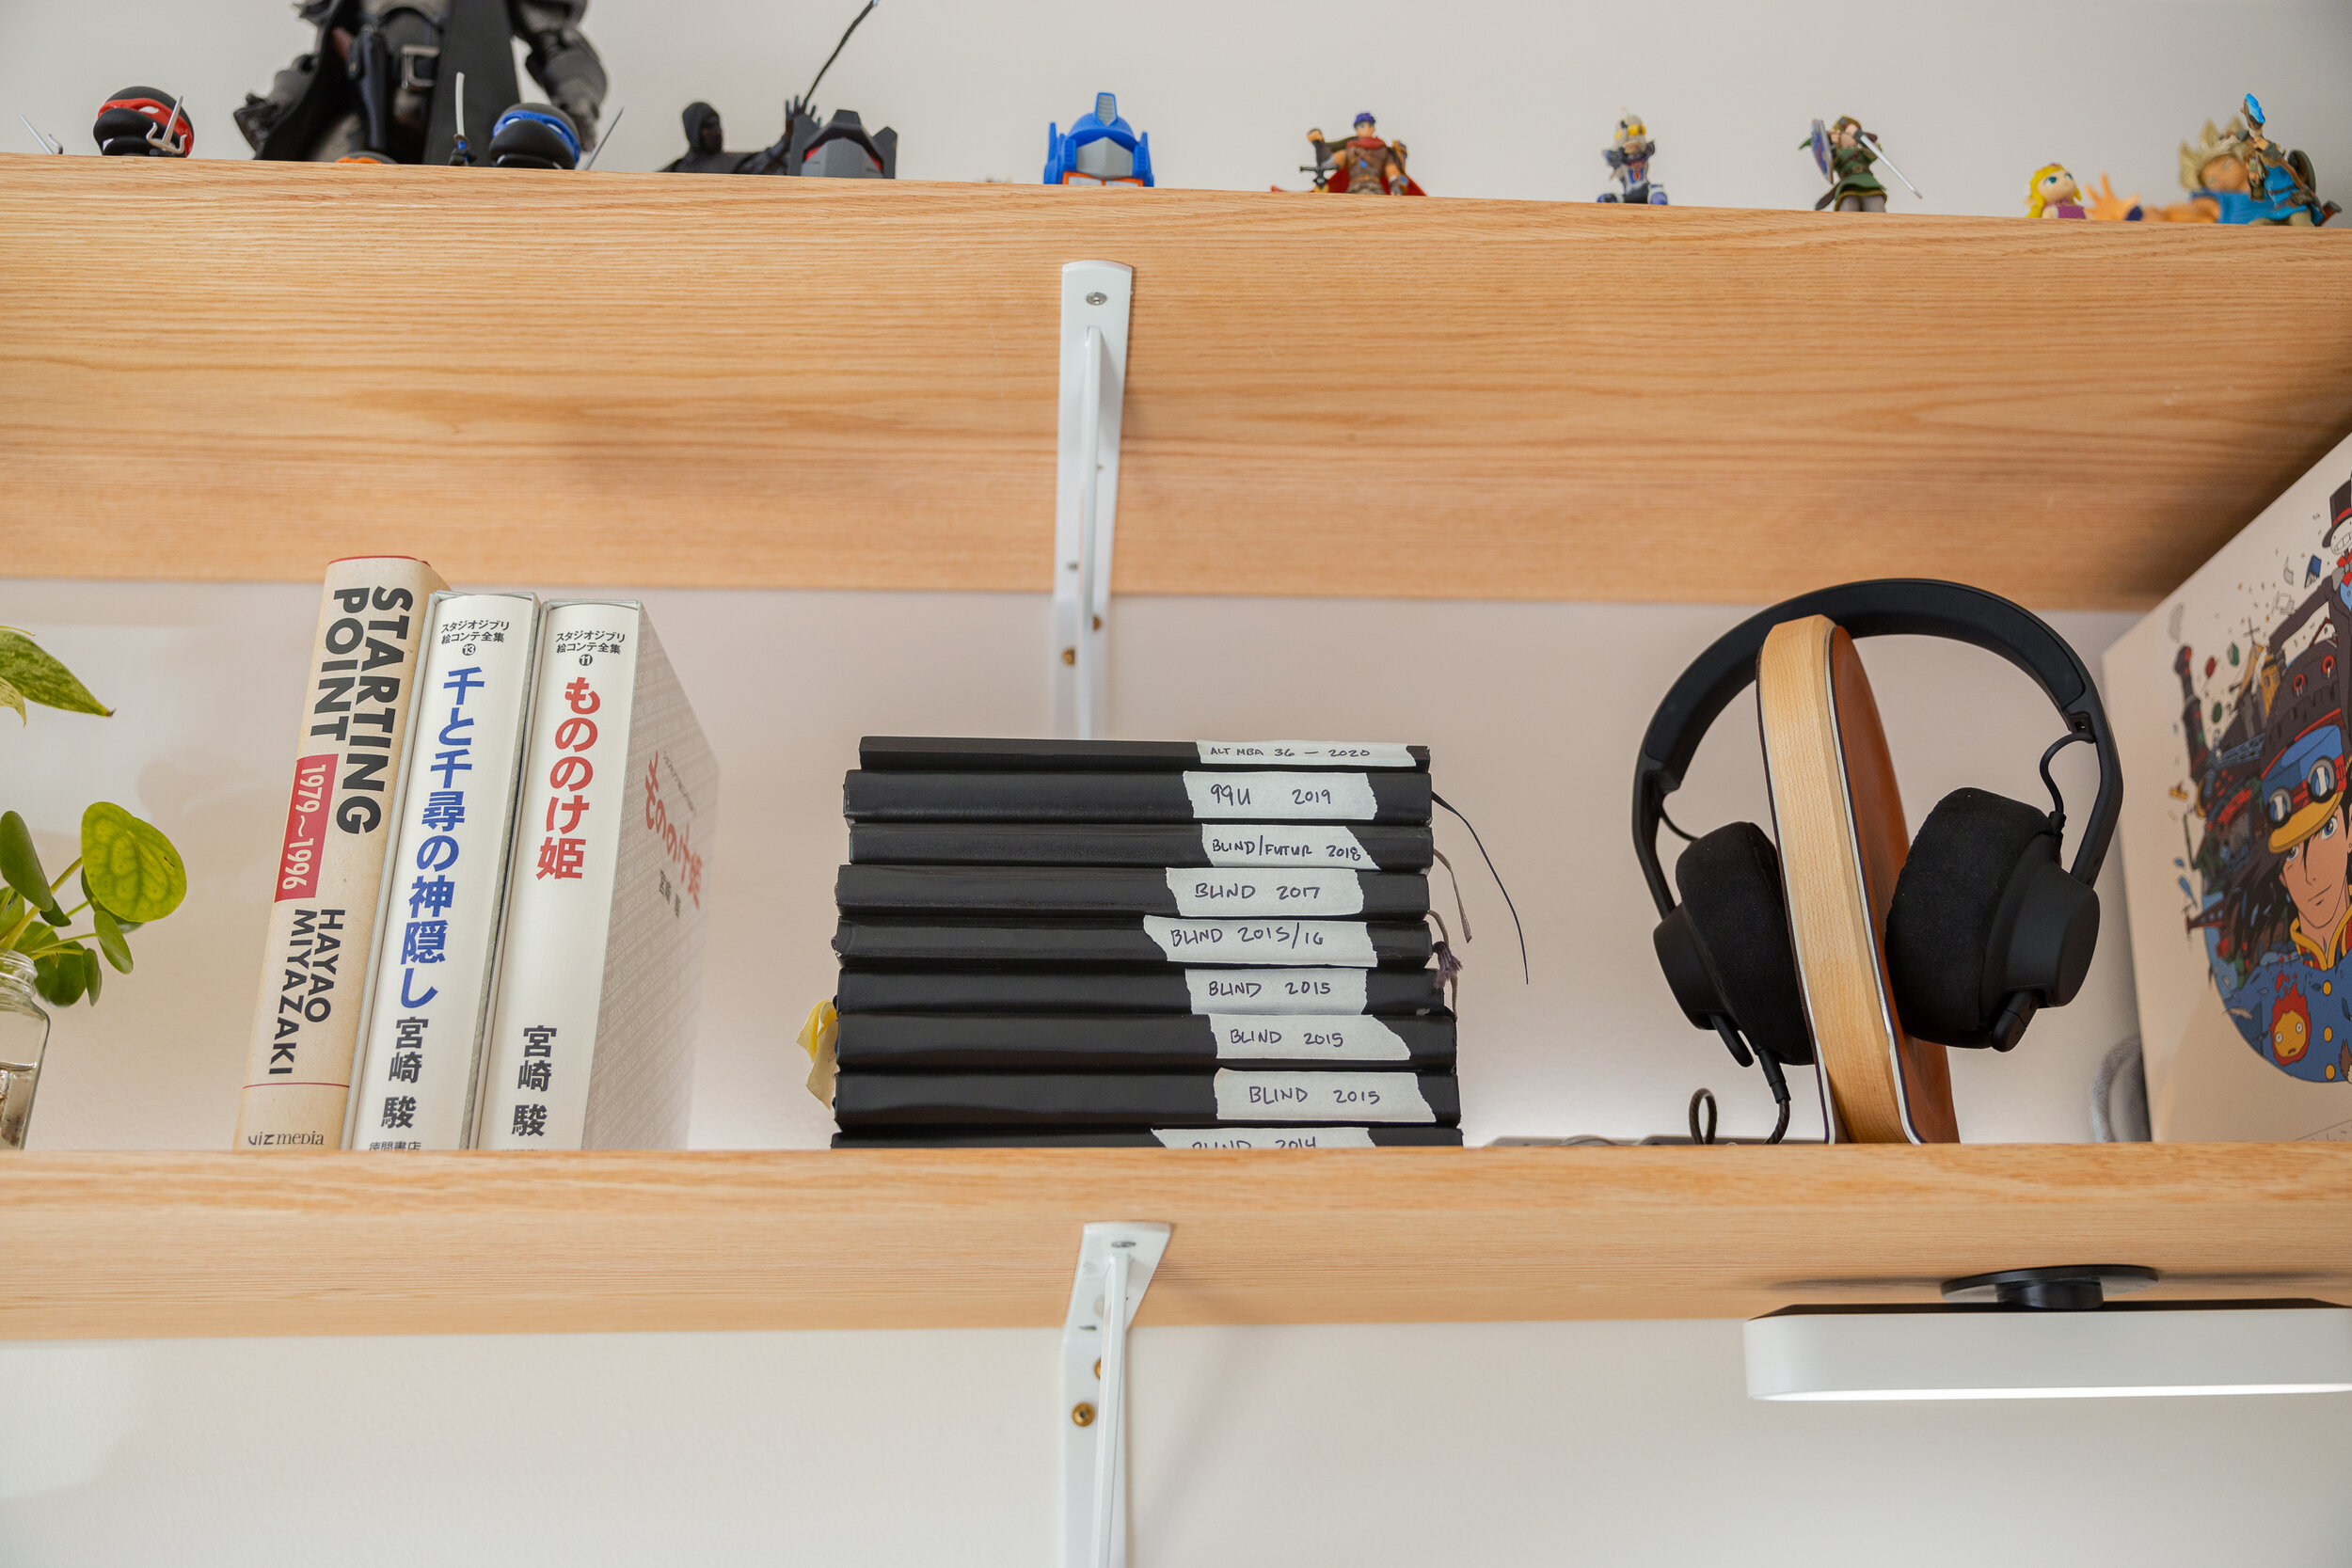
With everything in place, I spend some time reorganizing my books, collectibles, tools, and even added a few plants to bring life to the space. It was challenging to arrange all of these in a way that fully utilized the space while looking cohesive and clean. But after a few weekends of living with it and rearranging it, I found a setup I liked.
Accessories featured:

Final Thoughts
This was a fun project to bridge the gap between utility and fun. My whole office feels so much more complete. It's a place that I can work in during the day, and relax in at night, when I want to spend time with some music.
Lately my wife and I have become addicted to home improvement and DIY builds, so let me know if you'd like to see more of that stuff here in the future. For more frequent updates, follow my instagram at mod.musings.
If you’re interested in any of the products featured in this space, check out my Kit link.