Mod Musings Studio Desk Setup – A Calm, Cozy, & Creative Place to Work.
A workspace can be more than a desk, computer, and chair. For me, it’s a place that can stimulate new ideas, connect you to your creativity, and is streamlined around how you work. In this blog post, I’ll share the ideas behind my studio desk setup and break down the details of the space. Some of the links included in this post are my affiliate links, which I receive a small commission for, at no extra cost to you. Thanks for supporting my content.
Goals for the office
Modular – Have furniture on casters so it can easily be reconfigured for a wide range of work.
Dual-Desk Setup – One for digital work, the other for a flex desk.
Ample Storage – Lots of places to organize my tools, gear, and accessories needed for my work.
Maximize Utility – Make use of the vertical space. Create usable surfaces.
Zen – A calm and minimal aesthetic based around white oak as the primary material.
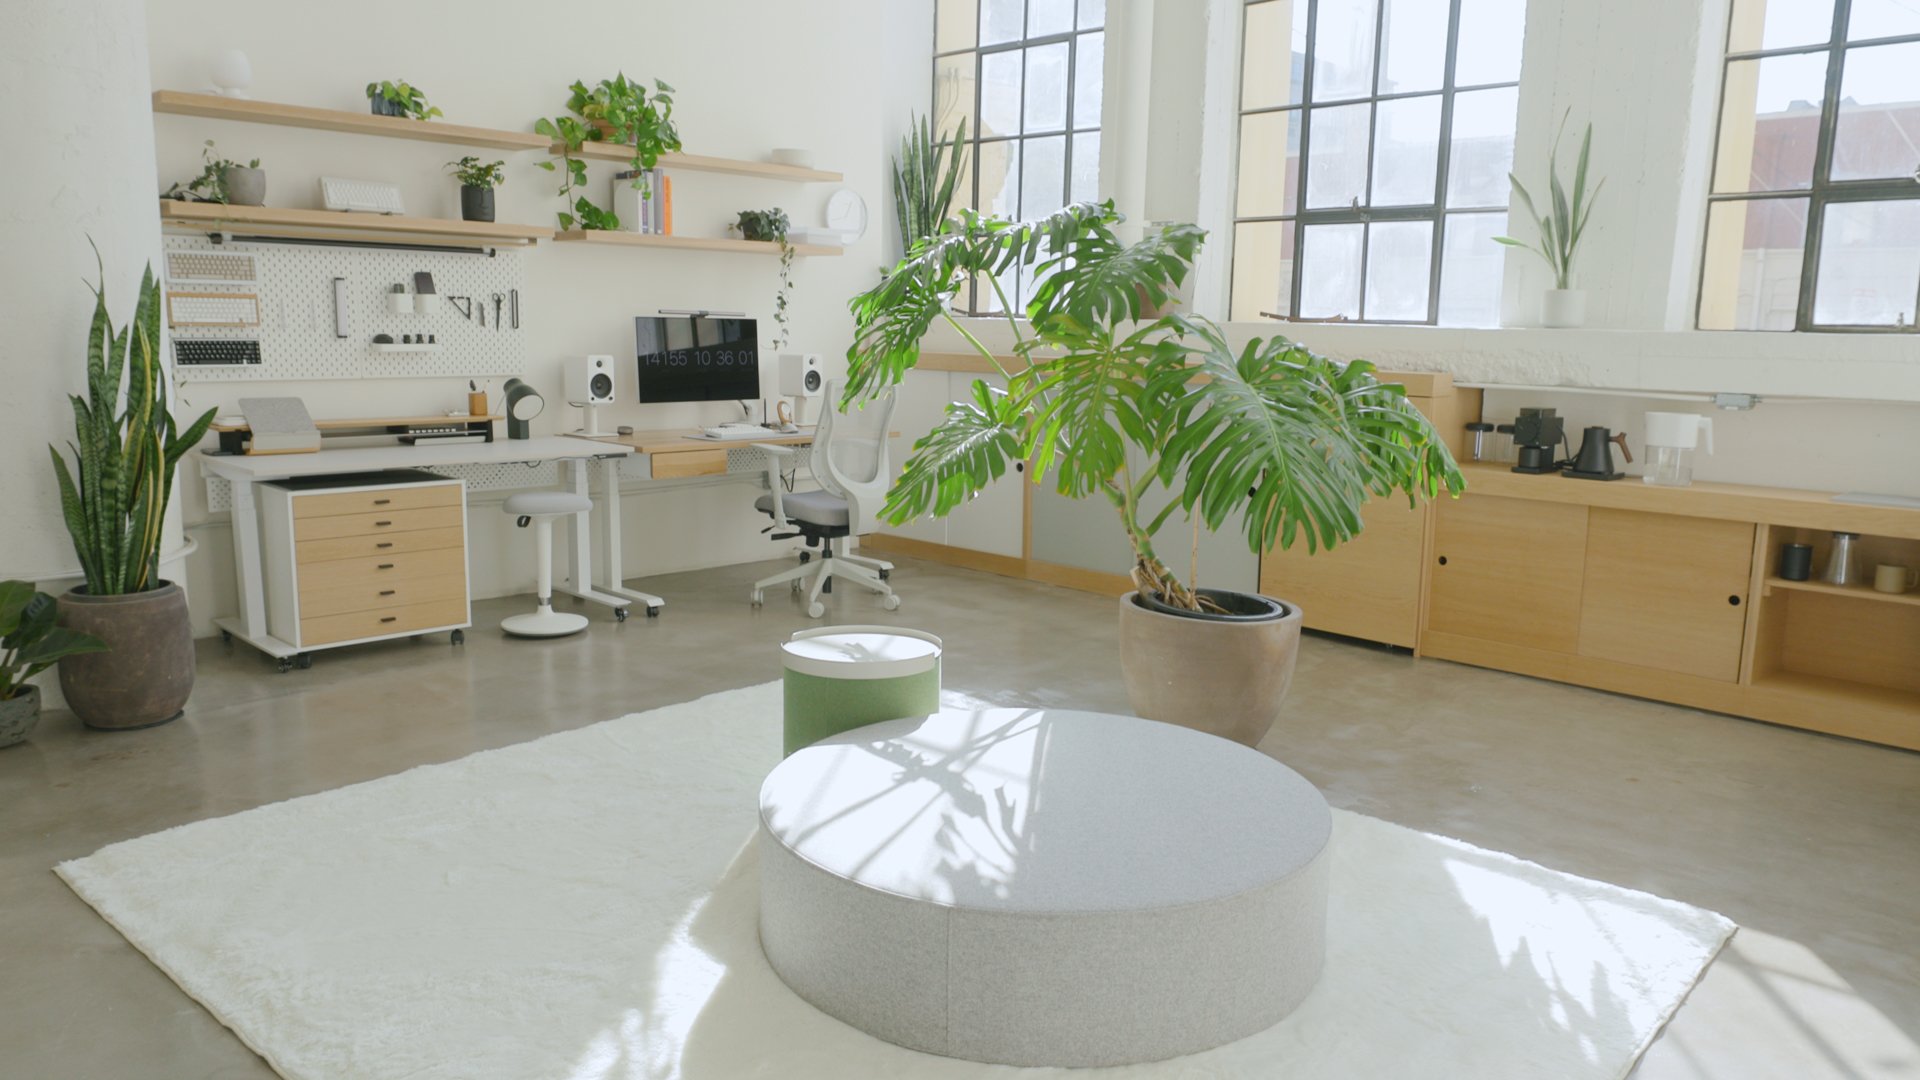
I’ve been working in this new office since September 2022. To catch you up on what’s happened so far: I leased the studio for my media and maker brand, Mod Musings. I designed a vision for this space, a zen workshop. And I’ve begun doing everything from scratch, including building my custom storage and sealing my concrete floors. Now, I’m working on the area where I’ll spend the most time: my desk. A setup with all the tools I need to create. Is inspiring and comfortable to be in. And is highly modular so that it can be reconfigured and used for a variety of work.
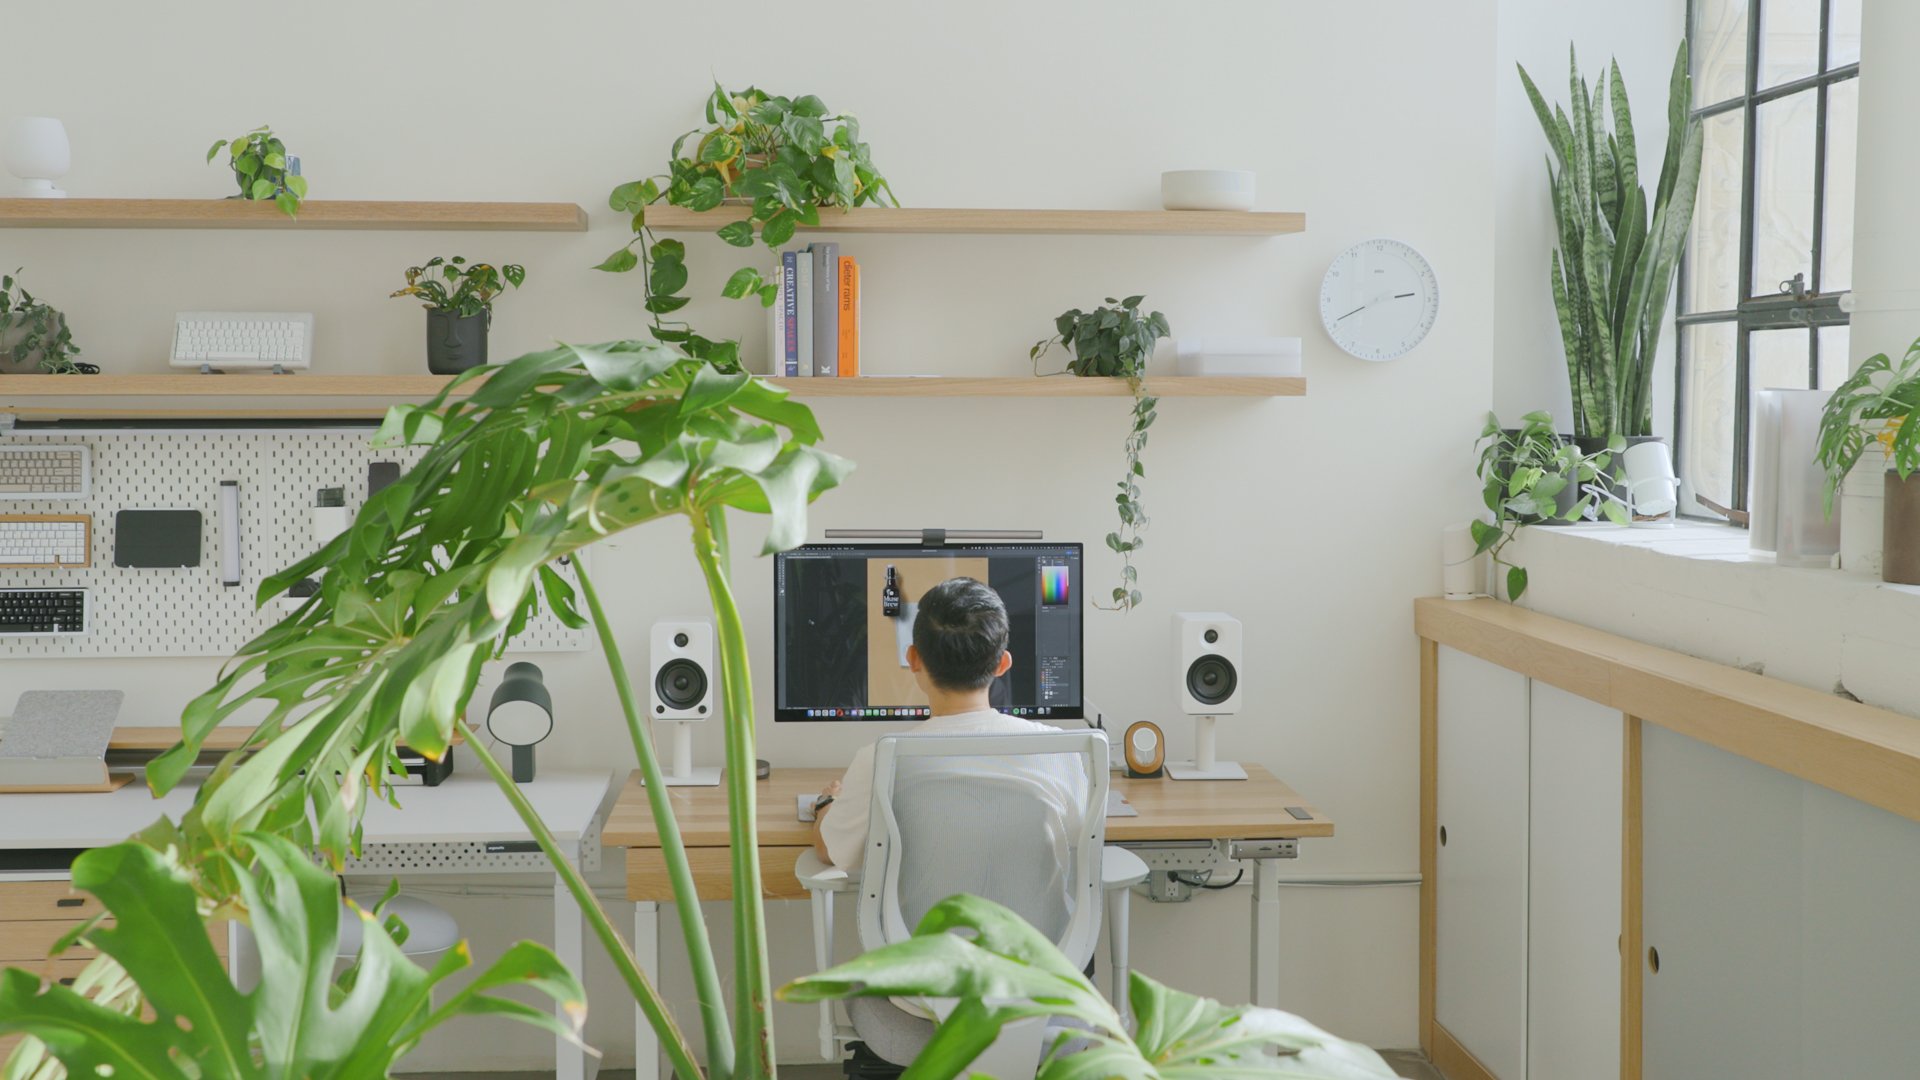
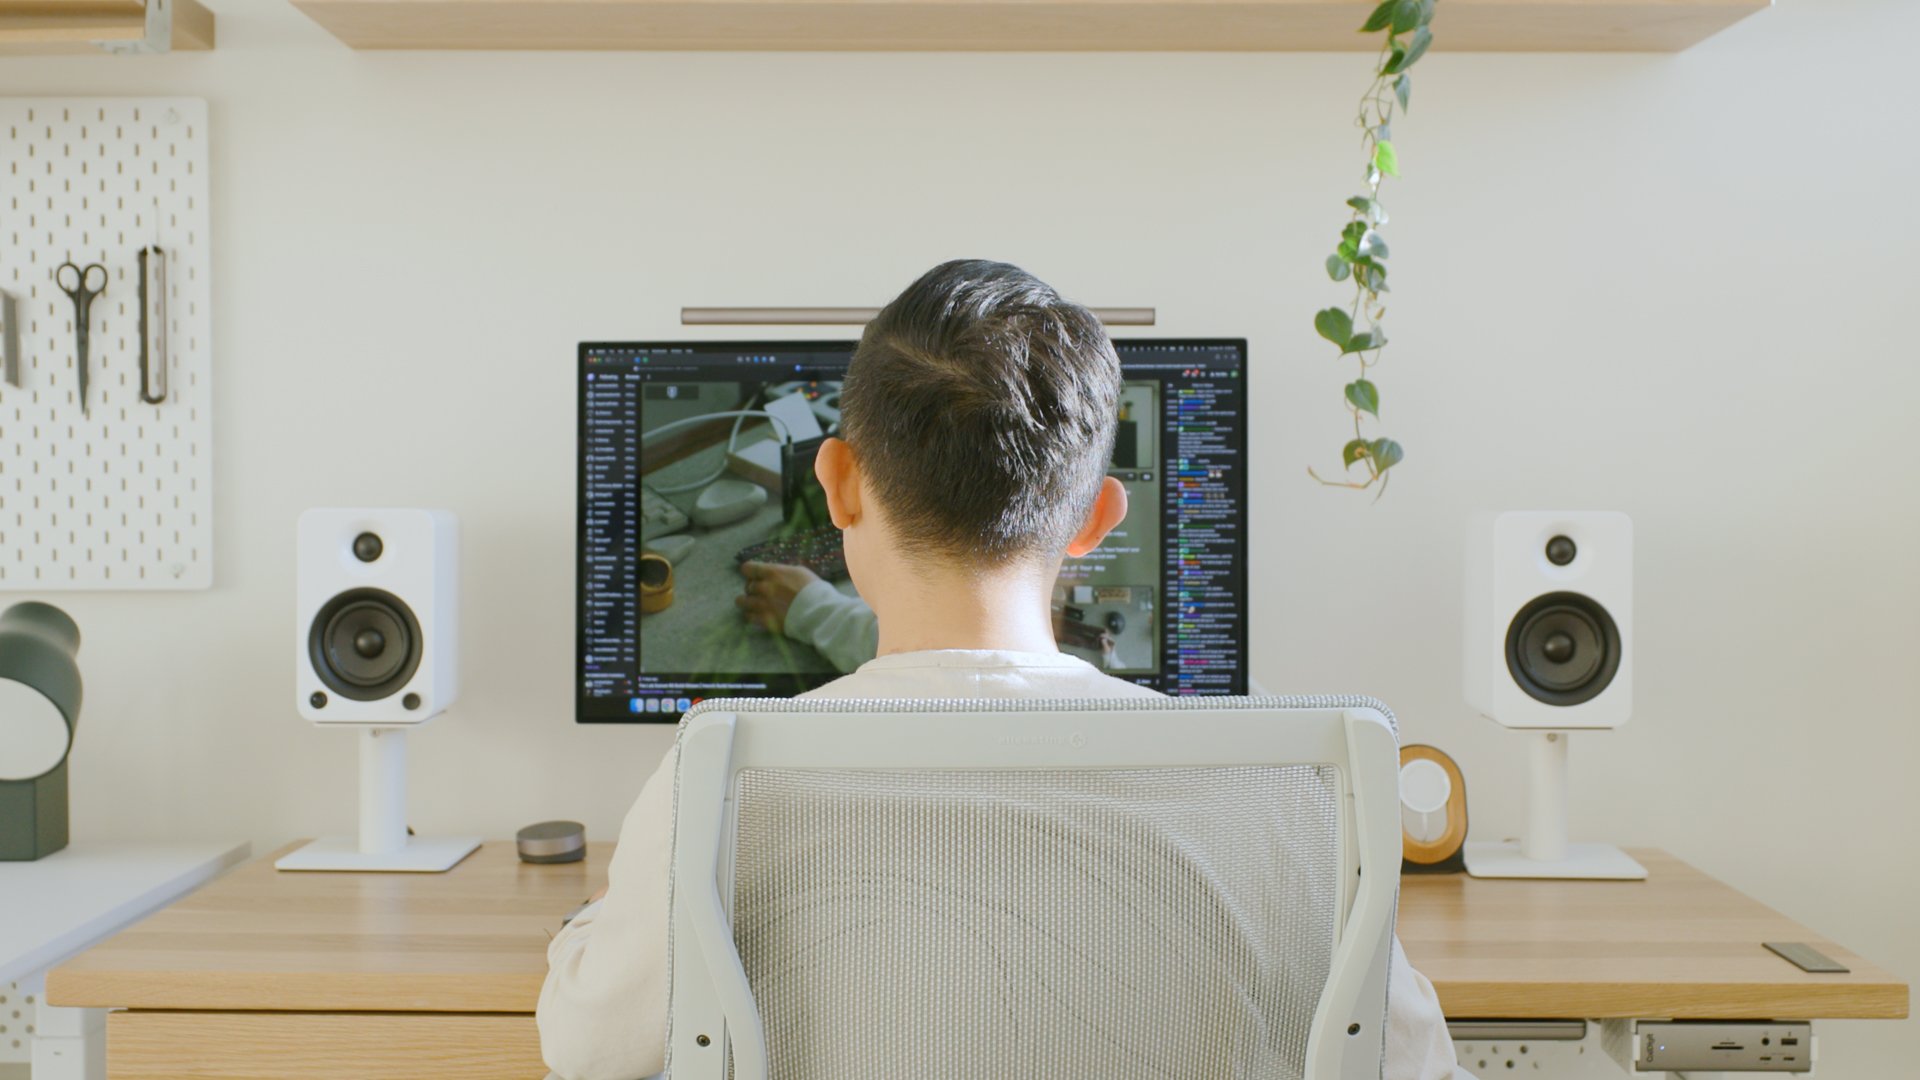
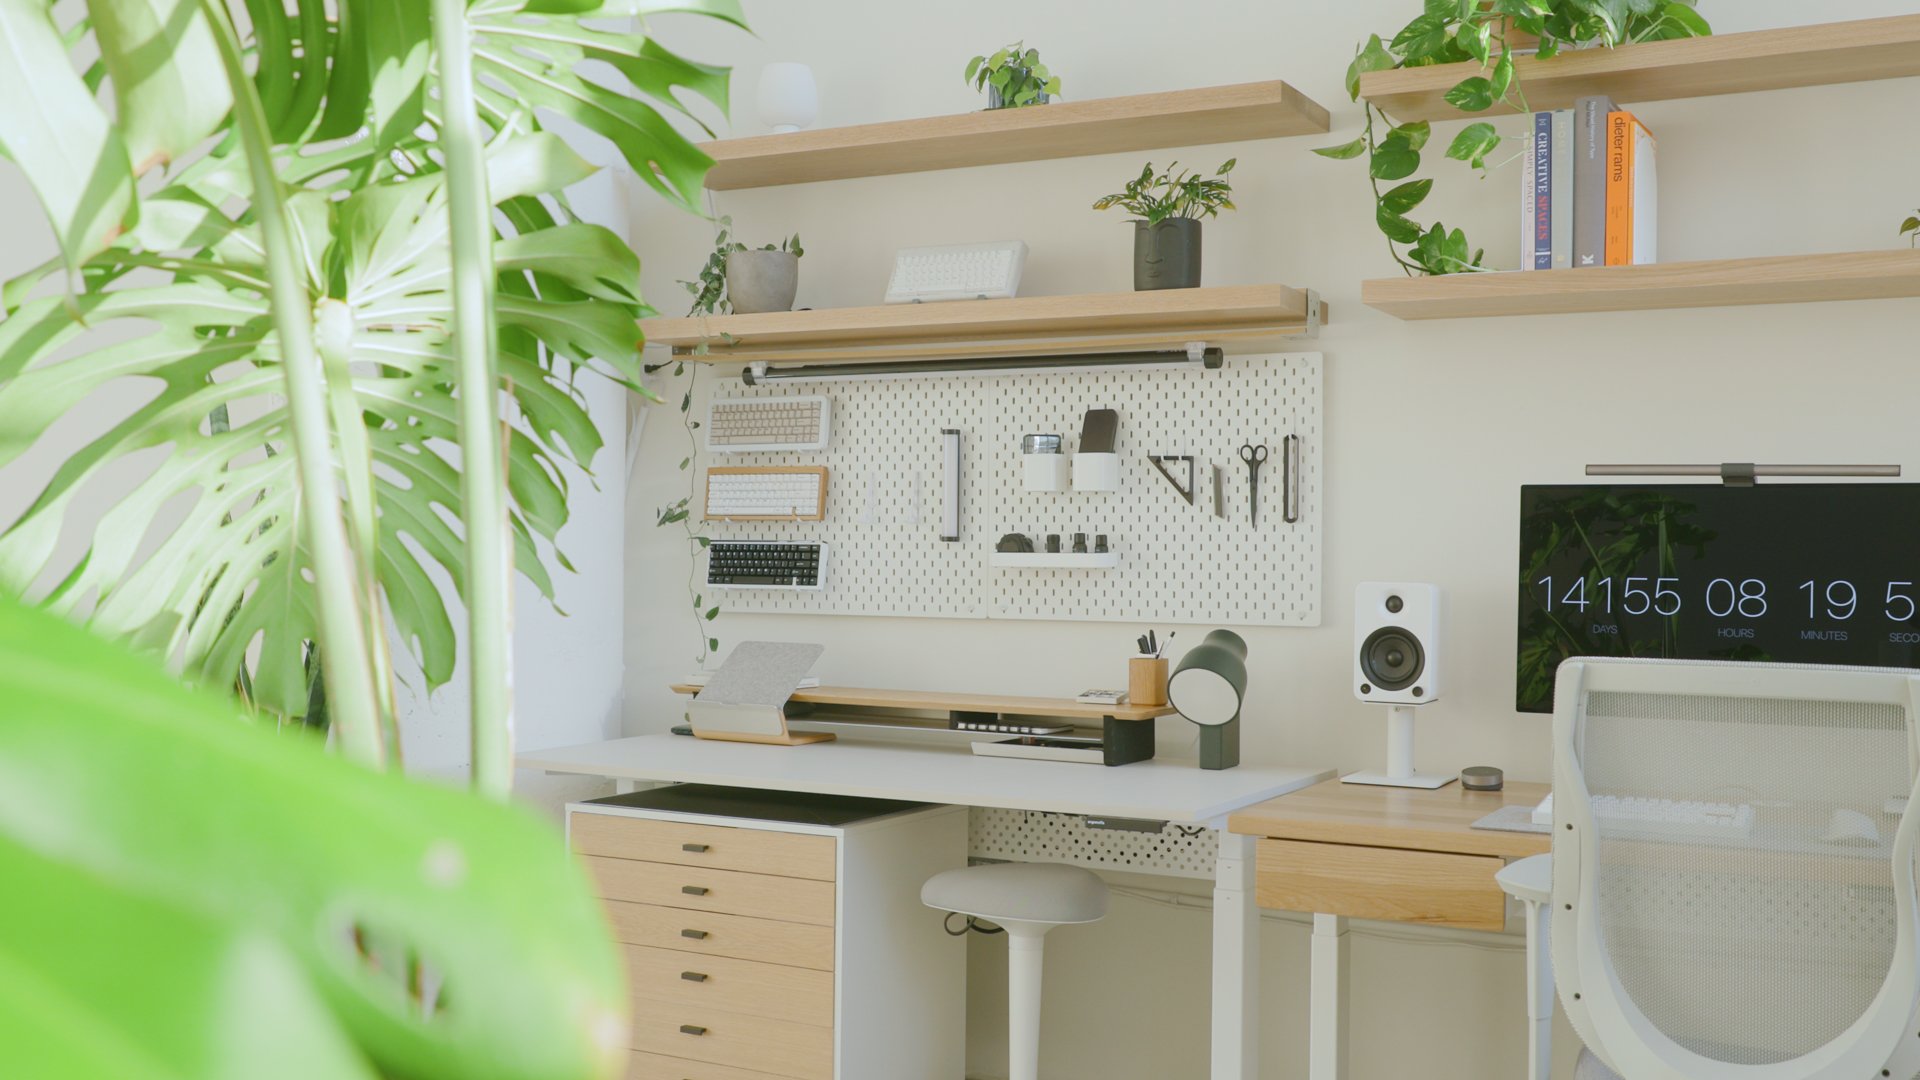
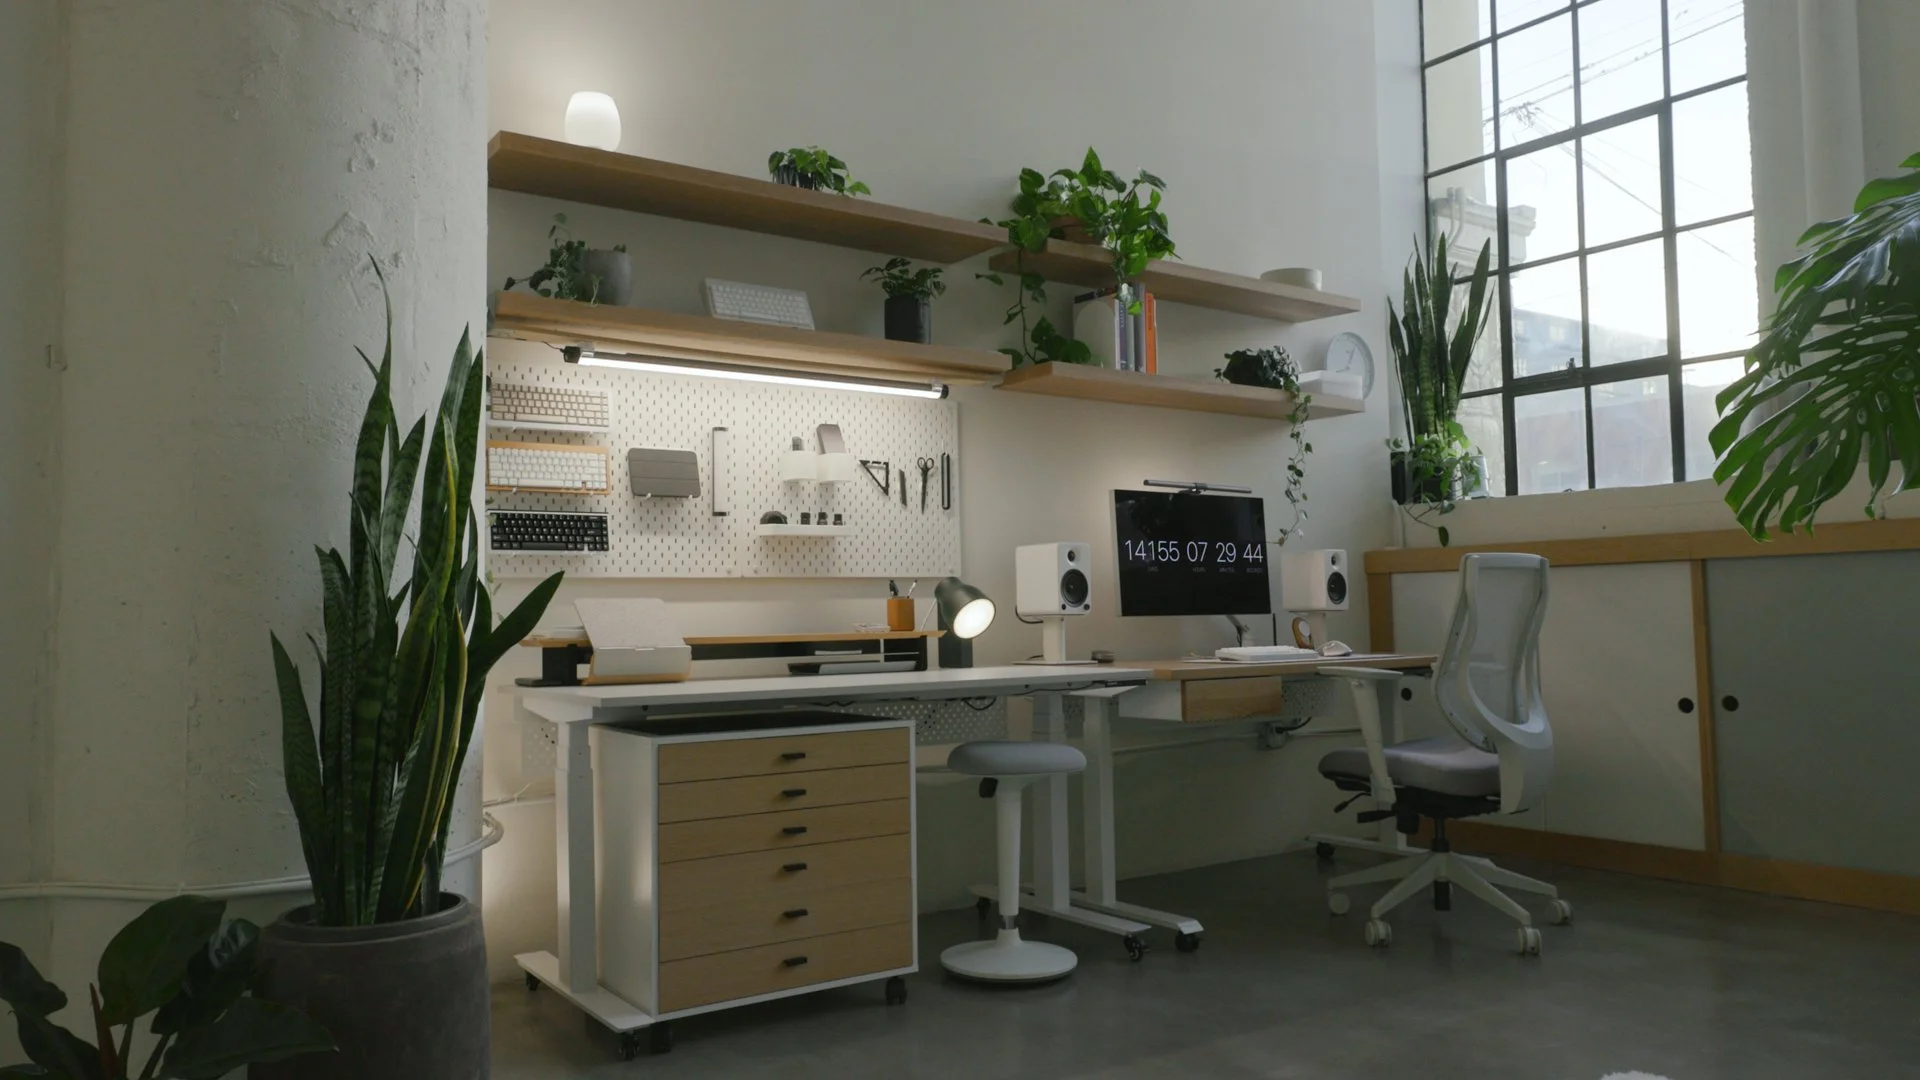
Main Desk
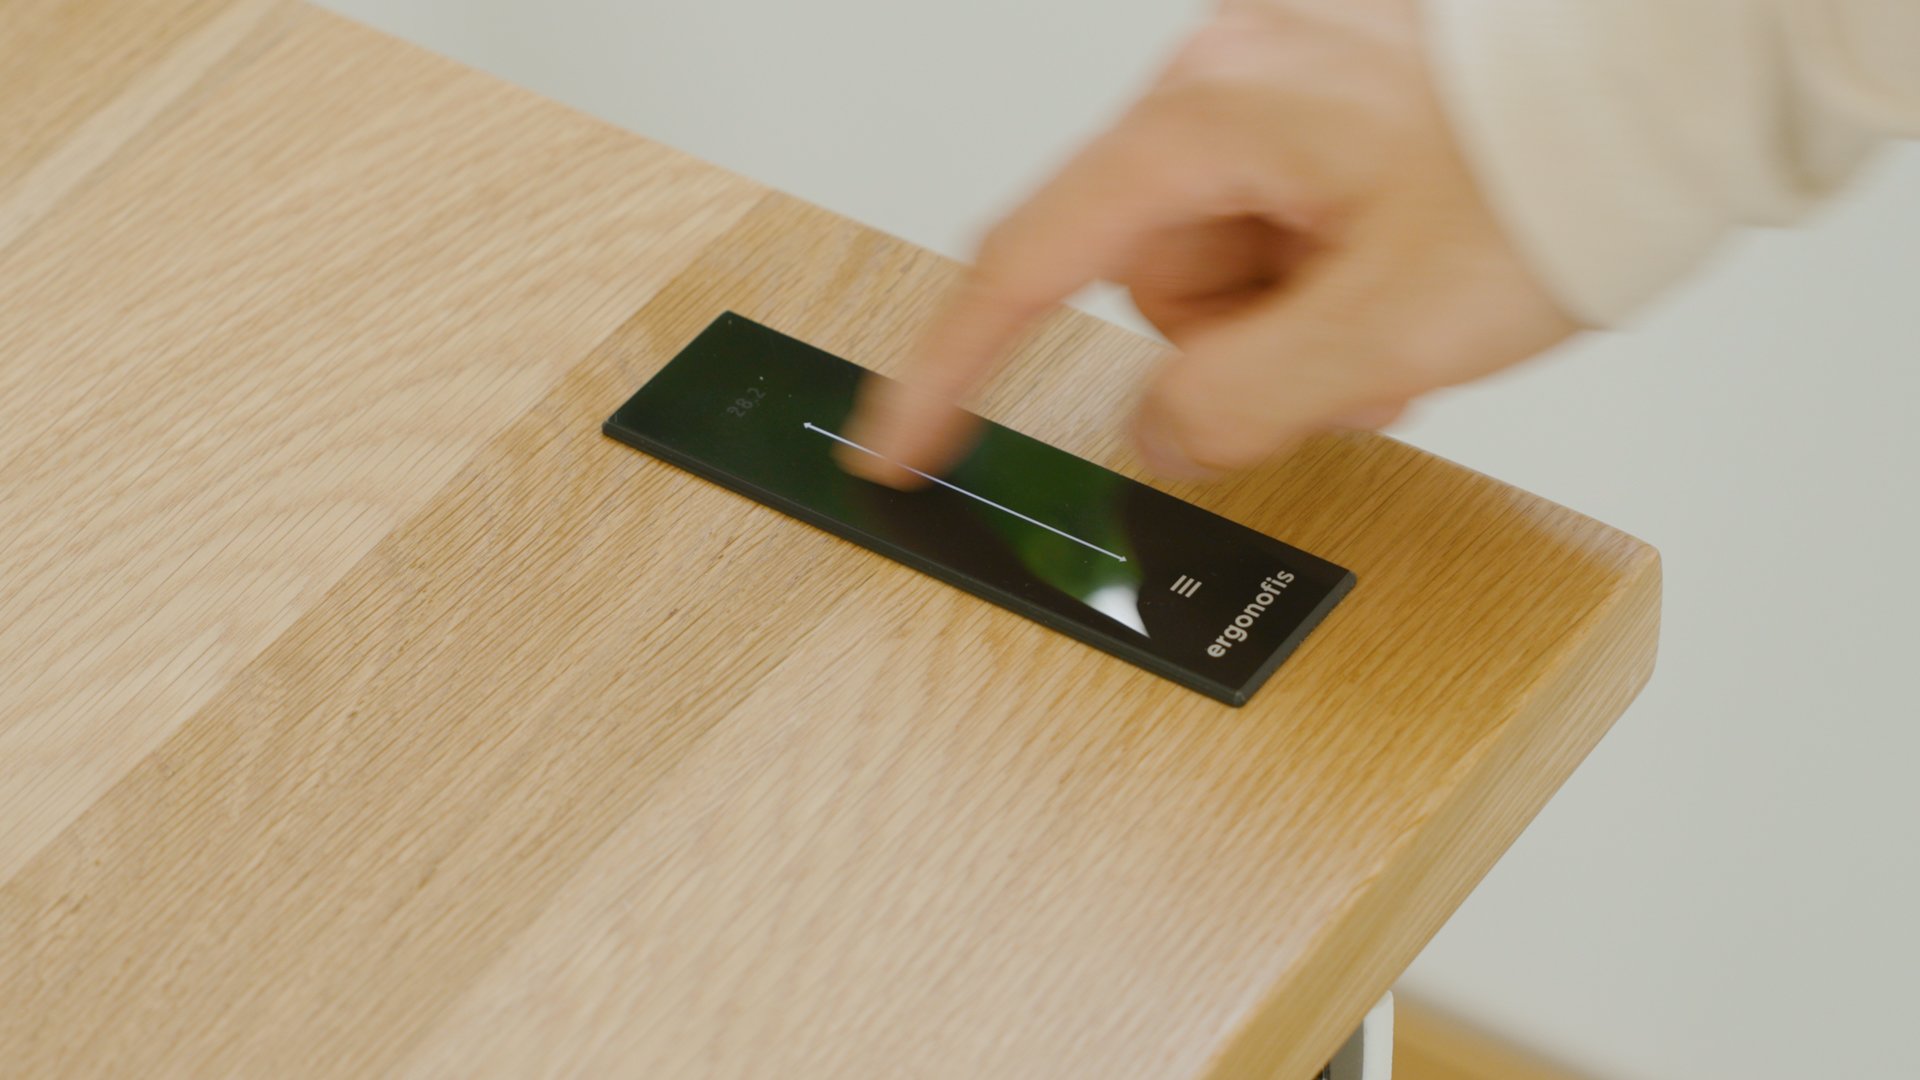
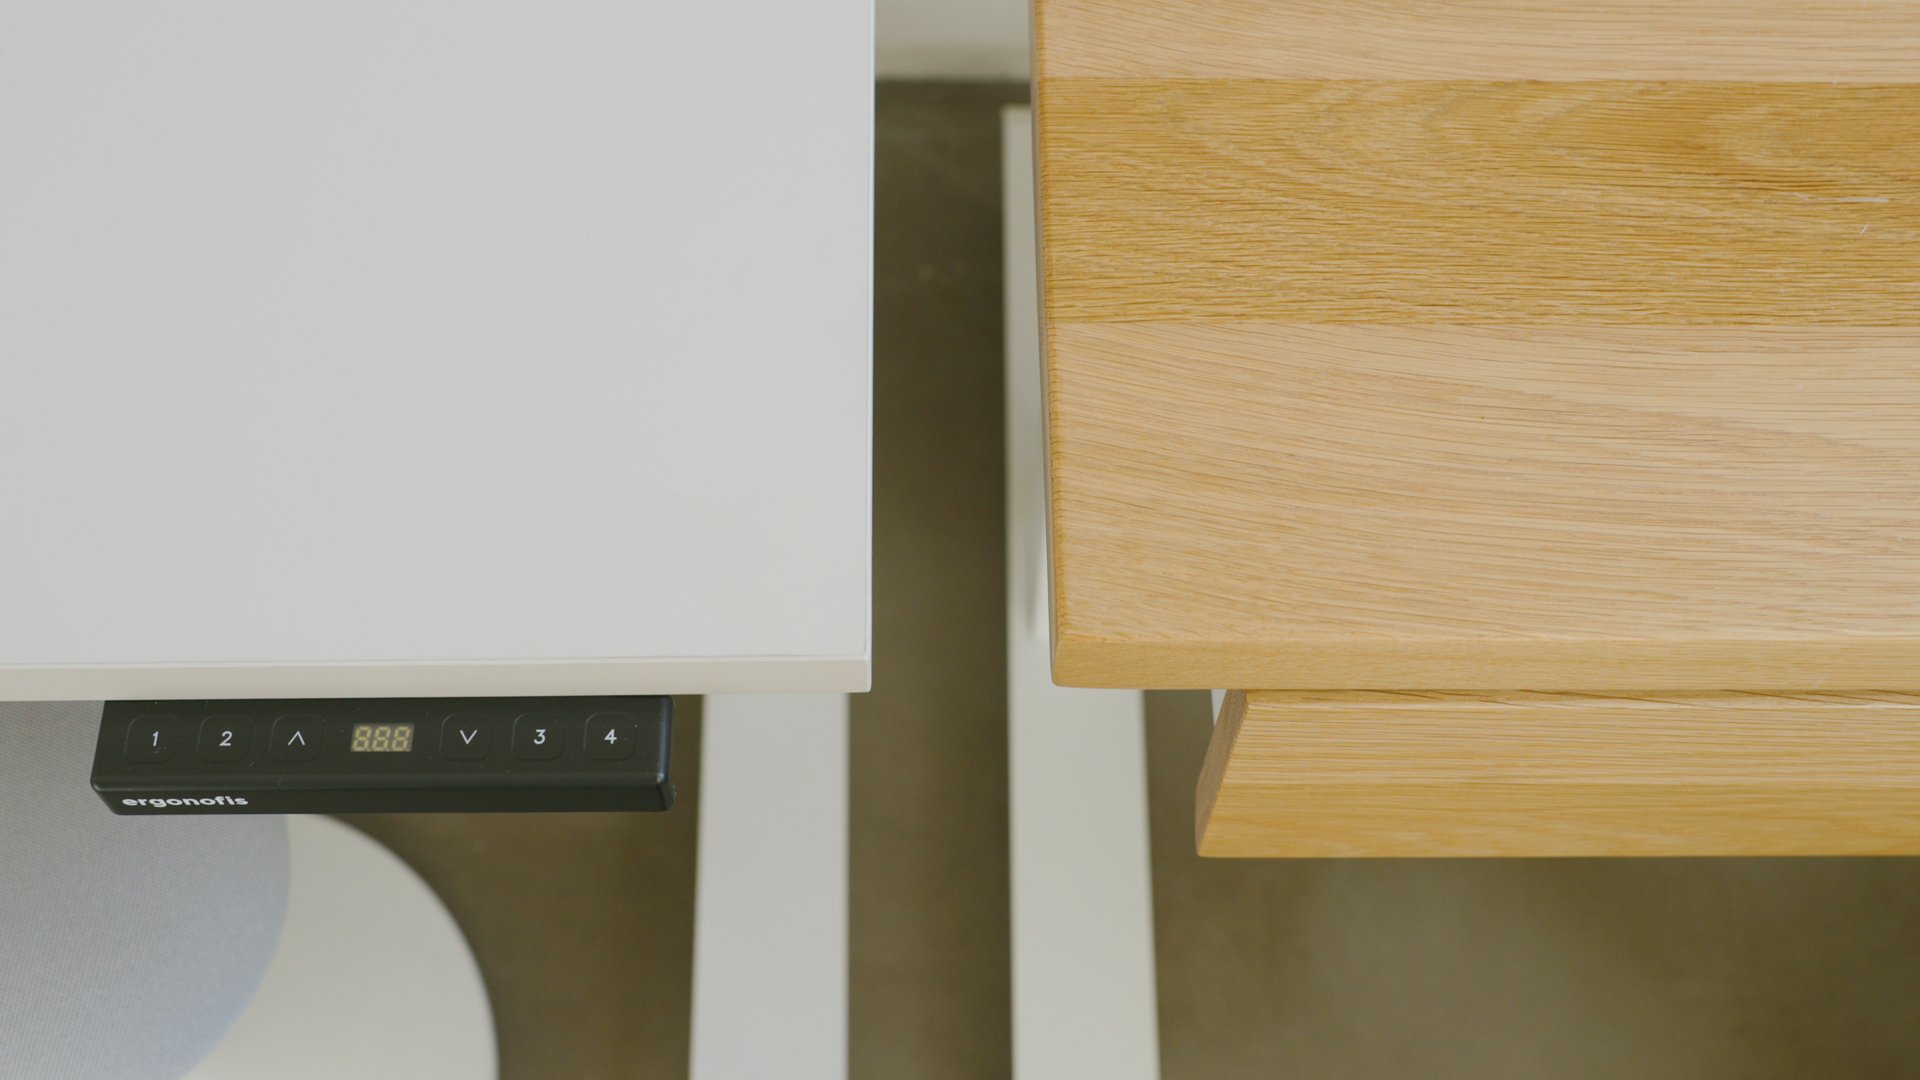
My main desk is where I do most of my digital work – design, editing, and communication. So I wanted something large and minimal, to give me ample space to work distraction-free. I’m using the Sway Desk in white oak, made by Ergonofis, who’s sponsored some of my content and provided this desk to me. It’s made from locally-sourced solid wood and is handcrafted in Montreal, Canada. The Sway Desk is heavy-duty and sturdy at all heights, even with the casters I installed.
My favorite detail is the updated design for their control, which features a simple and sleek, swipe up or down gesture to go to your saved heights—making it easy to switch between sitting and standing.
Links
Update April 2026: It seems as though Ergonofis might have closed down. These days, I do recommend the Desk by Grovemade as a better alternative.
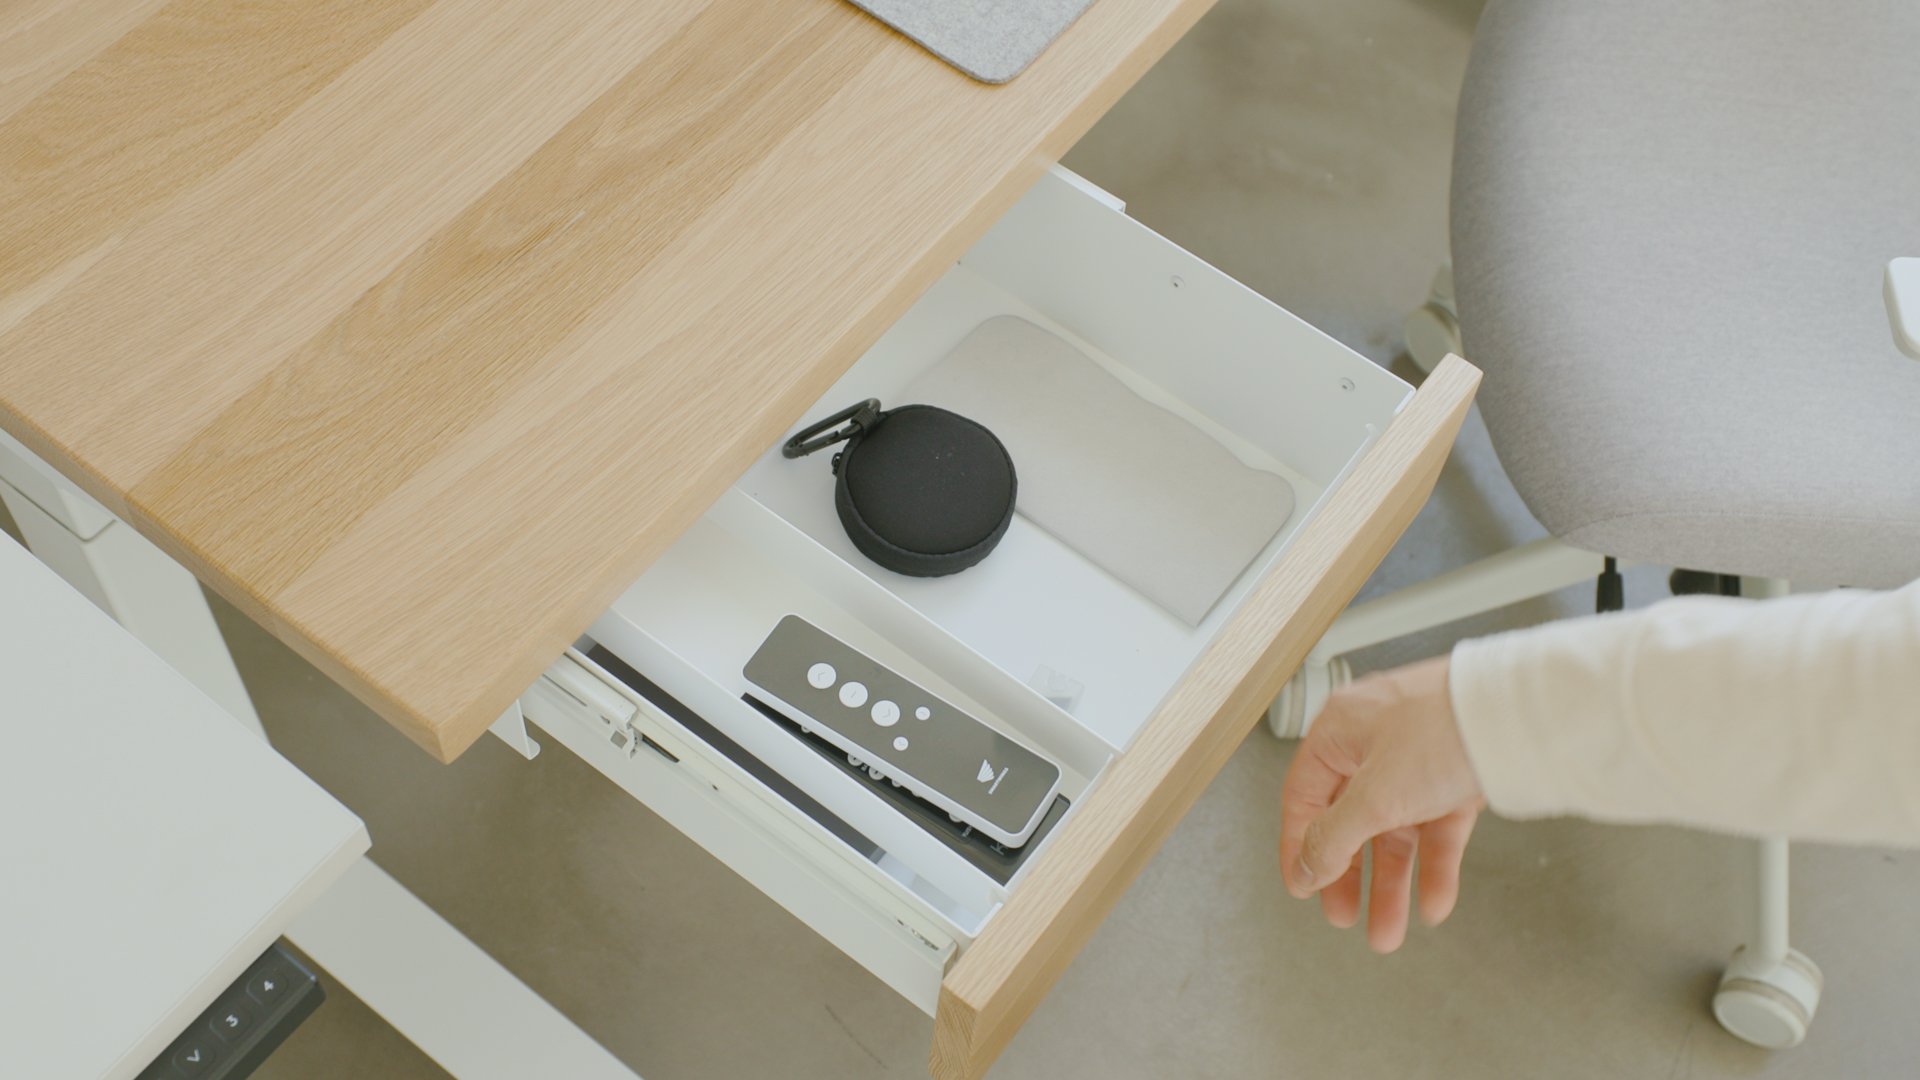
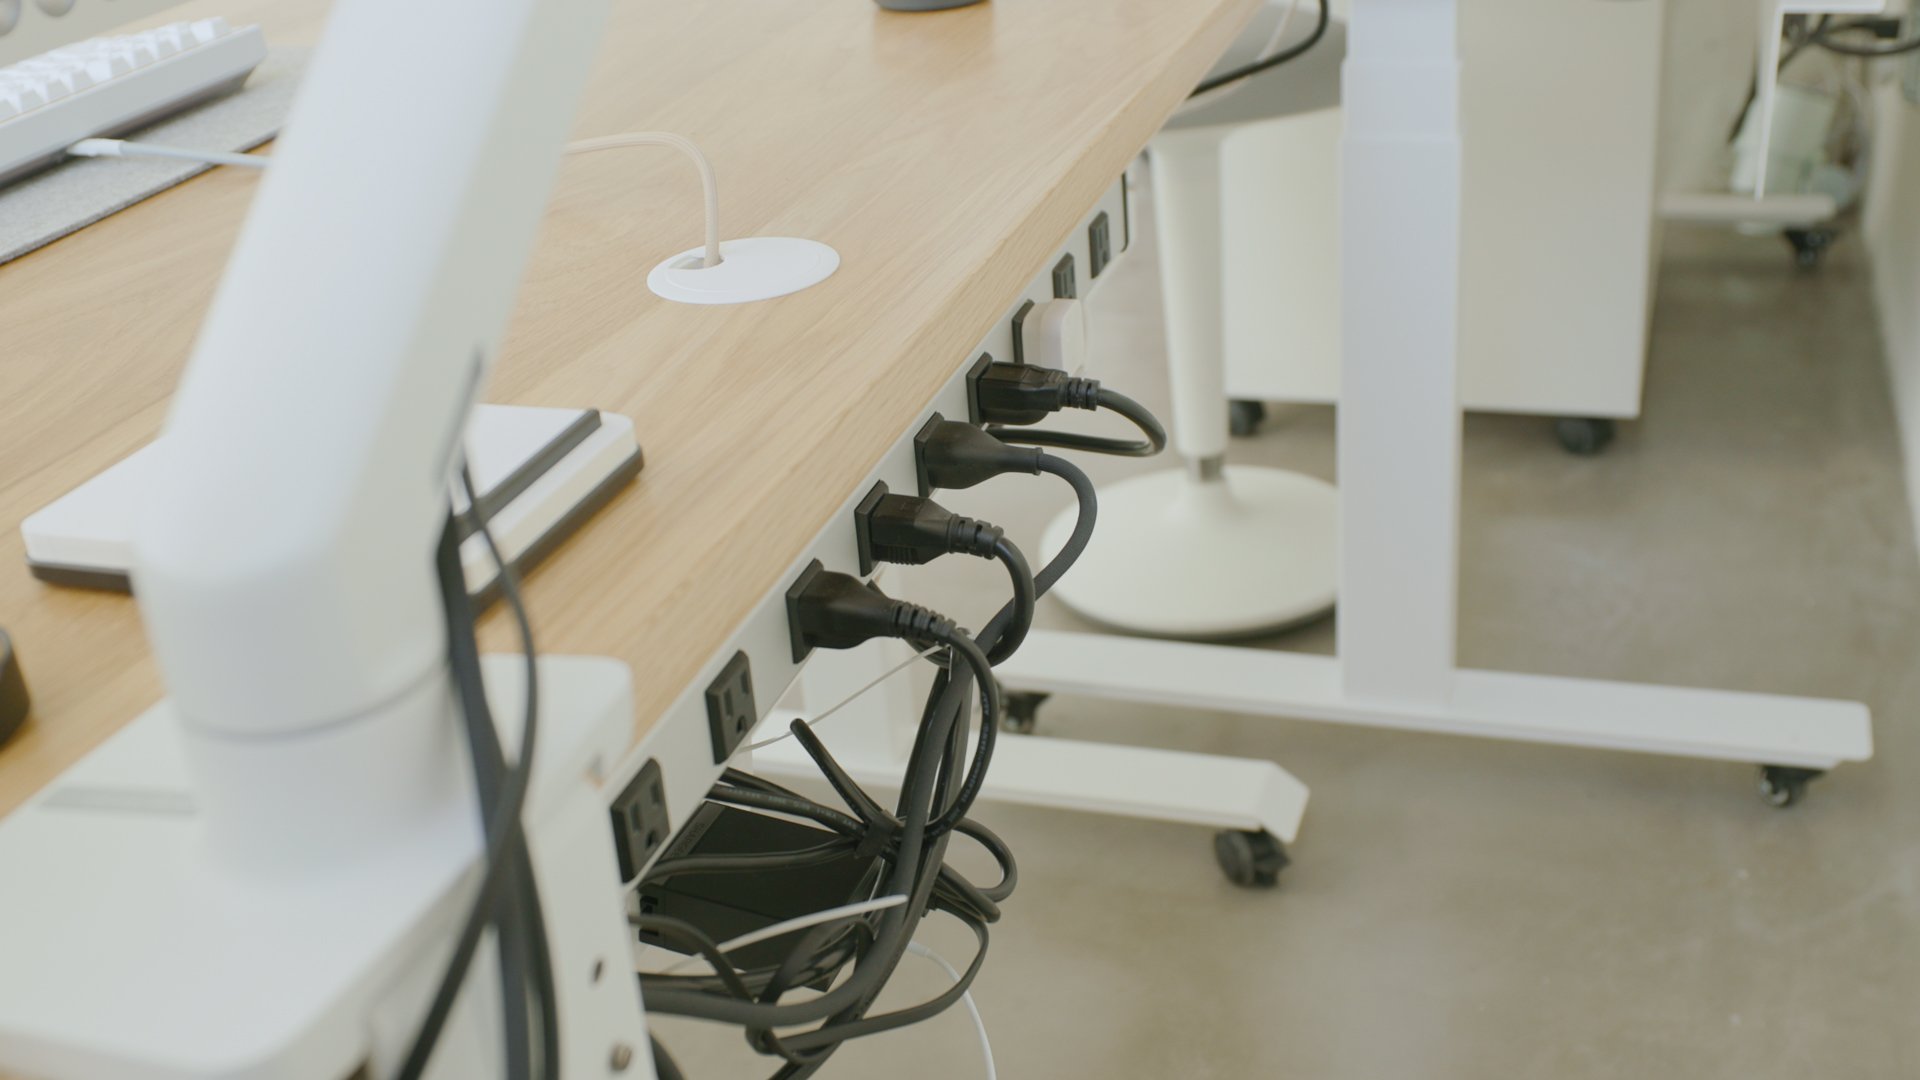
For my setup, I added a few extras to the desk. A drawer for quick access to my most used things. And the Cable Management System to tame and hide all of the cords from my devices. Everything is plugged into a single power strip mounted on the back of the desk. This allows my whole setup to be plugged in with a single cord. Keeping it visually clean and easy to unplug if I want to roll away the desk.
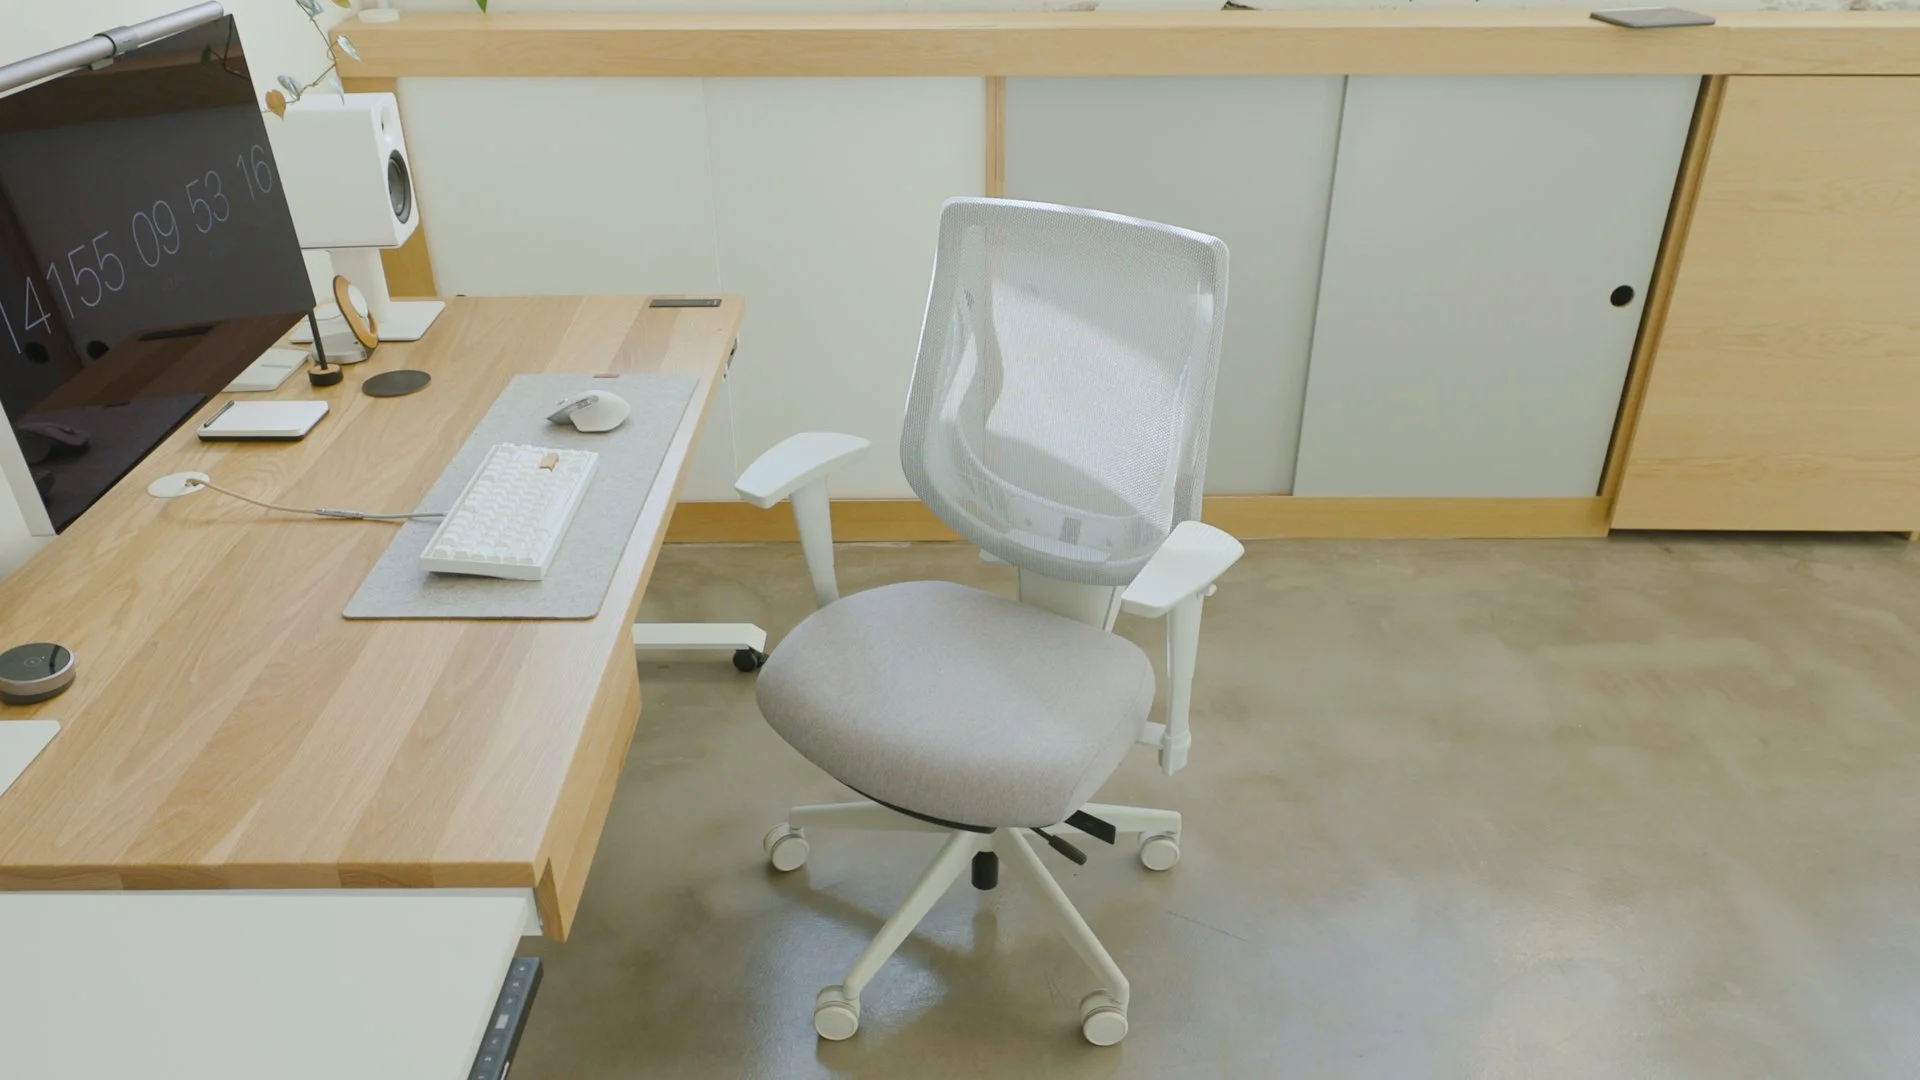
I use the Ergonofis YouToo chair in the Smoke and Sandstone color for my chair. I’ve sat in many different (and more expensive) chairs, and I was surprised at how comfortable and stylish this one was. I can highly recommend it.


Computer and Dock
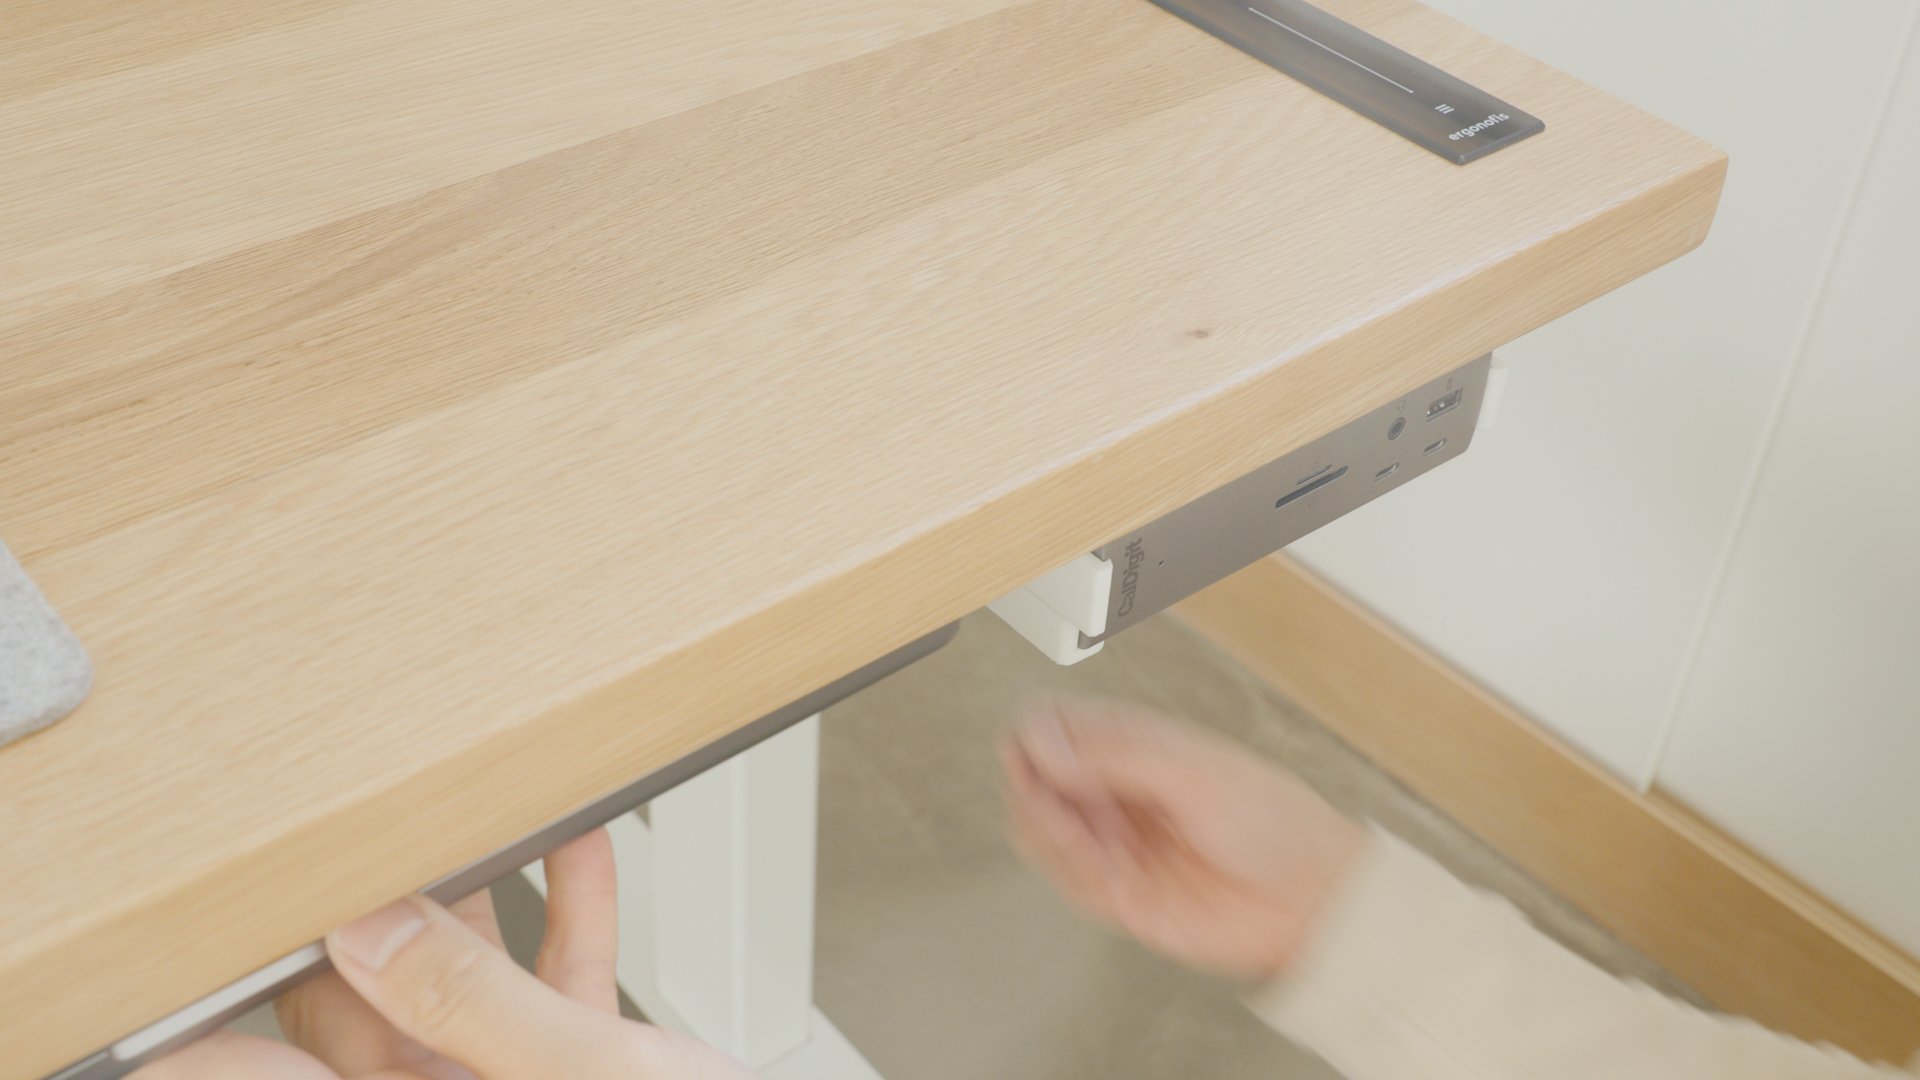
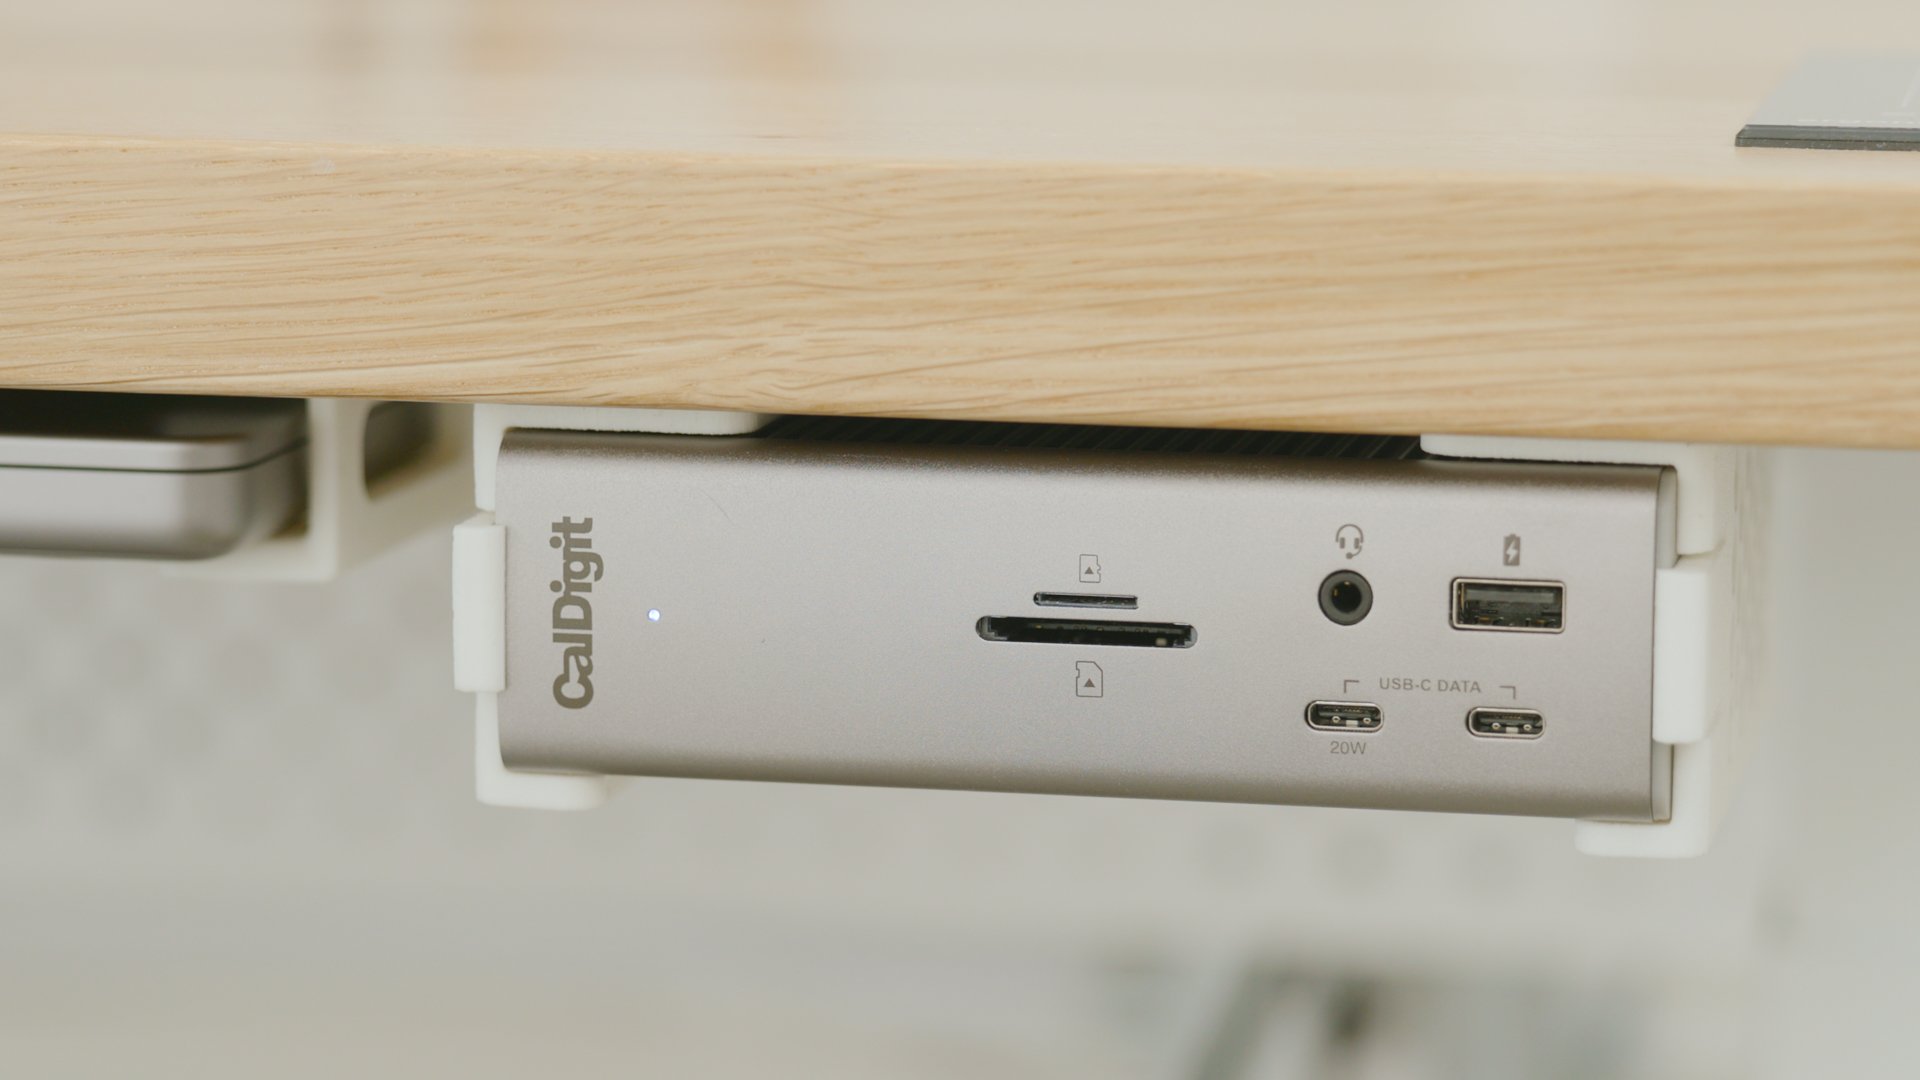
For my workstation, I’m using a 16” MacBook Pro that’s completely maxed out. It’s quite an investment, but I’ve gotten so much from it that it’s paid itself. To dock this, I use a laptop bracket hidden under my desk and plug into a CalDigit TS4 hub via Thunderbolt, which charges my MacBook and has 18 ports to connect additional peripherals to. With a single plug, it conveniently connects to everything in my setup.
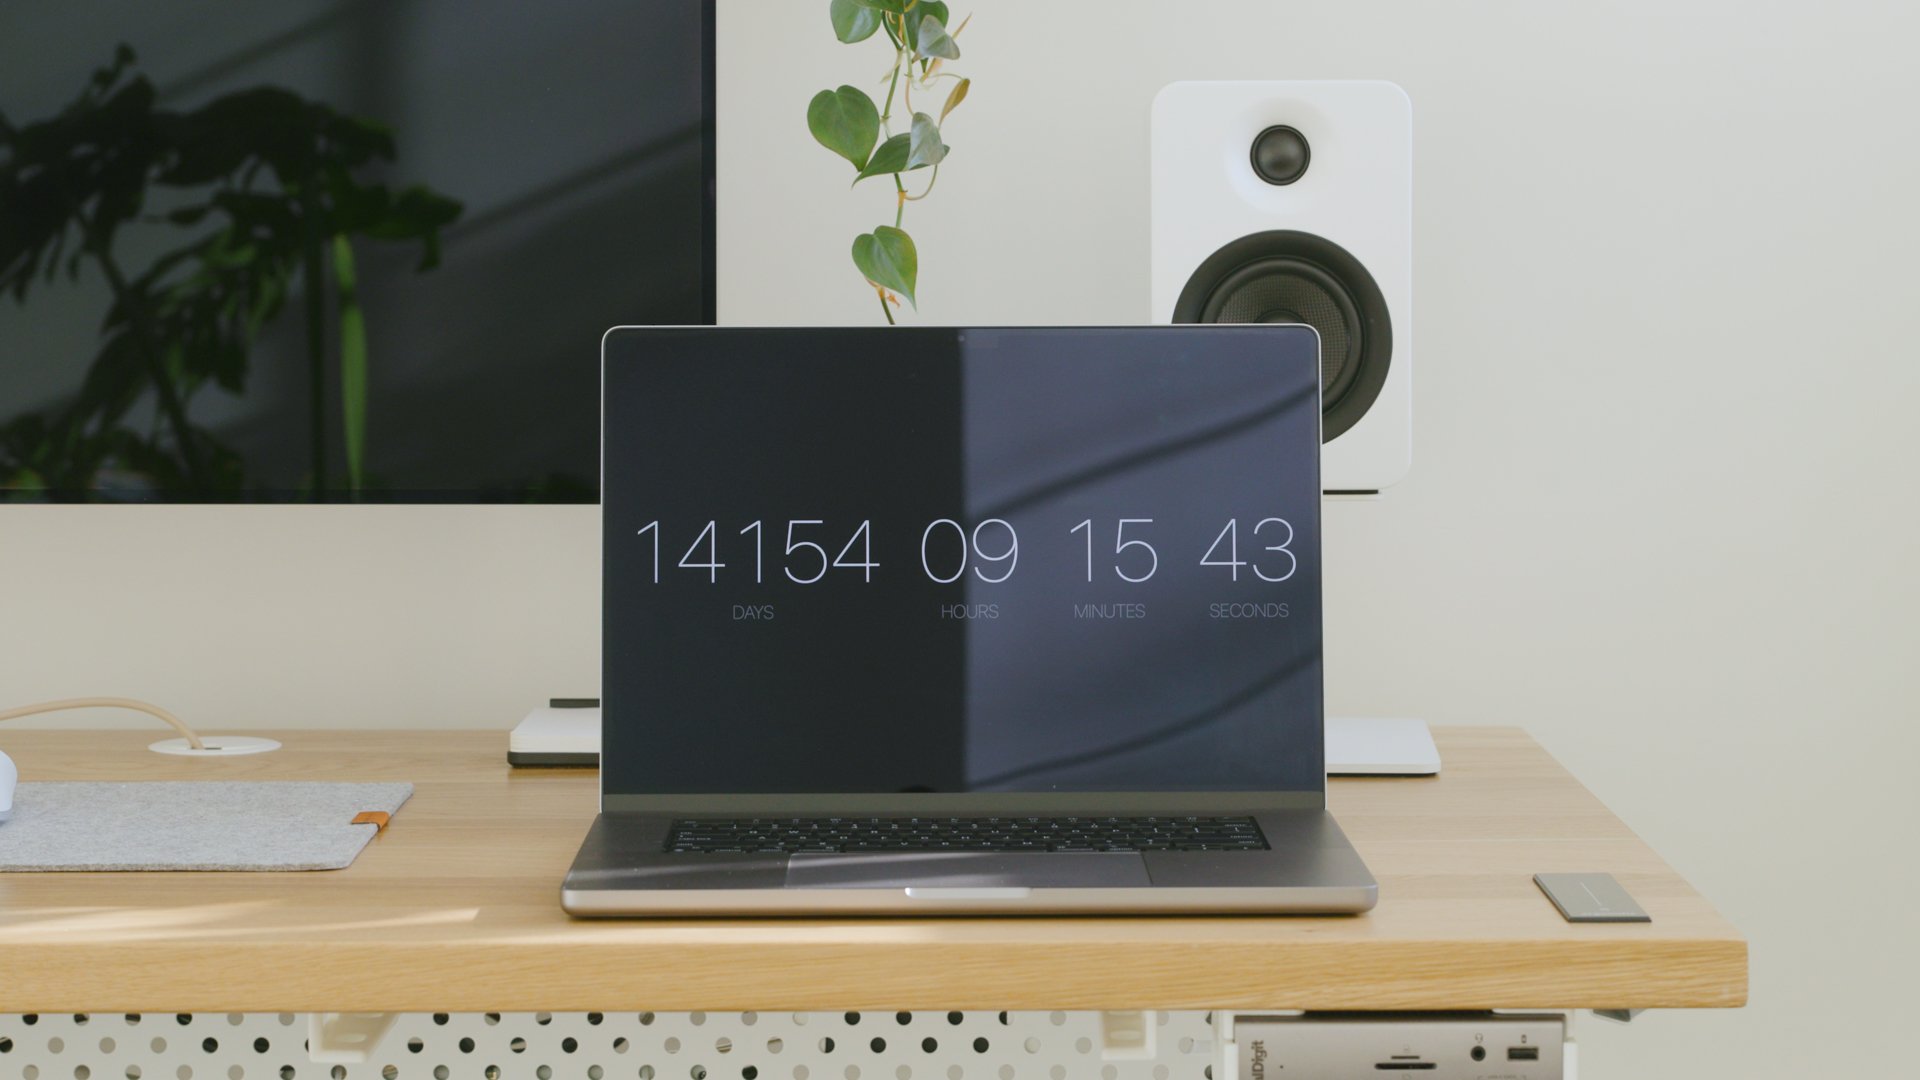
The Apple MacBook Pro with M1 Max chip is at the center of the setup.
Display
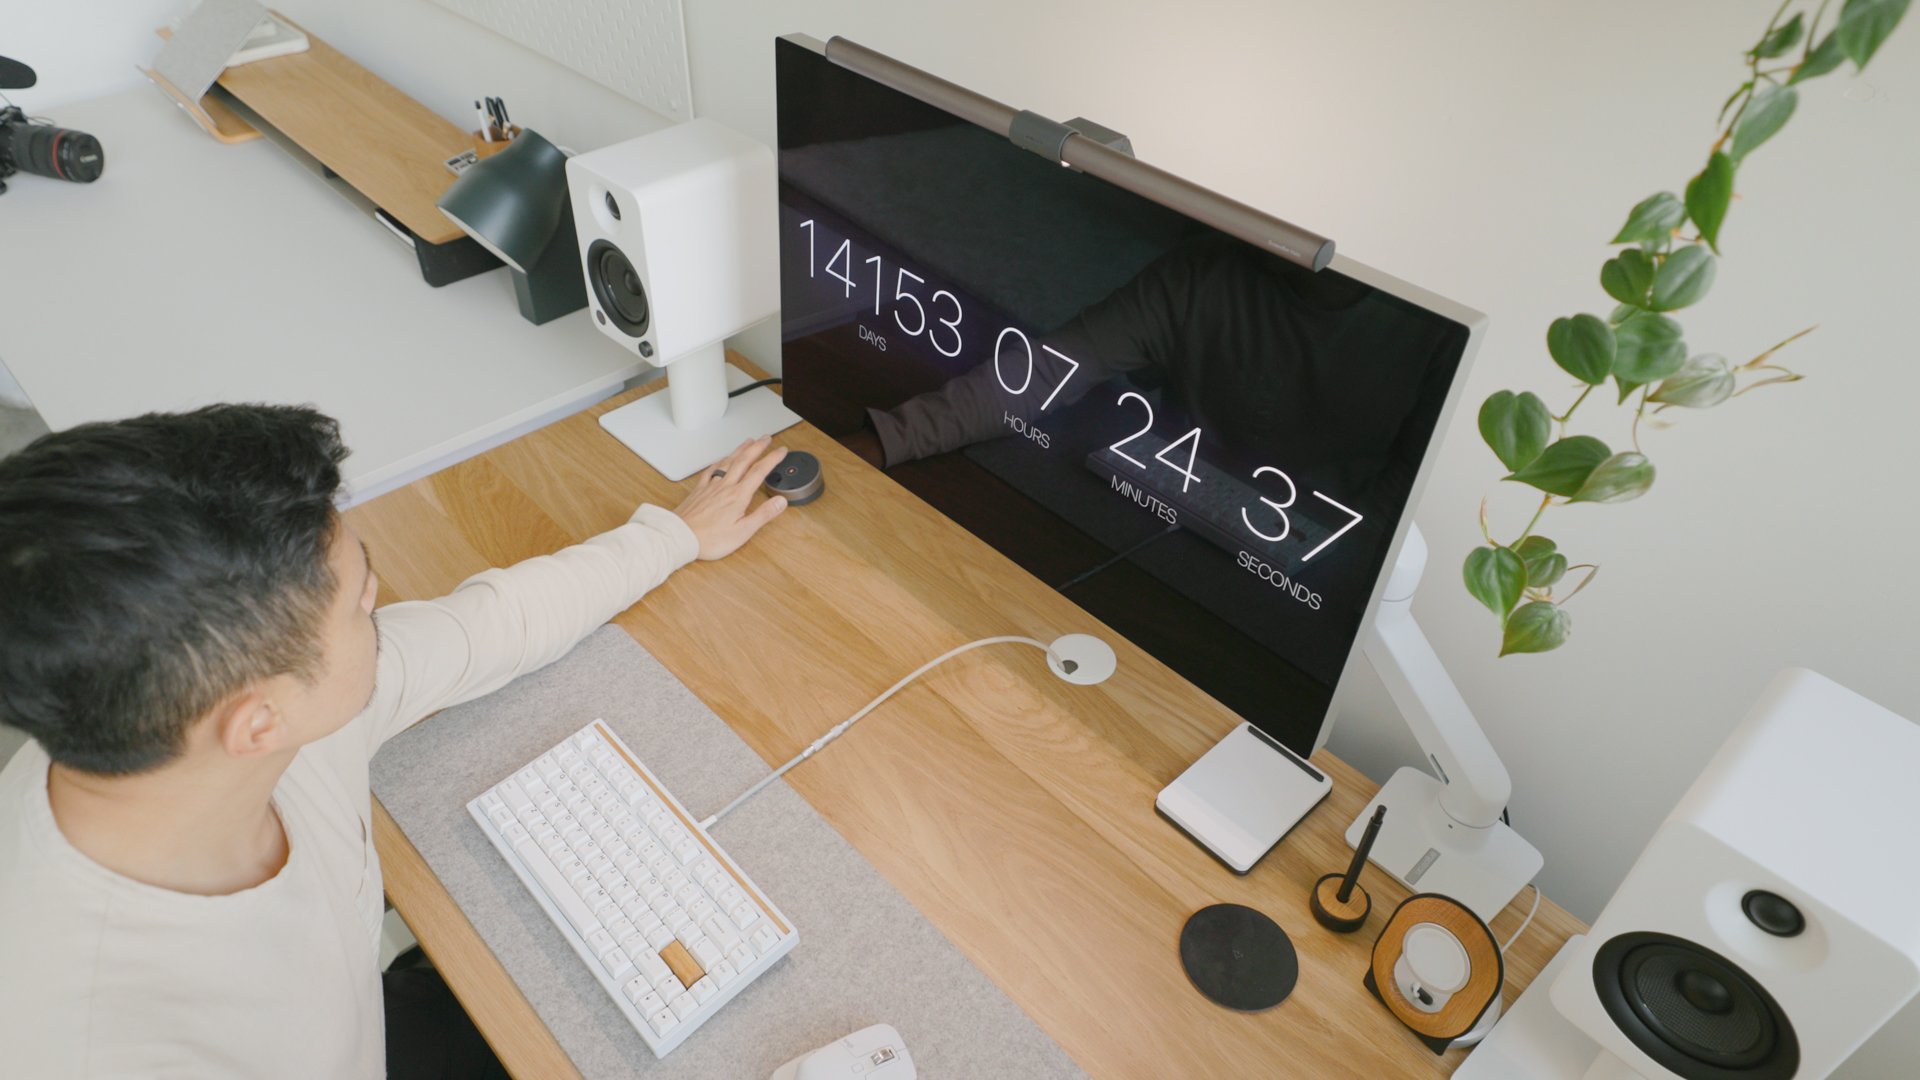
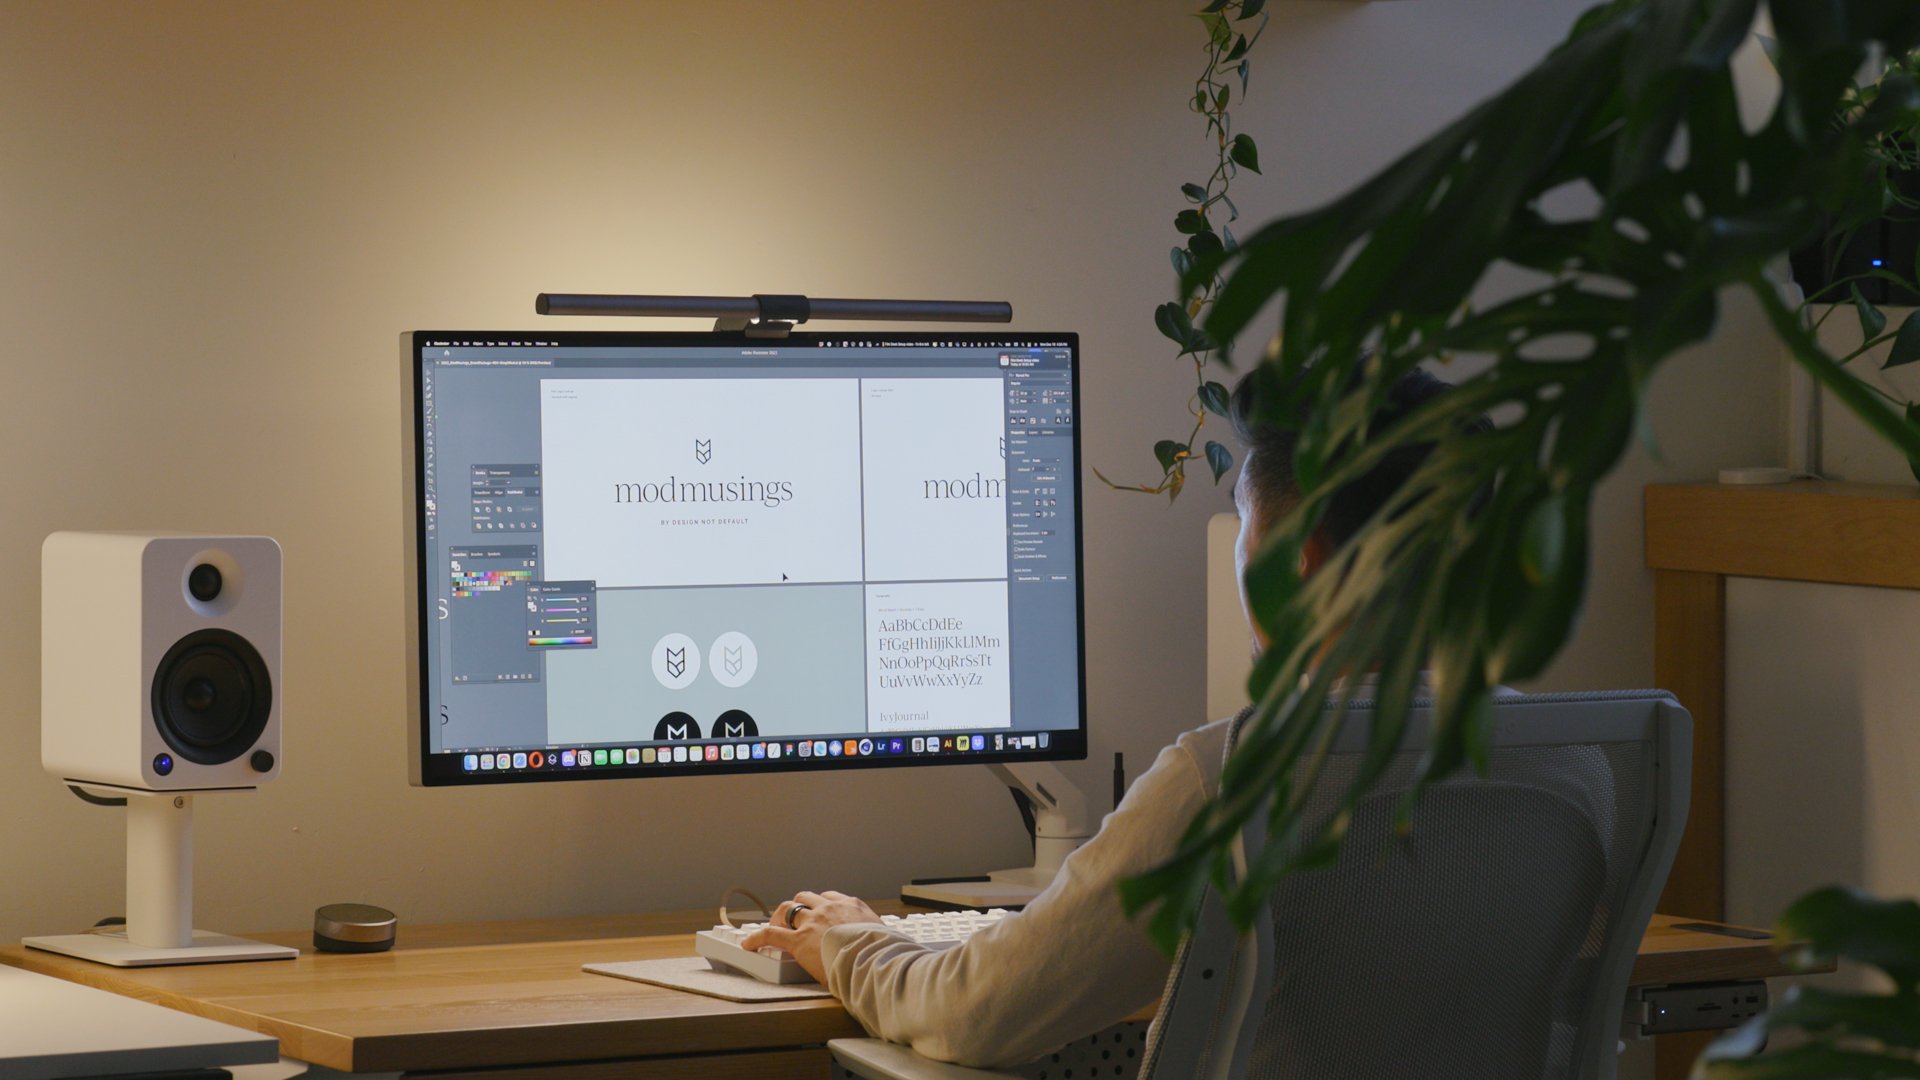
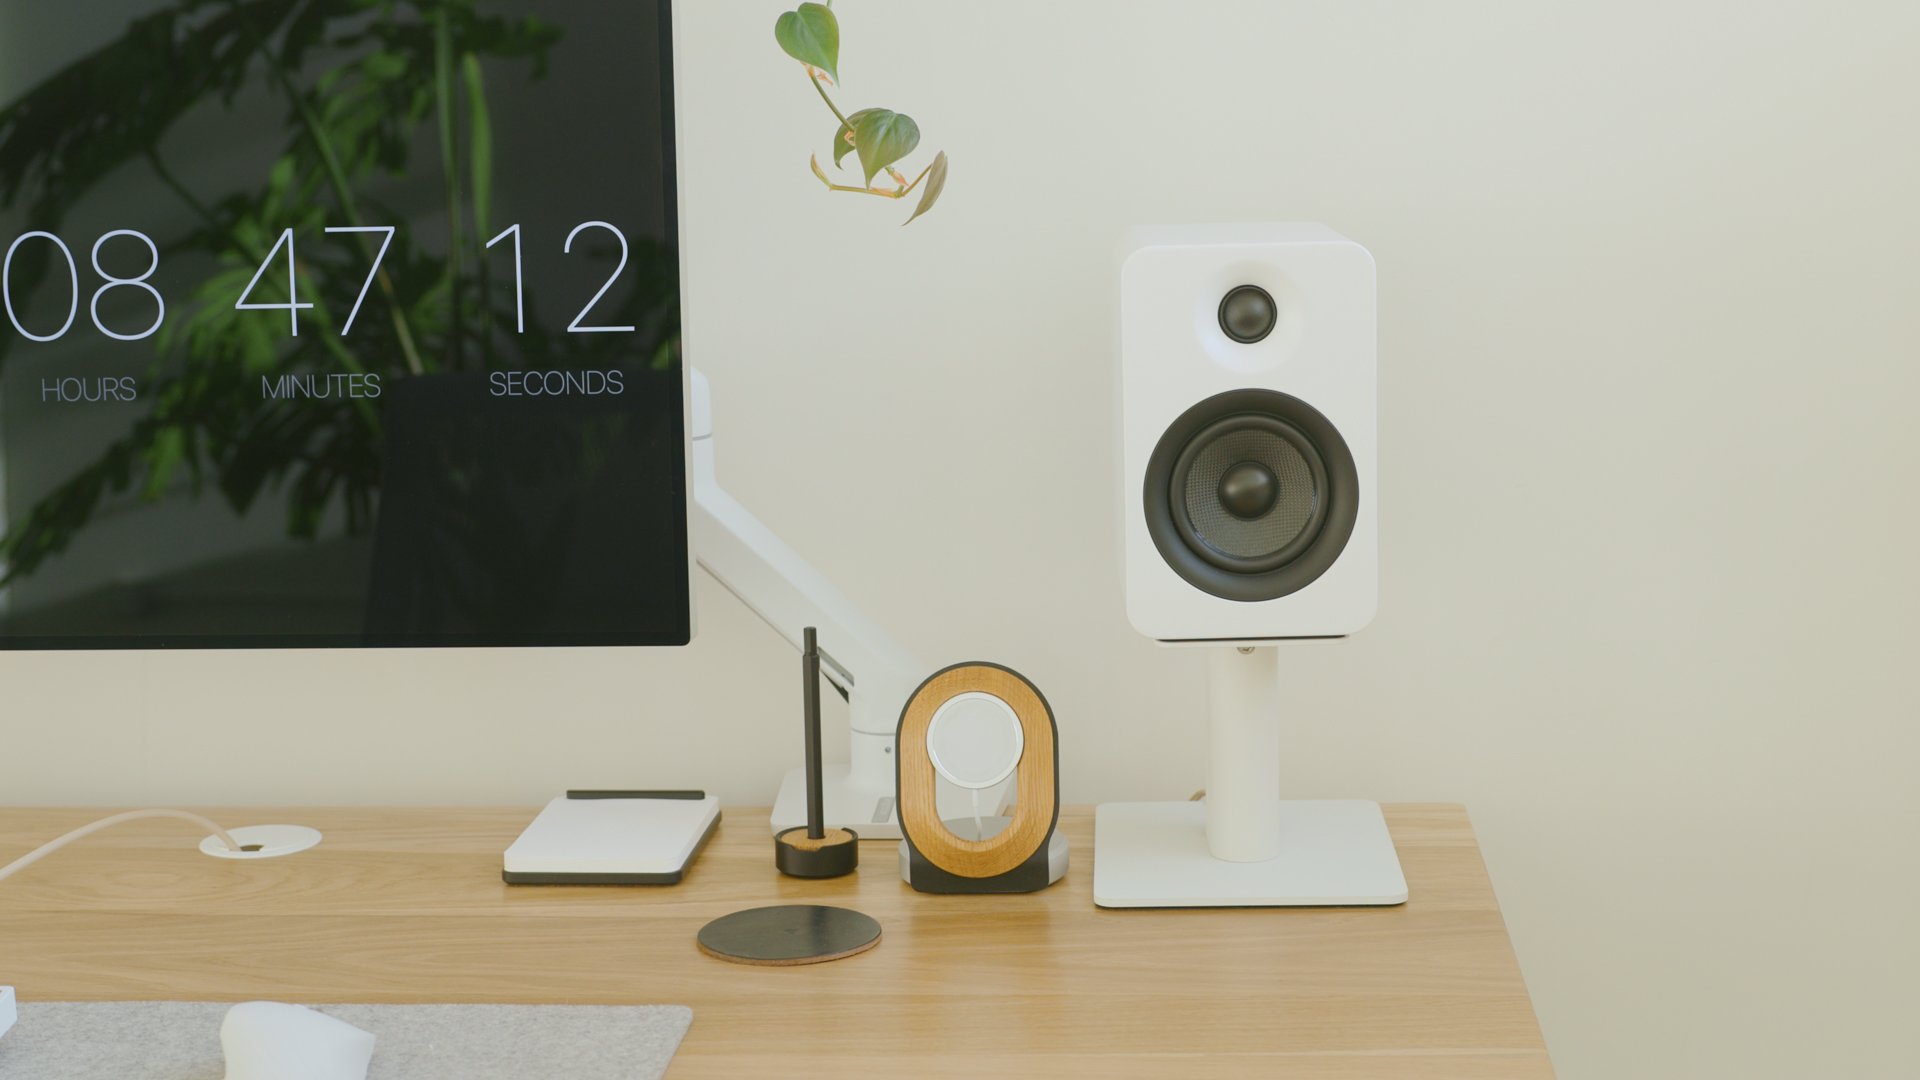
For my monitor, I use the 32” Apple Pro Display XDR. While I’ve grown accustomed to using ultra-wide monitors at home, nothing available on the market was bright enough to accommodate the abundant light coming into the studio. I hesitated to buy the monitor because of its high price, but the moment I turned it on, I knew why it cost so much. I’ve never worked on a monitor as crisp and vibrant as this one. Because it’s a Retina 6K display, I can fit so much on the screen, and it looks absolutely gorgeous. It’s not a monitor for everyone, but it’s exactly what I need in this space.
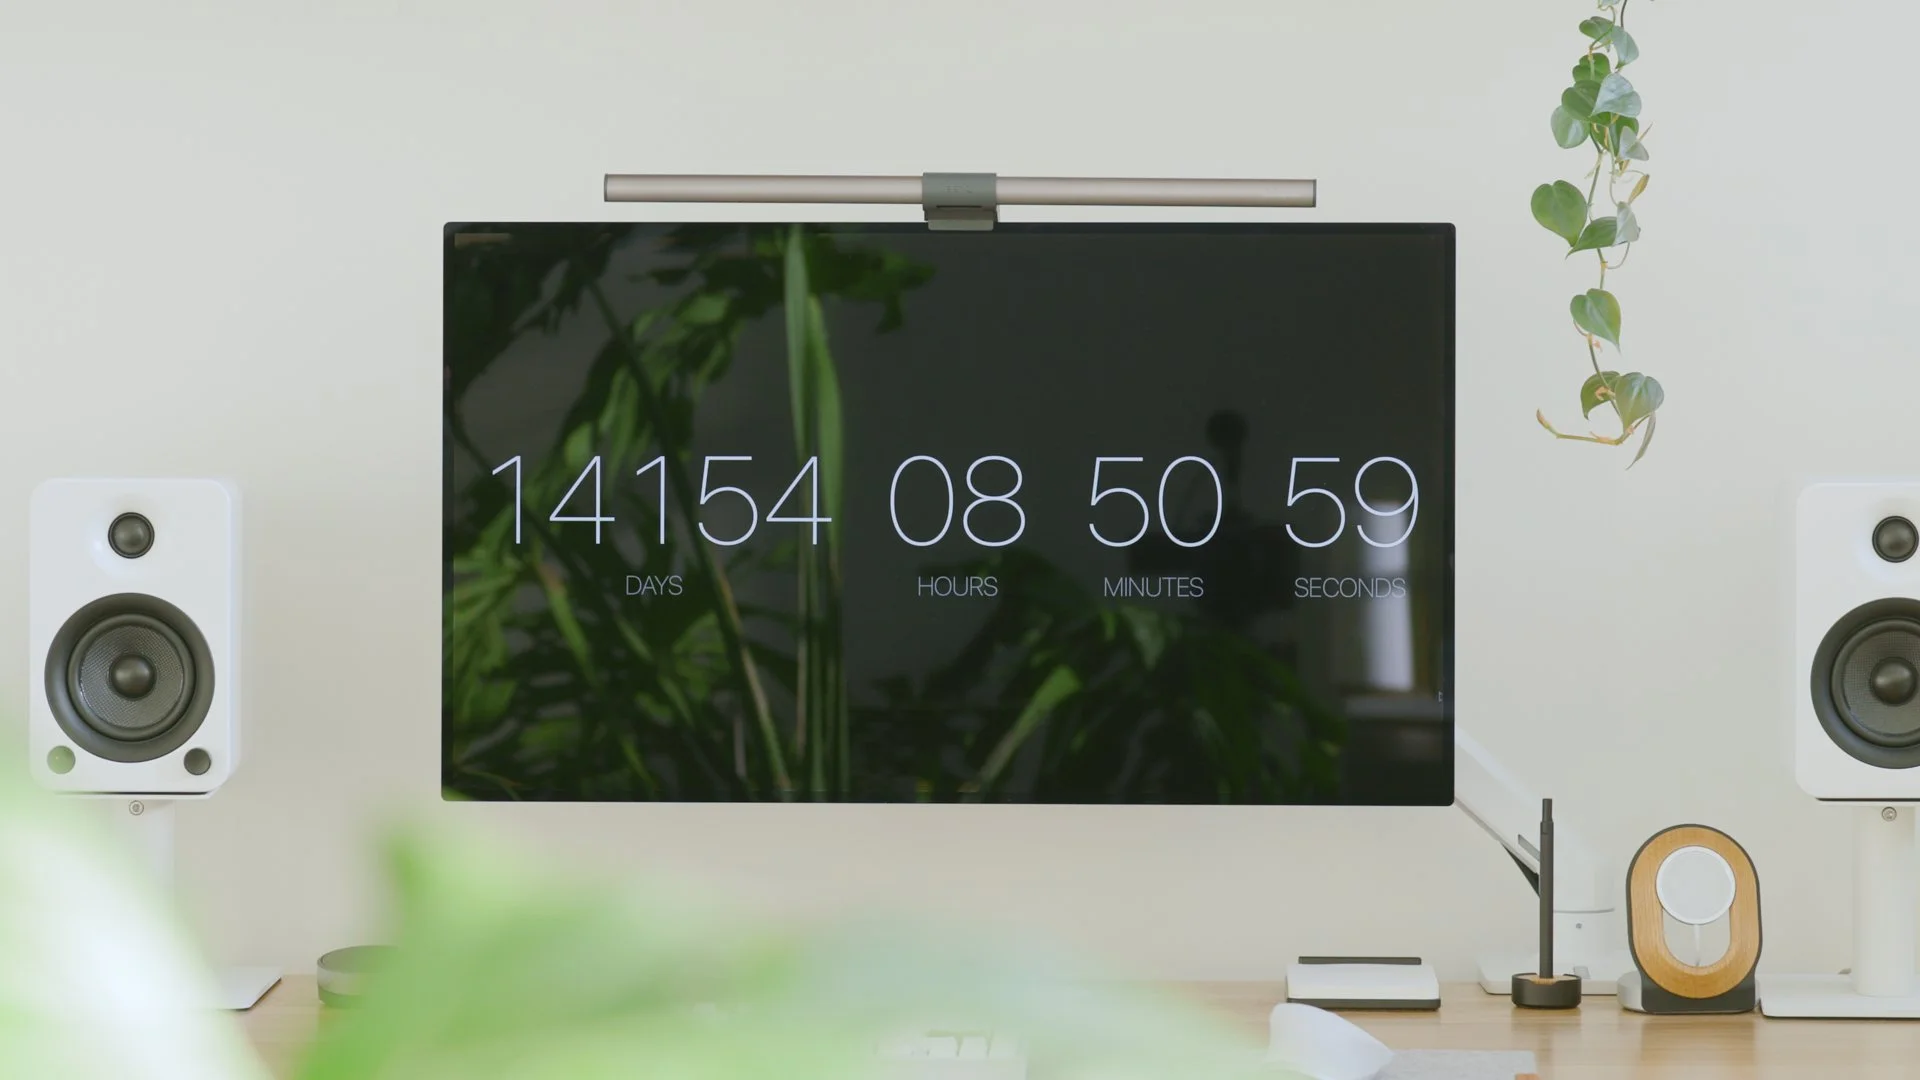
The HX Monitor arm by Ergotron is a better solution to hold the XDR display because it offers more flexibility in it’s positioning while maintaining a clean minimal look.
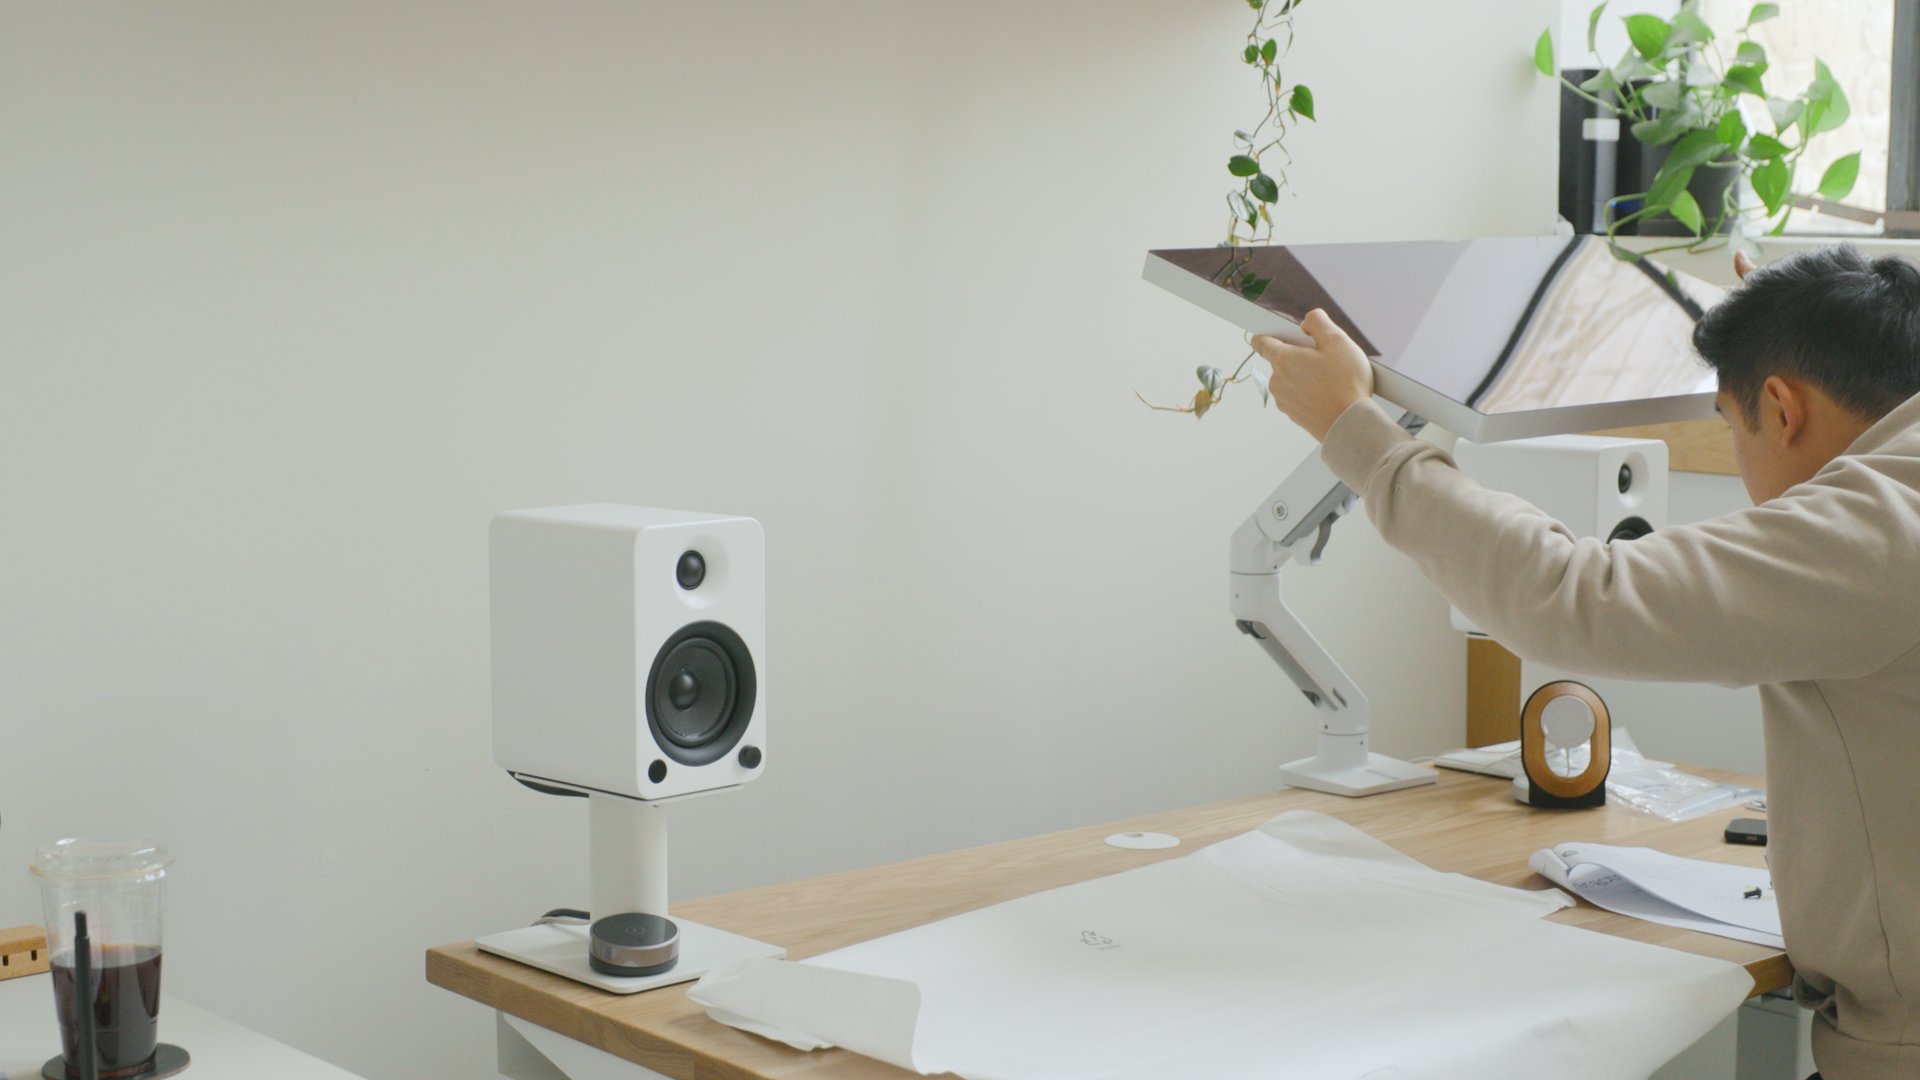

At first, I paired this with the Apple Pro Stand, but I had to swap it out because it blocked the path of the USB cable going into my keyboard. As much as I prefer the look of the minimal aluminum stand, I’ve found the HX monitor arm by Ergotron is more practical for this setup.
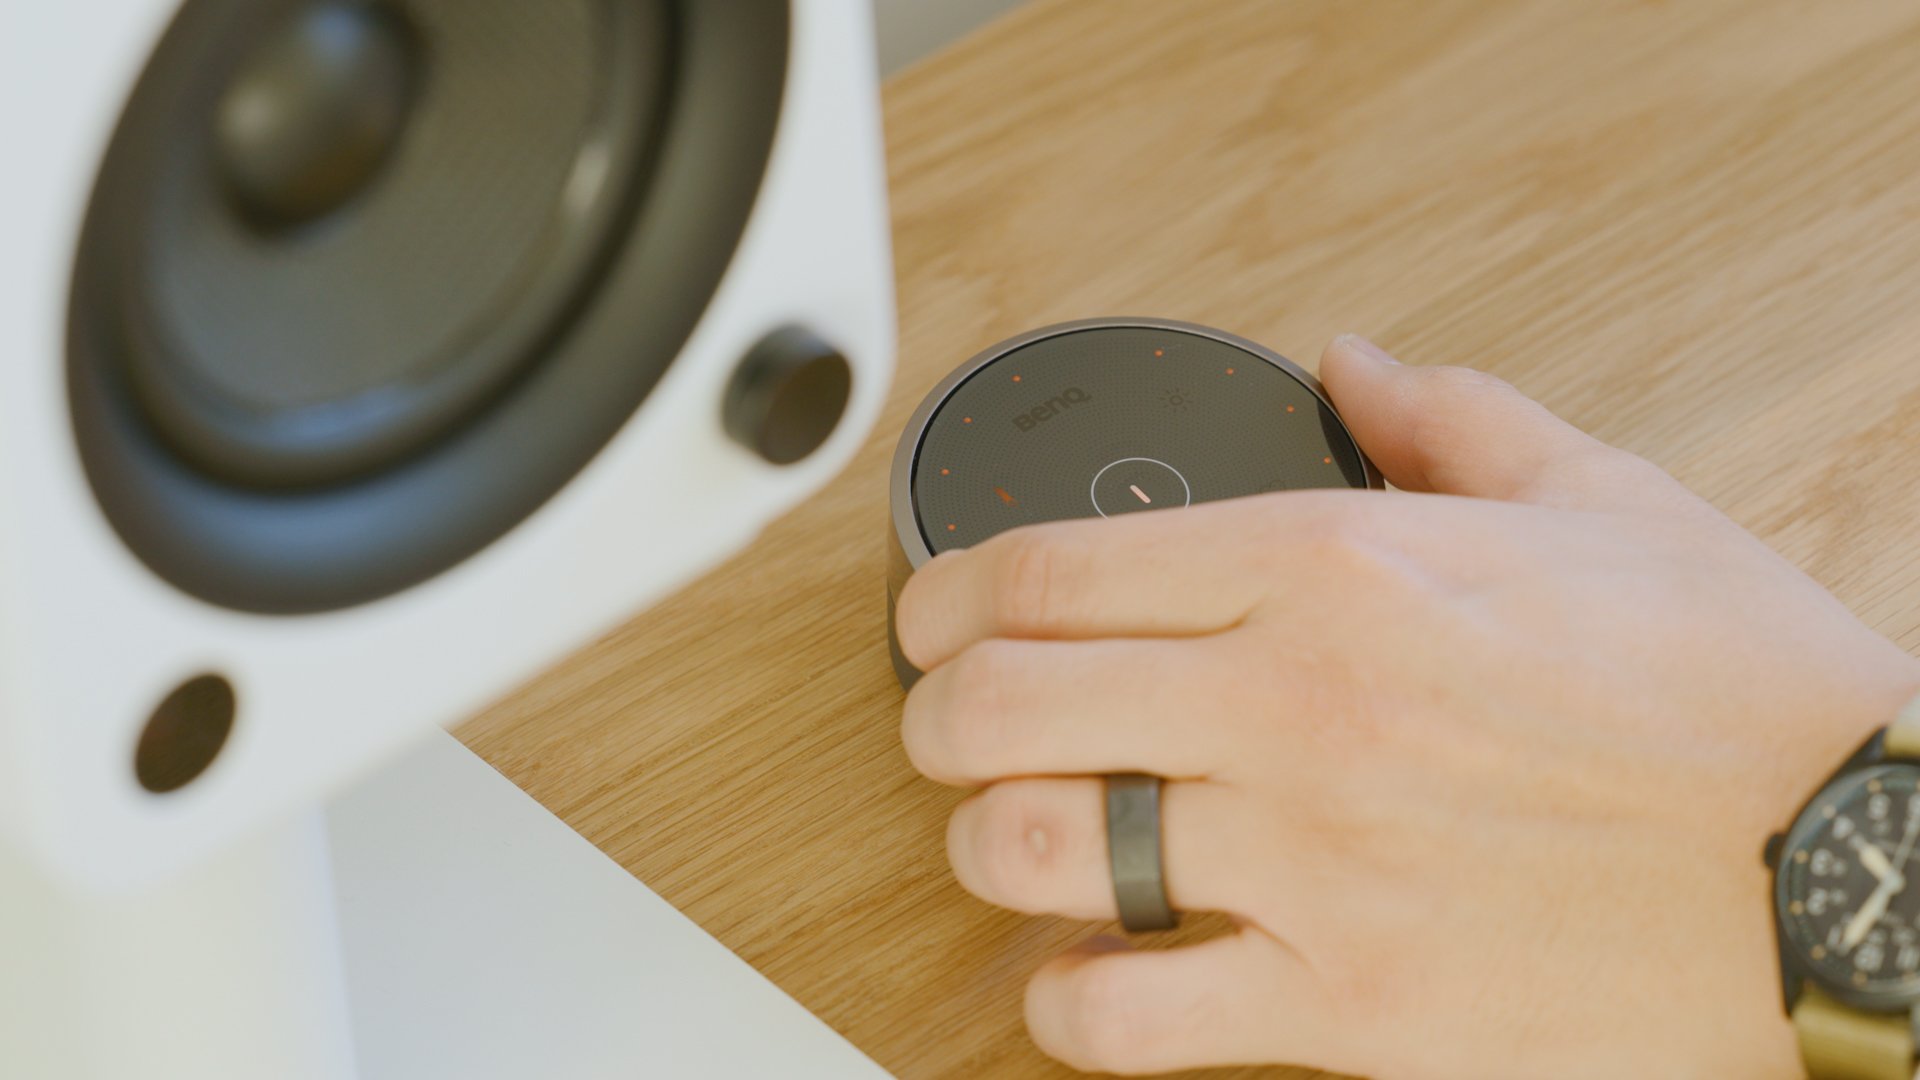
On top of my monitor is the ScreenBar Halo light by BenQ. This is an incredible accessory that illuminates my desktop when I need more light and also provides bias lighting behind my monitor. The light can be programmed and controlled using this sleek wireless dial that can go anywhere on your desk.
The Halo light by BenQ offers adjustable lighting for your desktop (without screen glare) and bias lighting for color-sensitive work.

Desktop Peripherals
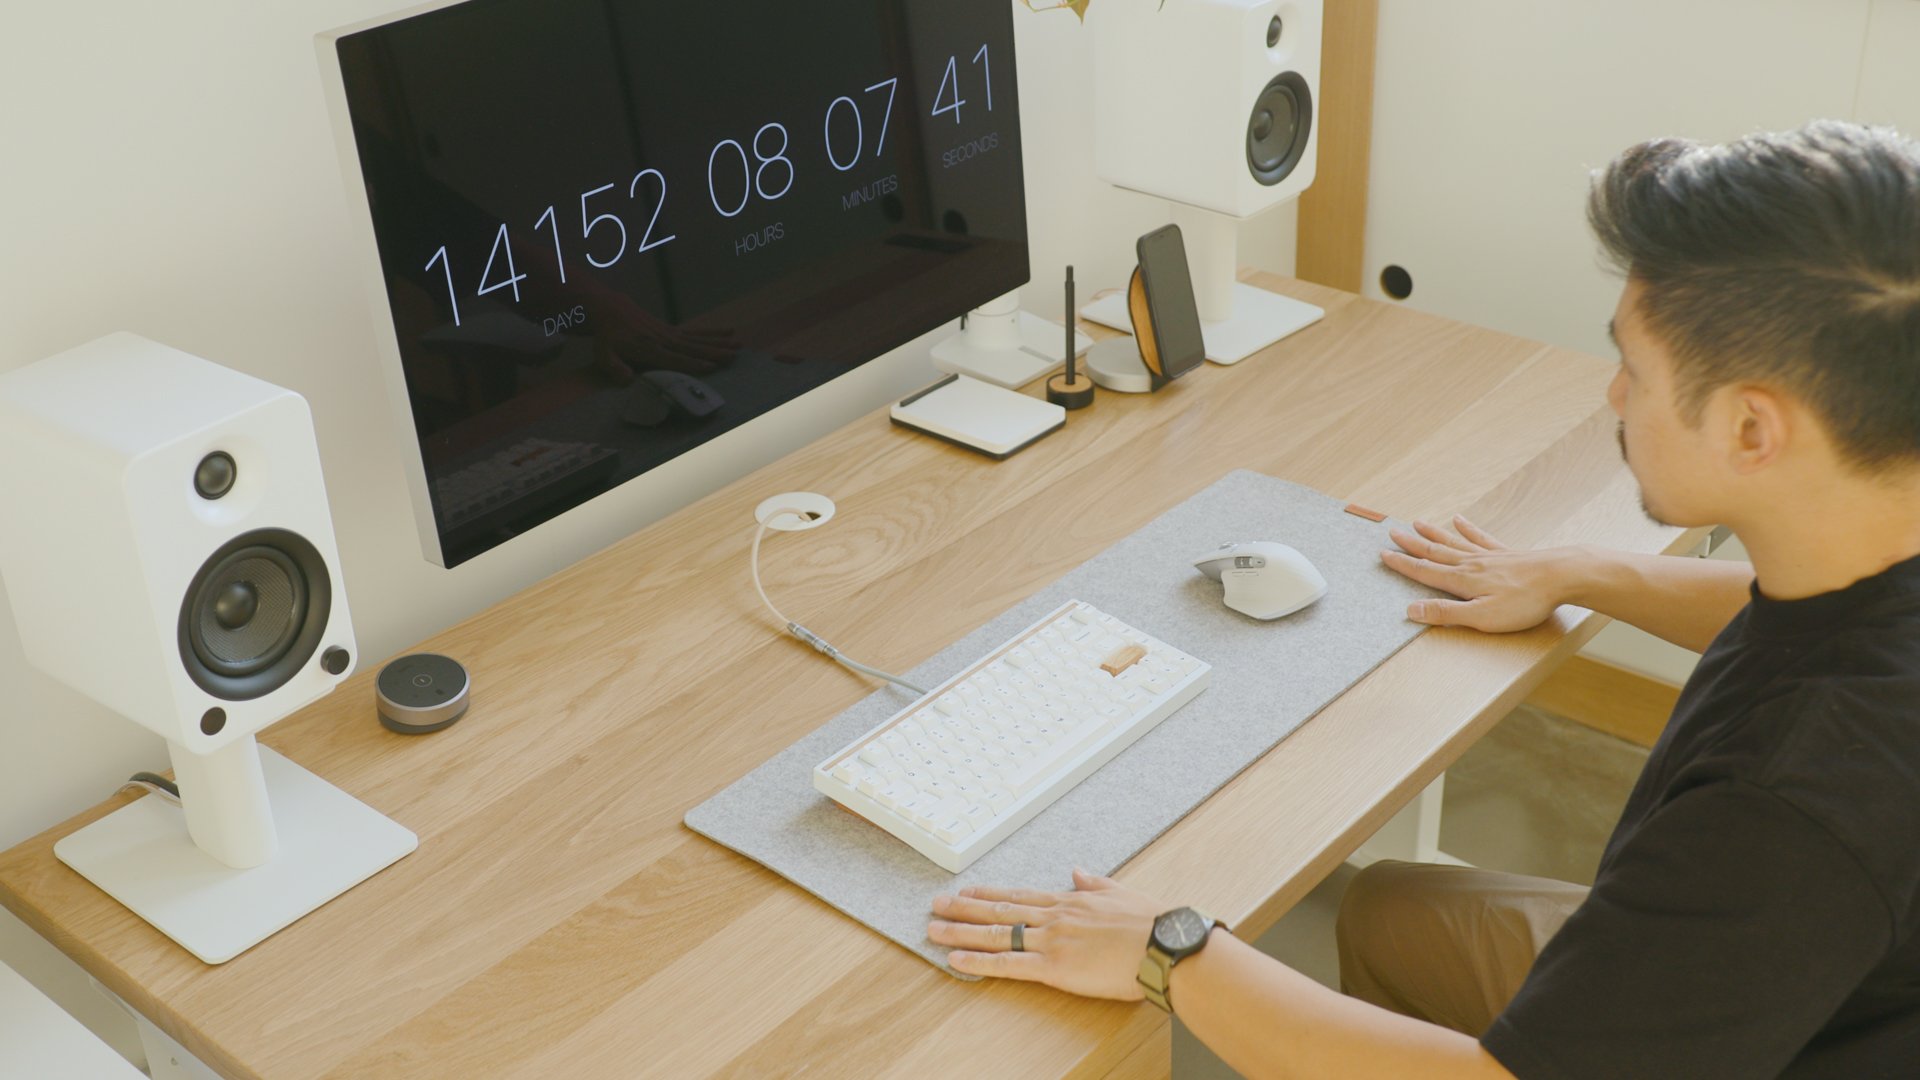
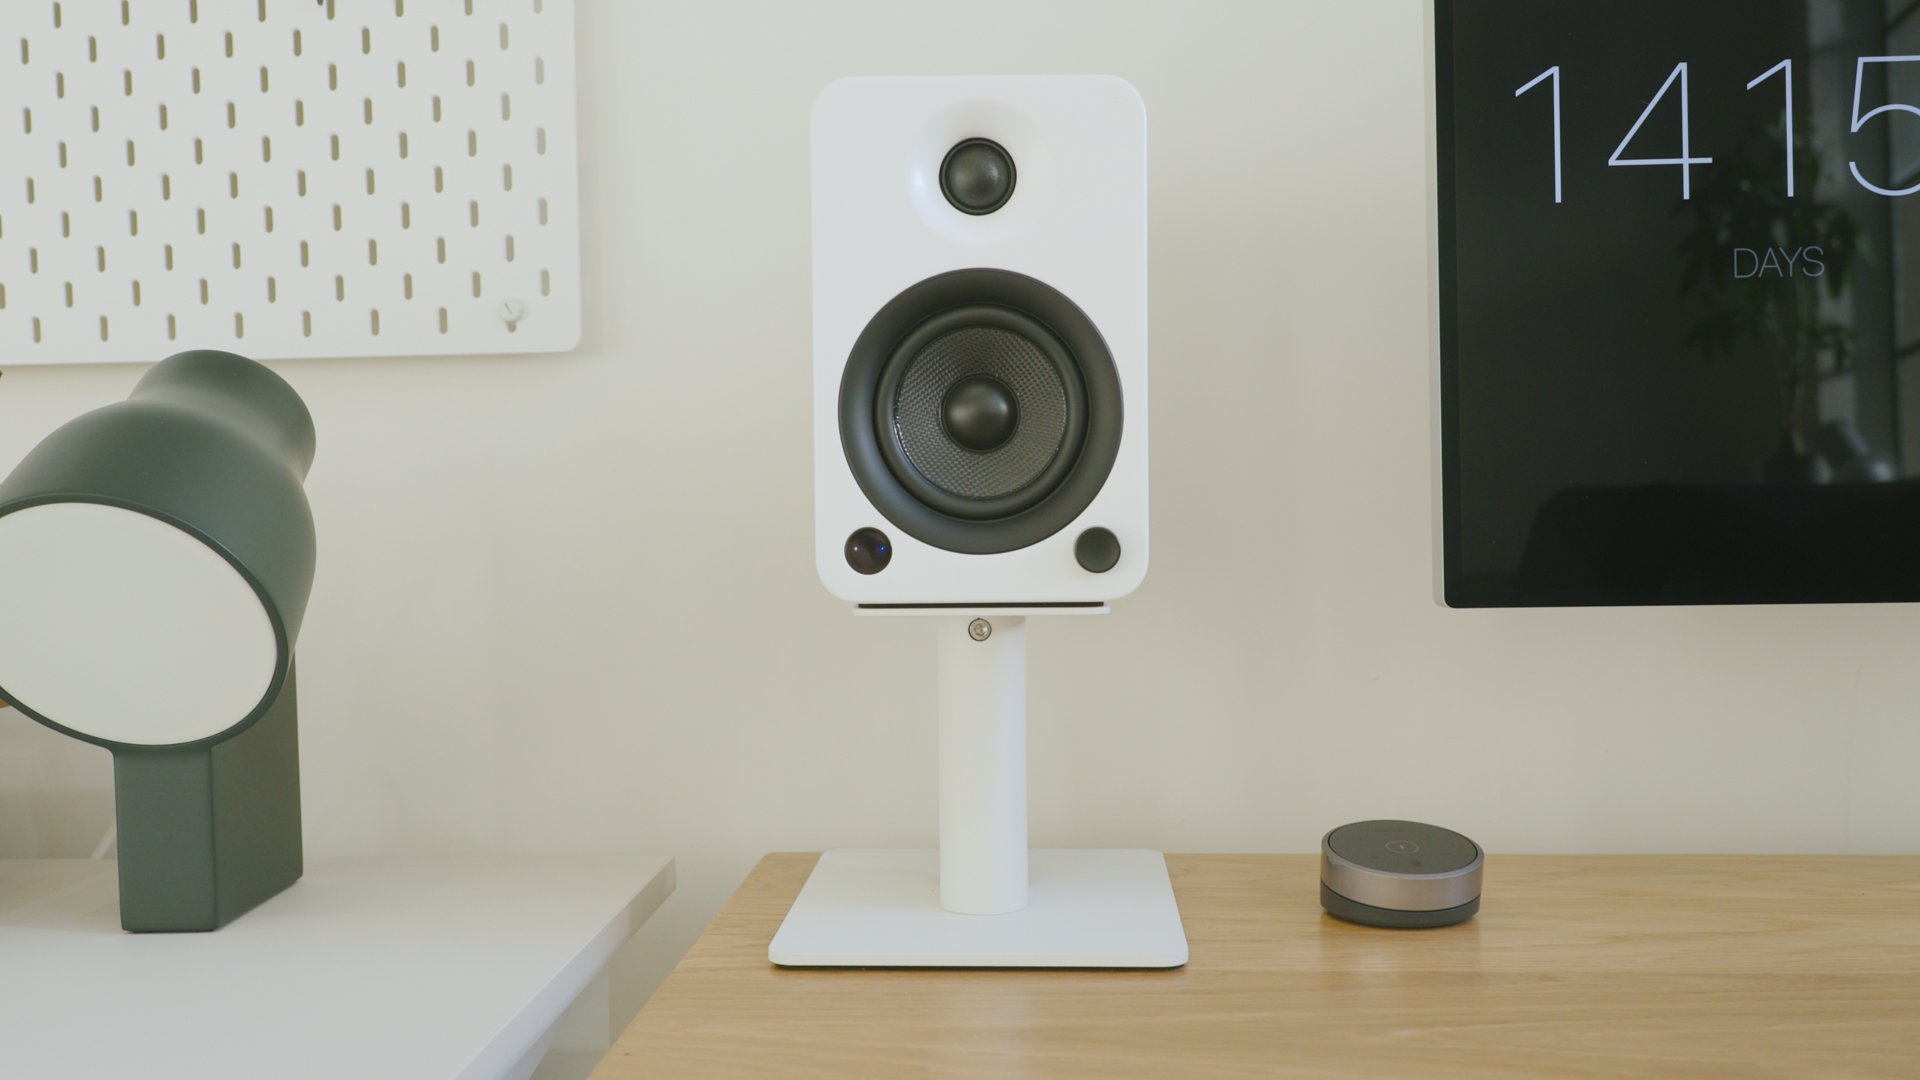
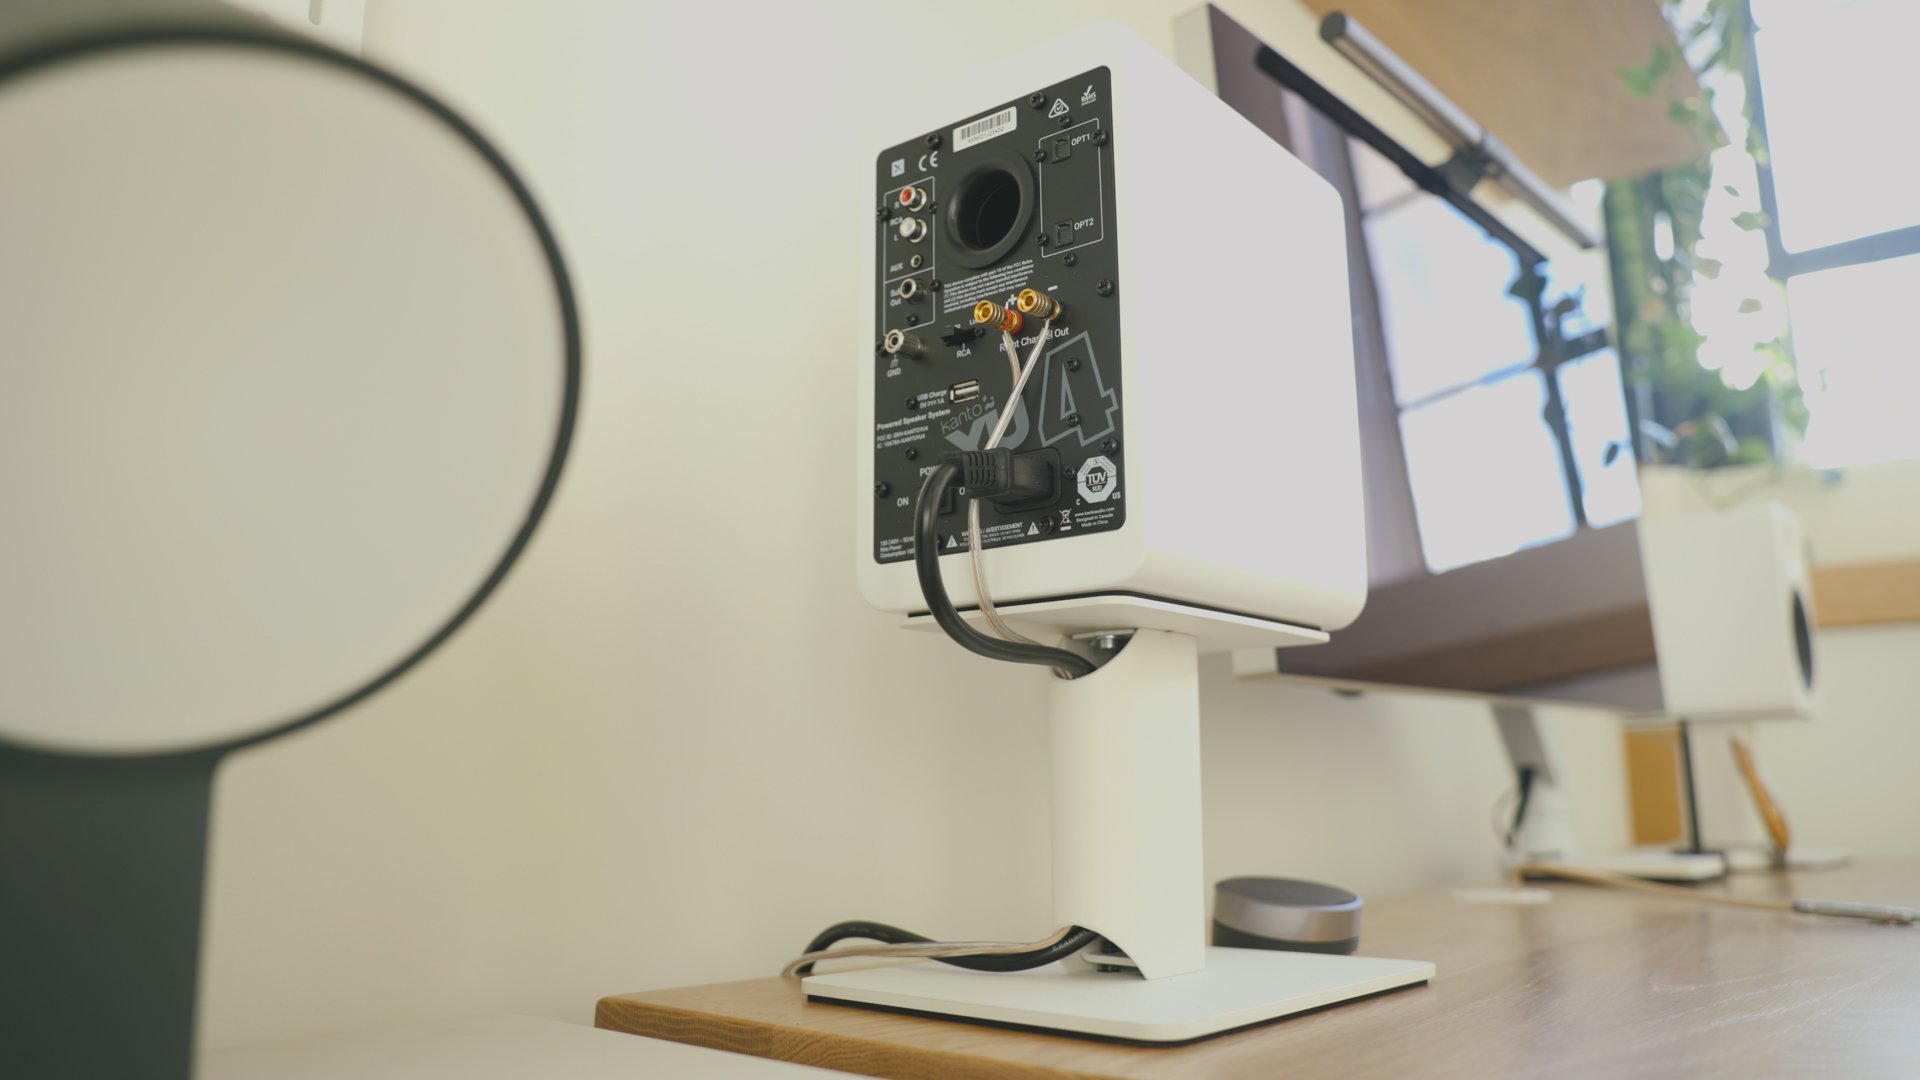
For audio, I am using the YU4 speakers by Kanto. I’m no audiophile, but to my ears, these sound amazing. My favorite feature is the remote control for the speakers, which helps me fine-tune the sound and switch between sources. They sit on 6” stands, also by Kanto, which helps hide and guide the cables from behind the speaker.

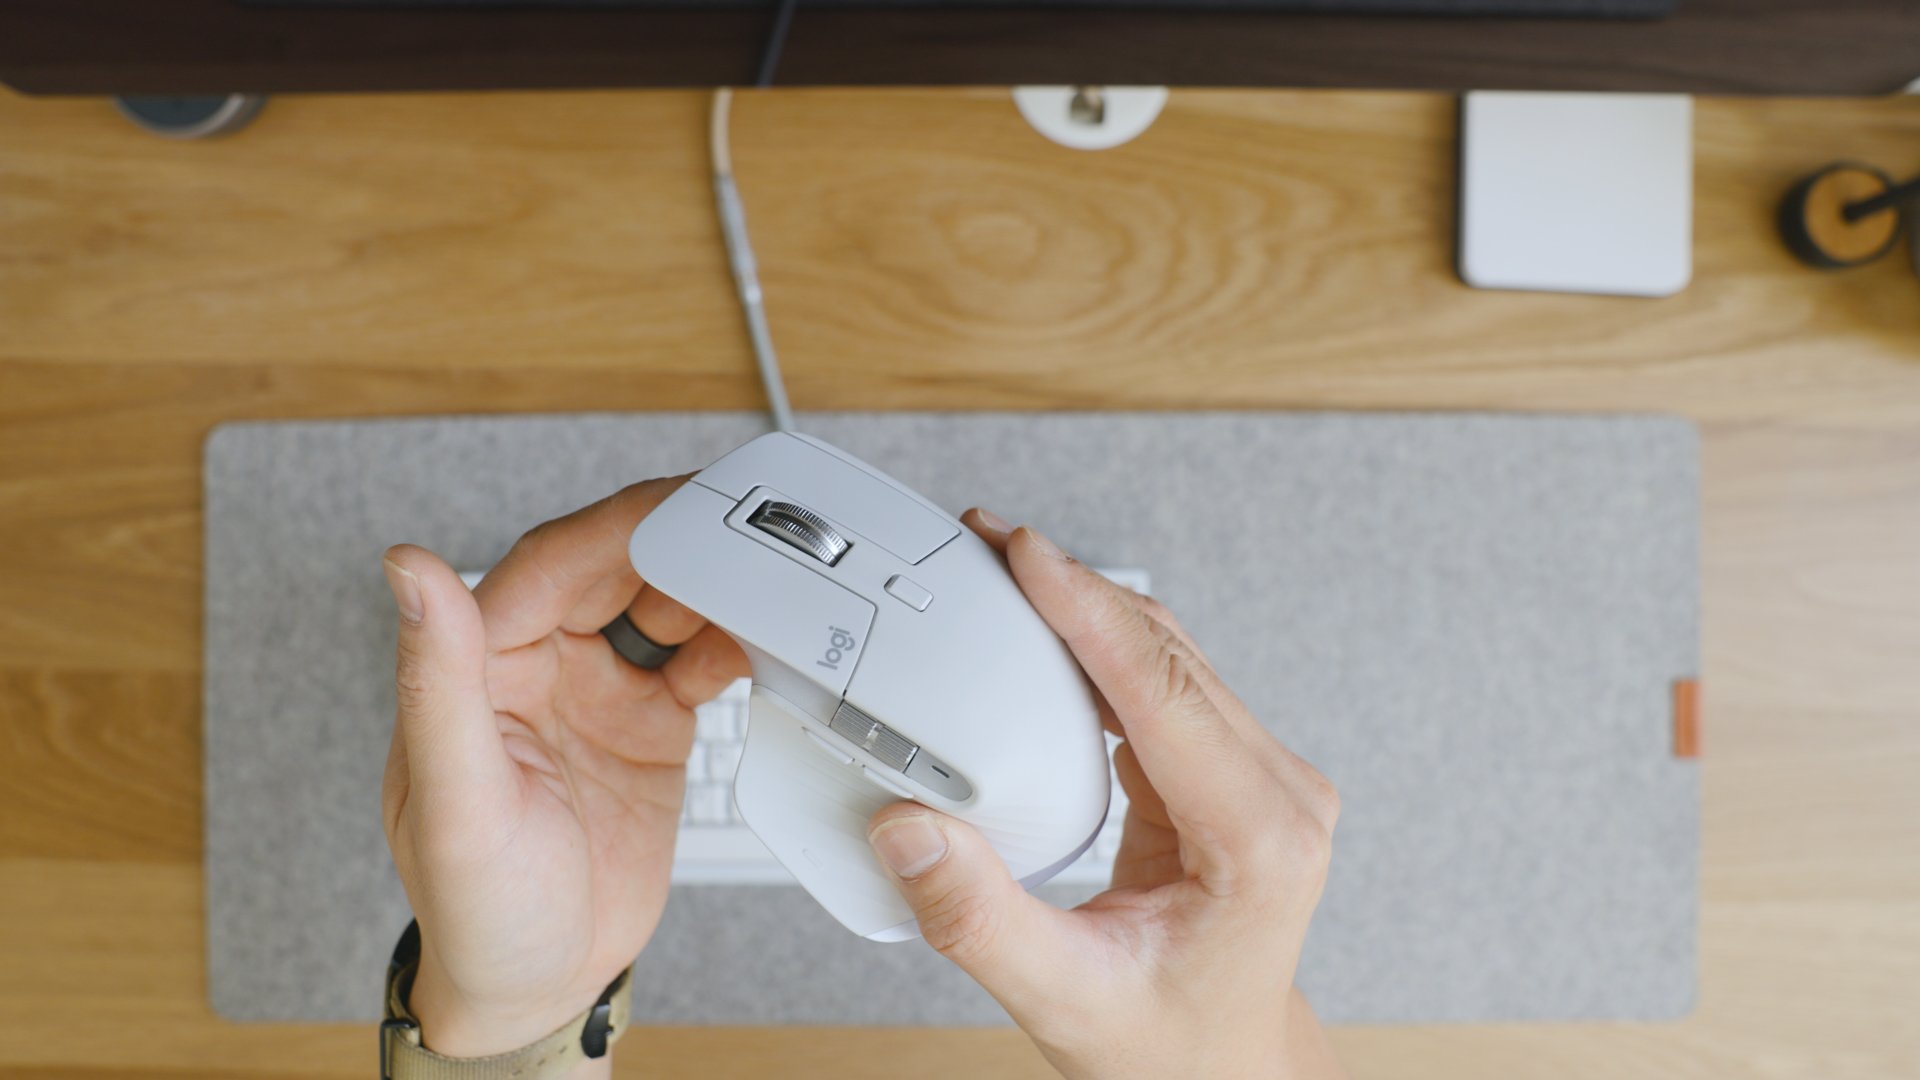
For my mouse, I am using the Logitech MX Master 3S for Mac in the Pale Gray color. This has been my go-to mouse for years because of its finely tuned ergonomic form and excellent productivity features like programmable buttons and thumbwheel. At home, I’m still using Logitech Lift, which has also become another favorite. I can highly recommend either for their comfort and aesthetics.
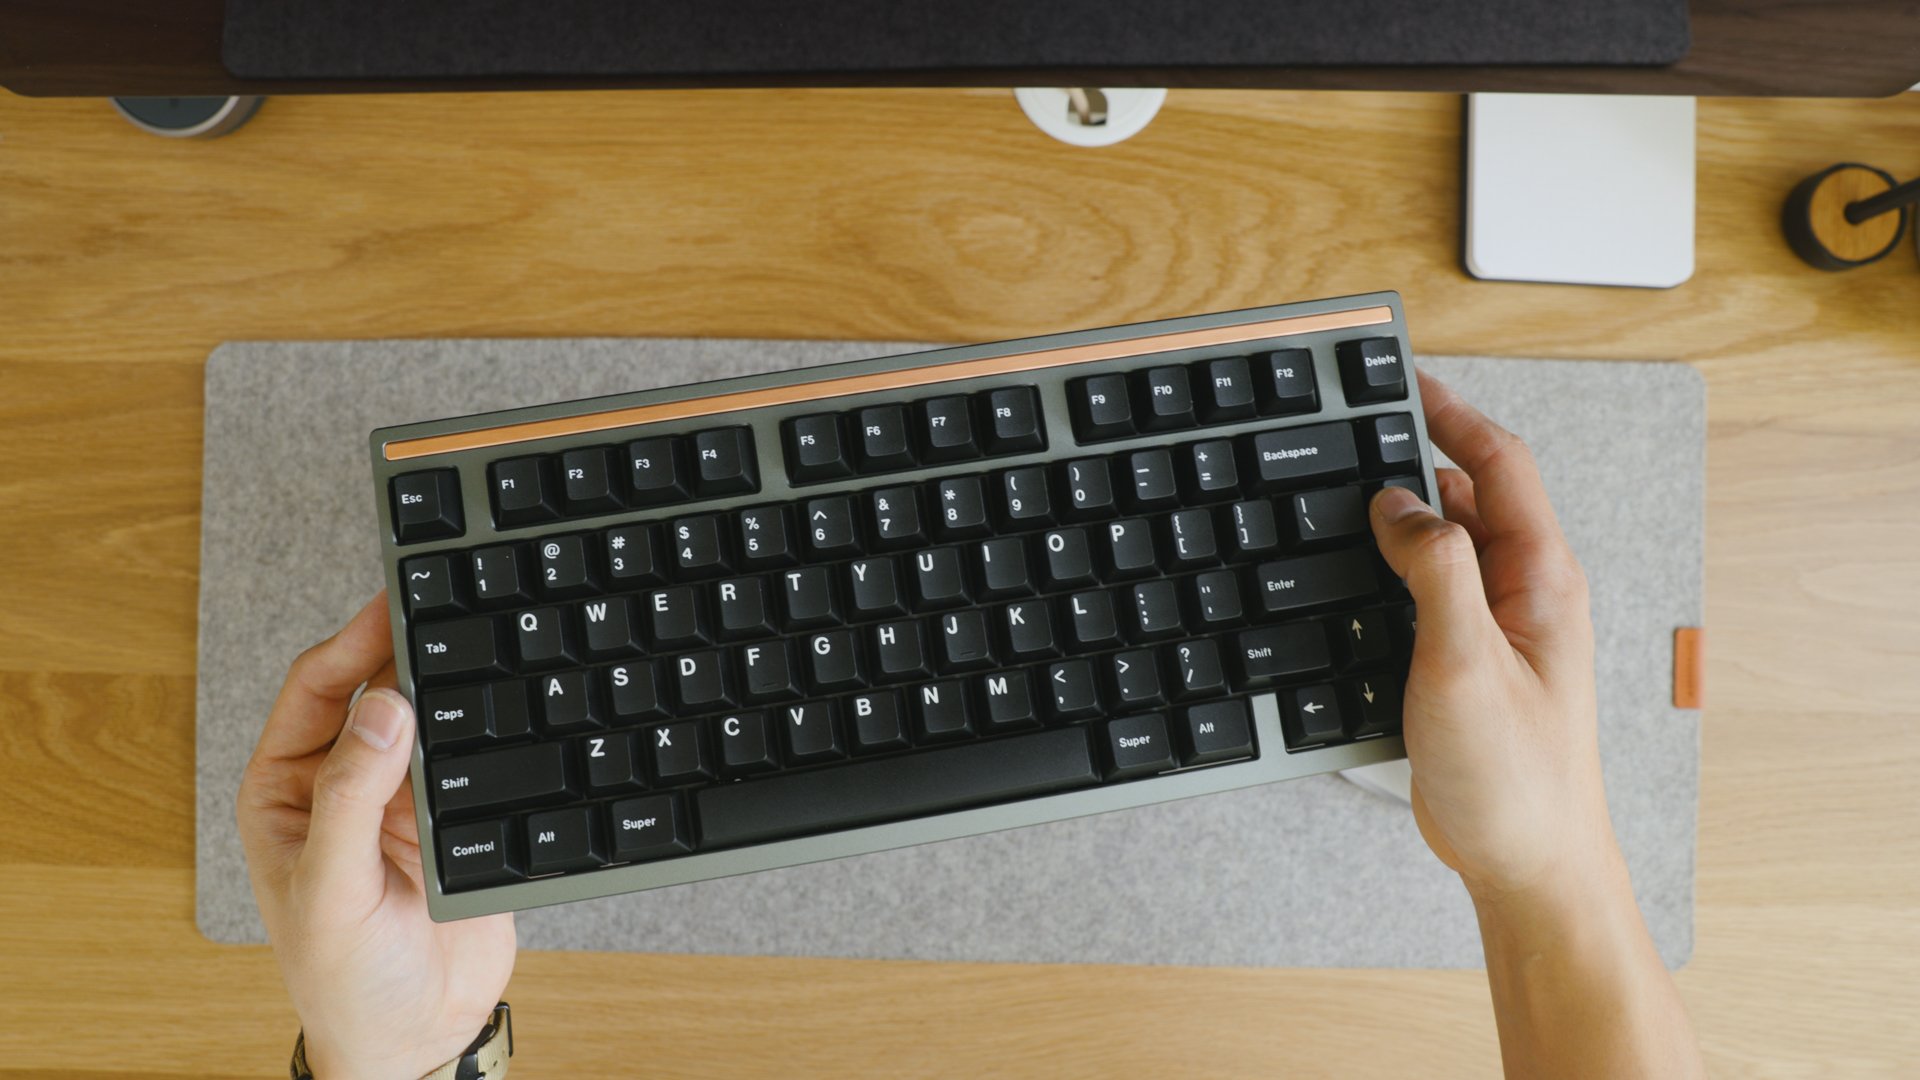
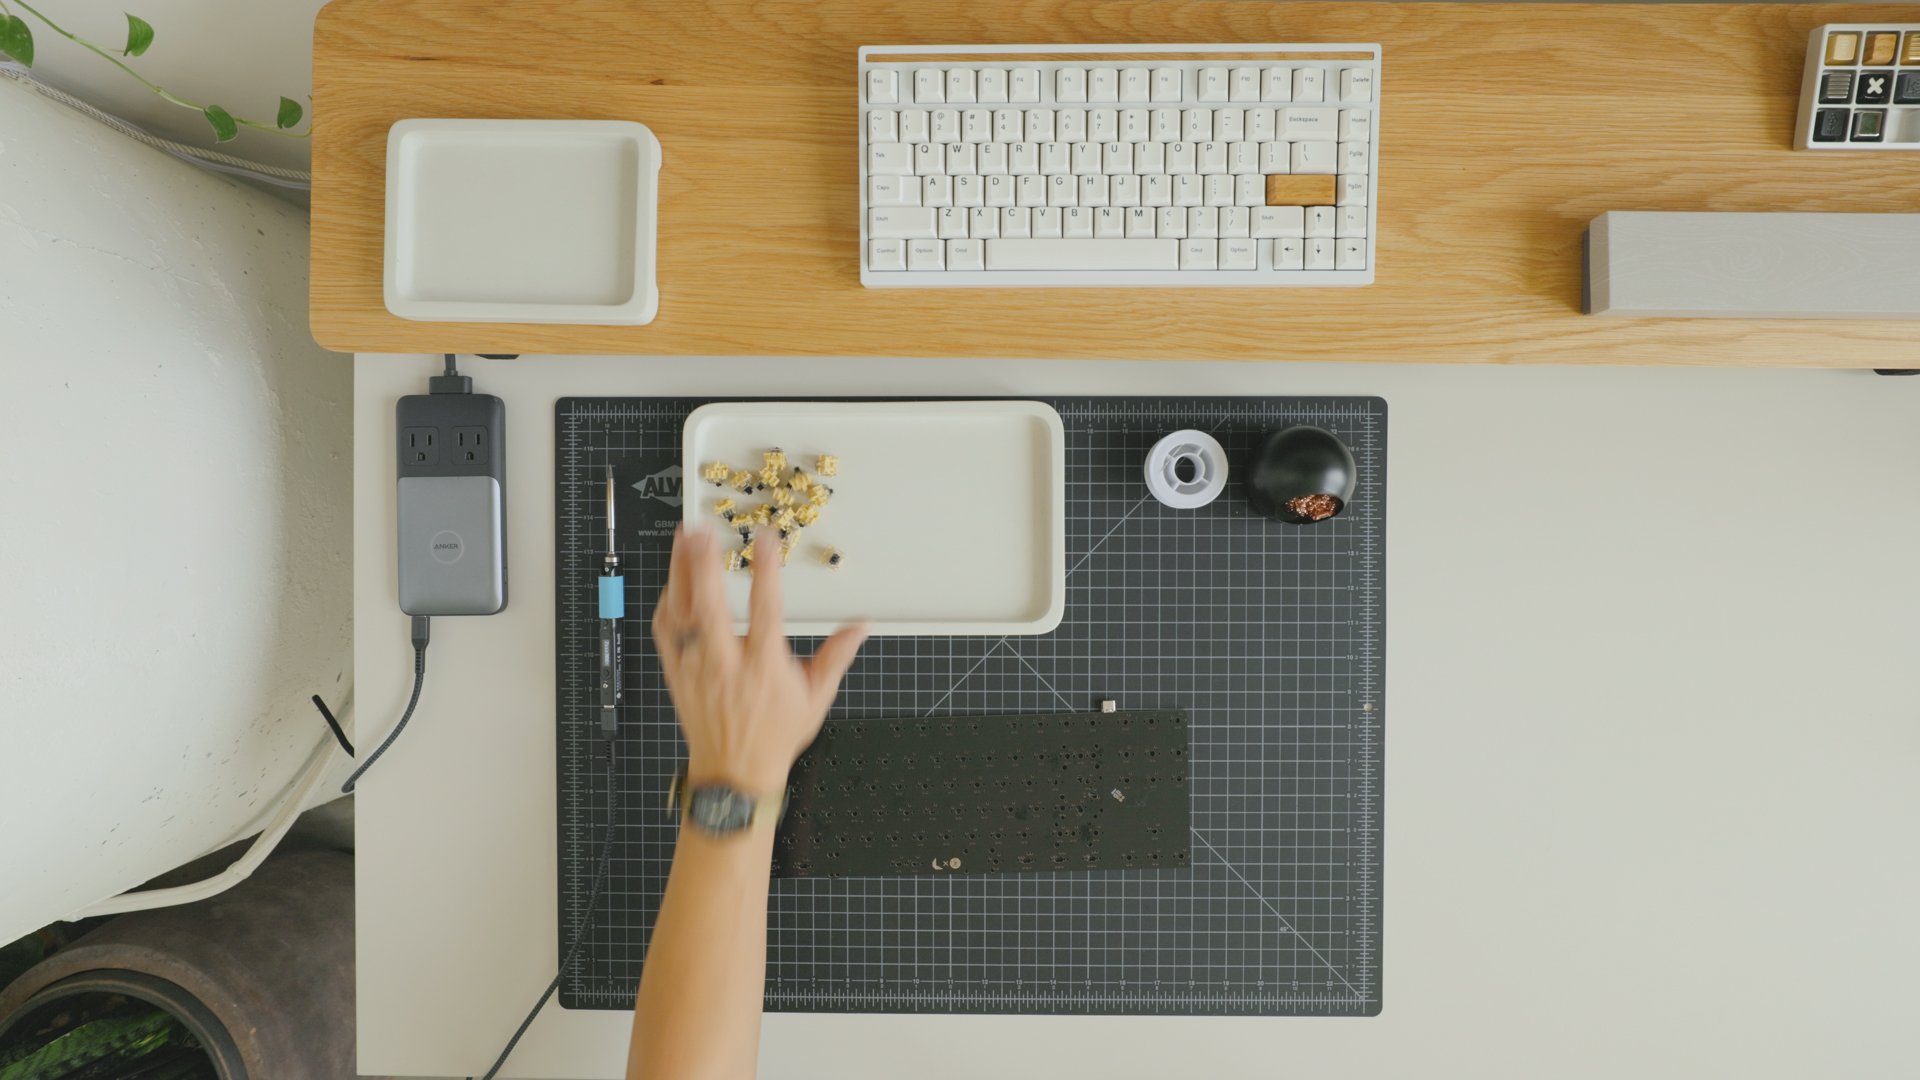
Custom Mechanical Keyboard
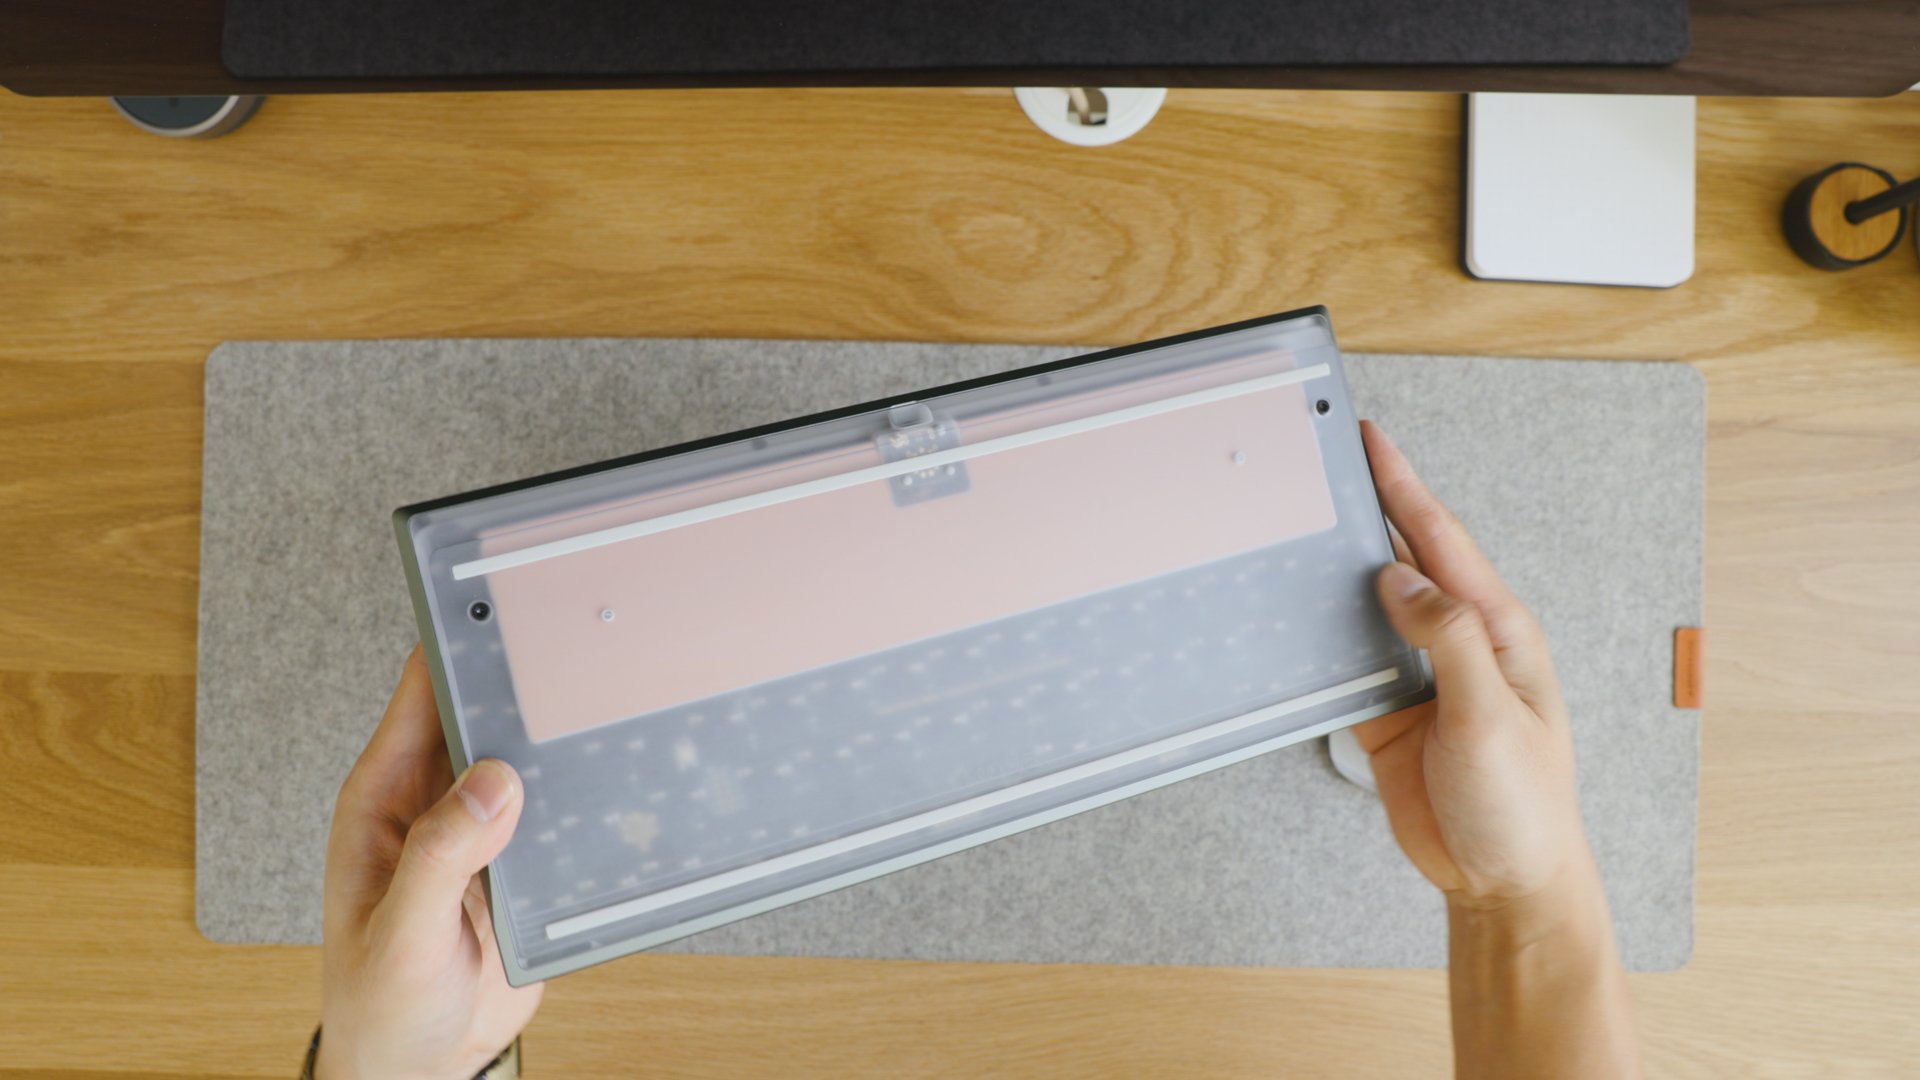
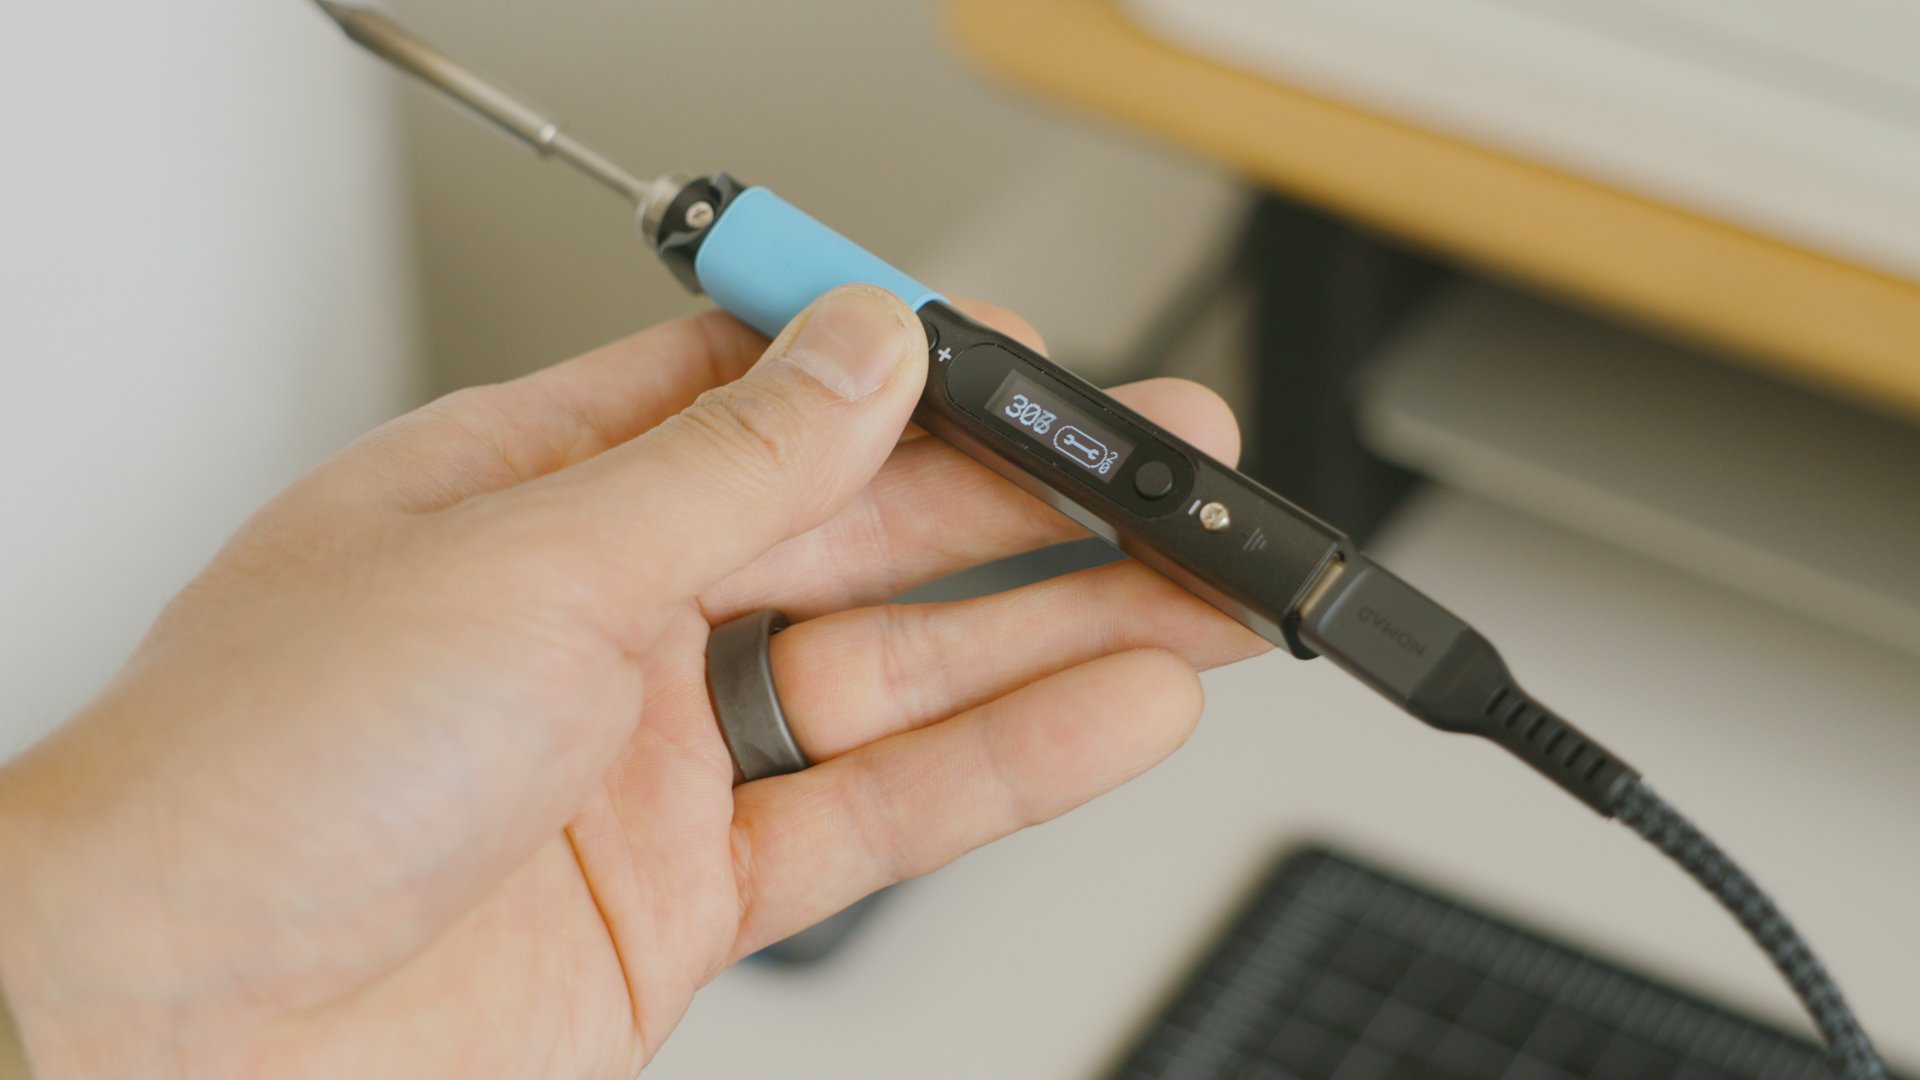
If you’ve been around the blog, you know that I’ve become obsessed with mechanical keyboards. They’re fun to build and customize, look incredible, and are an absolute dream to type on. For this setup, I am currently using the Sonnet. A premium 75% custom mechanical keyboard by MODE. The Sonnet comes in many color options and materials, so you can design it in a way that best suits your style and build it in various configurations for your preferred feel and sound.
The Sonnet is connected to my computer via a custom USB-C cable with LEMO connector made by my friend Georen of Dispatch Cables. My keyboard and mouse sit on top of a wool felt desk pad by Grovemade. This provides an excellent surface for me to work on and allows me to slide my things out of the way when needed.


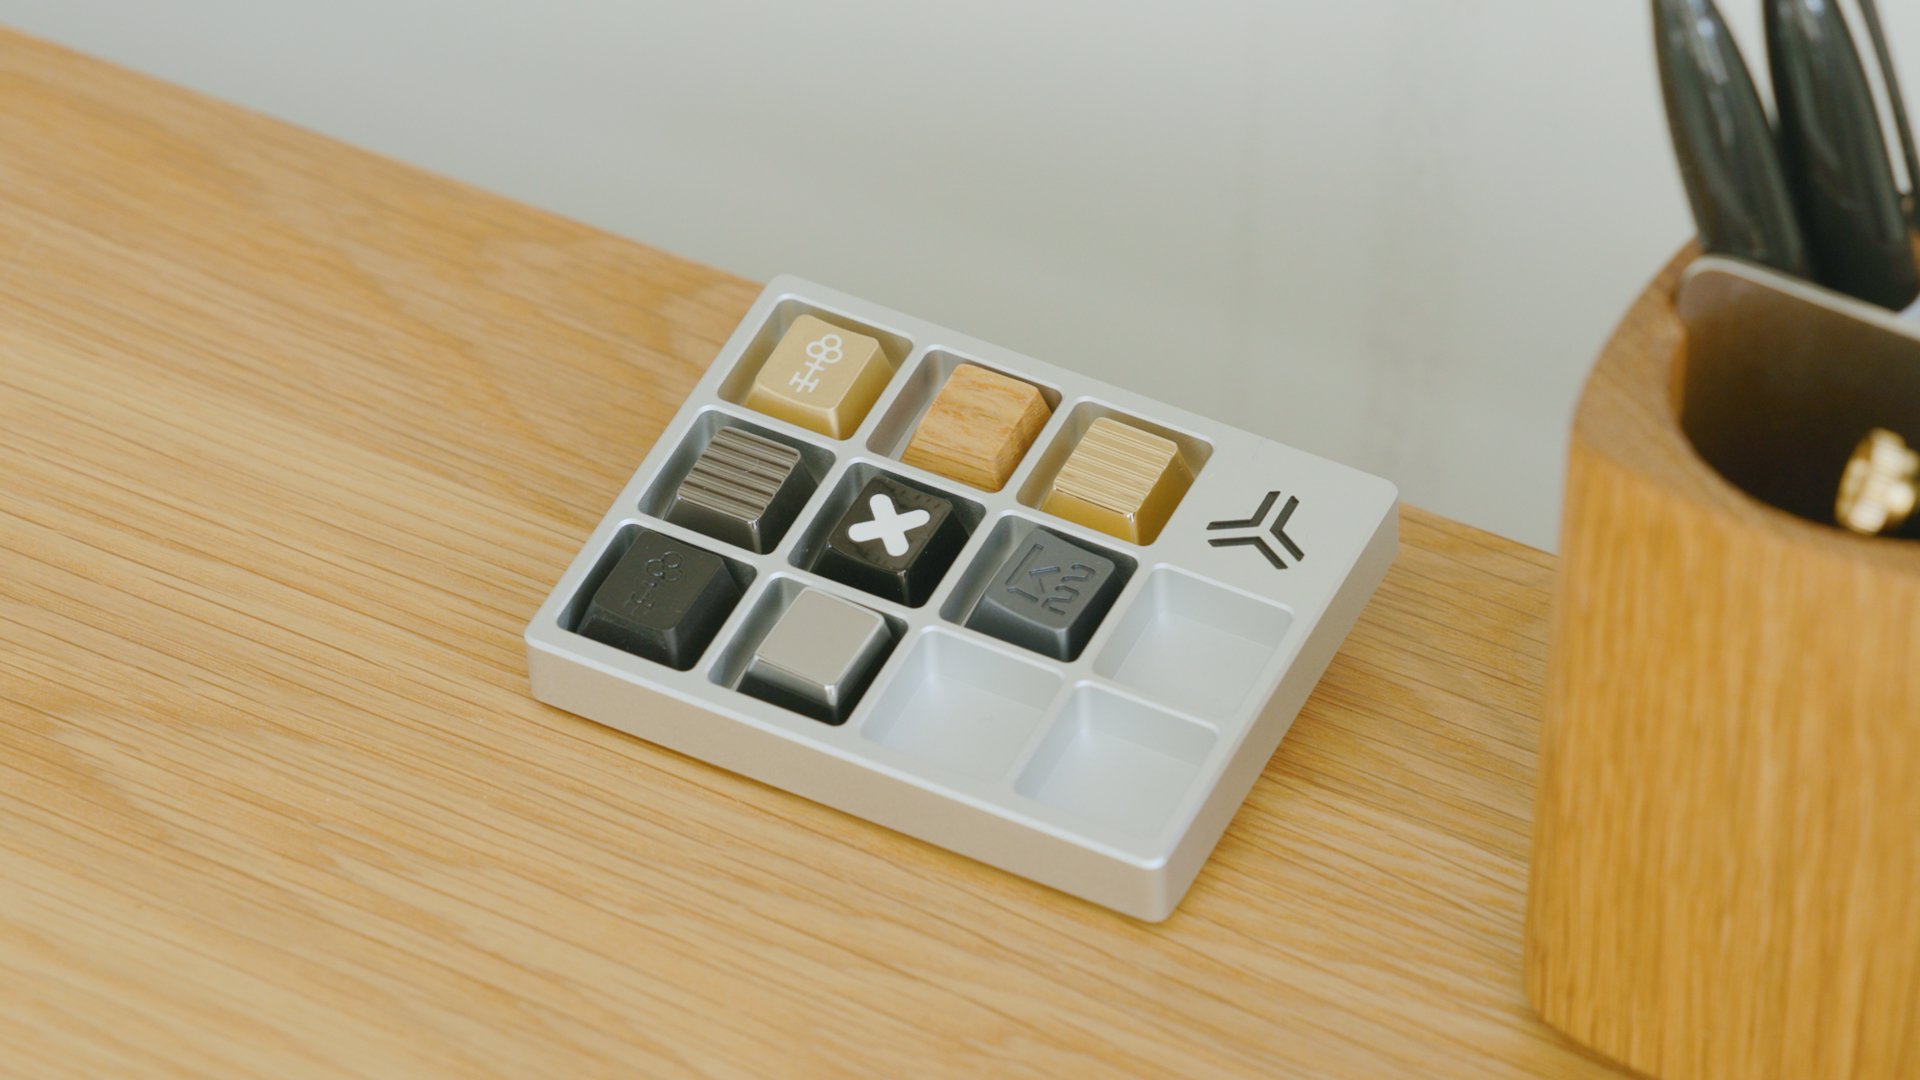
I’ve done some work with MODE before, and I’m excited to announce that I’ve partnered with them to create a special-edition collaborative product. What started as a DIY project has now become an official wood accent piece for the MODE Sonnet keyboard. It’s made of solid White Oak, hand-sanded, and finished with a natural oil for added durability.
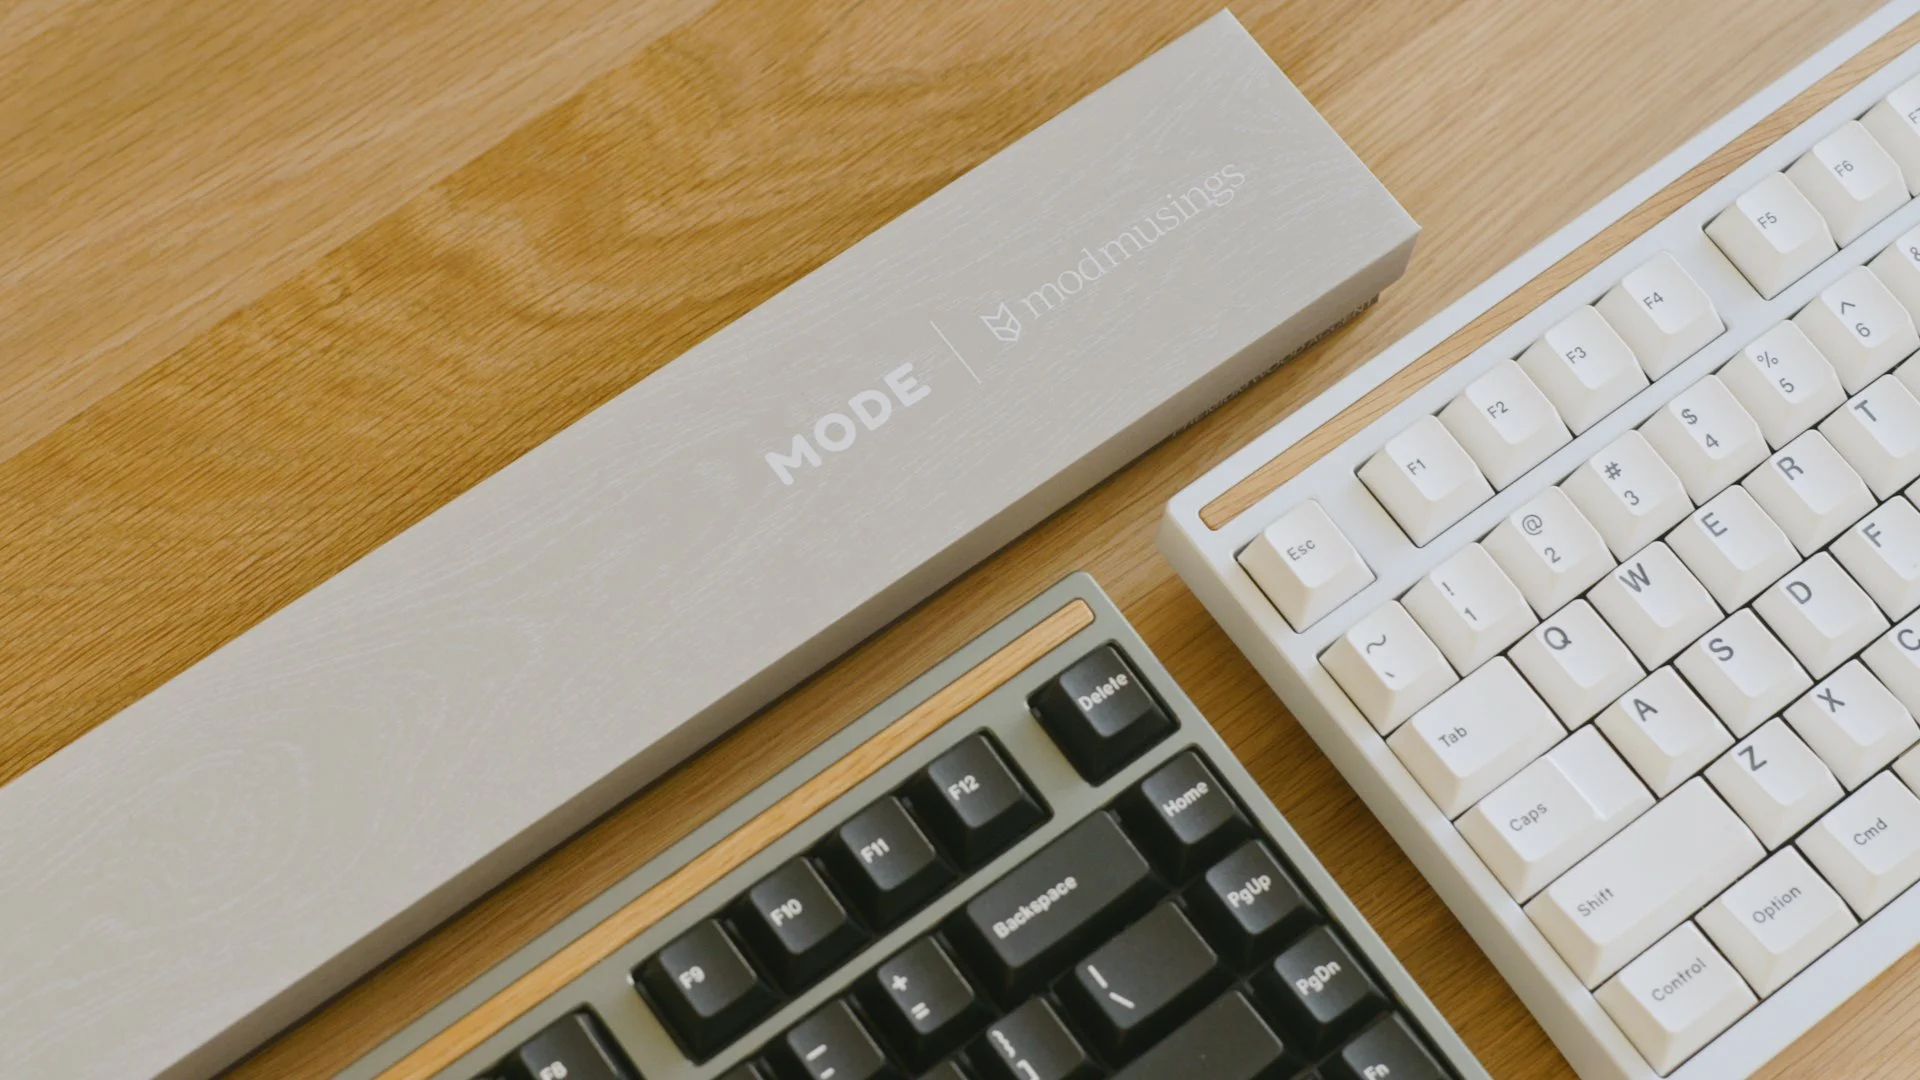
Mode x Mod Musings Special Edition White Oak Accent is now available for the Sonnet.
Second Desk
While my main desk is where I do most of my video and design work, my second desk is more of a workbench. A place intended for building, assembly, and sketching. It’s also a flex desk in case I need to host a freelancer here in the future. I’m using the 30x60” Shift Desk in Pale Gray. A sit-stand desk also by Ergonofis. This is paired with the Tilt stool in white.


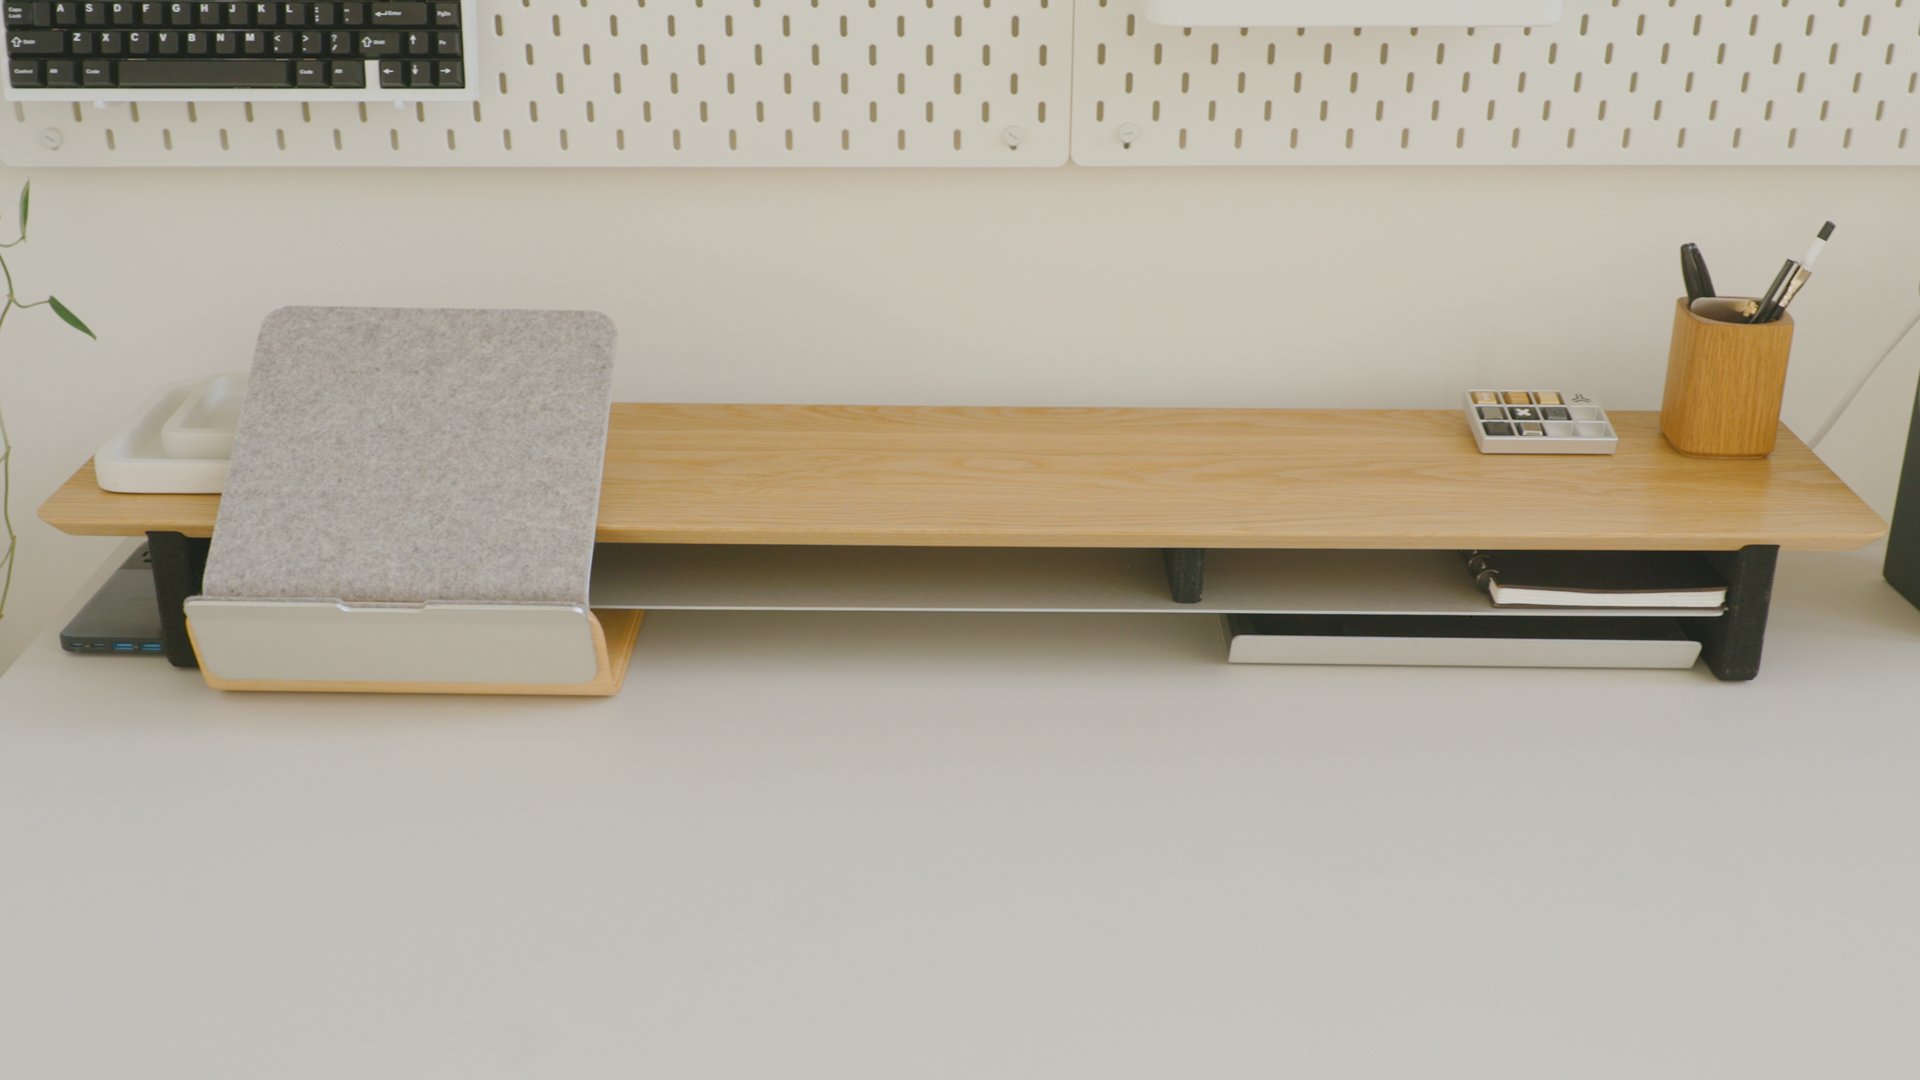
I chose a different color from my main desk to give it some material contrast. I'm using some white oak accessories to tie this desk into the rest of the office, starting with the newly released white oak desk shelf by Grovemade. This adds extra storage to my desk to help me organize the things I’m currently working on.


White Oak Accessories
Links
Use code MODMUSINGS for 10% off your first purchase from Grovemade
Until now, Grovemade has only had offerings in maple and walnut, but because I favor white oak, they’re starting to explore it as an option. So They created an additional set of prototype white oak accessories to test out in my setup. I personally love white oak because it’s a medium-value wood that’s flexible enough to go with dark or light color schemes.
While the desk shelf is available to order now, the rest of the white oak accessories are still in testing. Learn about Grovemade’s upcoming white oak releases here.
In full disclosure, I am working closely with Grovemade on some upcoming projects, and these products were sent to me. But as a long-time customer of Grovemade, I would still recommend their high-quality products. It’s the reason I’m working them.
Keyboard Building Accessories
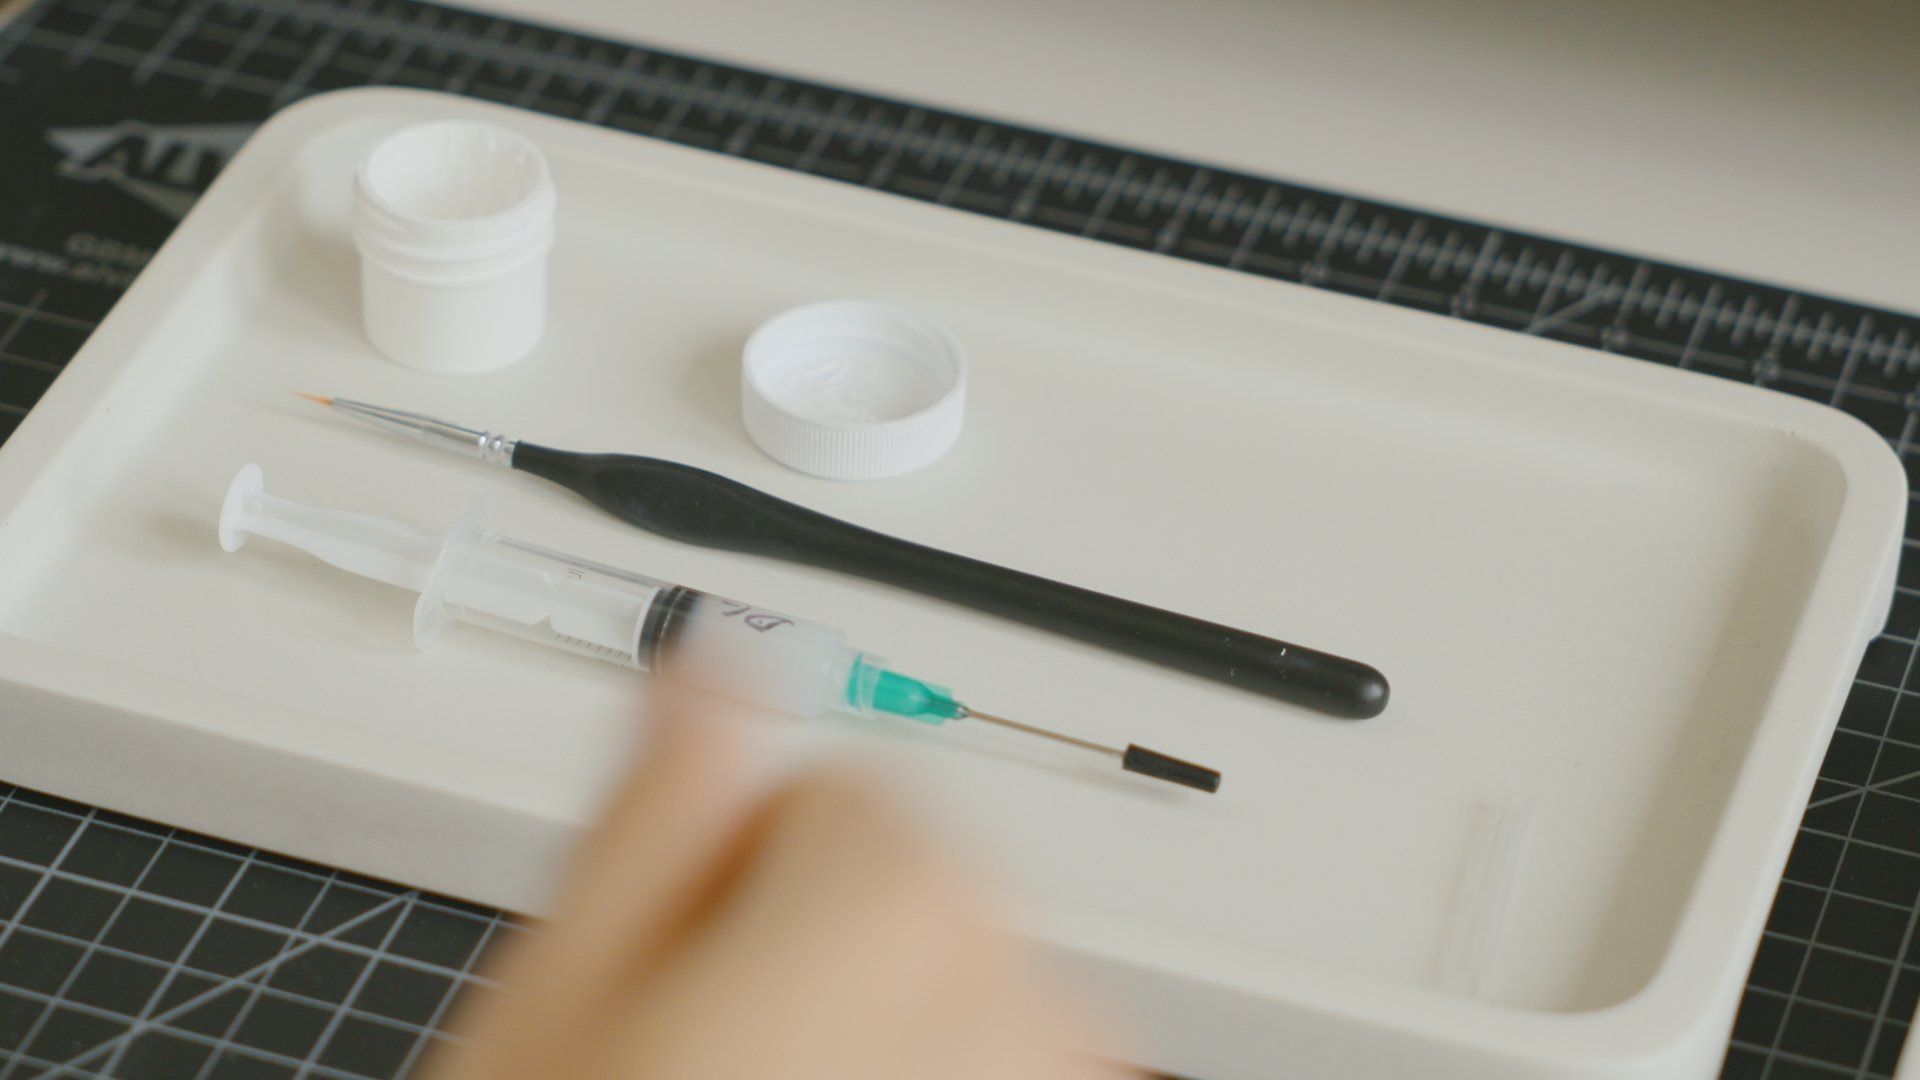
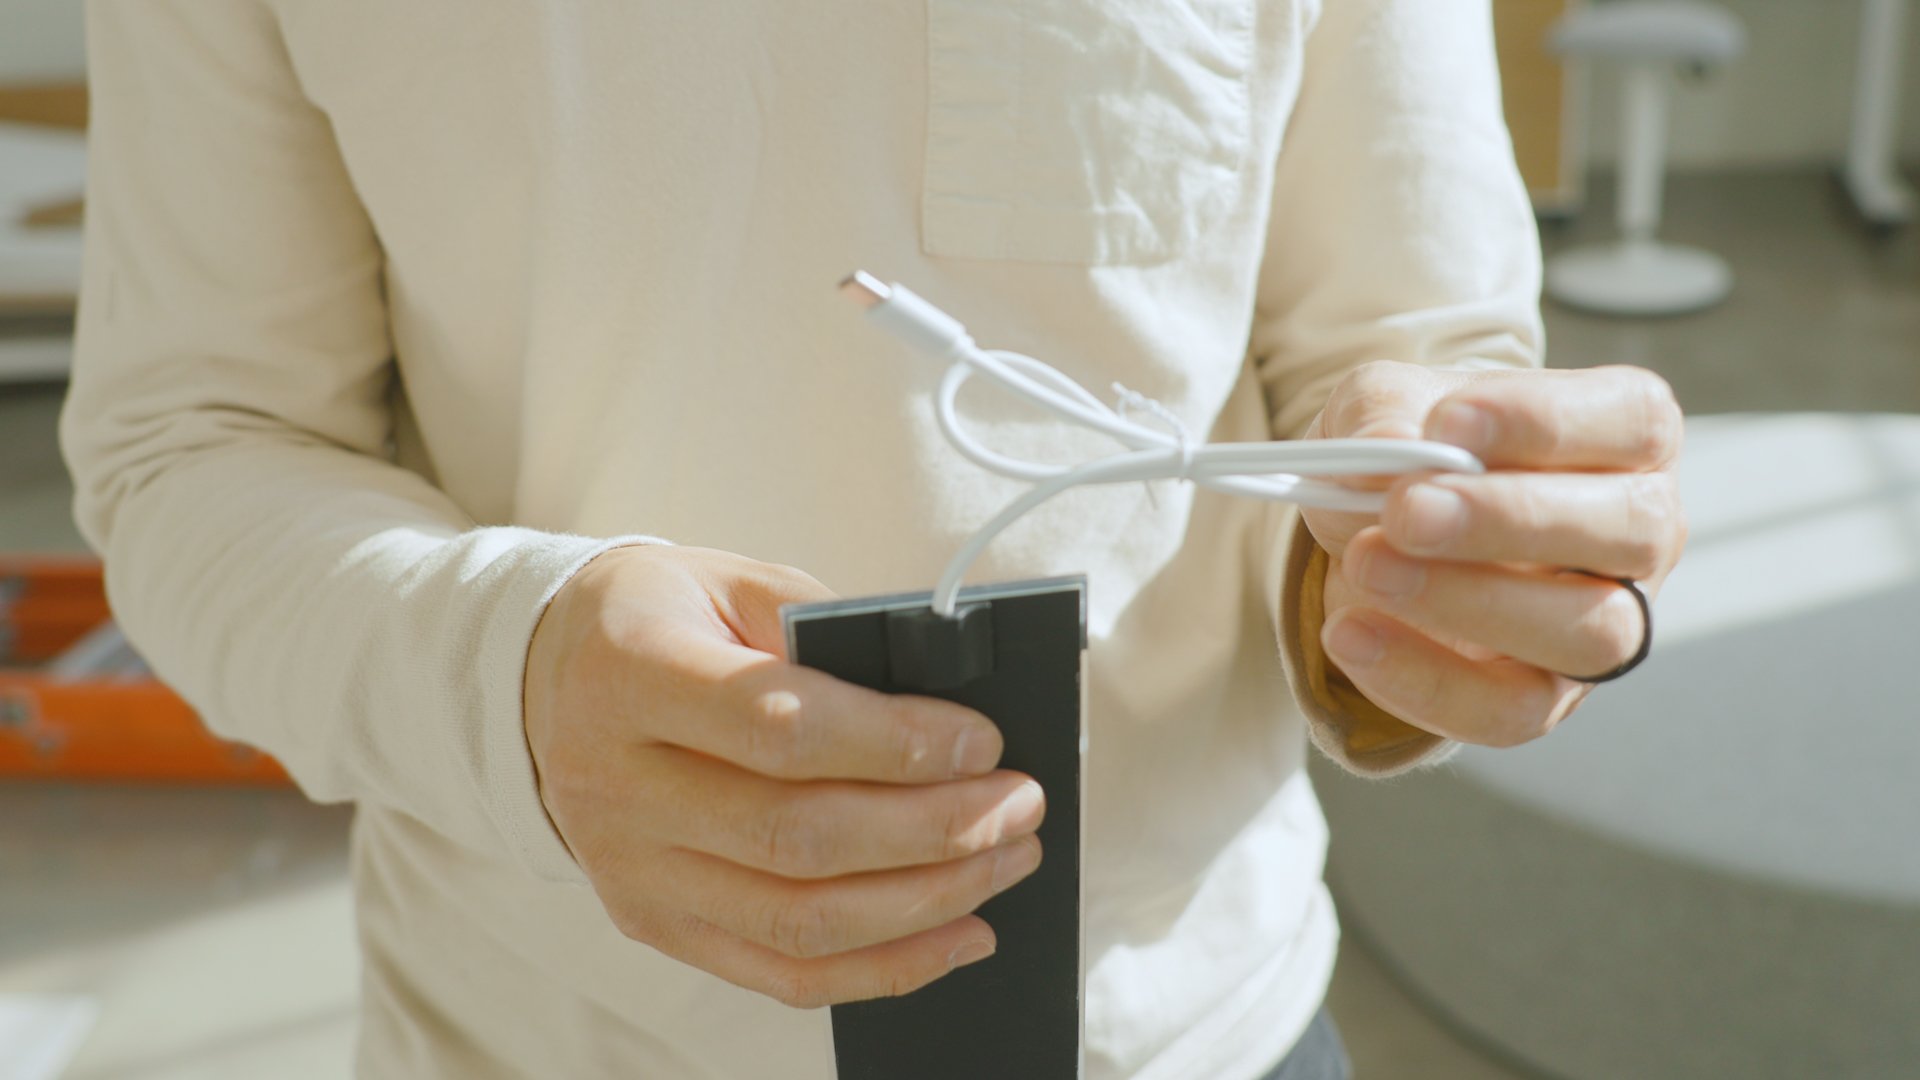
One of the things I do on this desk is build keyboards, which sometimes requires a soldering iron. To have access to power, I got this slim charging station from Anker, which I keep tucked away in my desk shelf, when not in use.
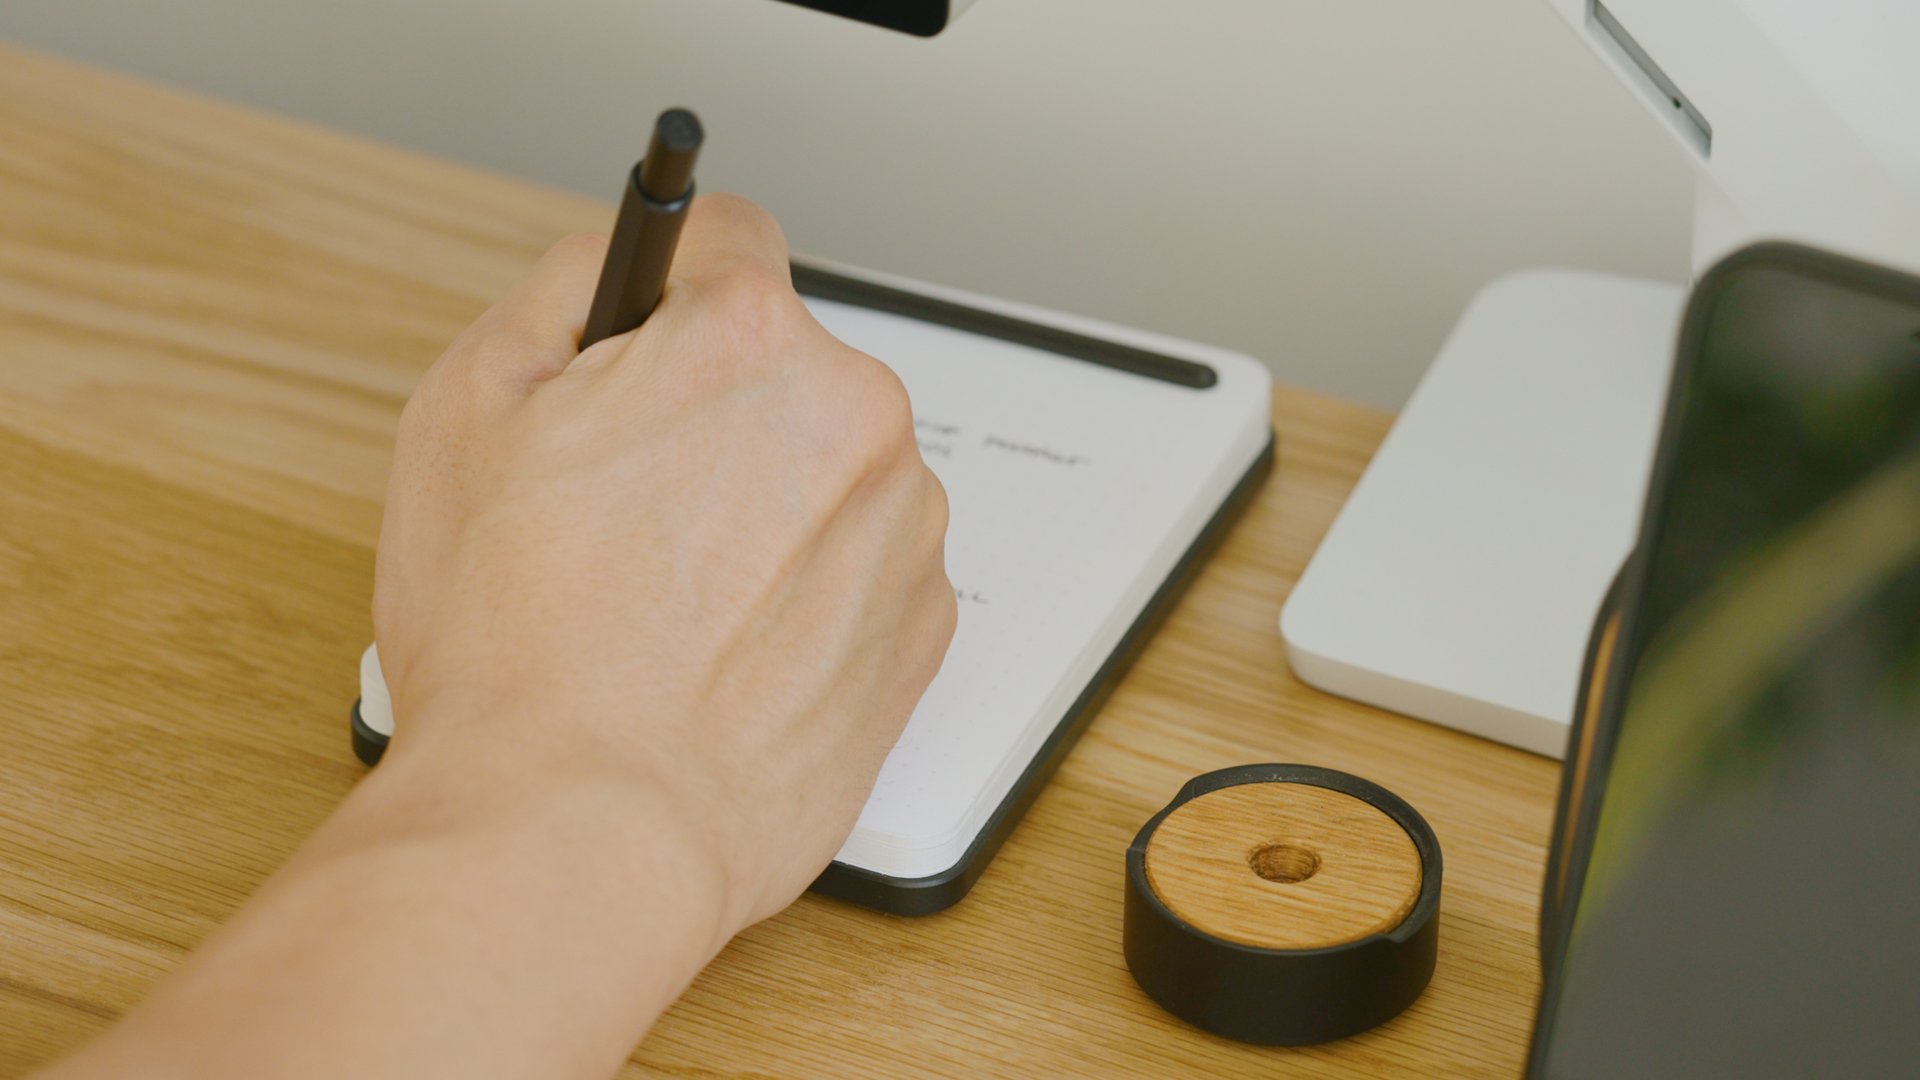
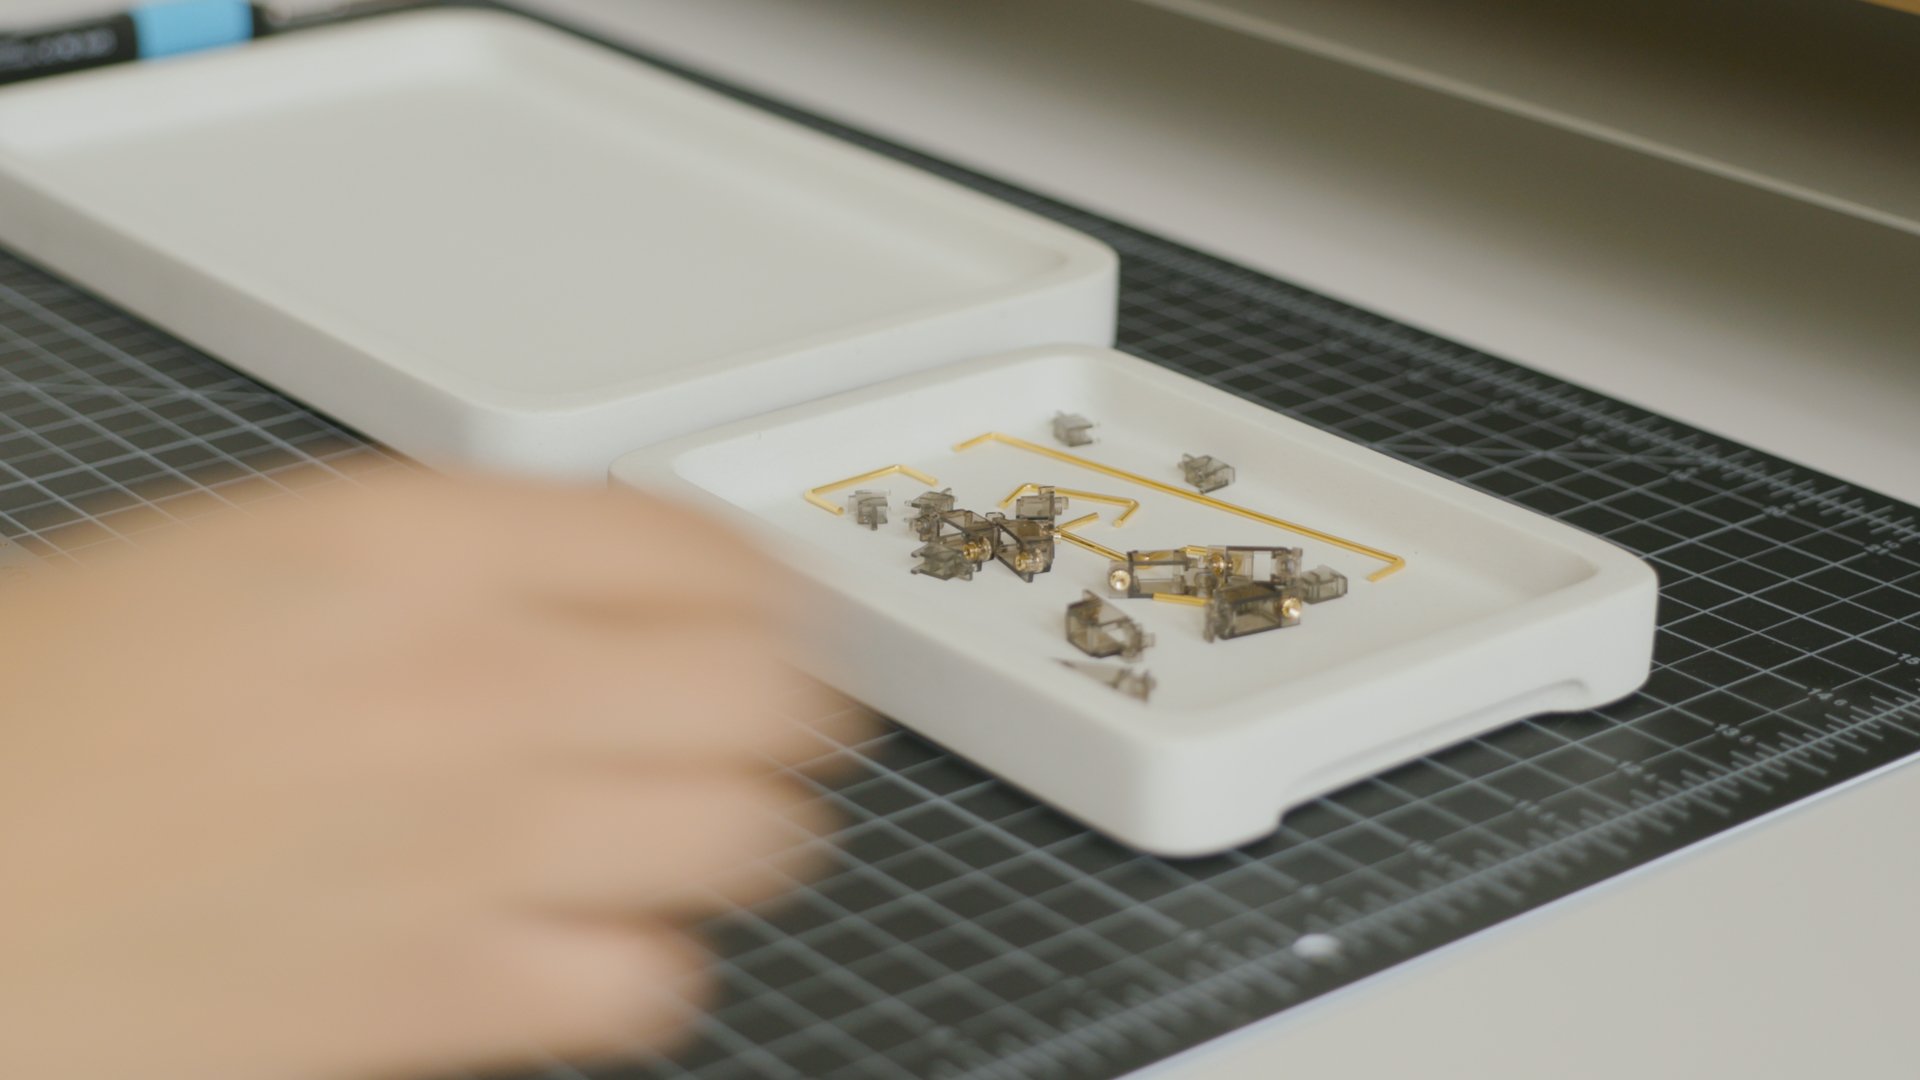
When I’m building on this desk, I tend to have loose parts I’m working with. I use these raw concrete trays as a catch all to hold small pieces and tools while I work. Overall I’m trying to incorporate more concrete as a material in my office to tie into the floors.


Pegboard Organization Wall
Above my desk are two Ikea Skadis pegboards, which I’ve used extensively in my home office. I love this system because I think they look nicer than regular pegboards, and they come with a bunch of first-party and third-party accessories that help me organize and display my things.
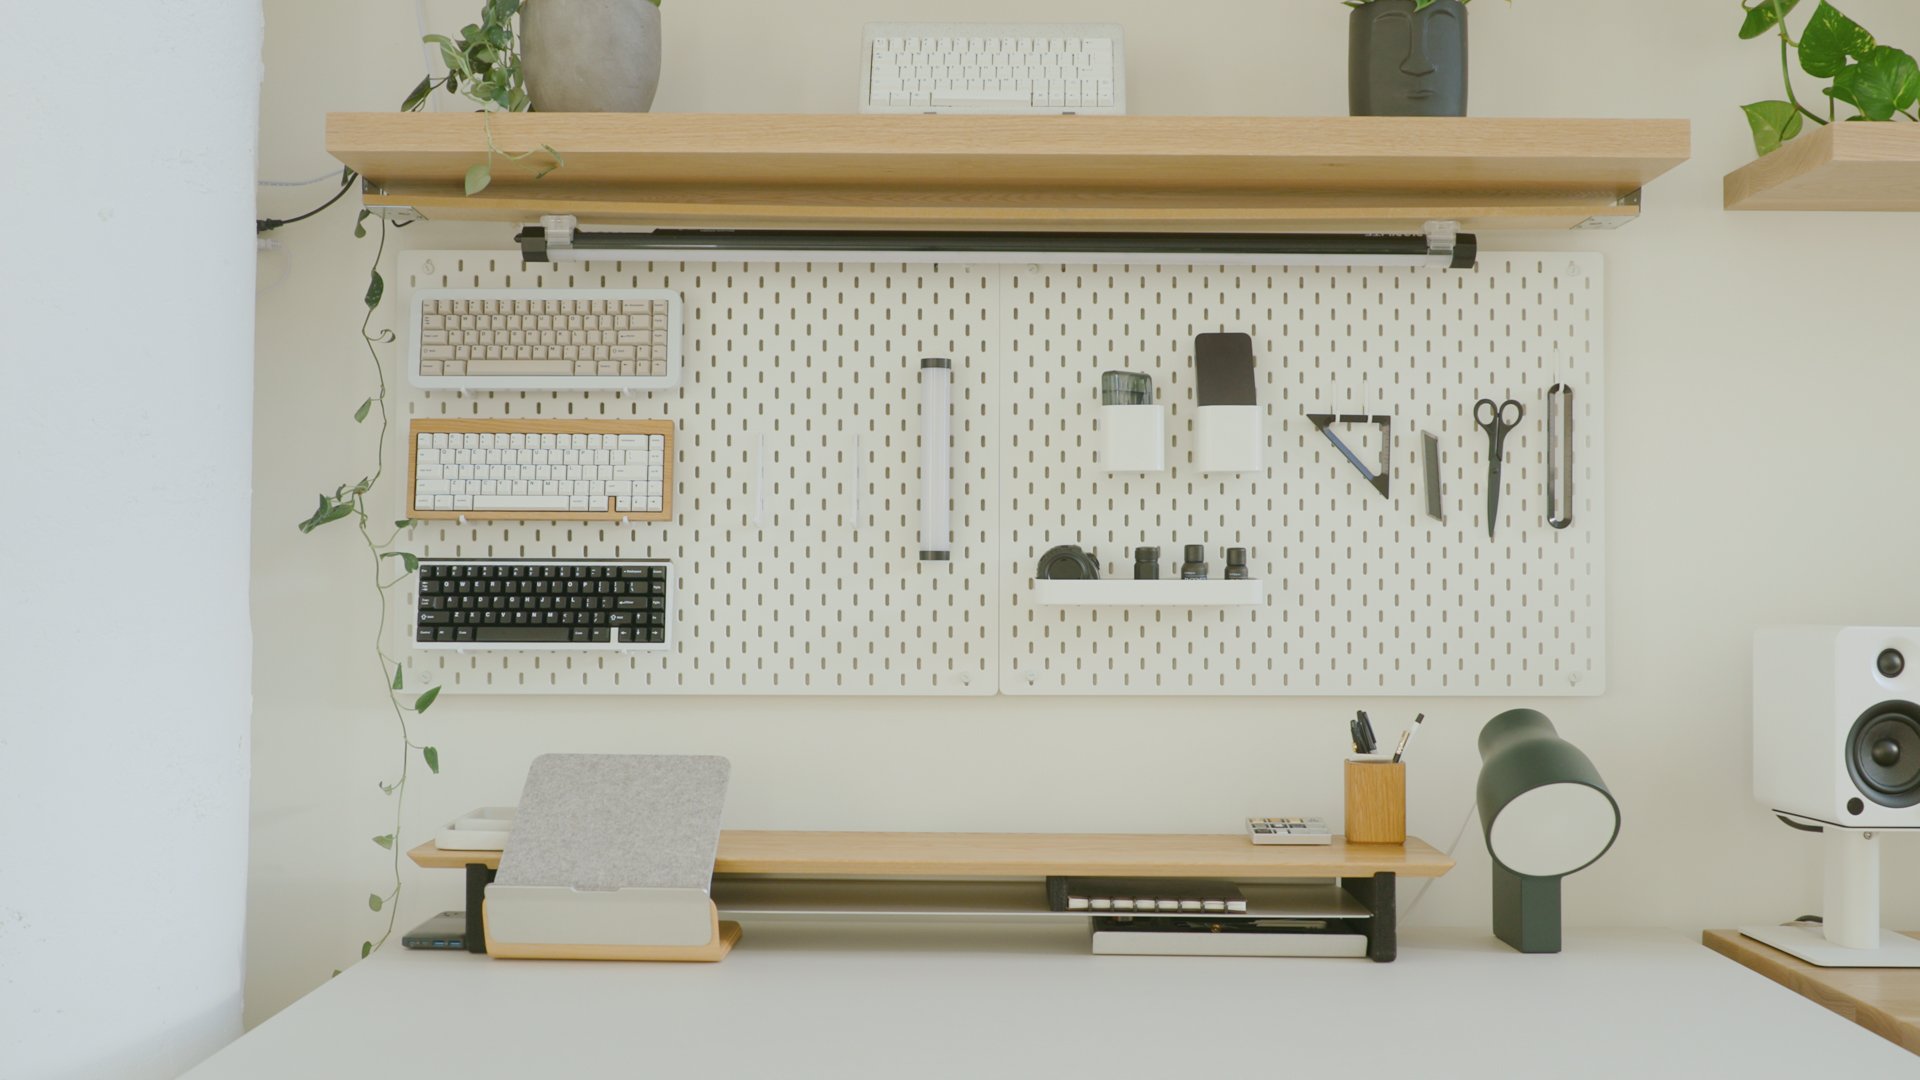
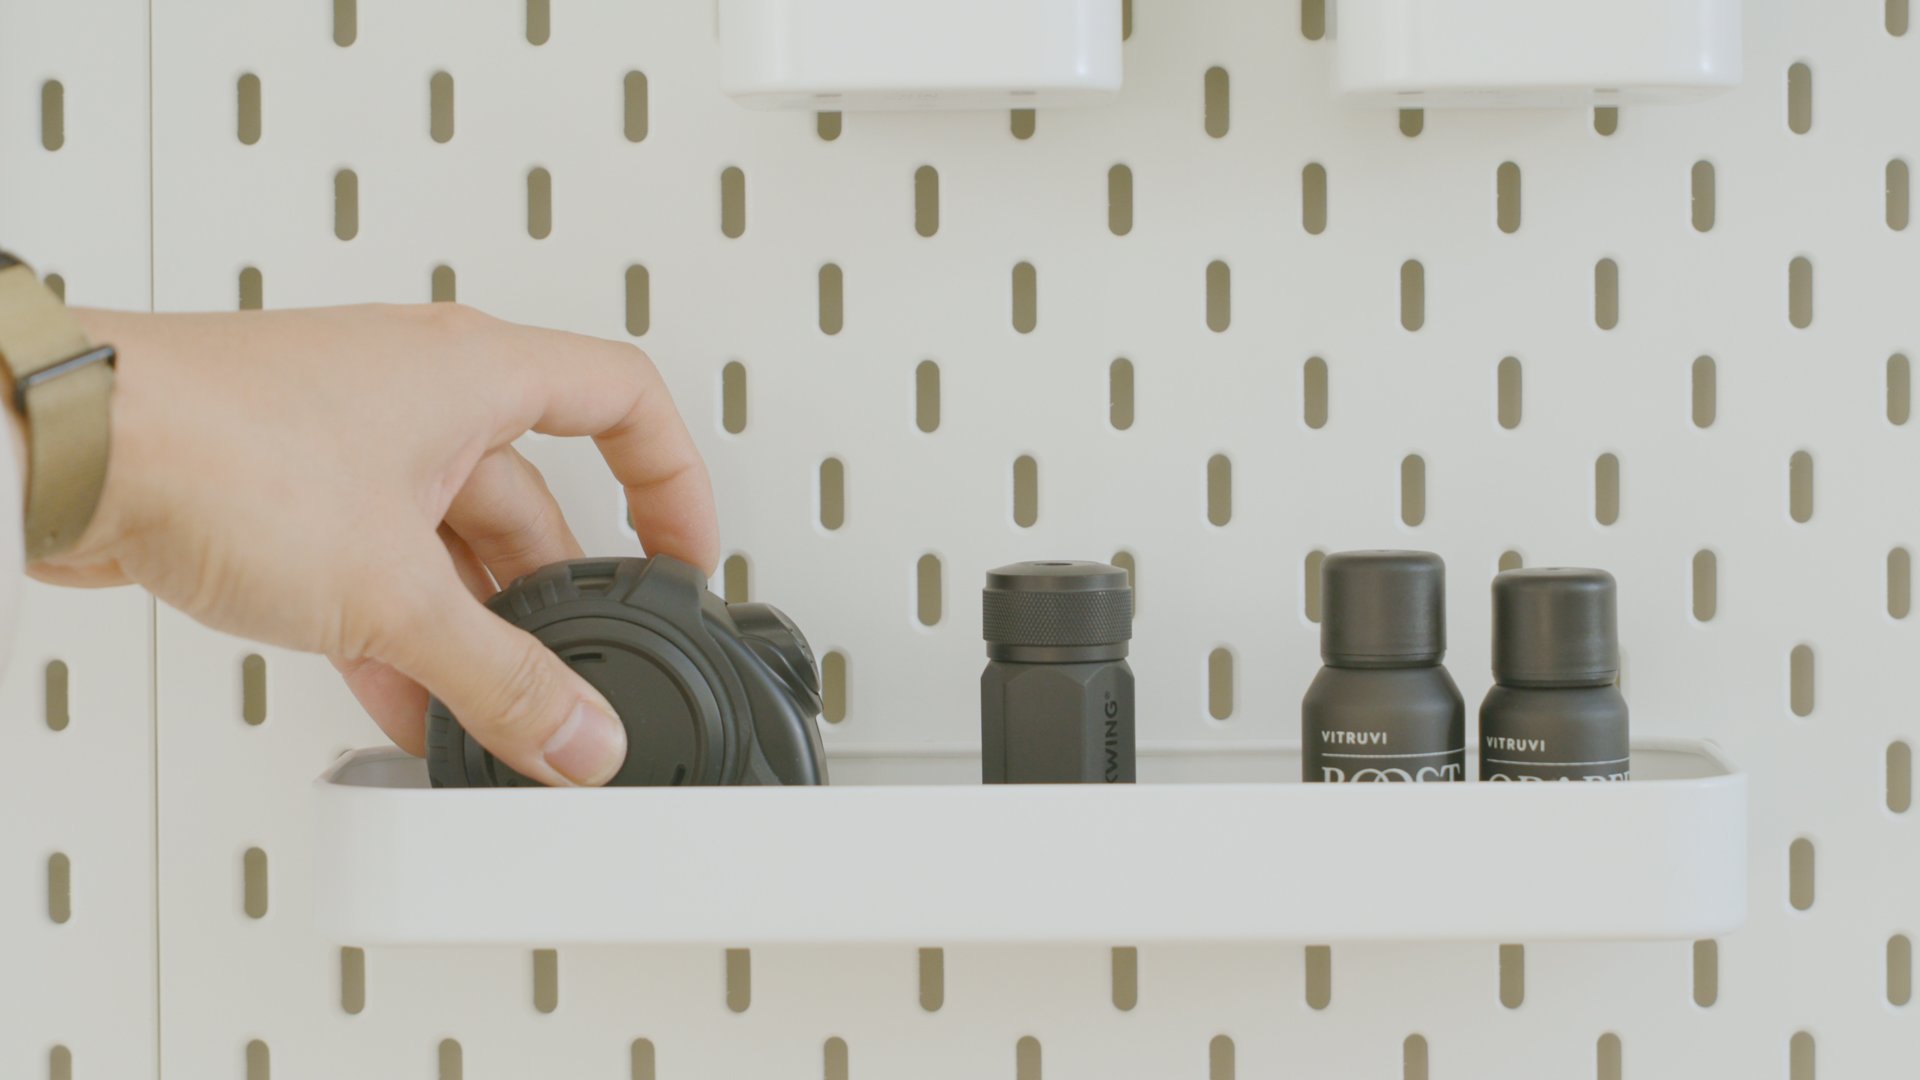
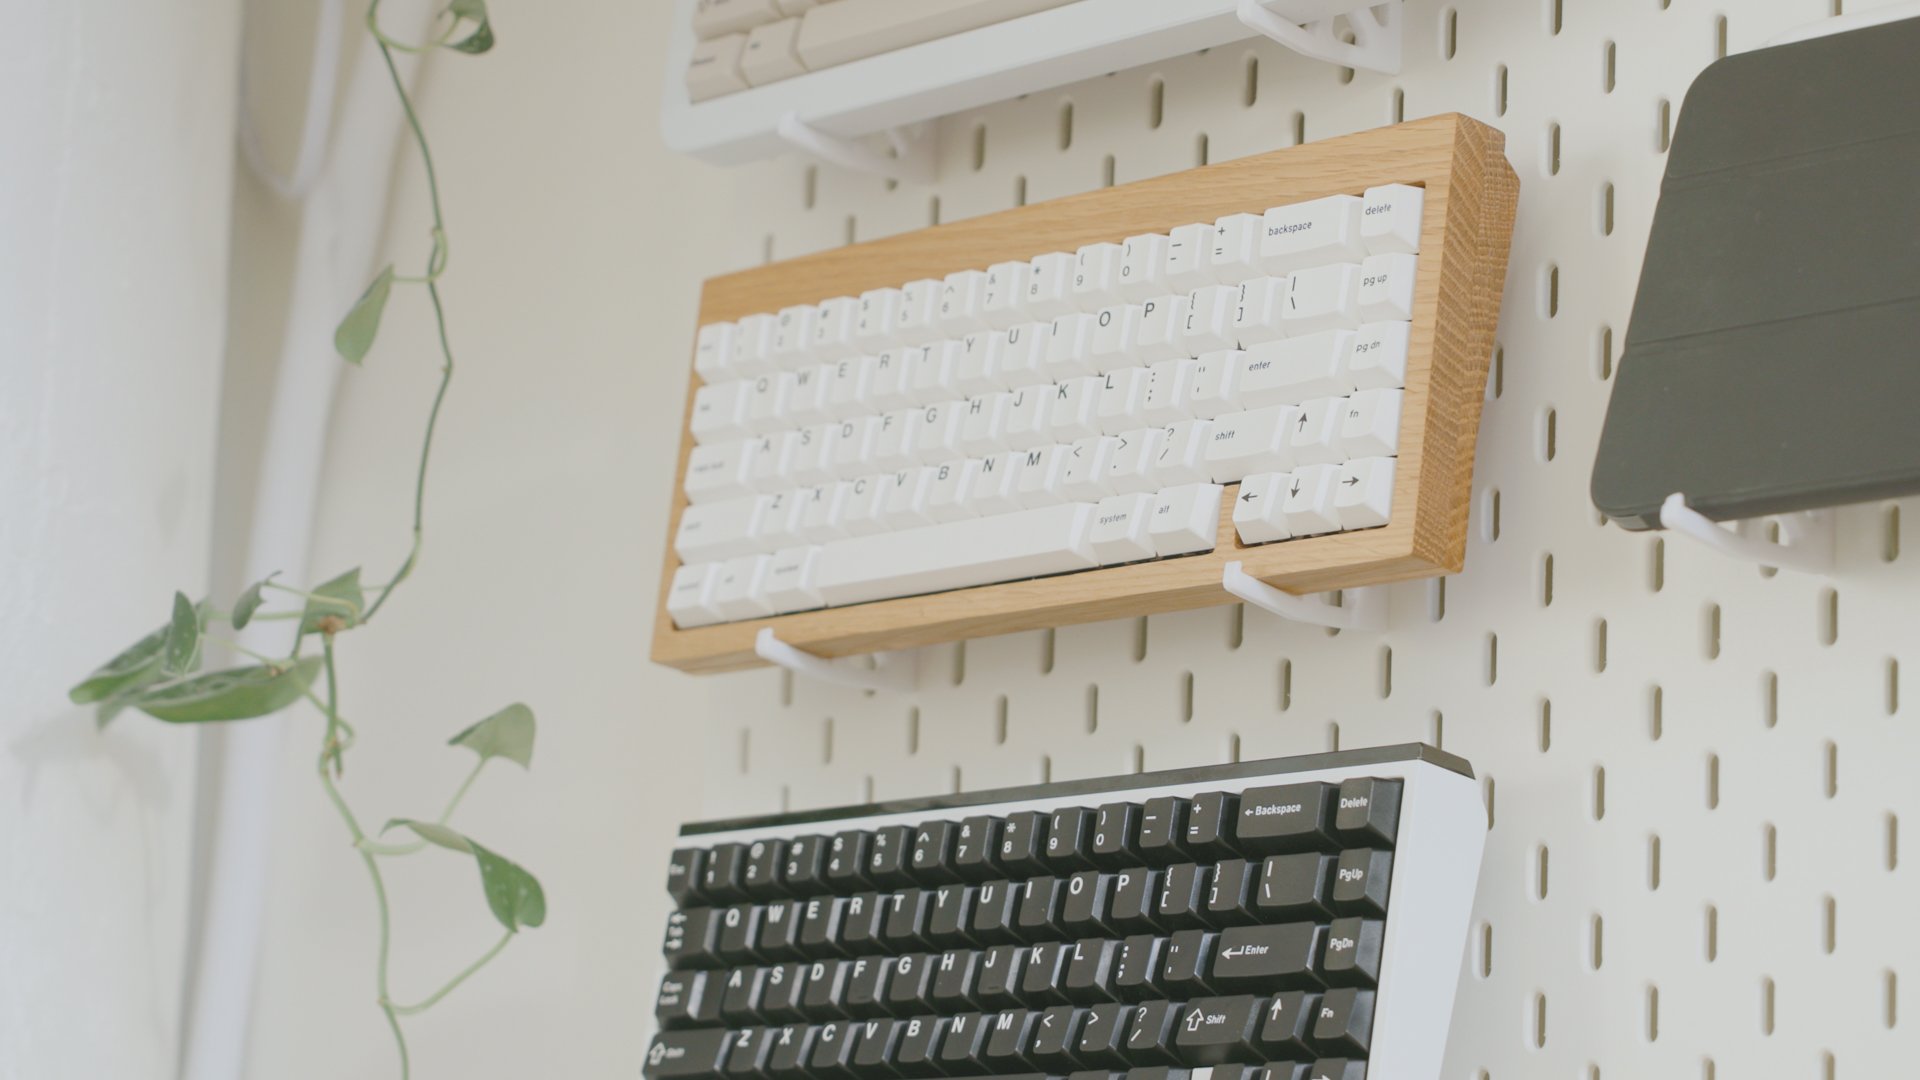

My favorite accessories are these custom-printed hooks that hold my keyboards and iPad. And these magnets hold my tools.
Since my things are a bit heavy, I wanted to give the Skadis pegboards a little more support and stability. So I got custom-printed mounts that allow you to add two more screws at the bottom (or anywhere on the pegboard) to replace the rubber feet that normally come with it.
The pegboards are mounted high enough so they don’t interfere with my desk when it’s elevated in standing mode. It’s the perfect add-on to make this desk highly functional and beautifully organized.
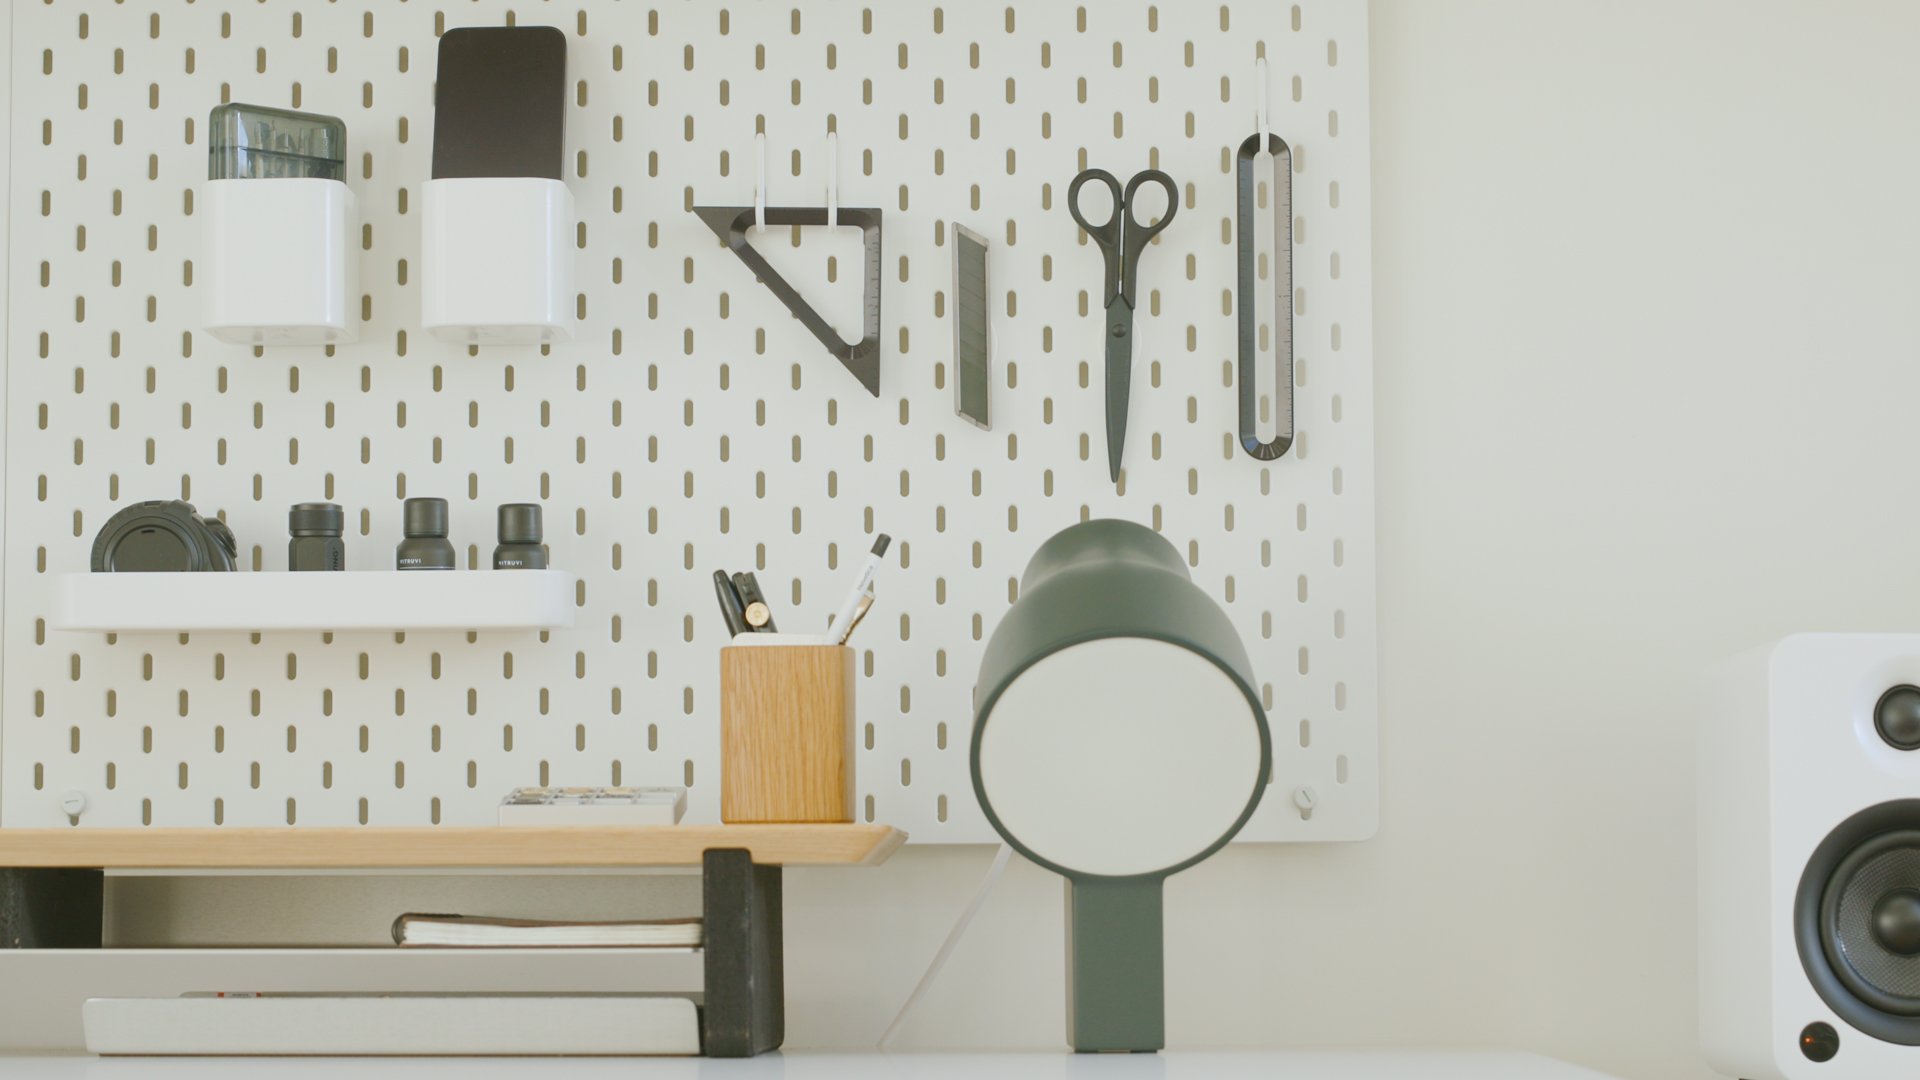
Even with the desk at standing height, it does not collide with the pegboard.
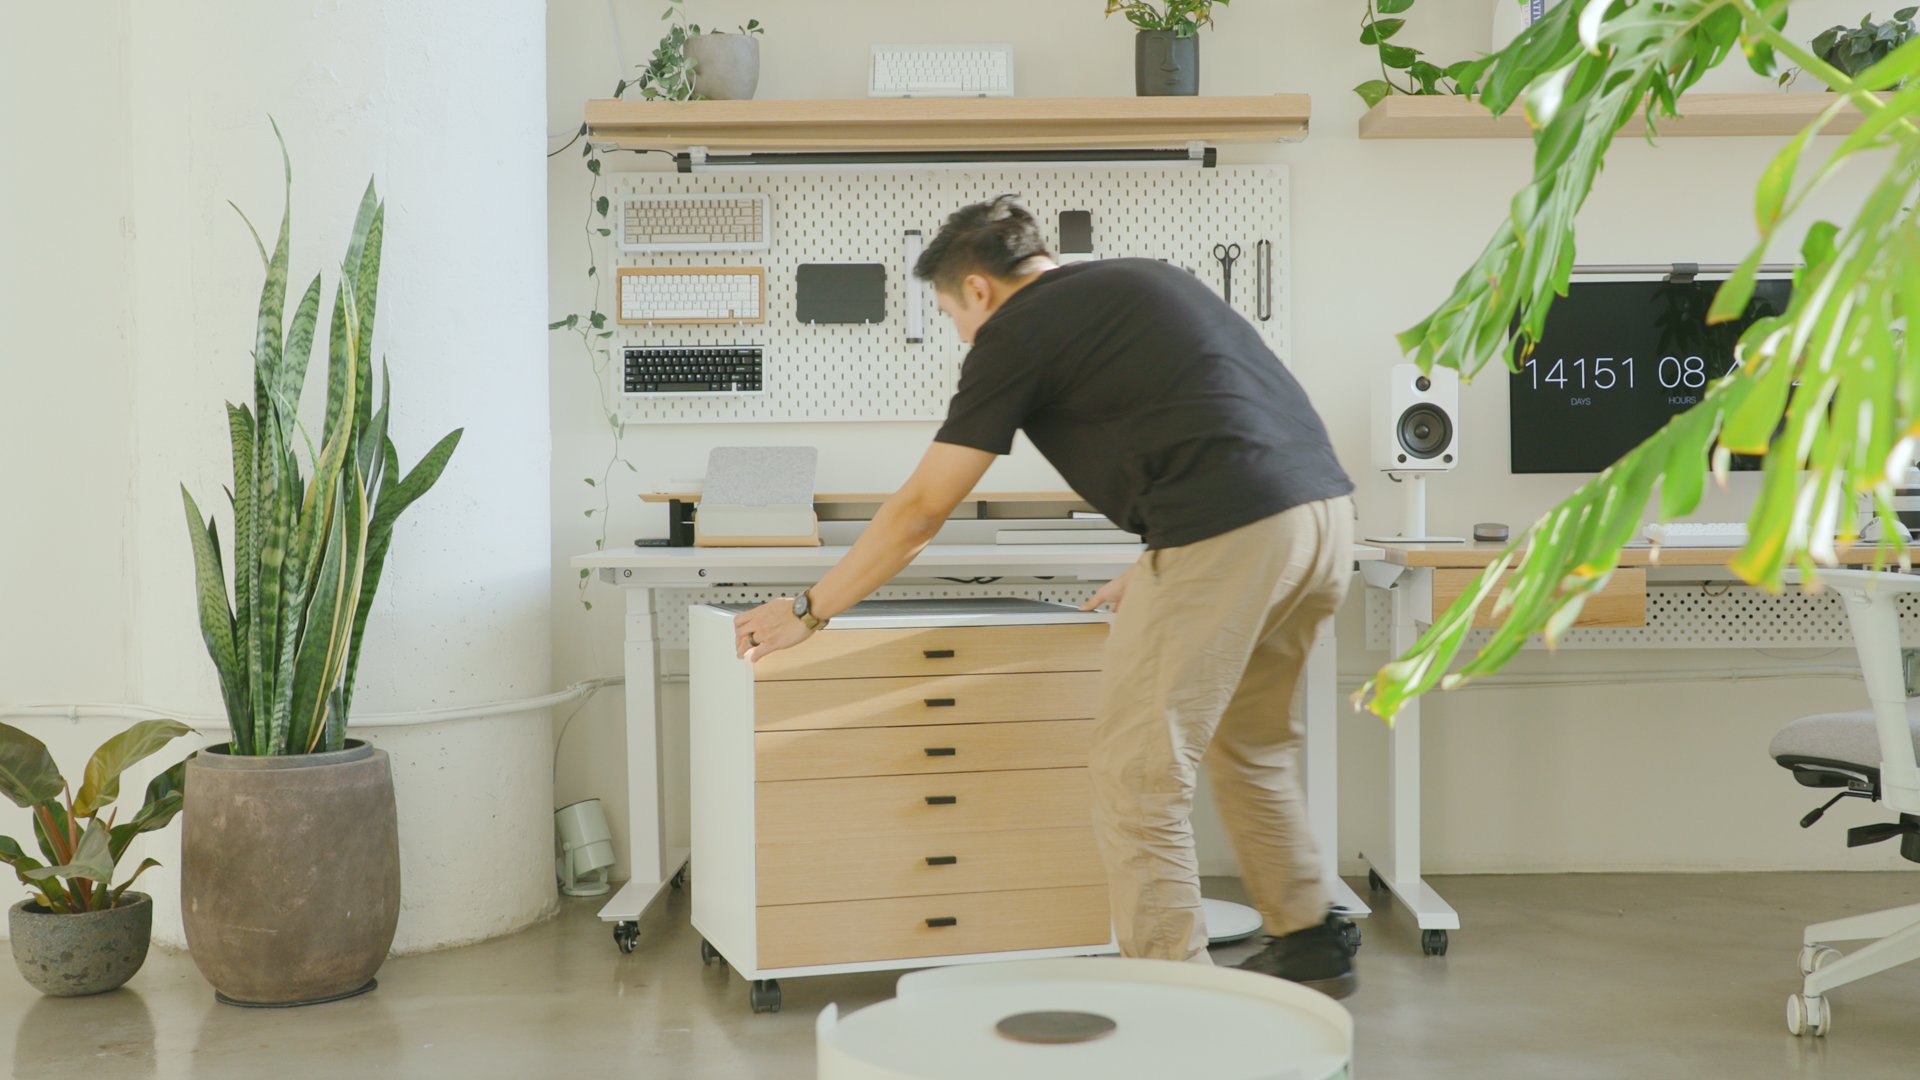
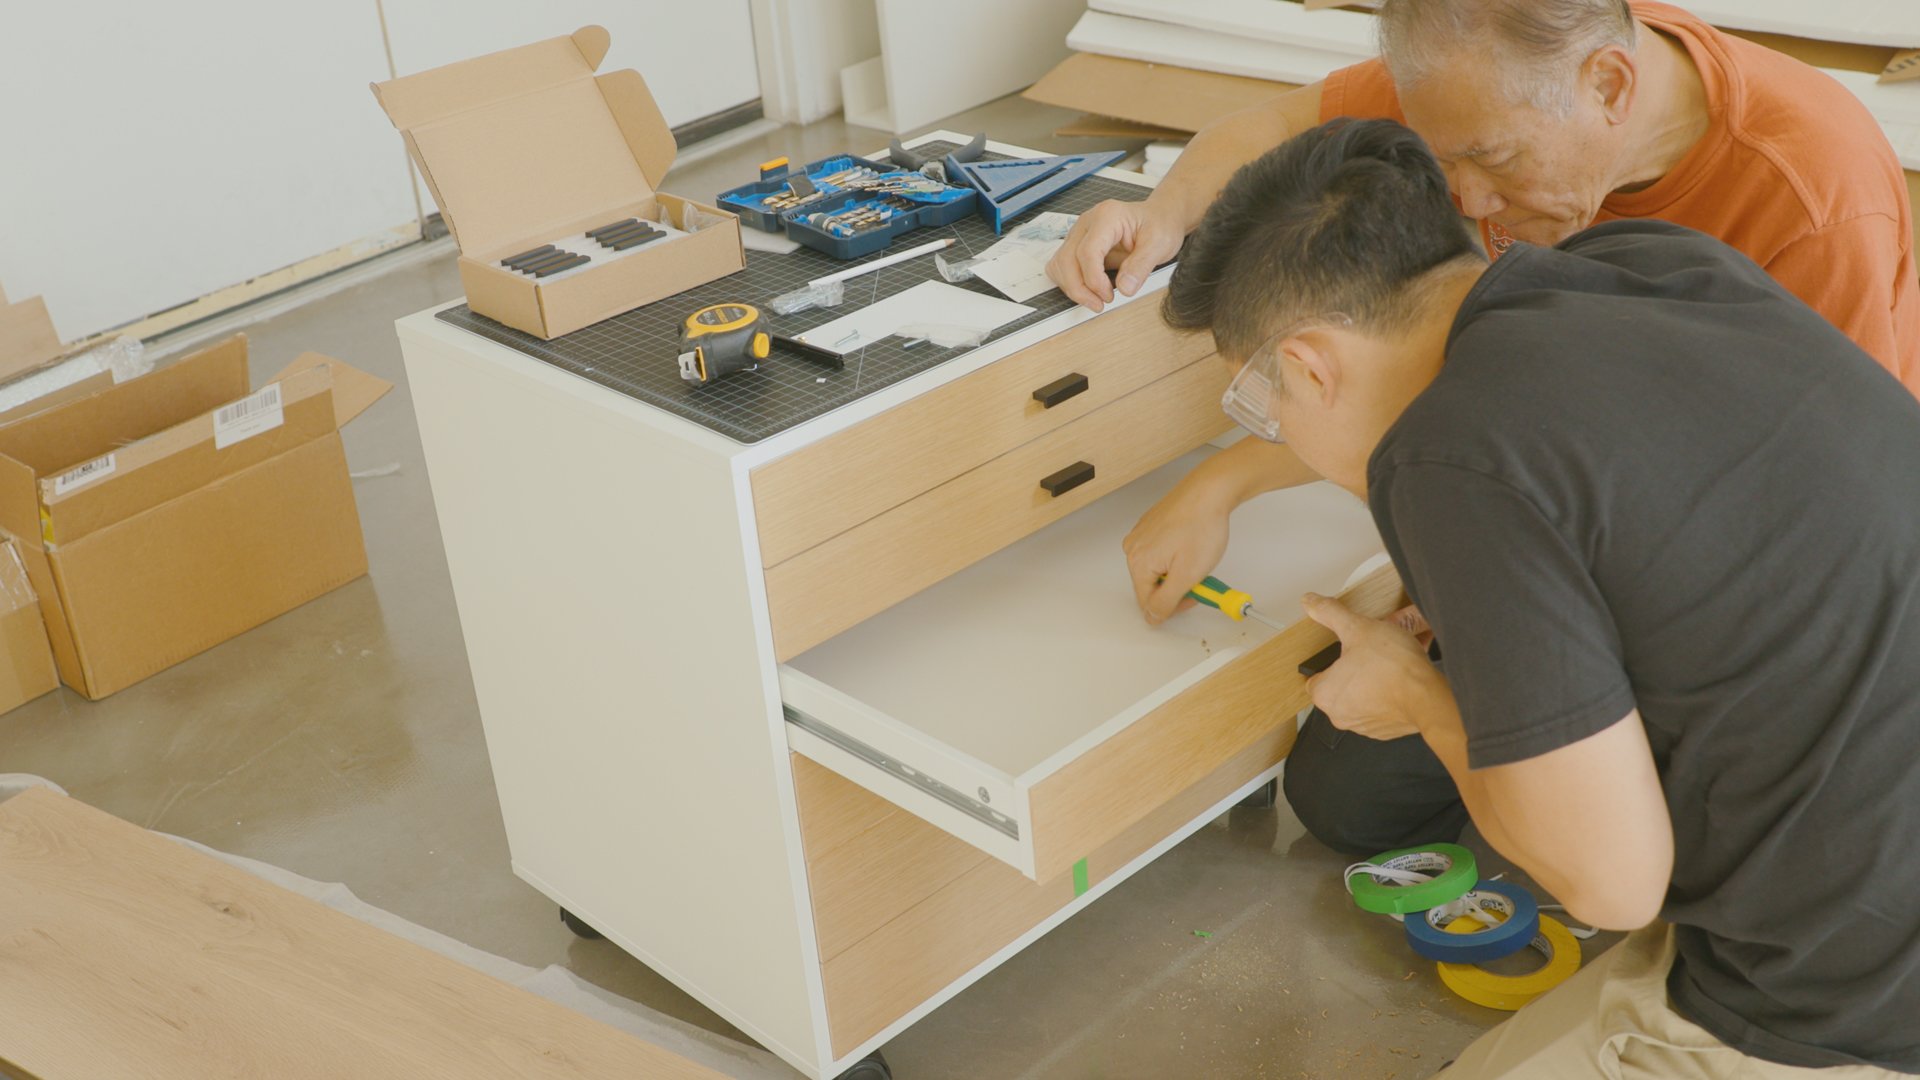
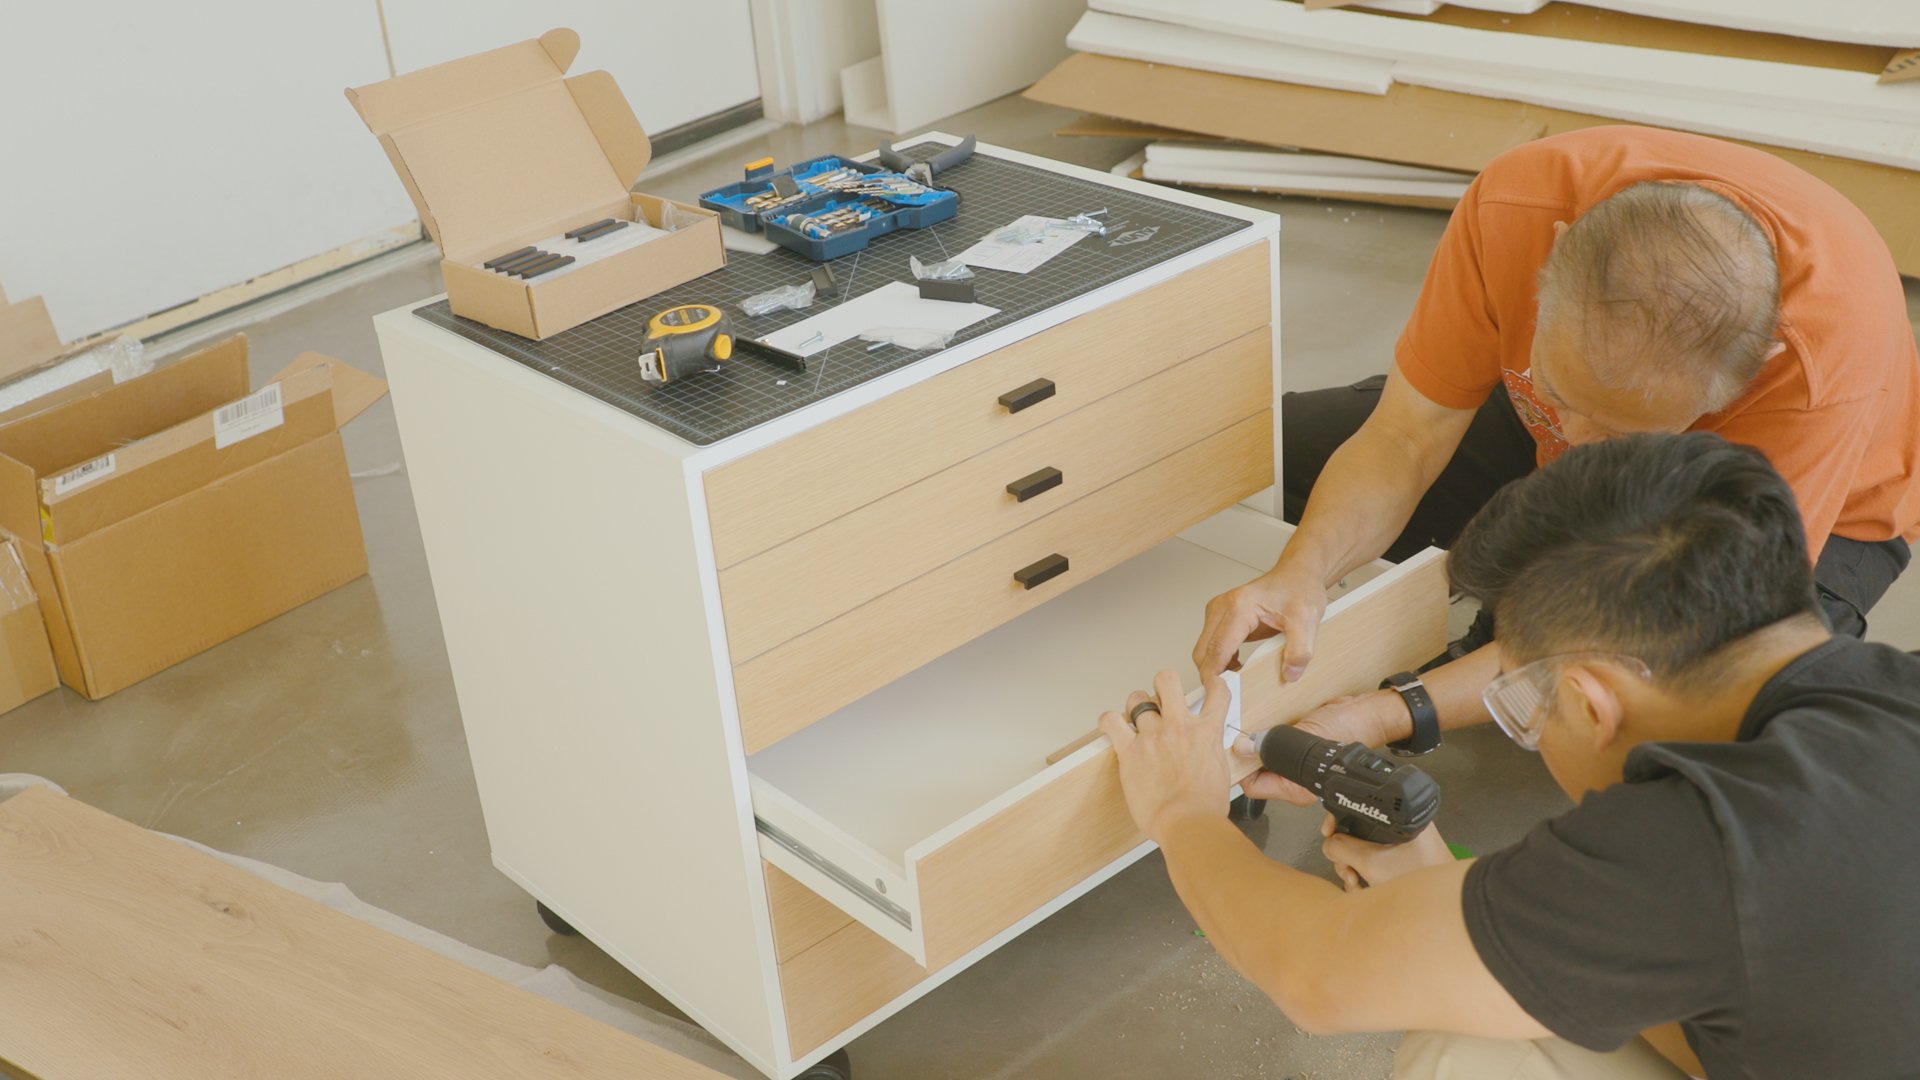
DIY Alex Drawer IKEA Hack
Below the desk, I need storage to organize small items like cables, parts, and accessories. So I built this DIY Ikea Alex drawer on casters that can be conveniently moved around. While the Alex Drawer works as-is, I wanted to customize it to match the rest of my setup.
This custom DIY IKEA Alex Drawer provides a lot of extra storage for small items at a low cost.
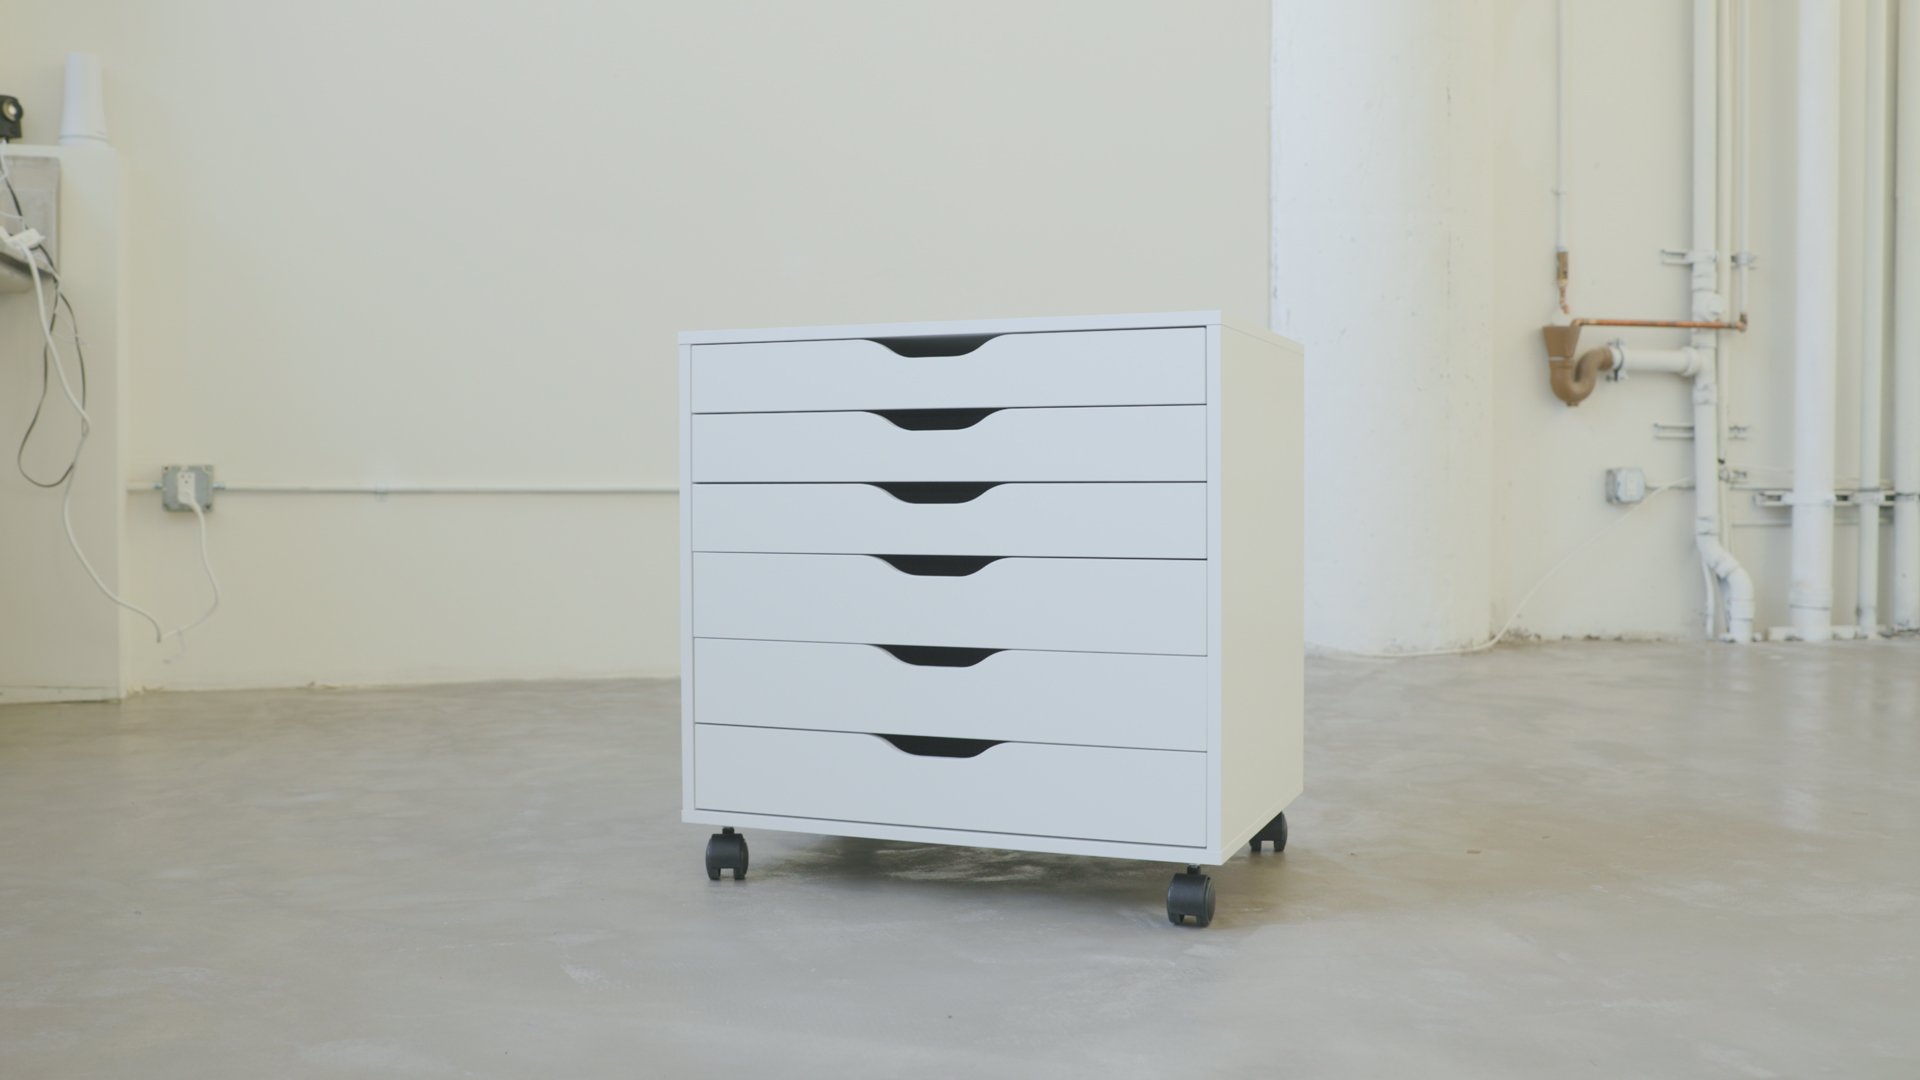
A “before” picture of the standard, unmodified 26” IKEA Alex Drawers on casters.

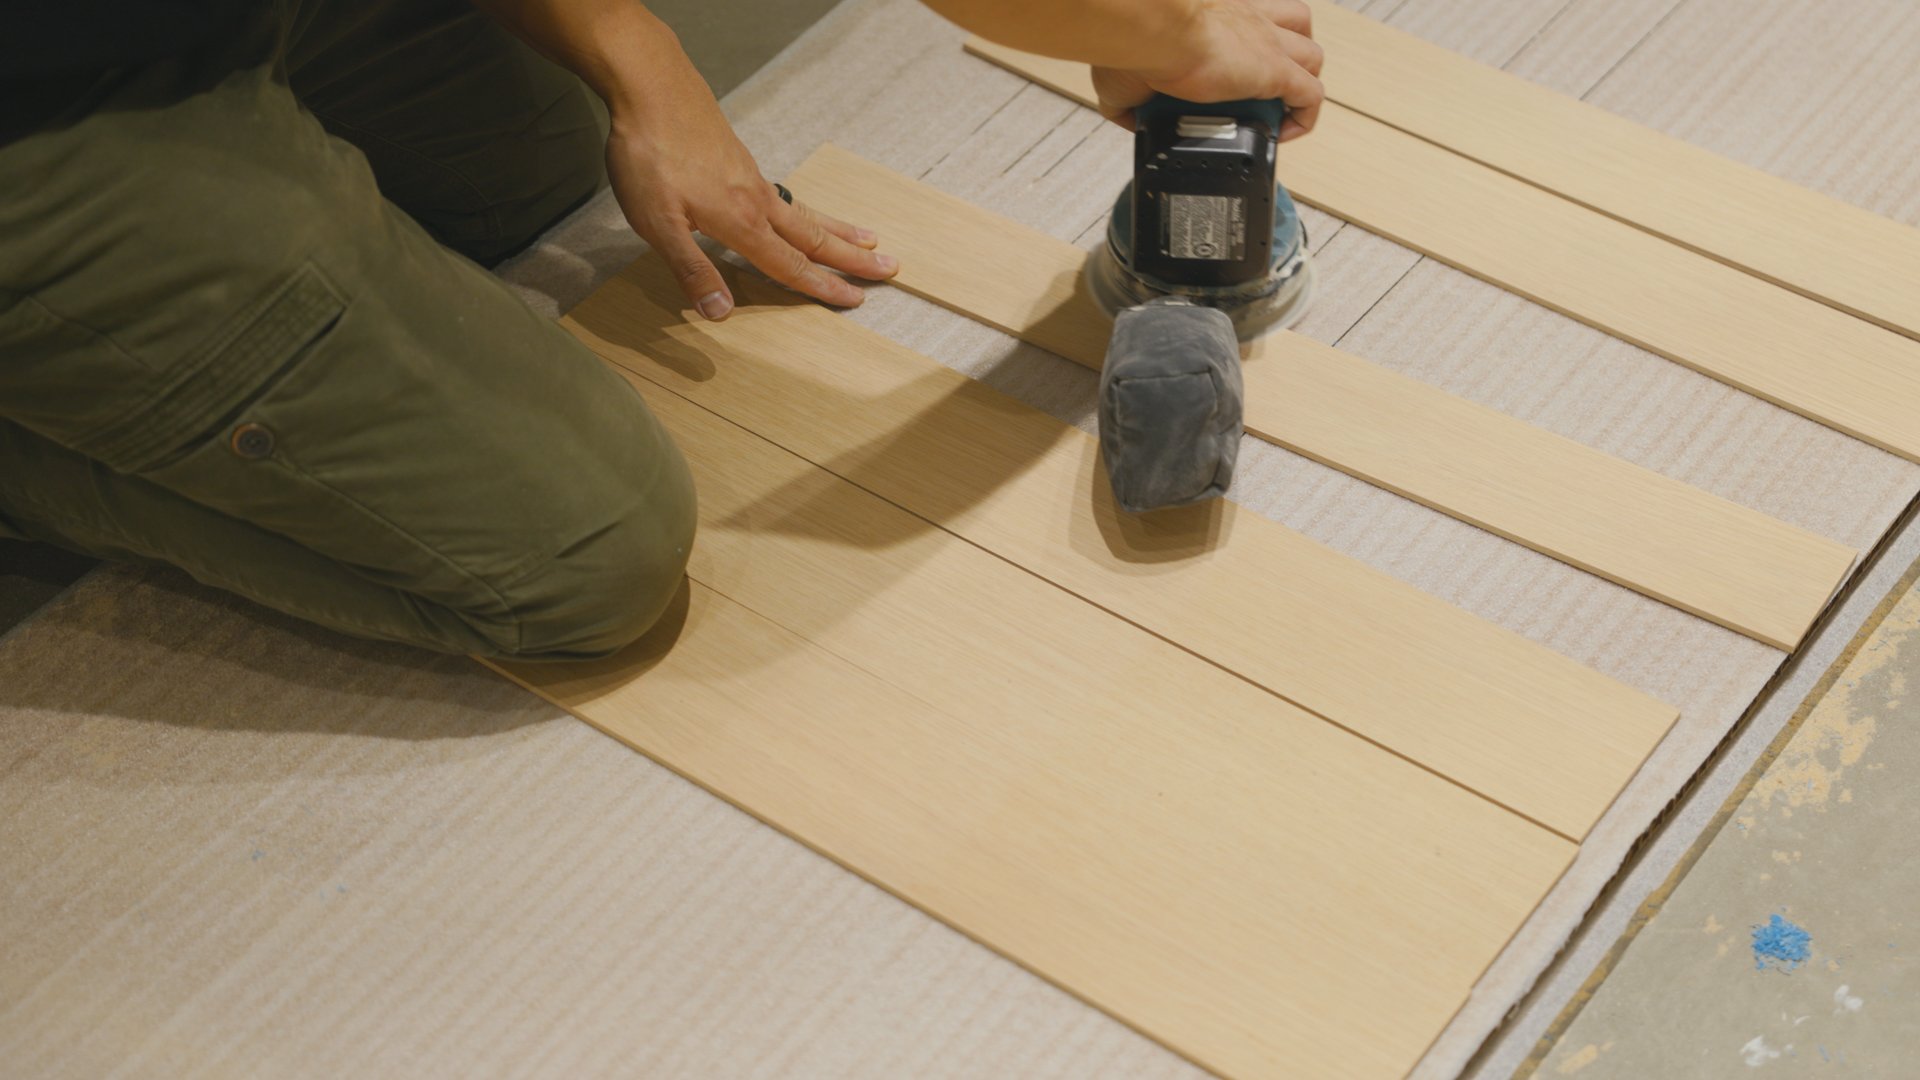
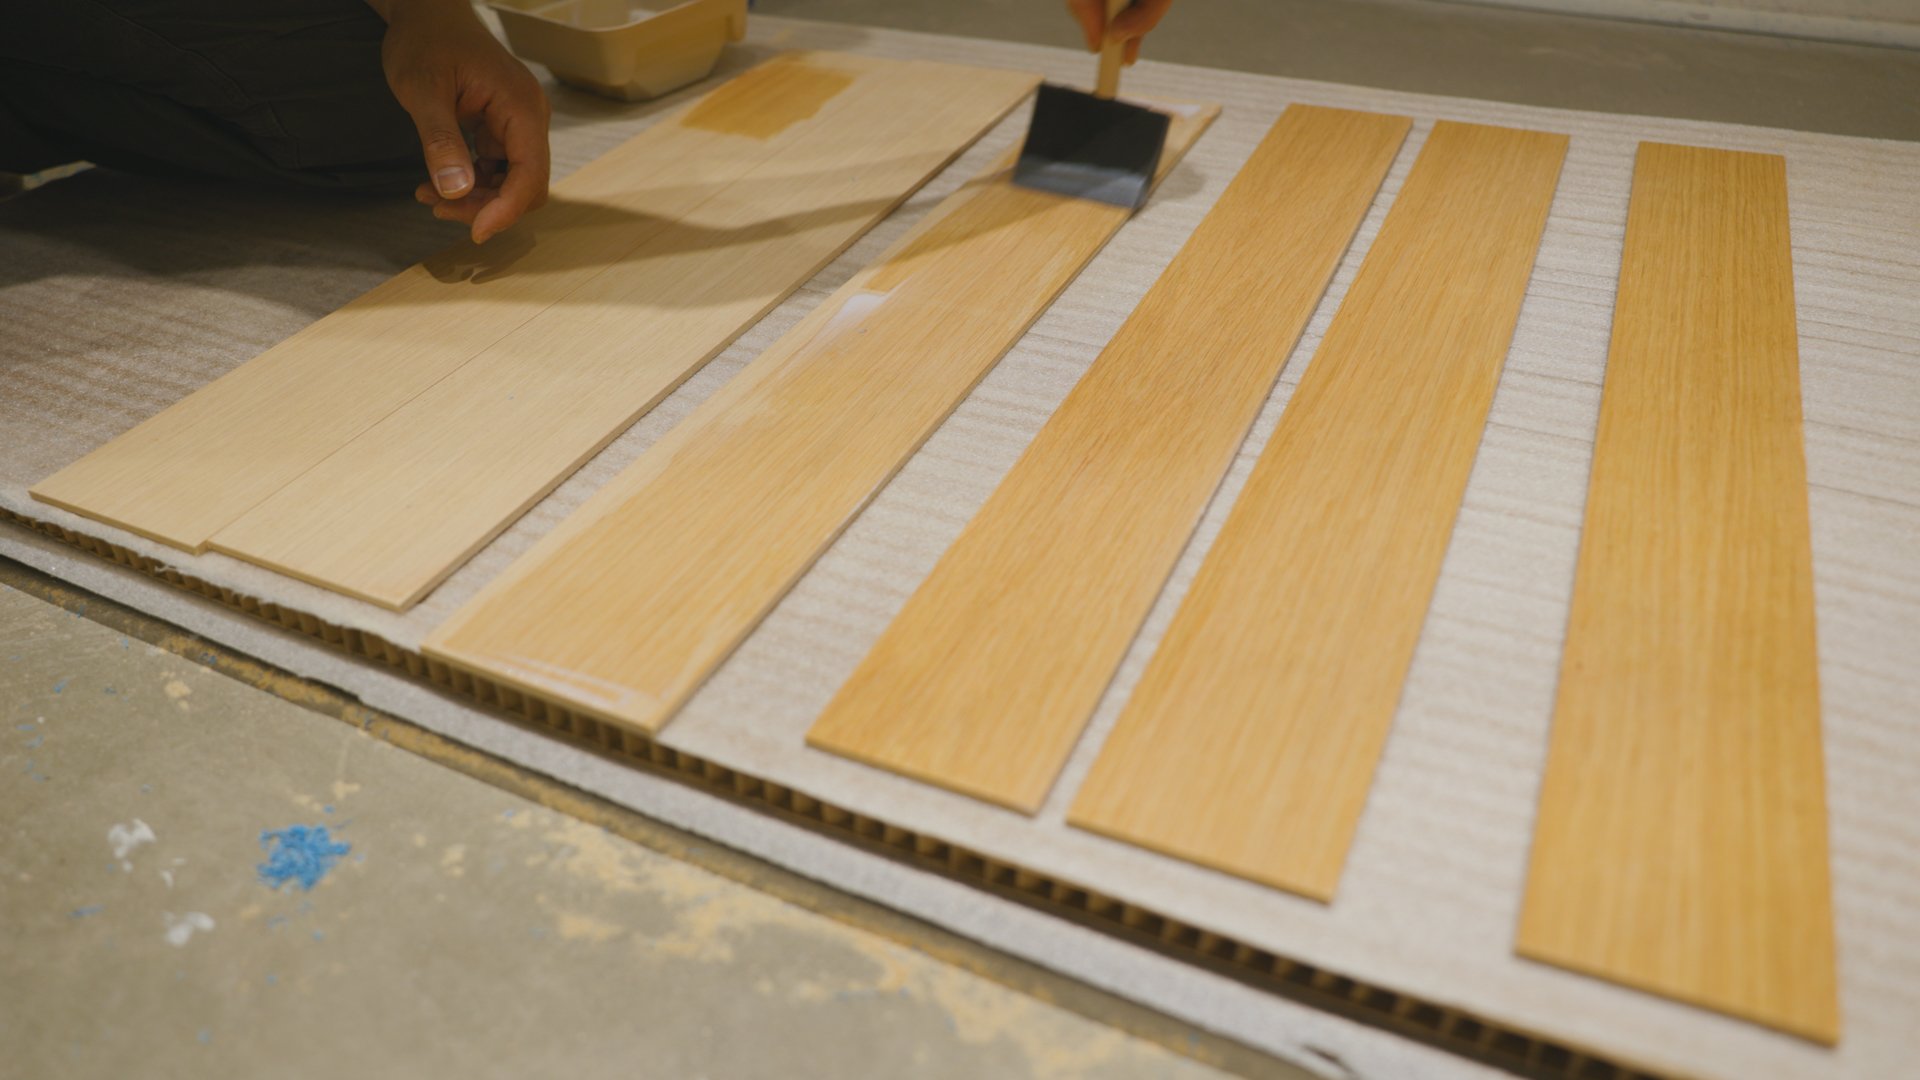
Since I recently finished building out the storage for my office, I have so many leftover offcuts I want to use up. So I took some sheets of 1/4” white oak panel and cut them up to cover the existing drawer faces. Then I sanded and finished them the same way I did my storage cabinets.

Video overview of the DIY Alex Drawer Ikea Hack
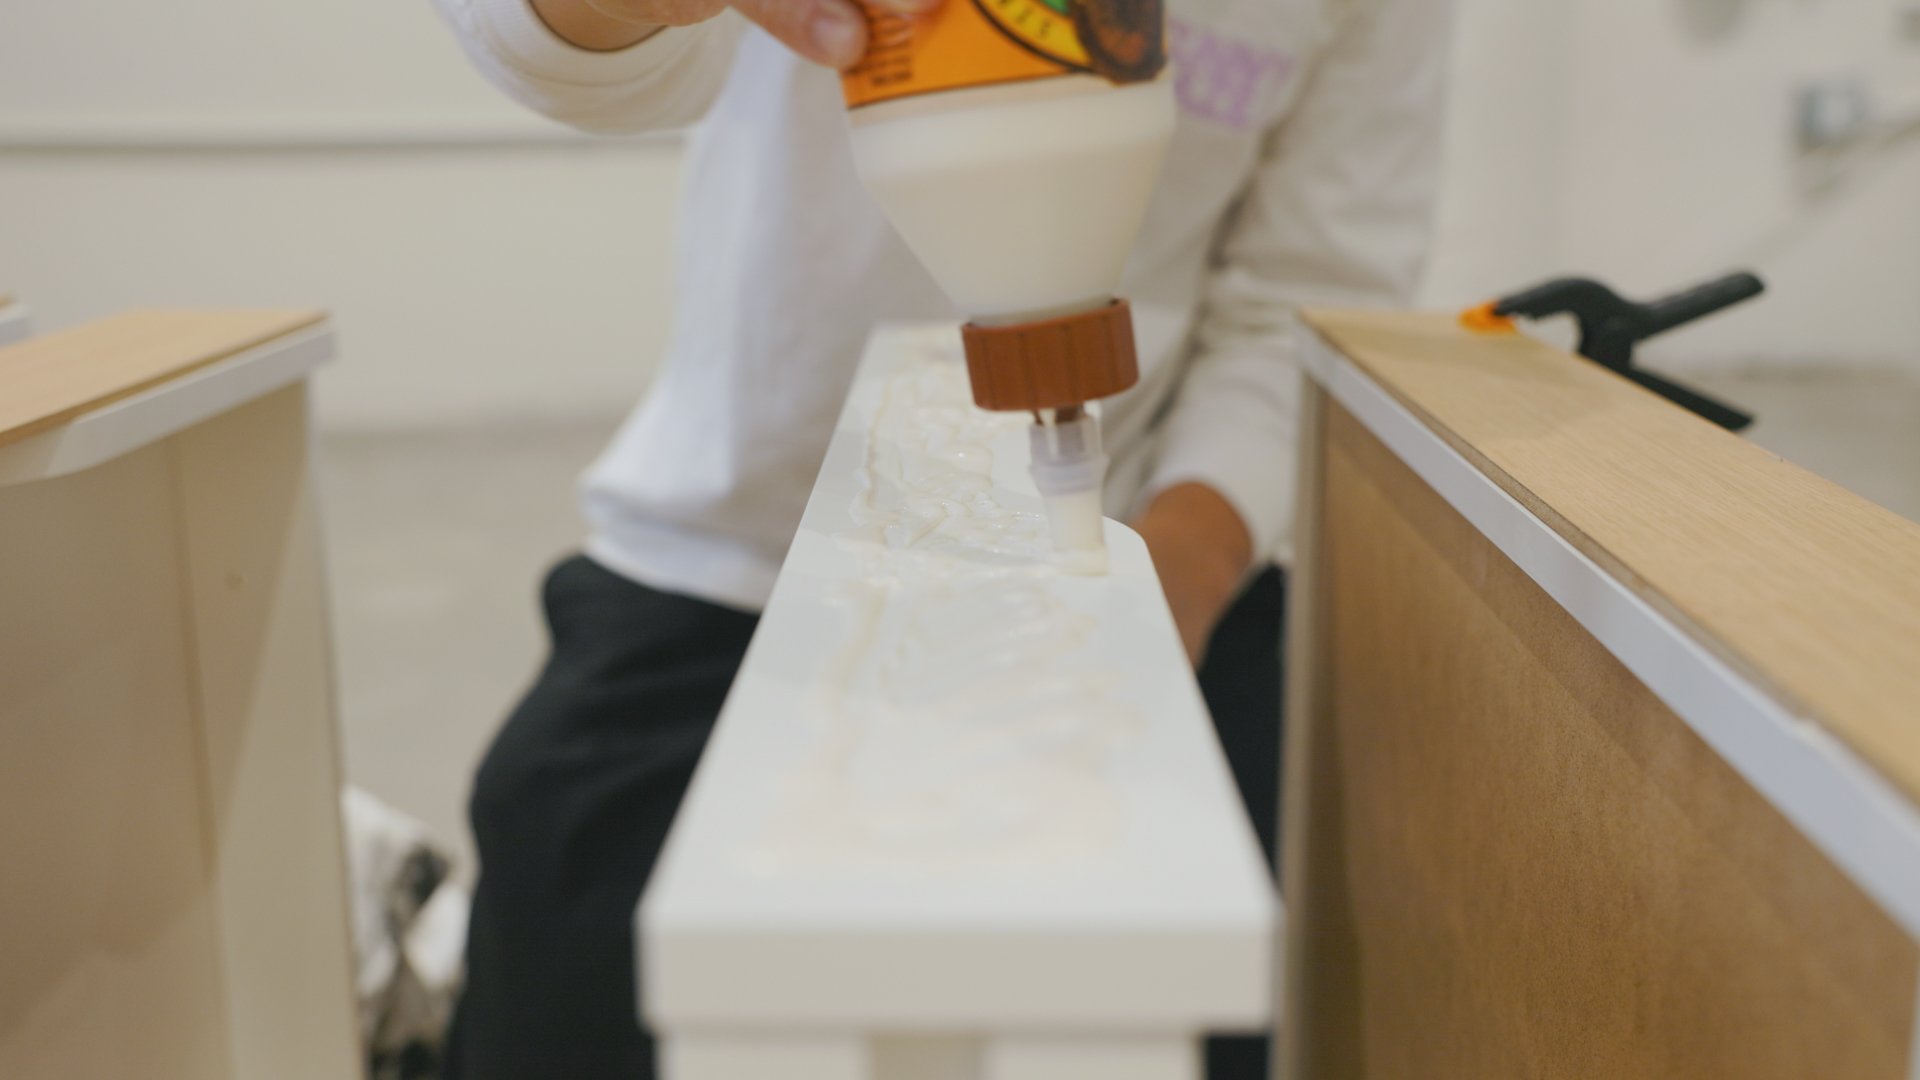
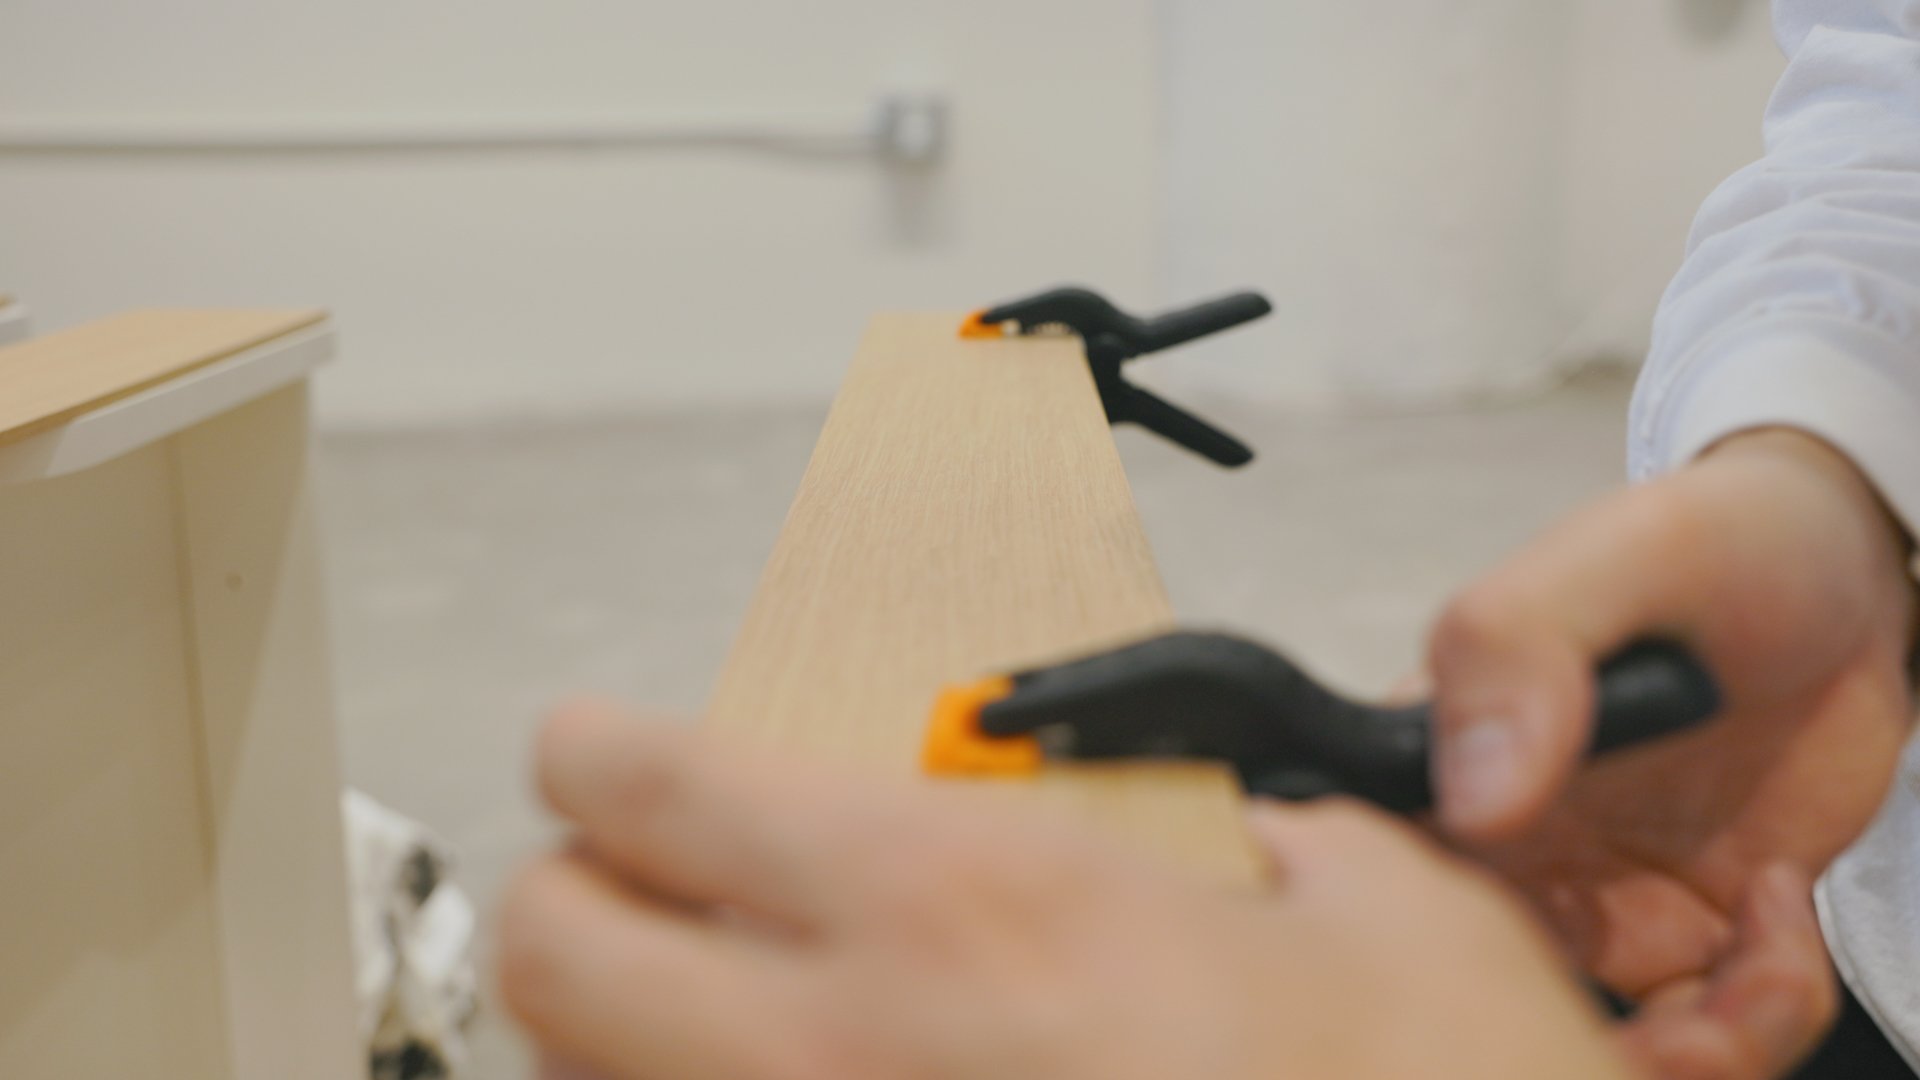

To apply the faces, I use wood glue and clamps to hold it in place while it dries. A tip here: make sure to add enough glue to get good adhesion, and progressively wipe off any squeeze-out.

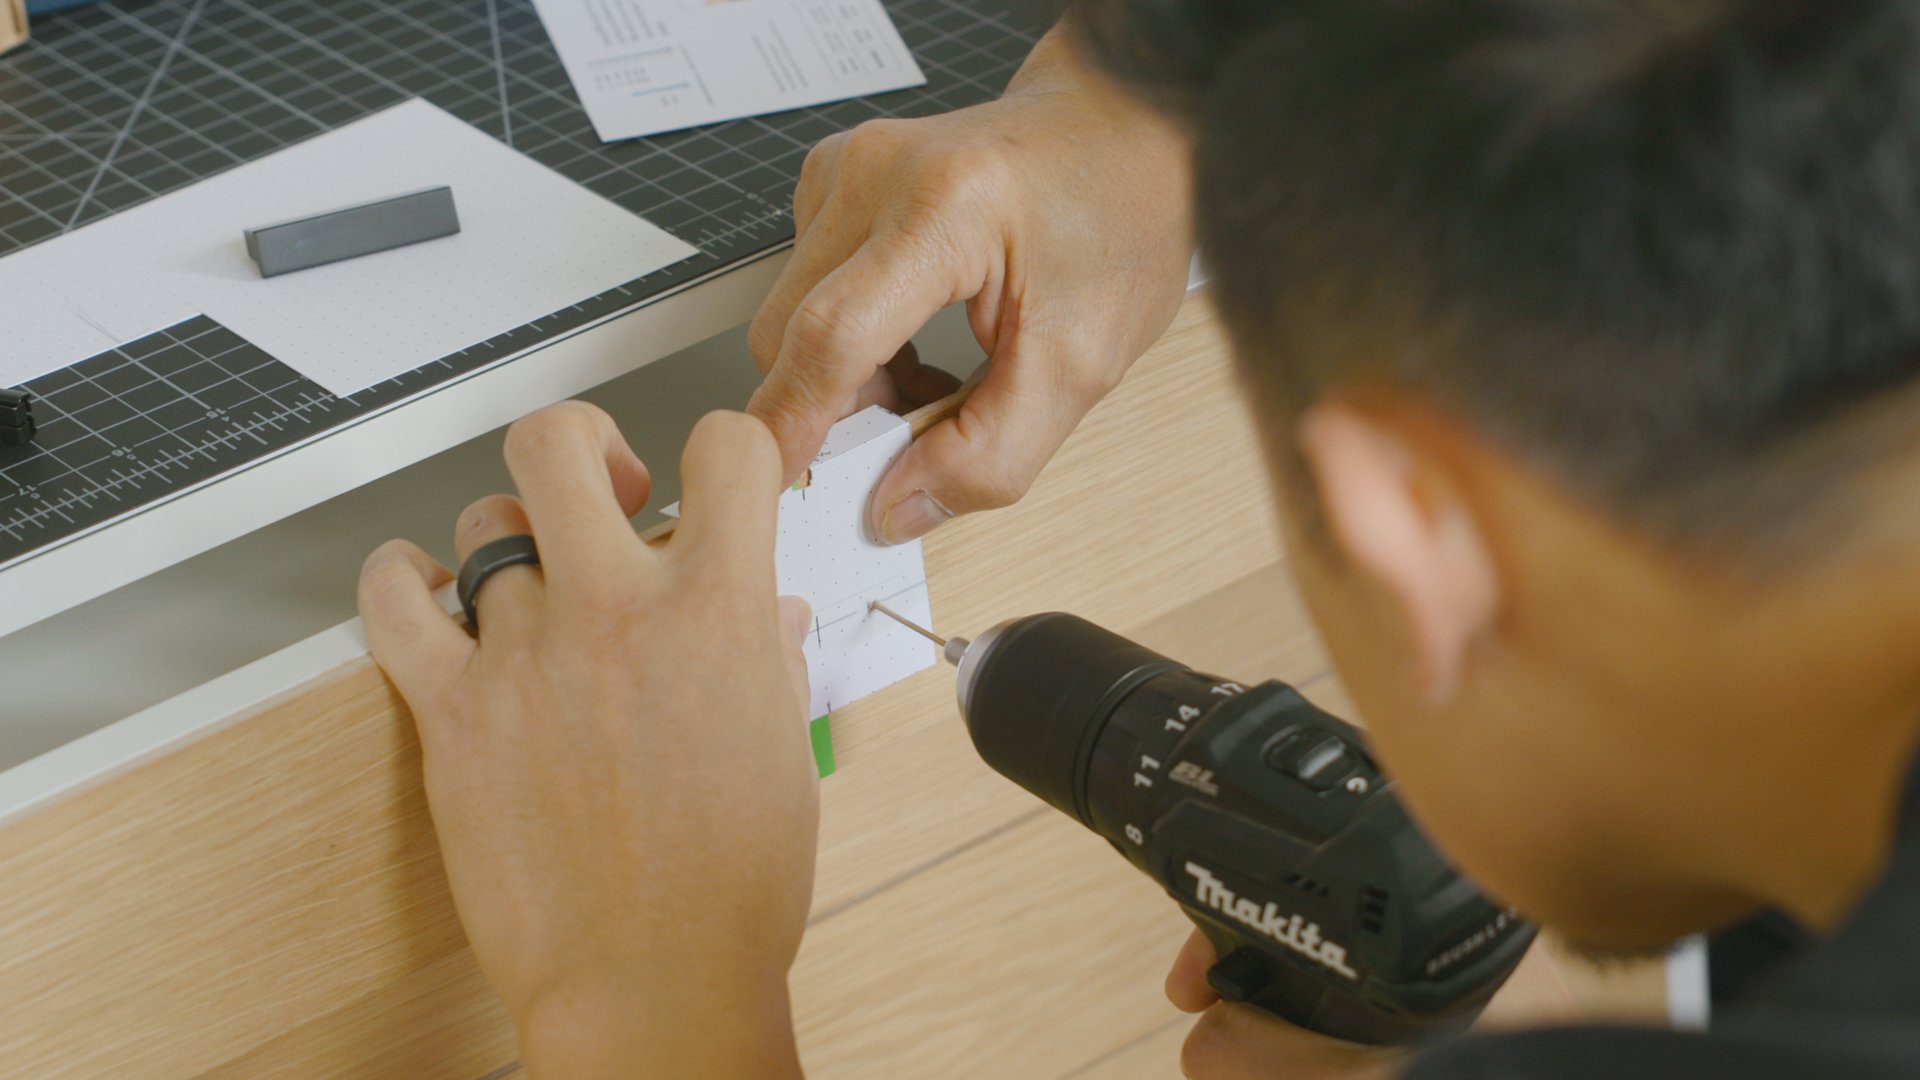
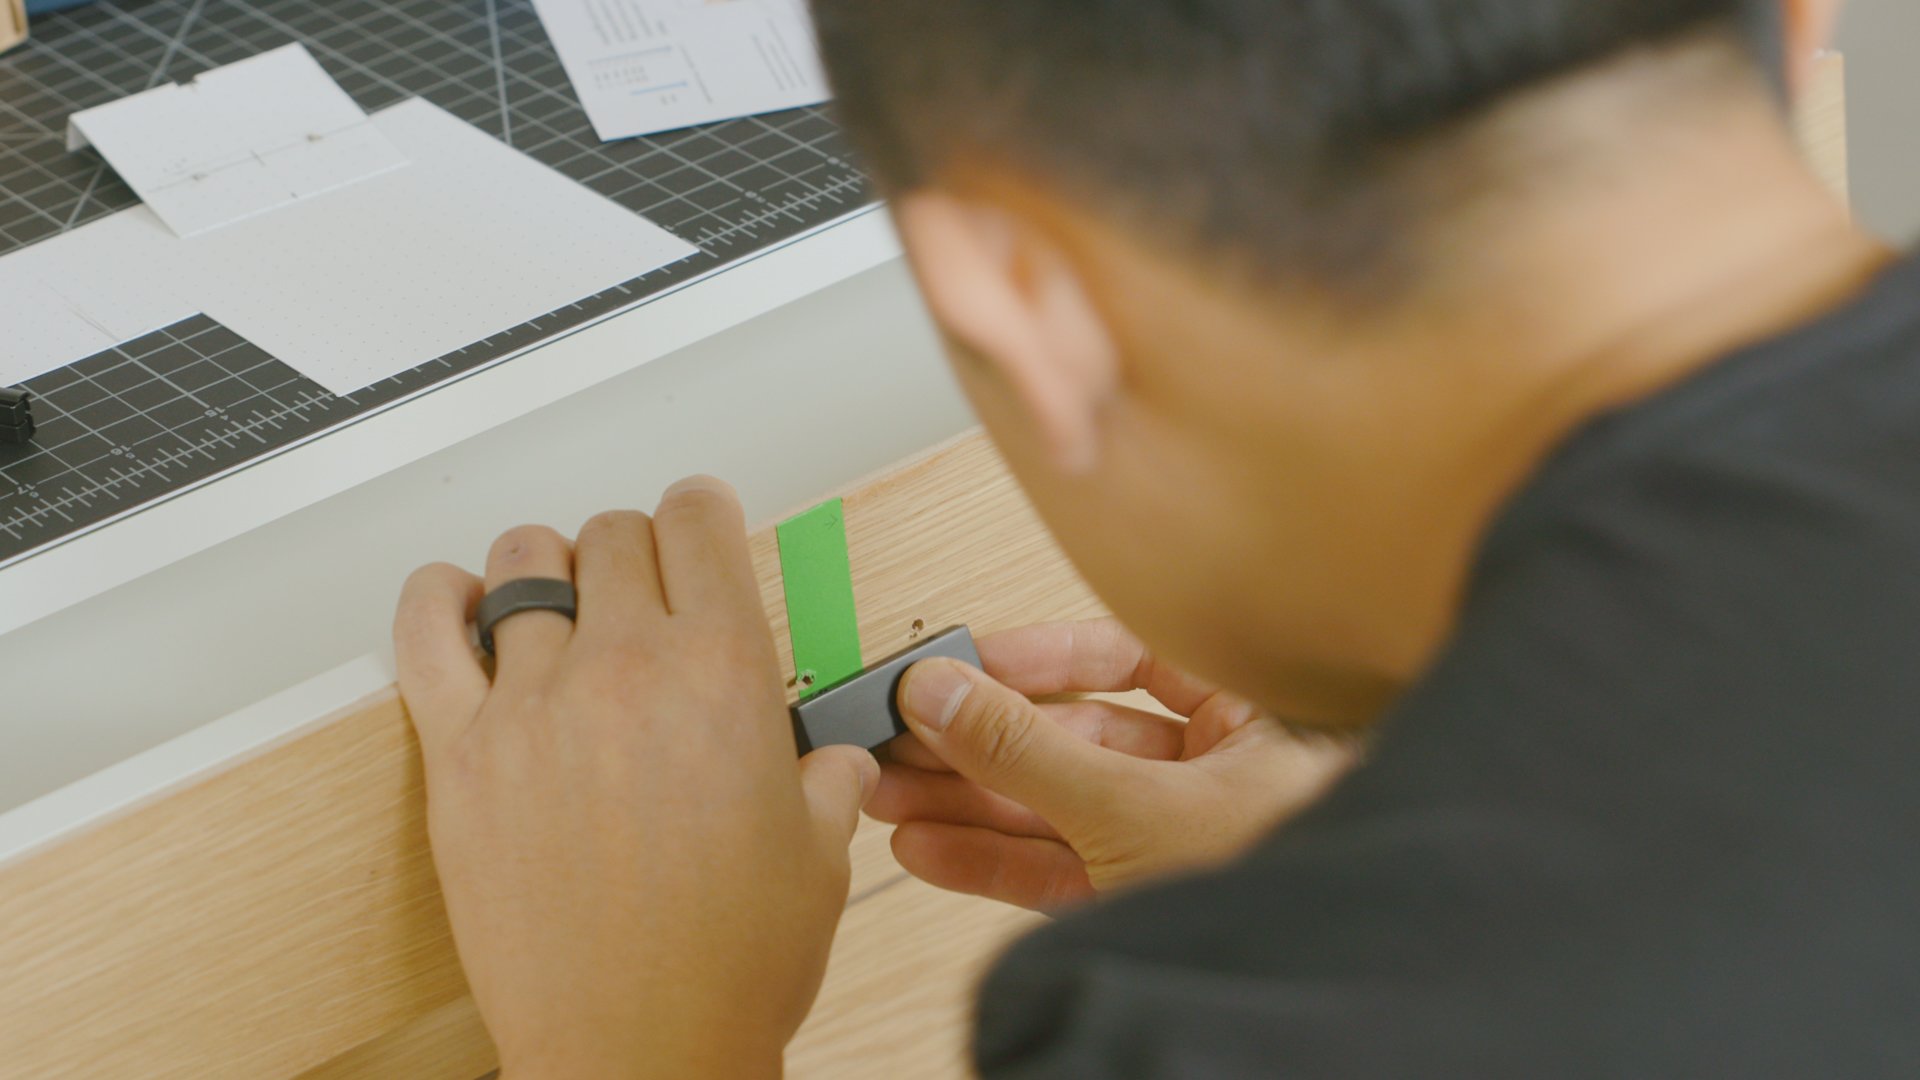
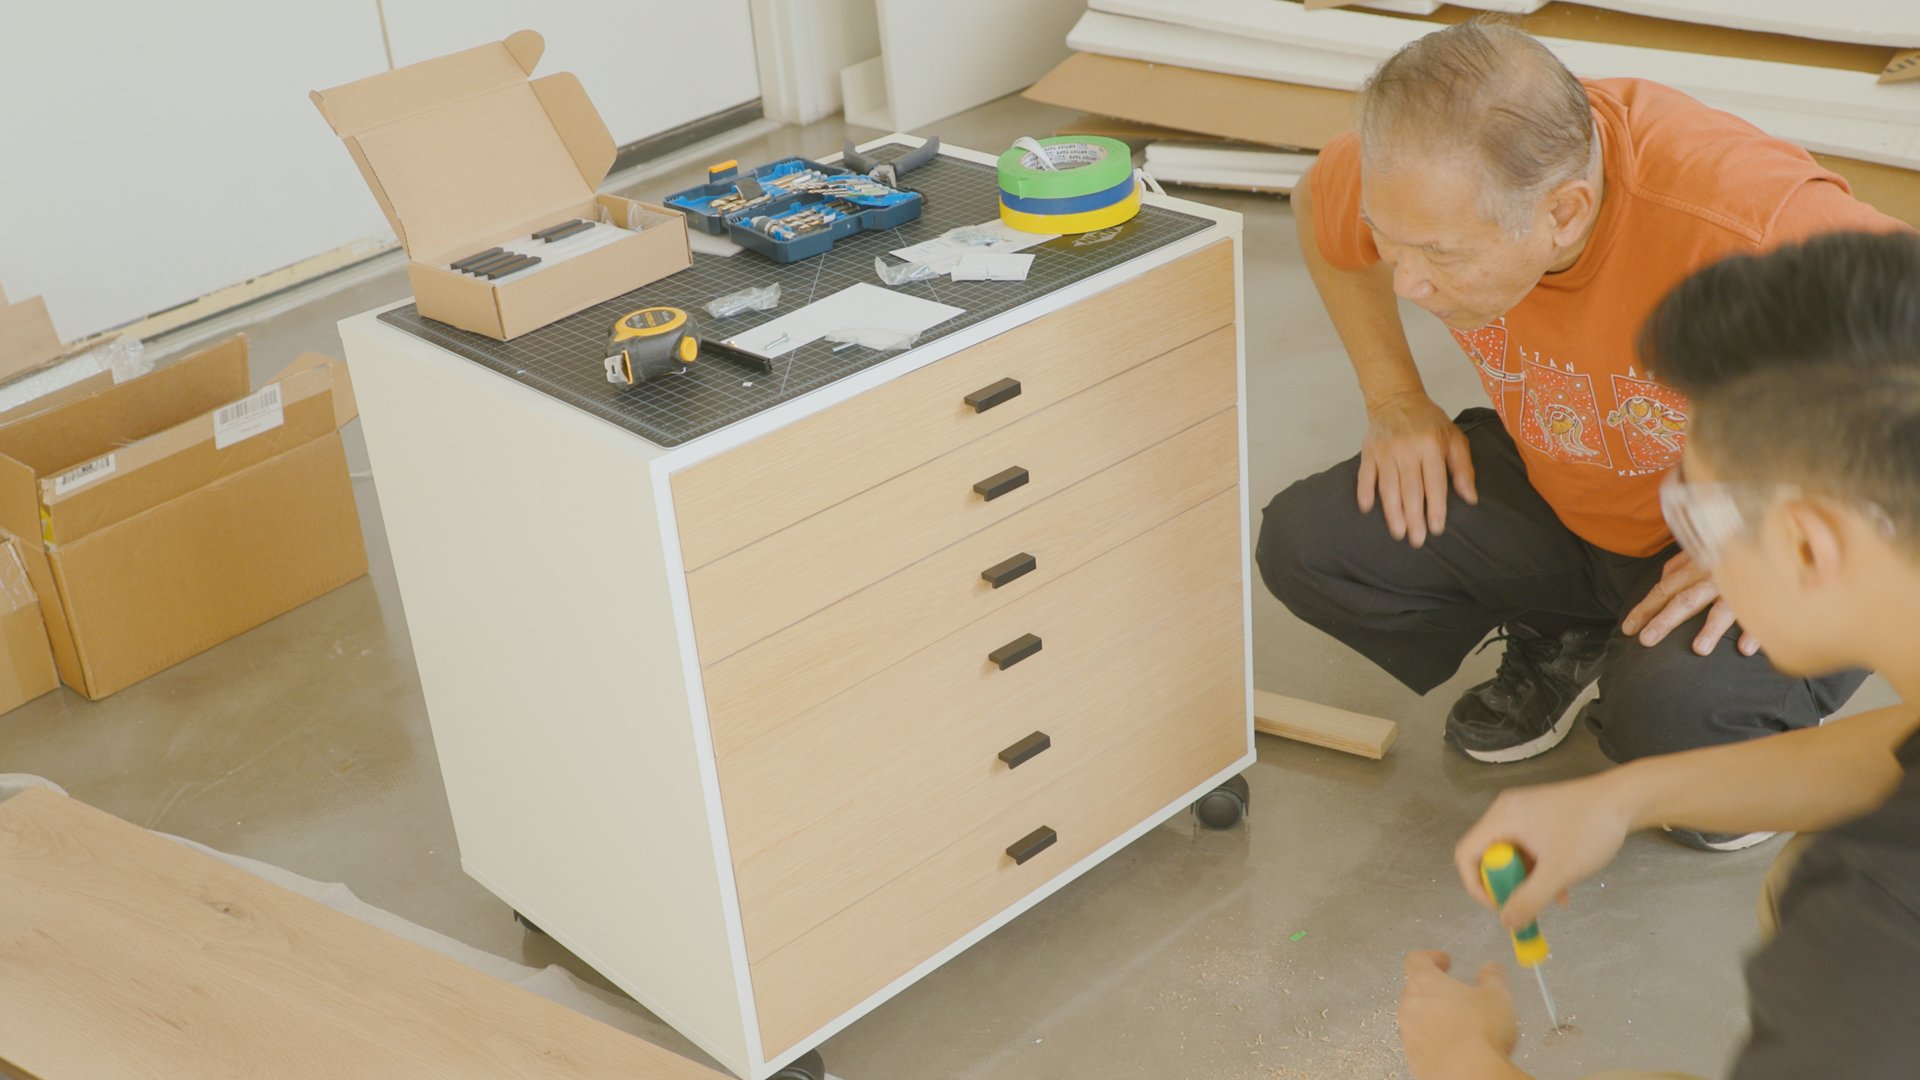
Next, I installed these black pulls to the drawer faces using a template I made out of an index card. This card has a cut out to align with the center of the drawers, which I marked with tape and has holes for where my screws need to go. This made it easy to align and install all the pulls down the center. To prevent tear-out on the inside of the drawer, I used a scrap piece of wood behind the drawer face, with help from my dad.
This fun DIY project adds character to a standard Ikea piece and gives me a solid mobile storage solution.
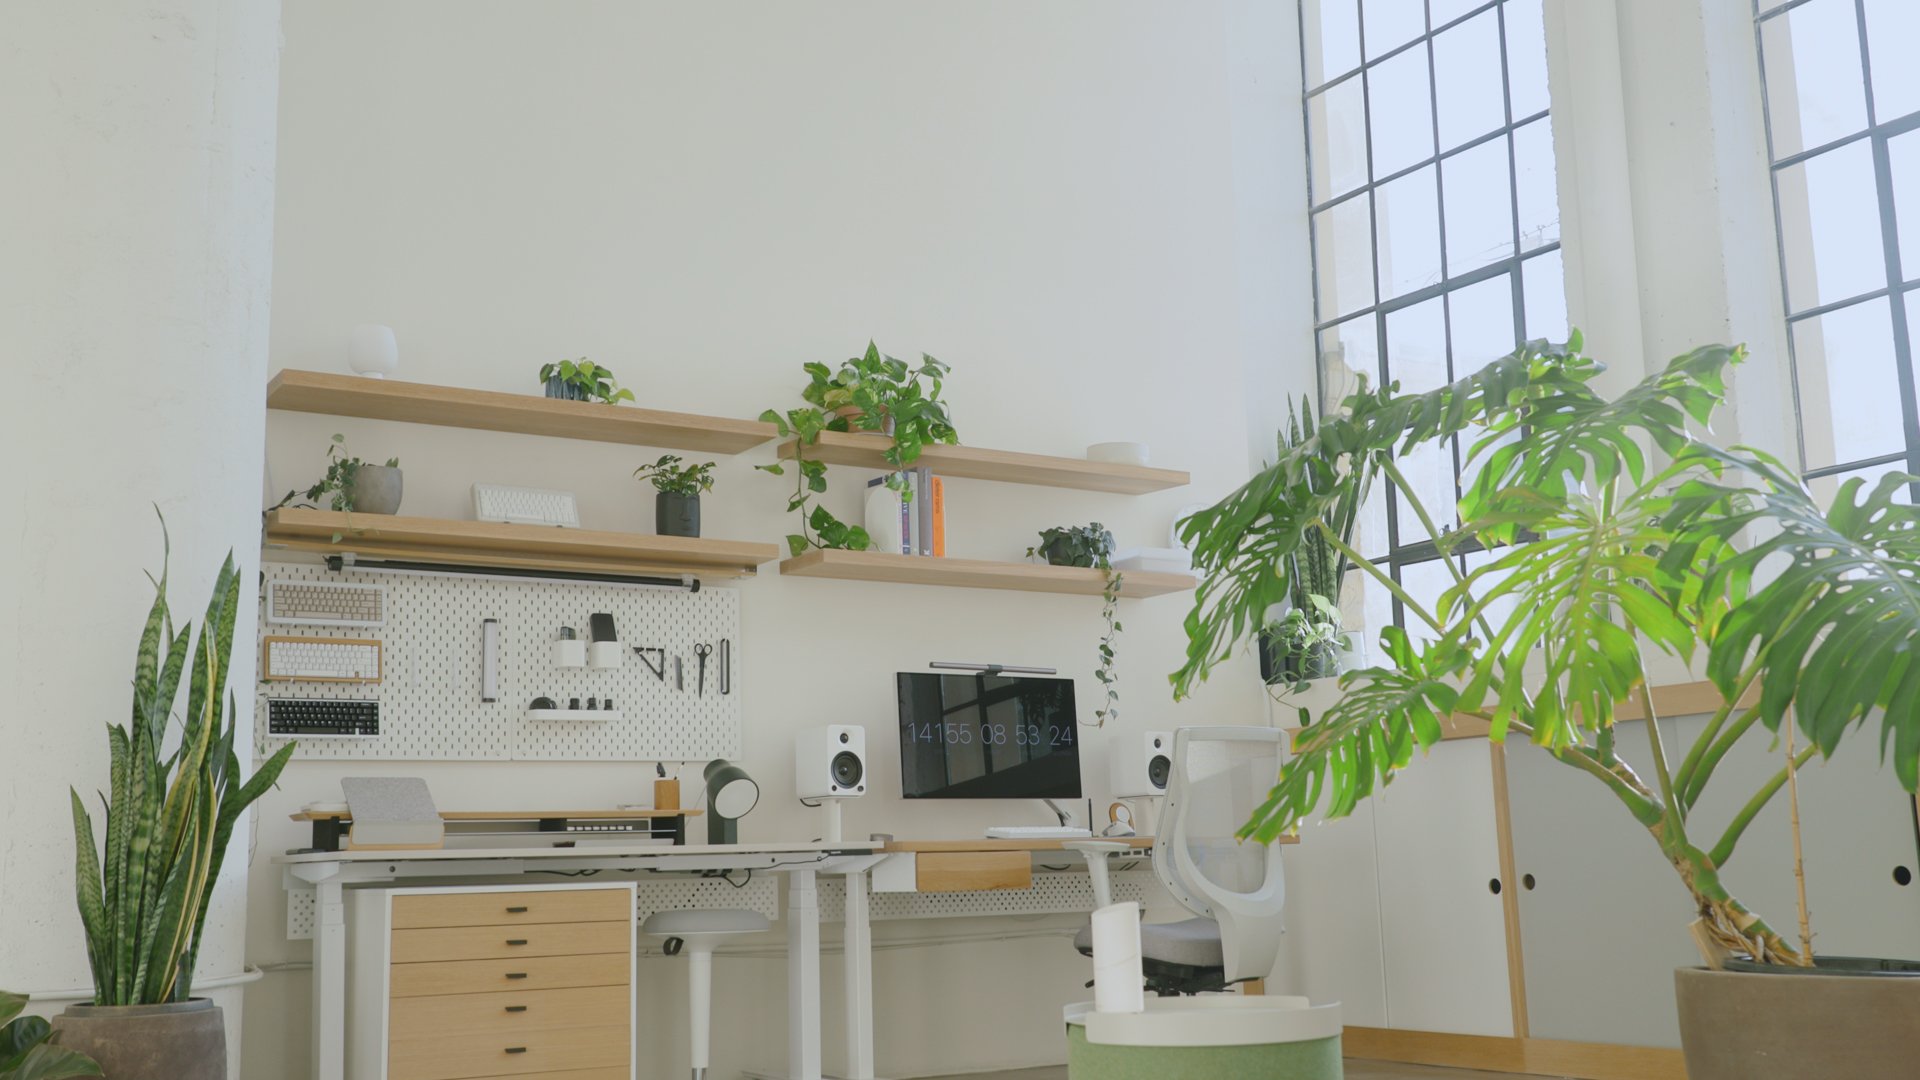
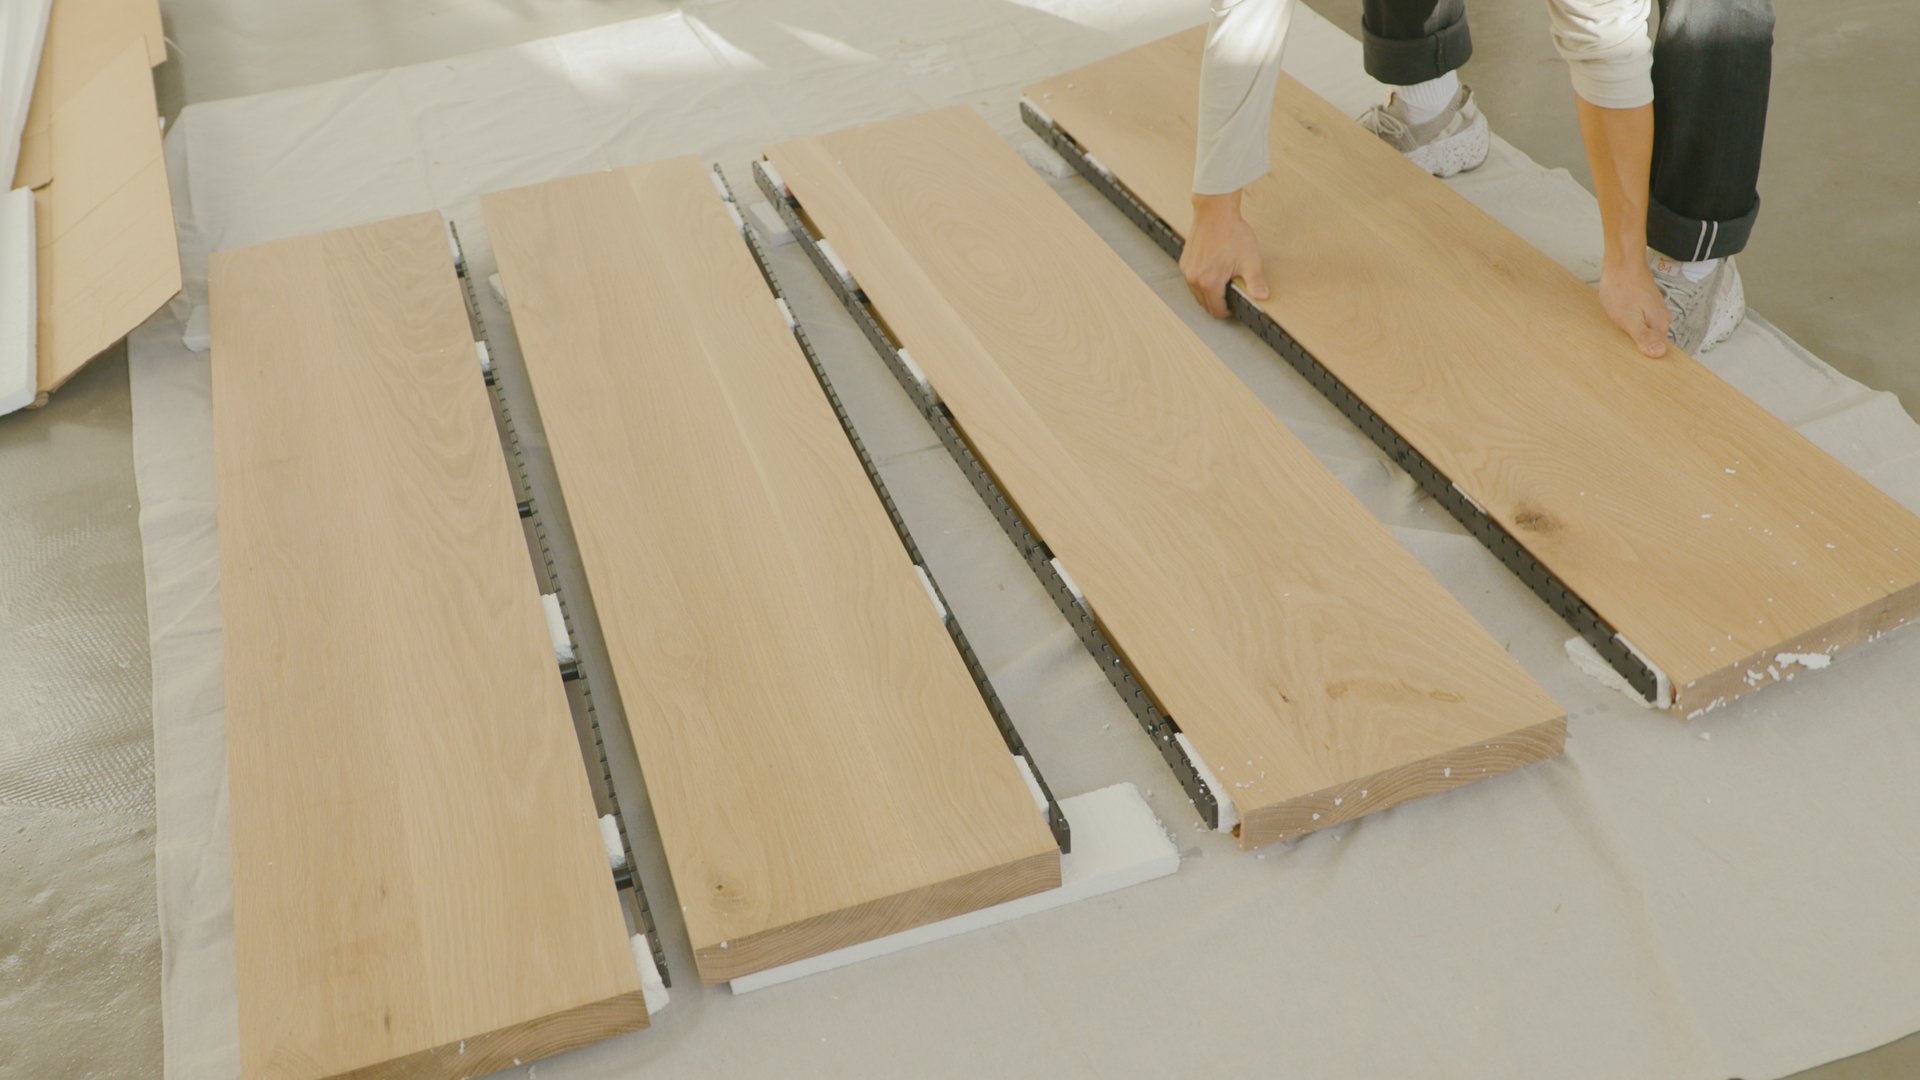
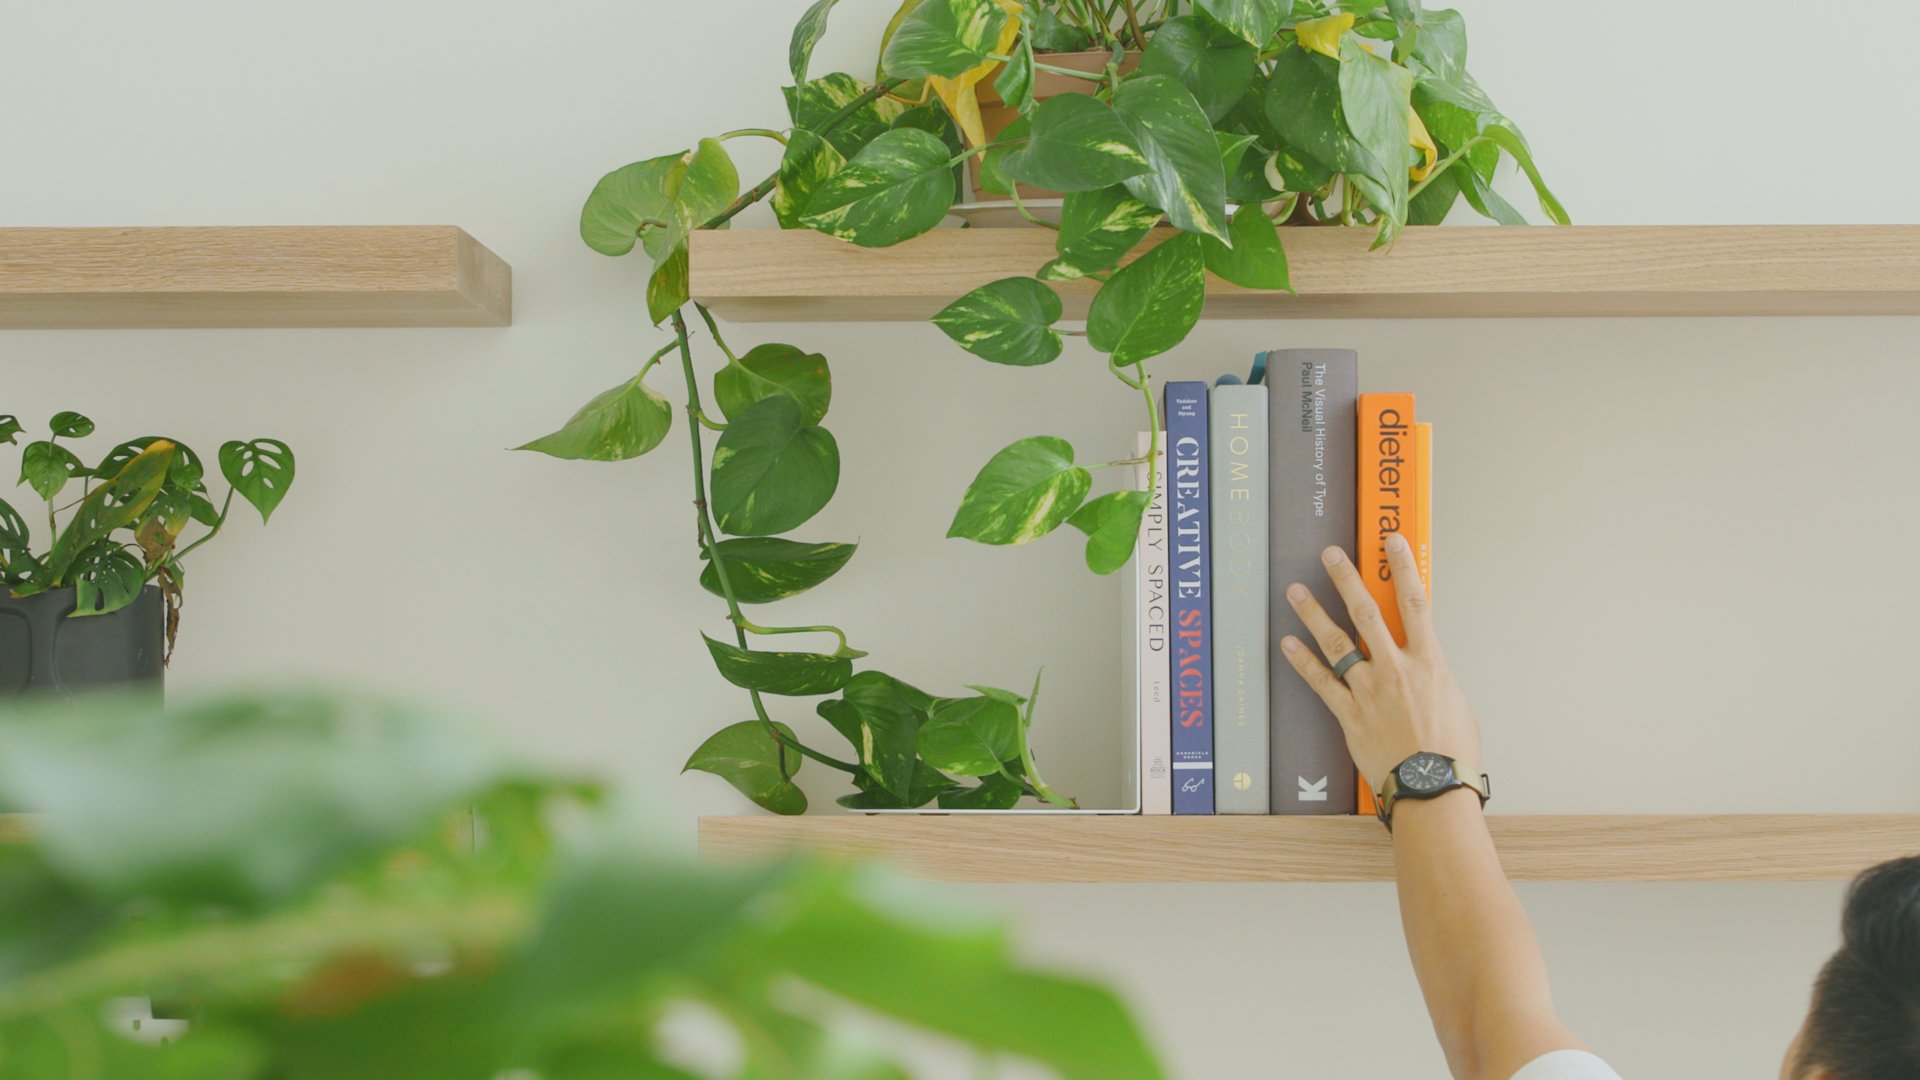
Overhead Shelves
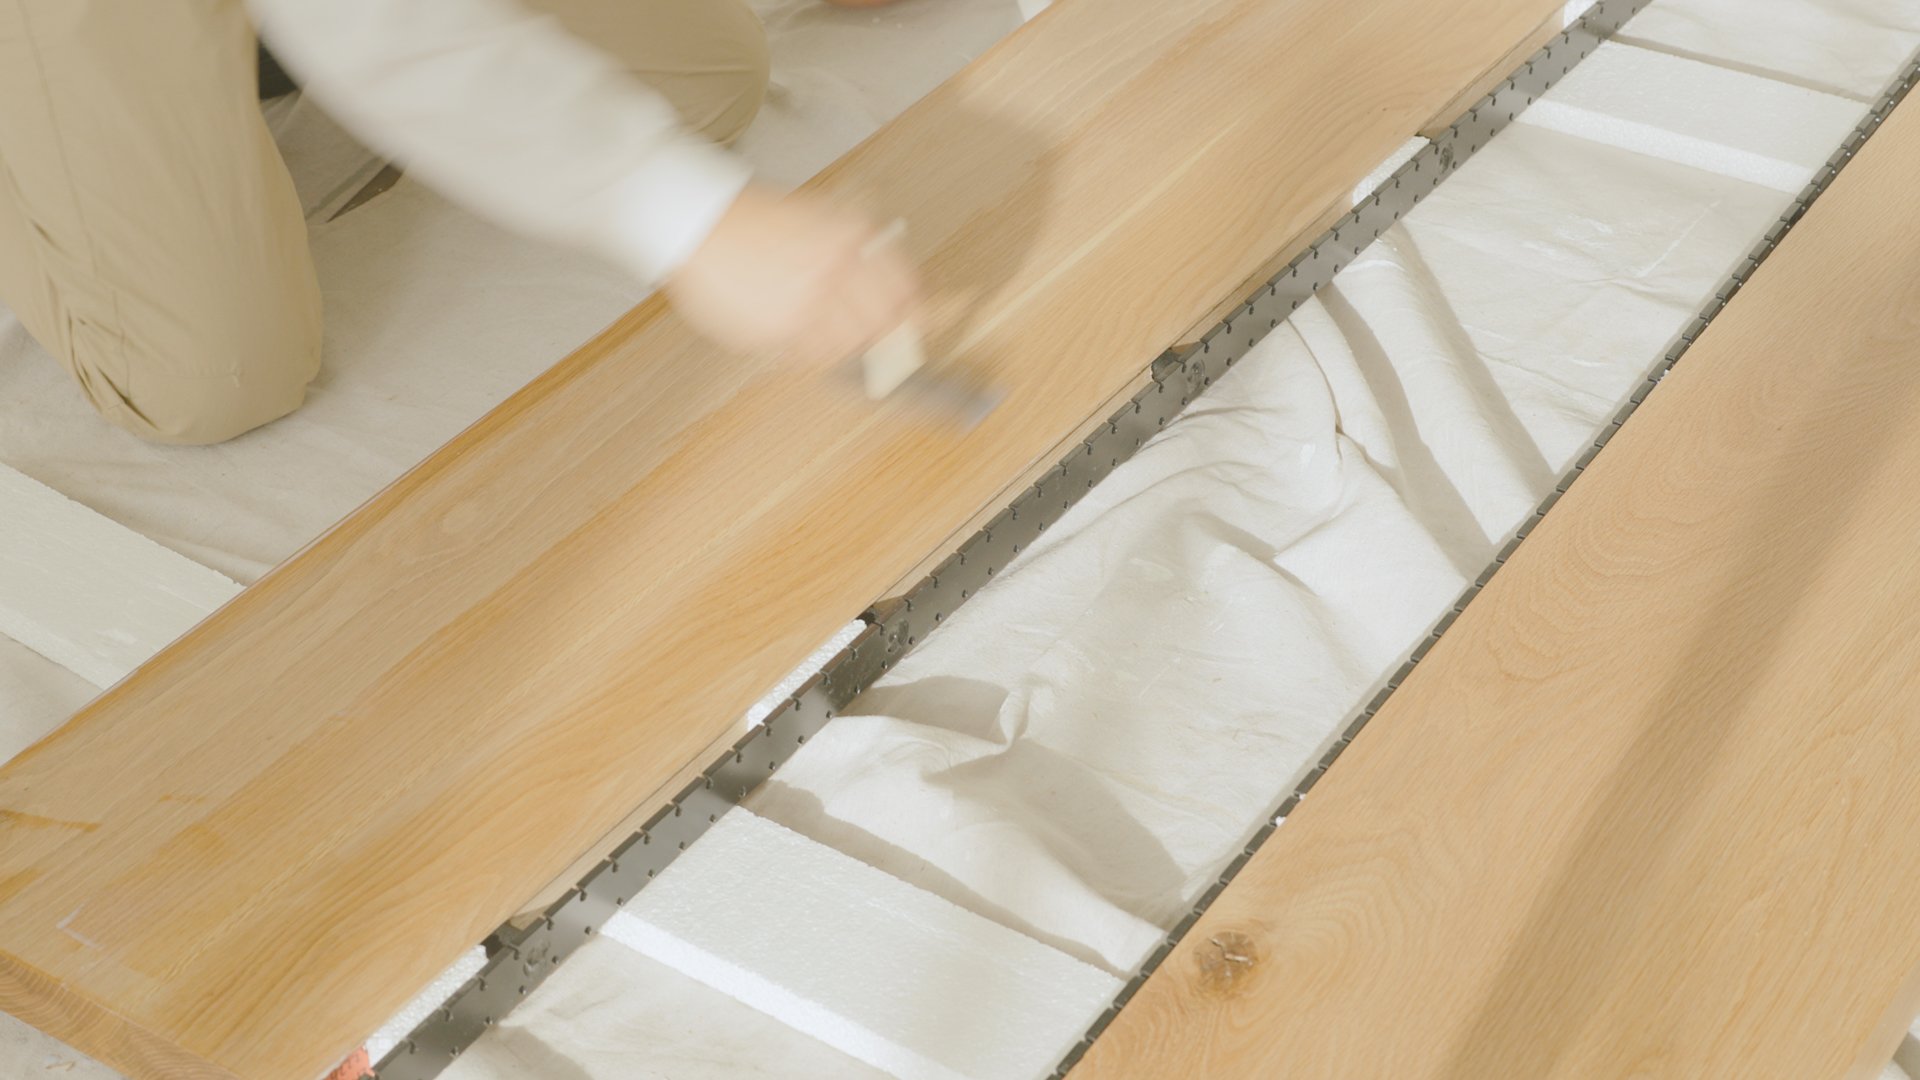
In my design for the space, I wanted to add long floating shelves above my desks to have overhead storage, a place display decor, and a surface to clamp camera gear. After looking at options between something off the shelf and building something myself, I found a place where I could order custom floating shelves. I got two sets of 60” shelves to line up side by side to match the length of my two desks. I ordered these in raw white oak to apply the same Flat finish I used on my storage cabinets and DIY Alex Drawer.

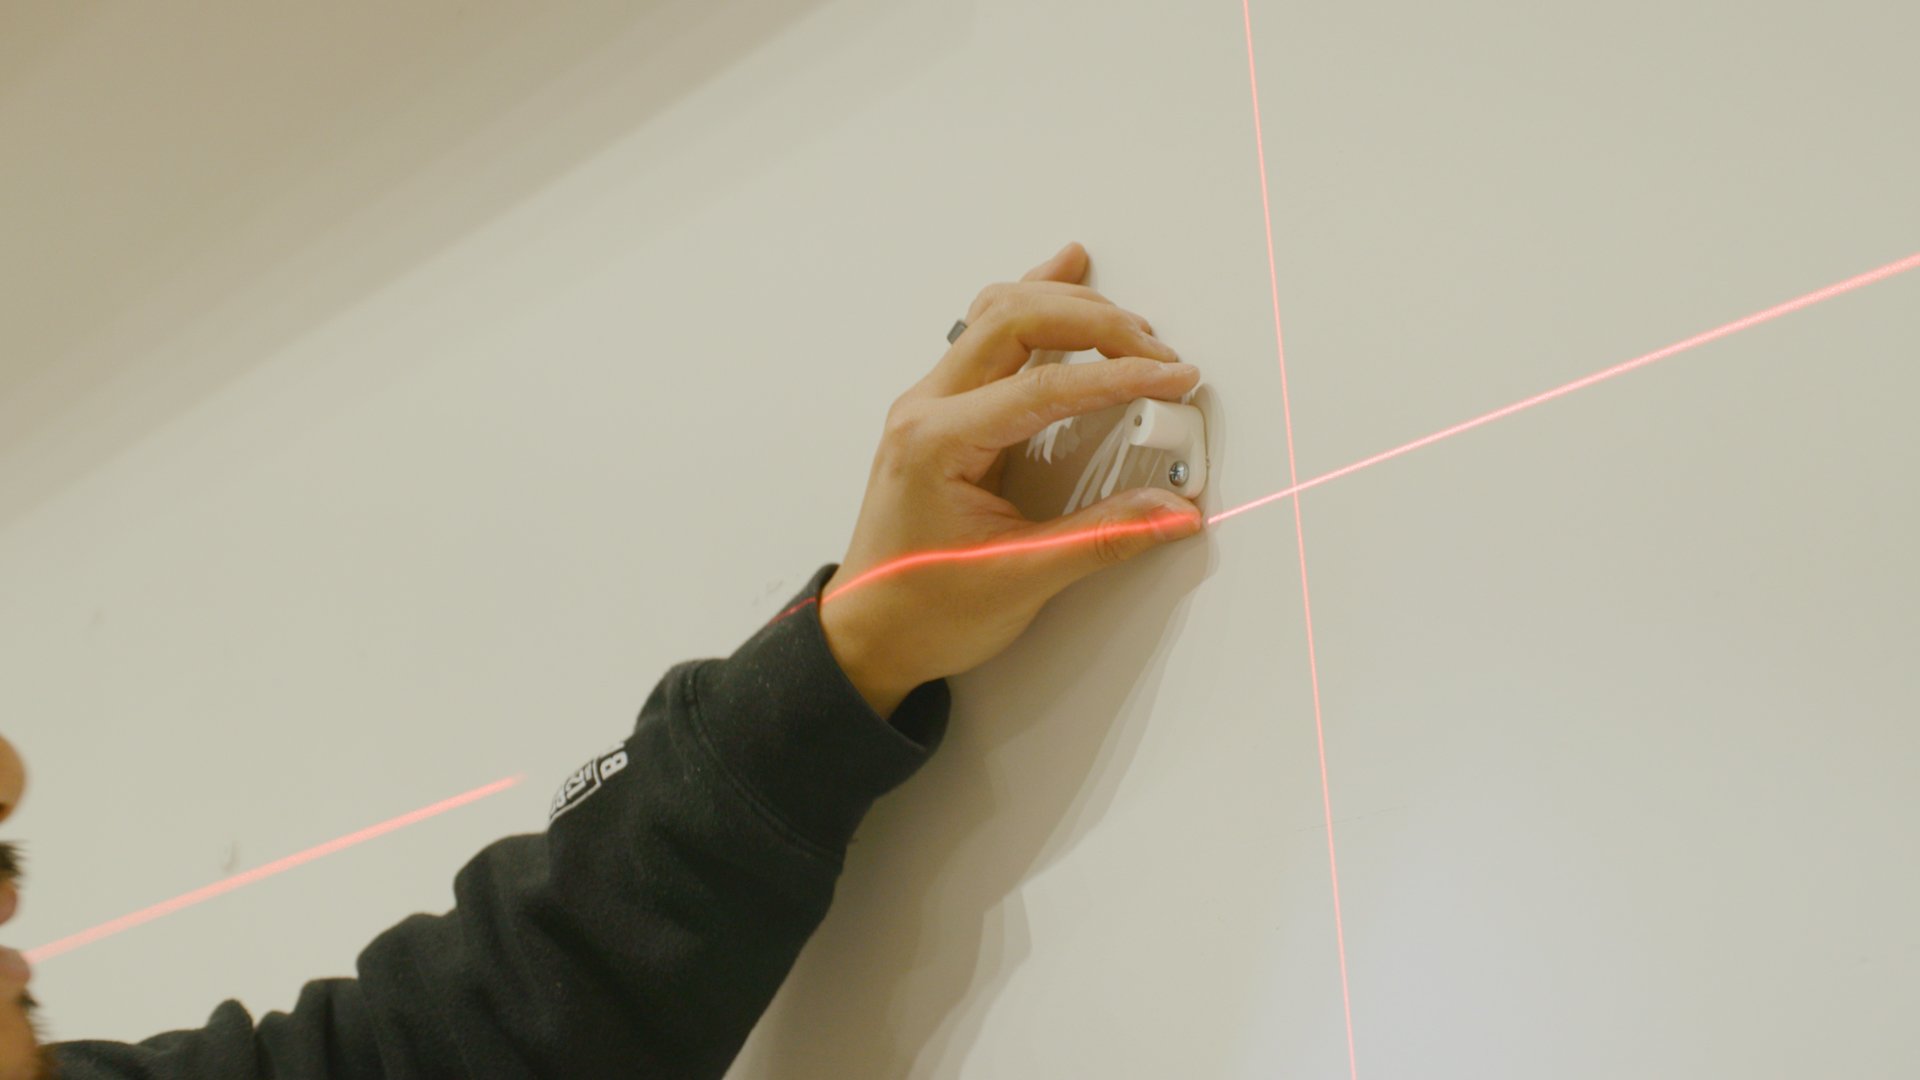
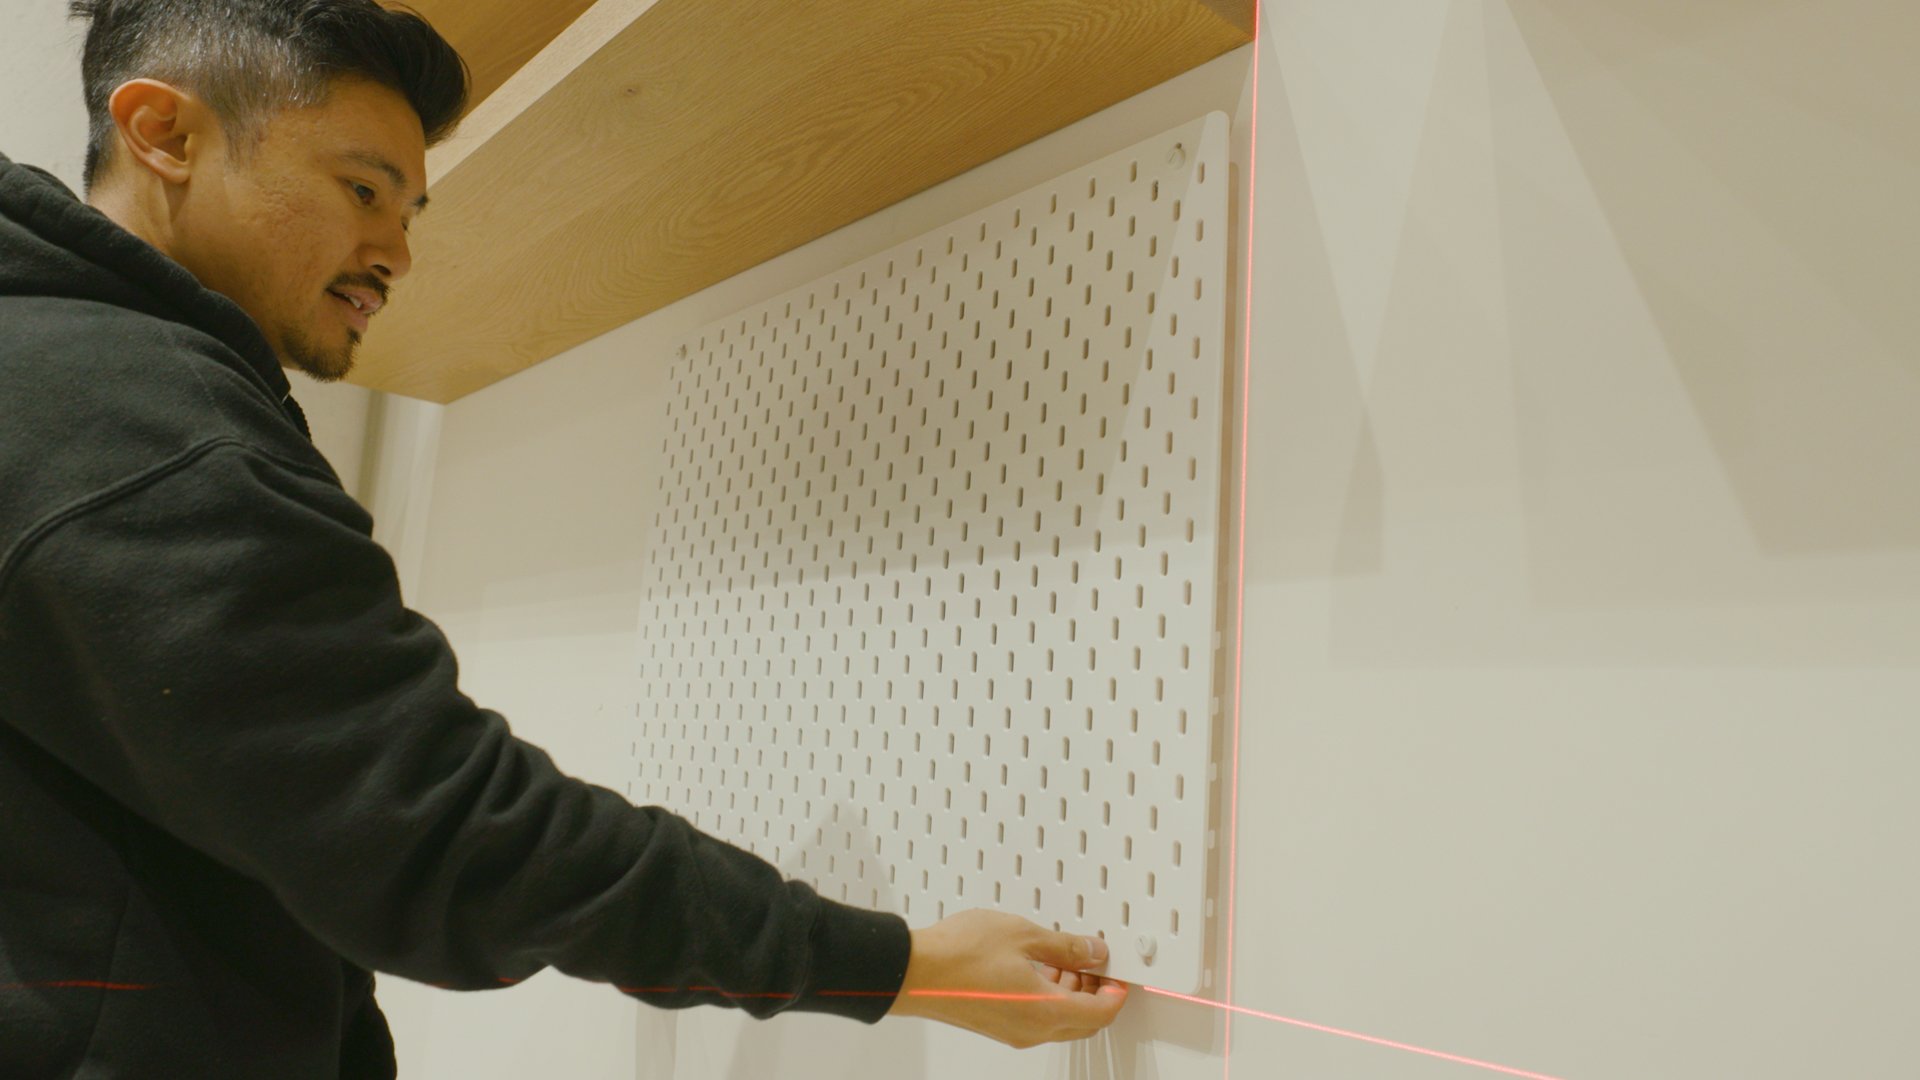
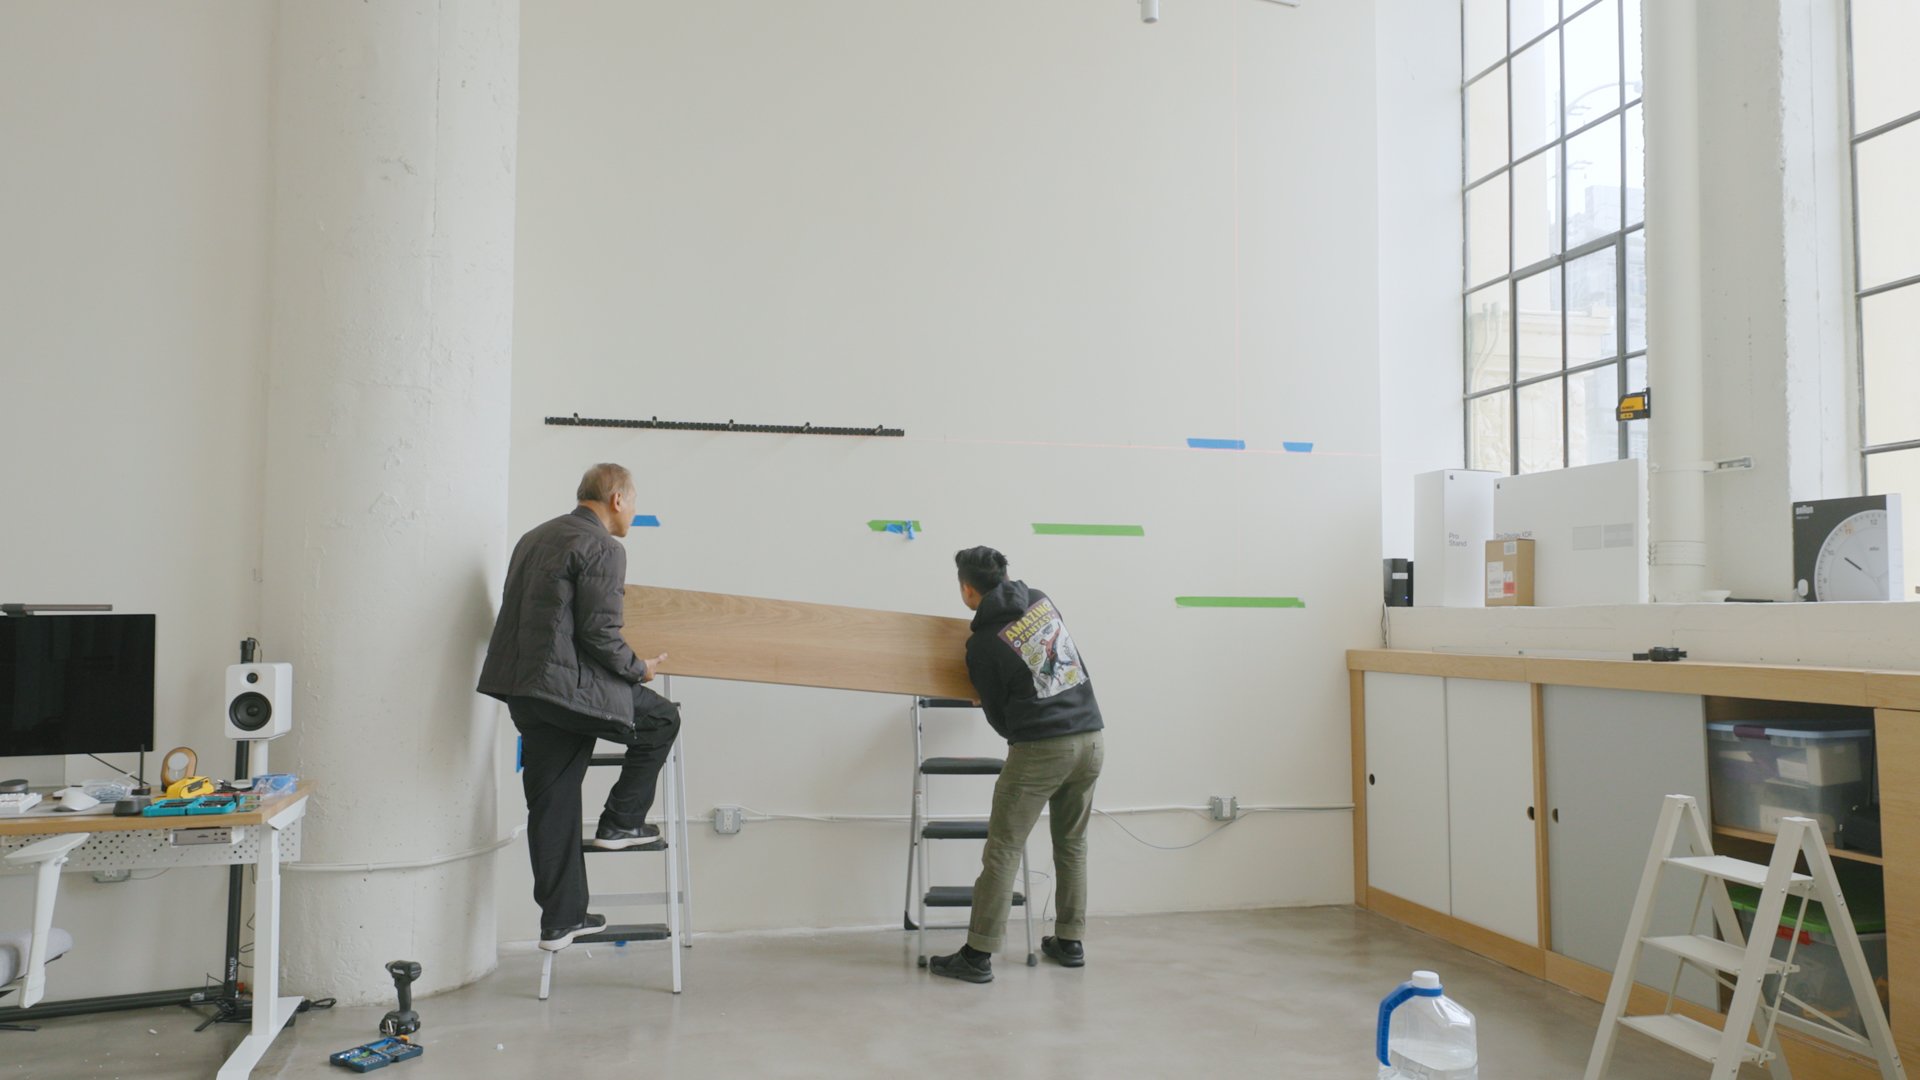
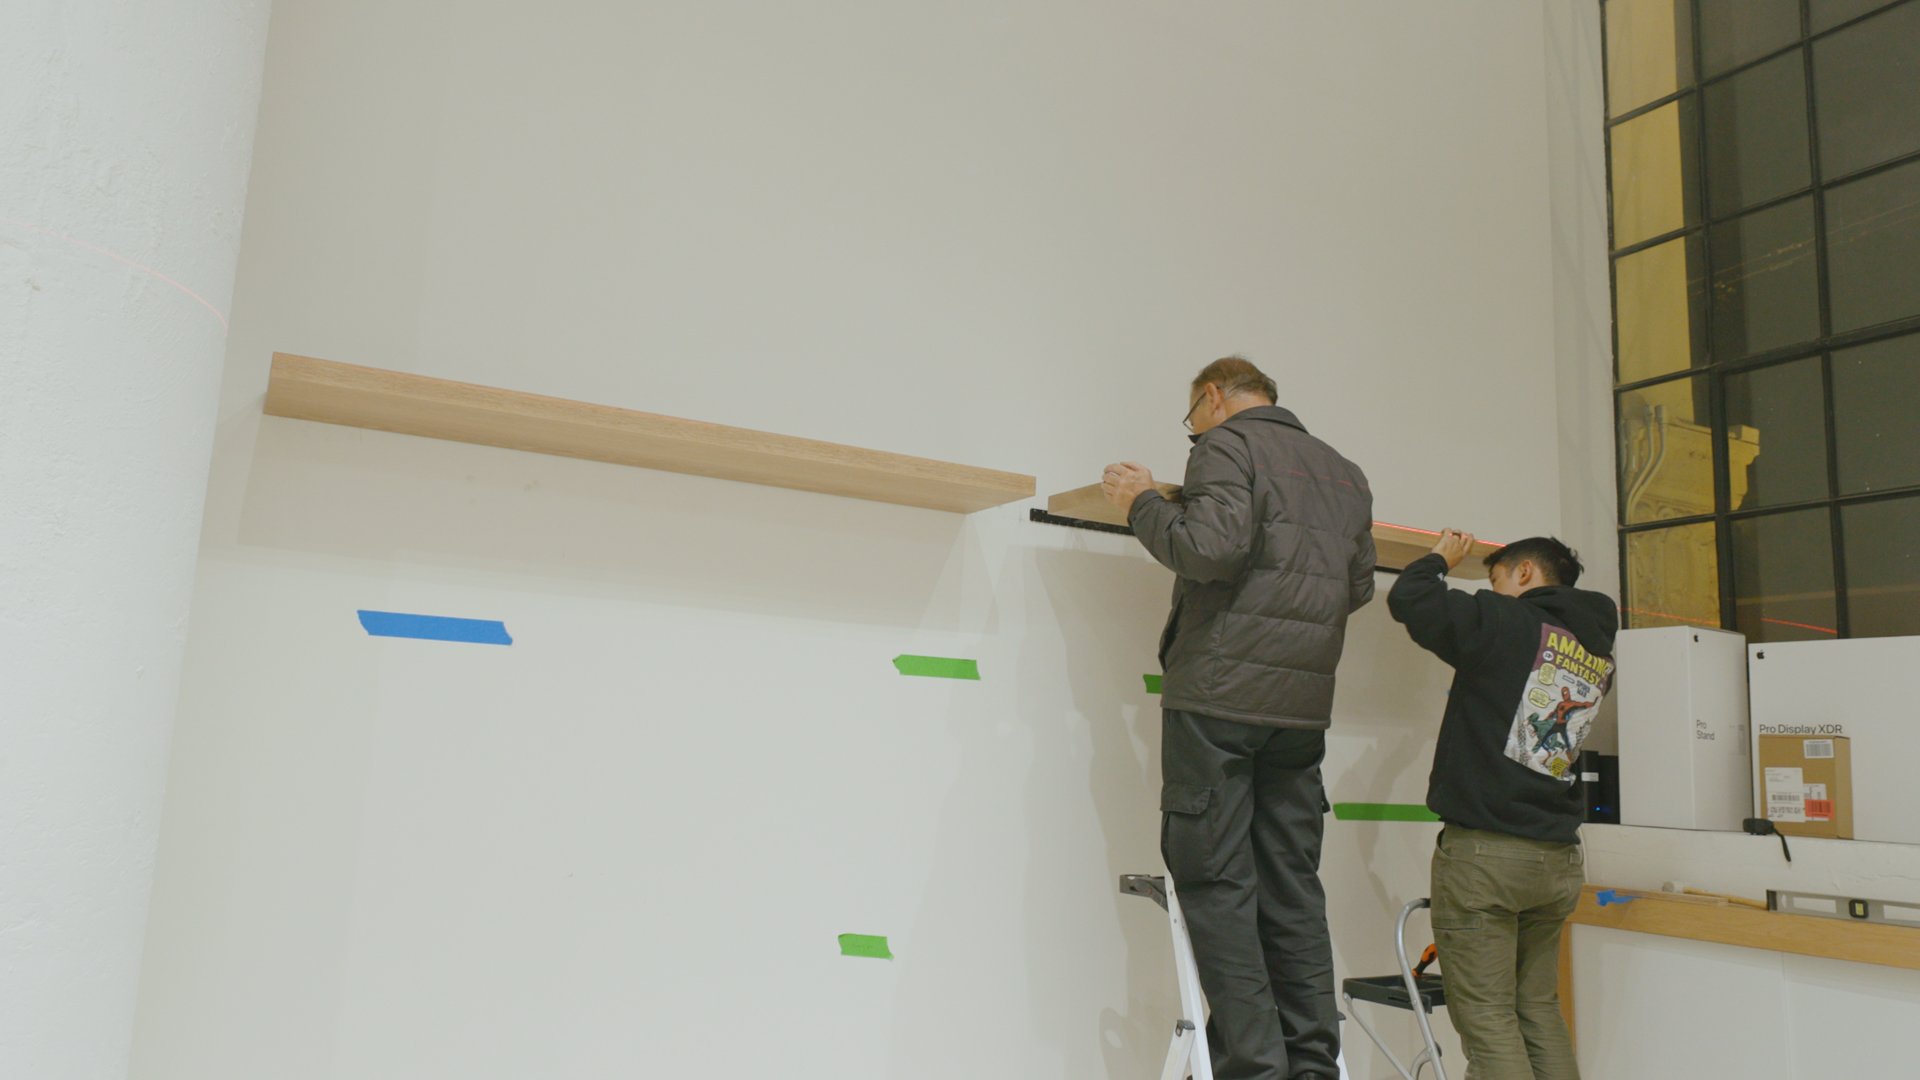
To help me figure out where these should go, I used painter's tape to help visualize where they would land—marking a height that would accommodate my desks at standing height. And using a laser level to align all of the brackets.
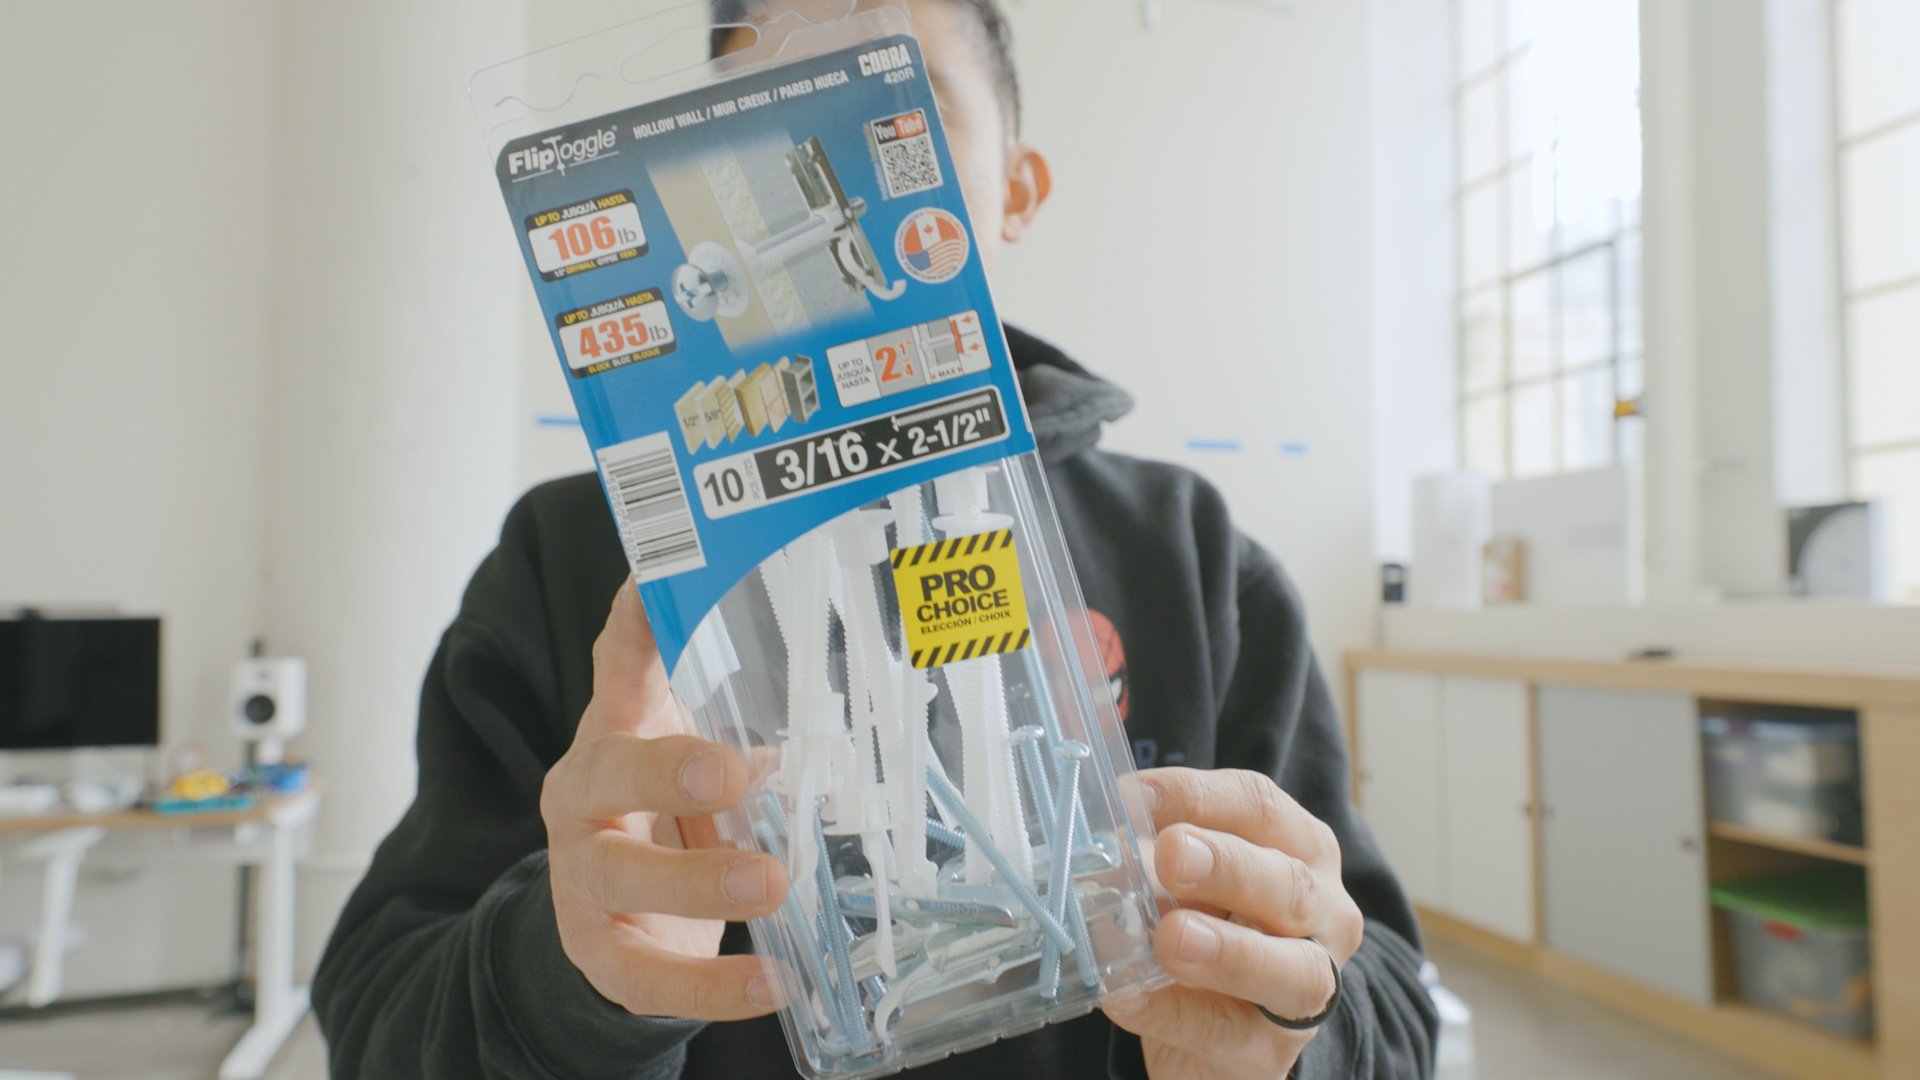
The shelves are rather large and heavy, so I enlisted my dad to help me install them. There were a lot of challenges installing these. At first, we used self-tapping screws to go into the steel studs I have in my walls. But it took a ton of work to get even a few in. Eventually, we used snap toggle screws in the drywall, which were just as strong but much easier to install.
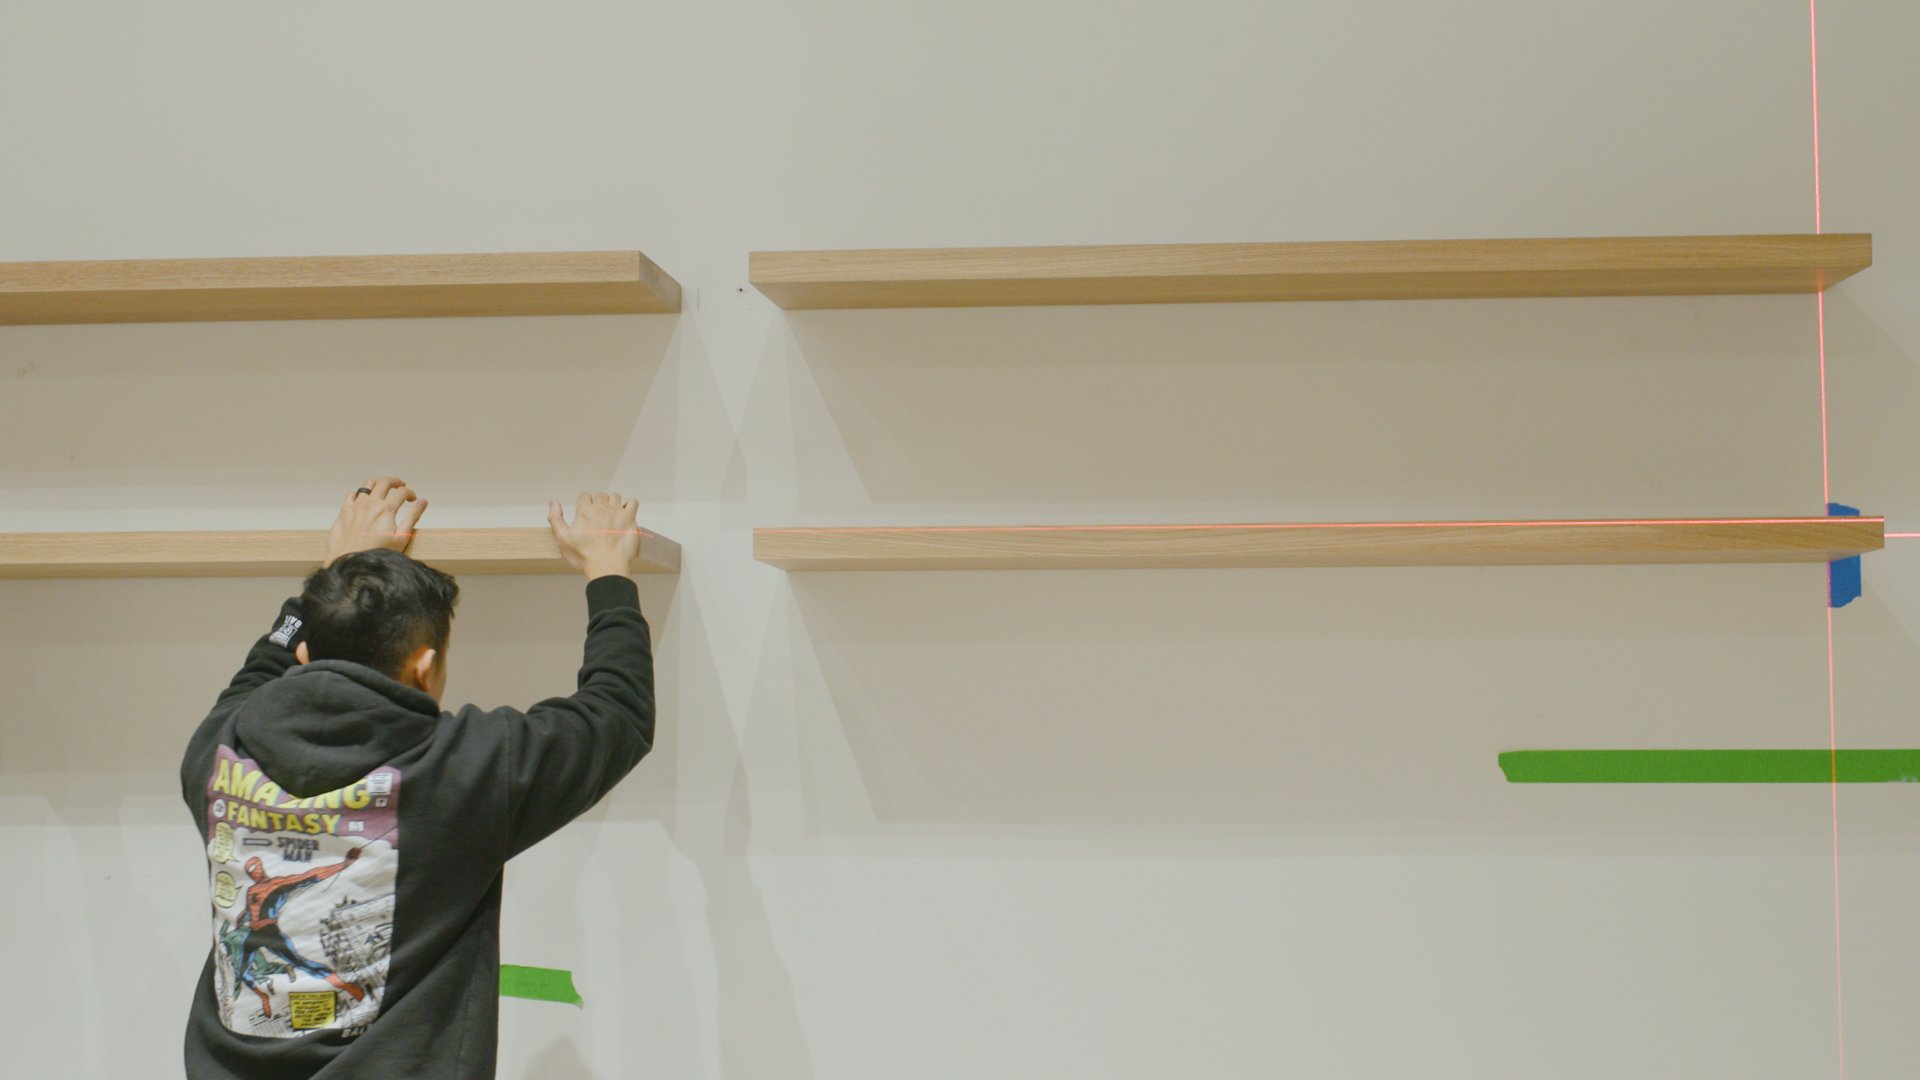
Originally I wanted to line them up side-by-side to make each row look like a single shelf. However, because they’re made by hand, each sat slightly differently on the wall and was impossible to line up seamlessly. So I made the decision to make an intentional gap of 6 inches between them, and it looked so much better.

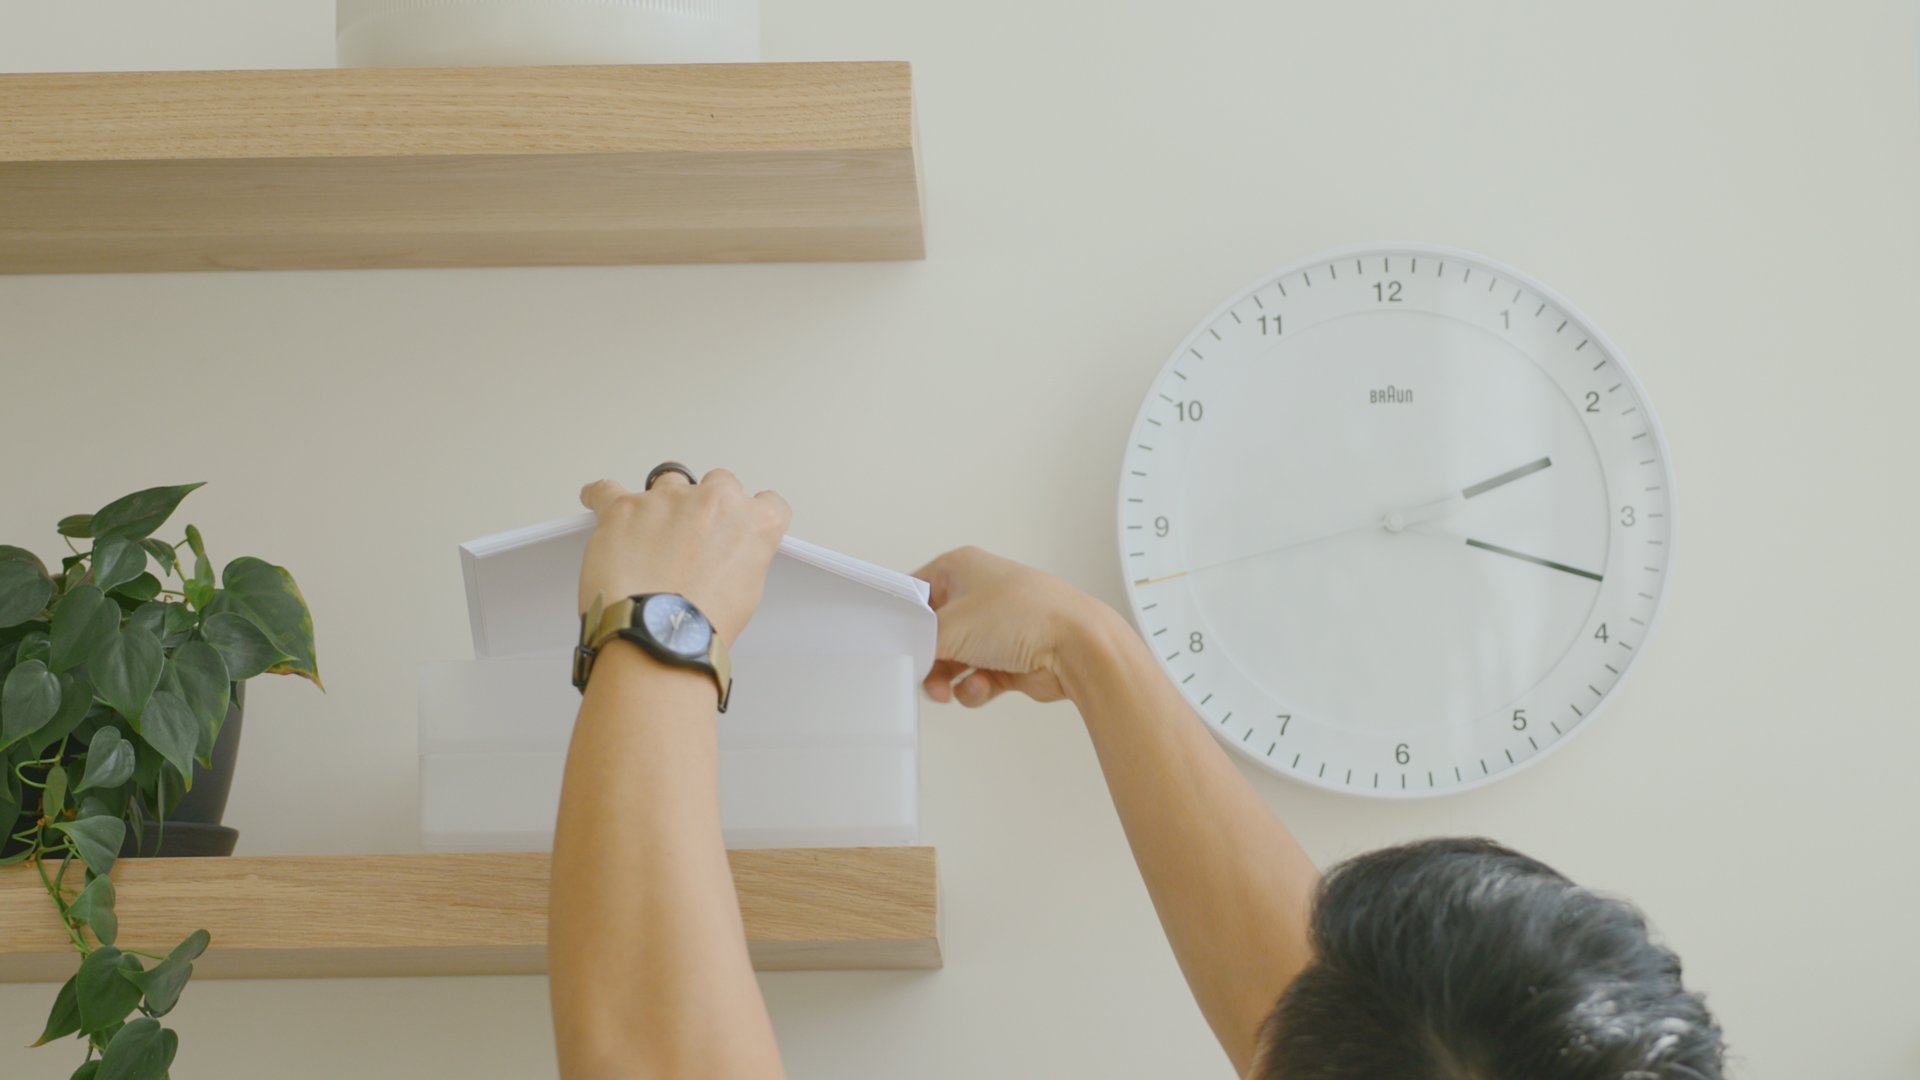
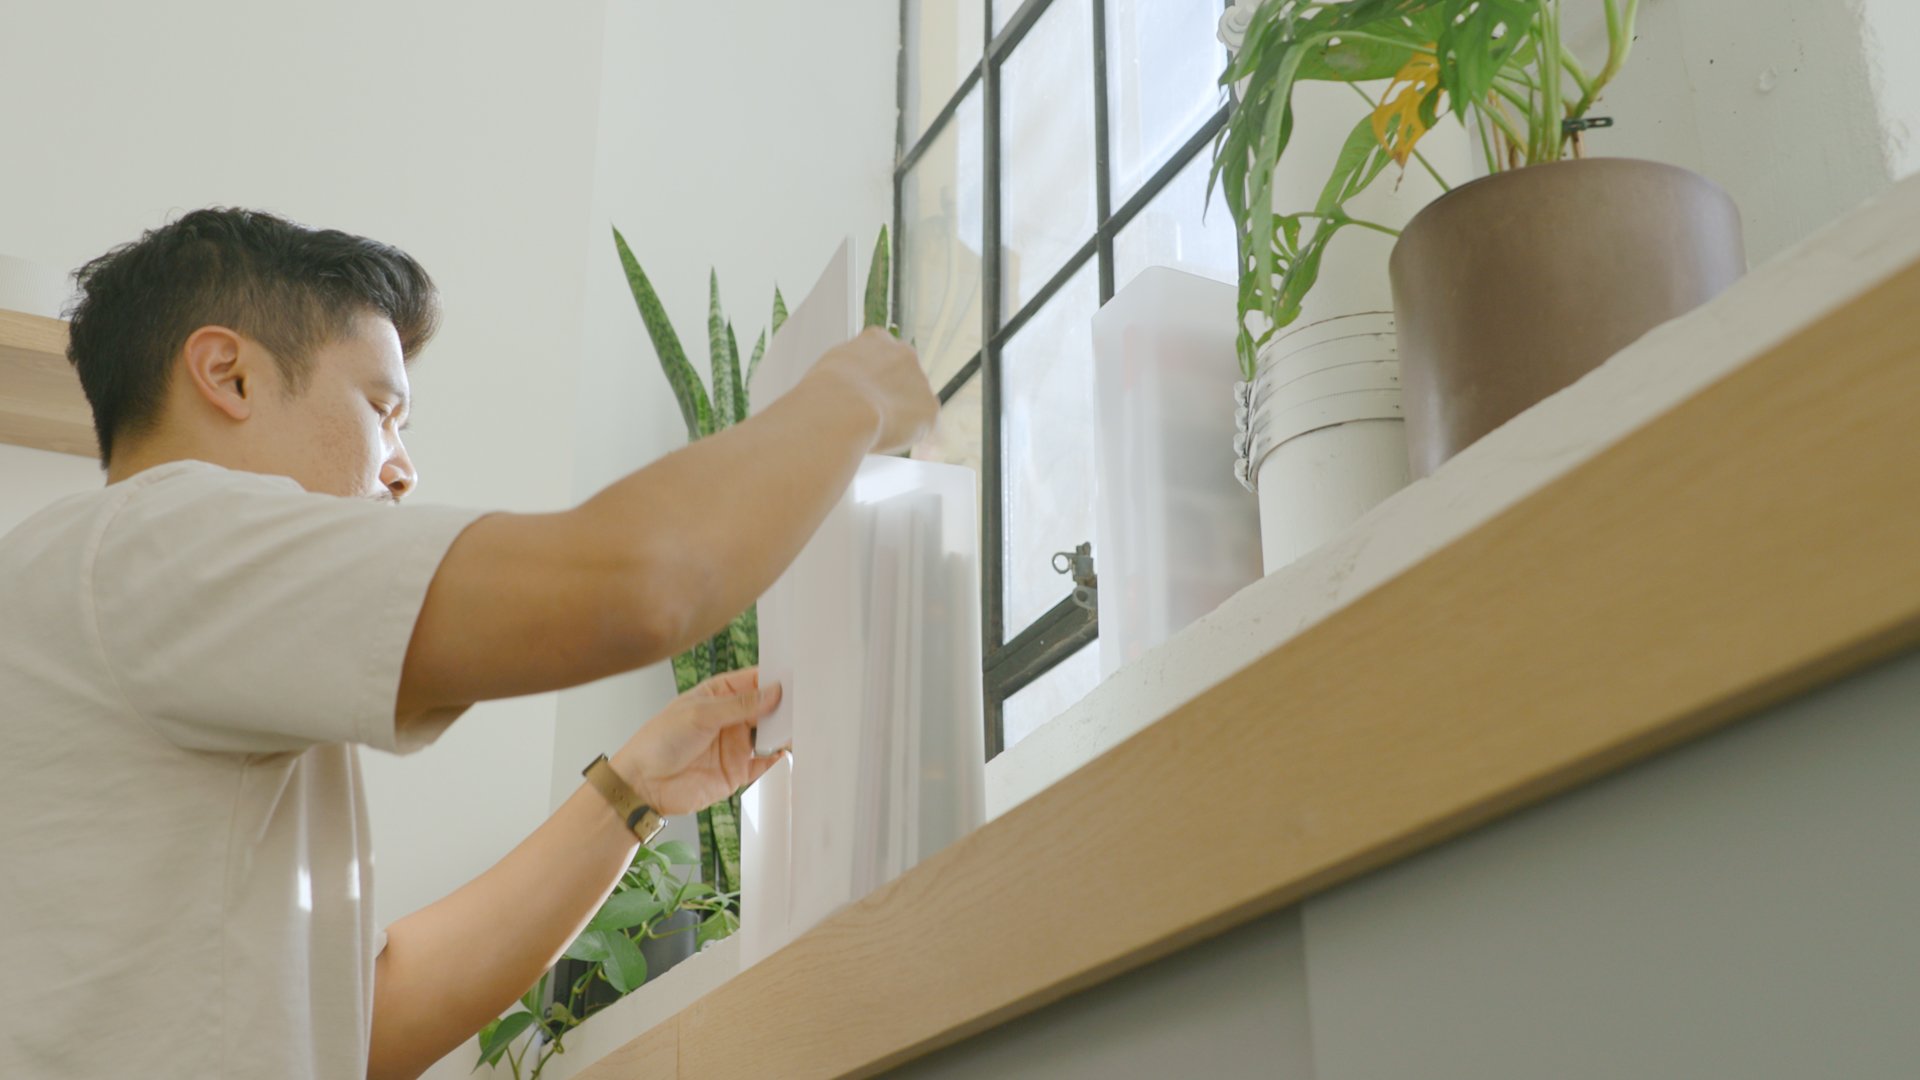
Decor
After installing the shelves, I spent some time organizing and decorating the space. I got this set of shelf accessories from Artifox. Starting with these large bookends, which hold up my hardcover books. To hold some paper, I’m using these stackable mist trays. And by the window, this set of holders for my magazines and catalogs. I love the look of analog timepieces, so on the wall, I added a classic Braun clock I got from Ugmonk.
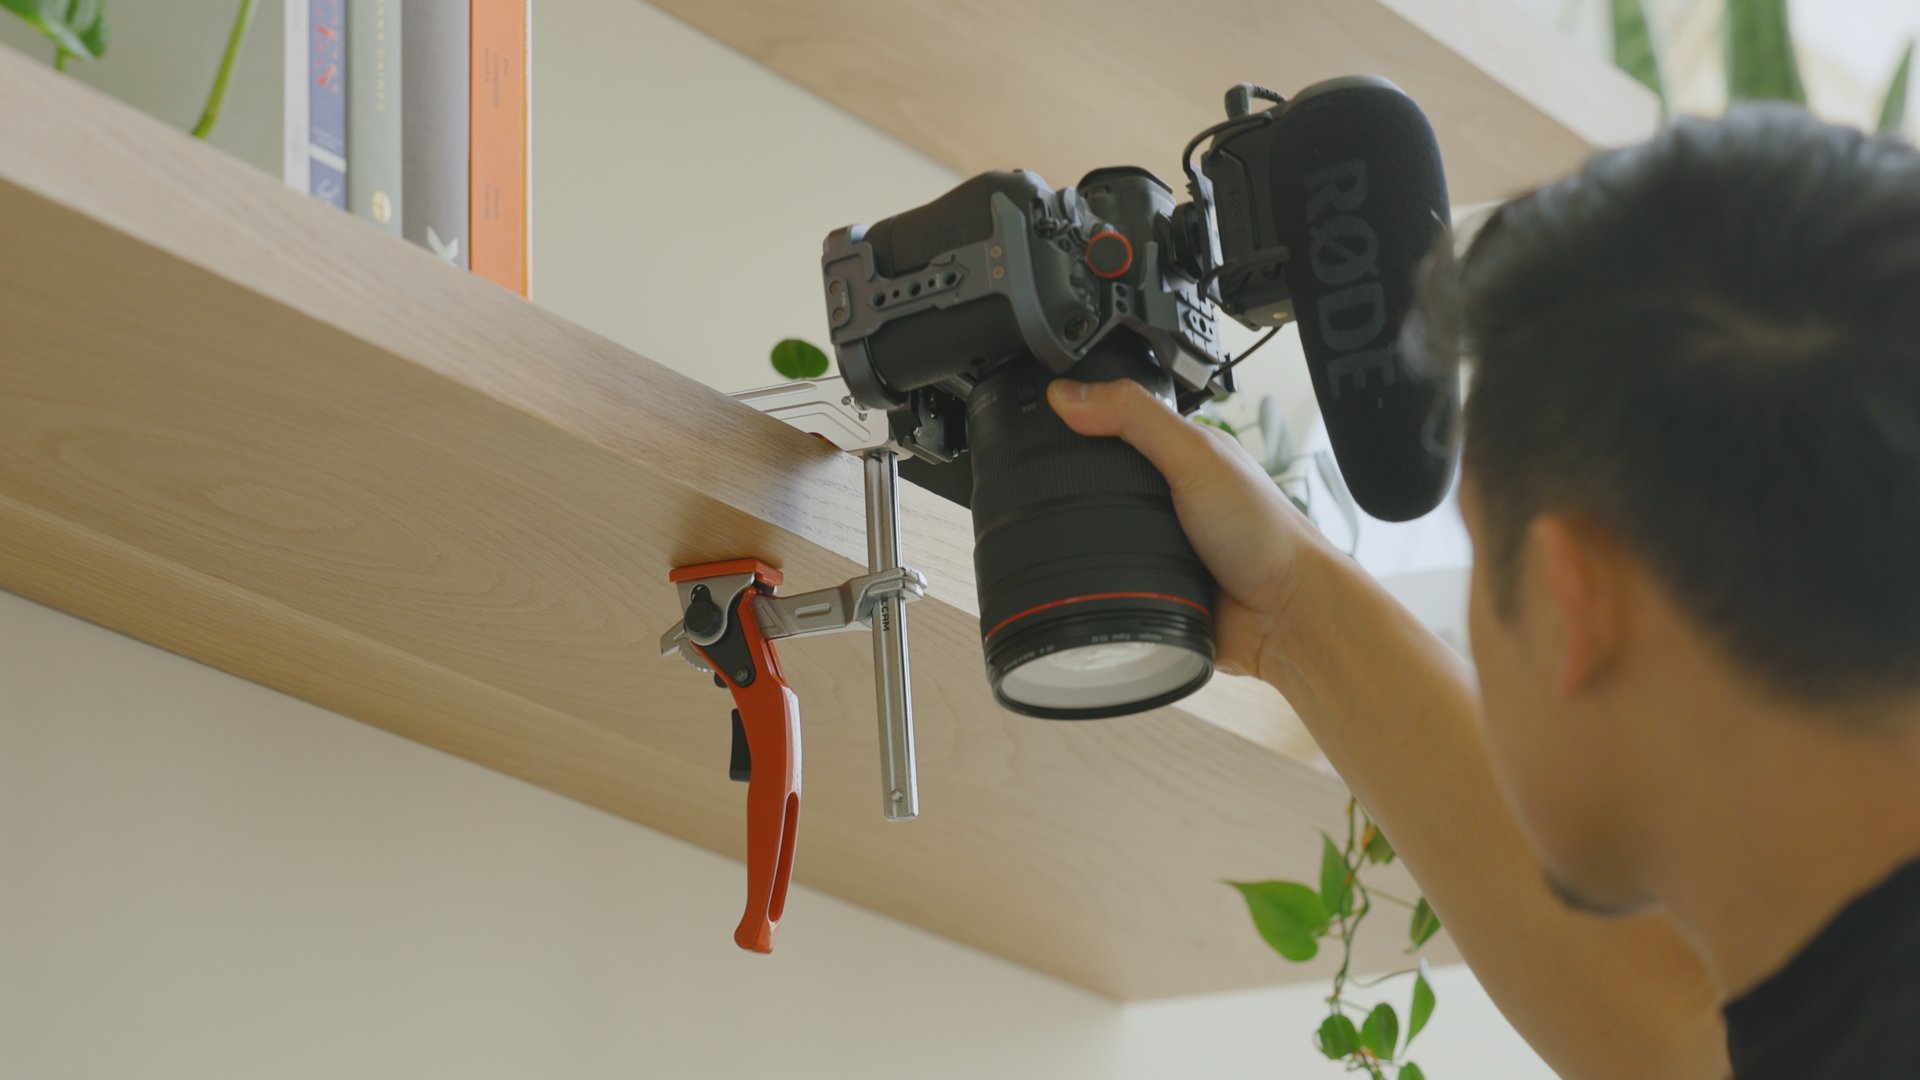
One reason I wanted overhead shelves is that they provide a sturdy surface to clamp on. Now I can use this super clamp and accessories by Falcam to mount my camera to capture overhead desktop shots.
To complete the look of the space, and give it that Zen vibe, I decorated the office with a variety of plants. My parents have a massive garden and a collection of beautiful plants. So they offered to donate some of theirs and help me out. We added a few hanging plants on the shelves and by the windows to help break up the rigid lines with organic shapes.
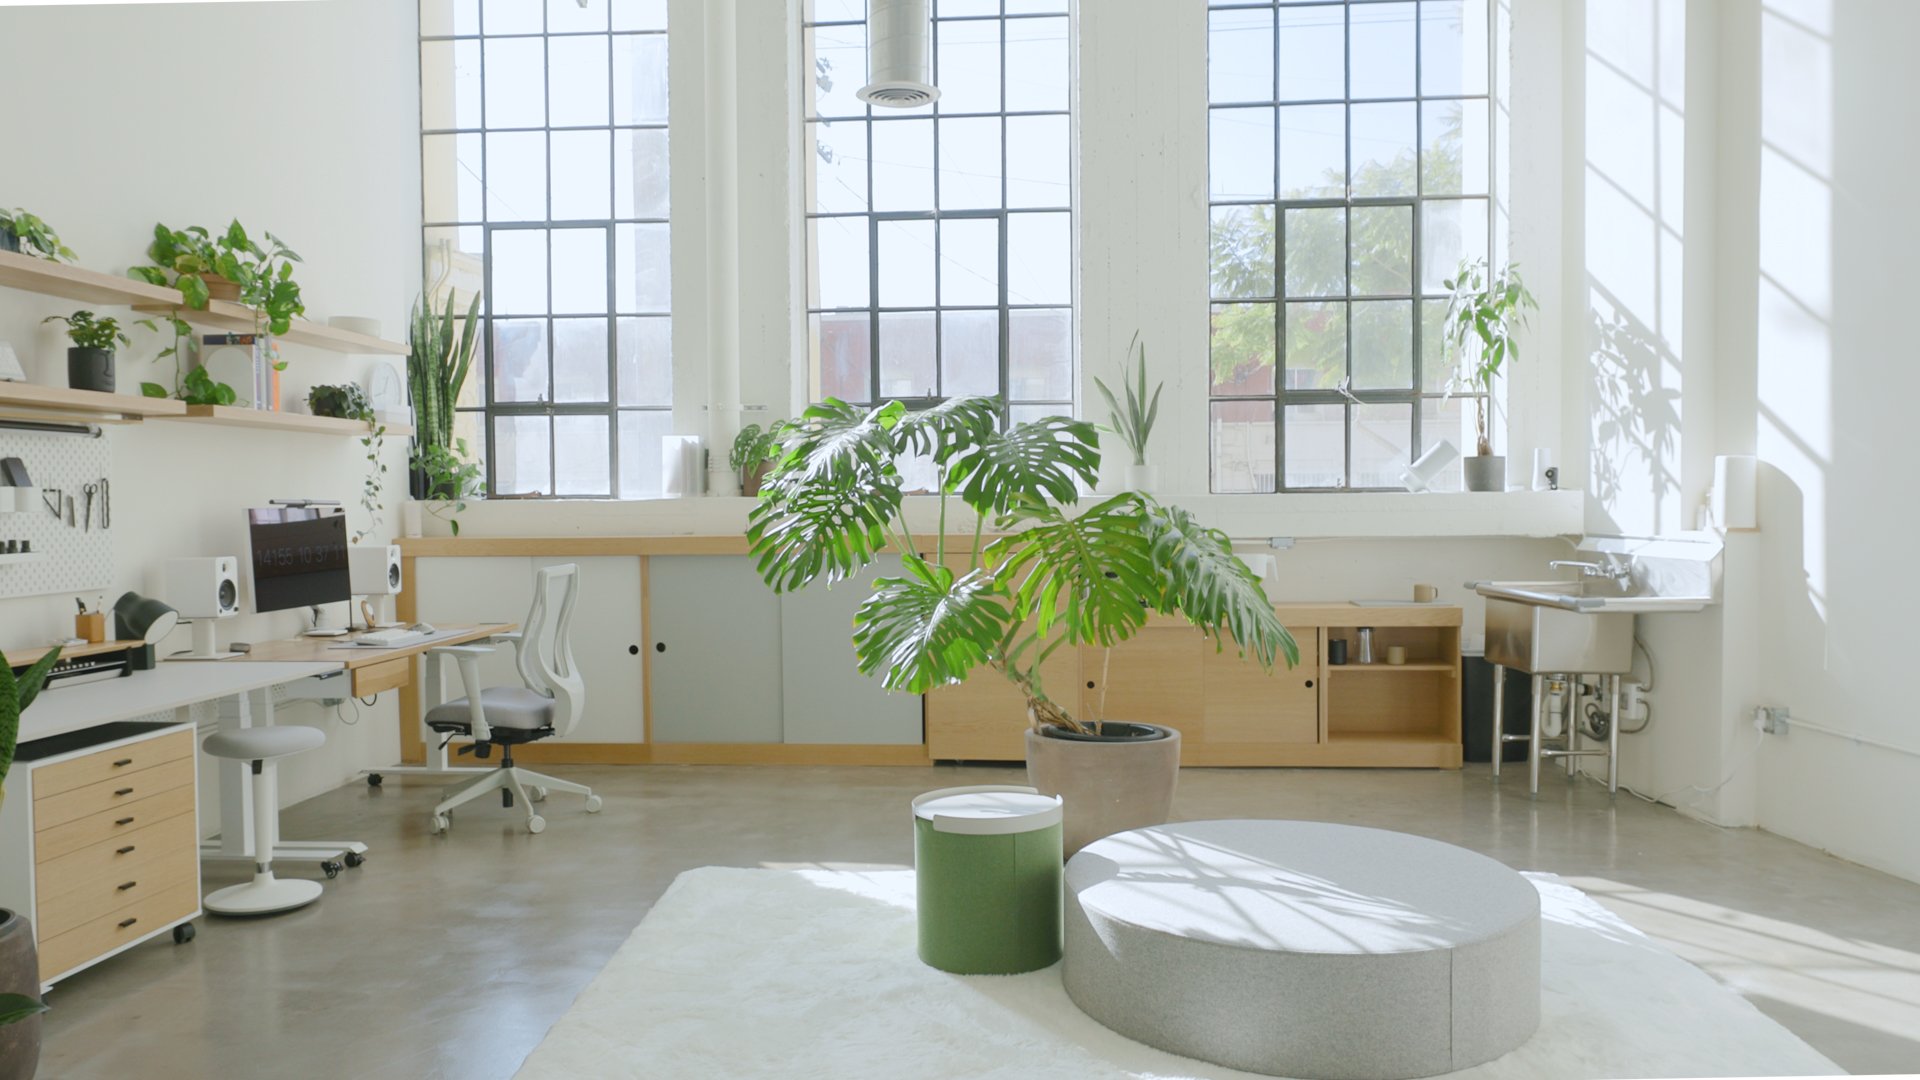
Plants fill the office space and give it life. The centerpiece is a 20-year-old Monstera plant from my parents’ garden.
The most impressive plant however is this 20-year-old Monstera plant that my parents had in their front yard. It’s about 5 feet tall, and has massive leaves with lots of fenestration. This is the centerpiece of my lounge area in the middle of the room.
Here I have 2 Ottomans I bought from Bludot that sit on this ultra-soft rug. I know you think I’m crazy for having a white rug here, but this is a unique rug from Ruggable because it’s completely washable. You take off the top and toss it in the washing machine.


Roller Shades
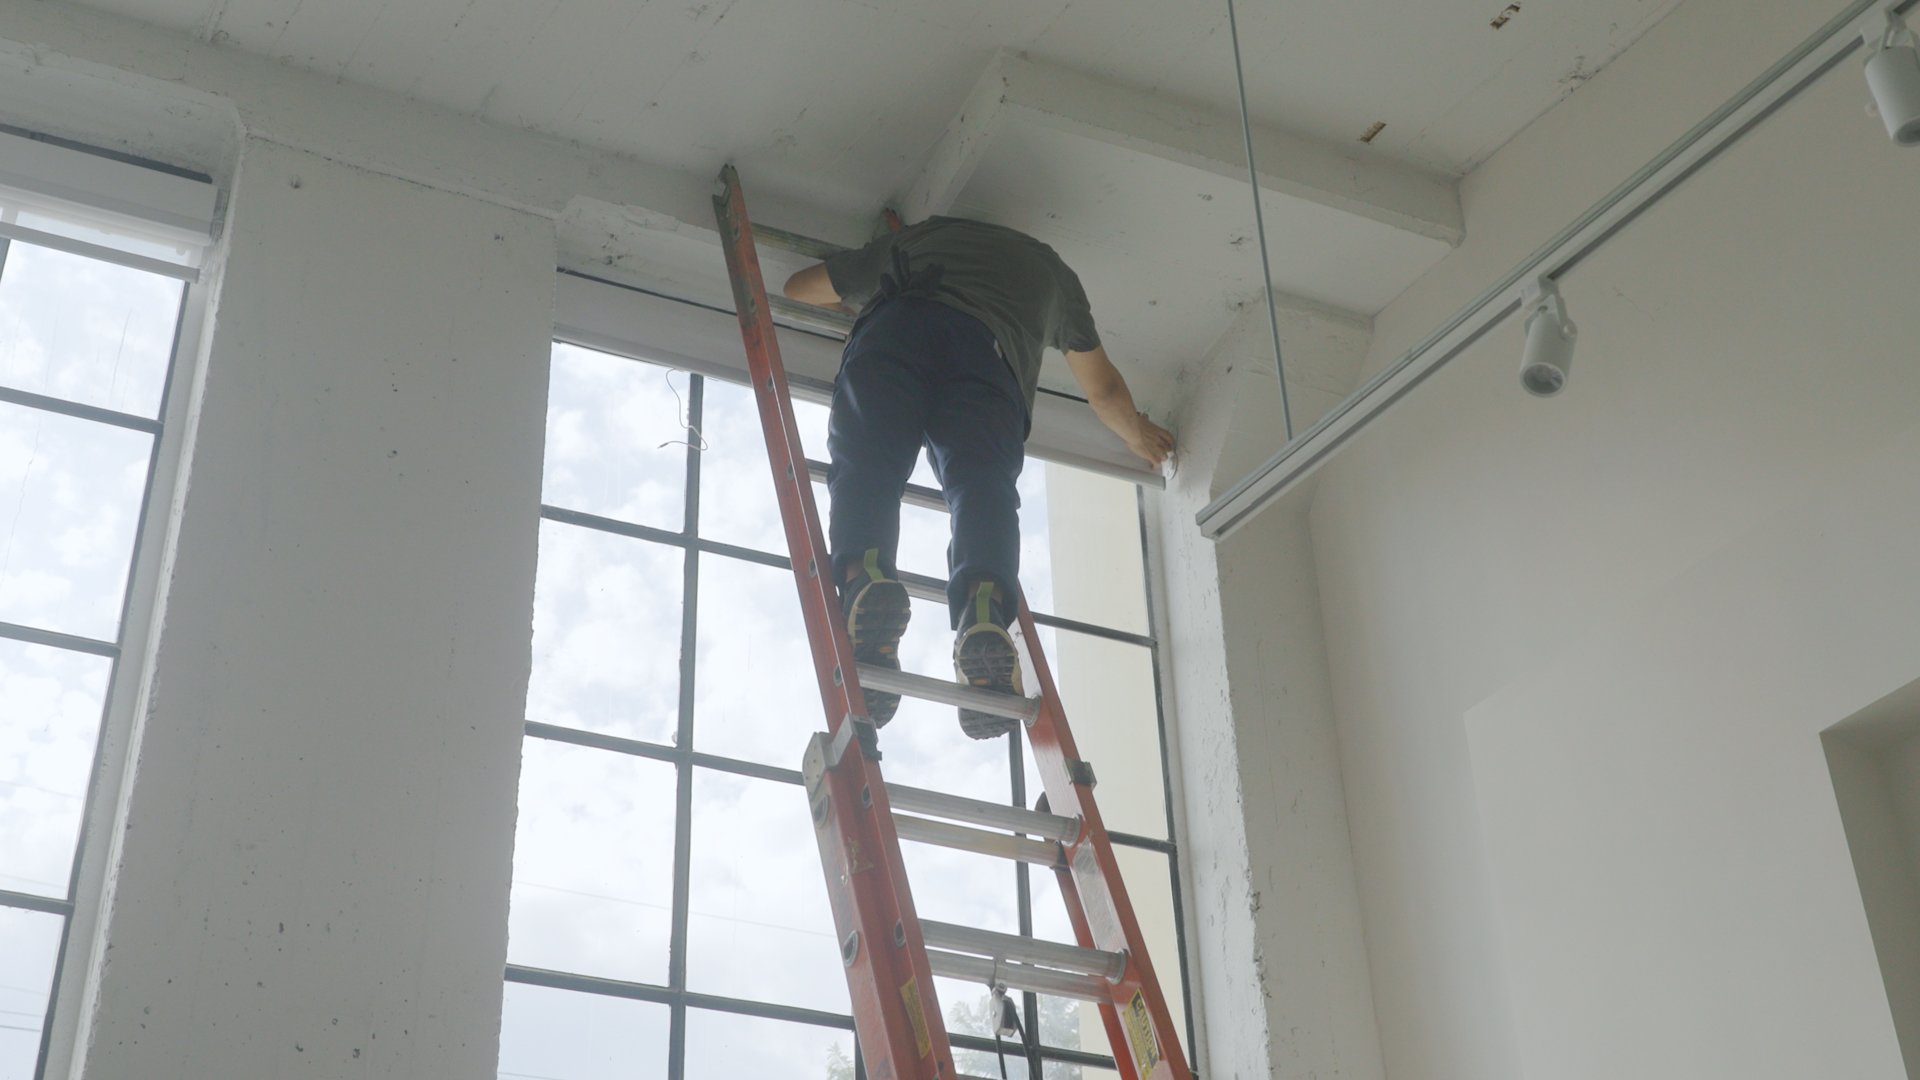
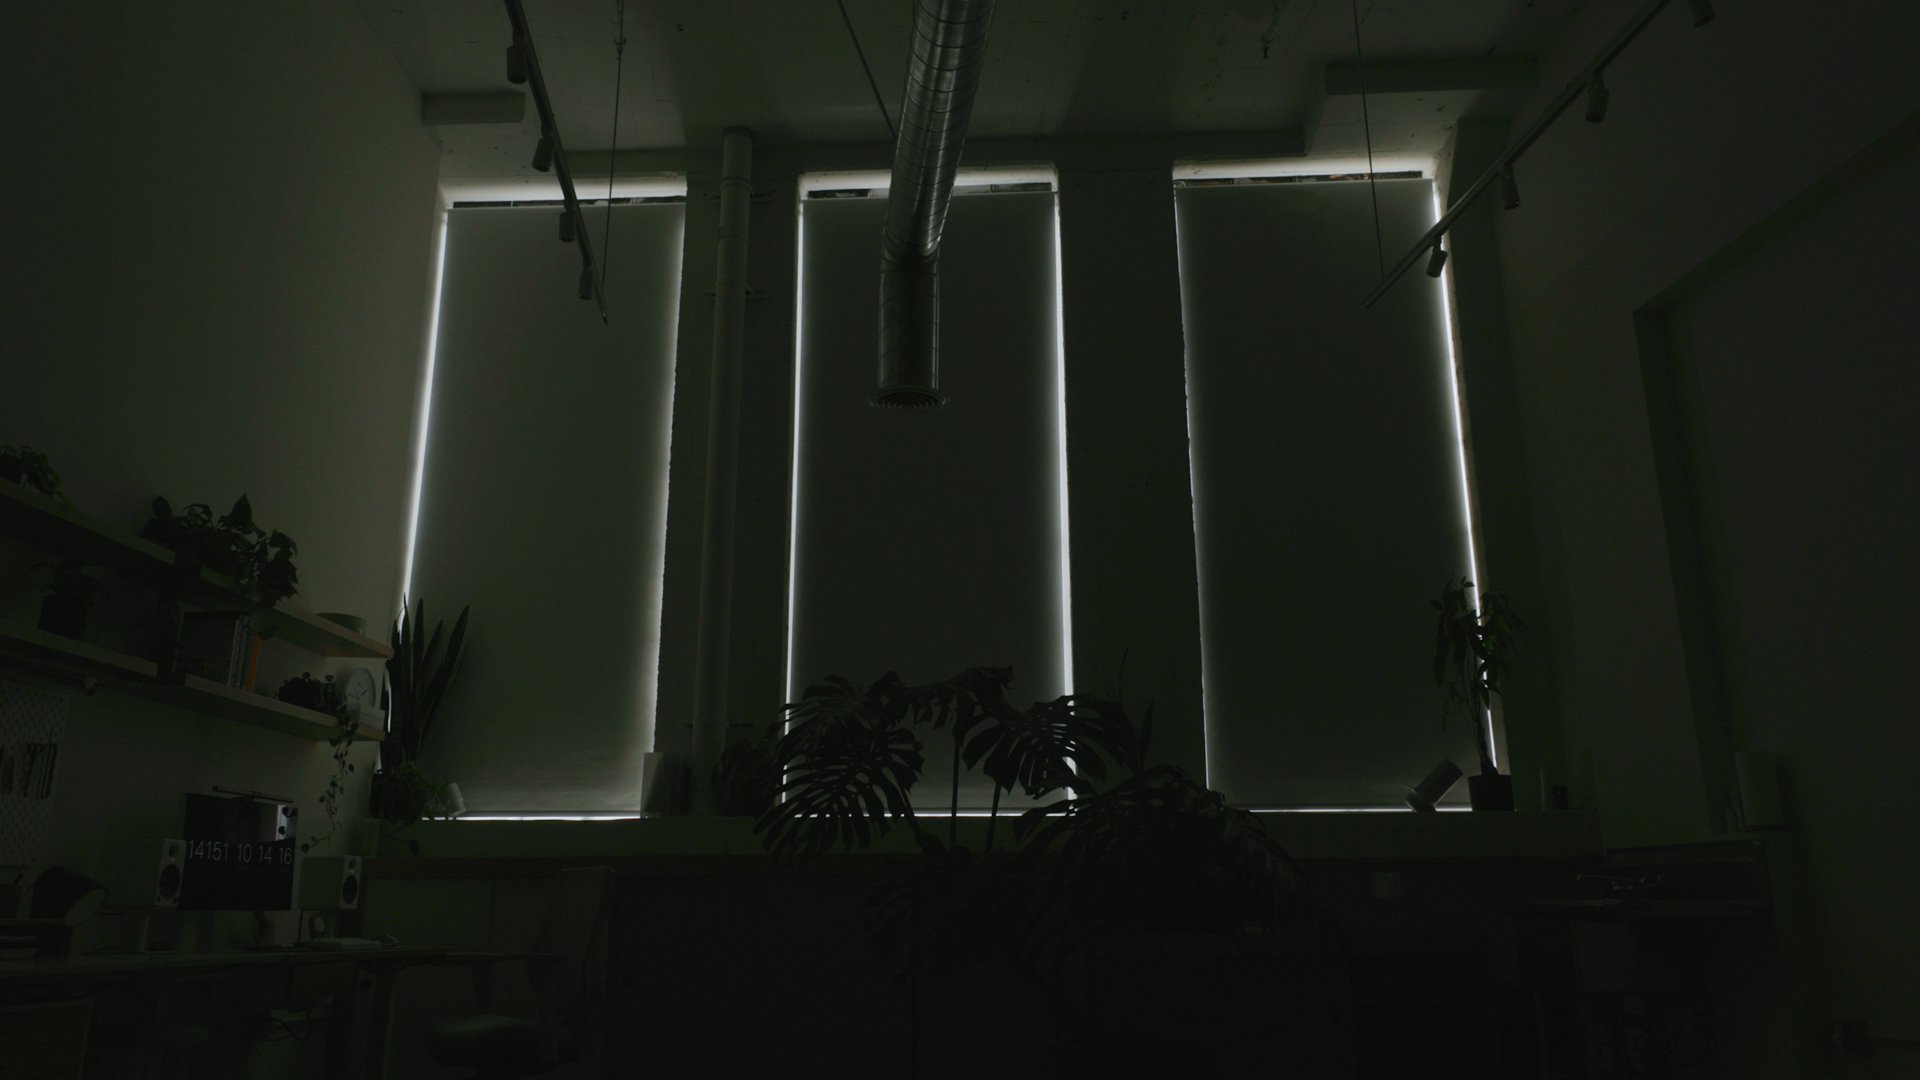
As I mentioned before, the draw of this office are the large industrial windows that fill the space with a ton of natural light. But that light can be intense. To tame them, I got these motorized double roller shades by Smartwings.

These were a bit tricky to install because of the 20 foot ceilings. But my brother came to the rescue and offered to install them for me. He’s an electrician that works on jobsites and a rock climber, so he’s used to being in all kinds of challenging situations.


The nice thing about these shades is that they are solar-powered, so they’re always charged. They can be controlled by remote or voice assistant. And they have two rollers on each. A 5% filtering shade drastically softens the sun coming in. When I need complete control of the lighting, I have a second roller with a 100% blackout shade.

Lighting
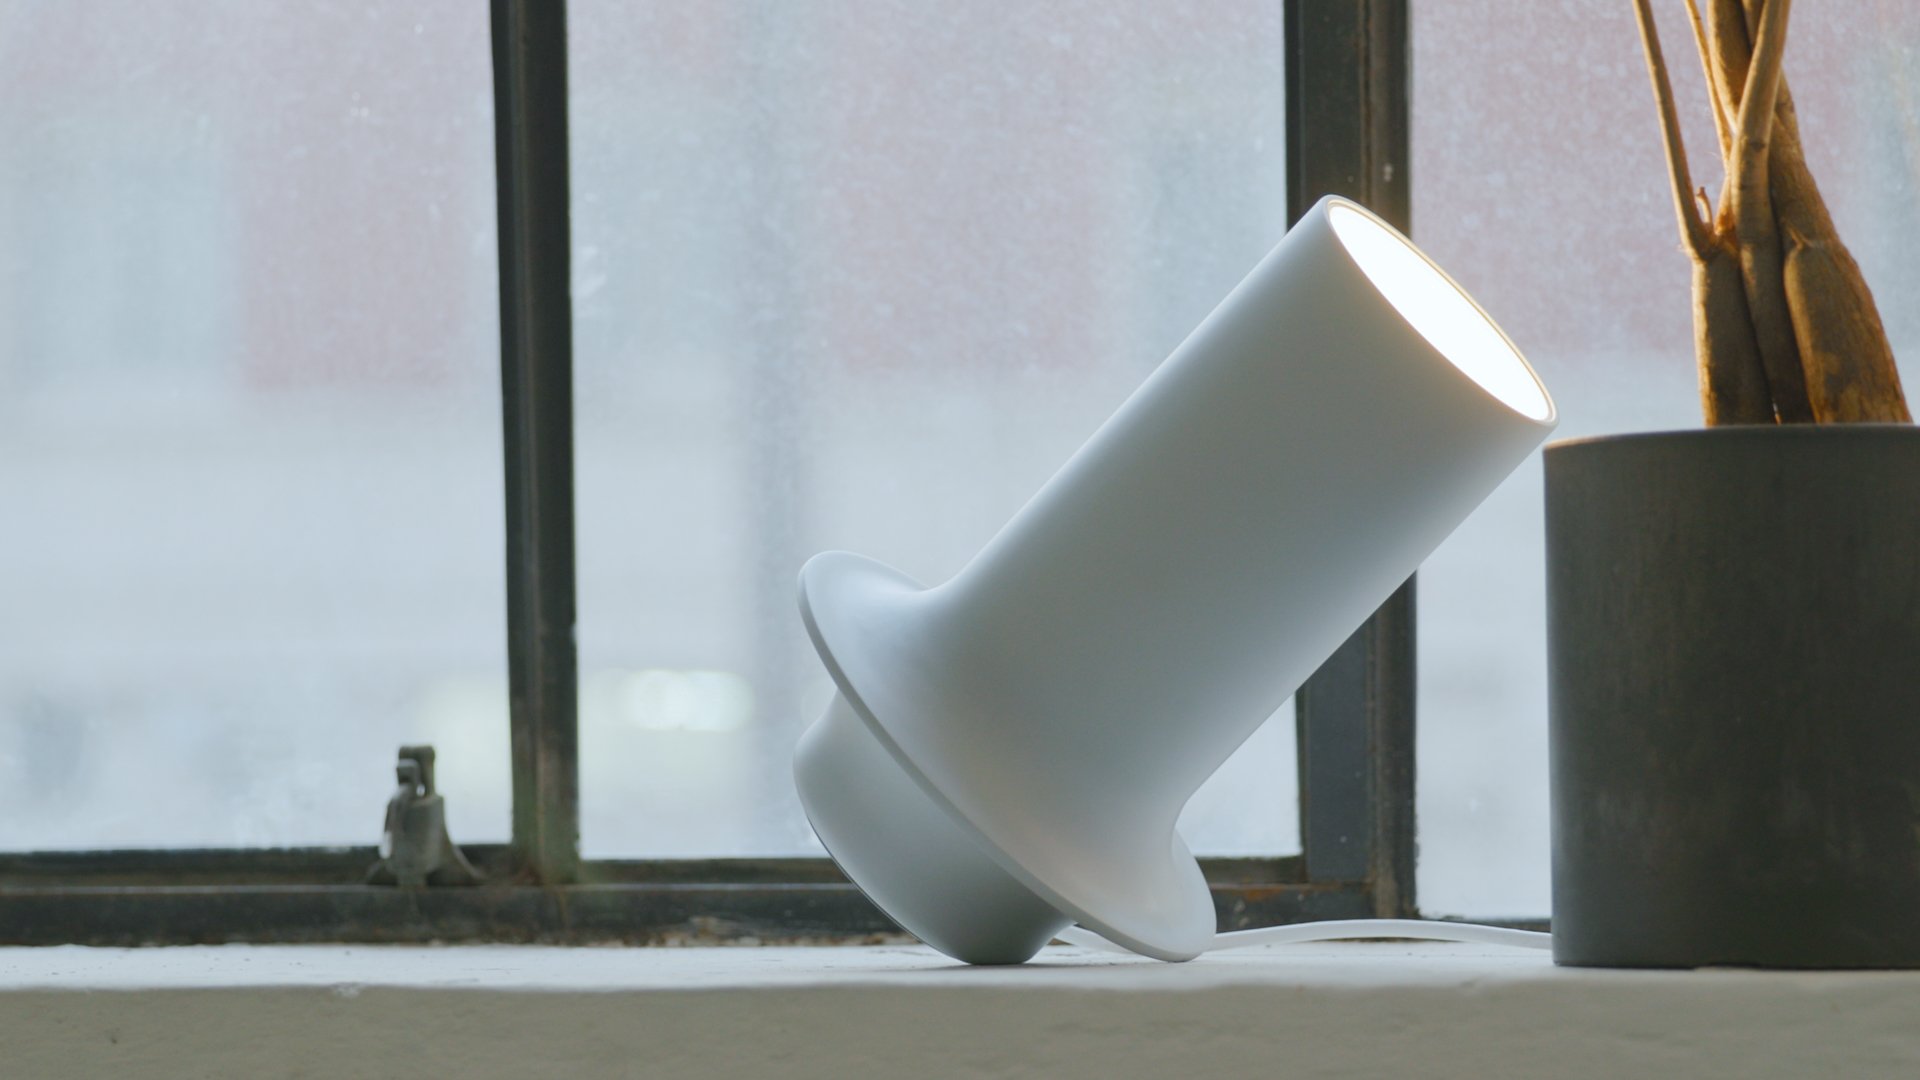
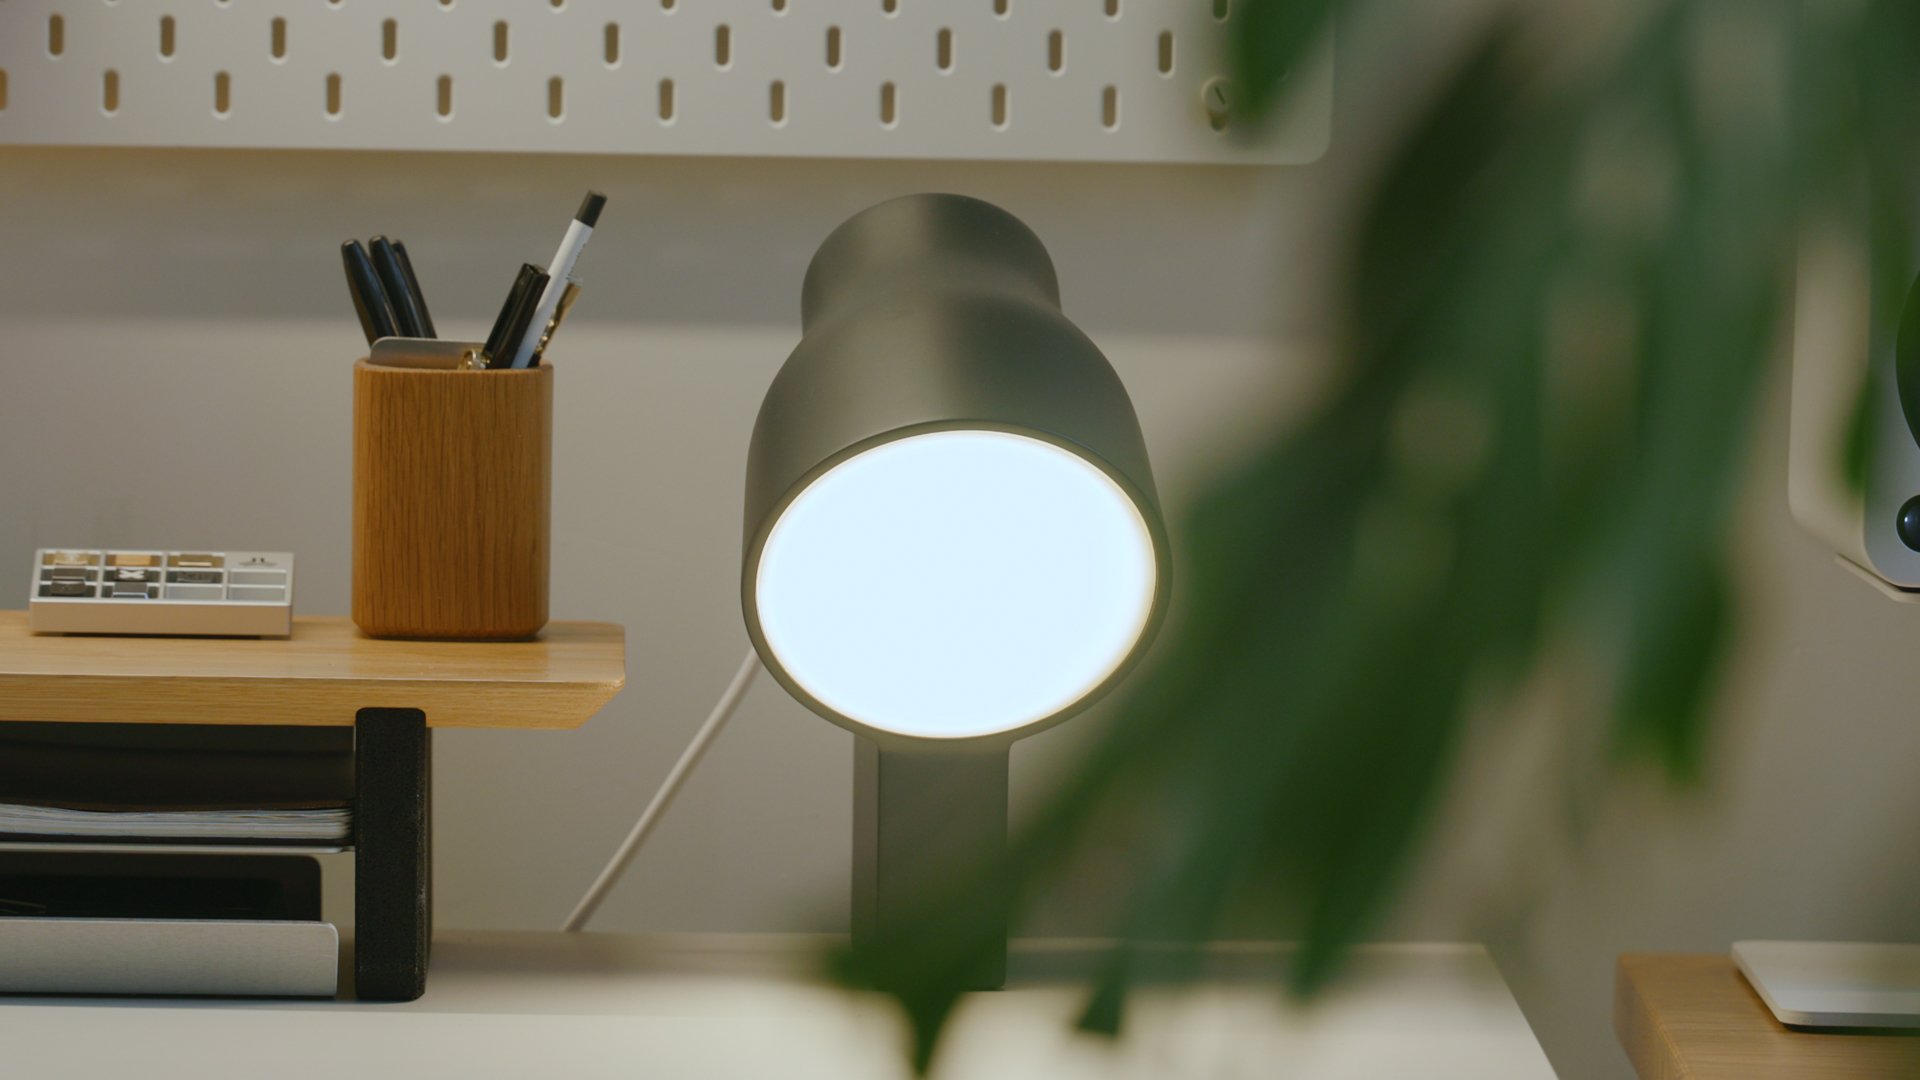
To light the office, I scattered a bunch of different lamps in the space to give it character, whether they’re on or off. My favorites are the beautiful lamps I got from Gantri. Not only are they unique in their design, but they are 3D printed out of plant polymers, which are biodegradable.
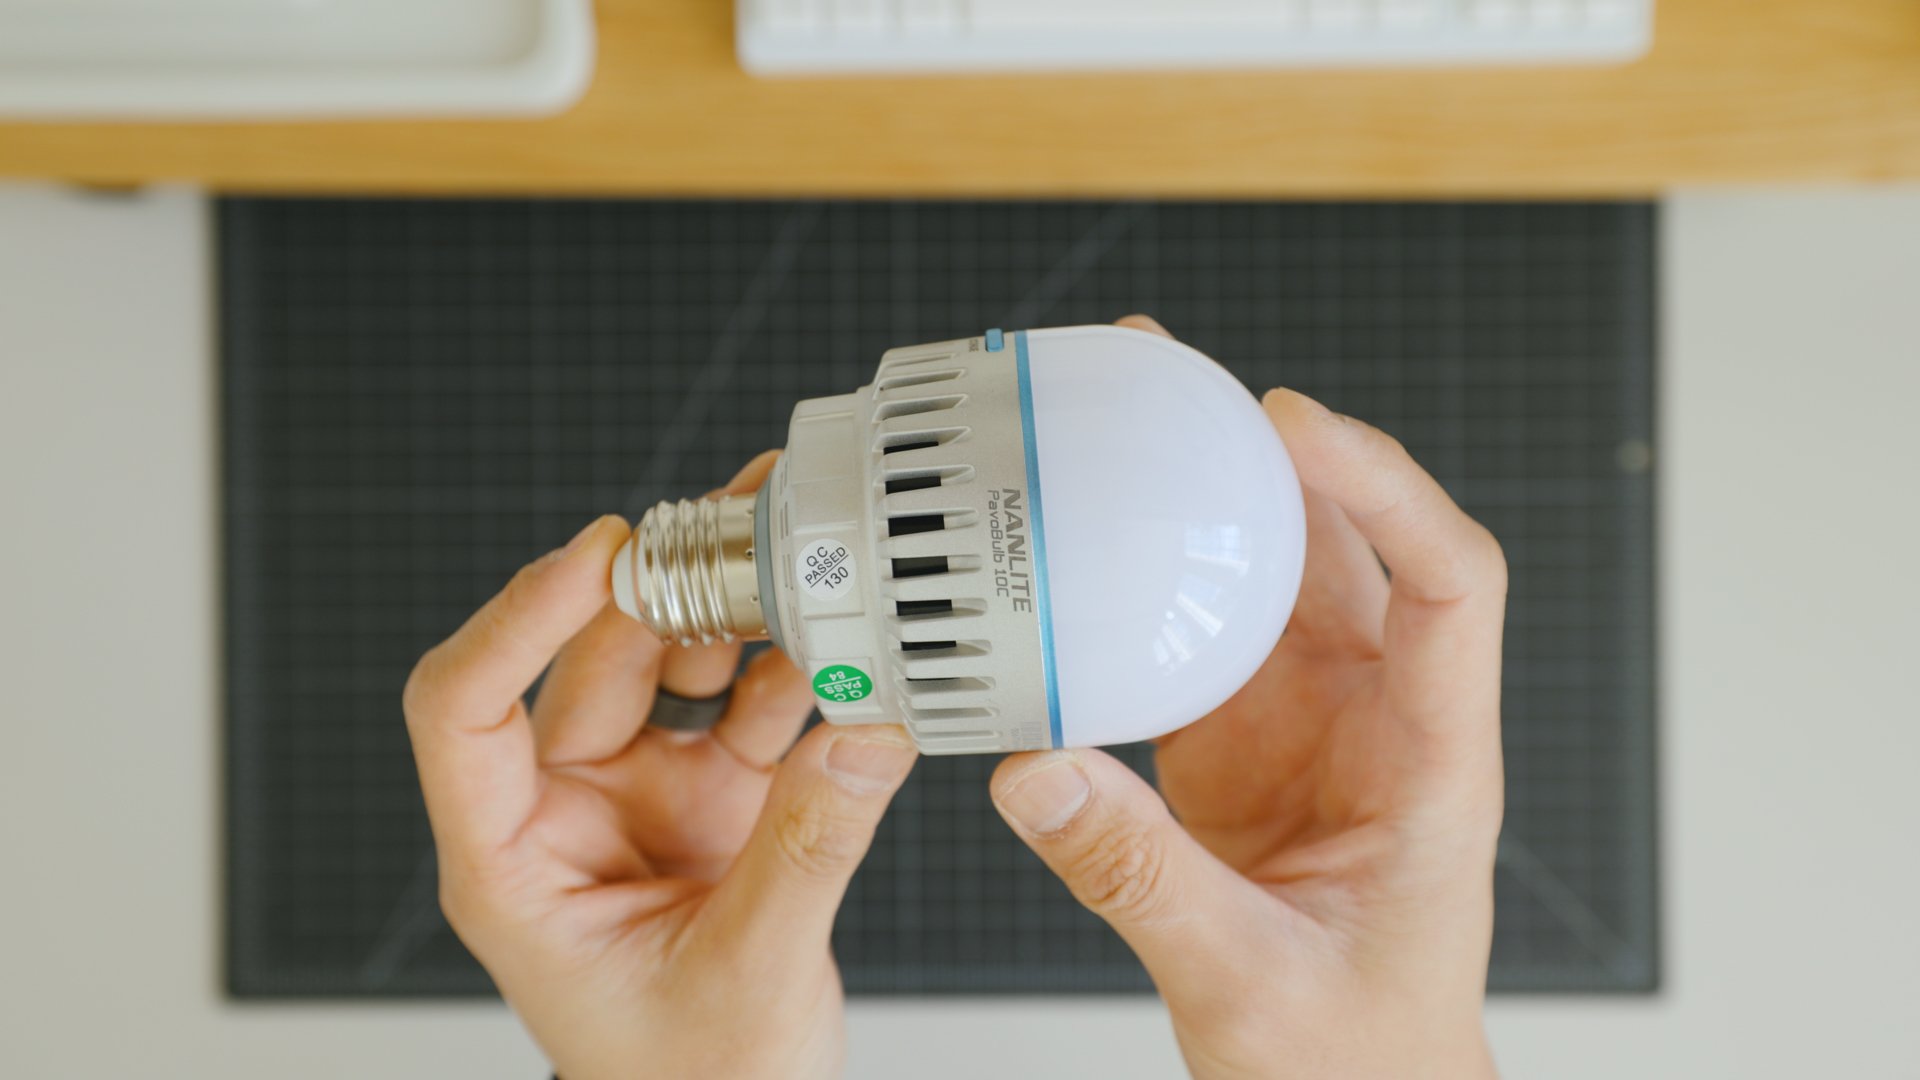
In most of my fixtures, I installed these Nanlite Pavobulbs, specifically designed for filming because, unlike other bulbs, they don’t flicker on camera.
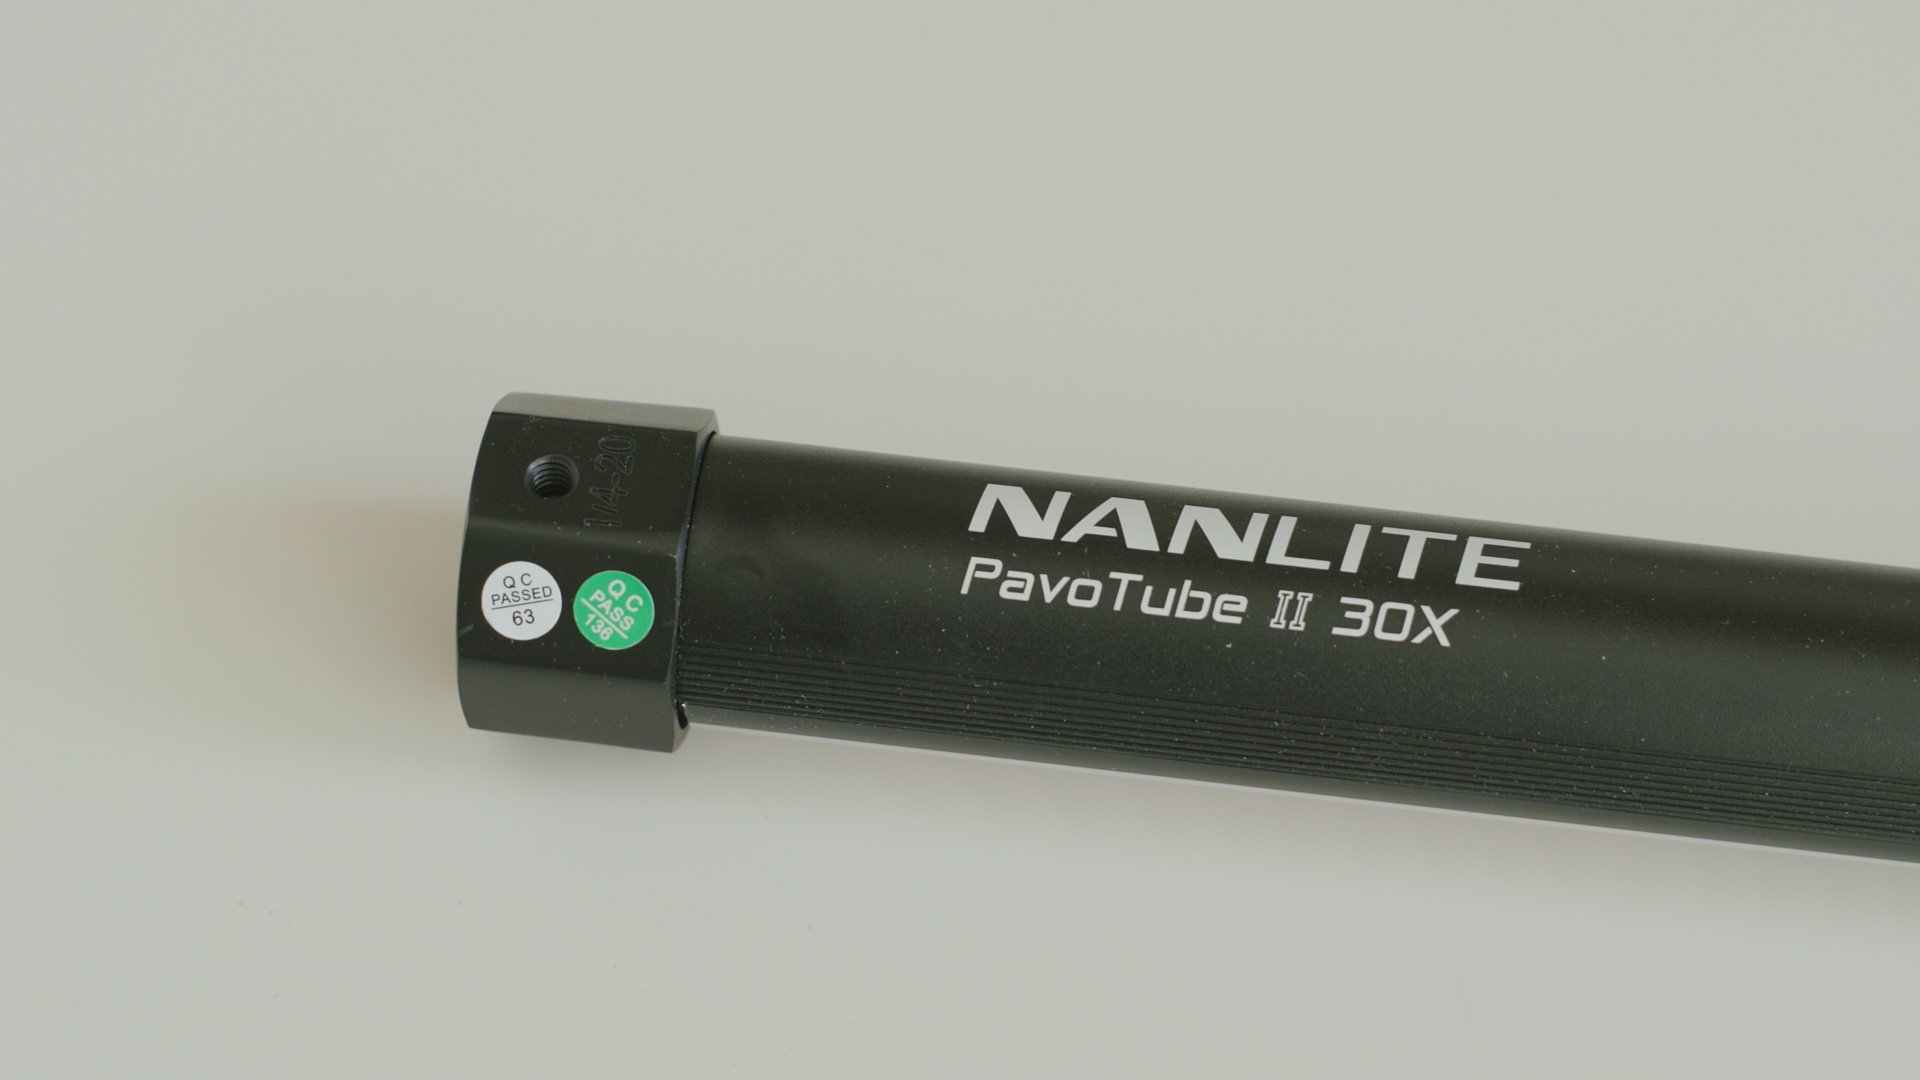
I also have a Nanlite Pavotube mounted underneath my shelf to light my work area. Because I didn’t want to screw directly into my shelf, I created a simple sliding rig made of these U brackets I found at Home Depot. I cut out a strip of leftover MDF to create an extended surface to mount to. Then I drilled holes, used these ¼” threaded screws to attach the light brackets to the MDF, and clipped in the Pavotube light.
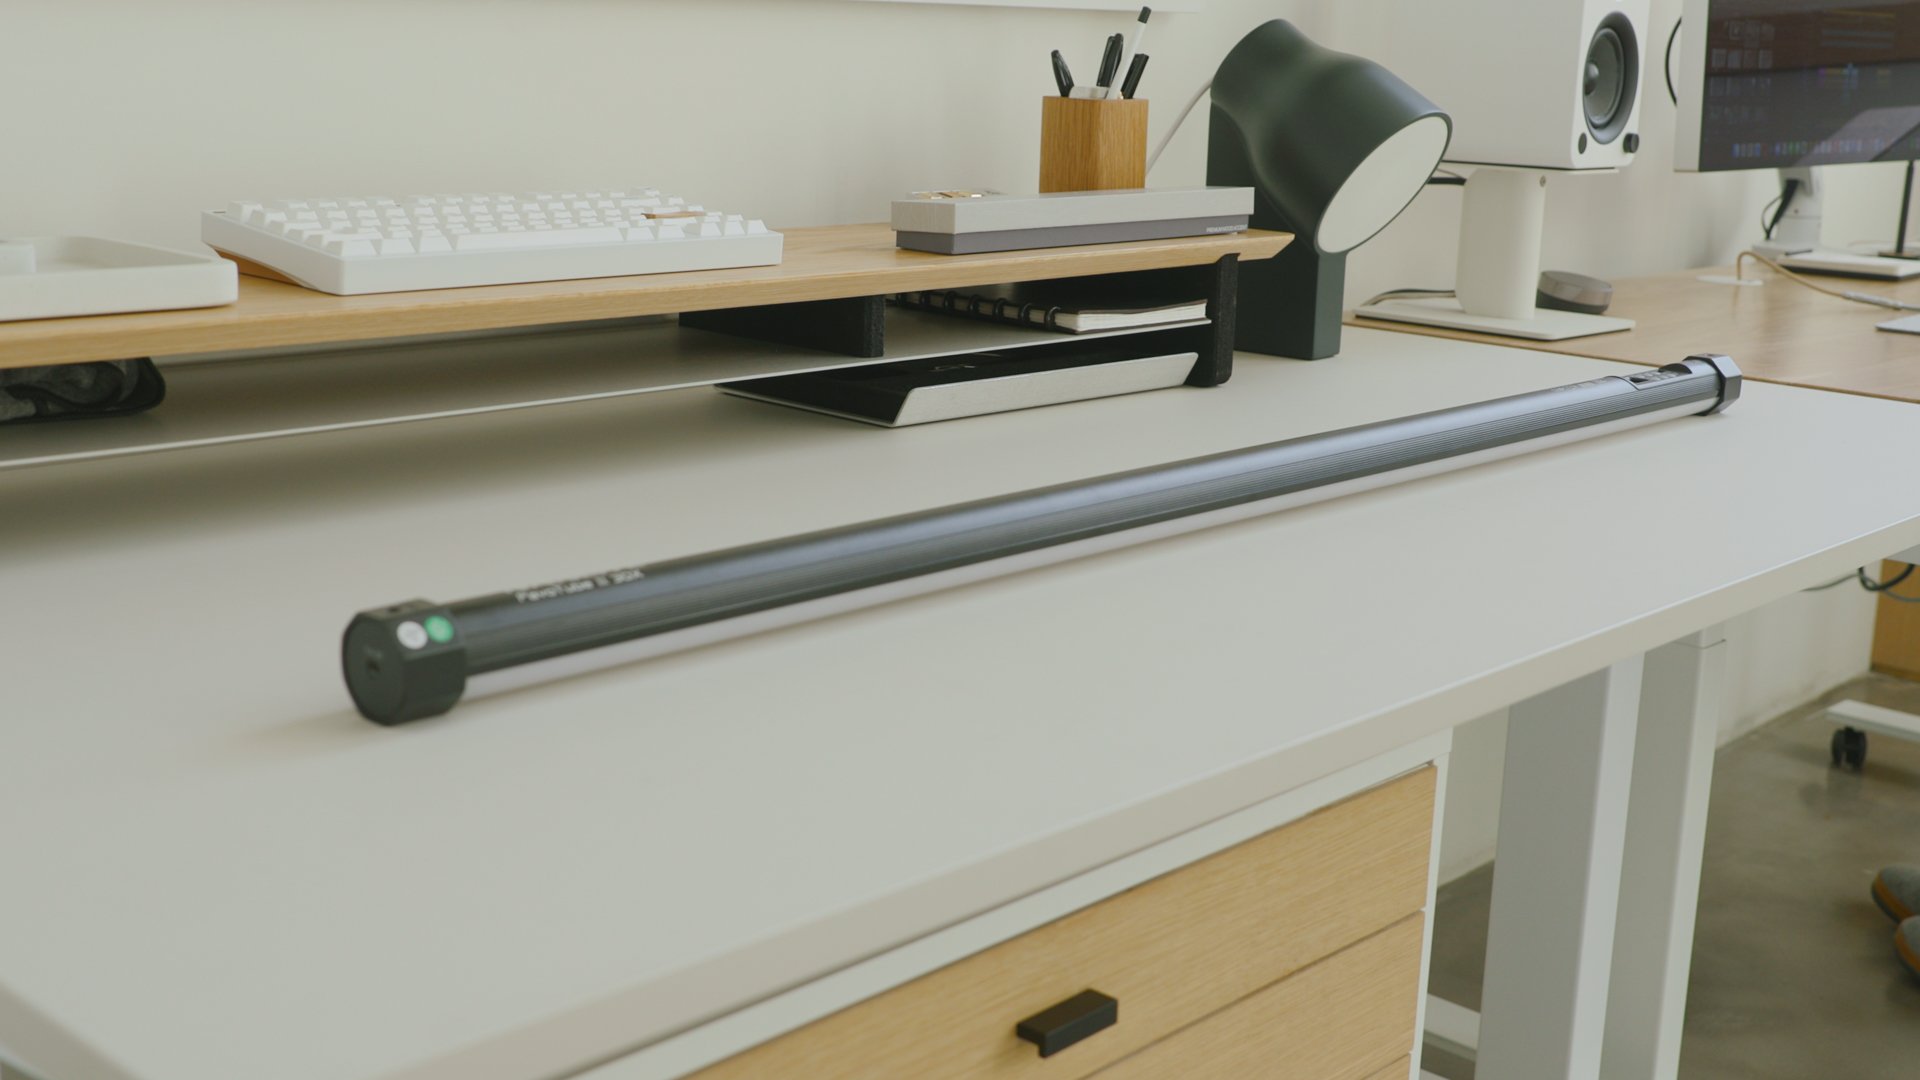
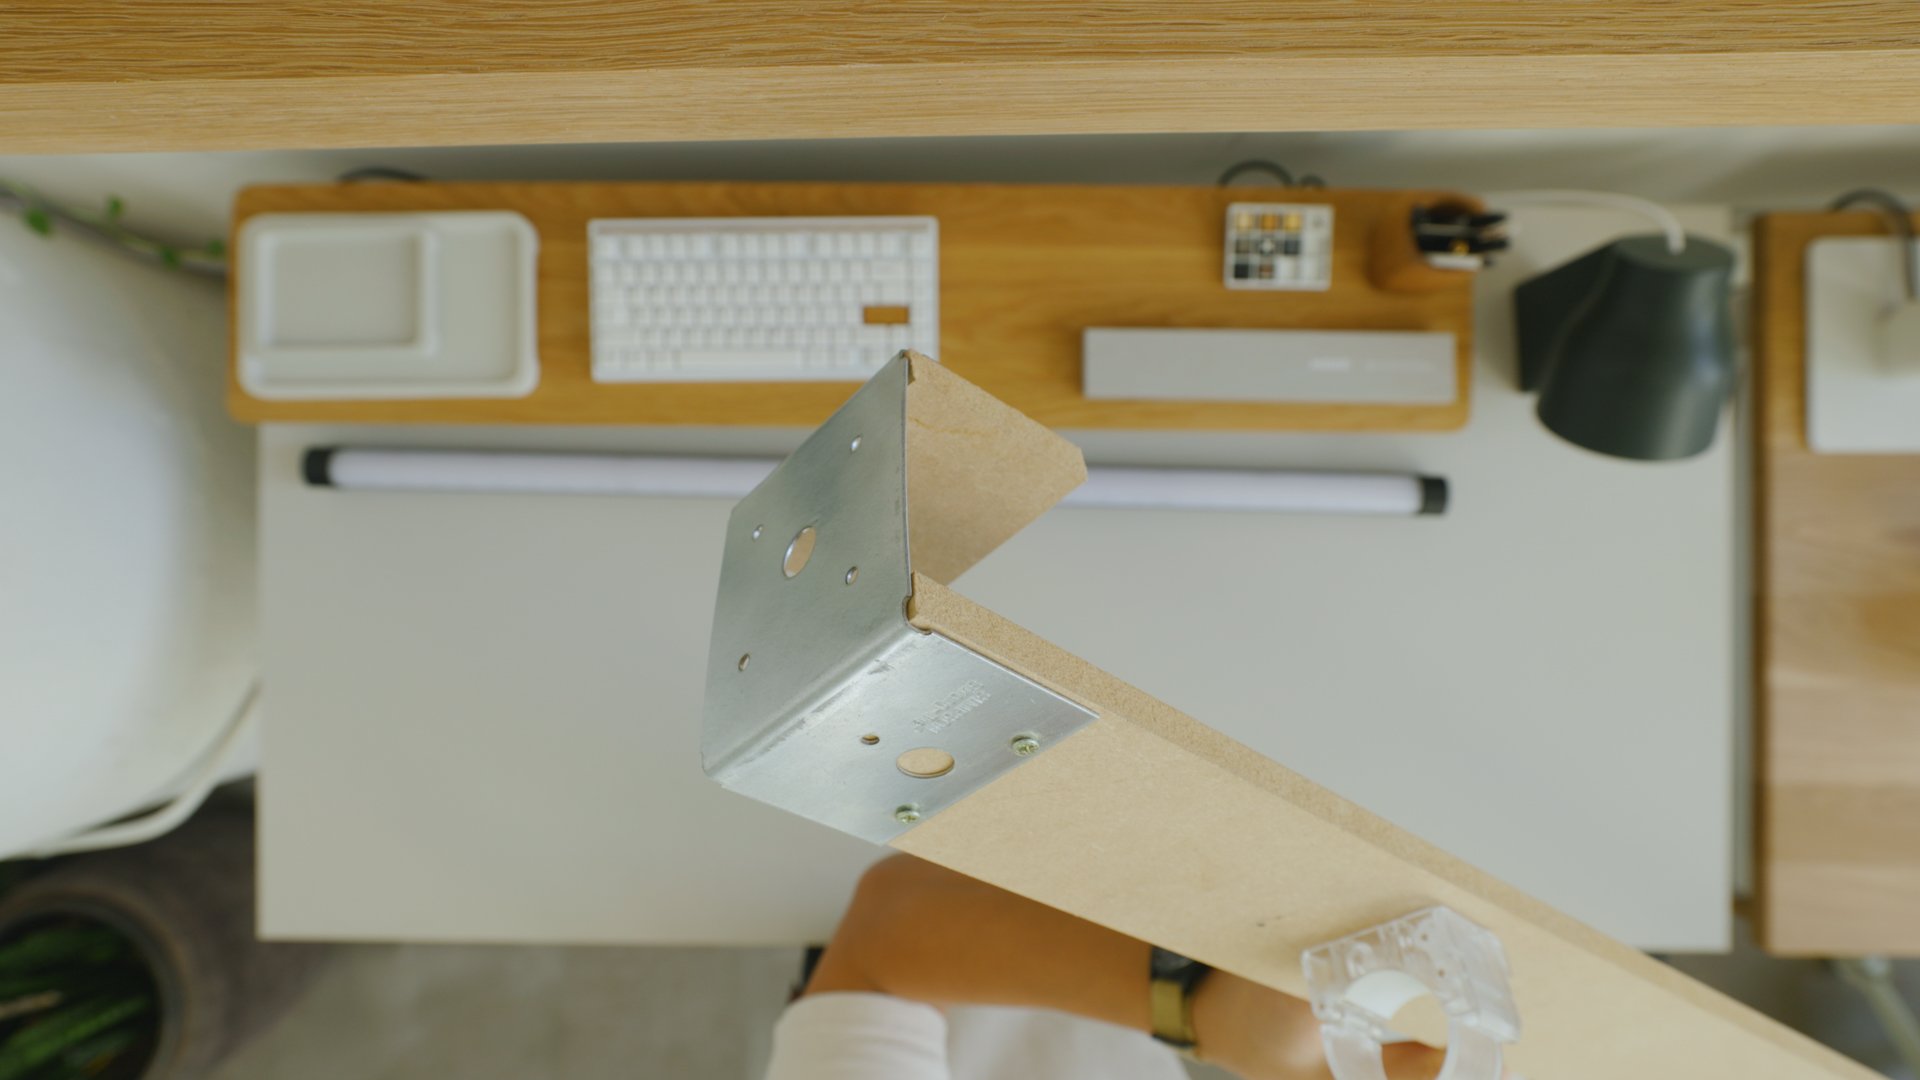
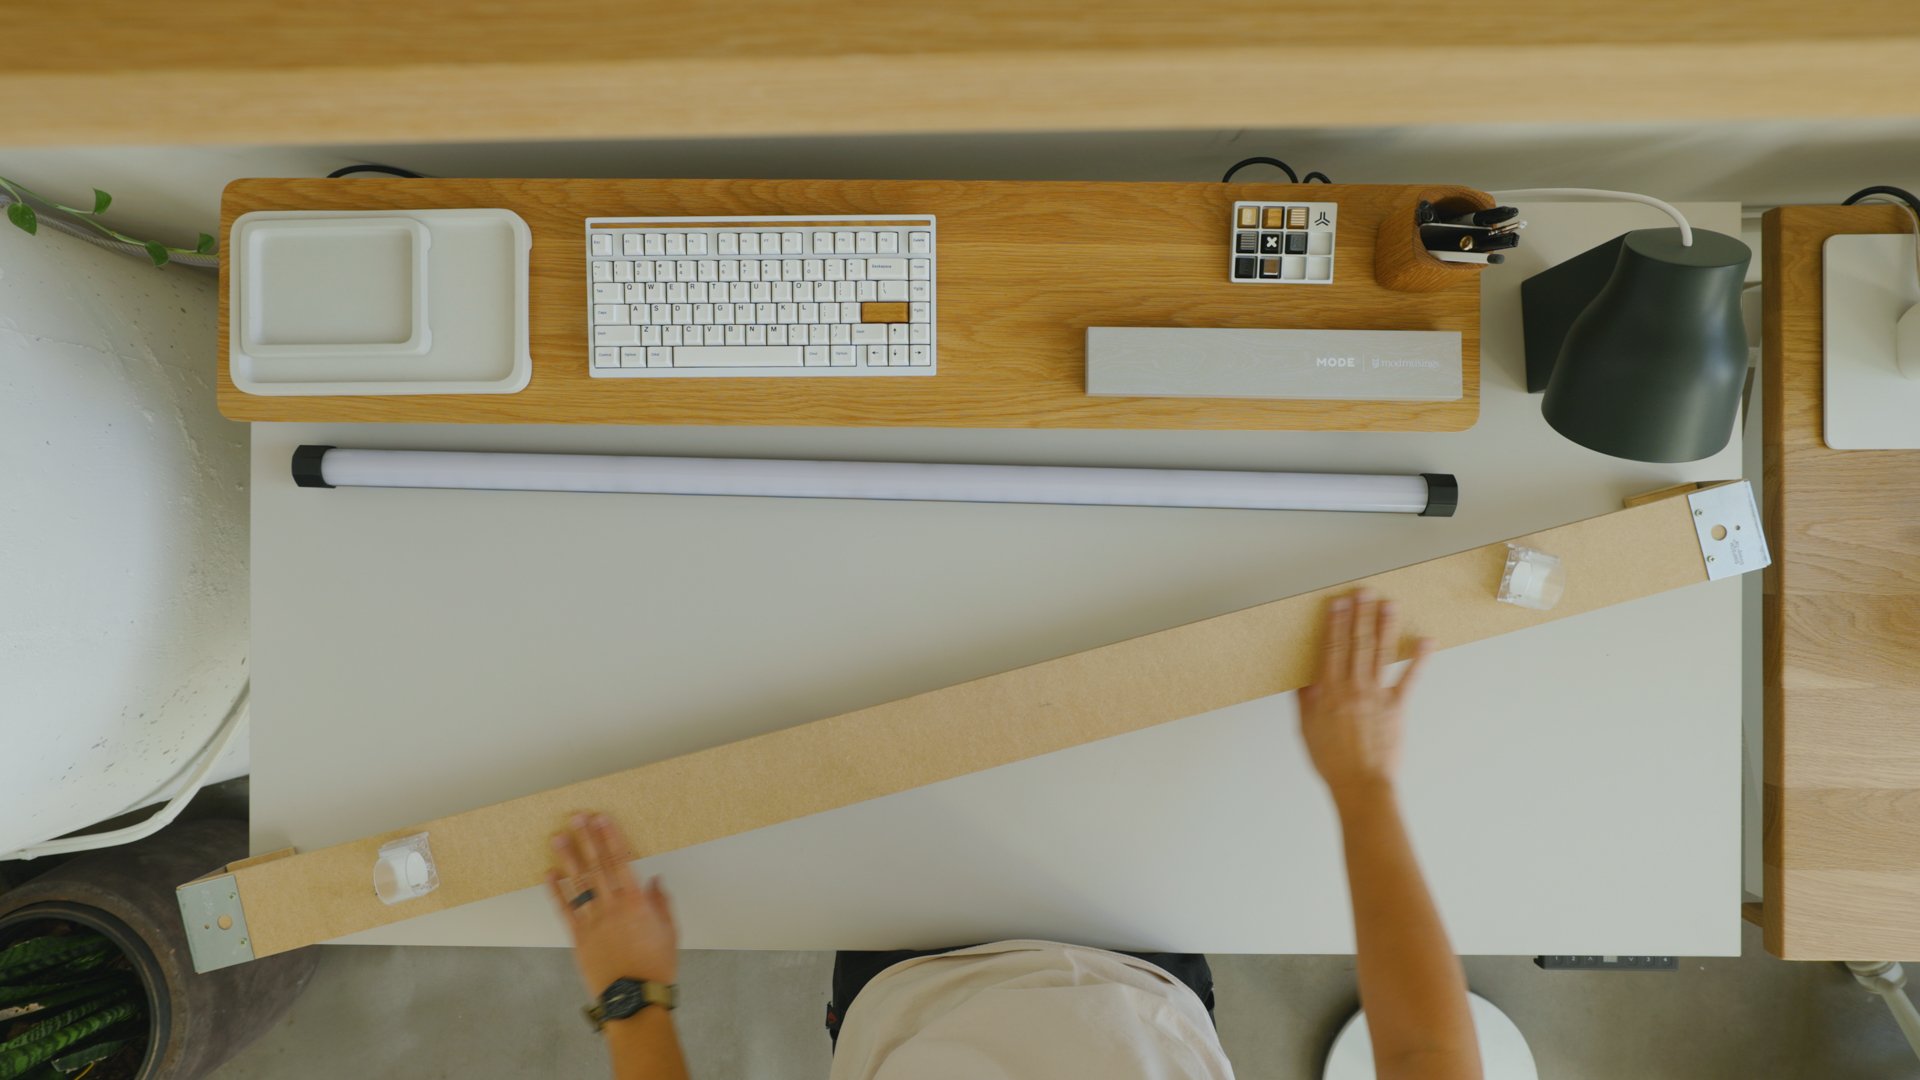
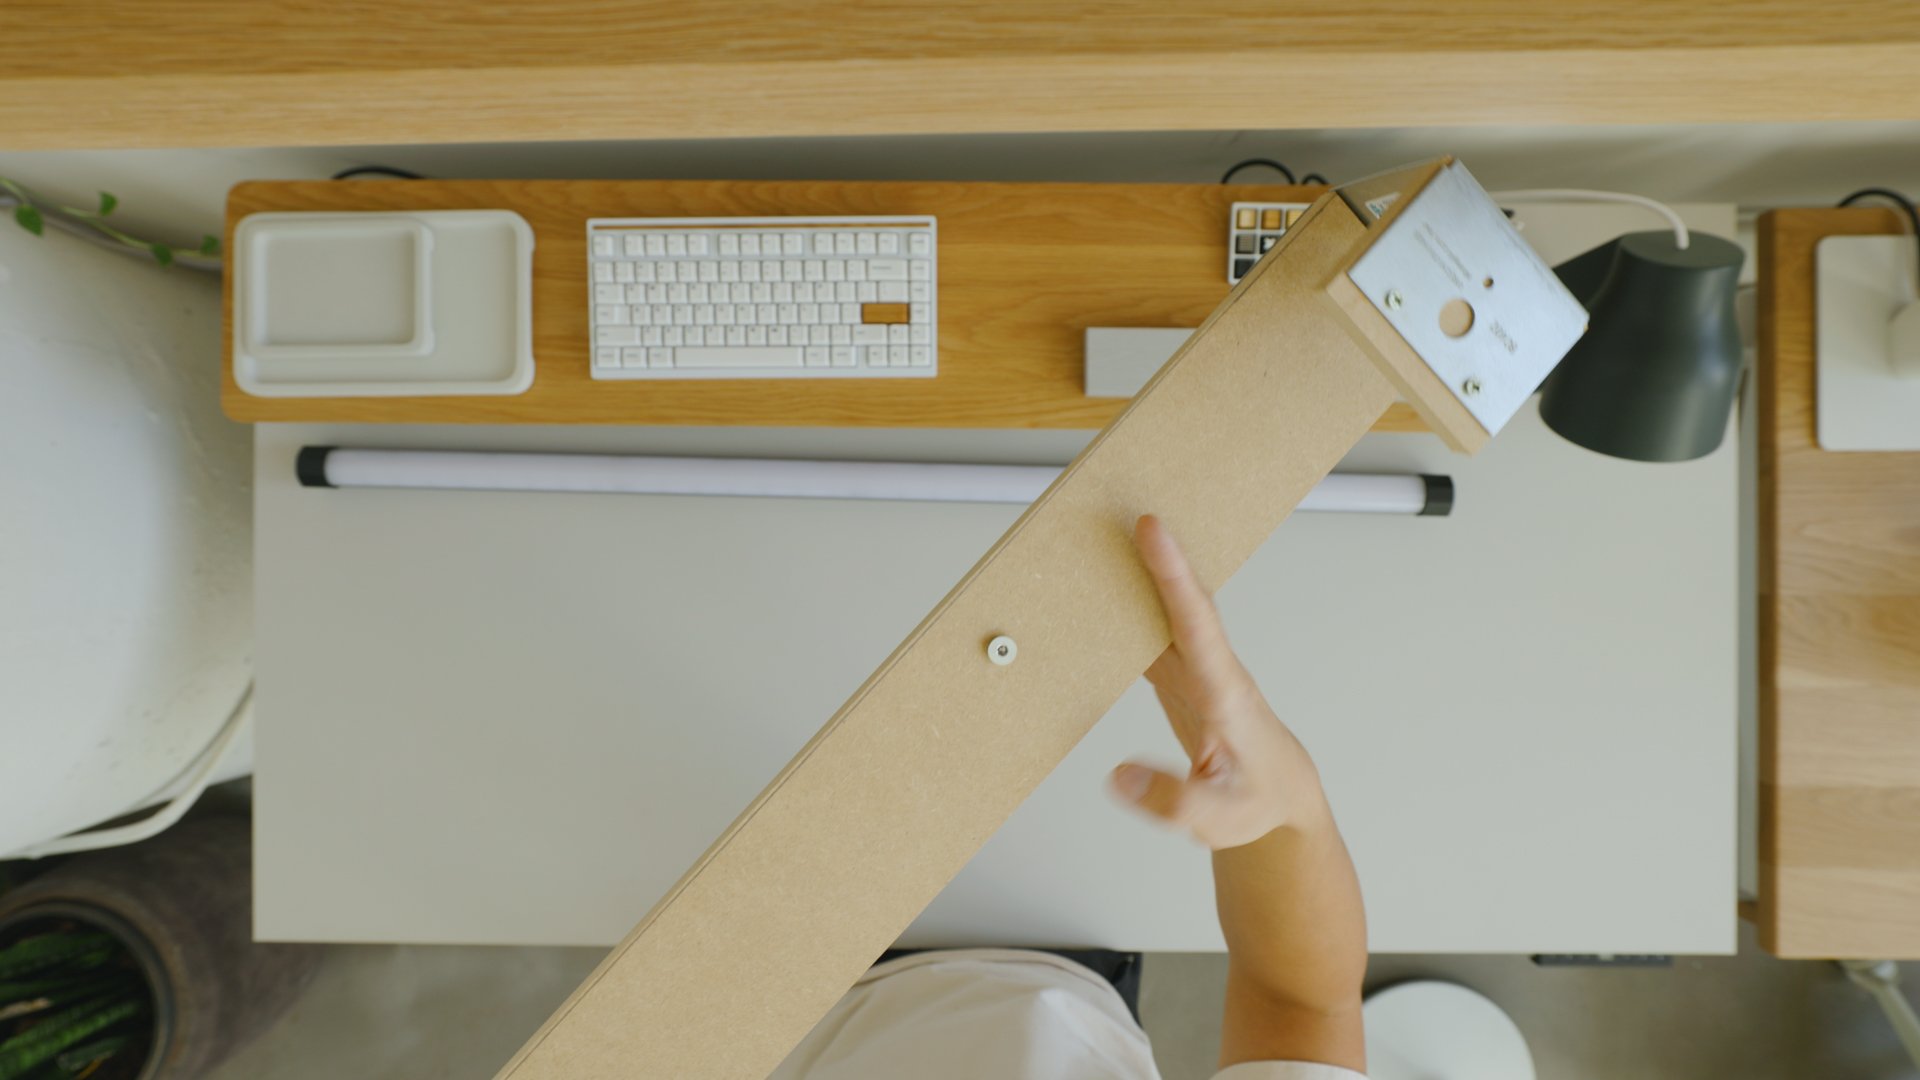

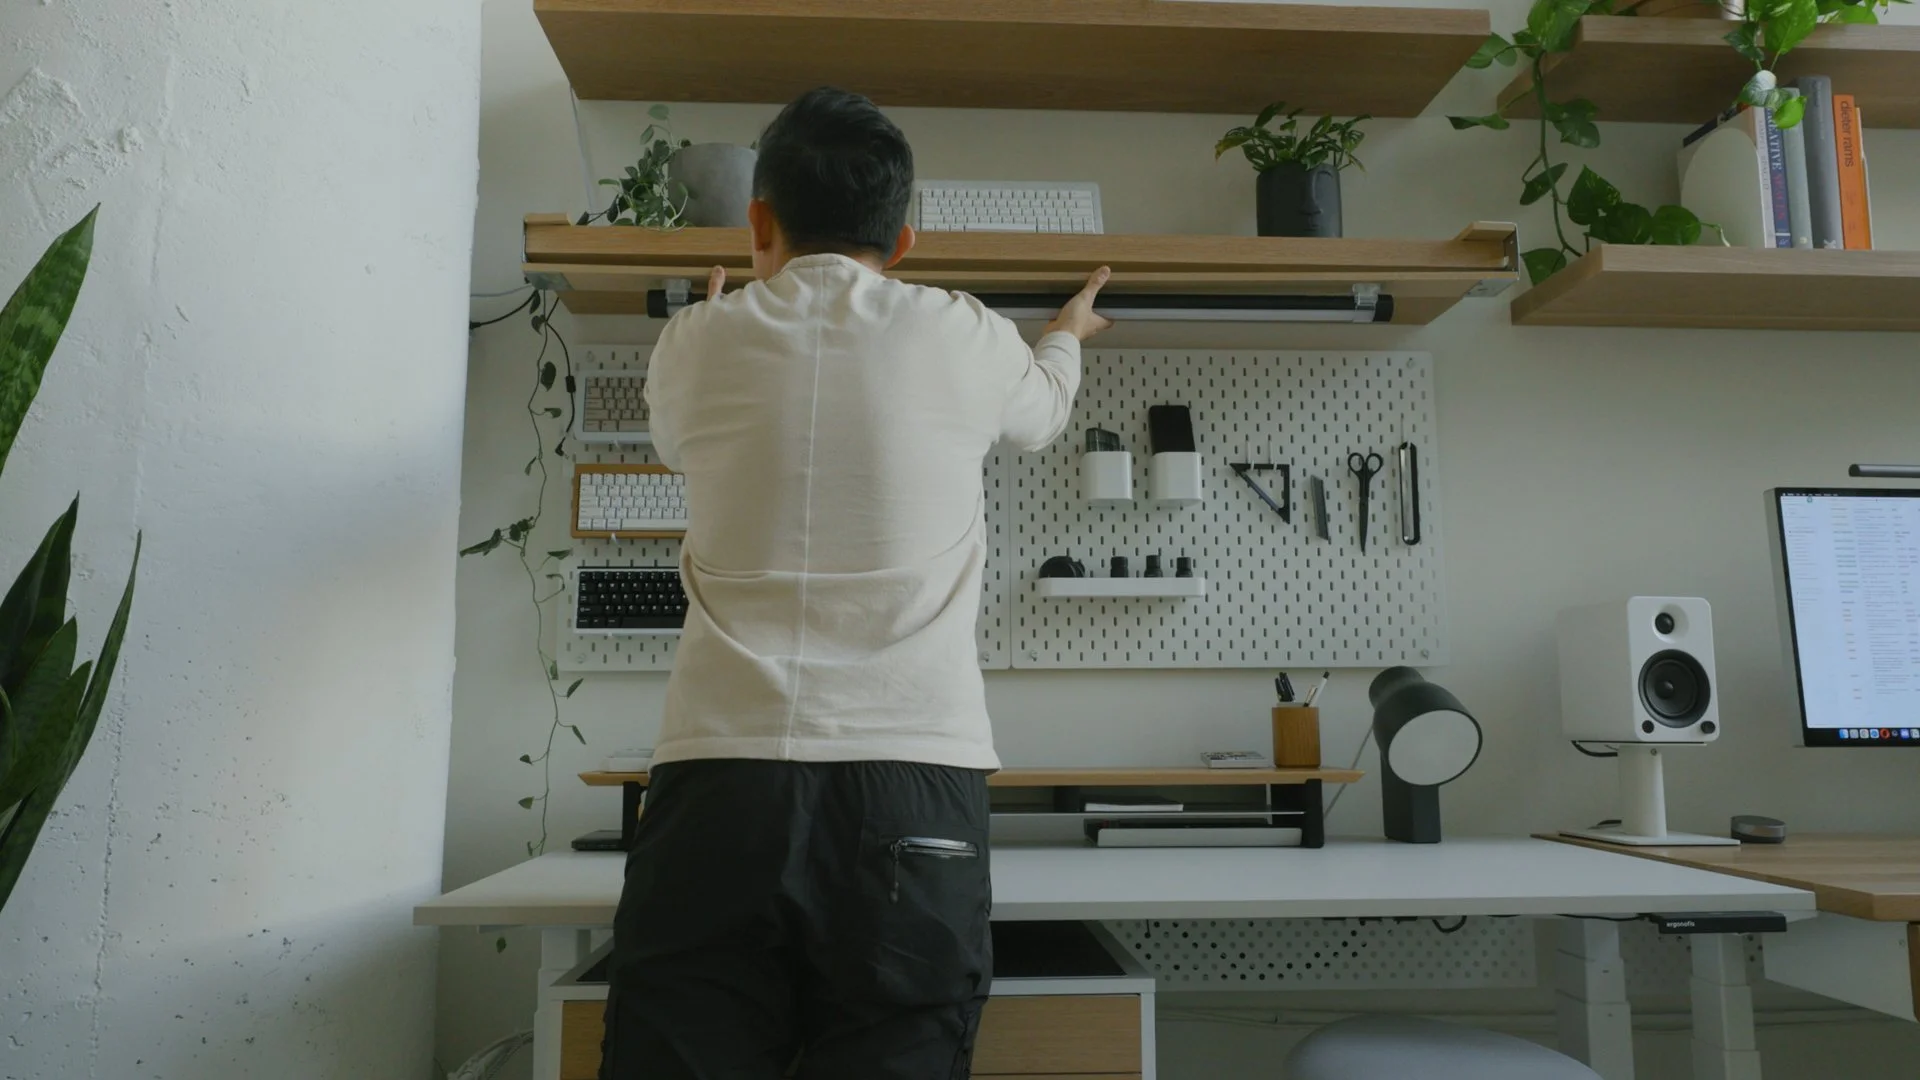
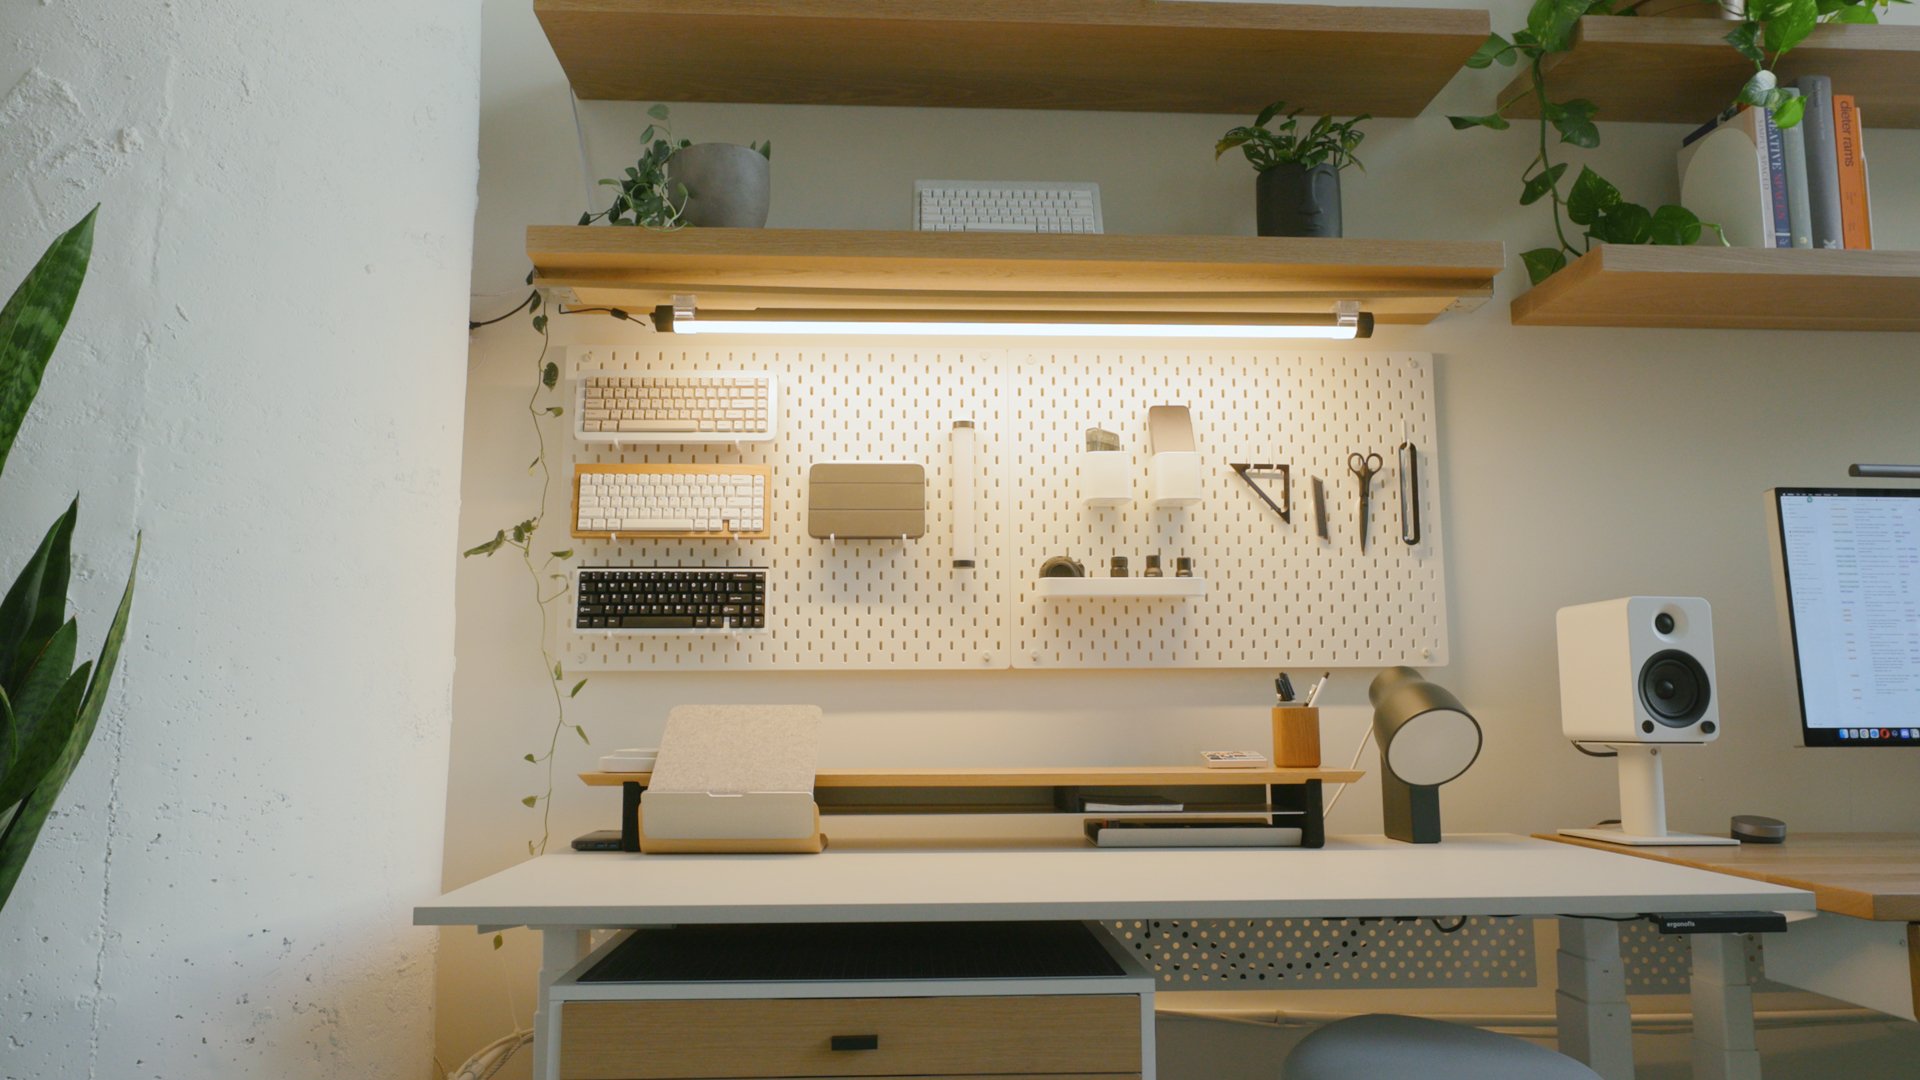
This rig can easily slide on and off my shelf, without any screws. And provides a huge diffused light source above my desk.
These lights are meant for filmmakers and aren’t traditional smart bulbs. But they can all be controlled using the Nanlink app, where you can adjust the color and intensity of the lights.
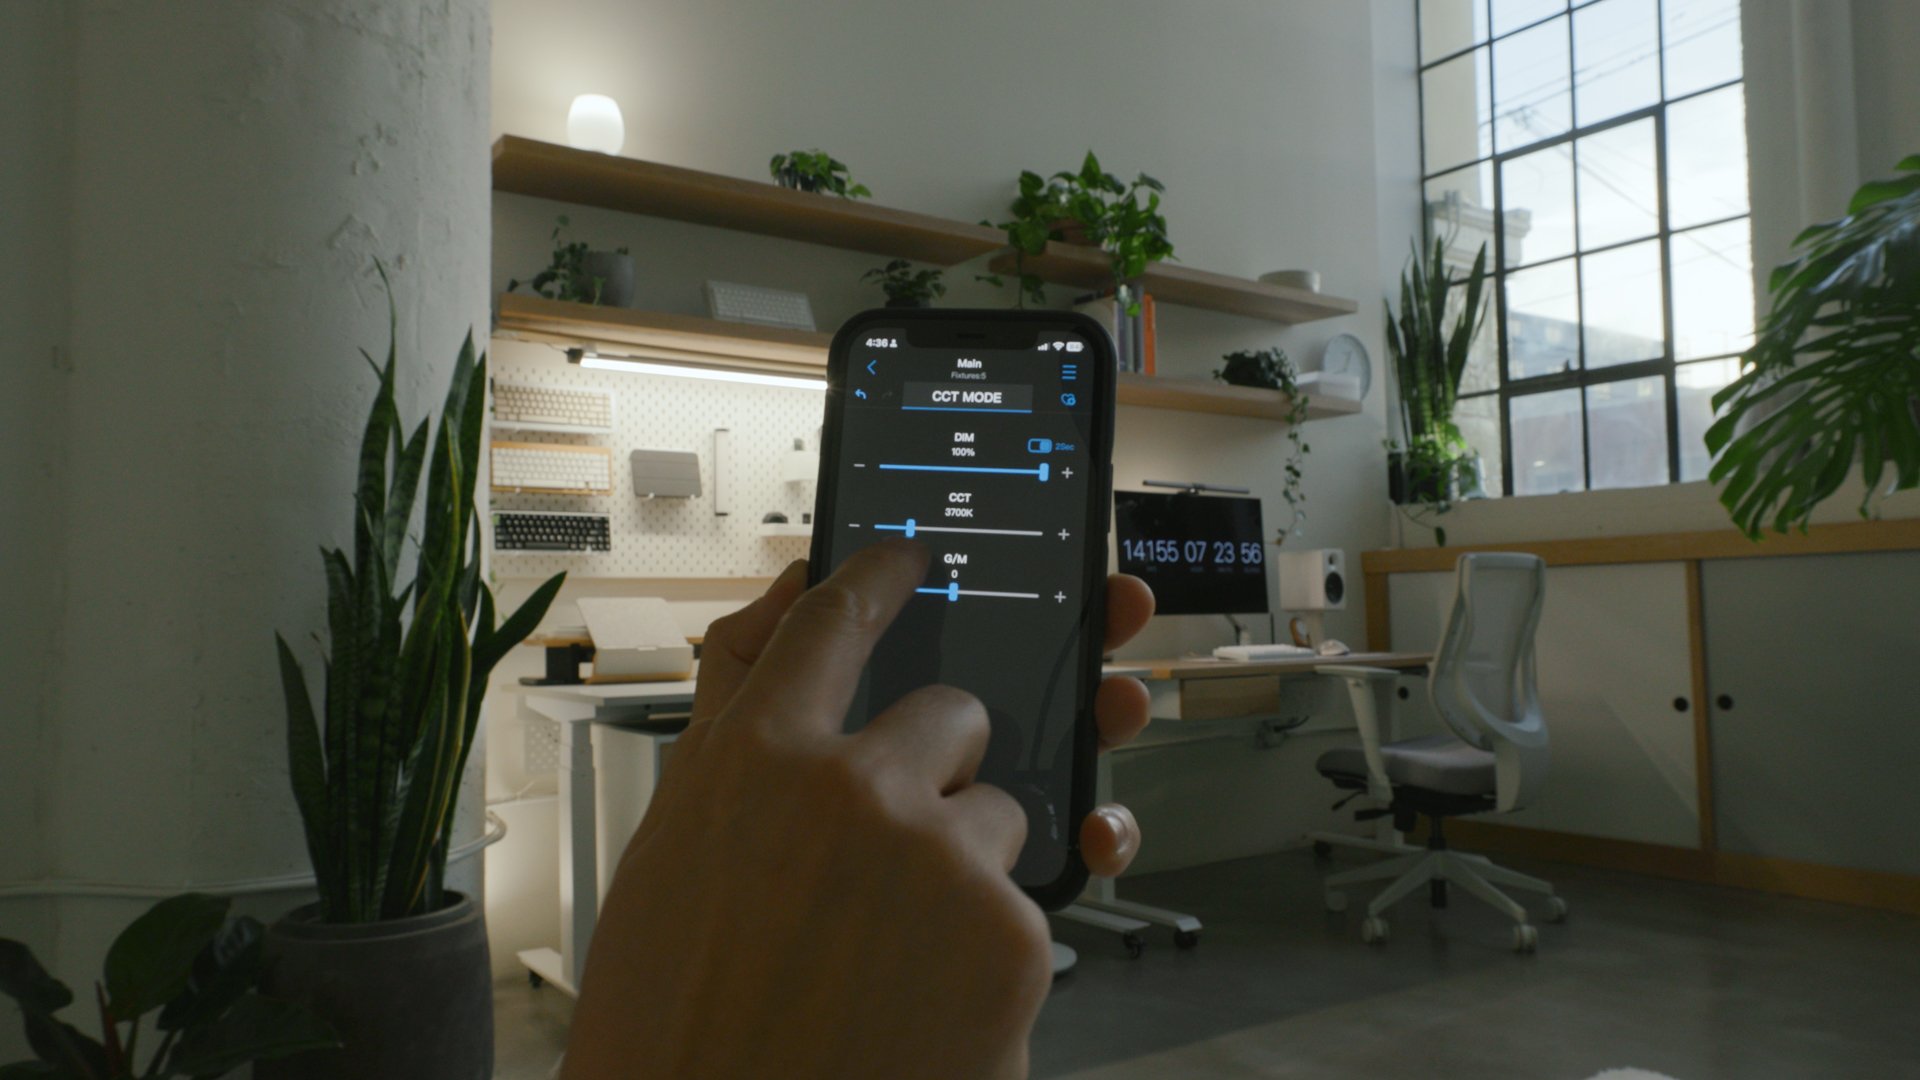
This lighting combo works well for filming and makes it feel incredibly cozy at night.
Conclusion
I’ve only just begun to use this space. So there will be plenty of adjustments and updates I’ll make the more I use it. For now, it’s been an incredible place to do my creative work.