
Mod Musings Creative Studio Tour
What started as an empty industrial space, has now turned into a custom-built studio, for all of my creative work. It took a year to design and build out each section, and now that it’s complete, I’m thriving in this space. Scroll down to read the details of each section of the studio. Some of the links included in this post are my affiliate links, which I receive a small commission for at no extra cost. Thanks for supporting my content.
Starting From Scratch
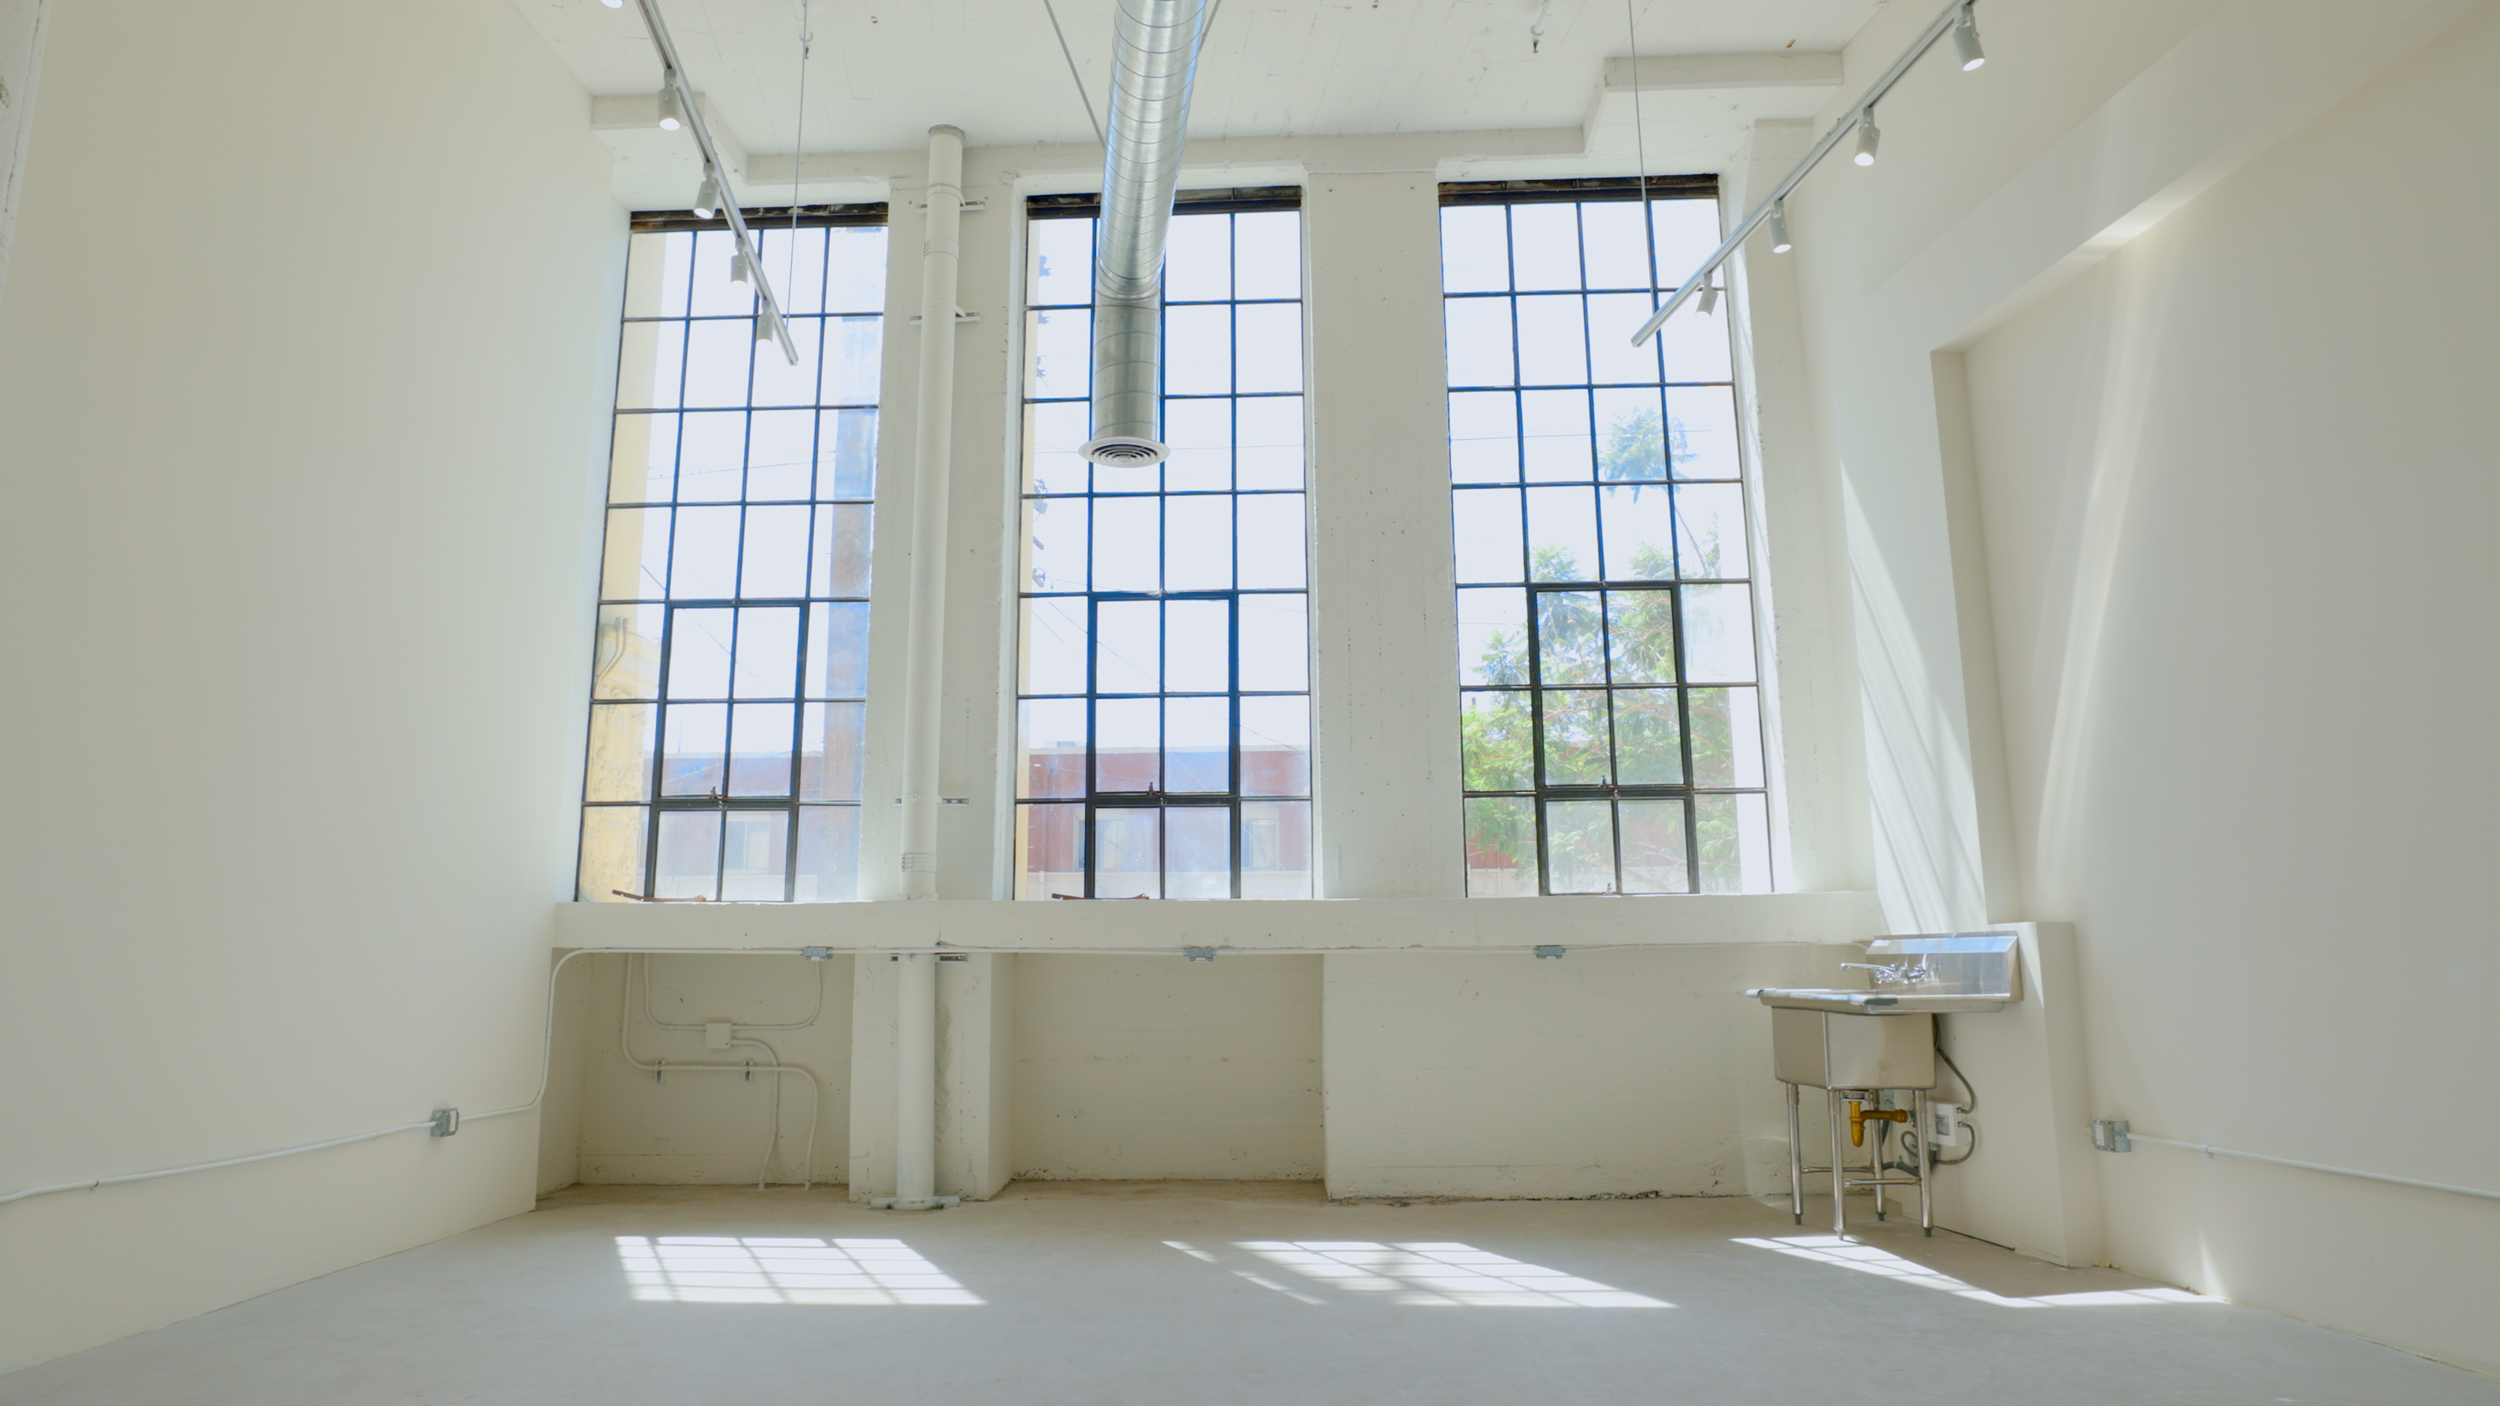
The studio is located in Los Angeles, California inside a repurposed factory turned into a live/work space. I leased a 700-square-foot open floor plan unit, for my business Mod Musings. A maker and media brand.
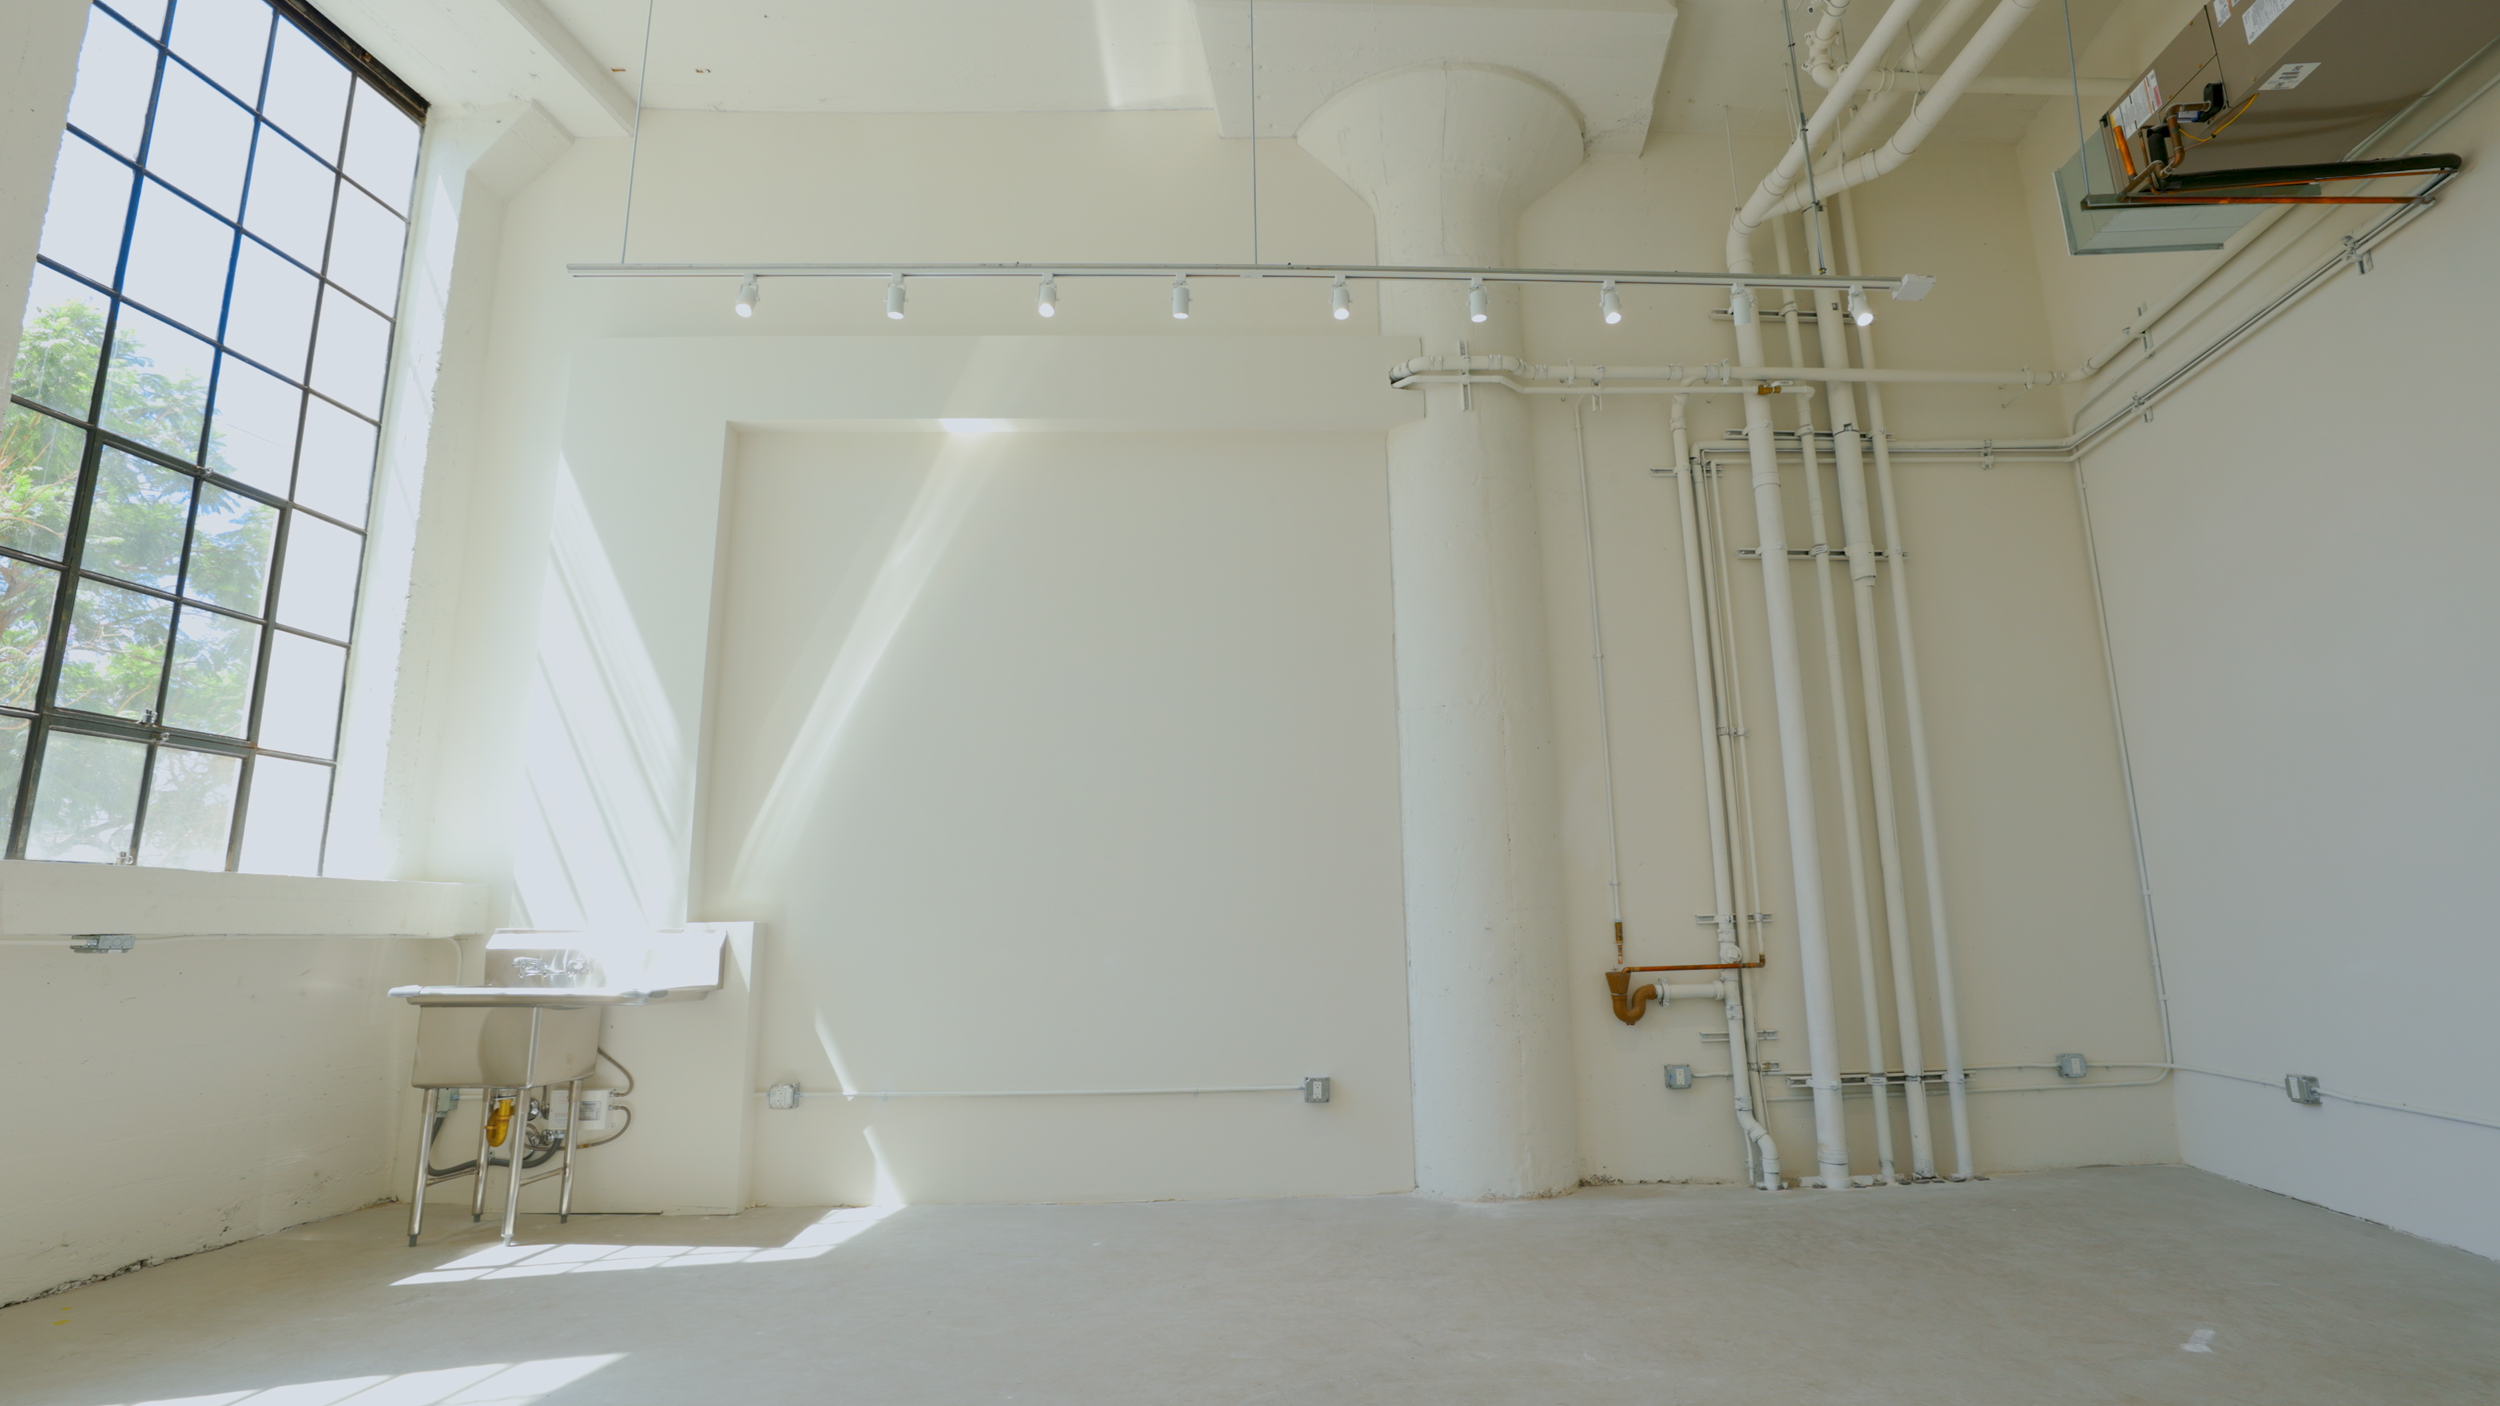
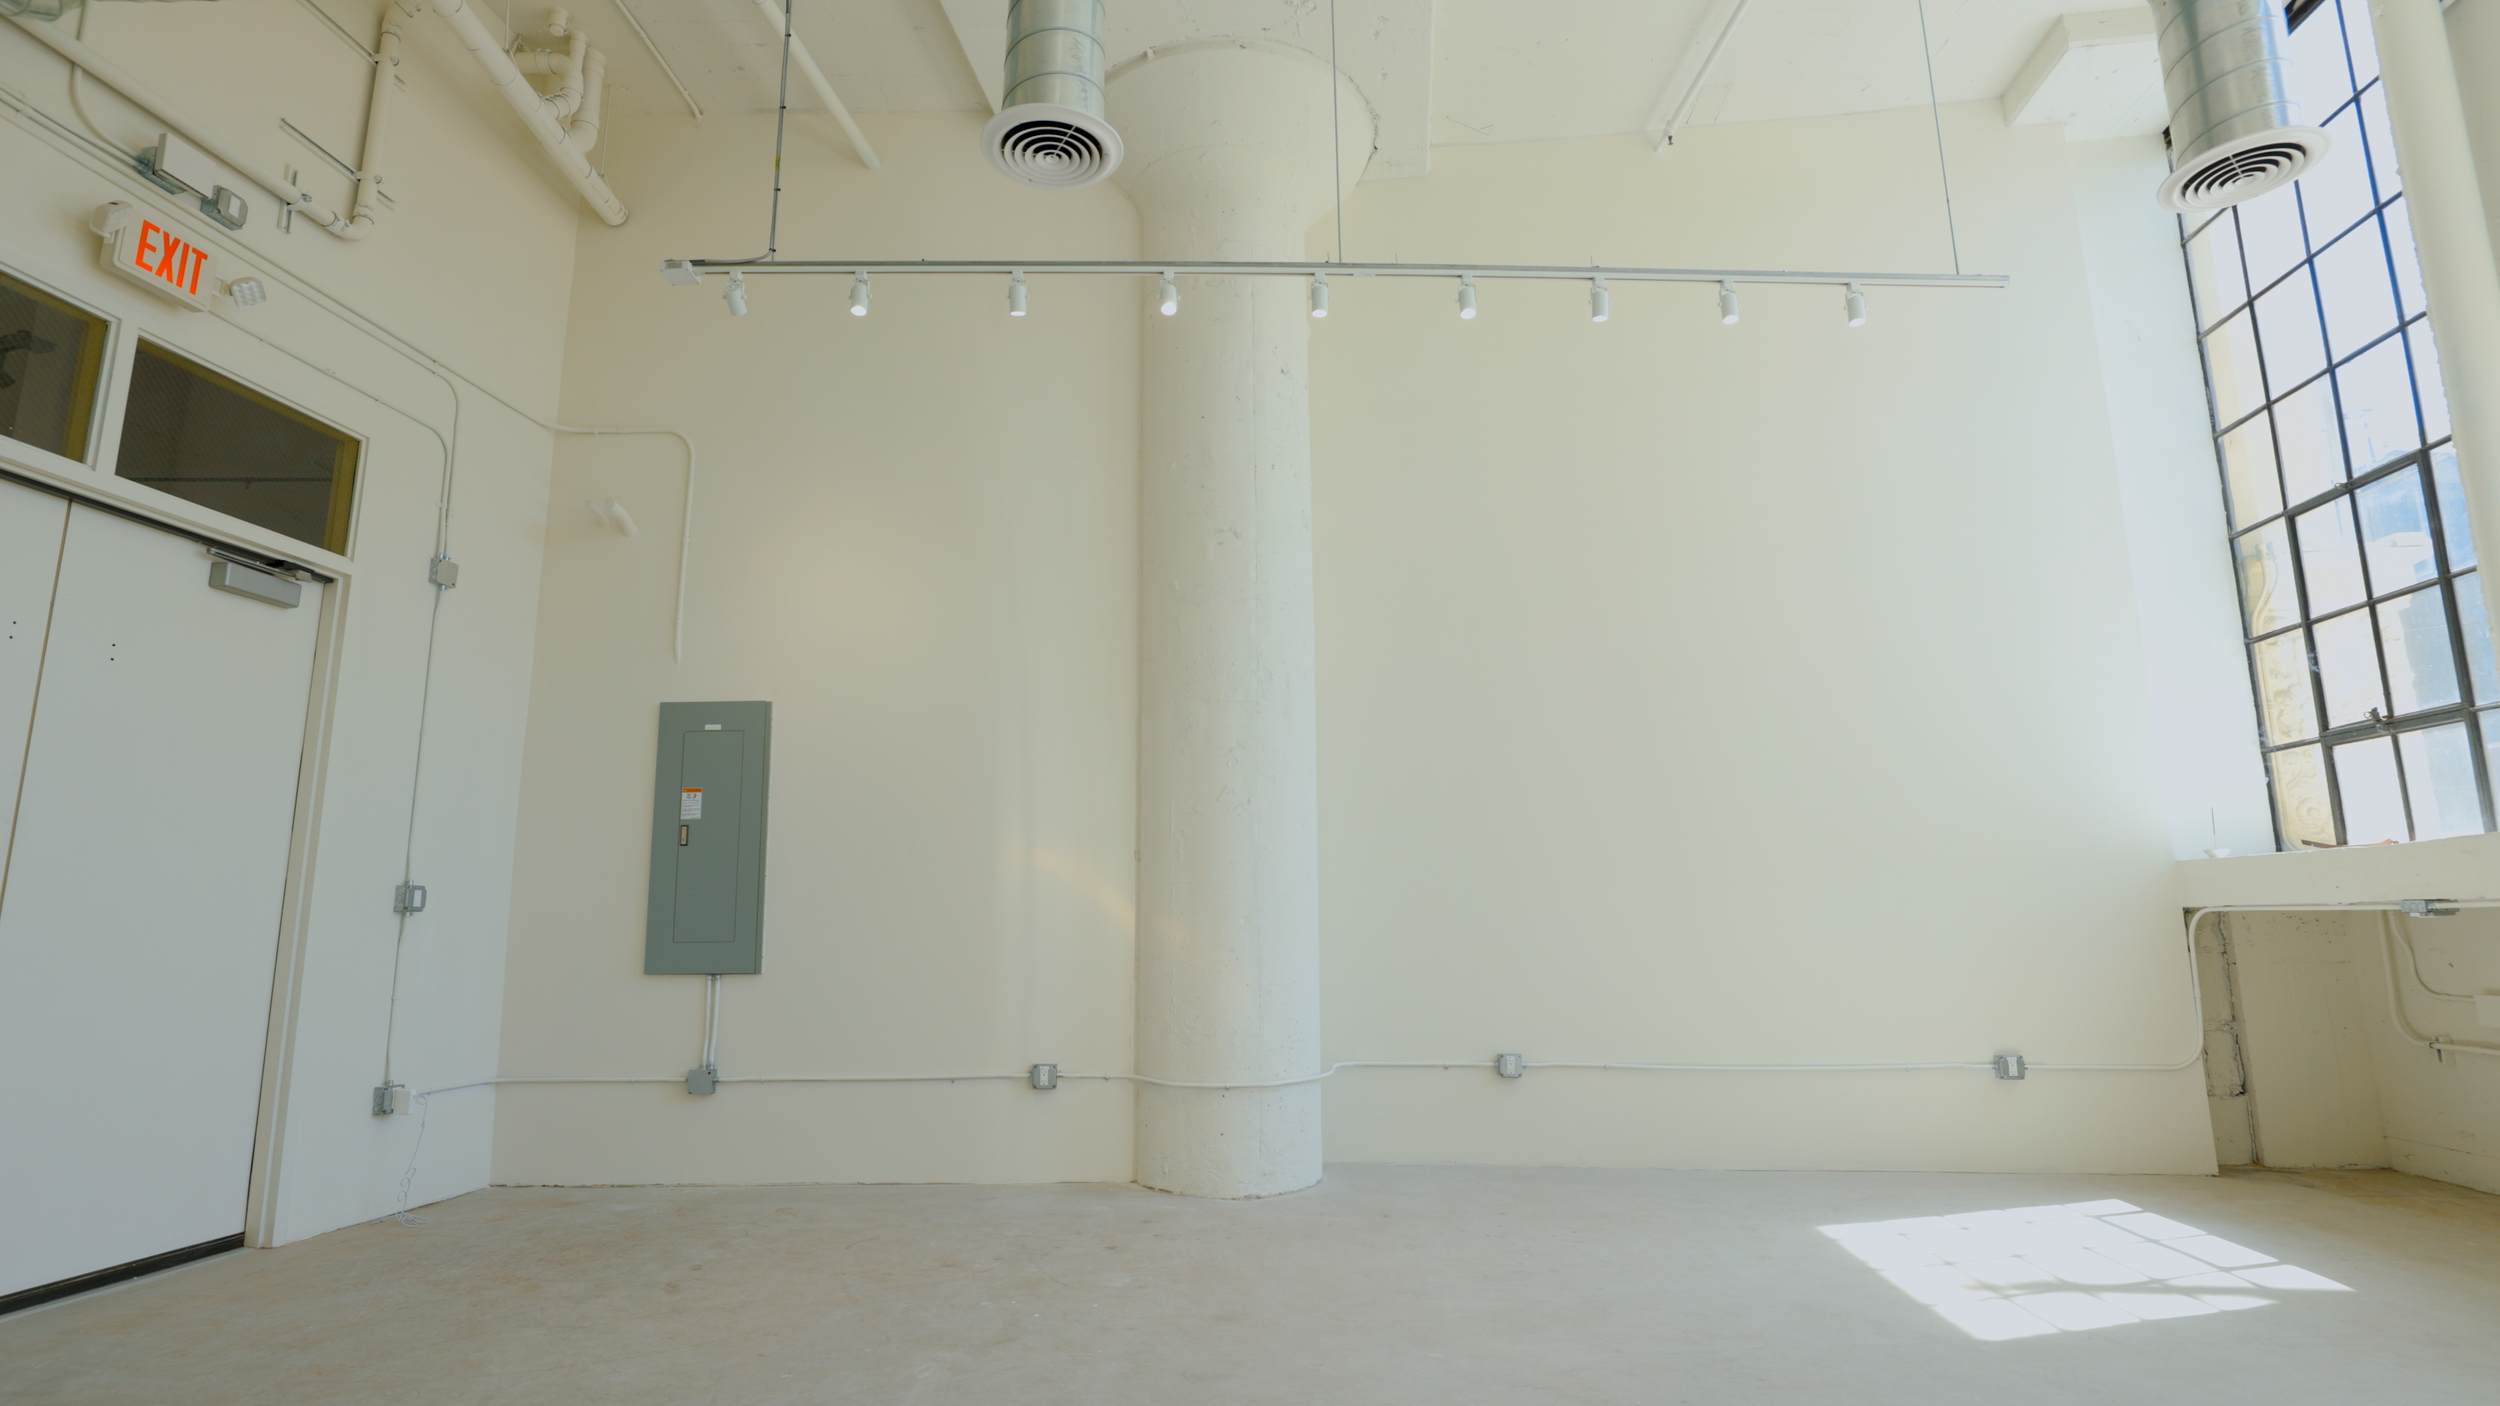
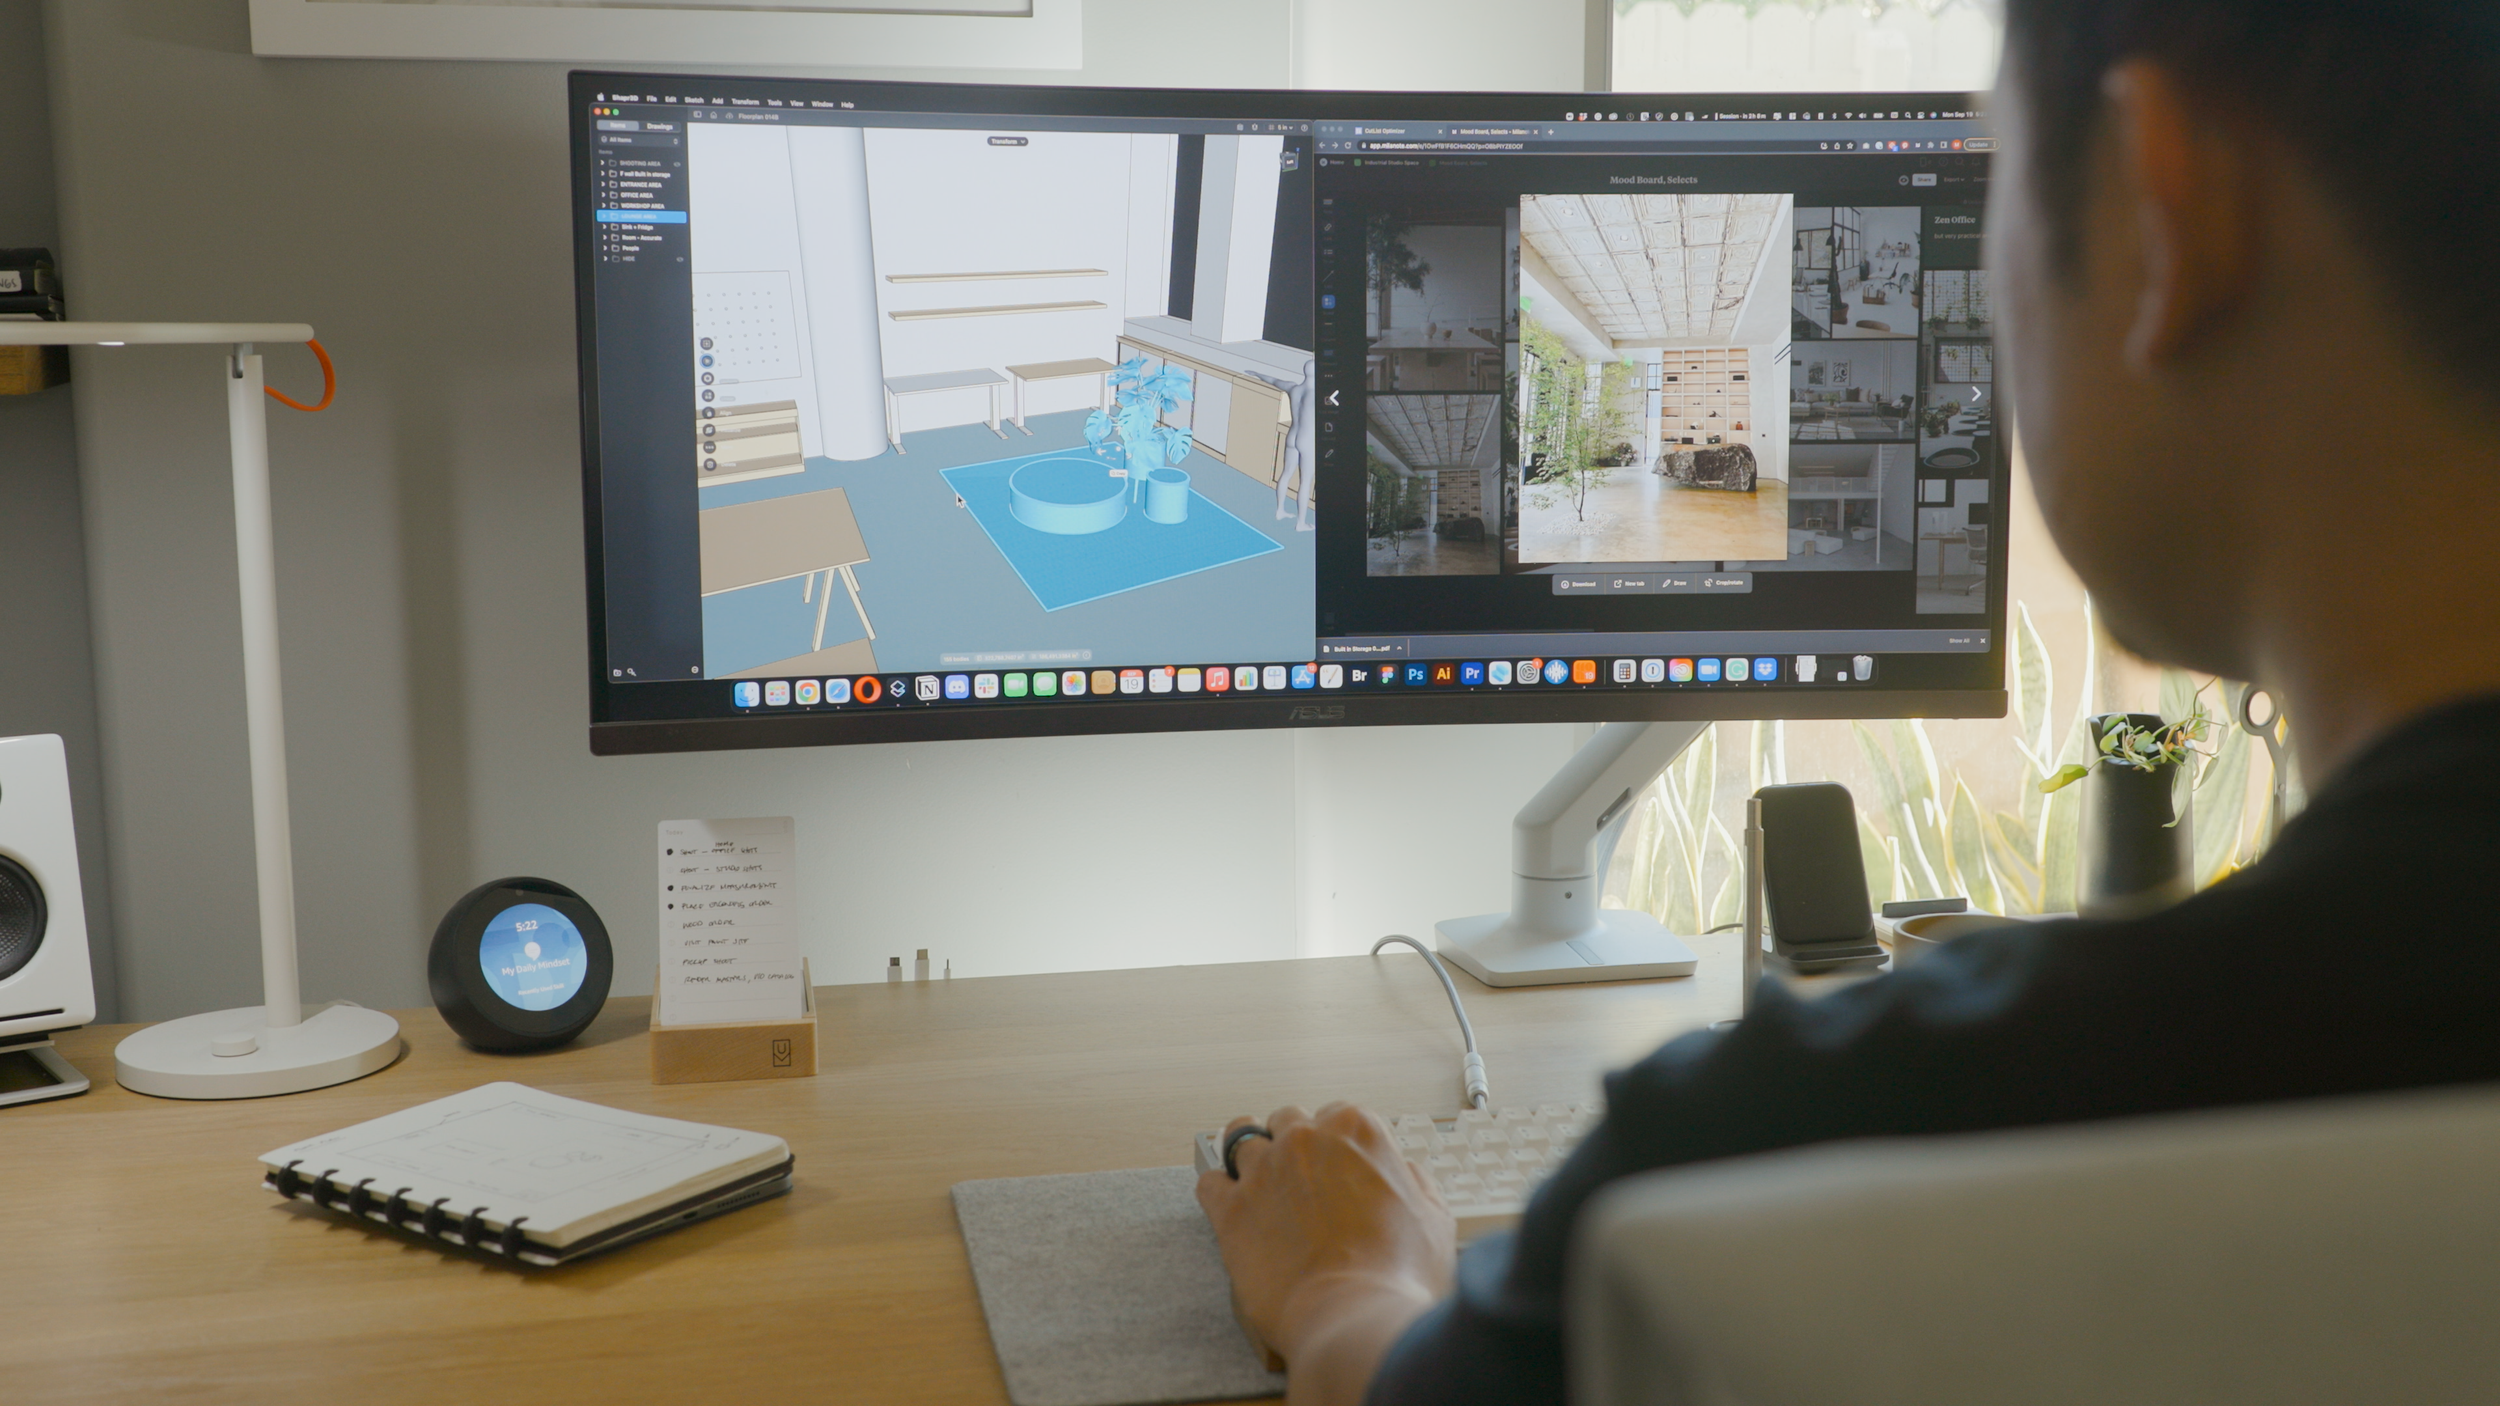
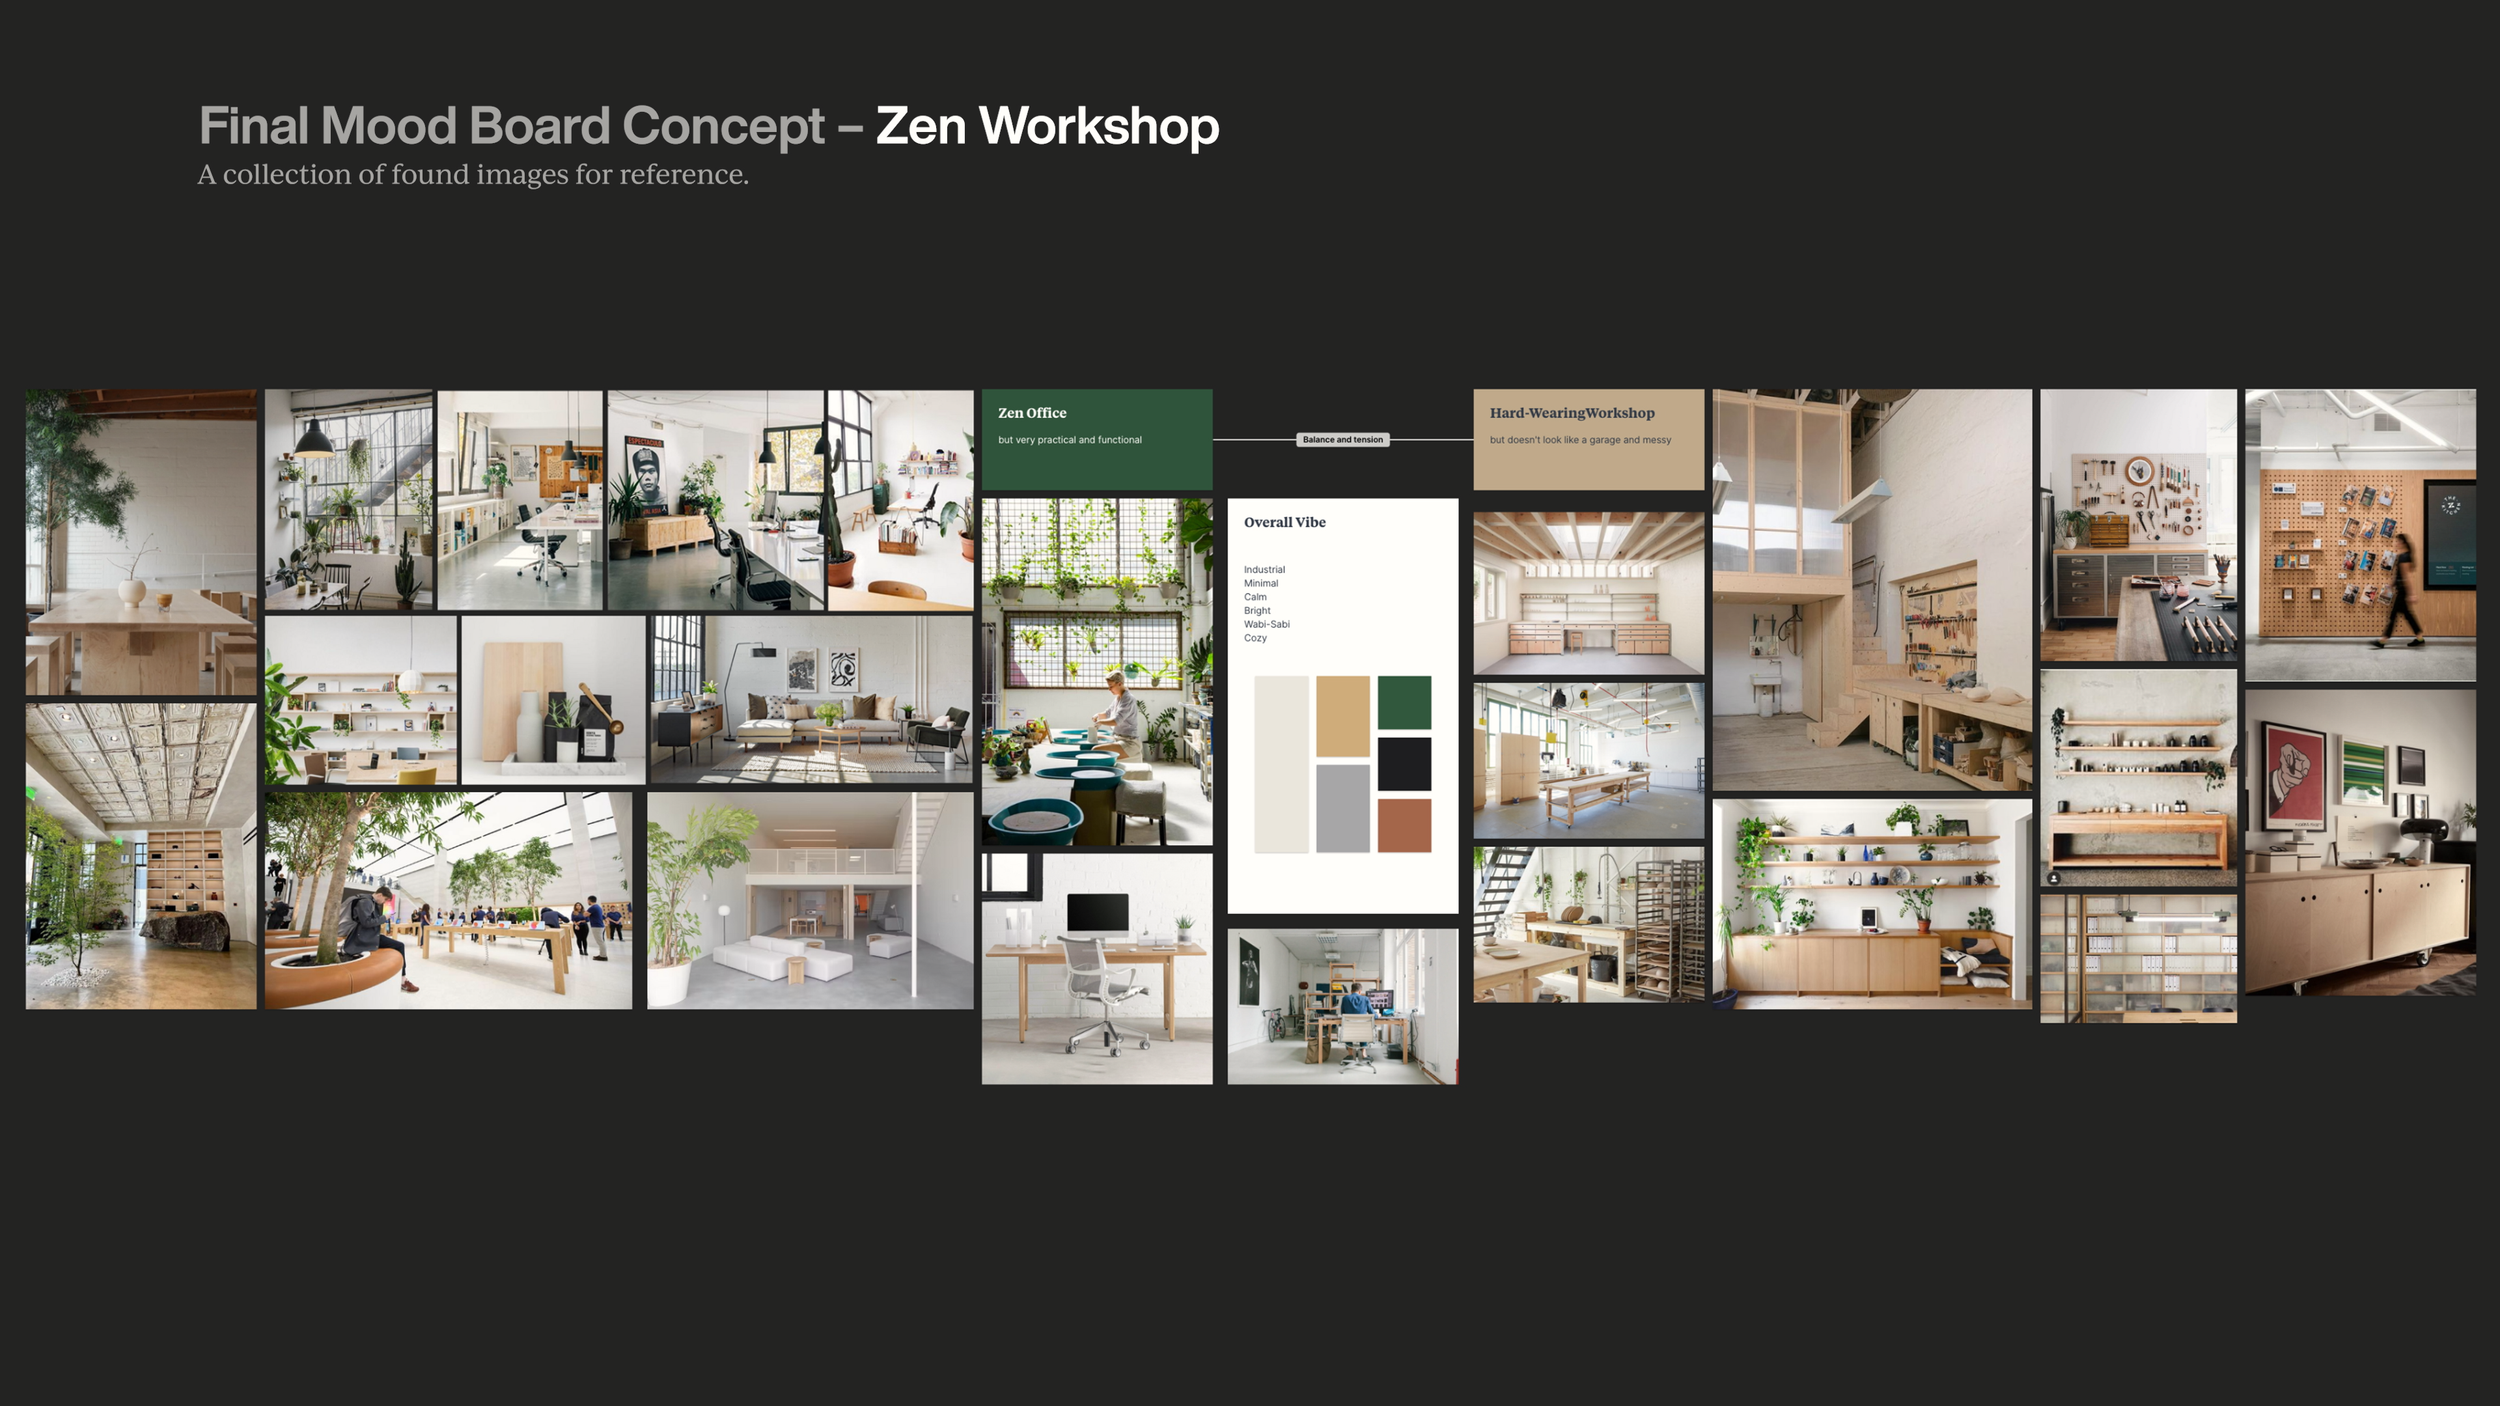
My goal was to create a Zen Workshop for me to design, film, and build in. To achieve this, I’ve carefully sectioned off the room to optimize flow and function and utilized a palette of colors and materials that create a calm mood in this space. If you want to learn more about my design process, watch the first episode of this studio design series.

The Entrance Display & Storage
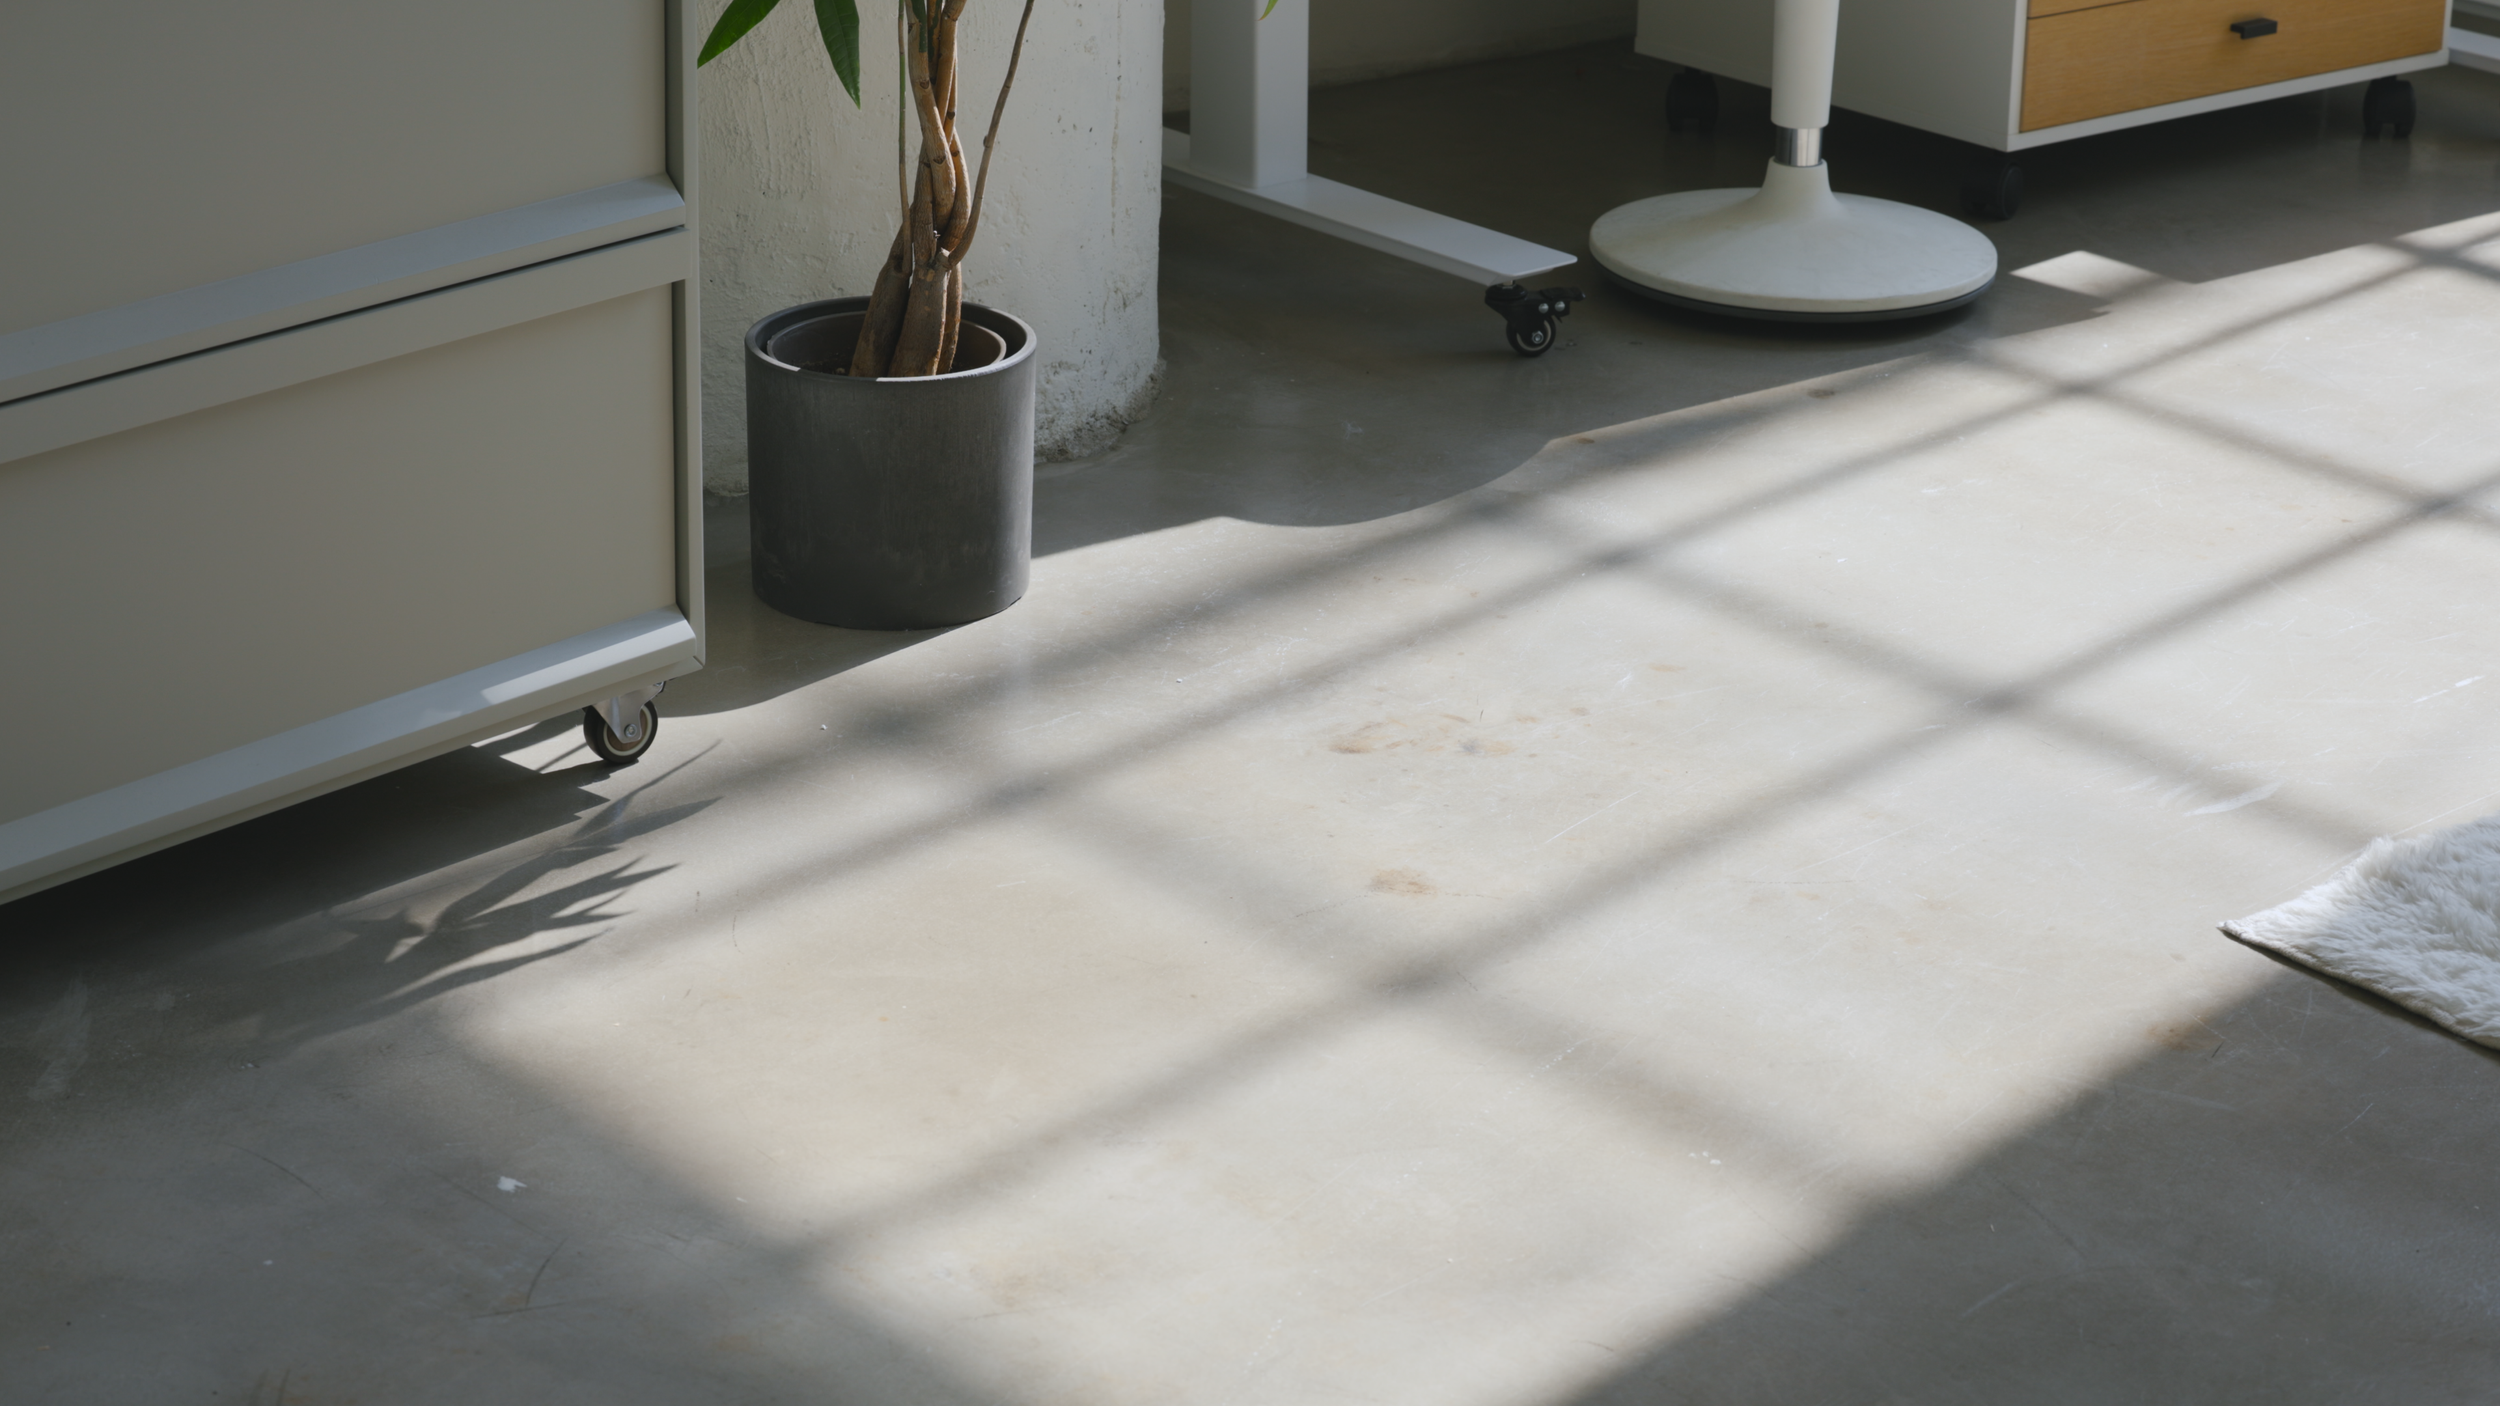
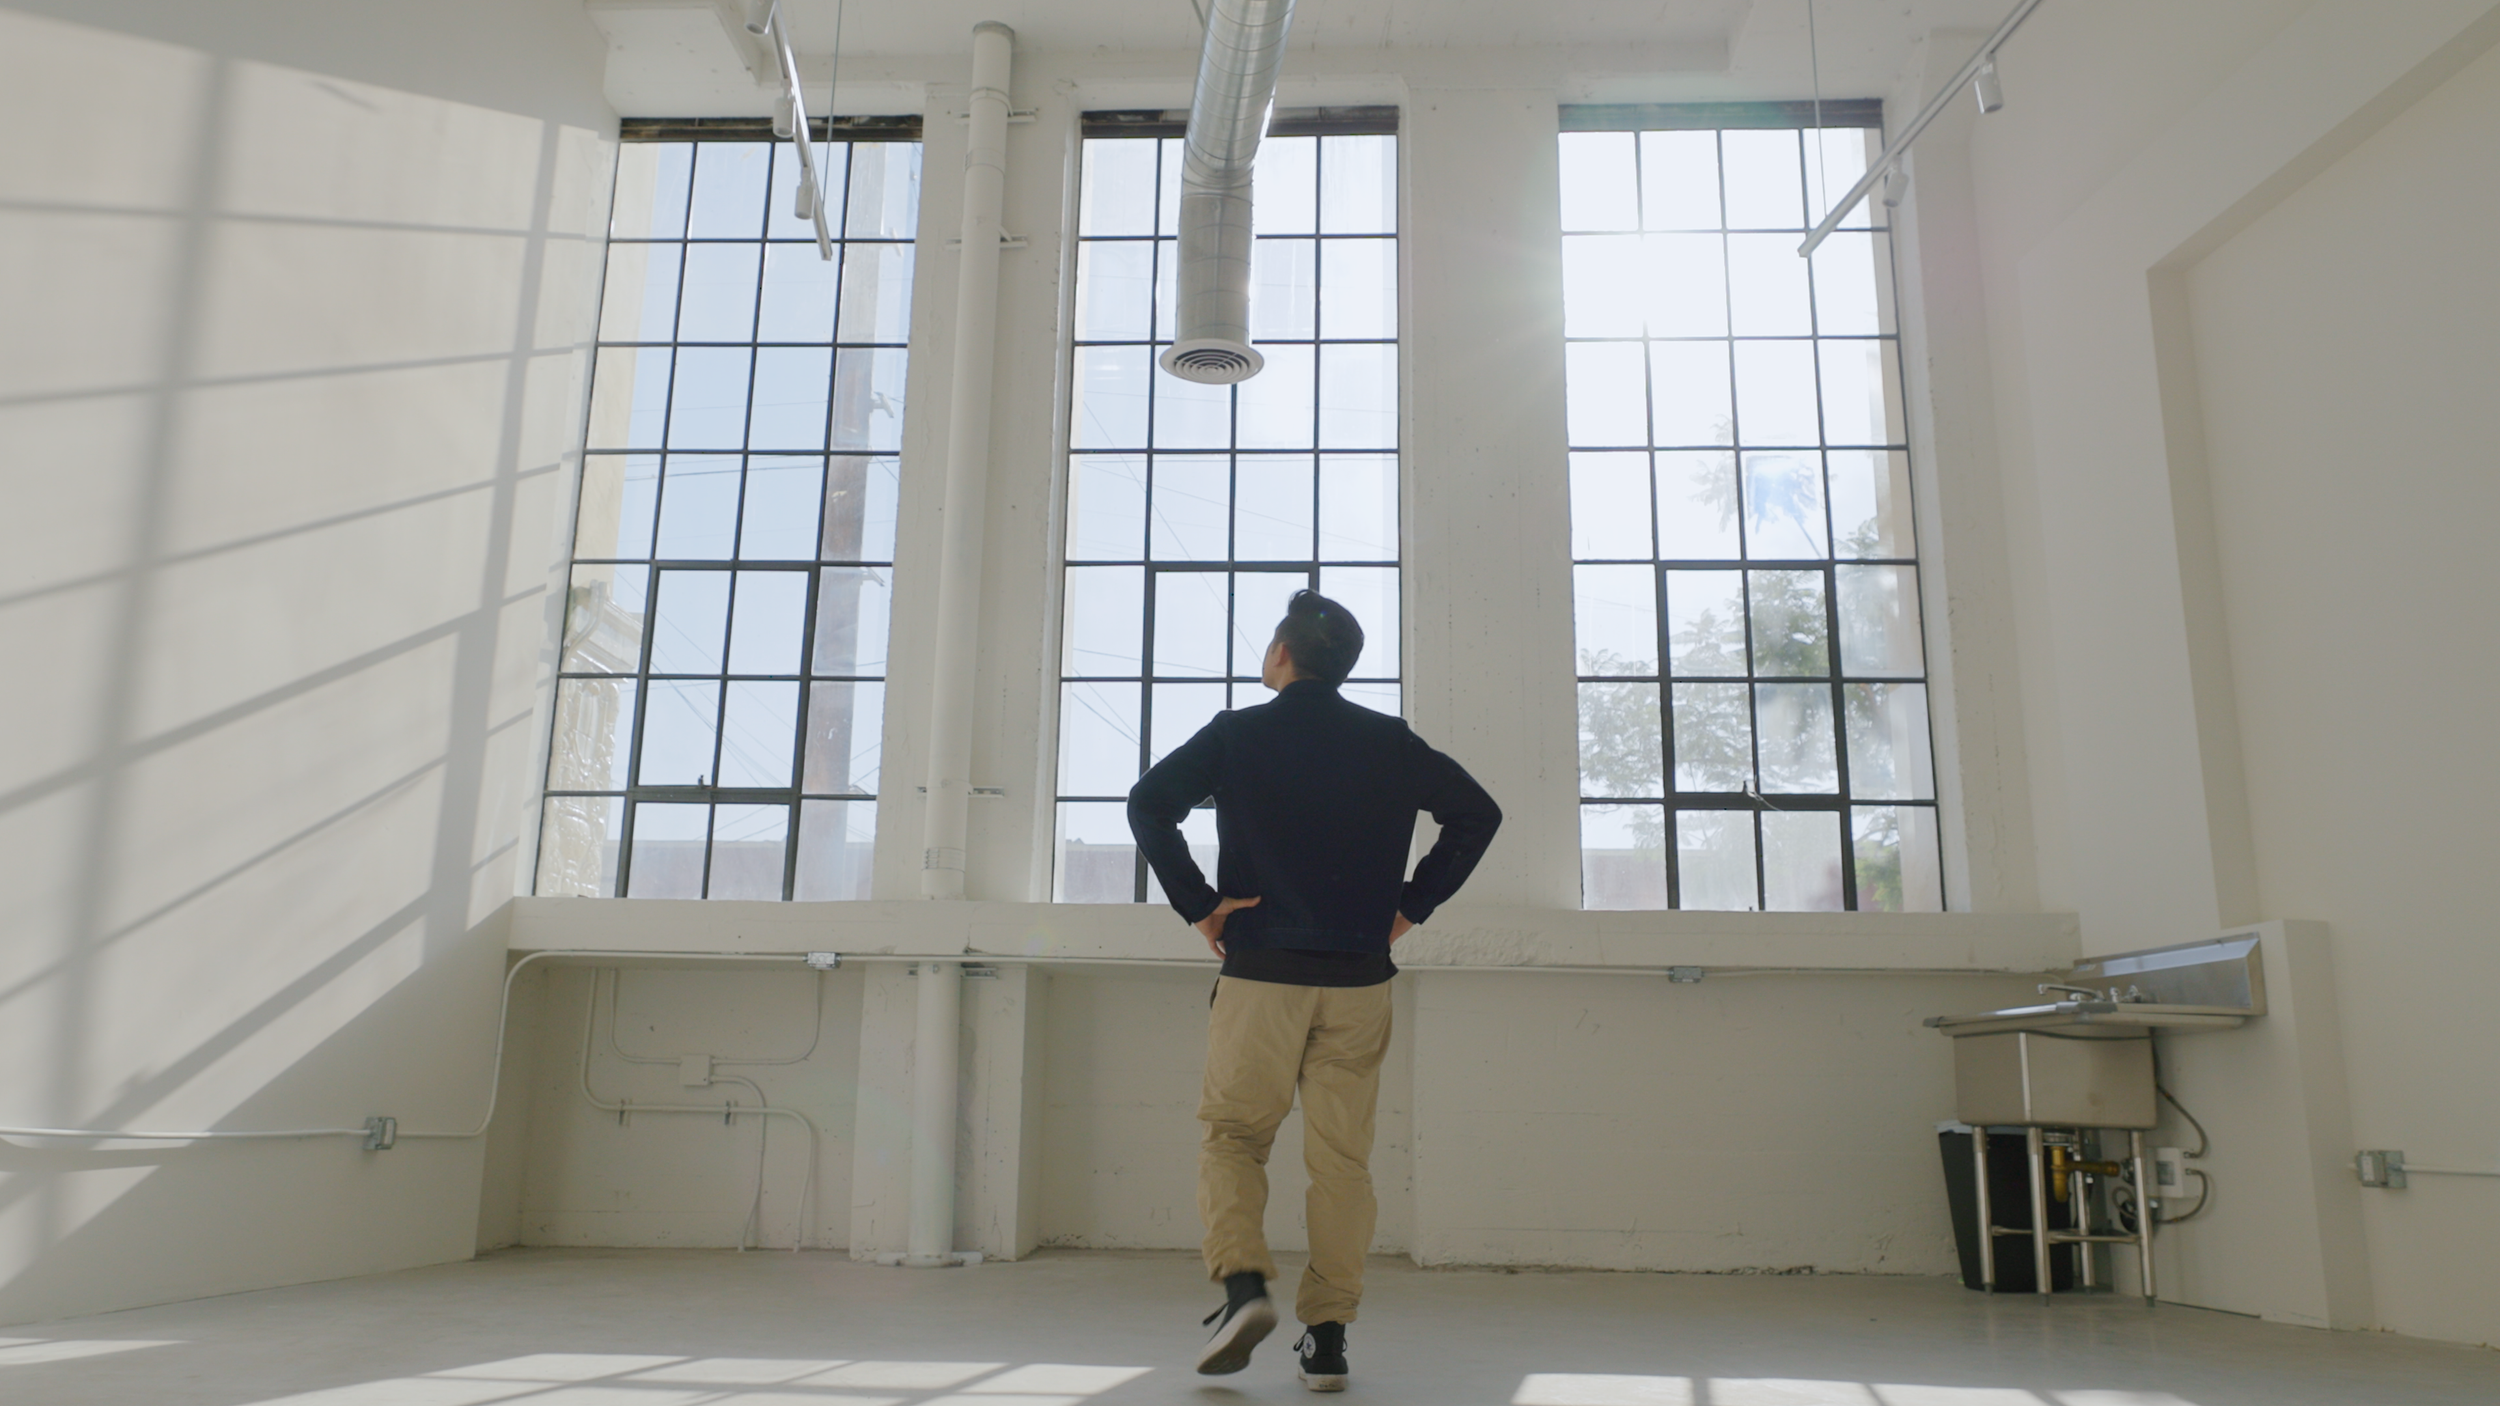
When you first walk into the office, you’re greeted with an abundance of natural light shining in from the 3 windows that span to the ceiling. The sunlight is the main reason I chose this space, because it positively affects your mood and focus, and makes the space look gorgeous no matter the time of day.

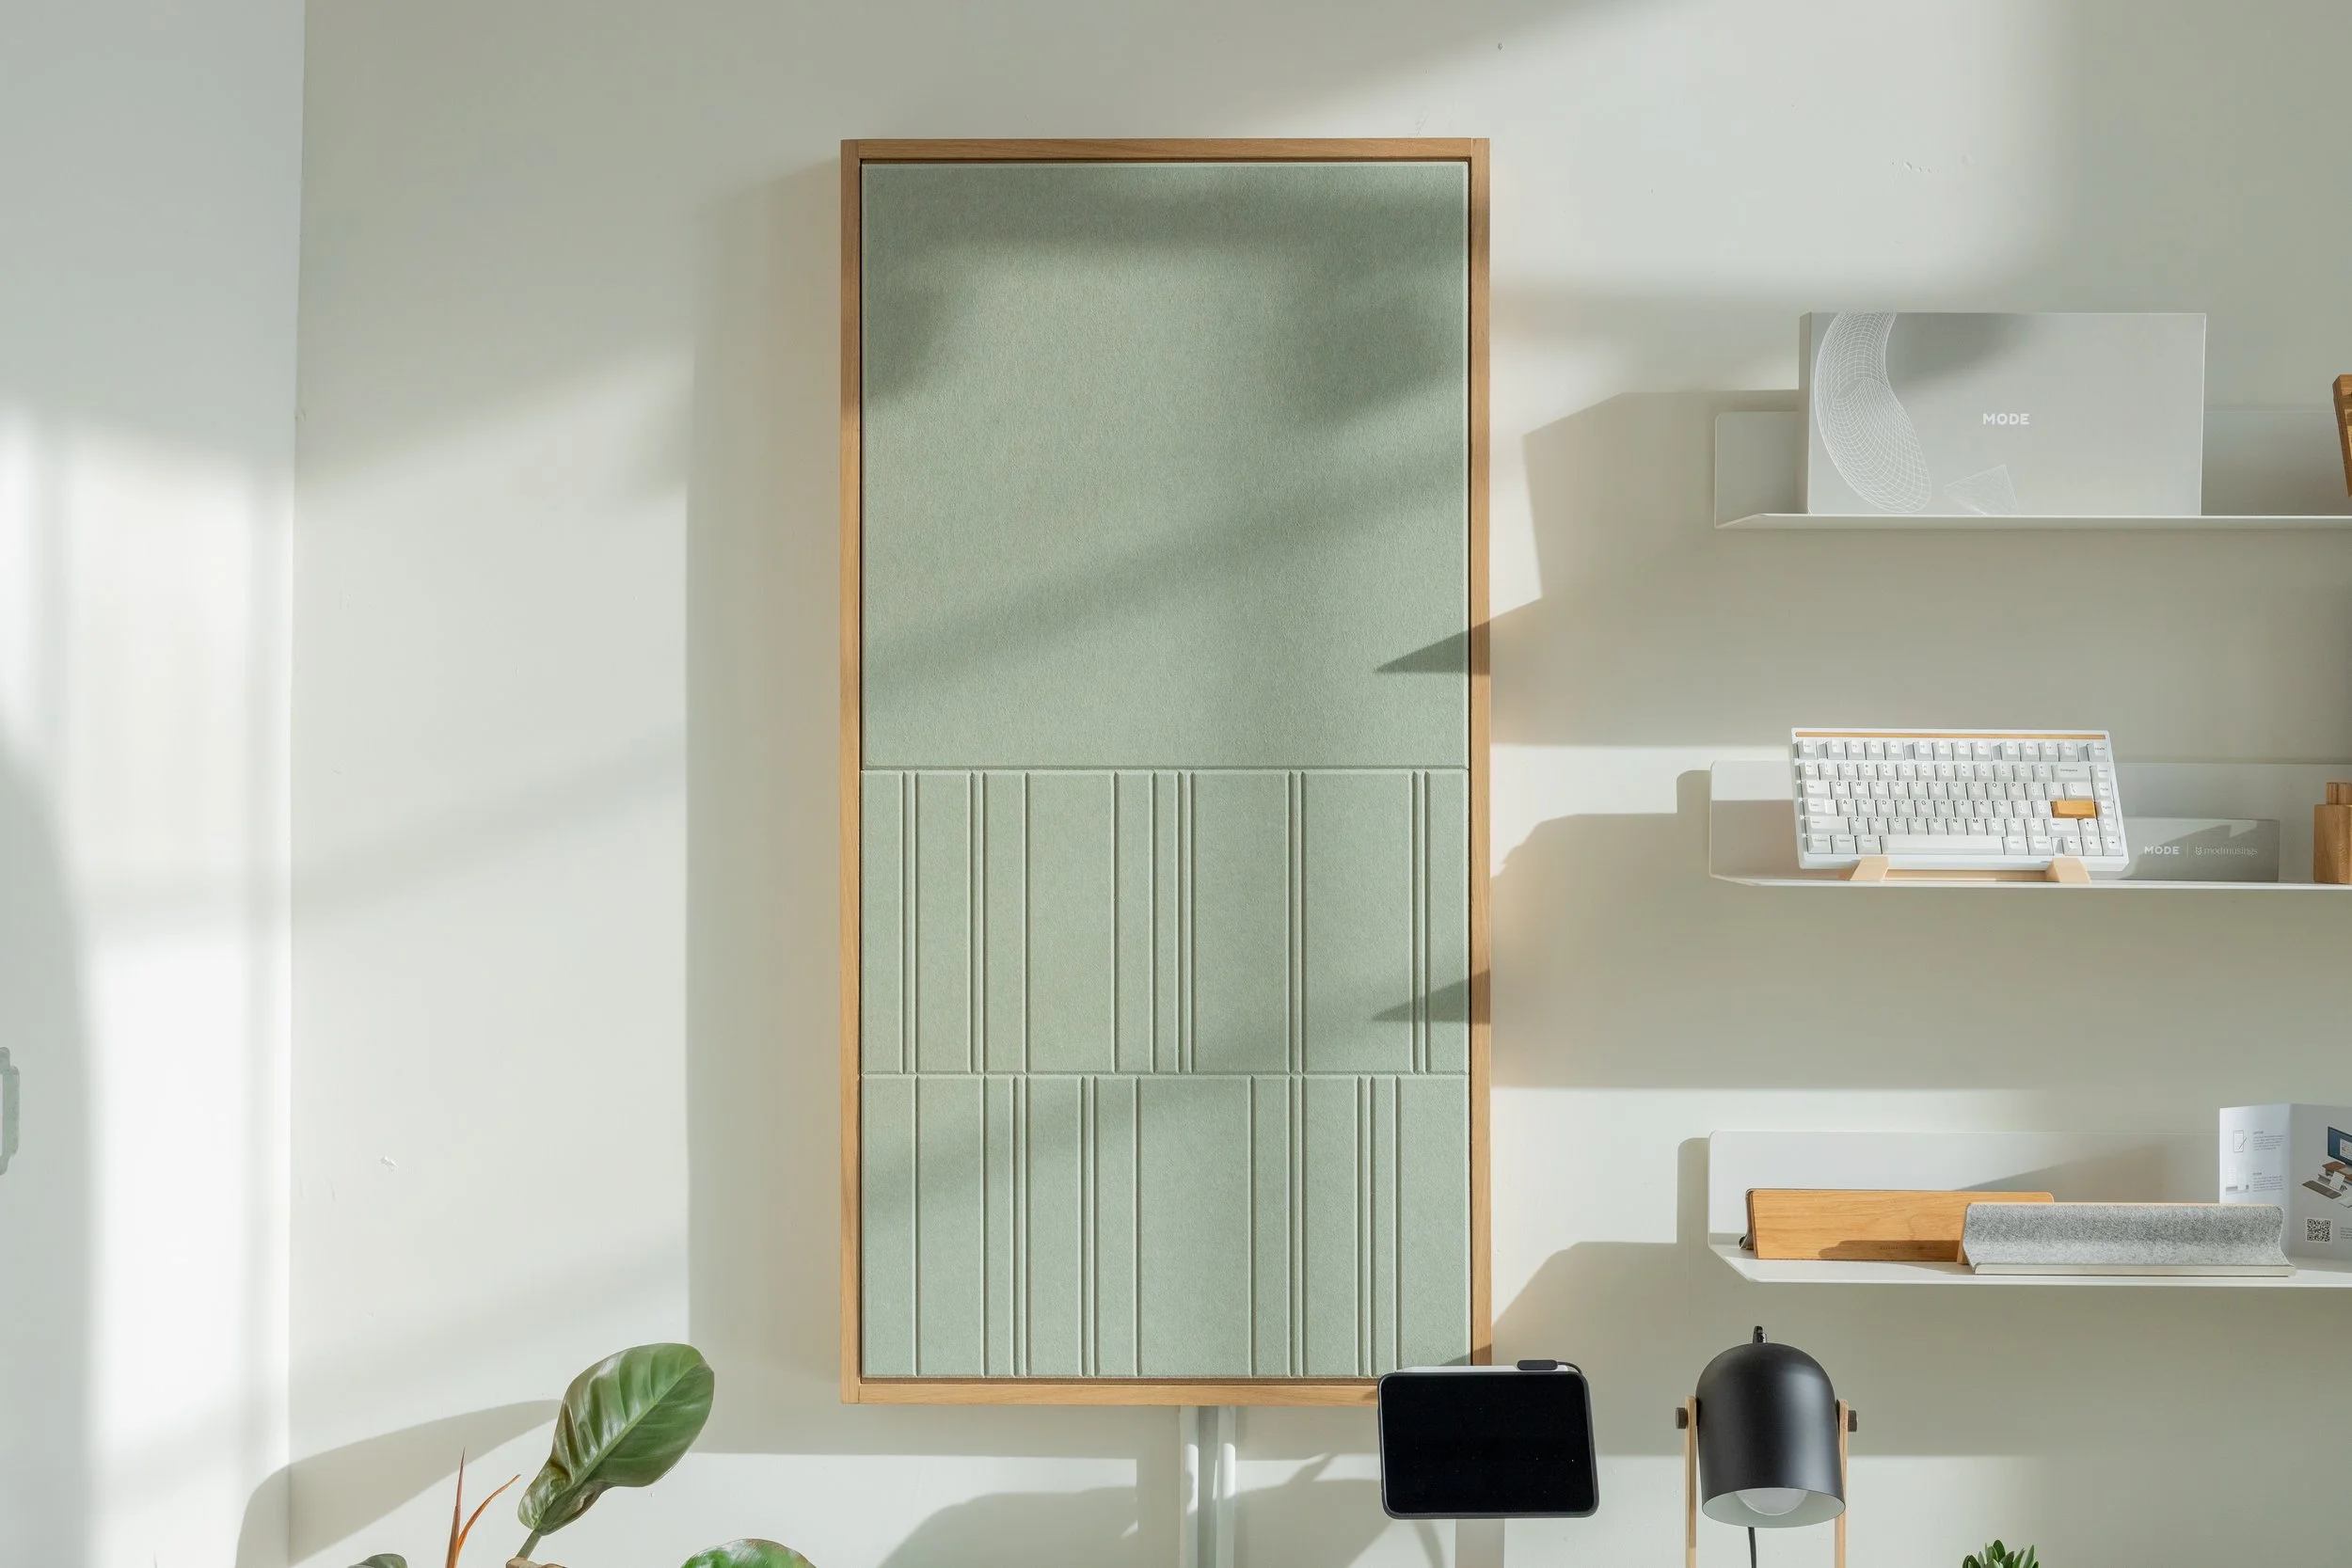
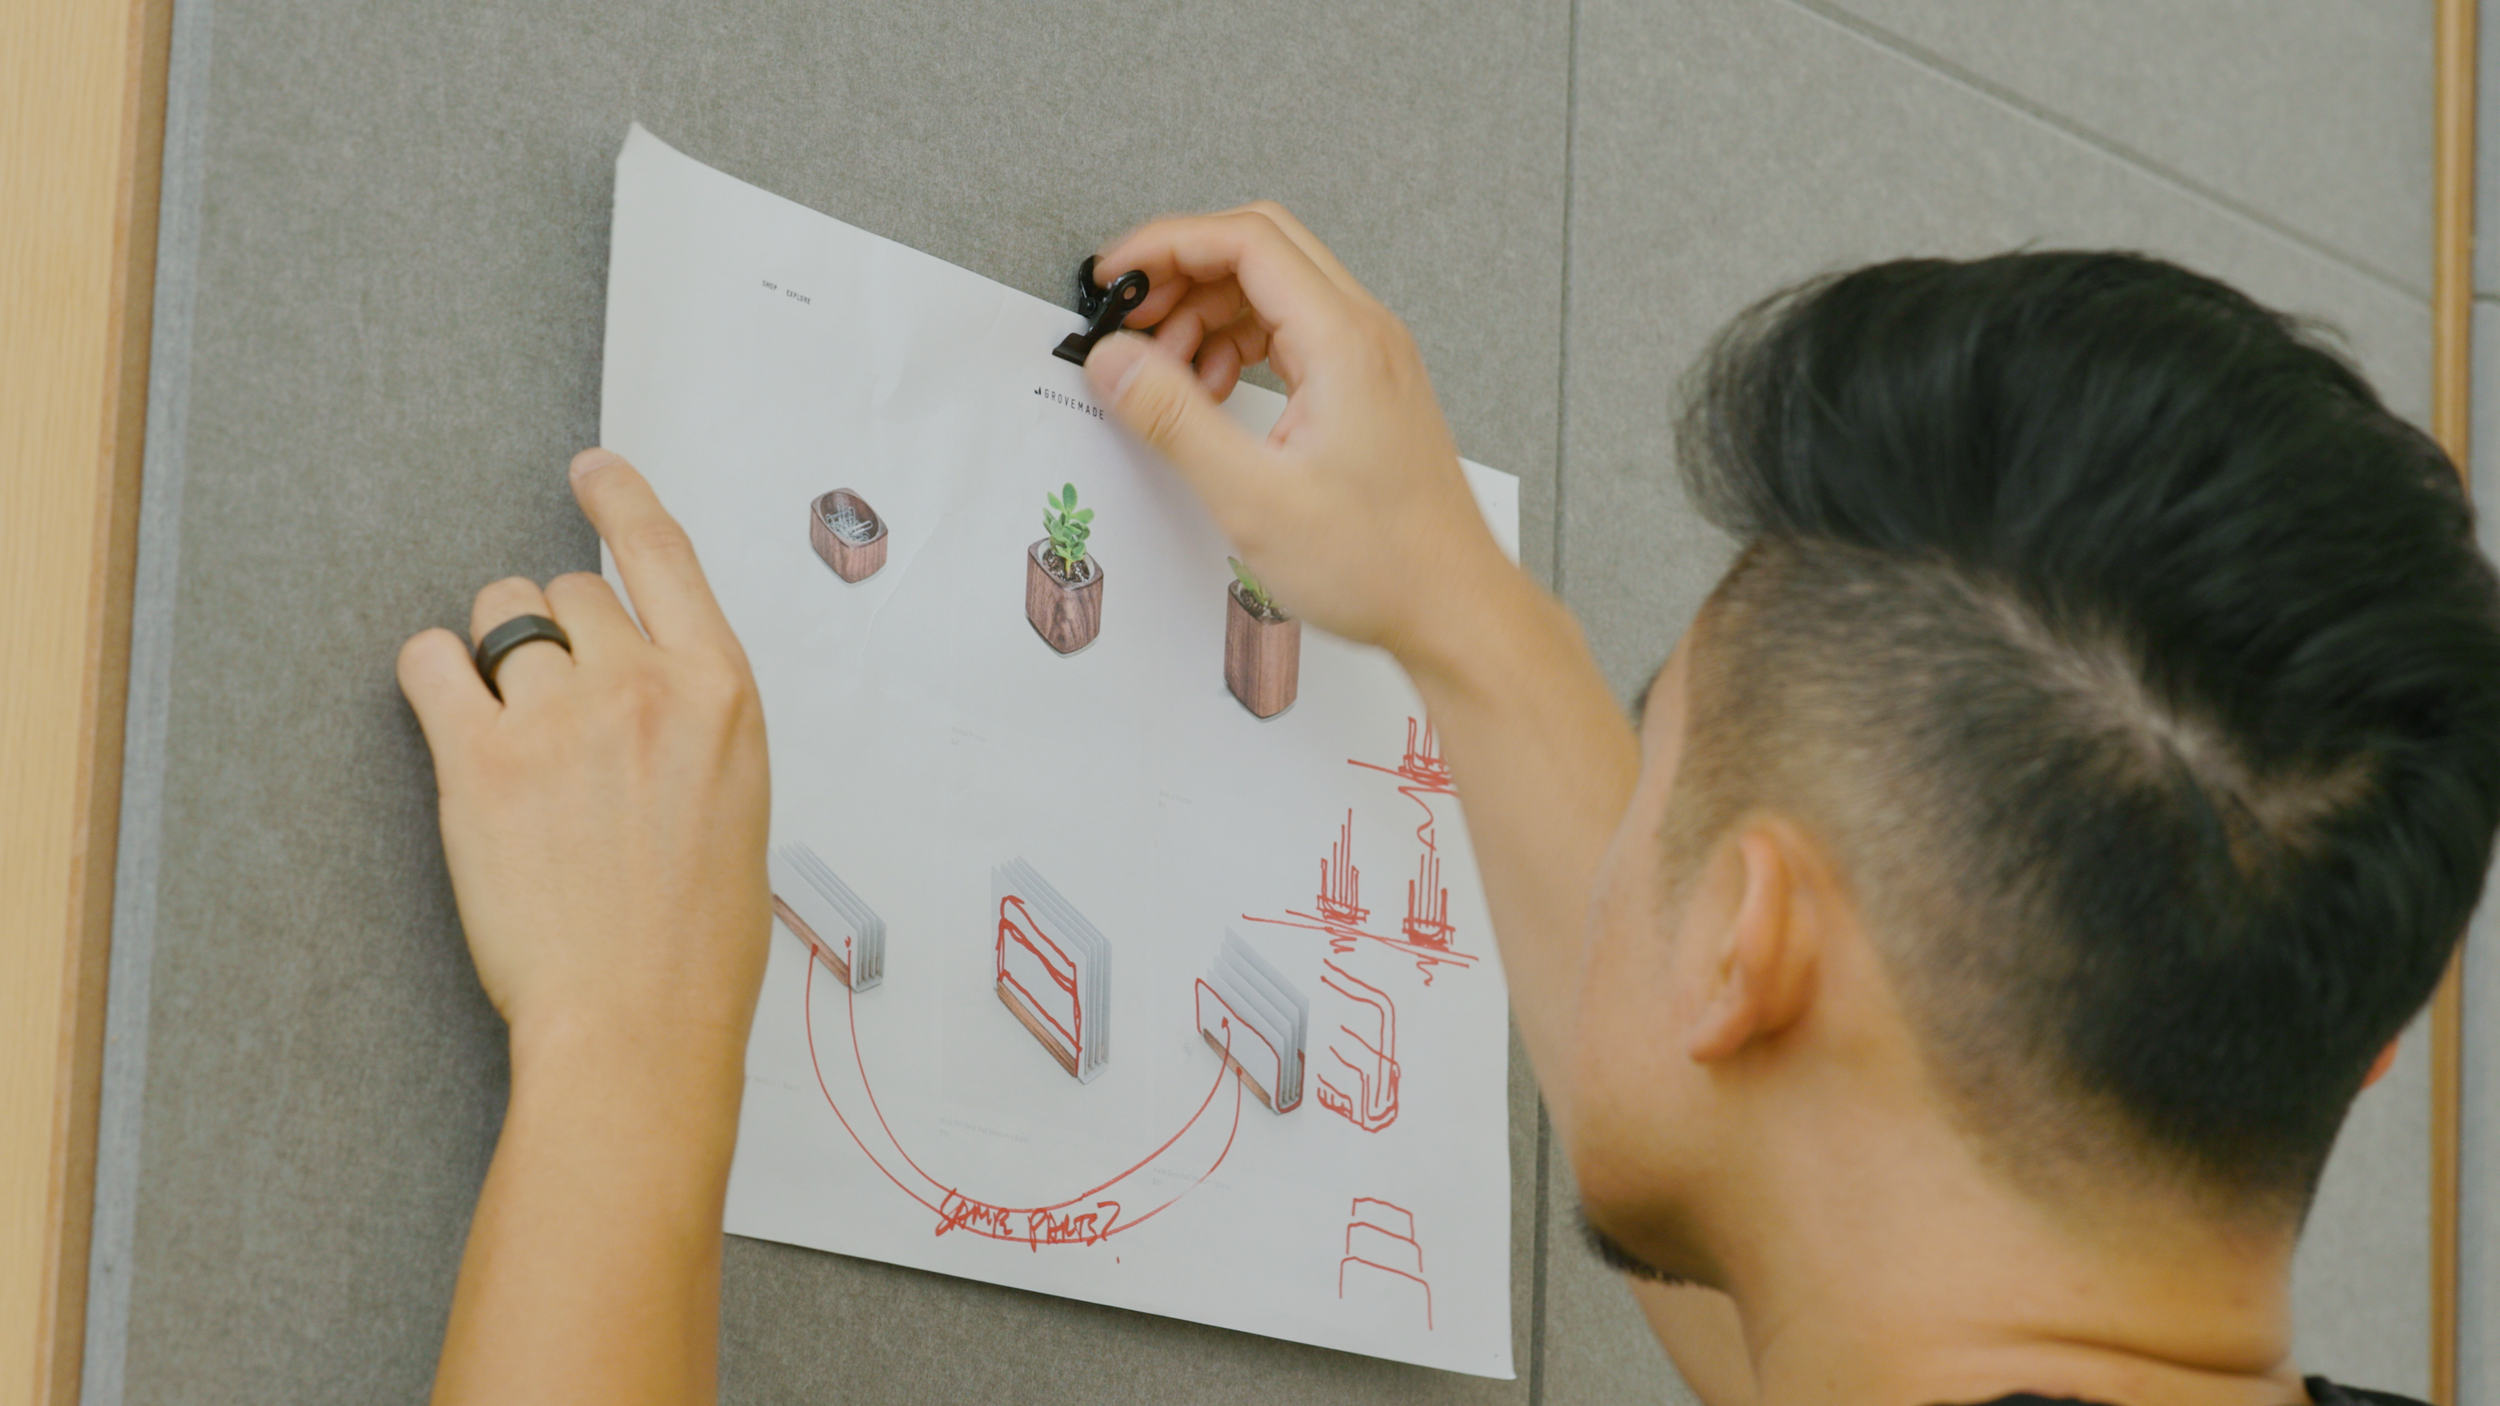
Immediately to the left of the entrance is a combination display and storage area. As you know, I’ve recently gotten into product design and wanted to create a place for the things I make. Most of the objects on here I’ve had a hand in designing, while the others, like this book and keycaps, are placeholders until I can replace them with my own creations.

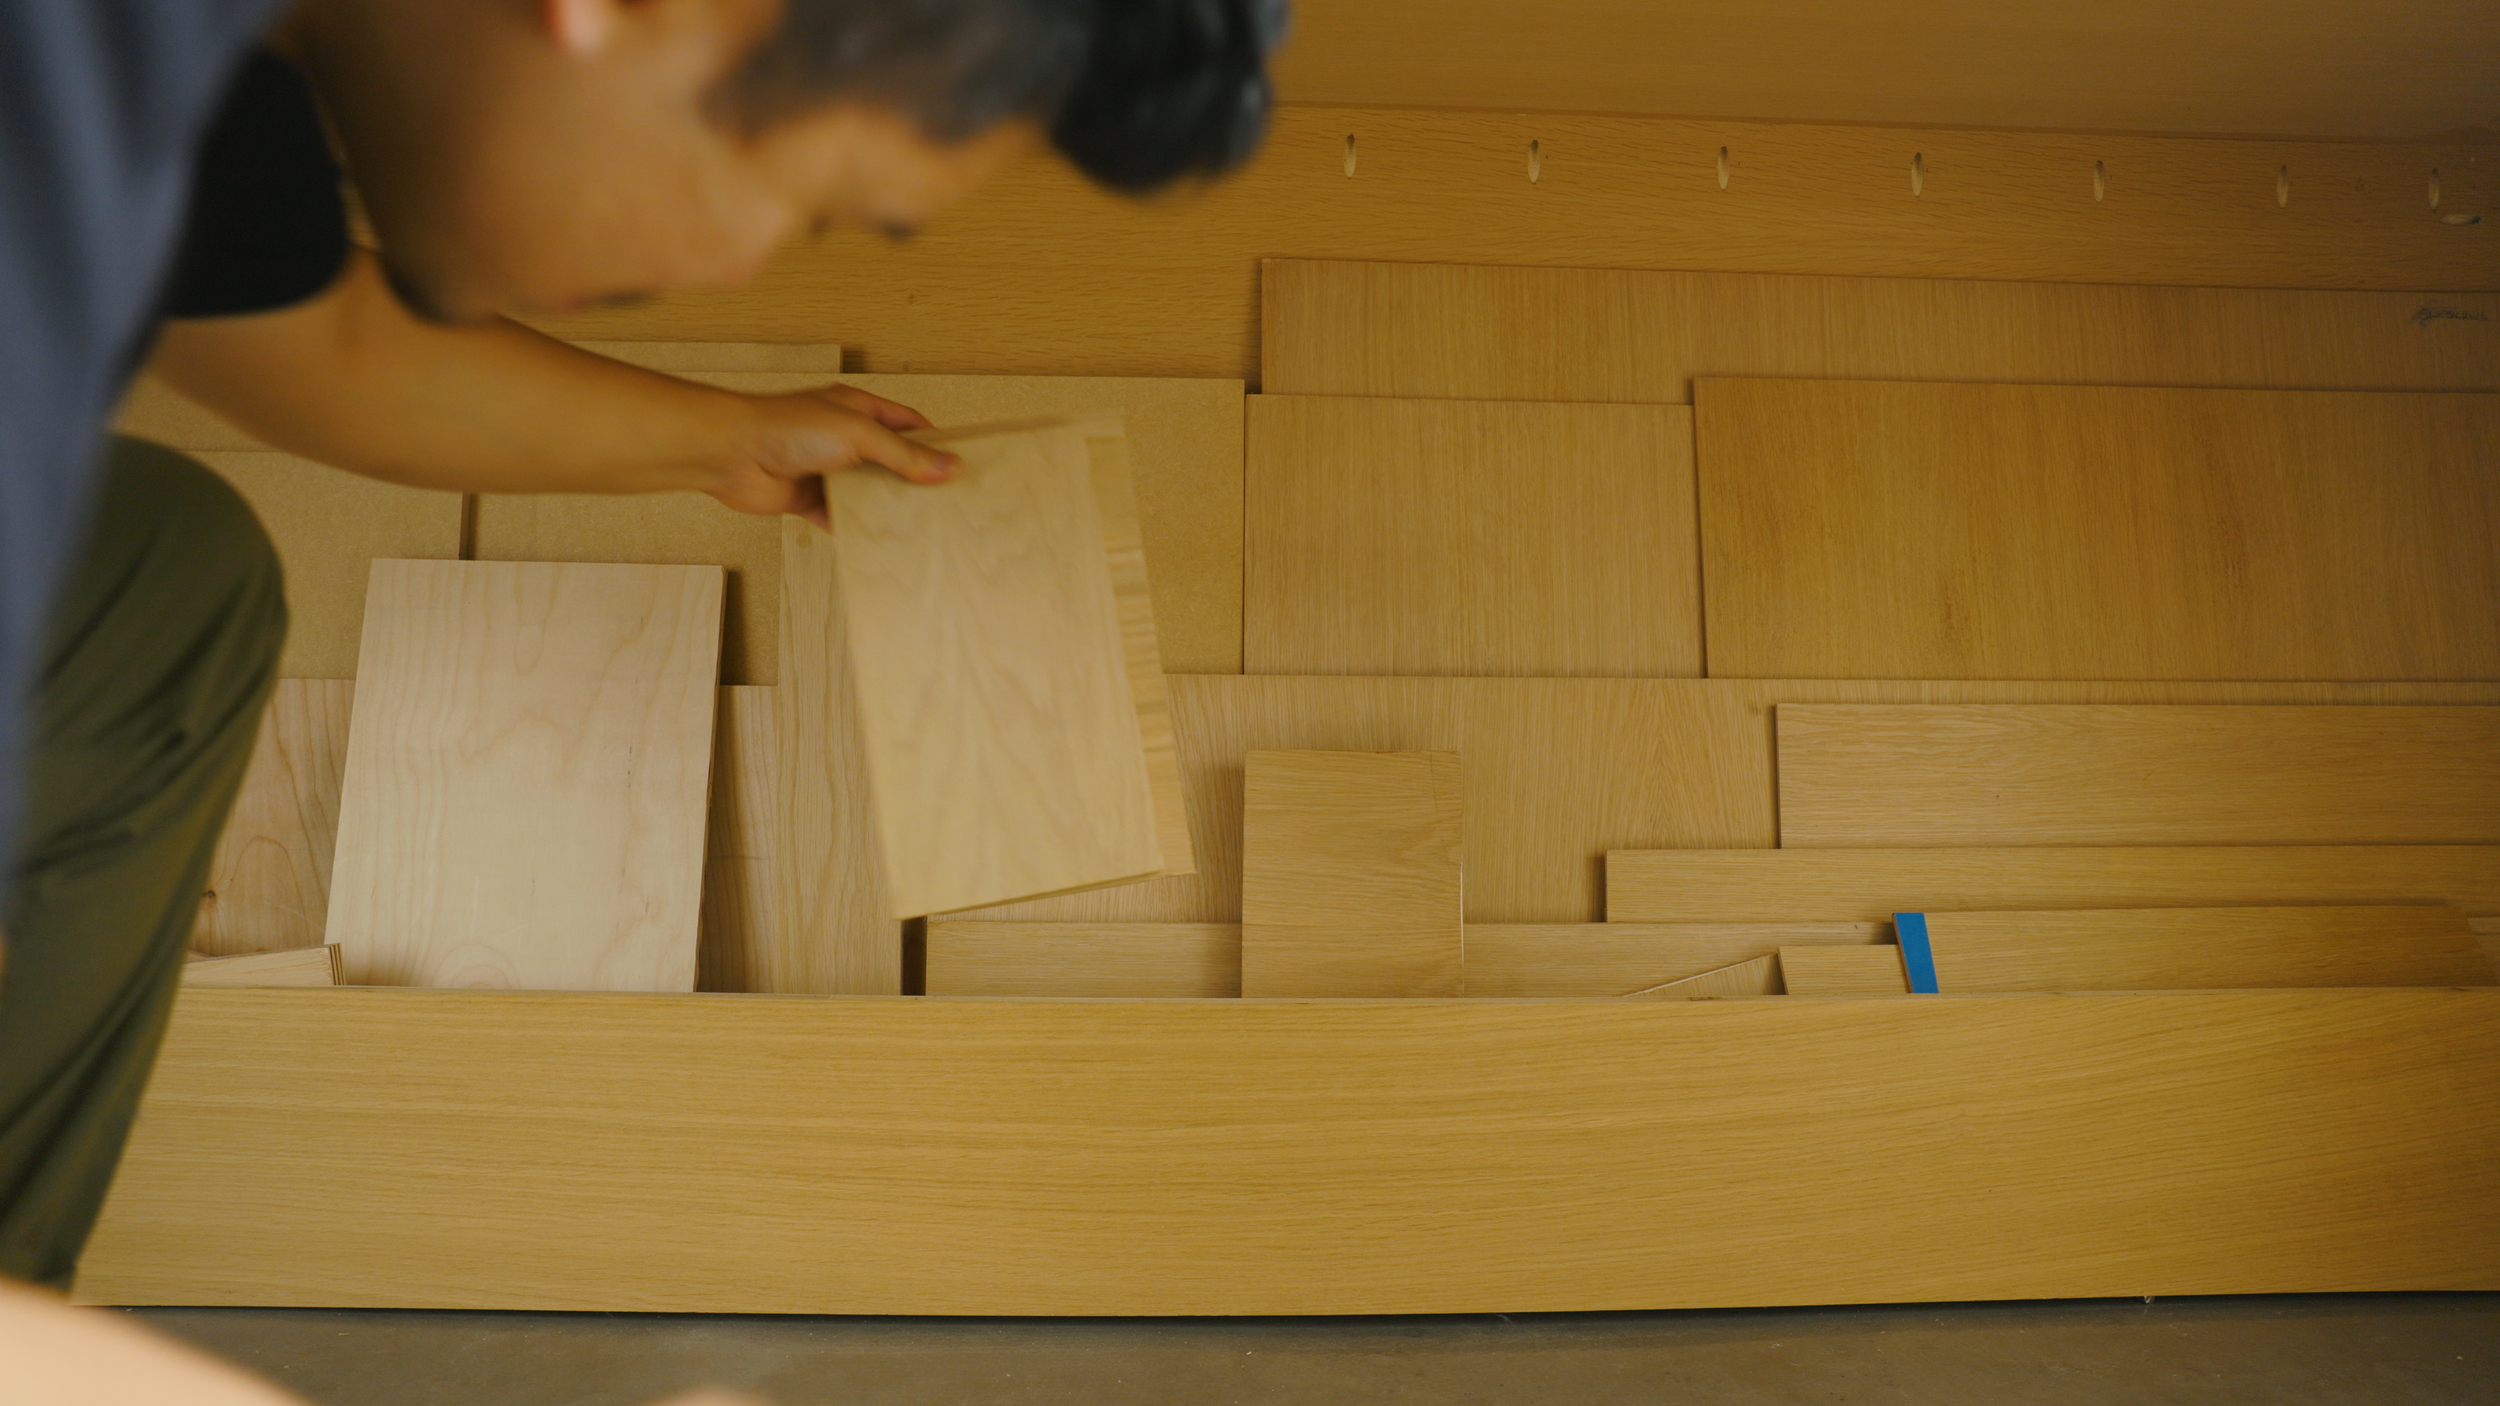
Next to that is the custom frame I built to hide the electrical panel, which easily comes off when I need to access it. I made this out of leftover scraps of white oak plywood, and a 2-foot by 4-foot hardboard– joined together using pocket hole screws. I covered the face with these sage green tiles by FeltRight. They give the frame a modern look and provide a little acoustic treatment for the space.
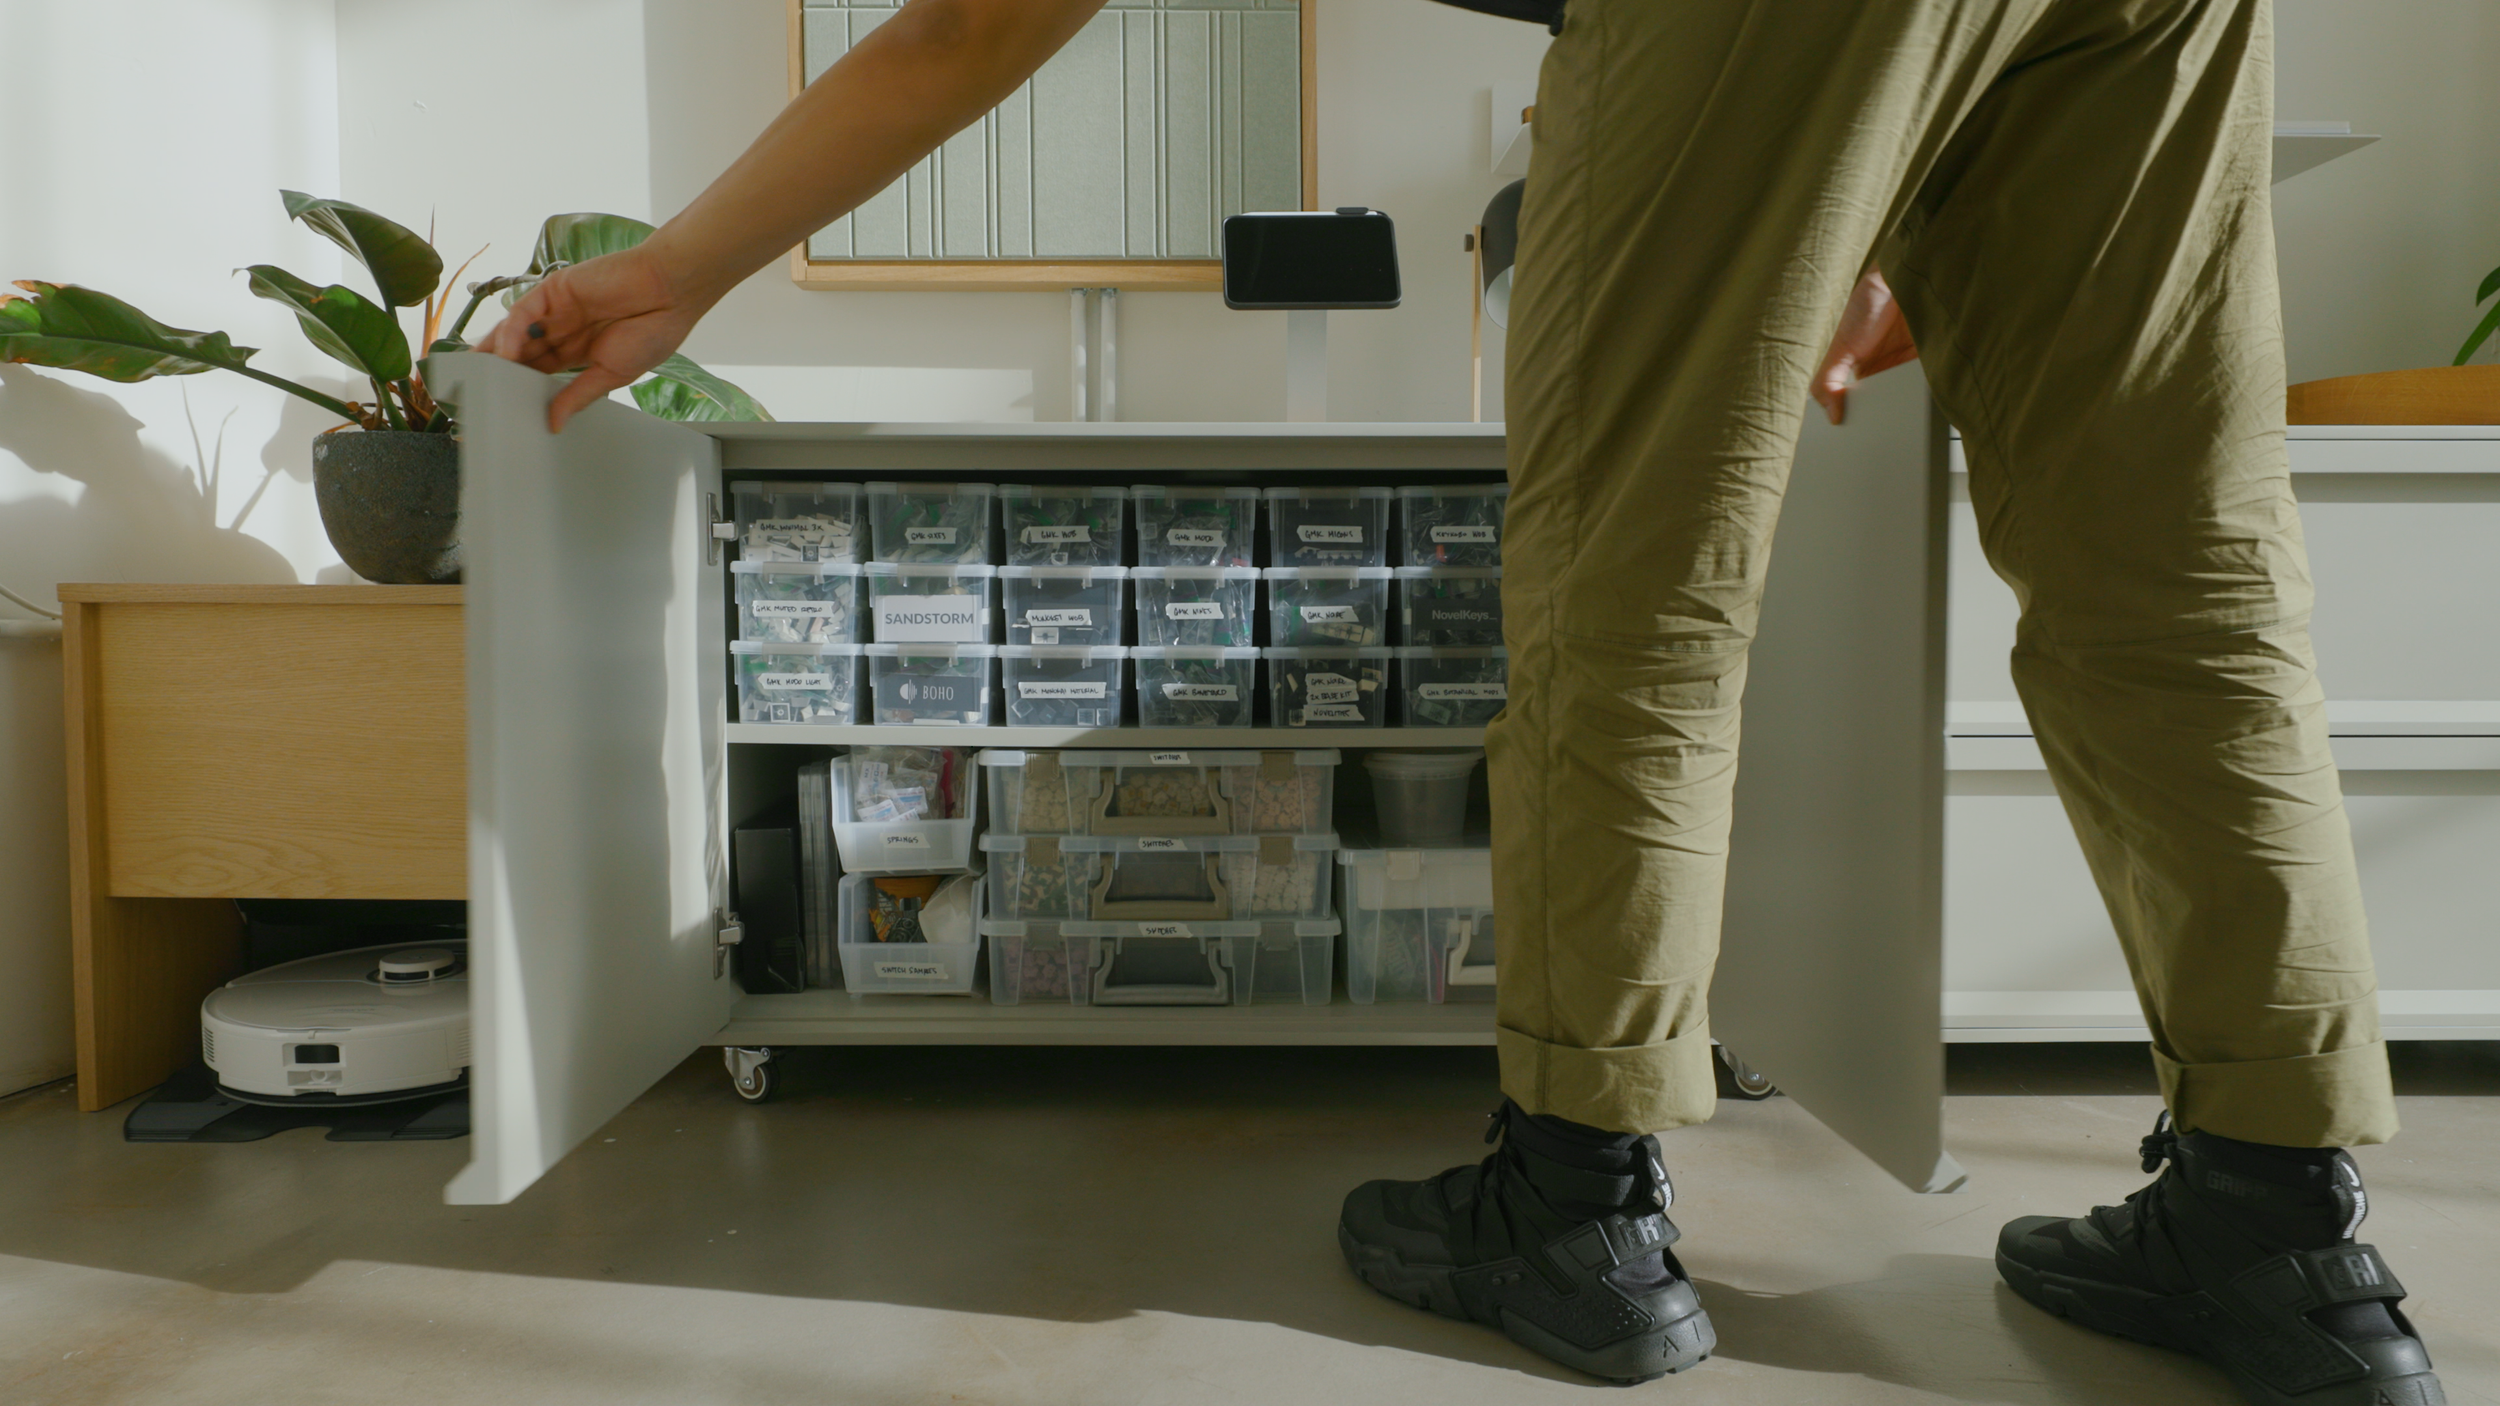
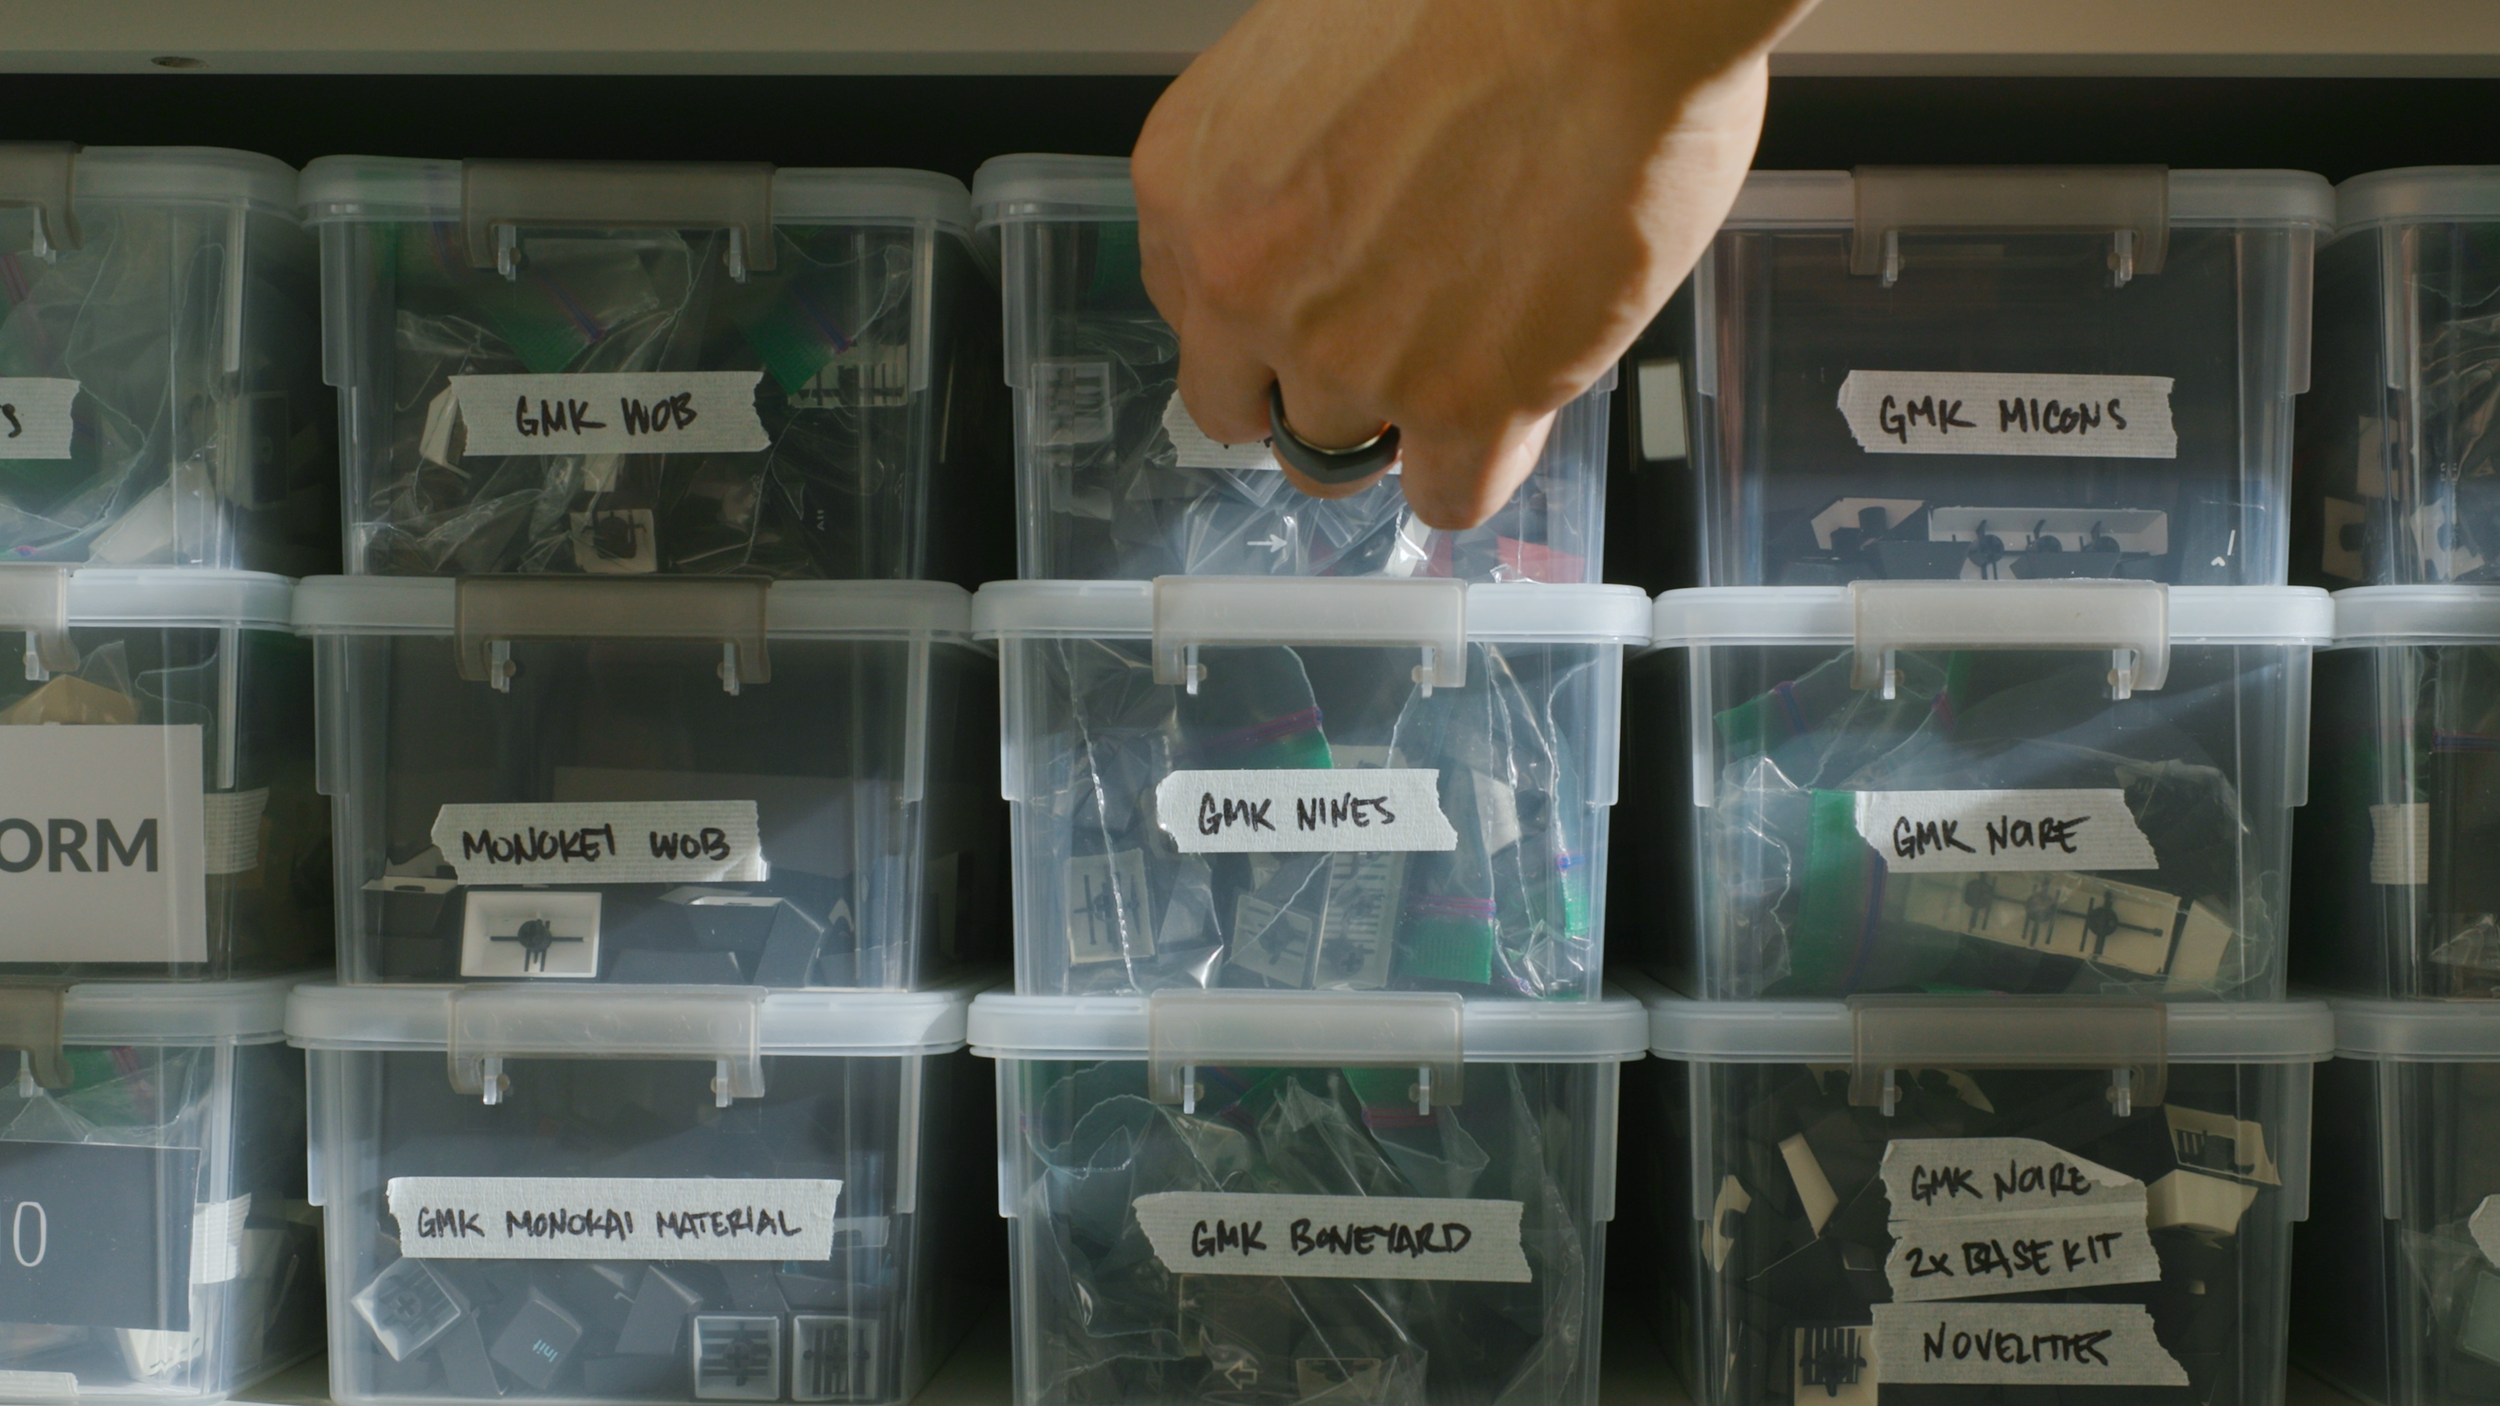
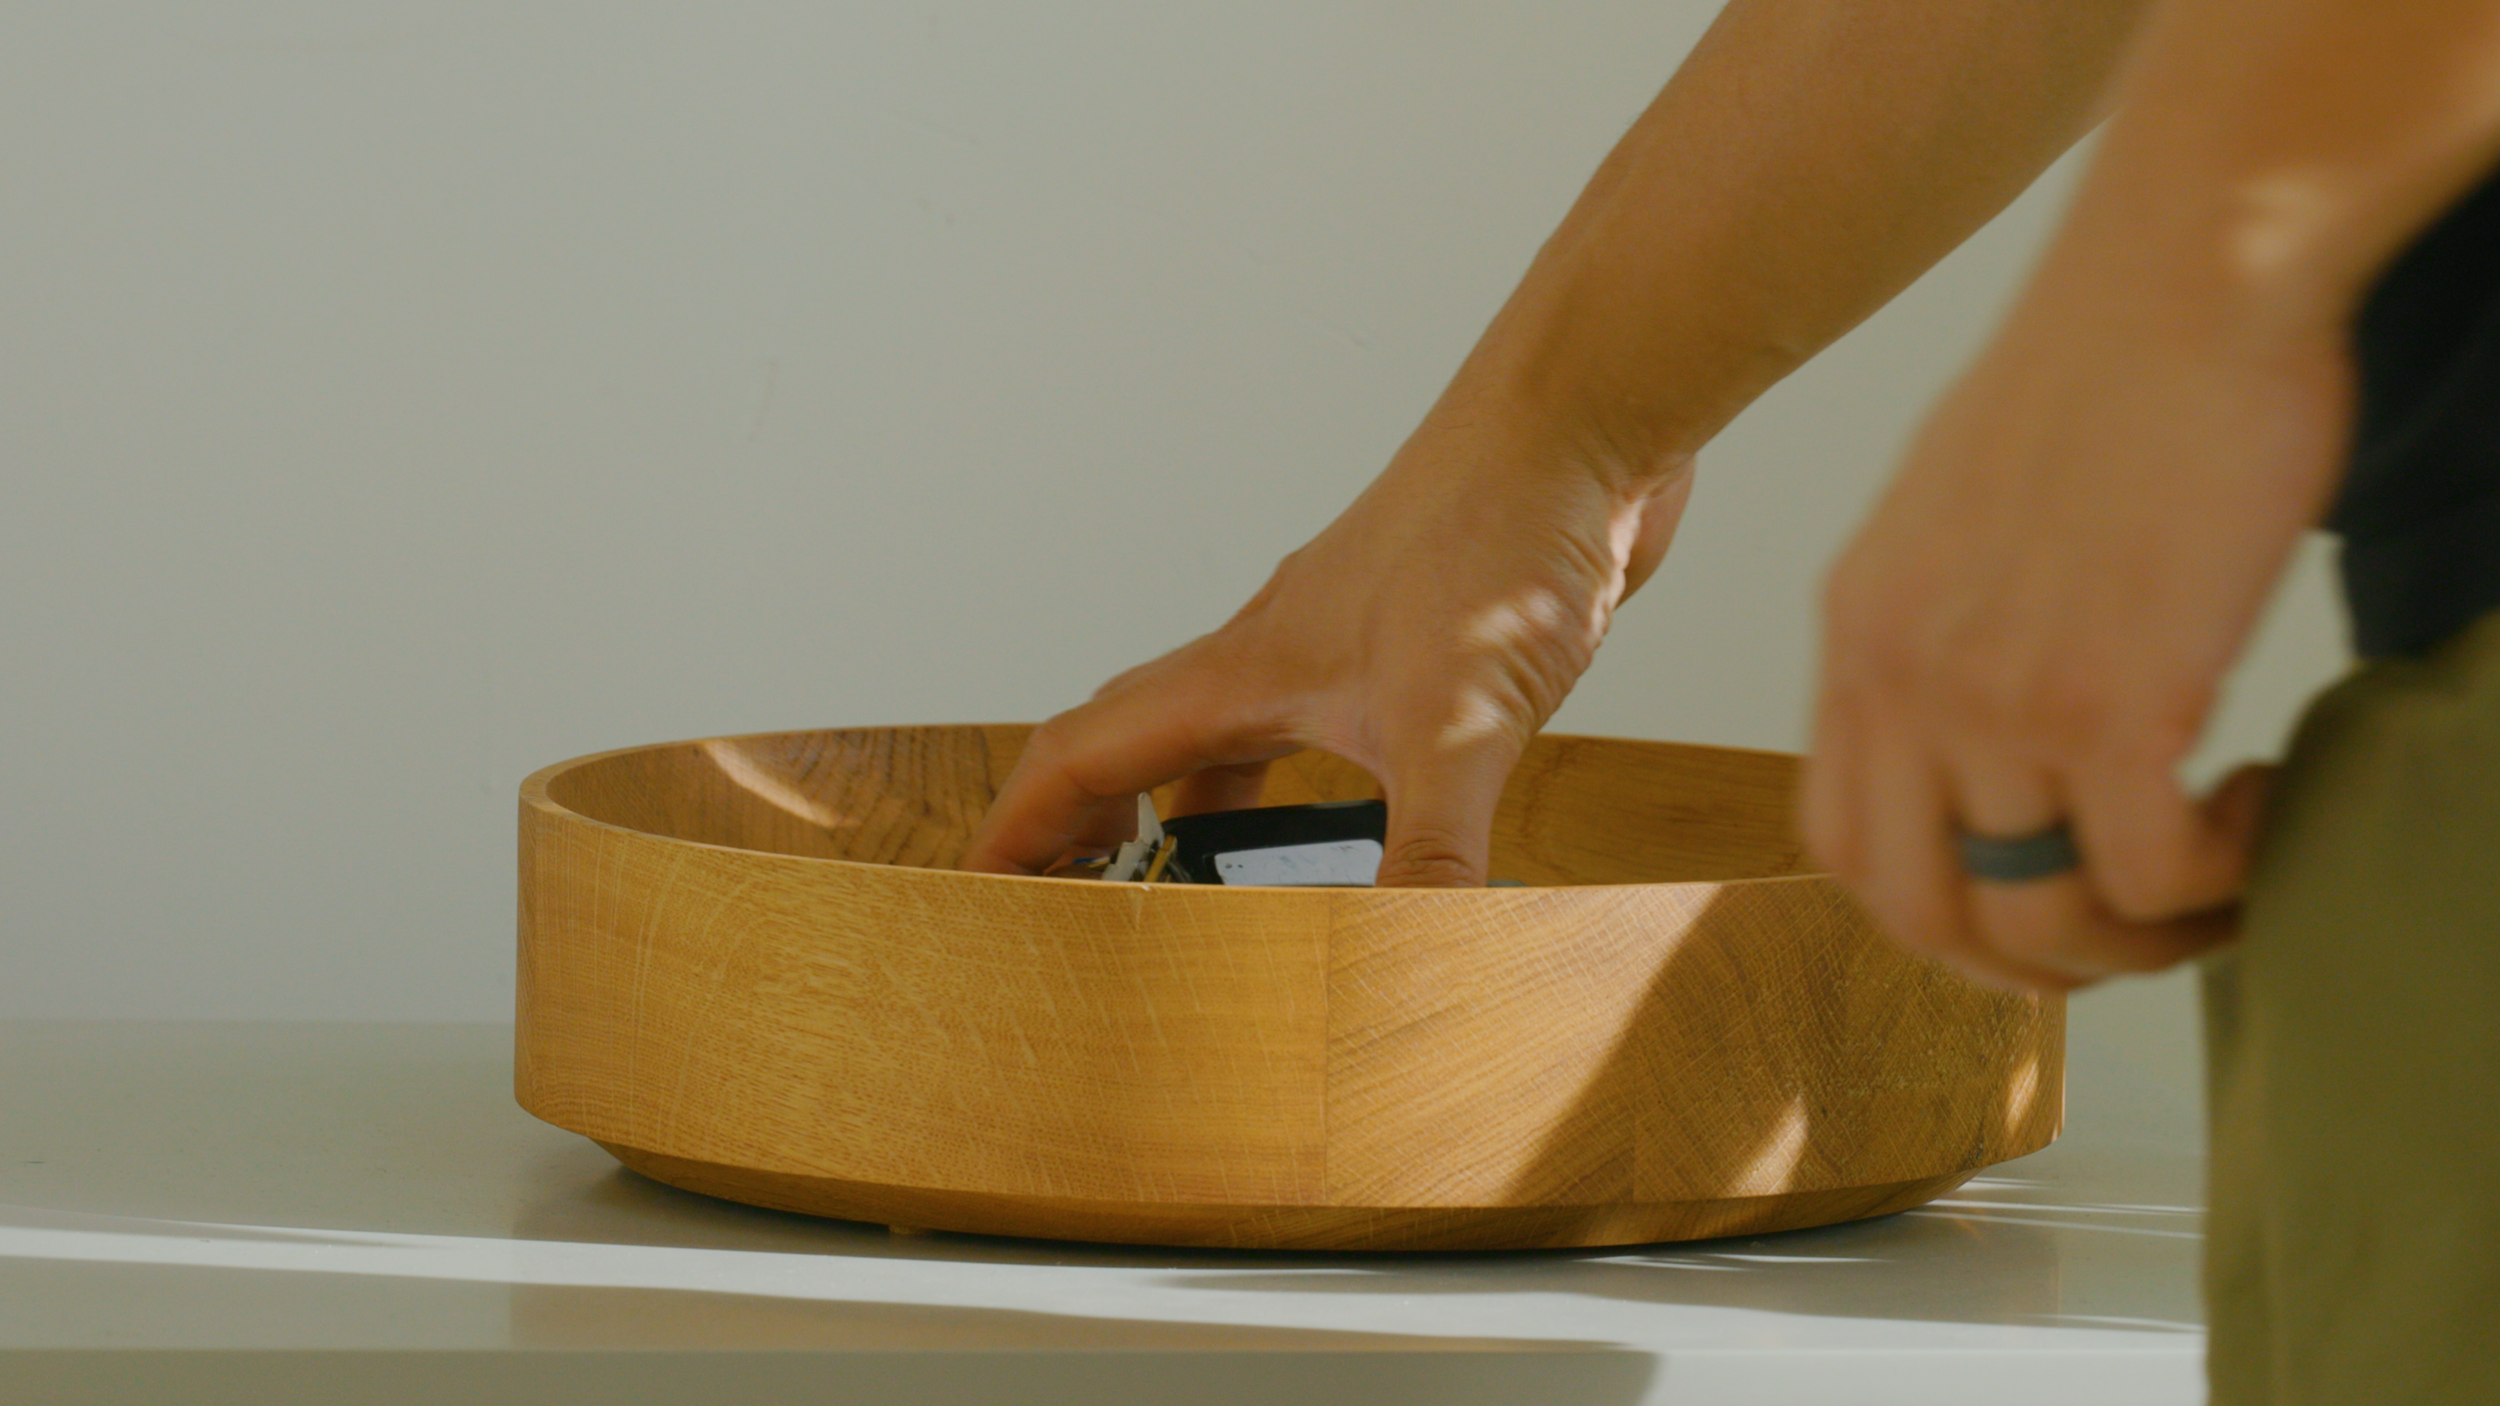
Below that is a drawer console unit by Bludot. Here I keep the parts and pieces for building custom mechanical keyboards, organized and labeled in stackable bins, so it’s easy to find what I need. On the console is a white oak bowl that serves as a catch-all for what’s in my pockets, when I walk in and out of the office.
To the left of this is where my RoboRock vacuum lives, which I use once a week to keep the place clean. While it’s a well-designed object, I don’t like the way it looks in this corner. So I created a small side table, to cover the unit, using leftover plywood from my other projects.

Entrance Display & Storage Links
Superchoice 2 Door / 2 Drawer Console (customized with M6 casters)
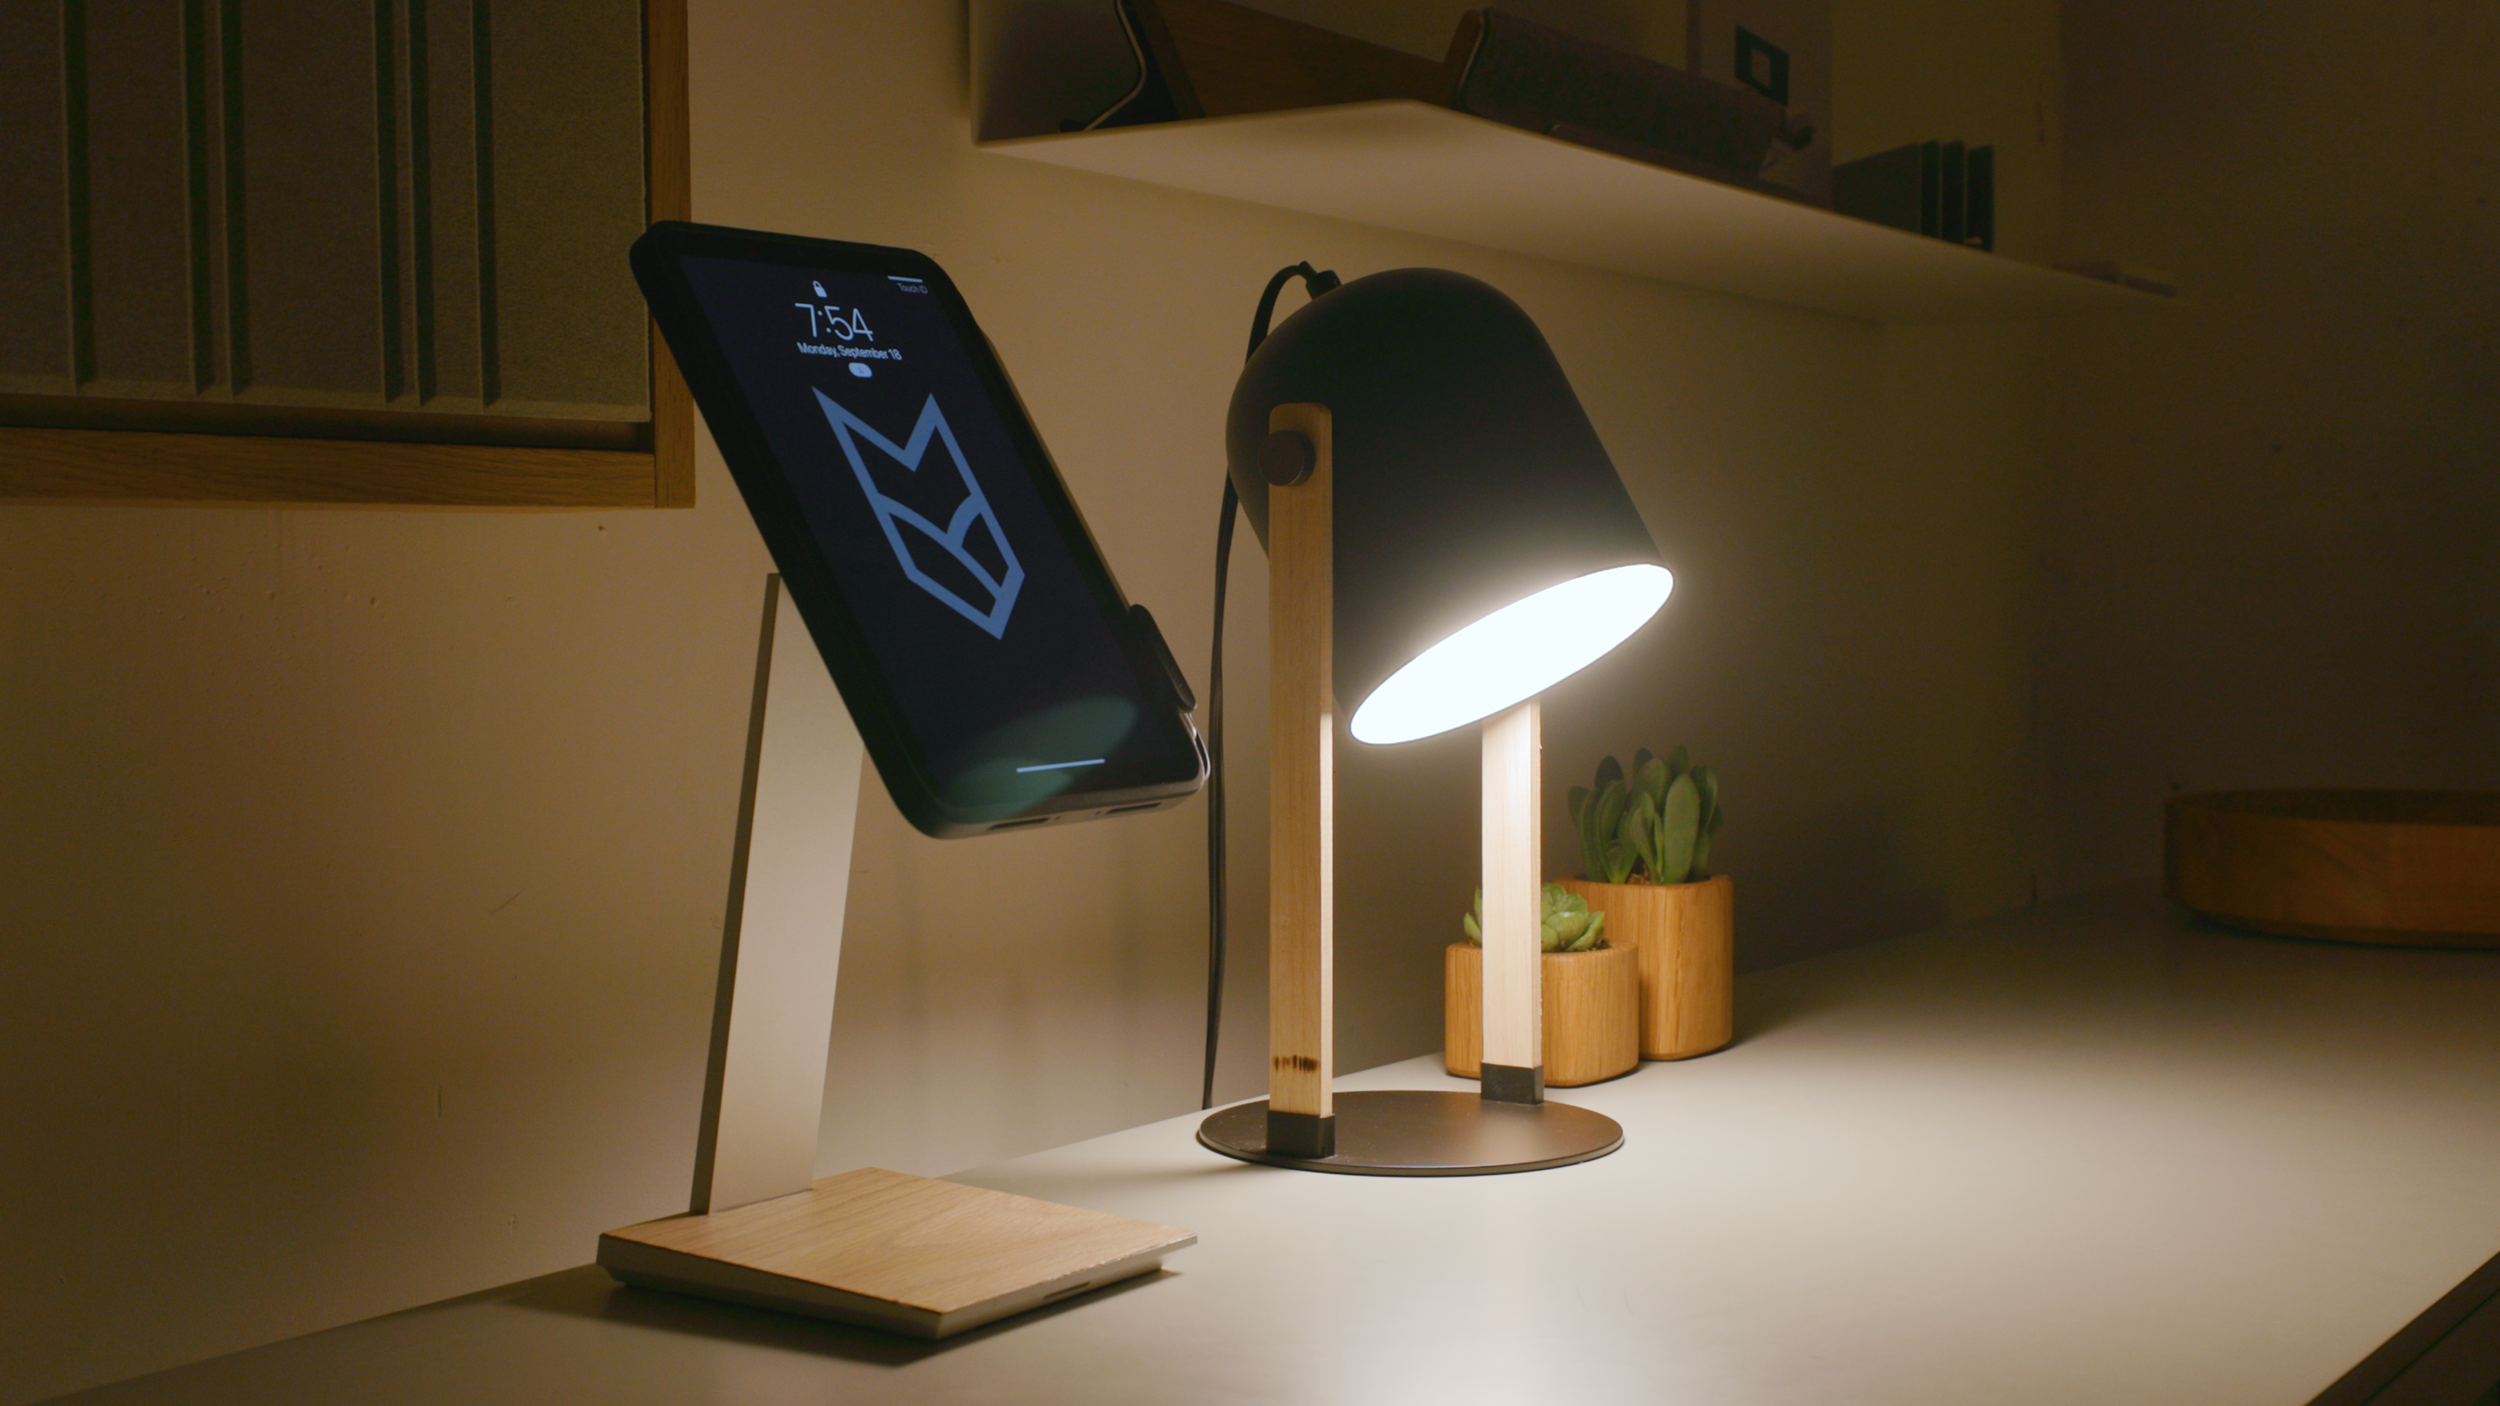
Pitaka Magnetic iPad Stand (customized with white oak veneer)
FeltRight tiles on custom frame. Save 15% off by using code: MODMUSINGS15
A “Hidden” Workshop
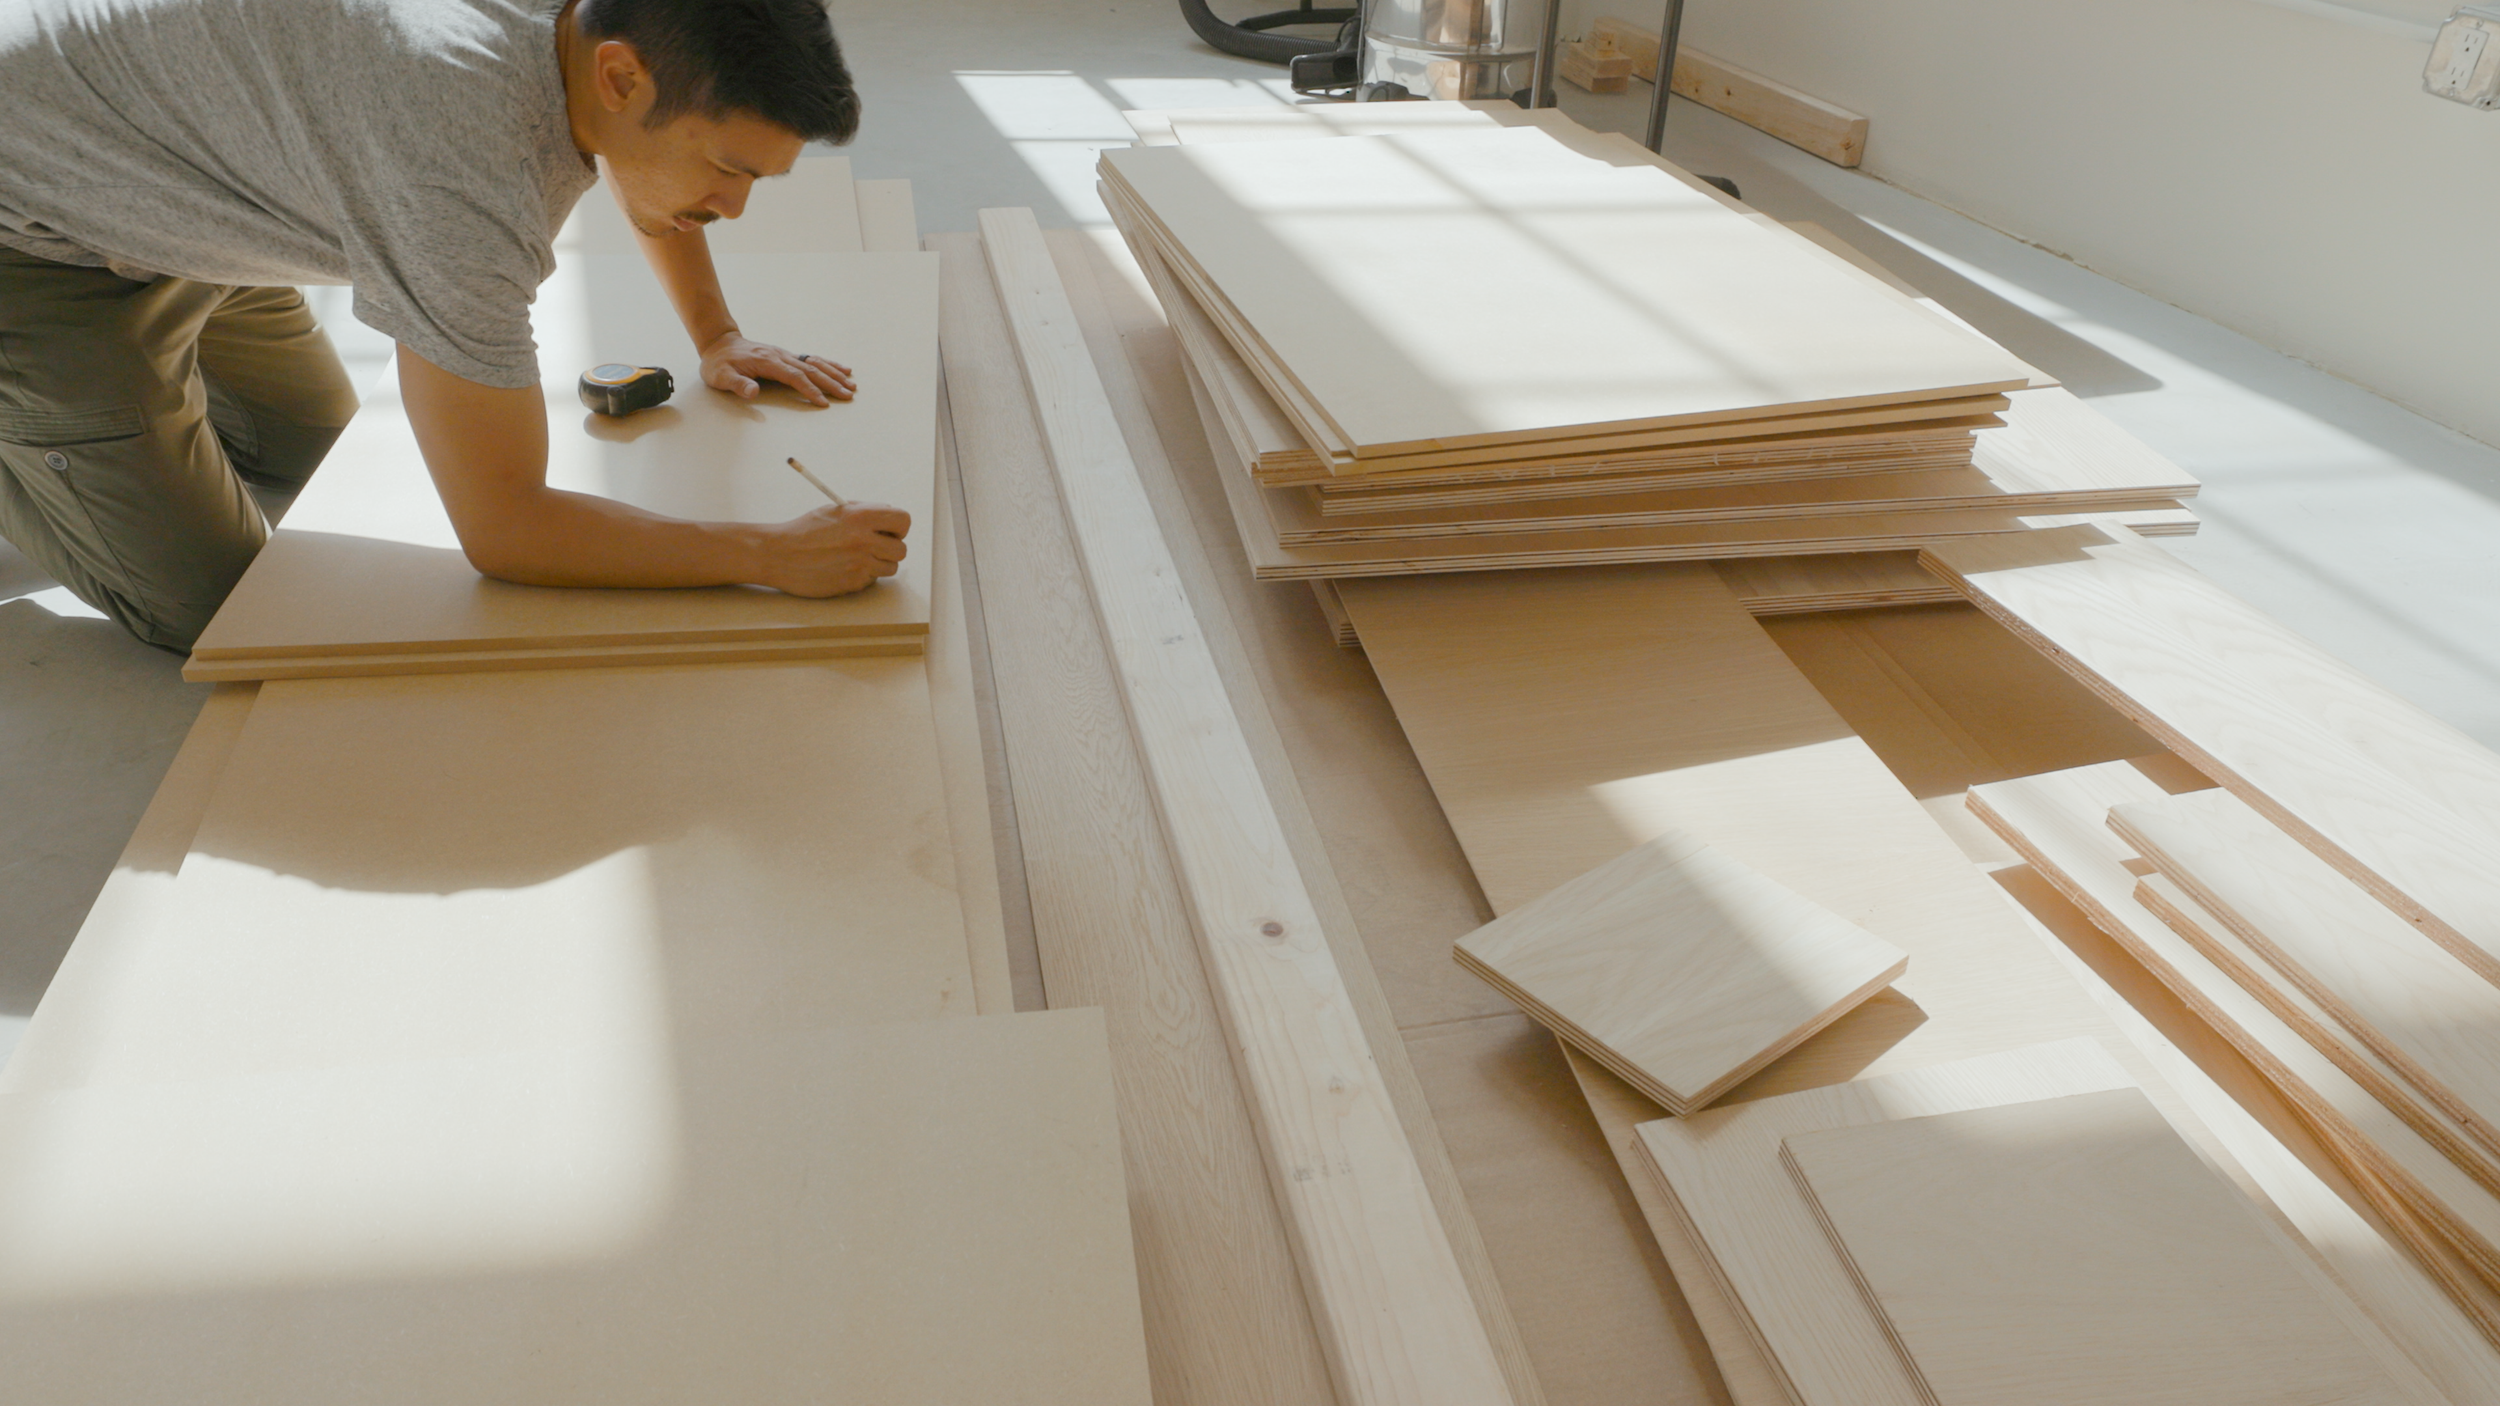
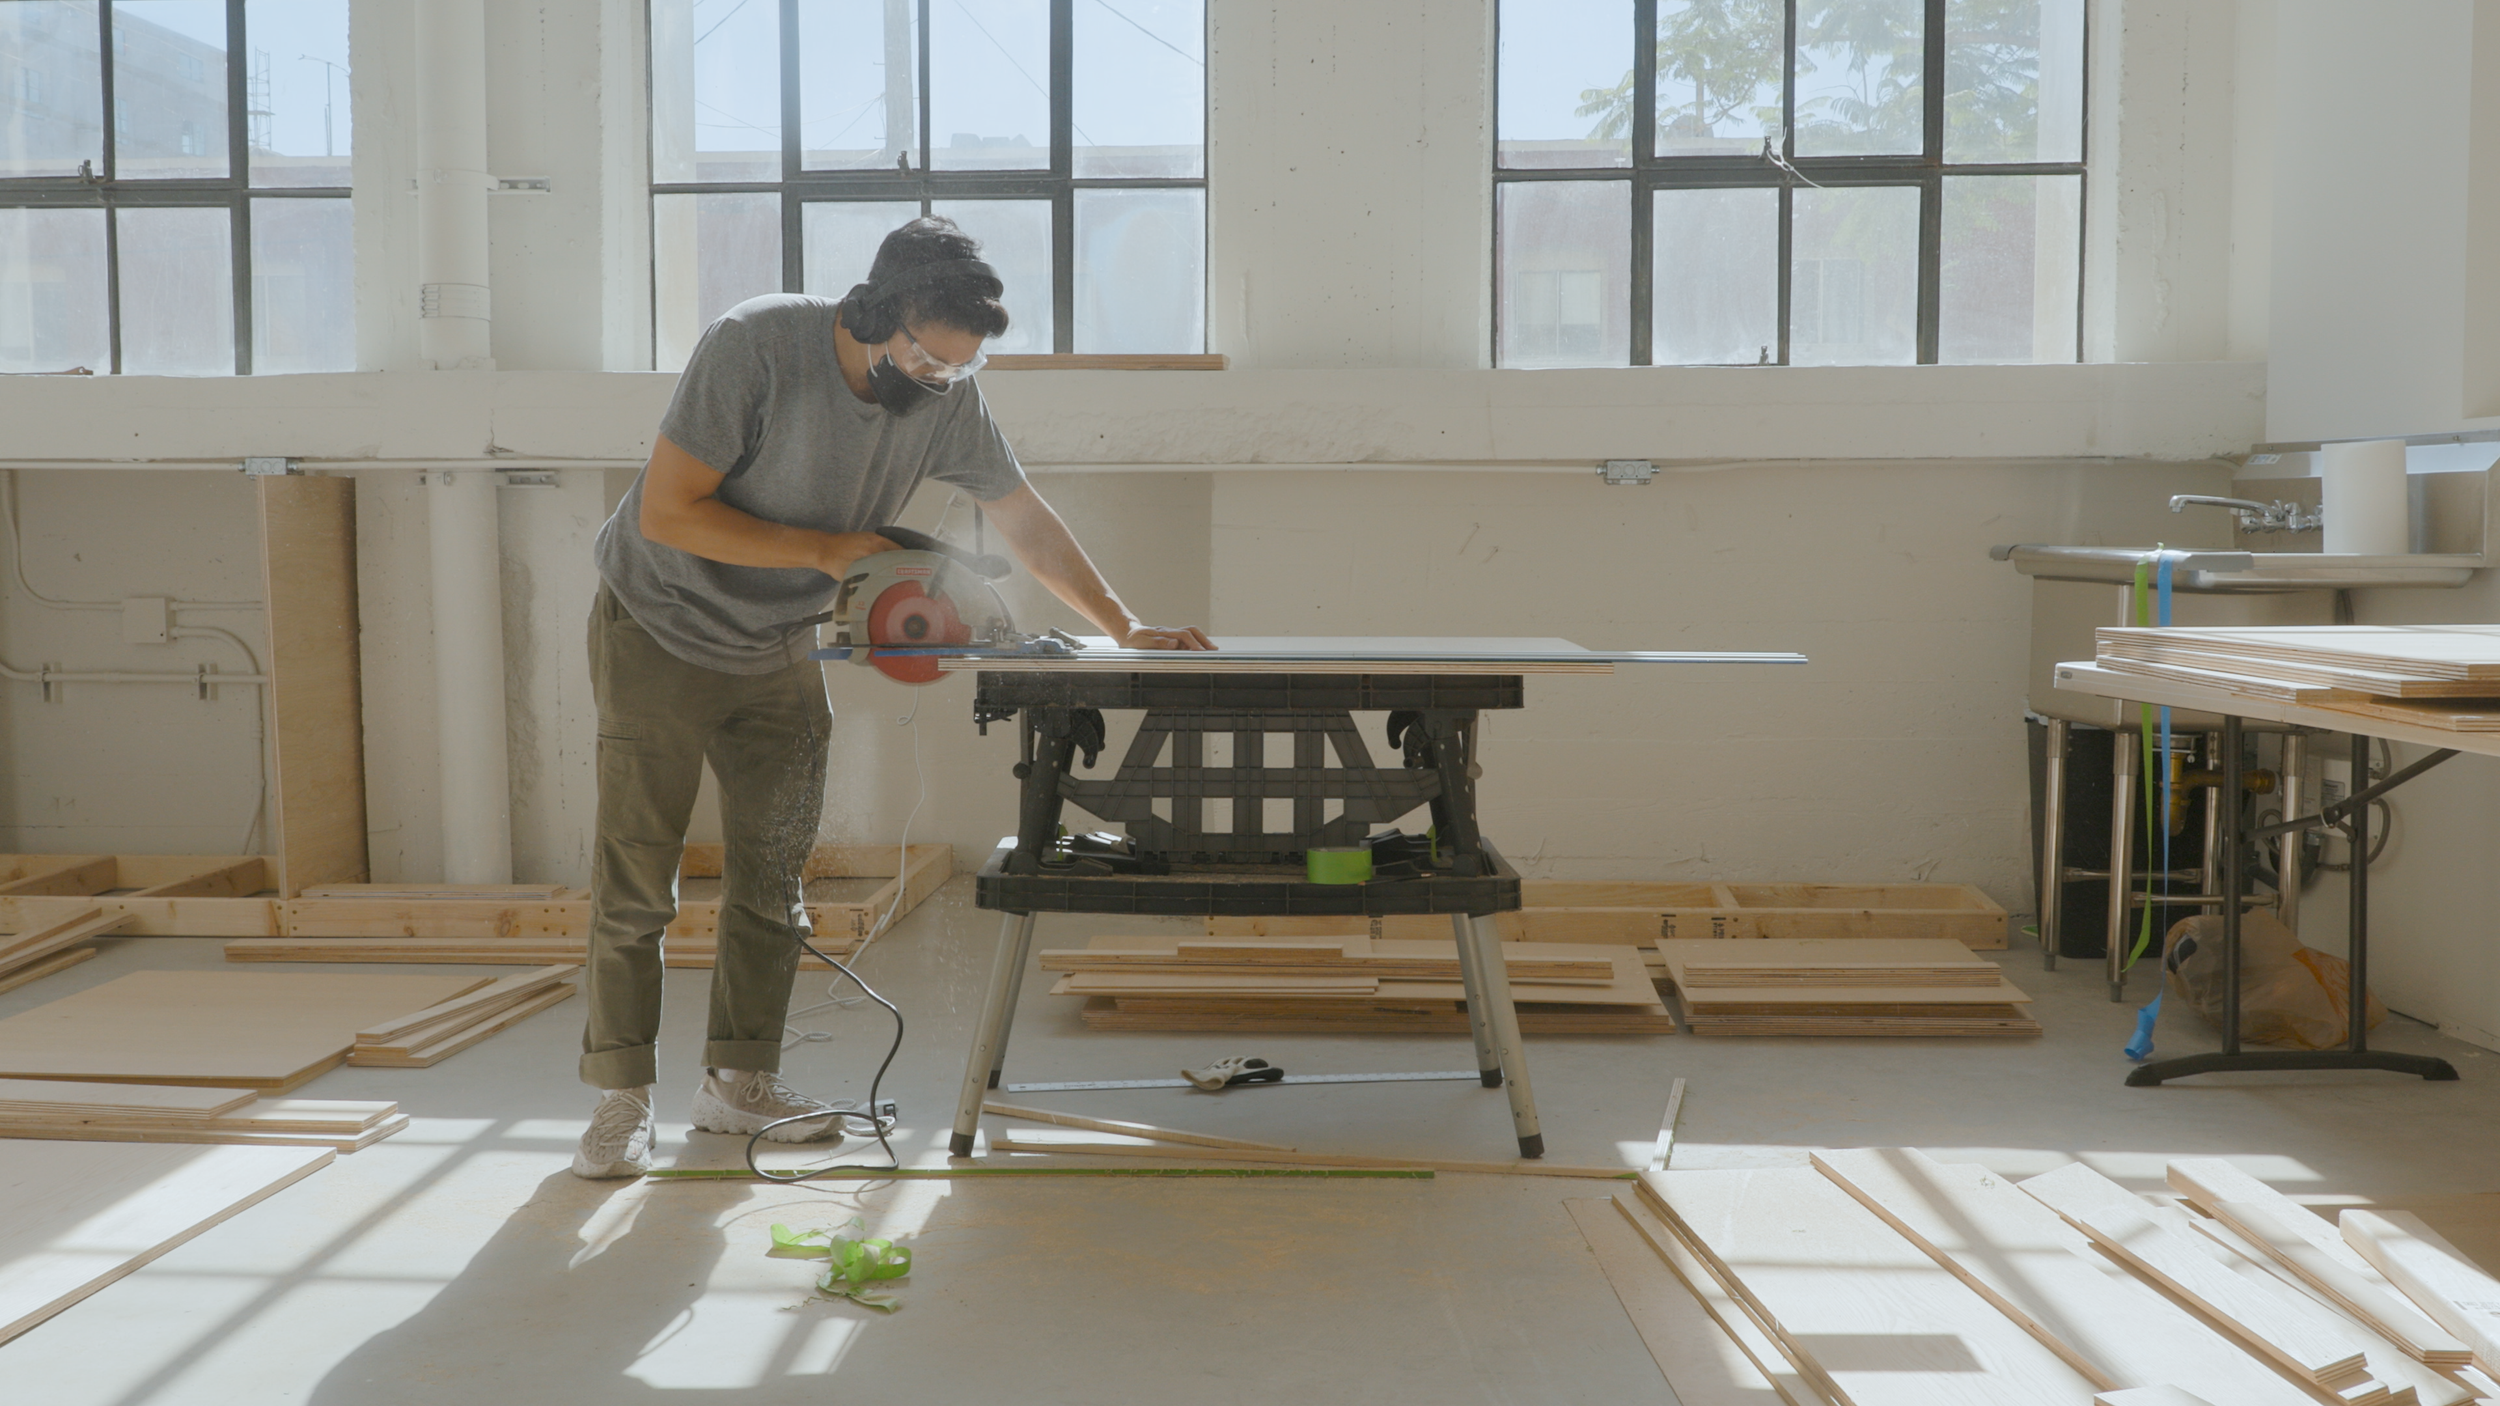
Across from this entrance display is my workshop. I specifically designed this area to be highly functional for building things, while maintaining a minimal aesthetic by finding clever ways to store all of my tools and materials.

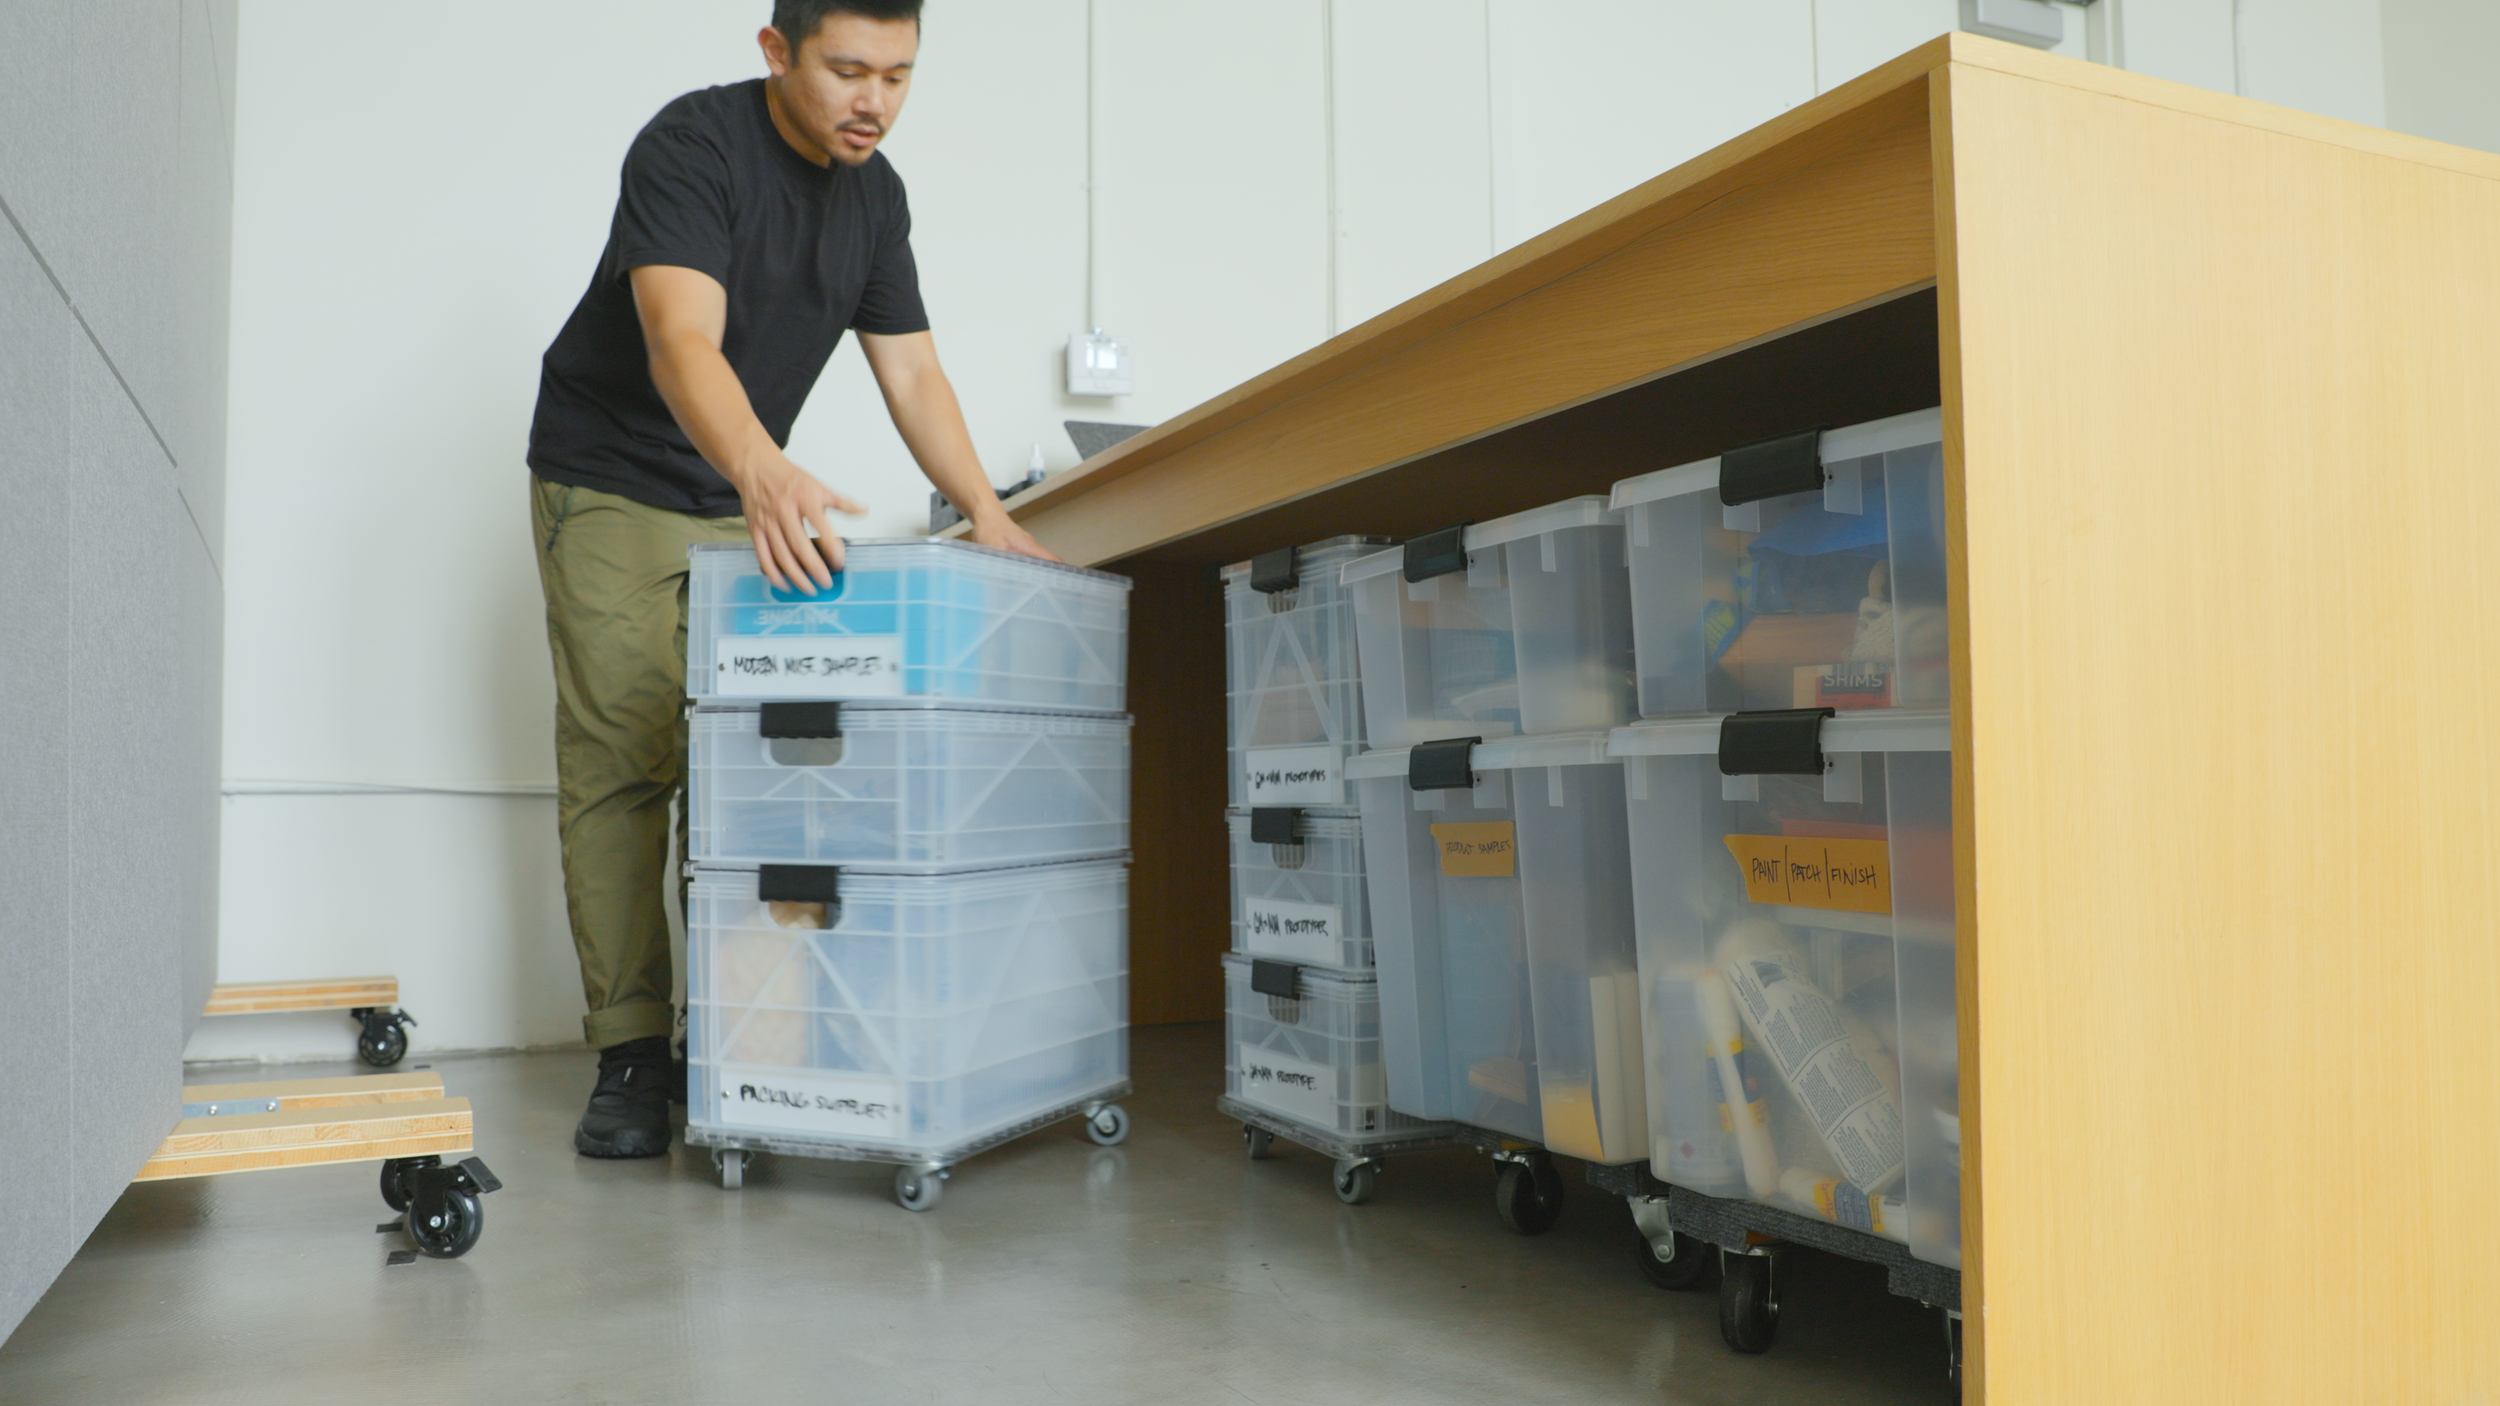
At the center is a large 4-foot by 8-foot worktable, which I built out of several sheets of plywood. The front has a few stools for sitting, while the back features a large cavity to store a shop vac, containers for materials, and a long bin for offcuts.
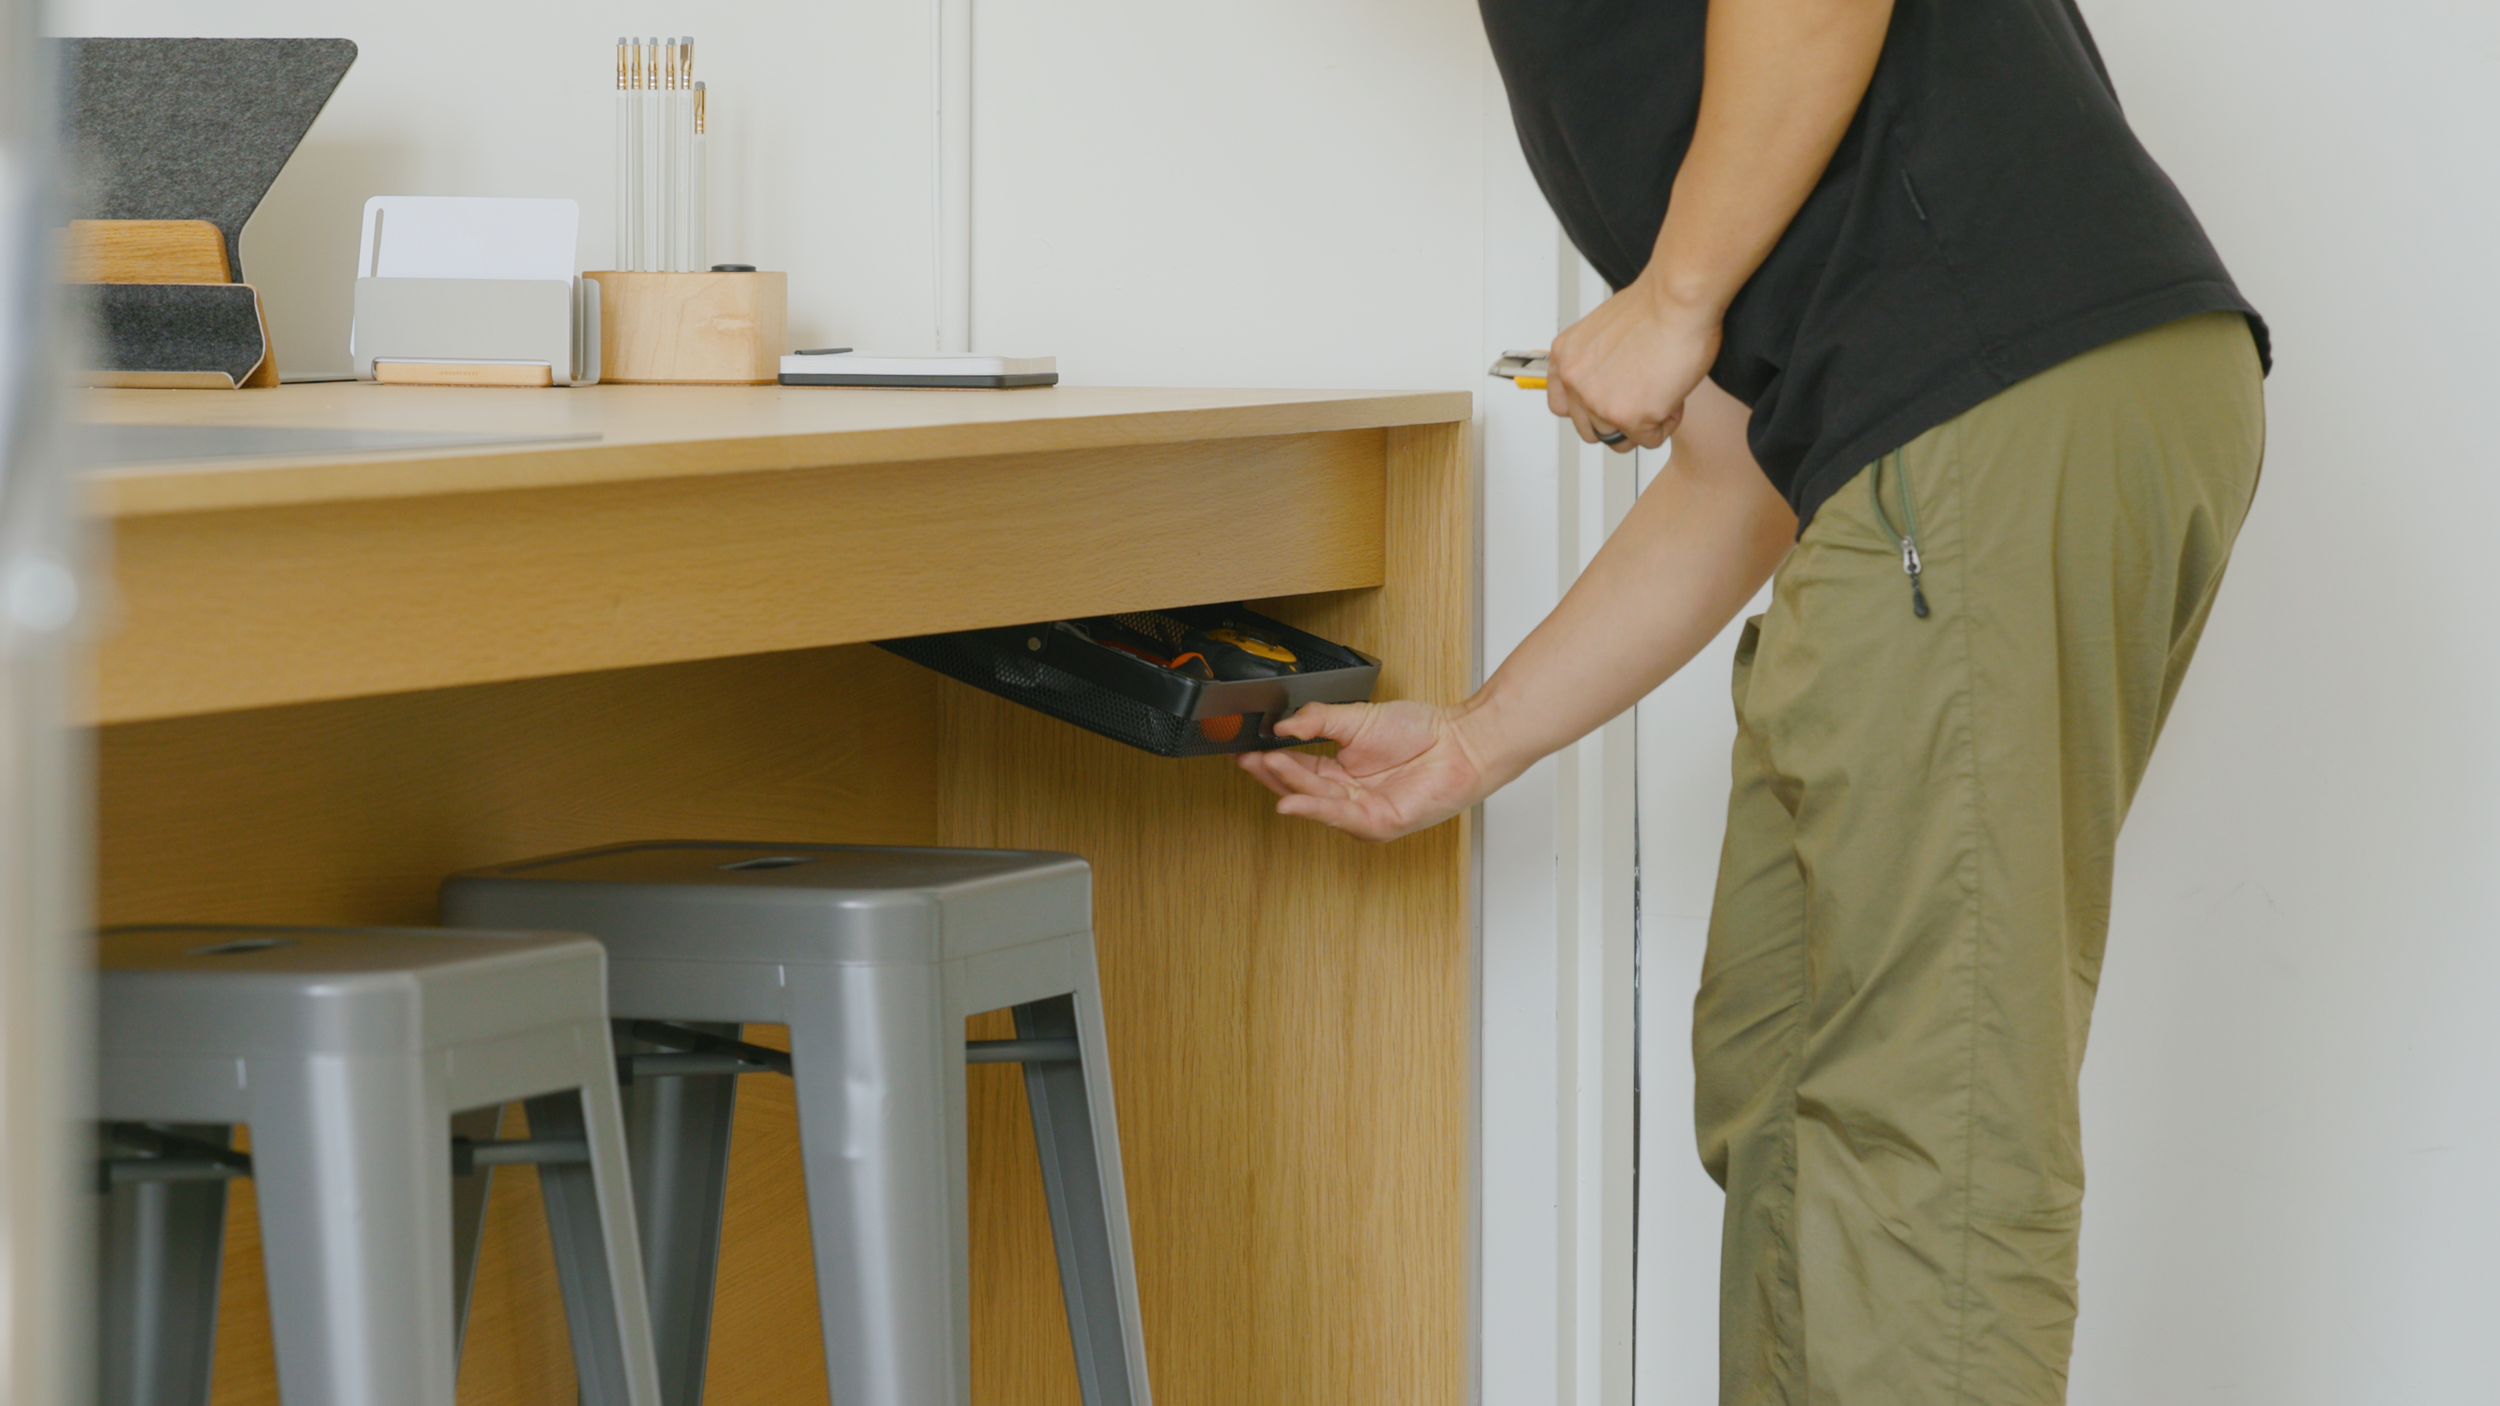
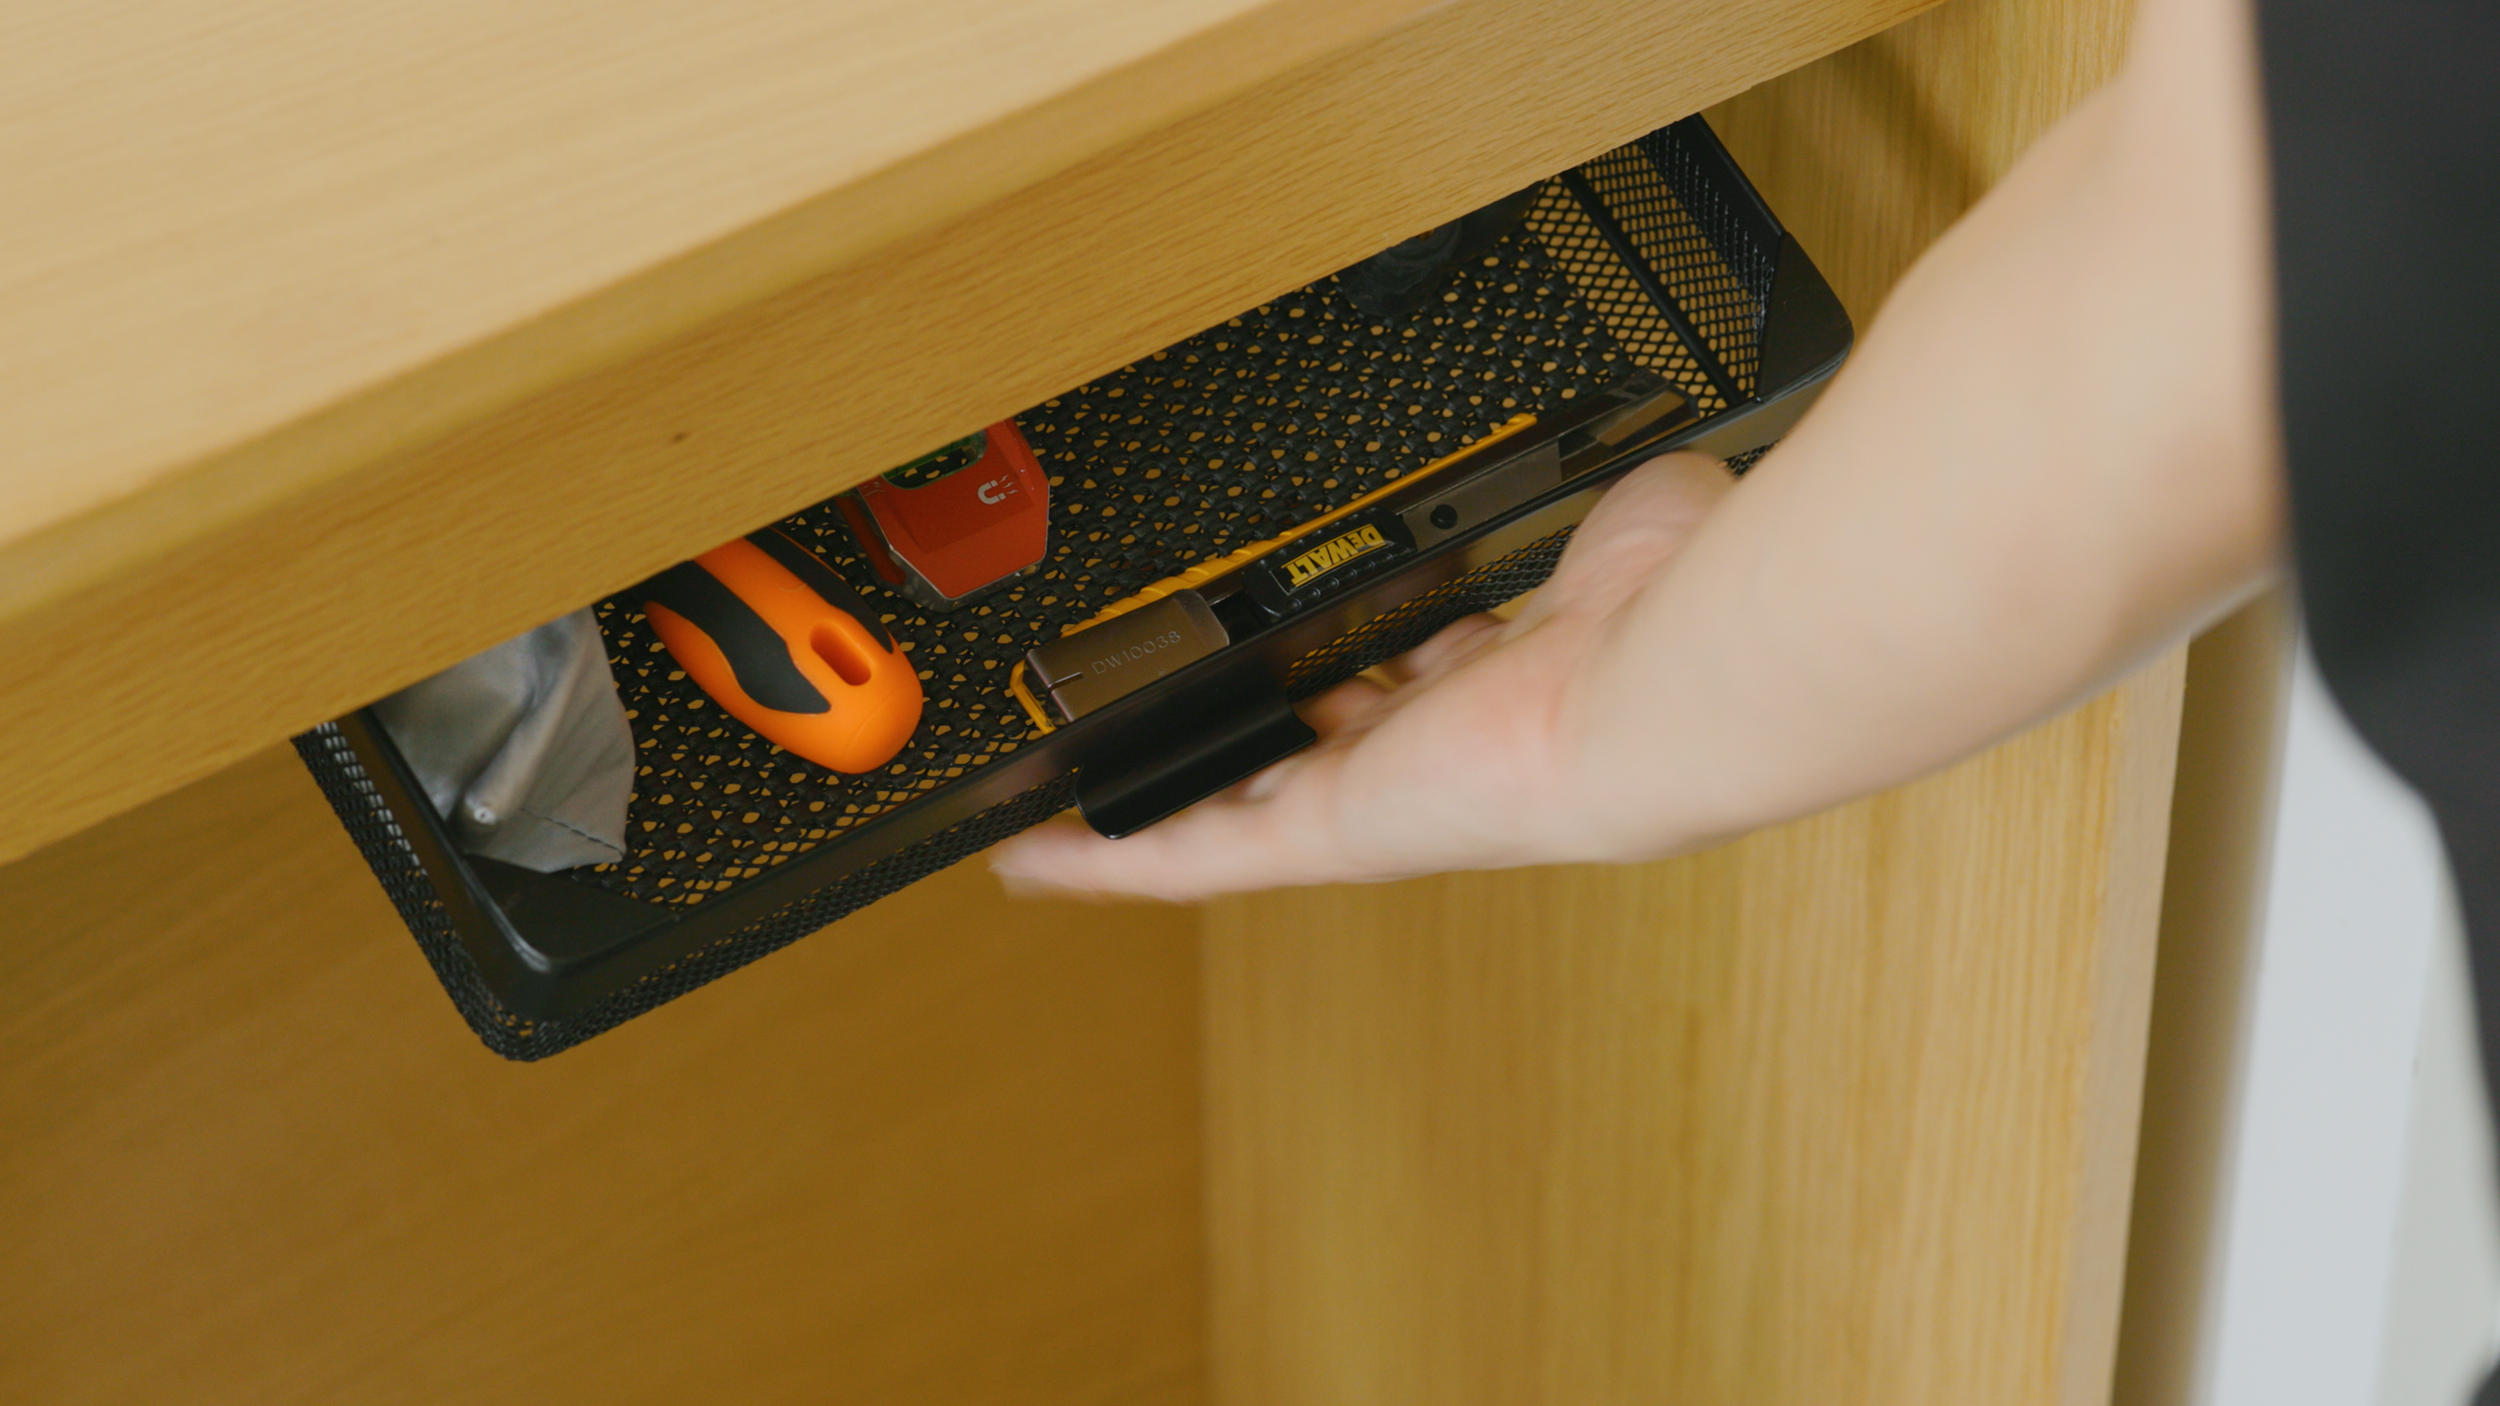
On the worktable is a large cutting mat, and a few writing tools for sketching. I also installed a hidden retractable basket to have access to frequent tools, like my protective goggles, utility knife, and screwdriver.
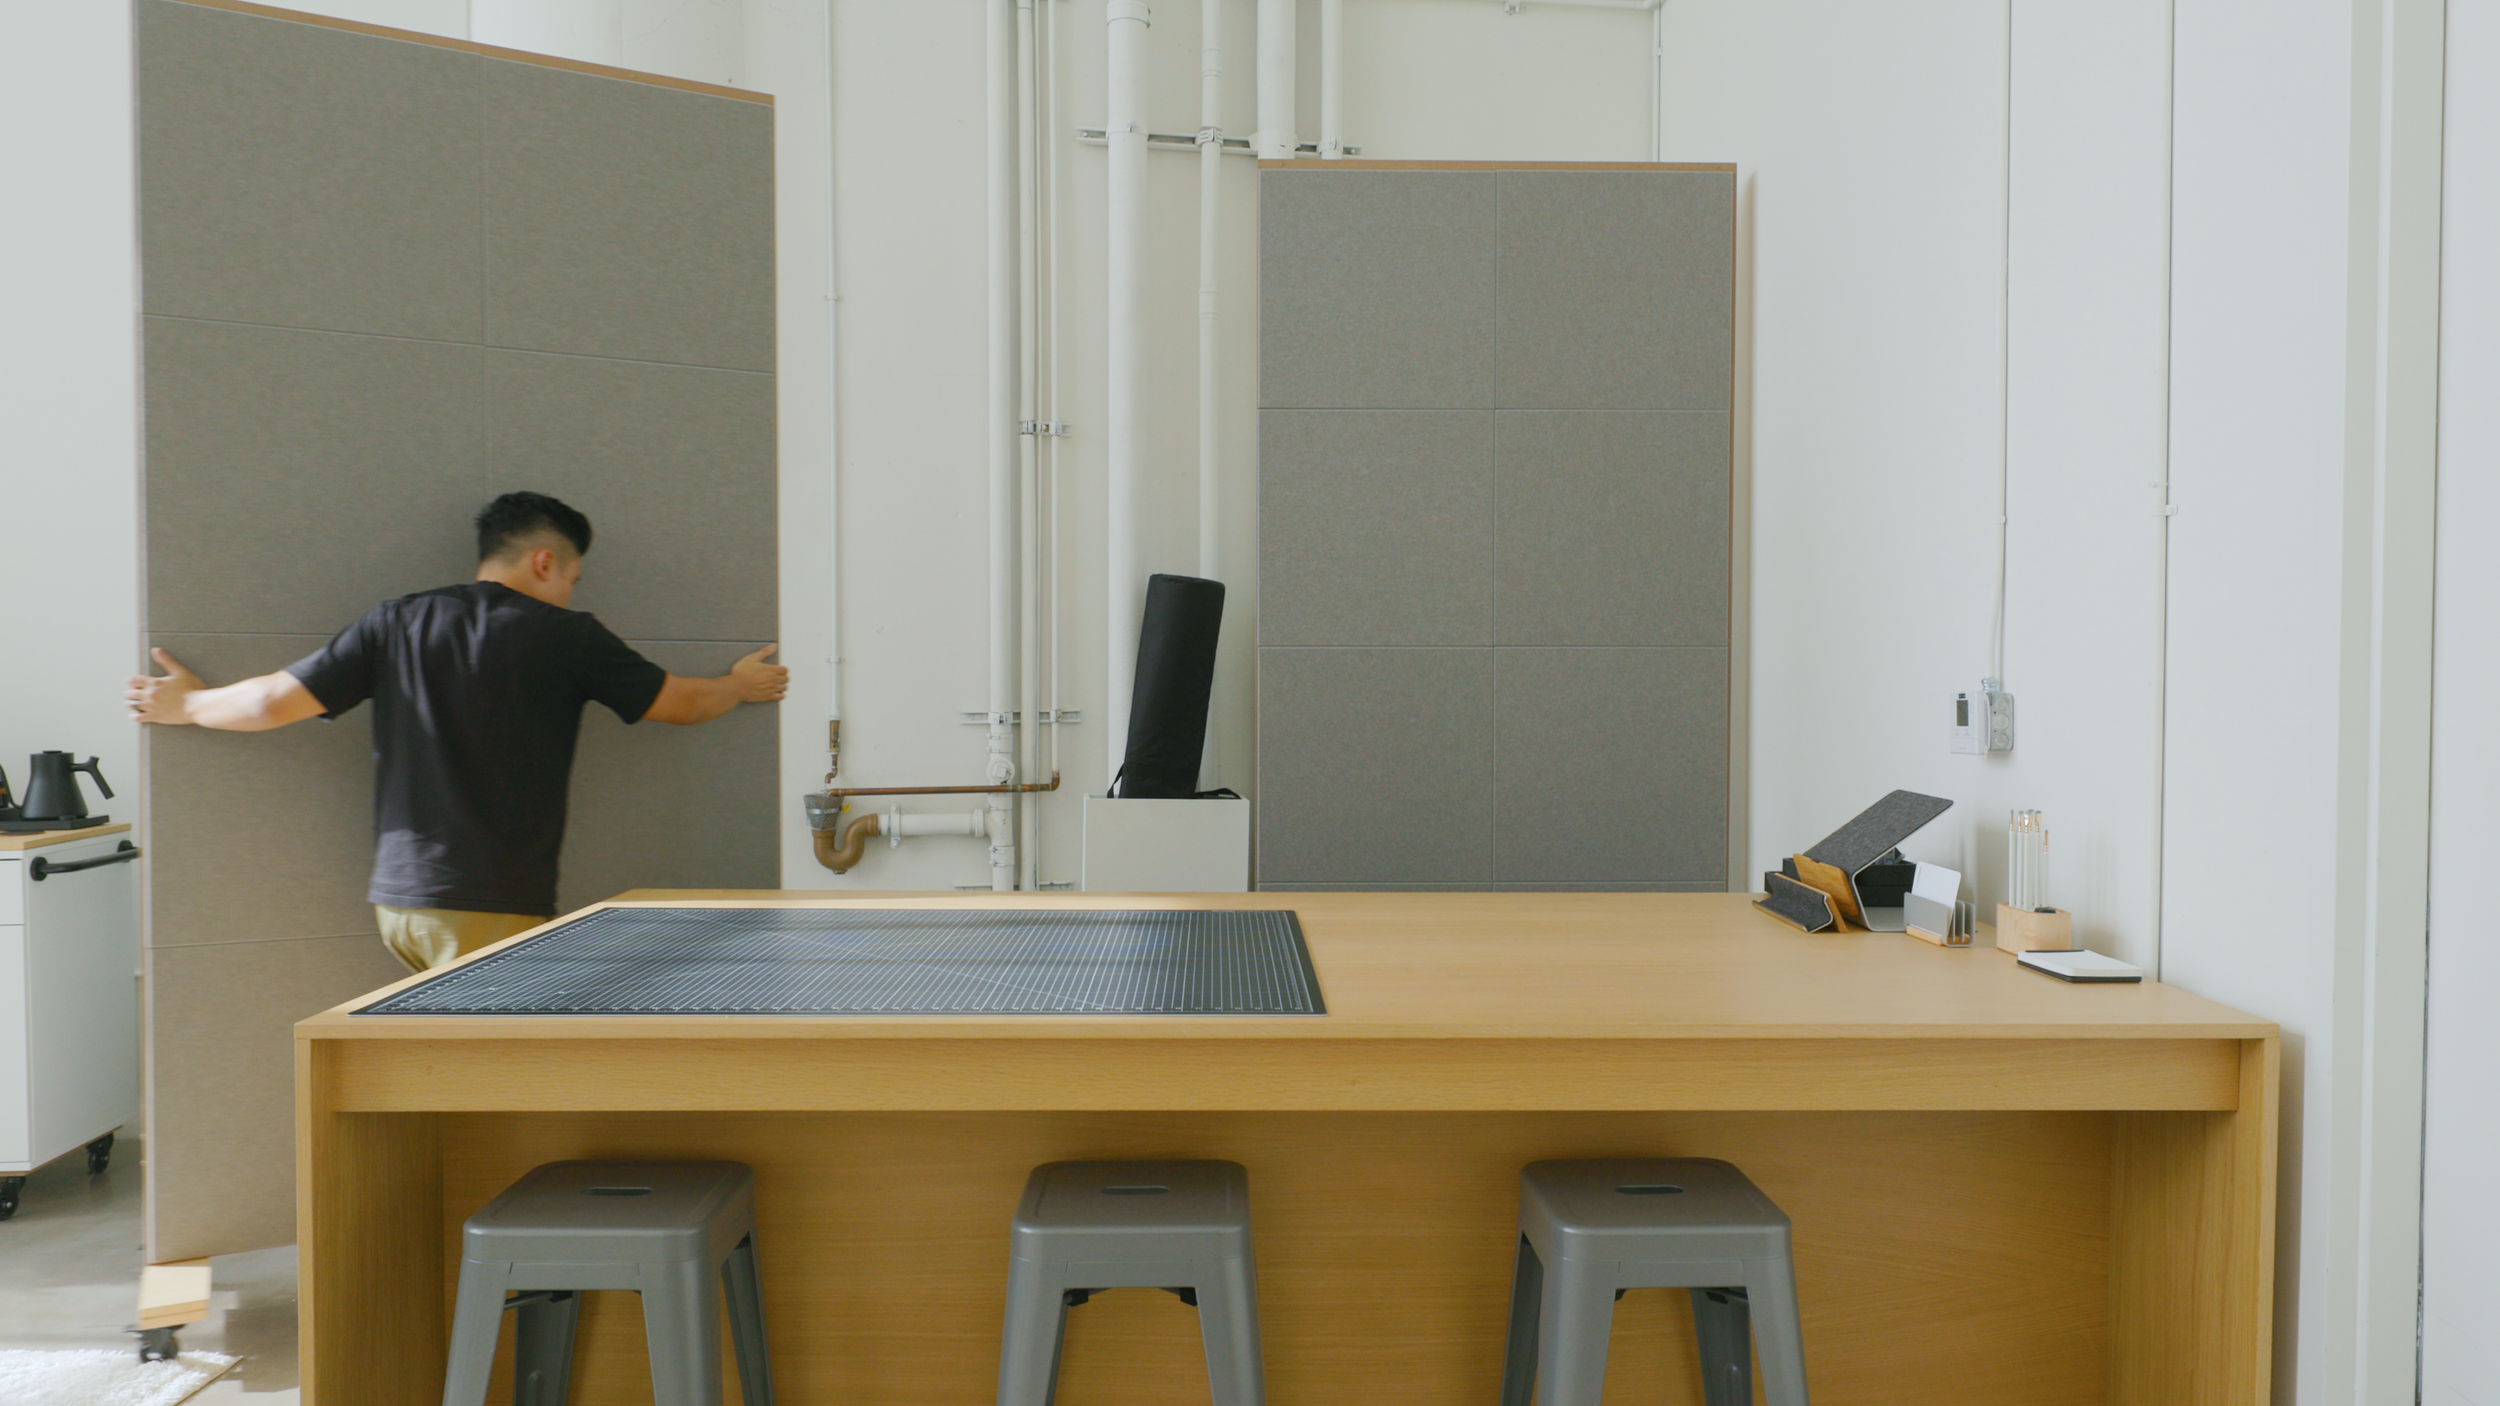
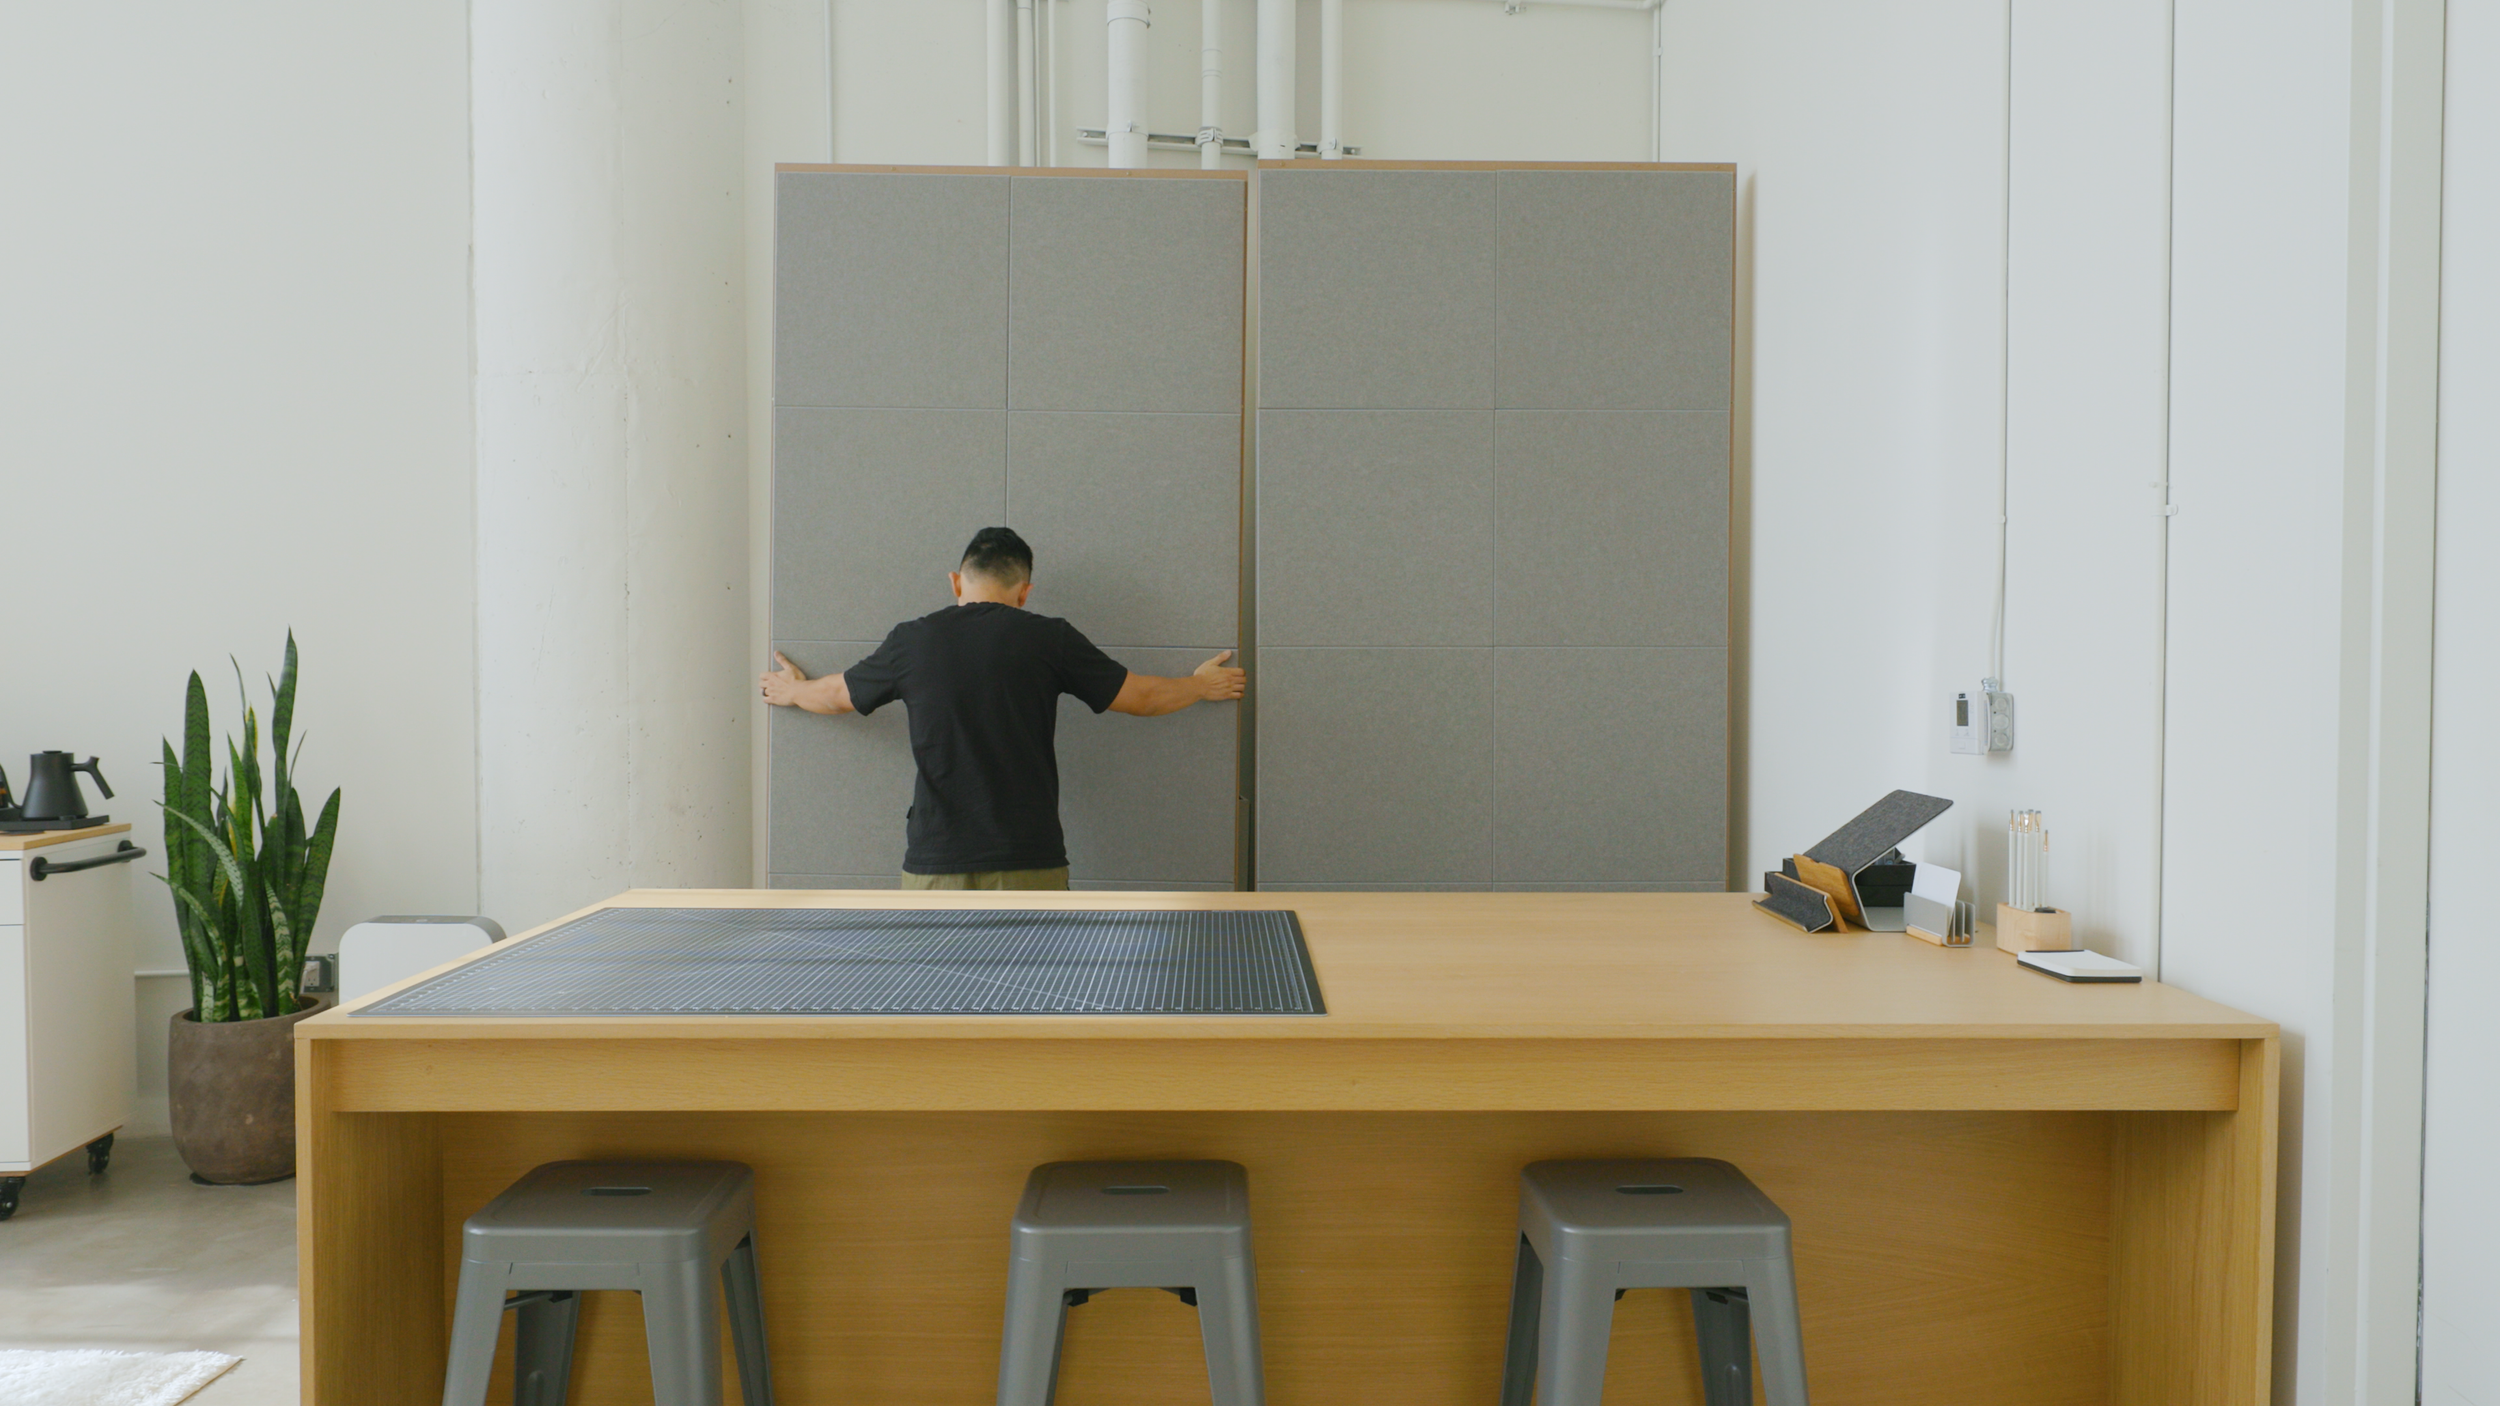
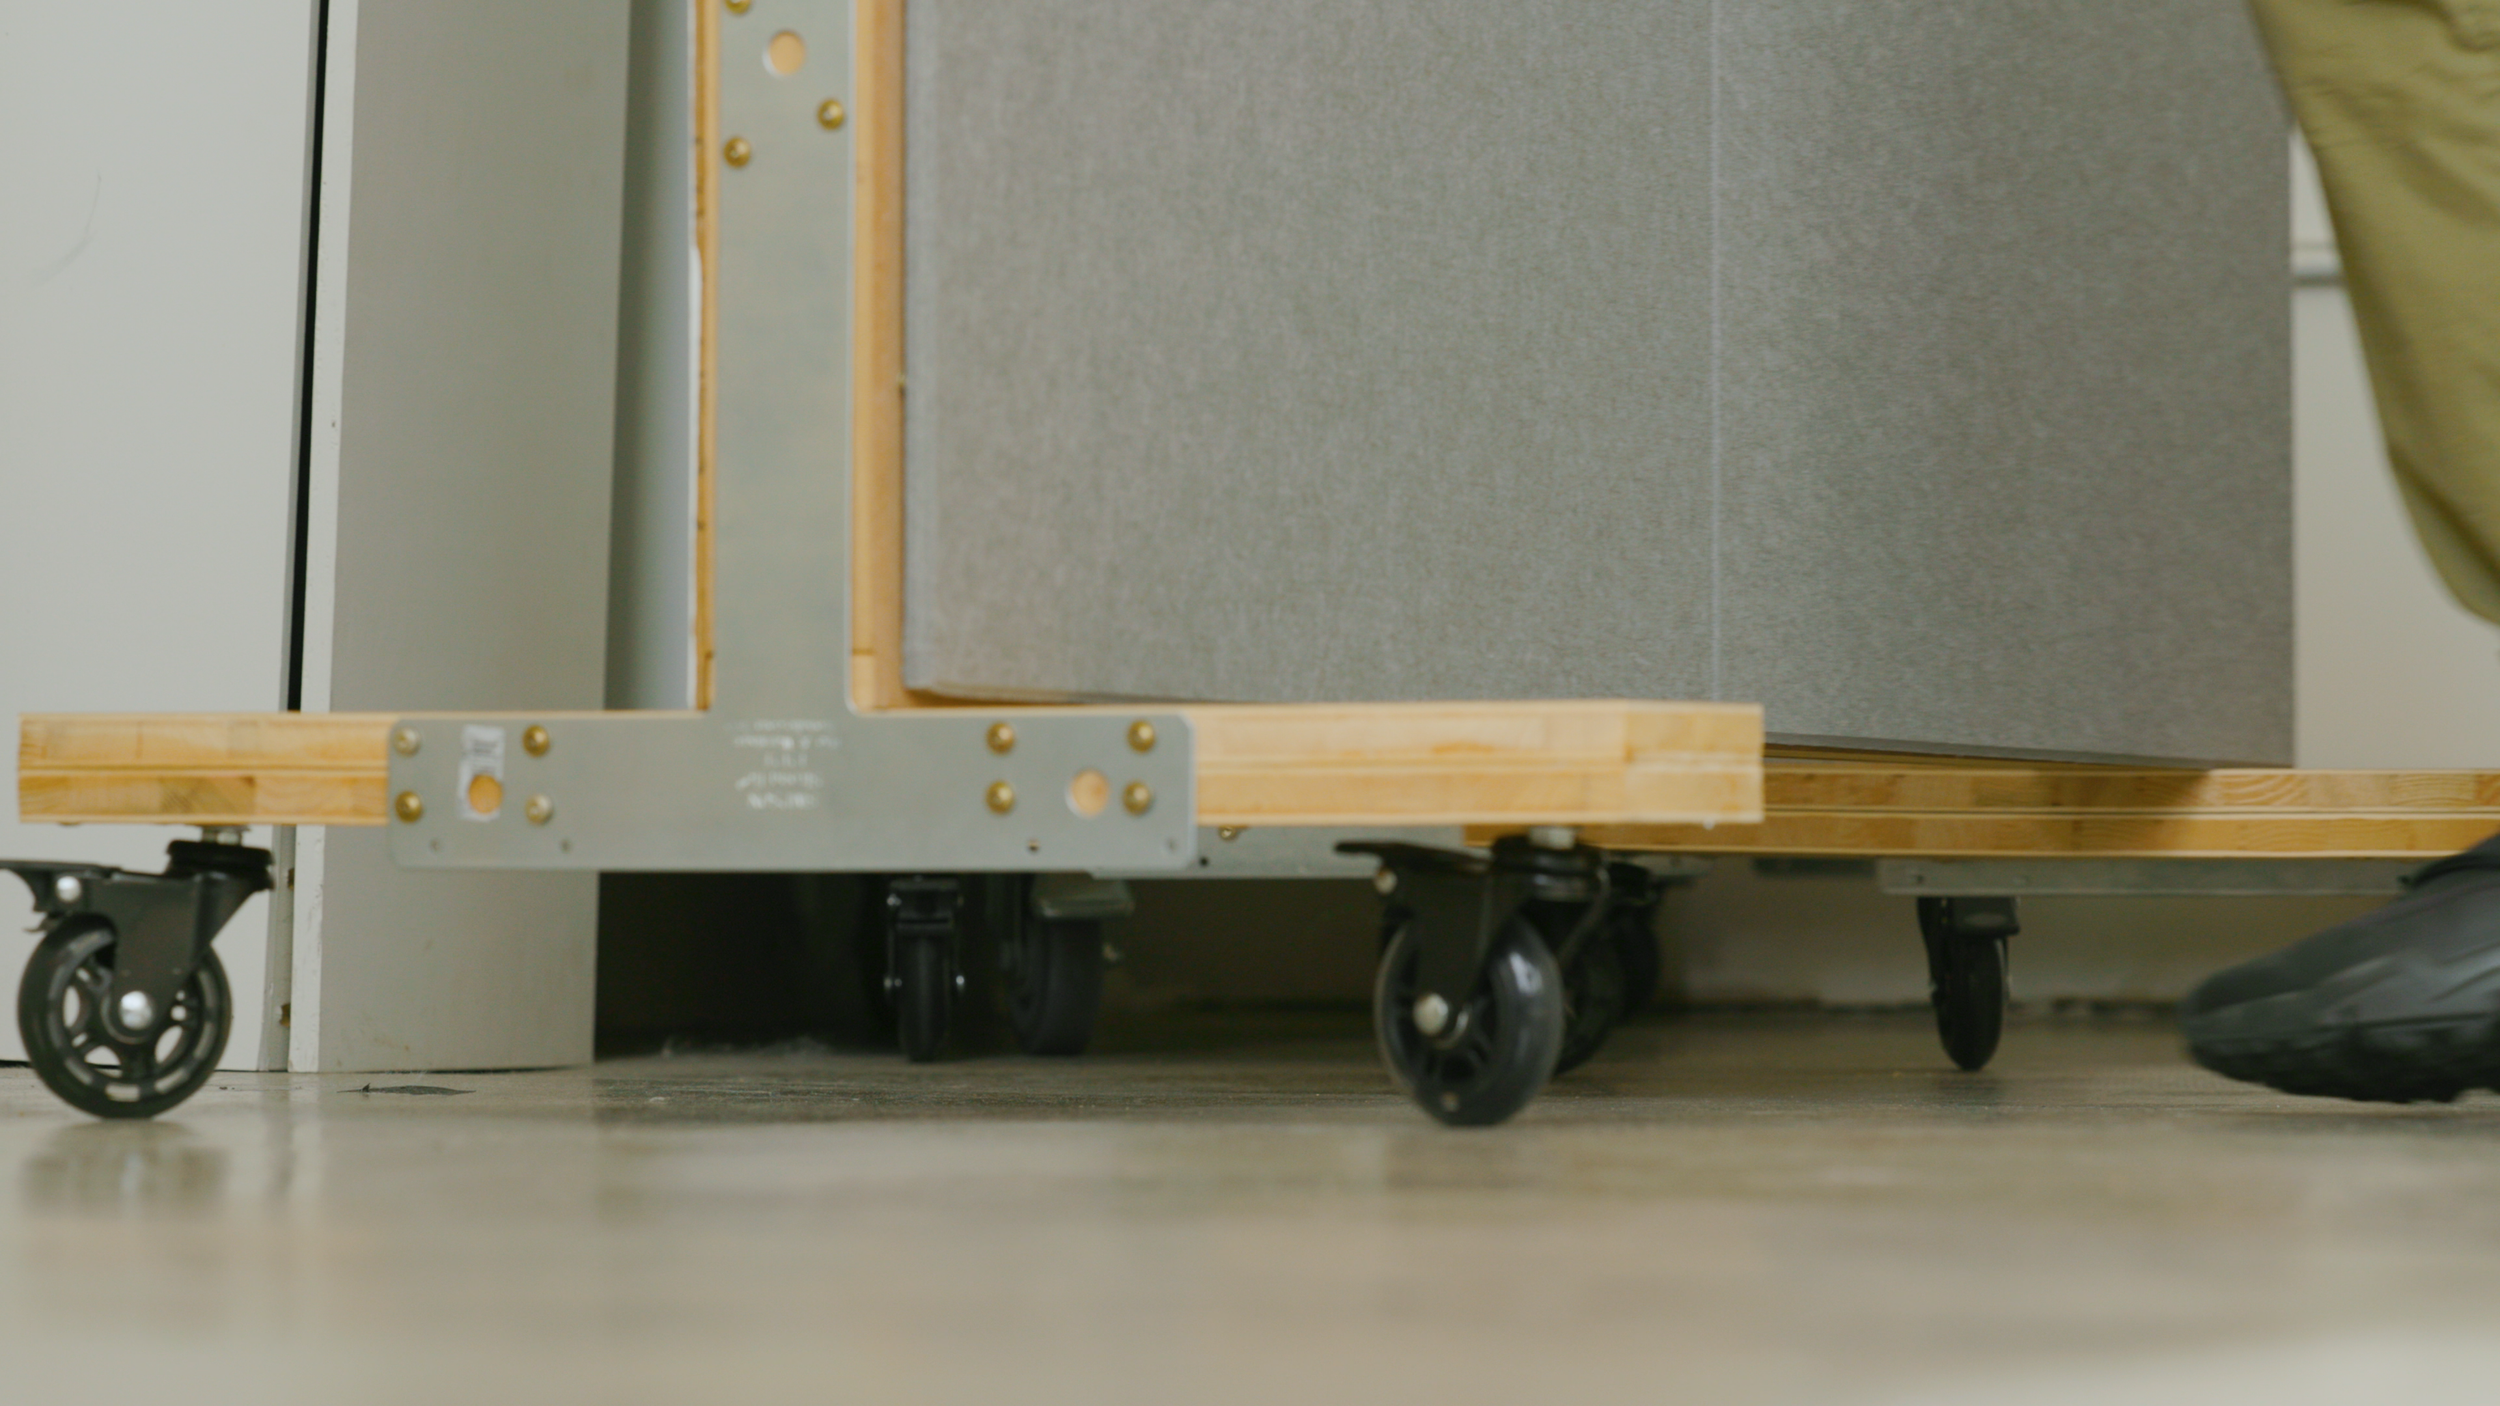
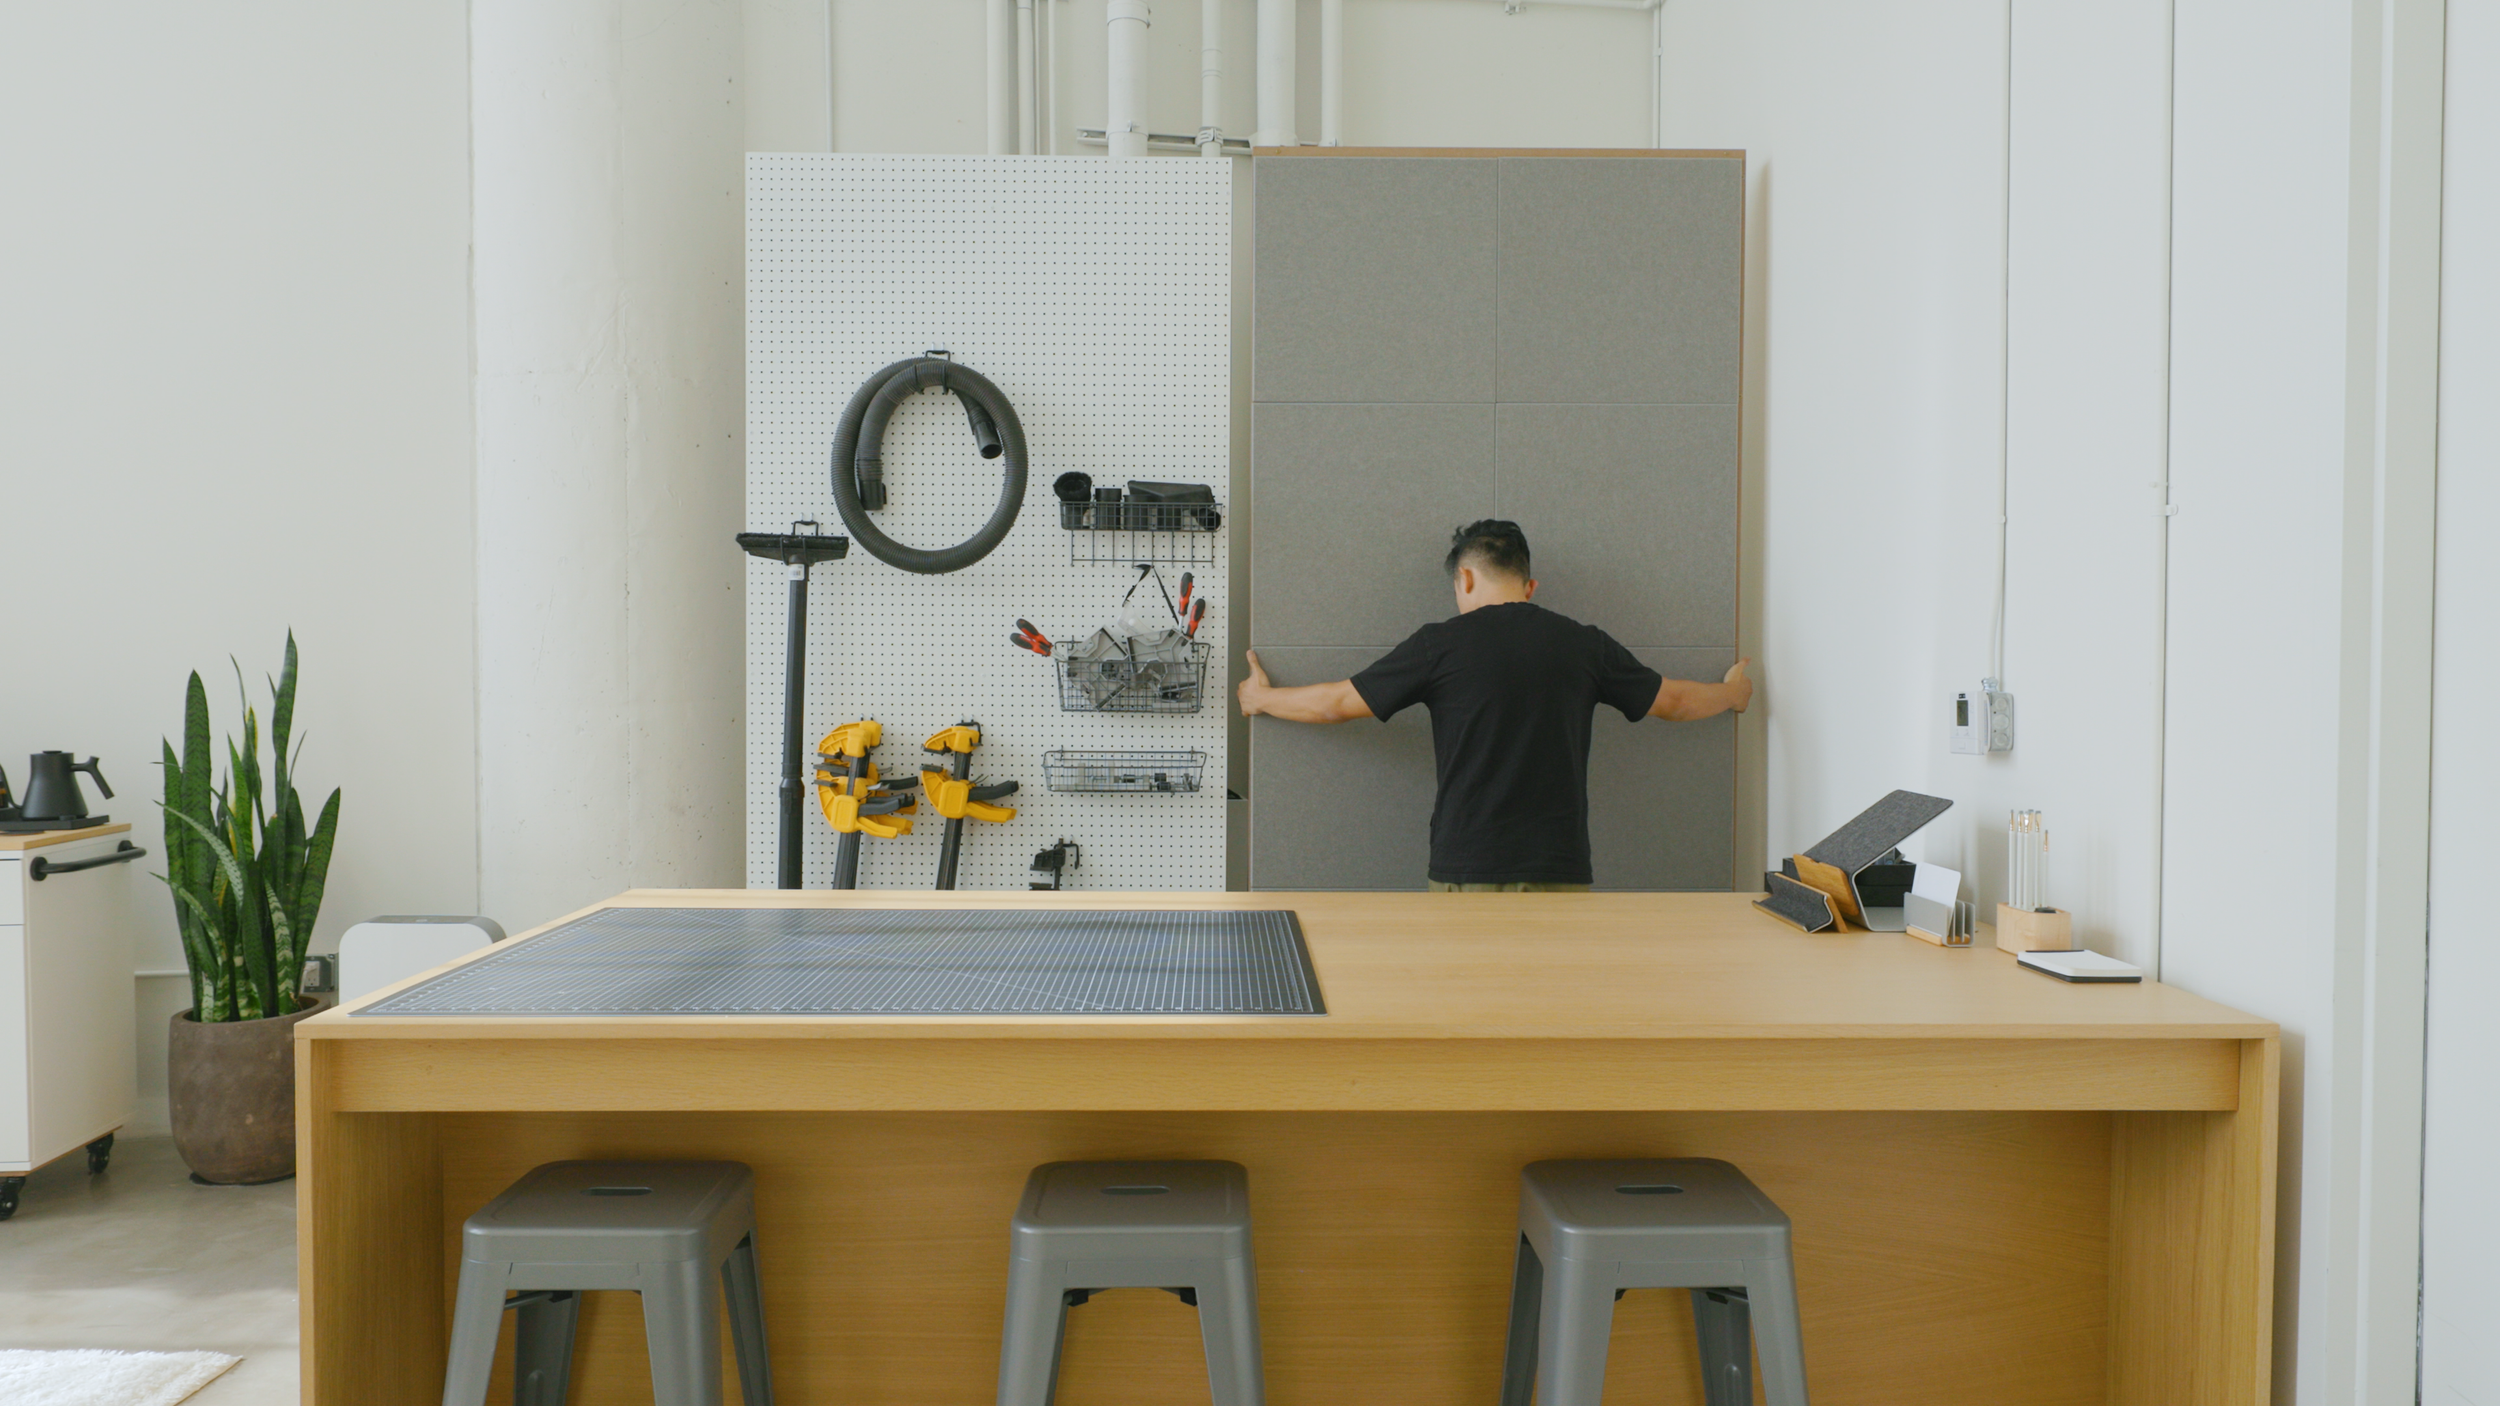
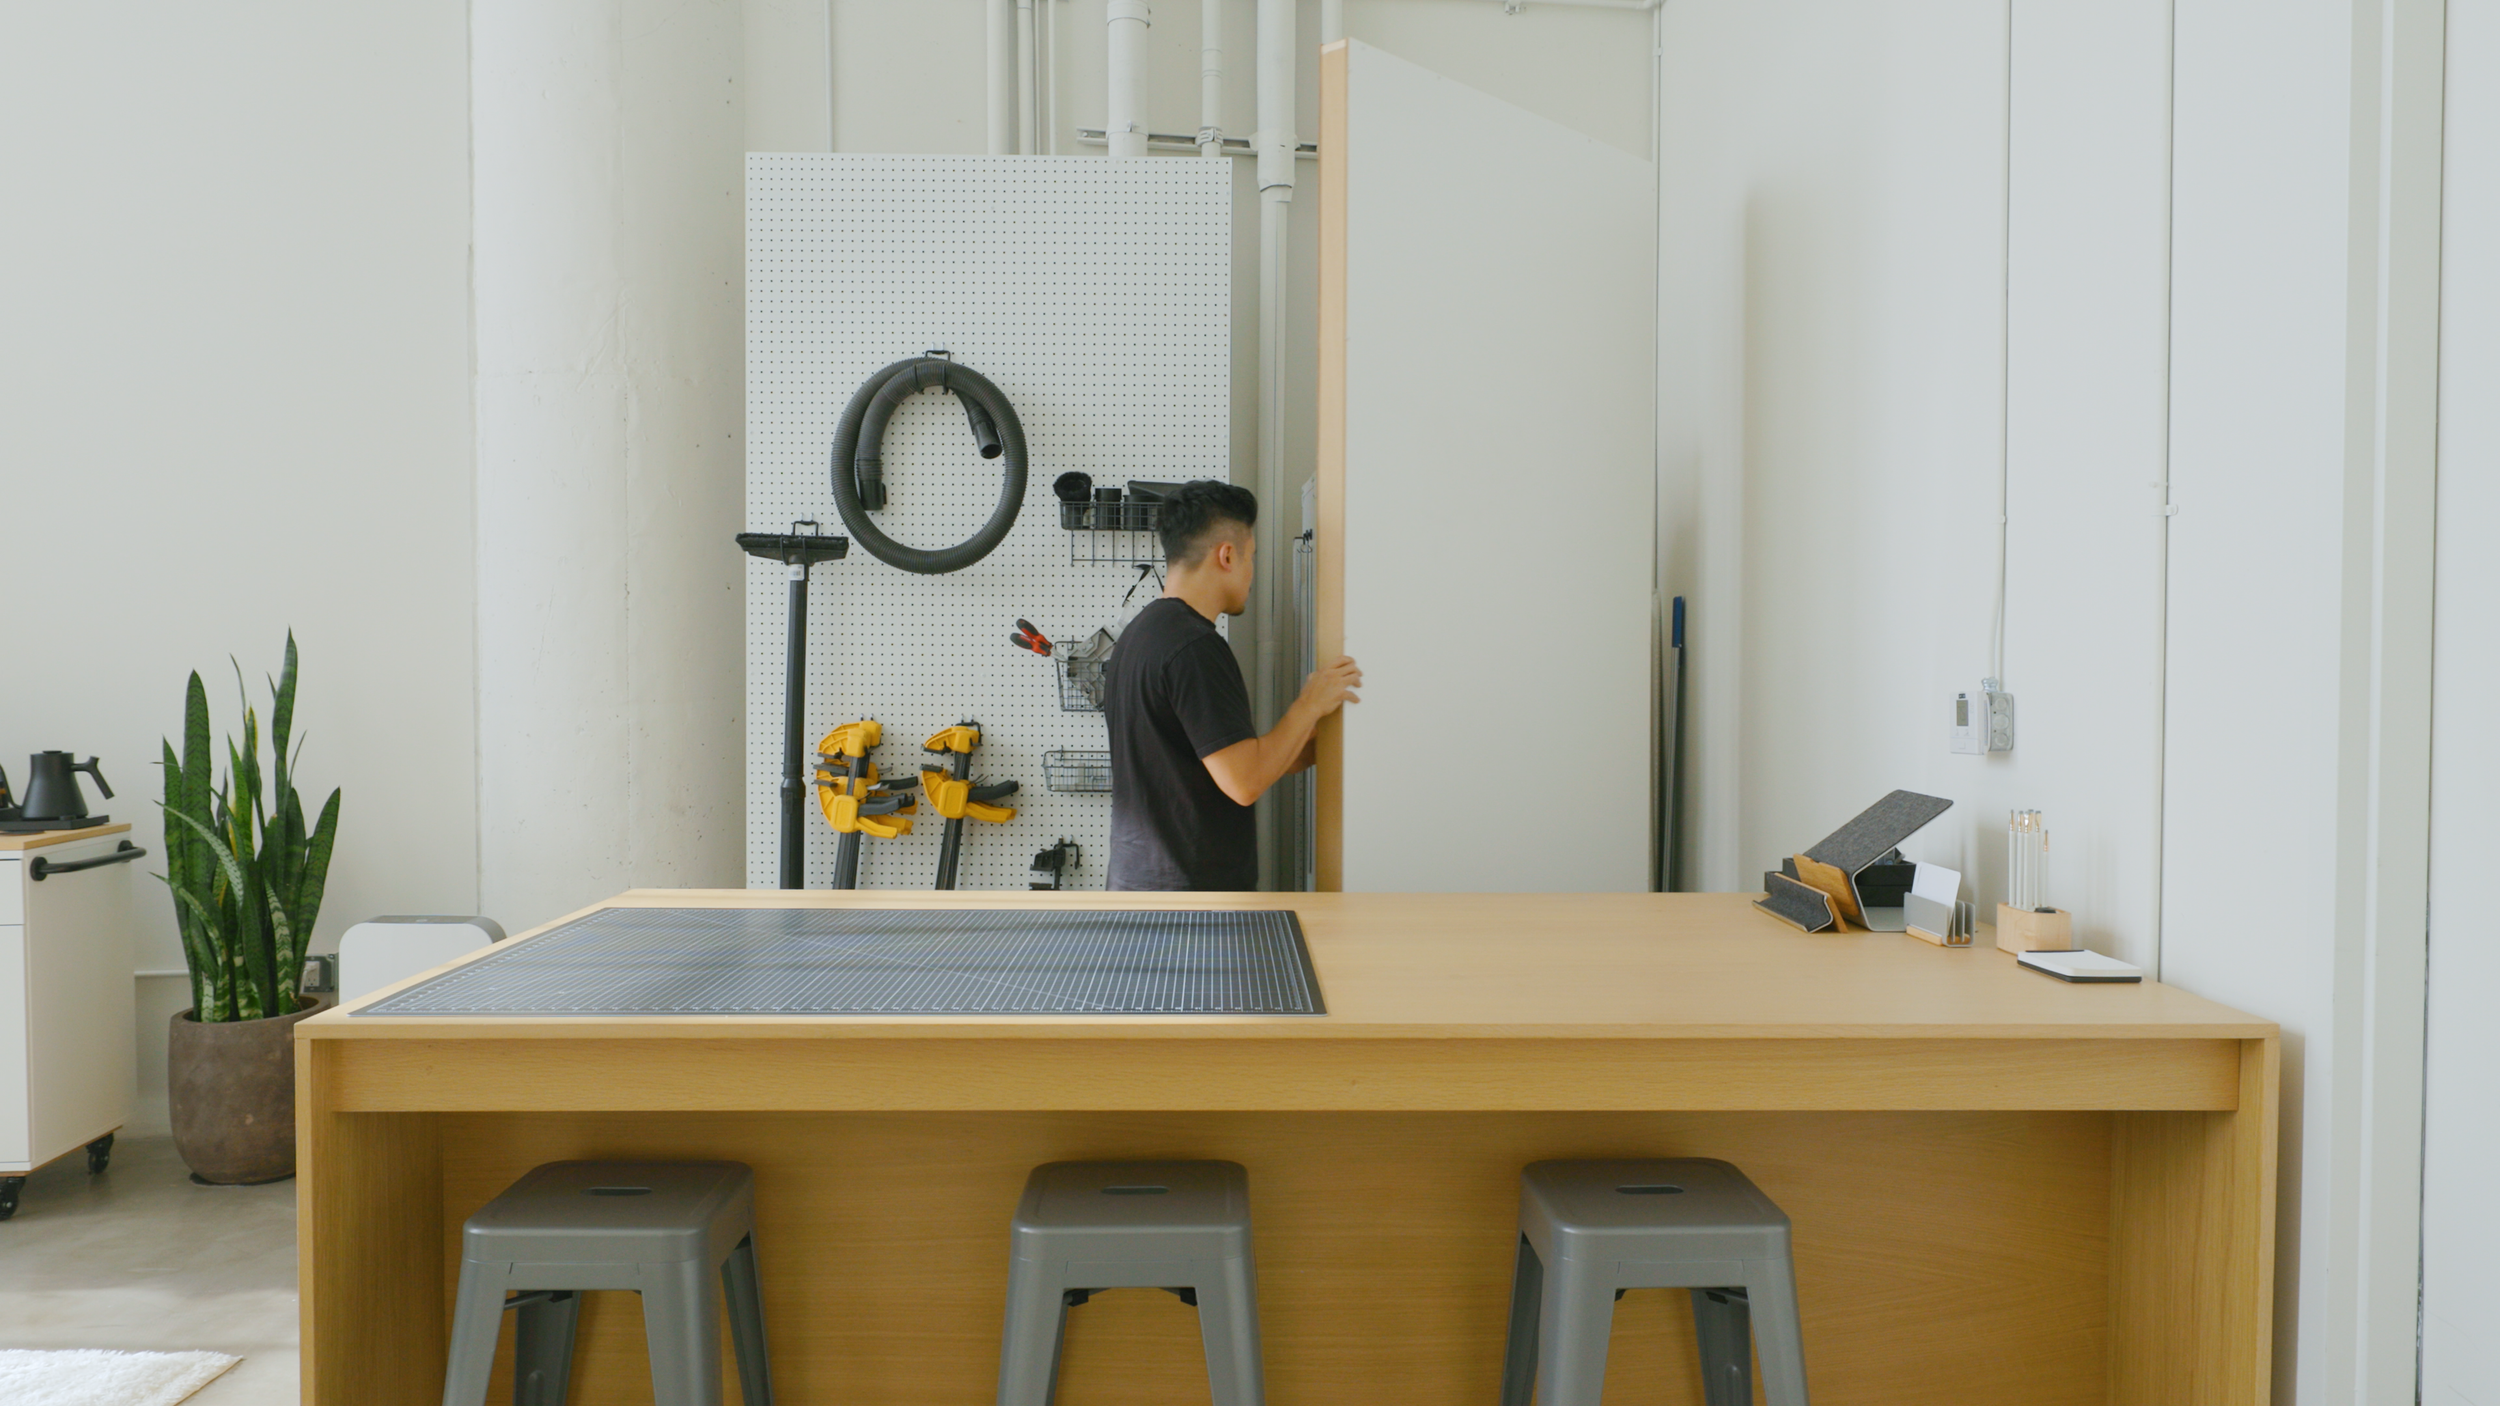
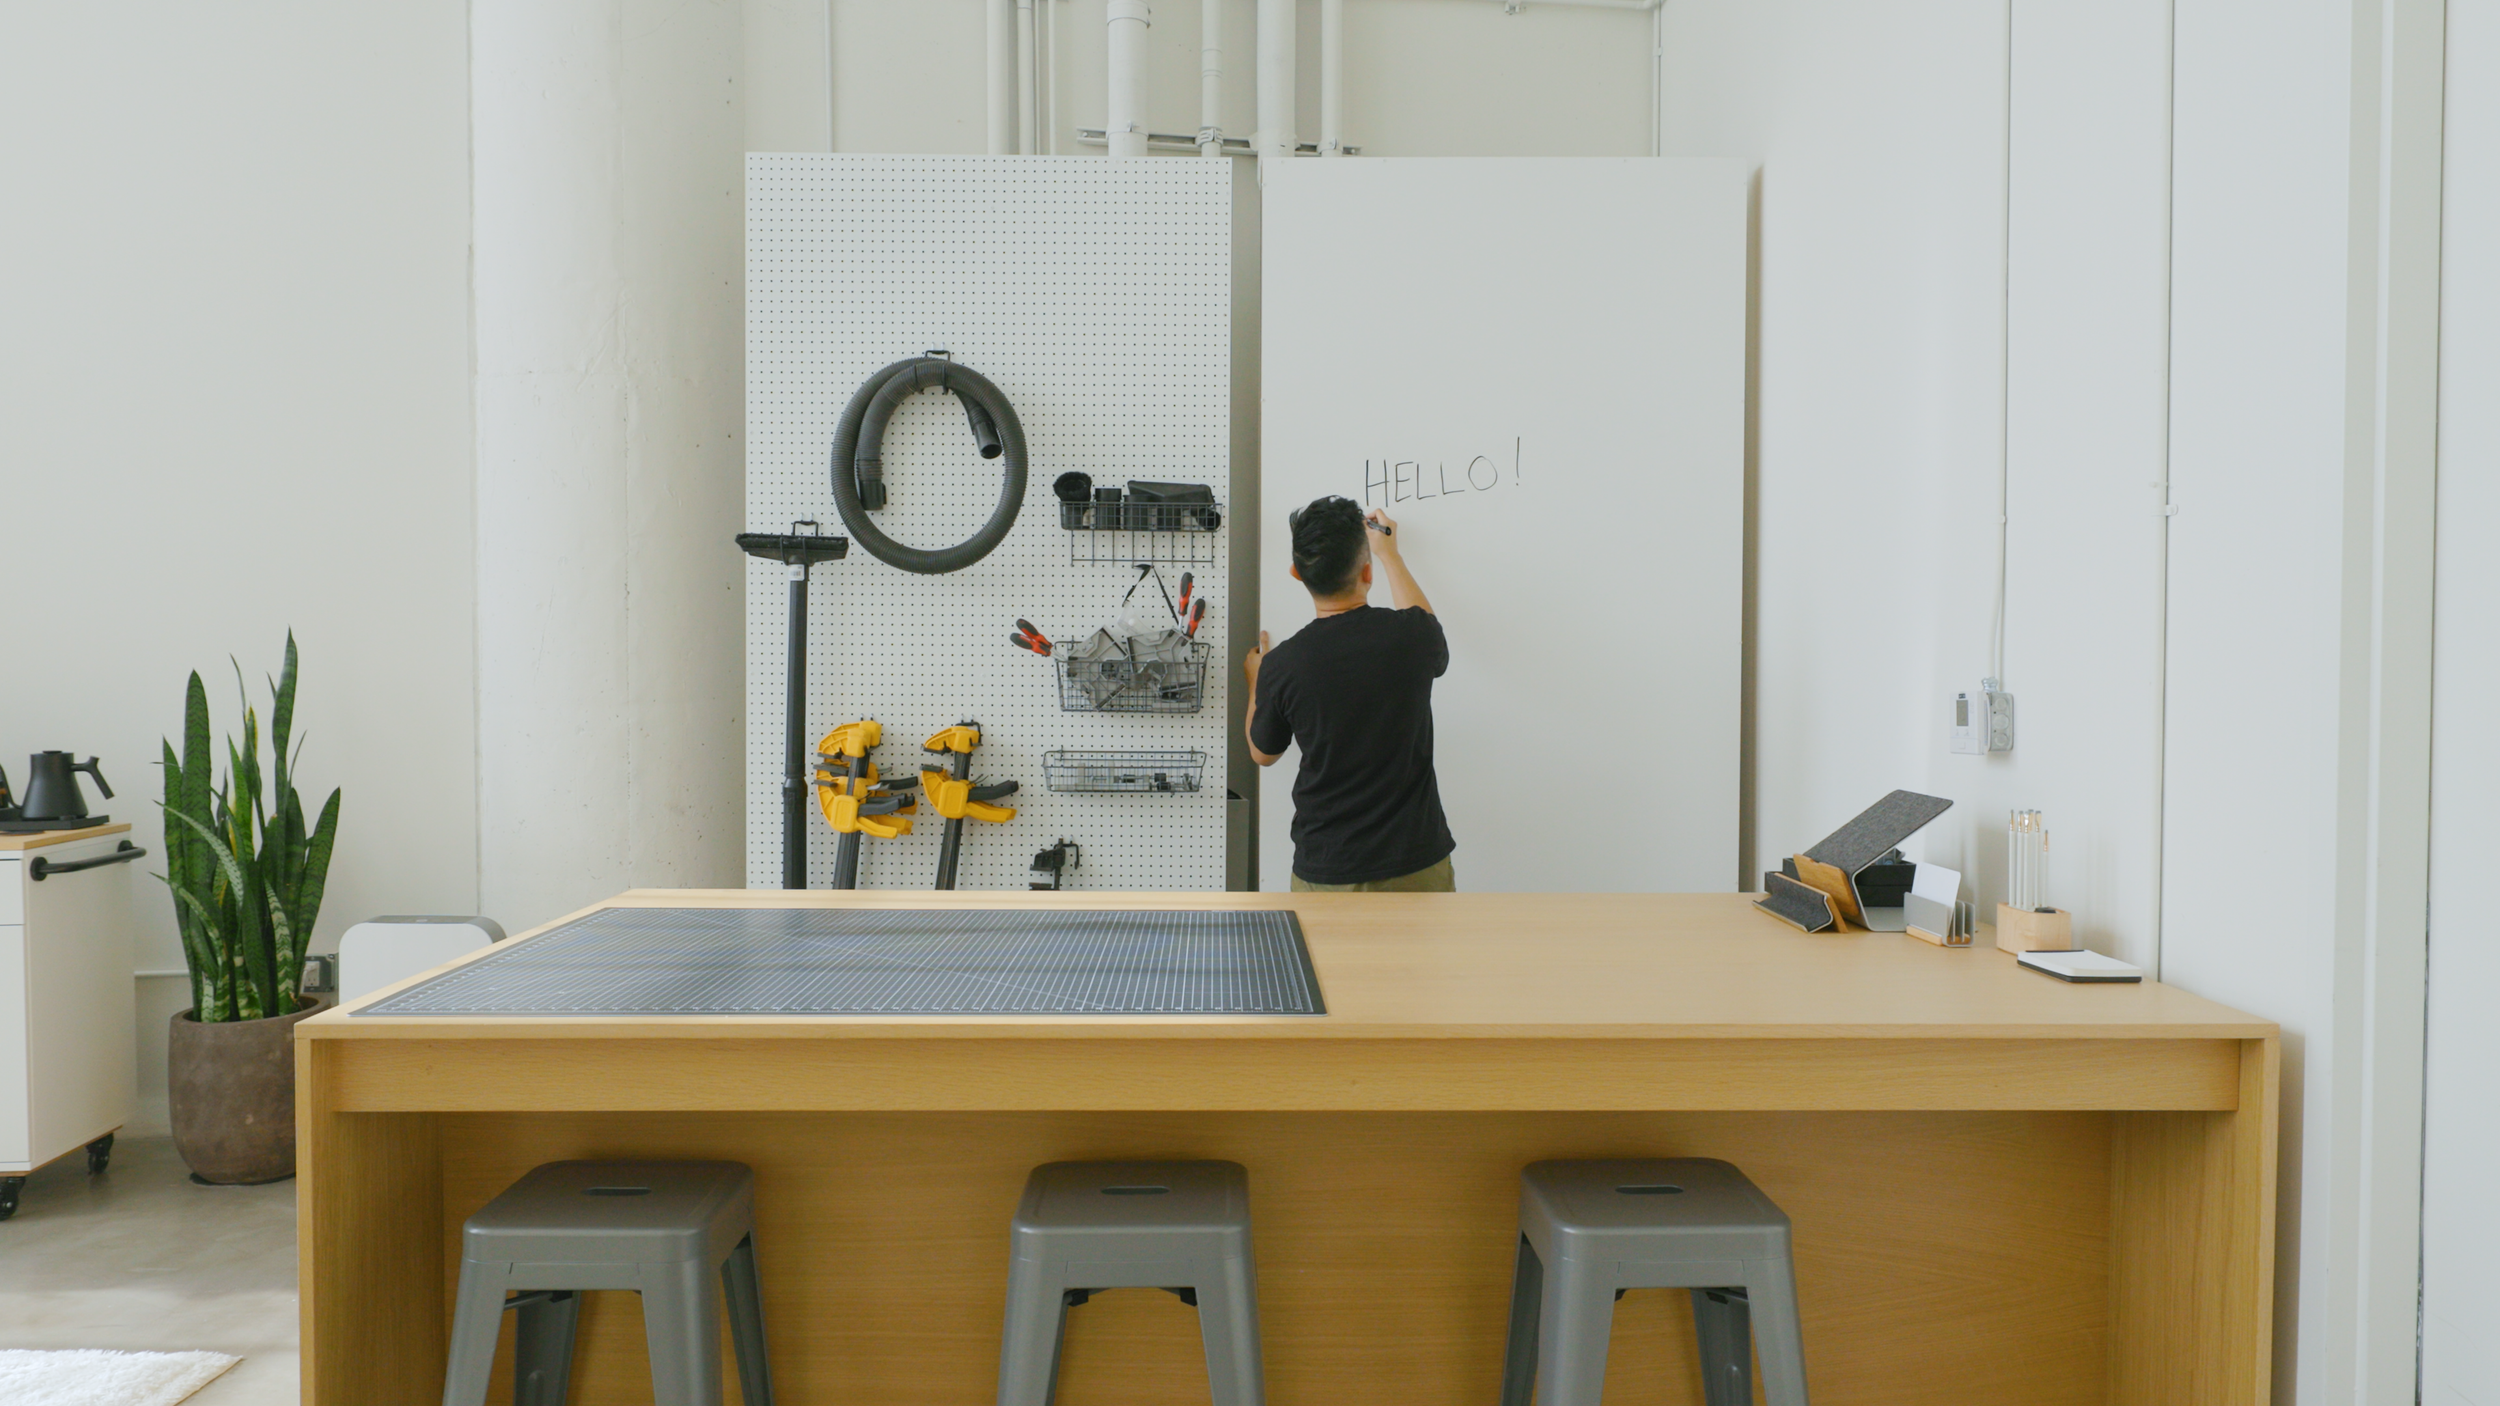
Behind the worktable is a set of moving utility walls. The front is covered with FeltRight tiles which act as acoustic treatment and doubles as a pinboard. One of the walls features a pegboard on the back for organization, while the other has a whiteboard for ideation. These can roll around the studio to serve as room dividers or stay in place to hide my unsightly tools and objects.
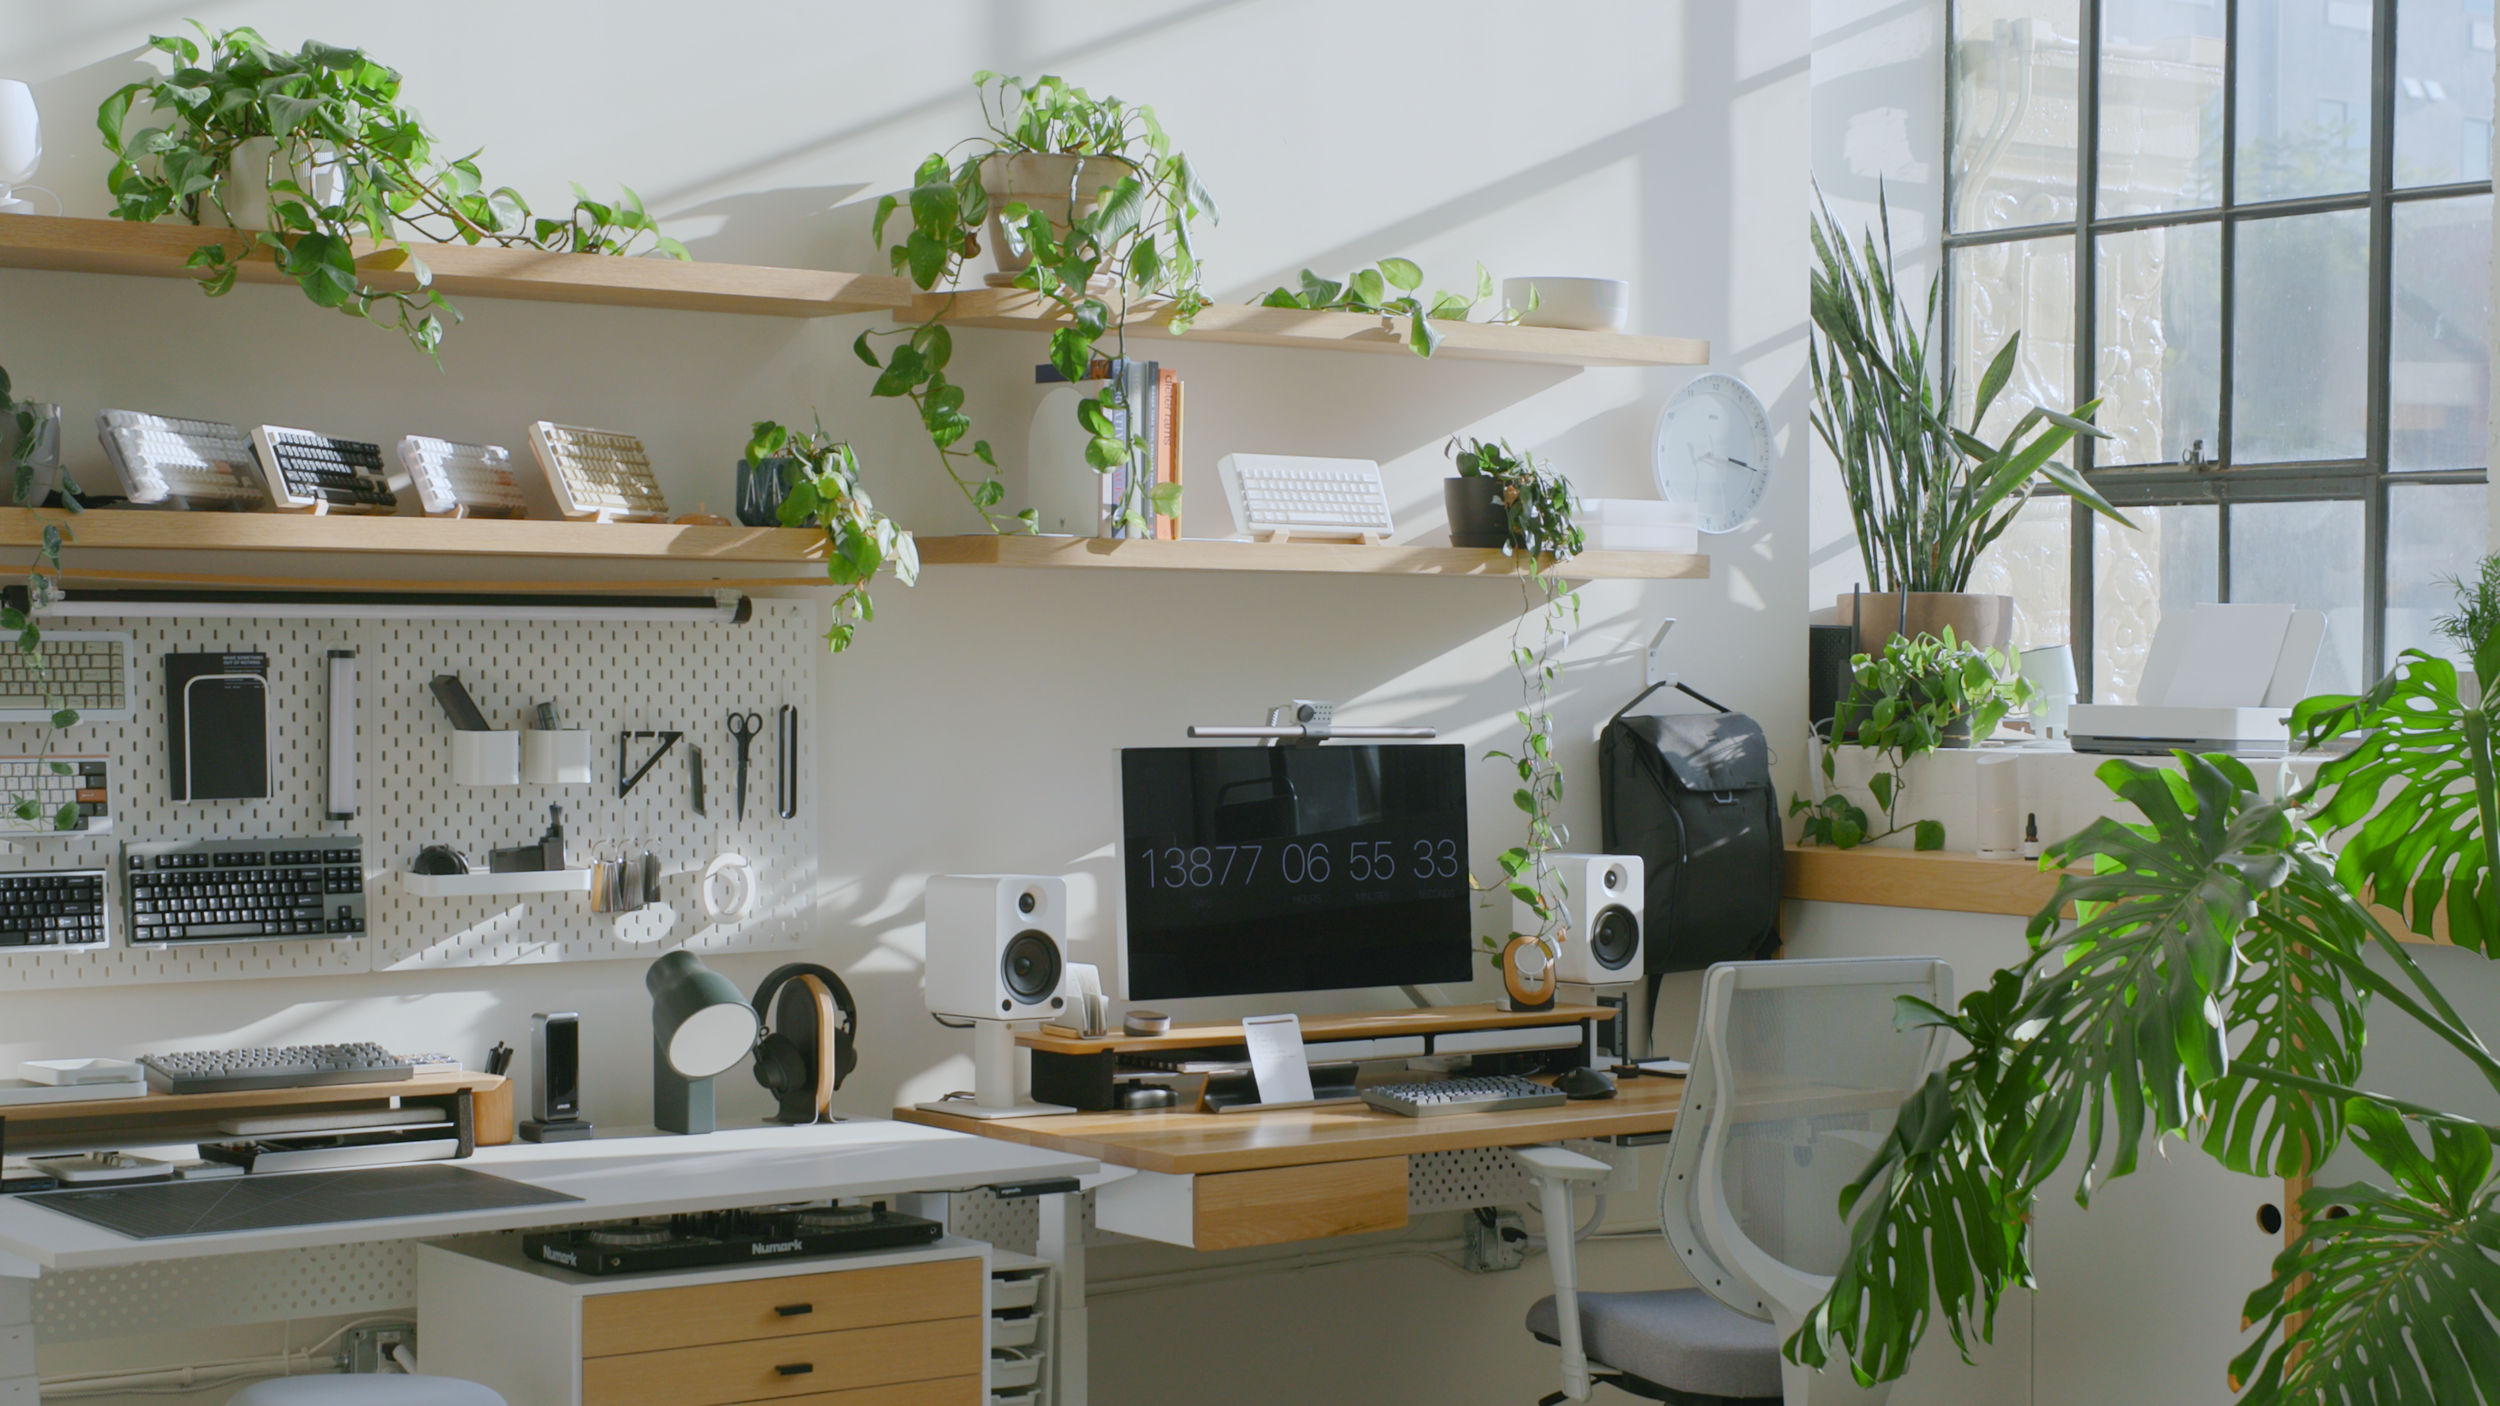
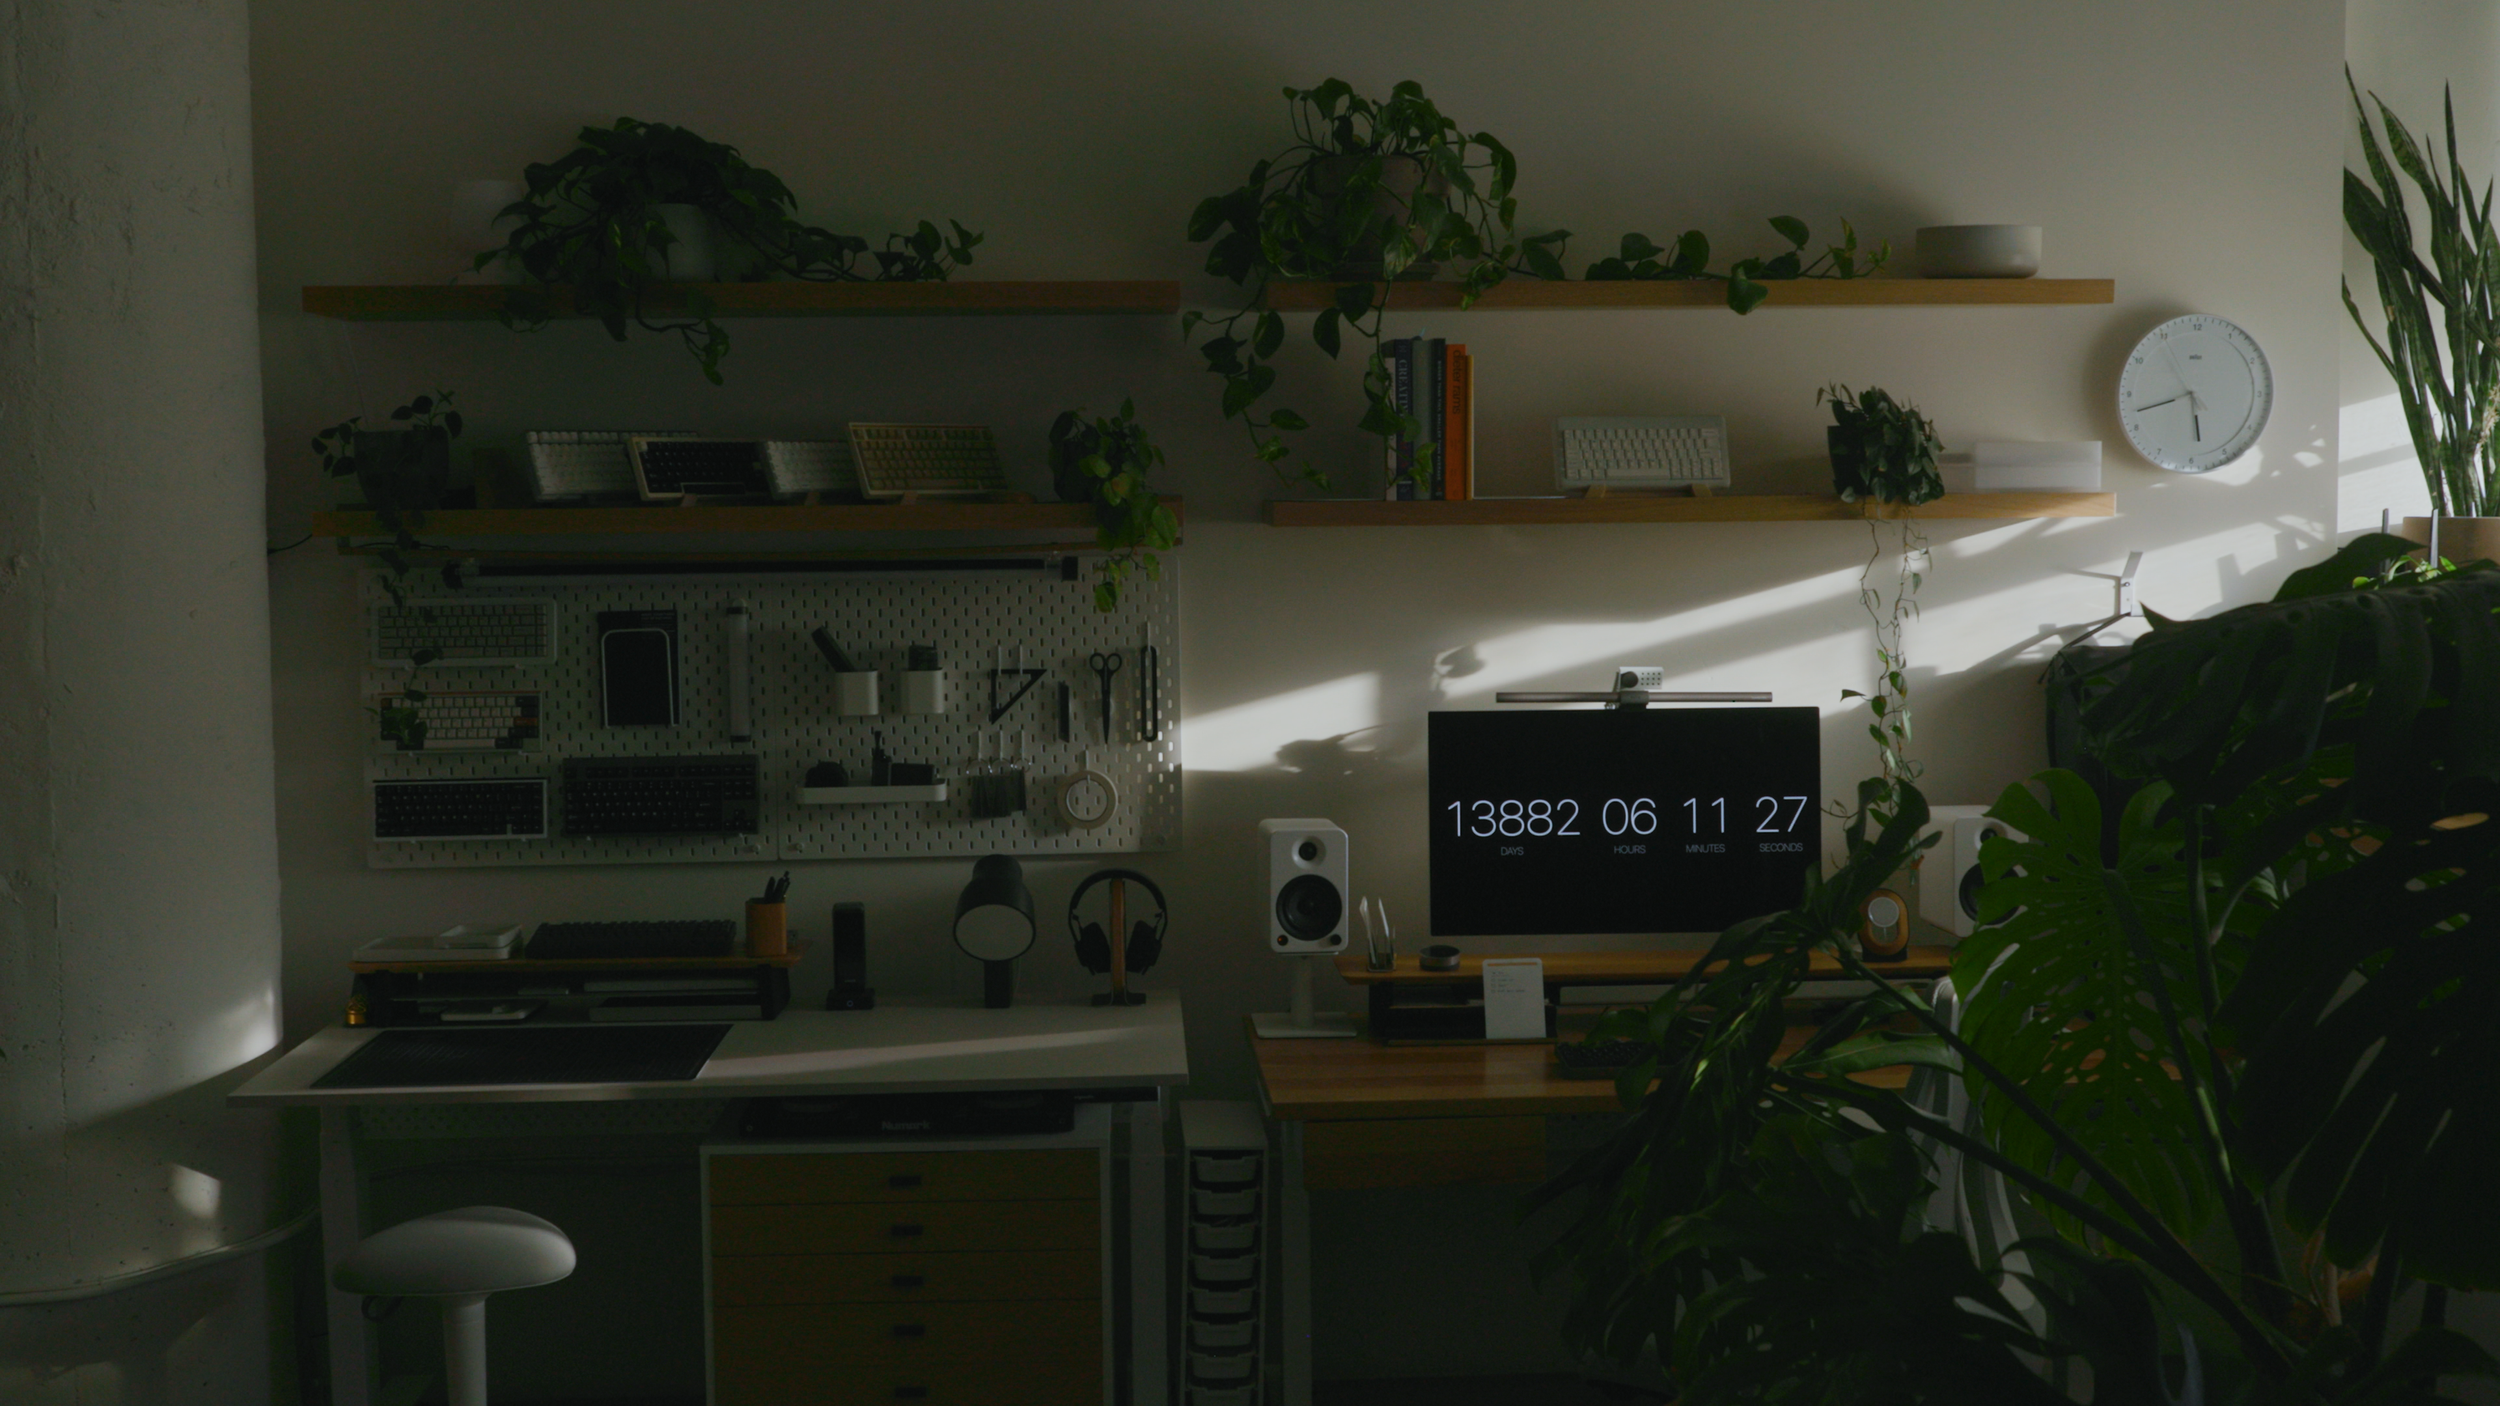
Dual Desk Setup
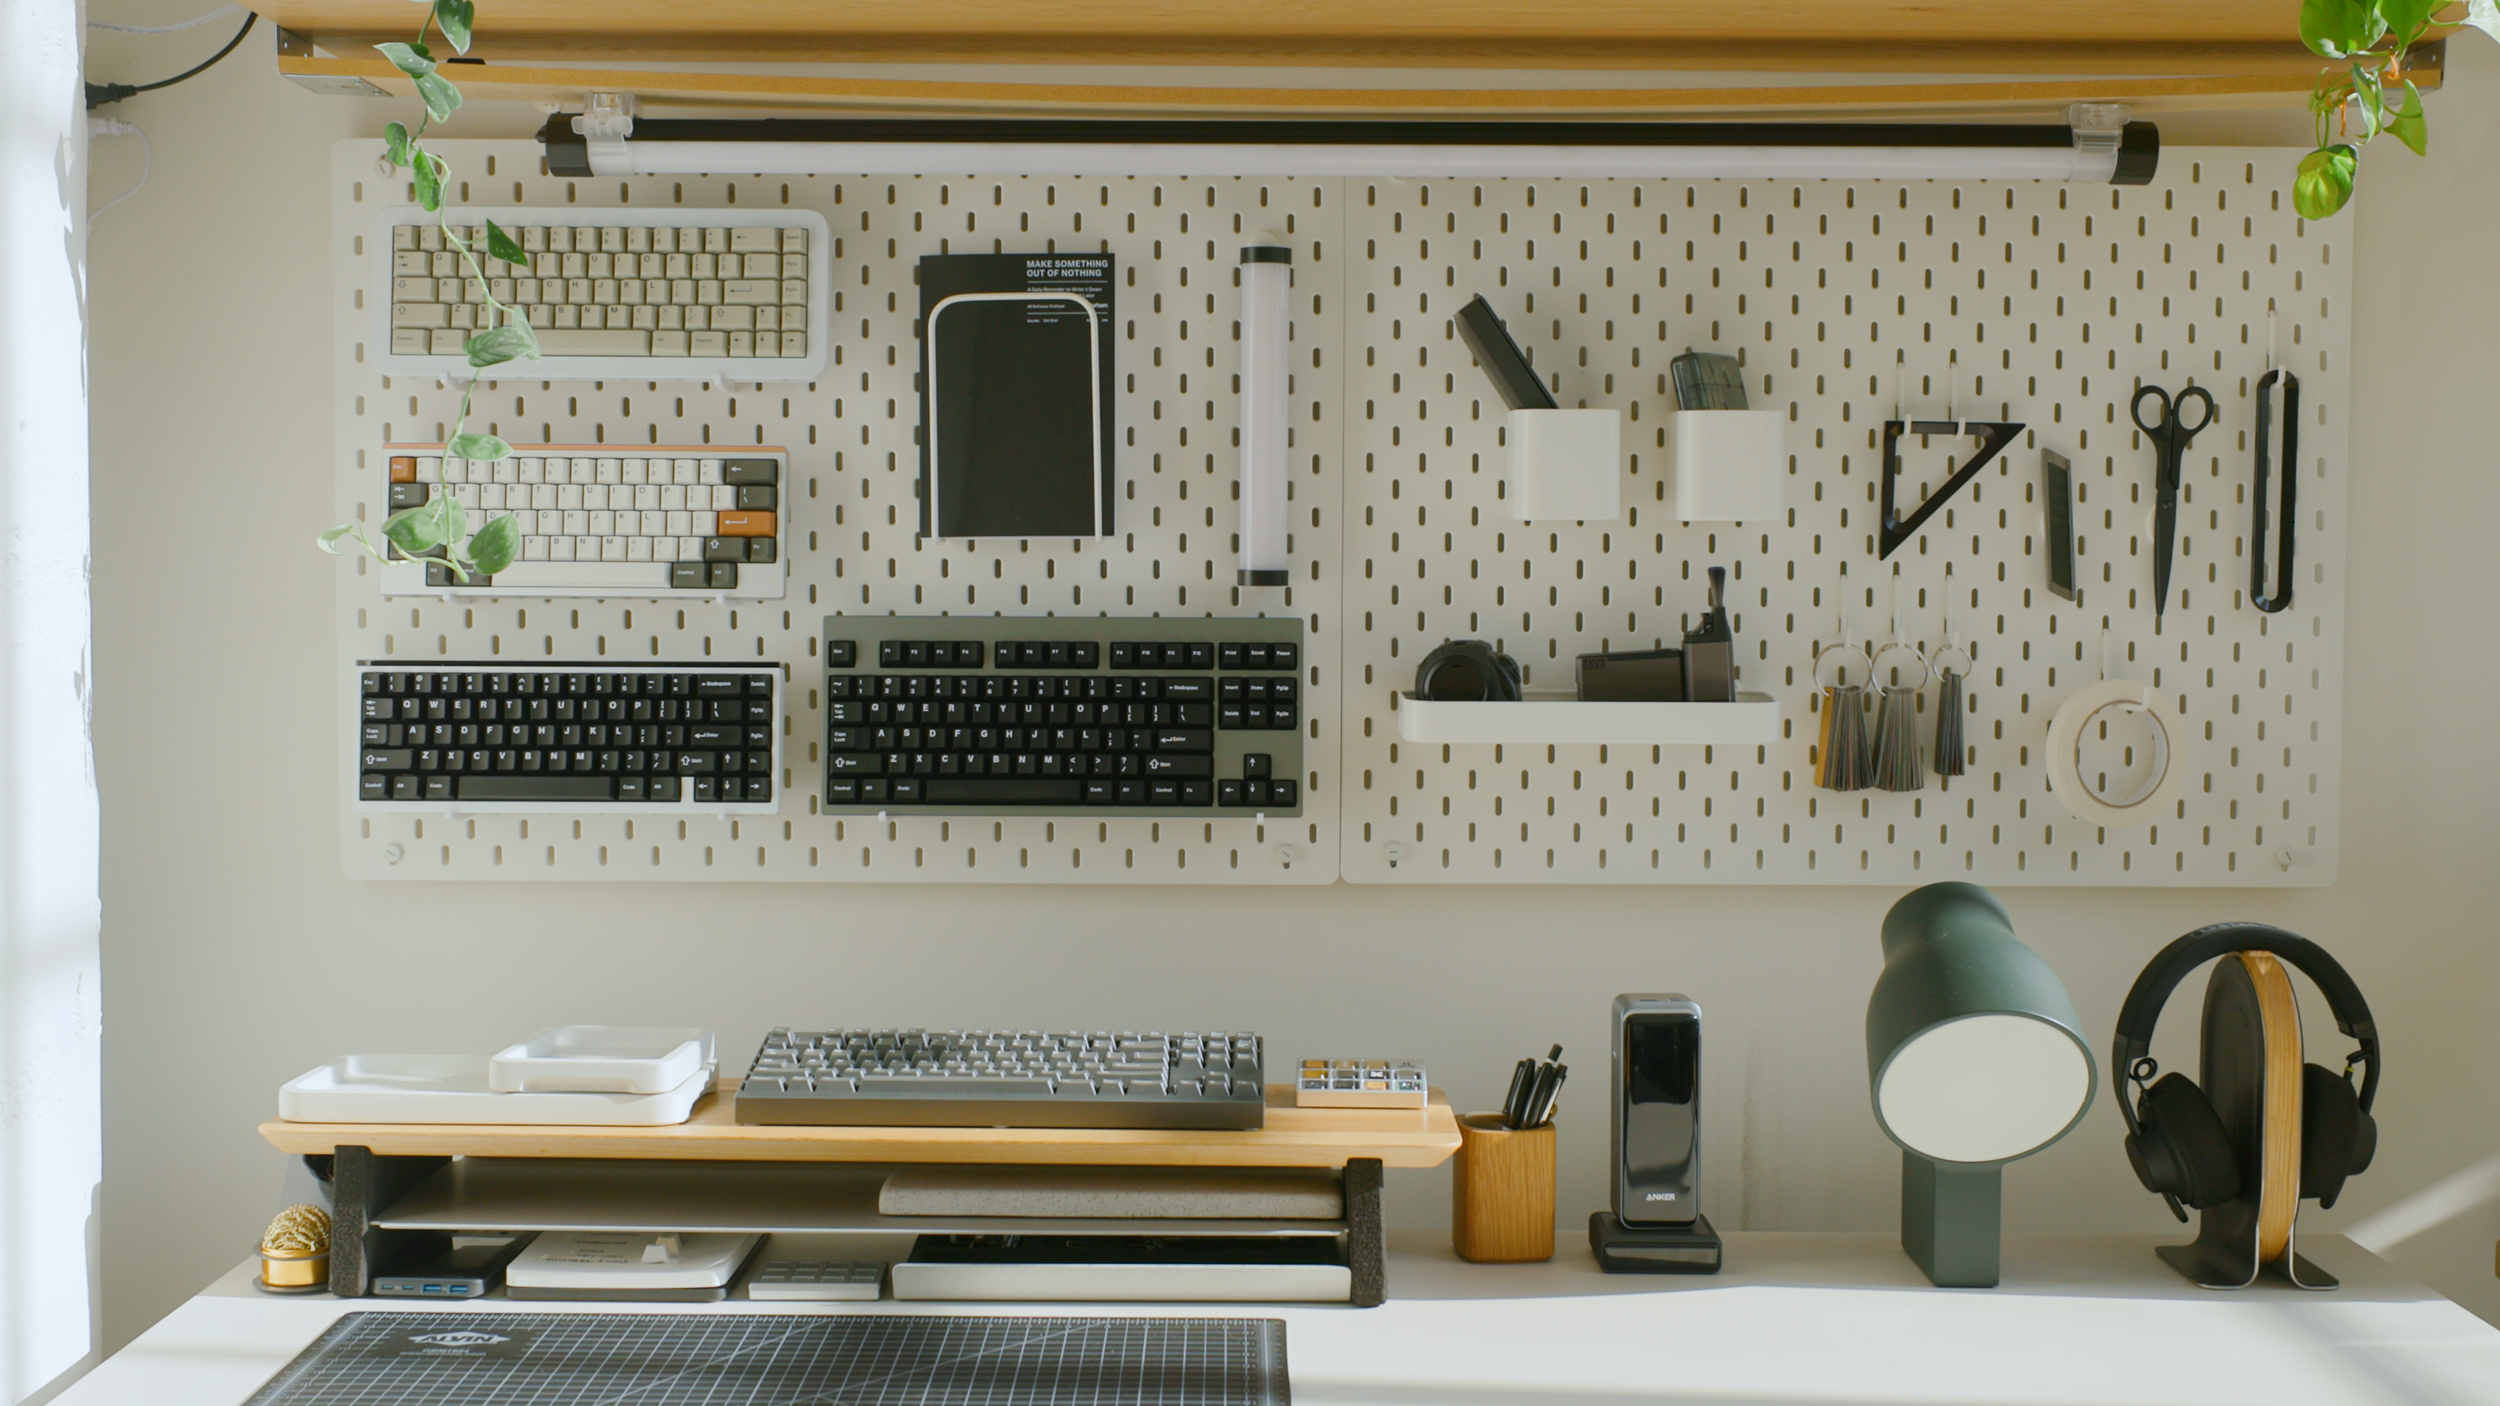
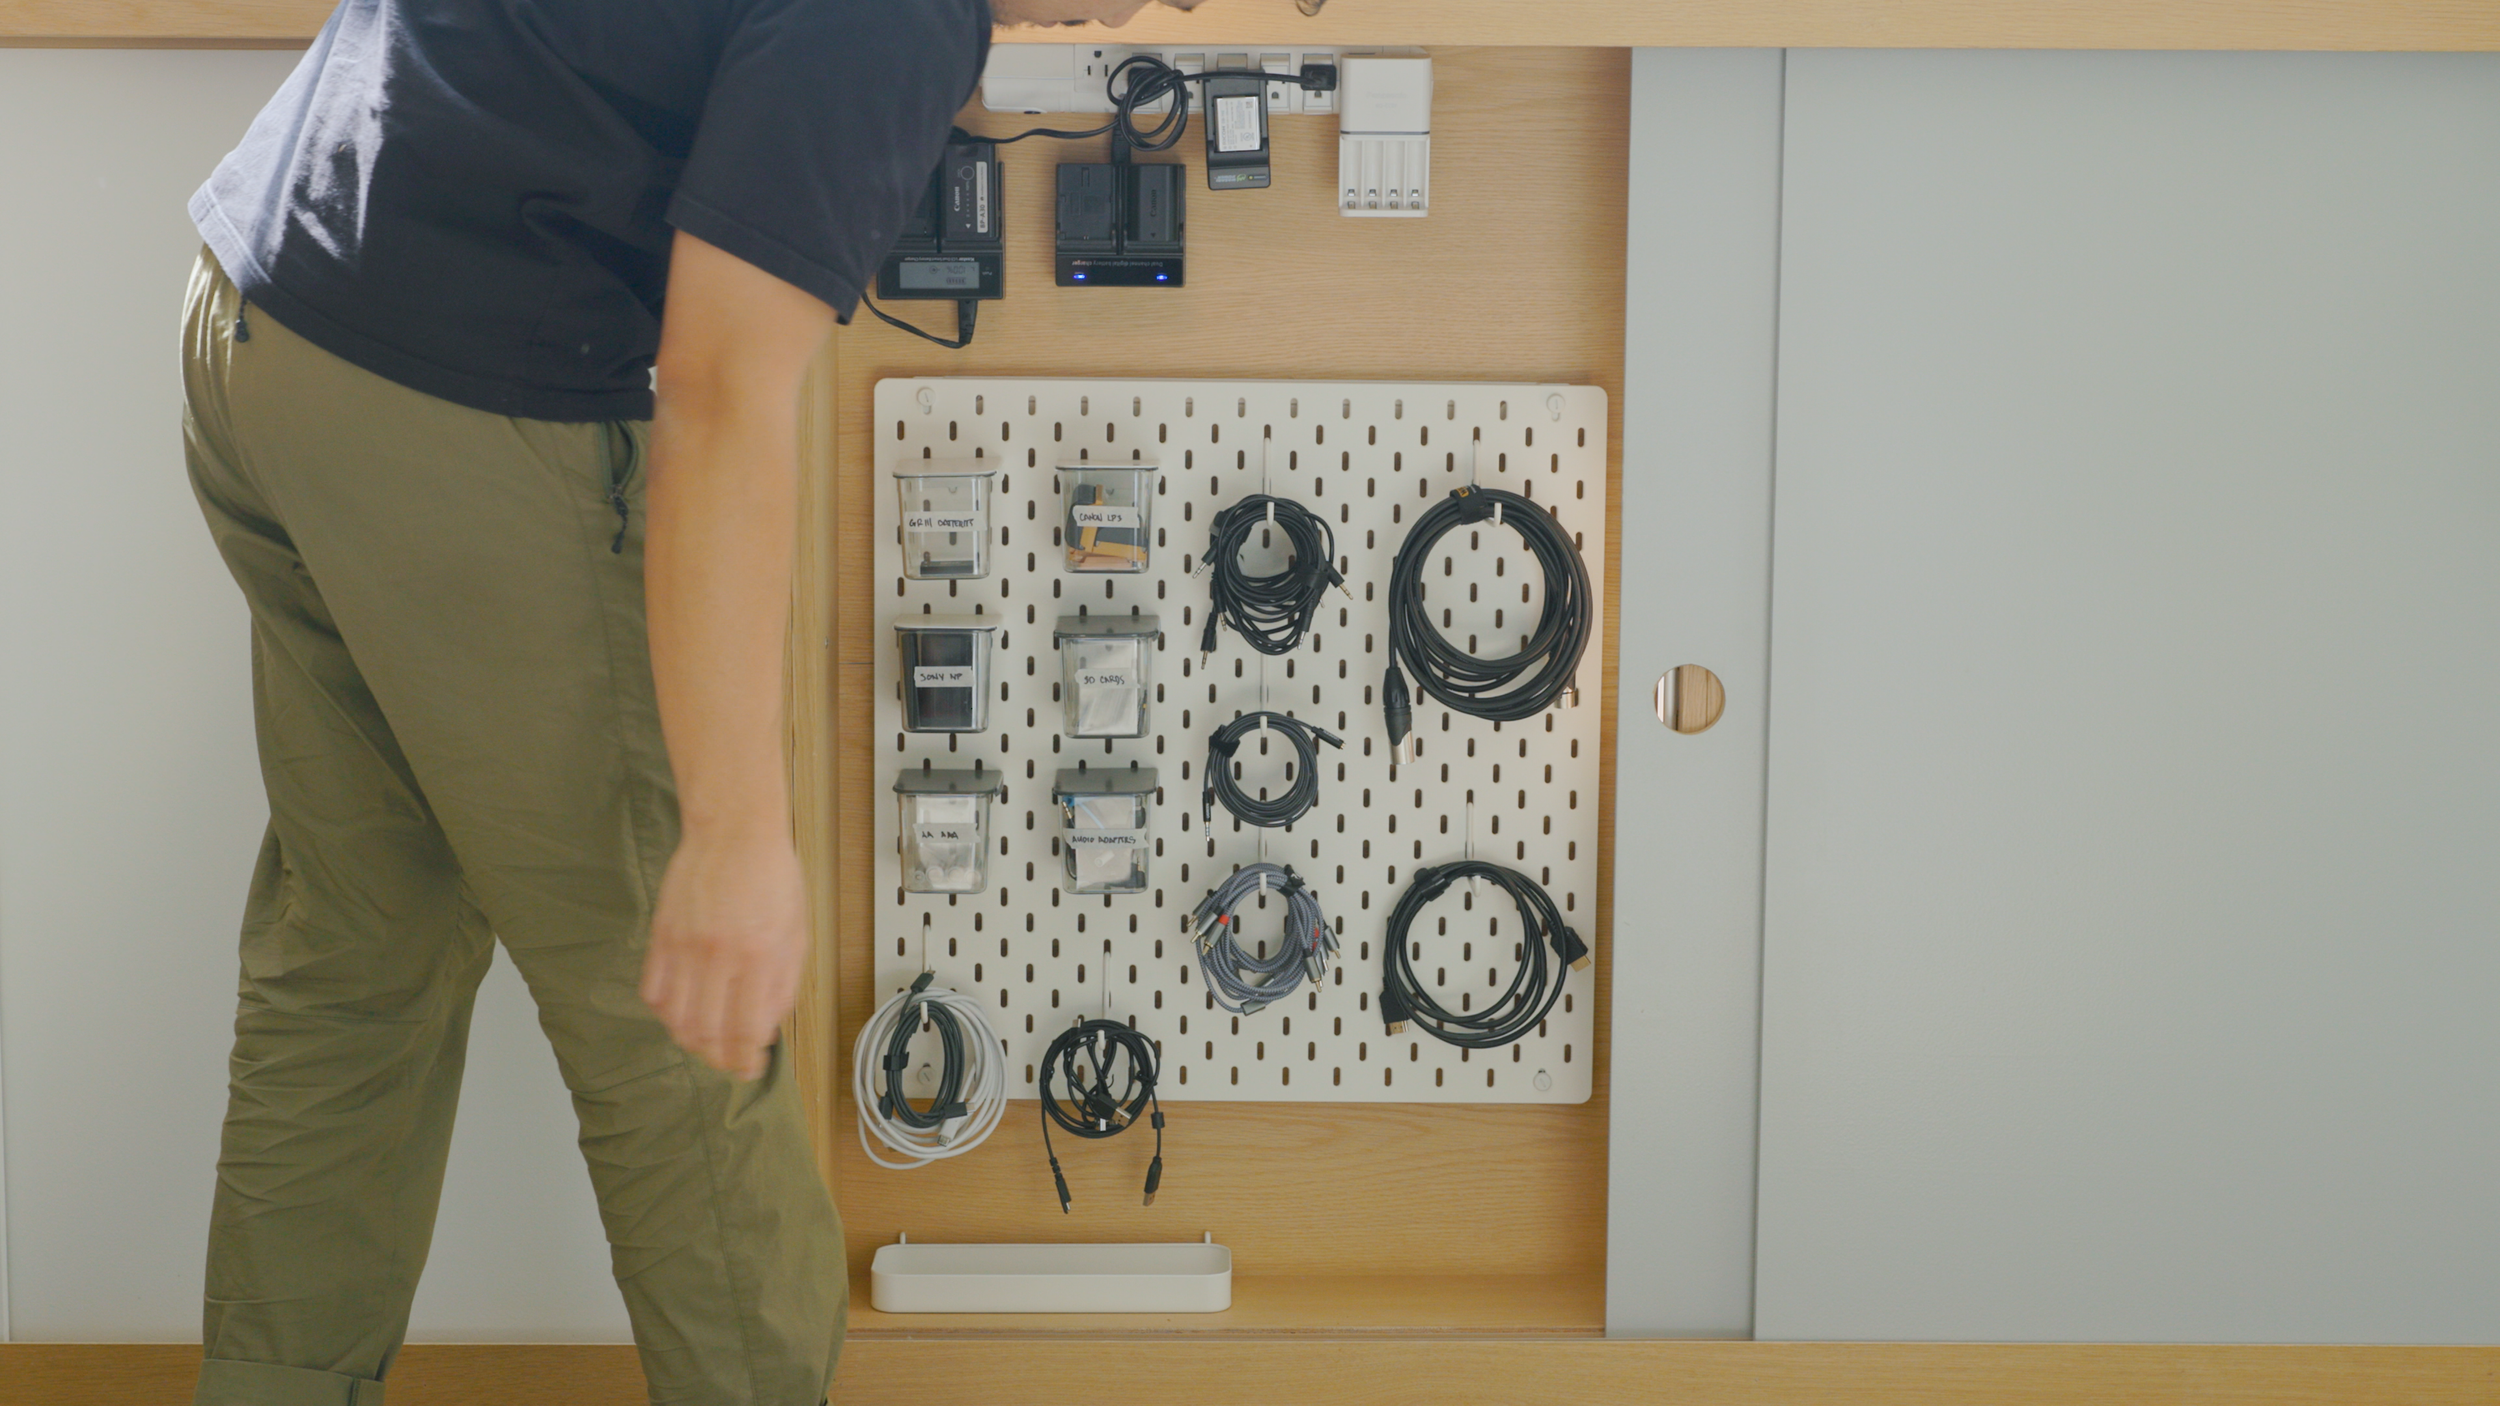
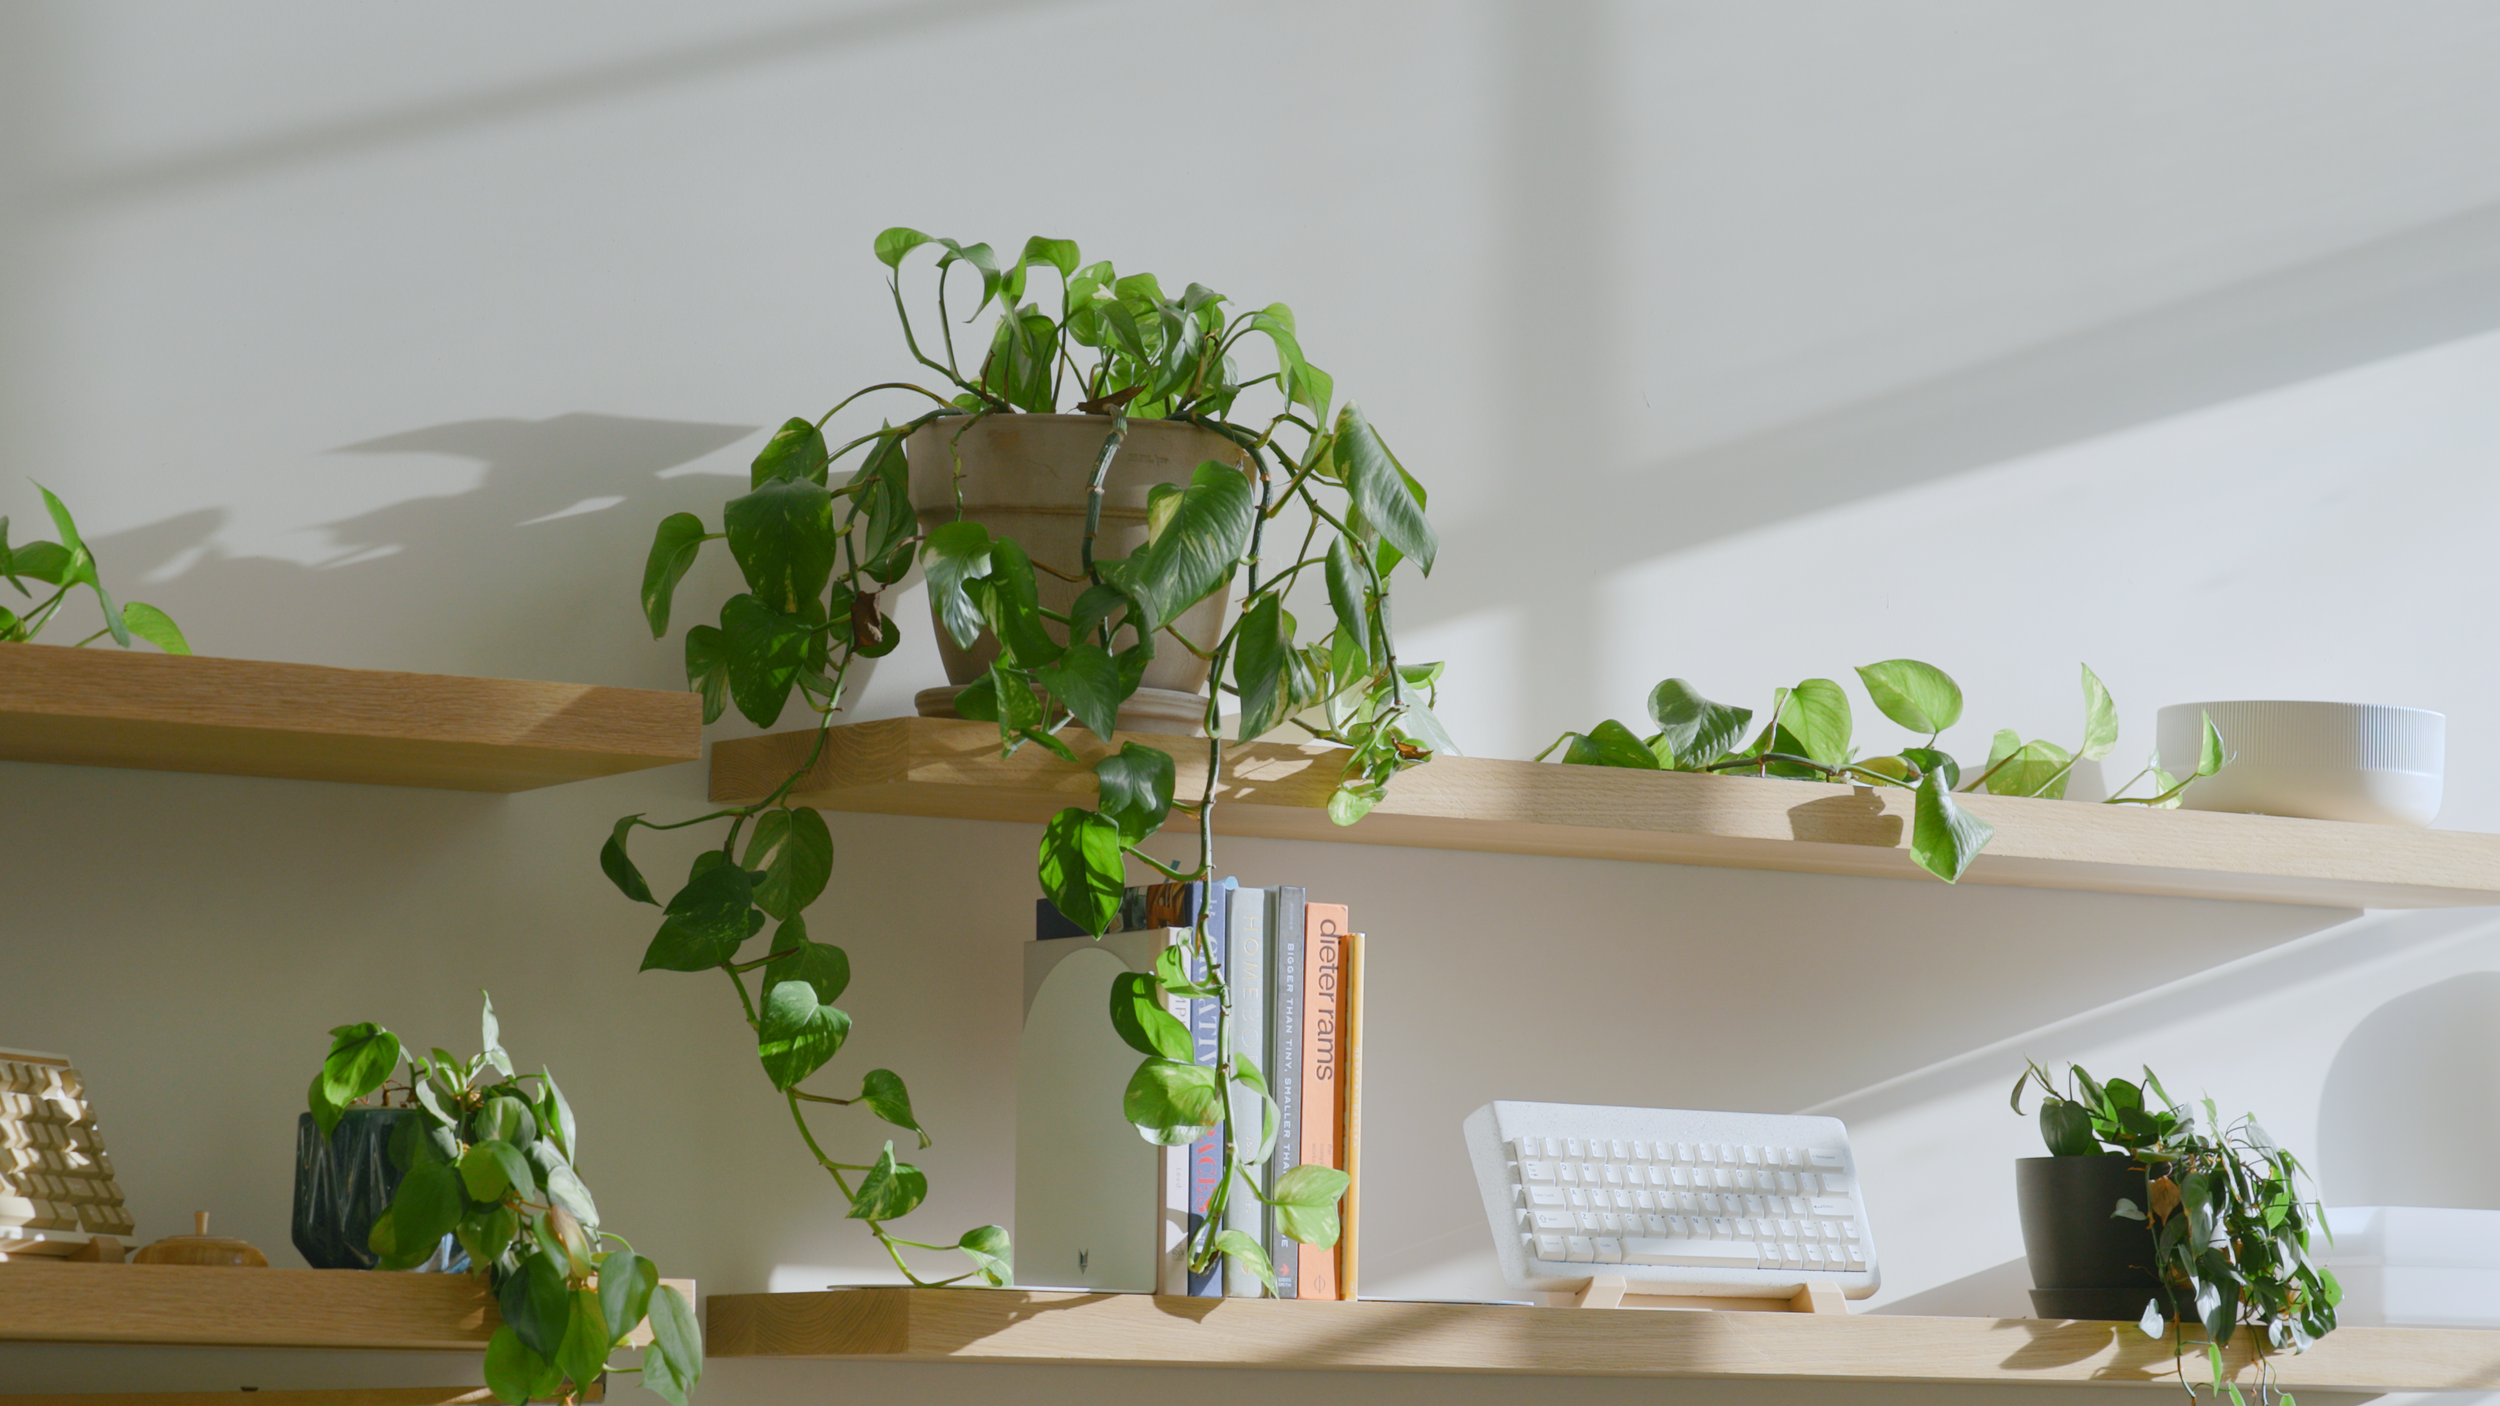
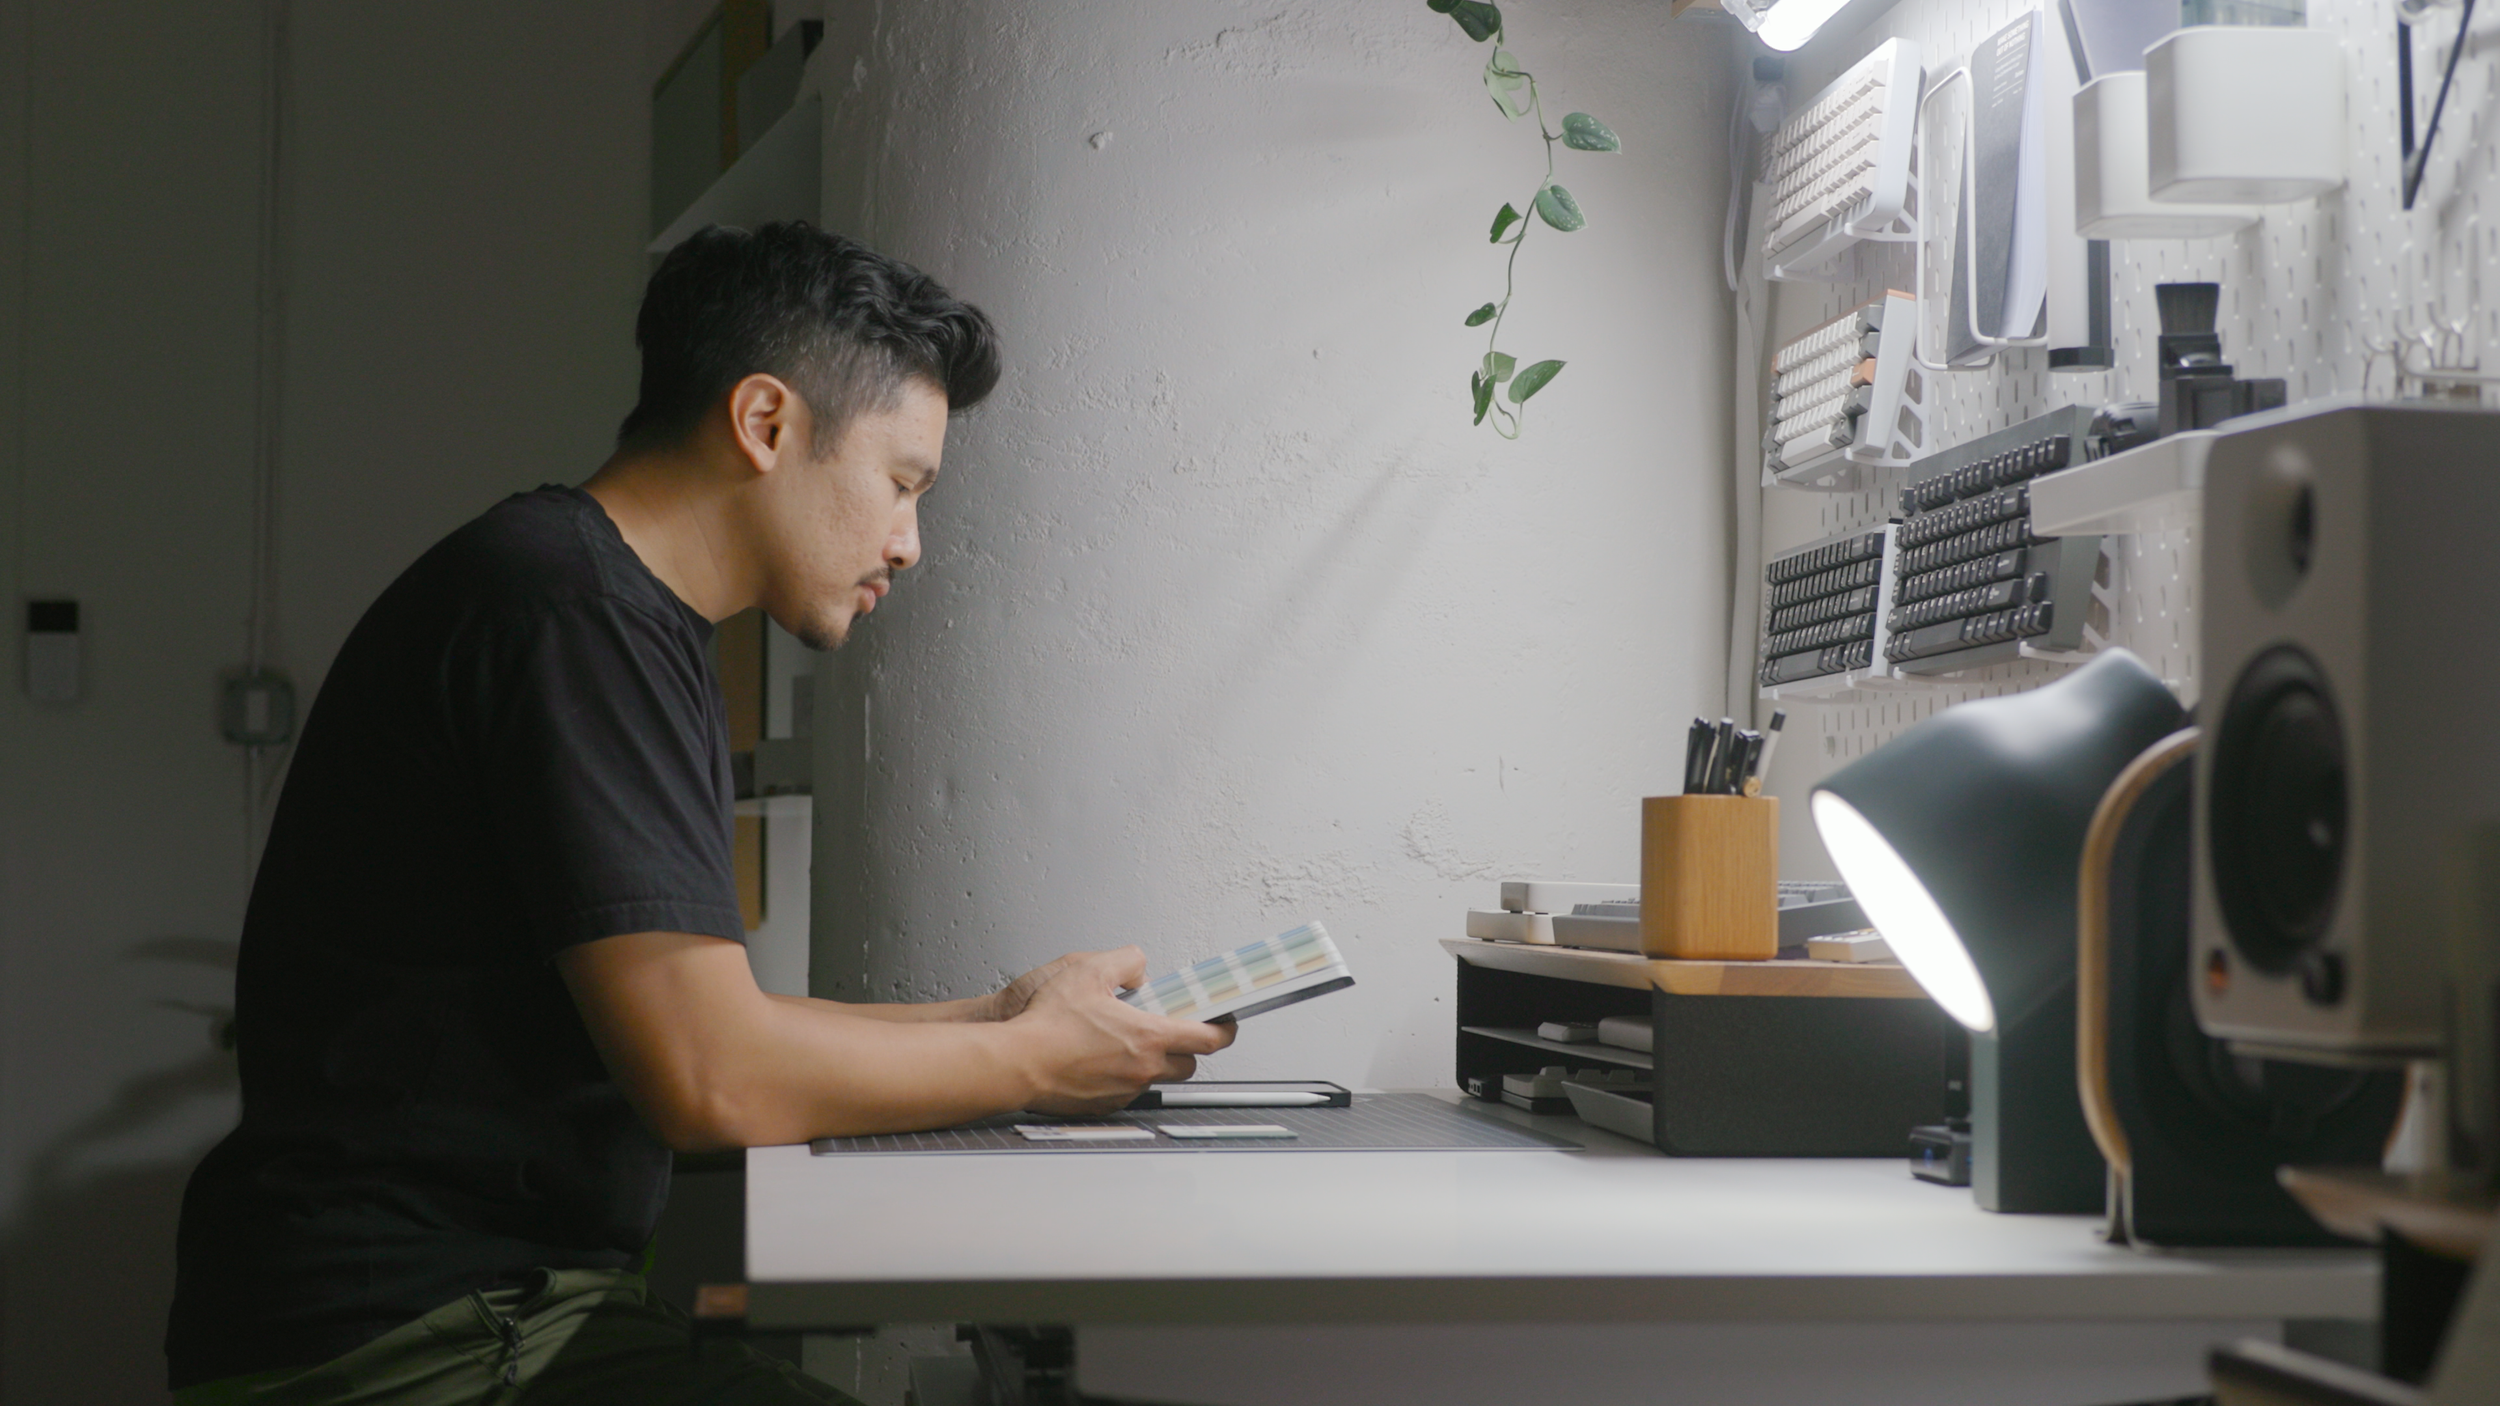
Across the room is a dual desk setup, with white oak floating shelves above them. On the left, is a desk I use mostly for assembly of my camera gear, and custom mechanical keyboards. I utilize a pegboard above it to display my collection and organize my frequently used tools.


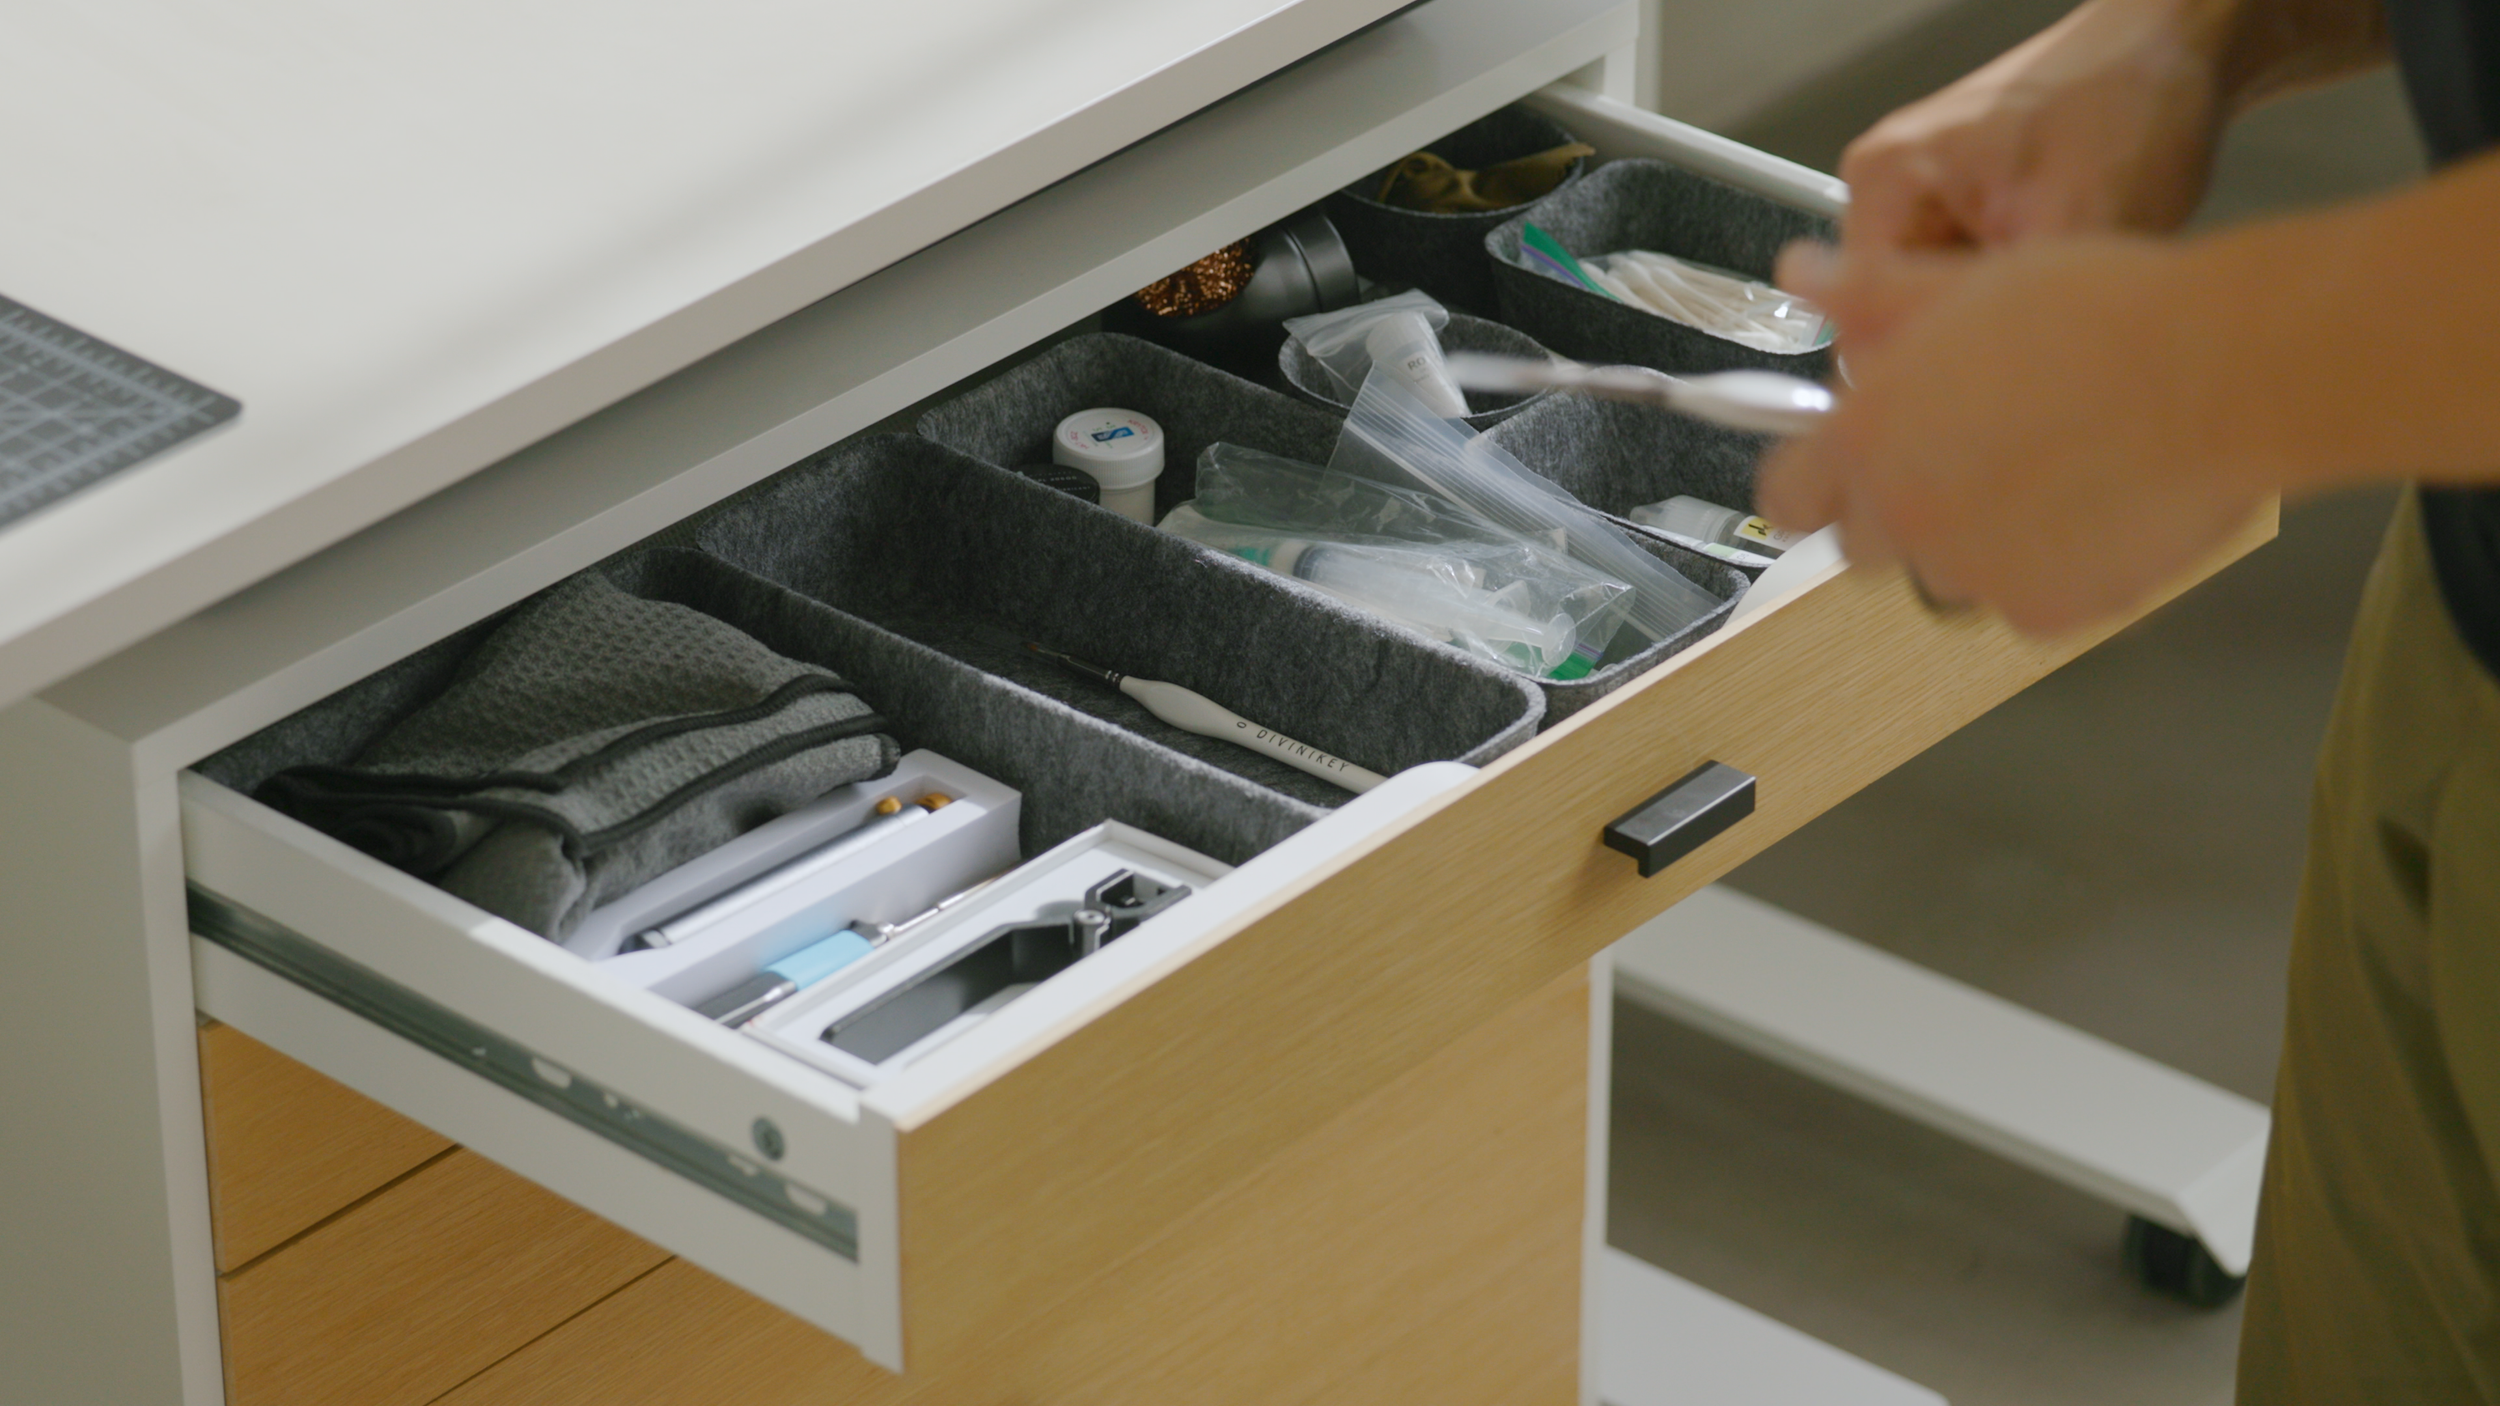
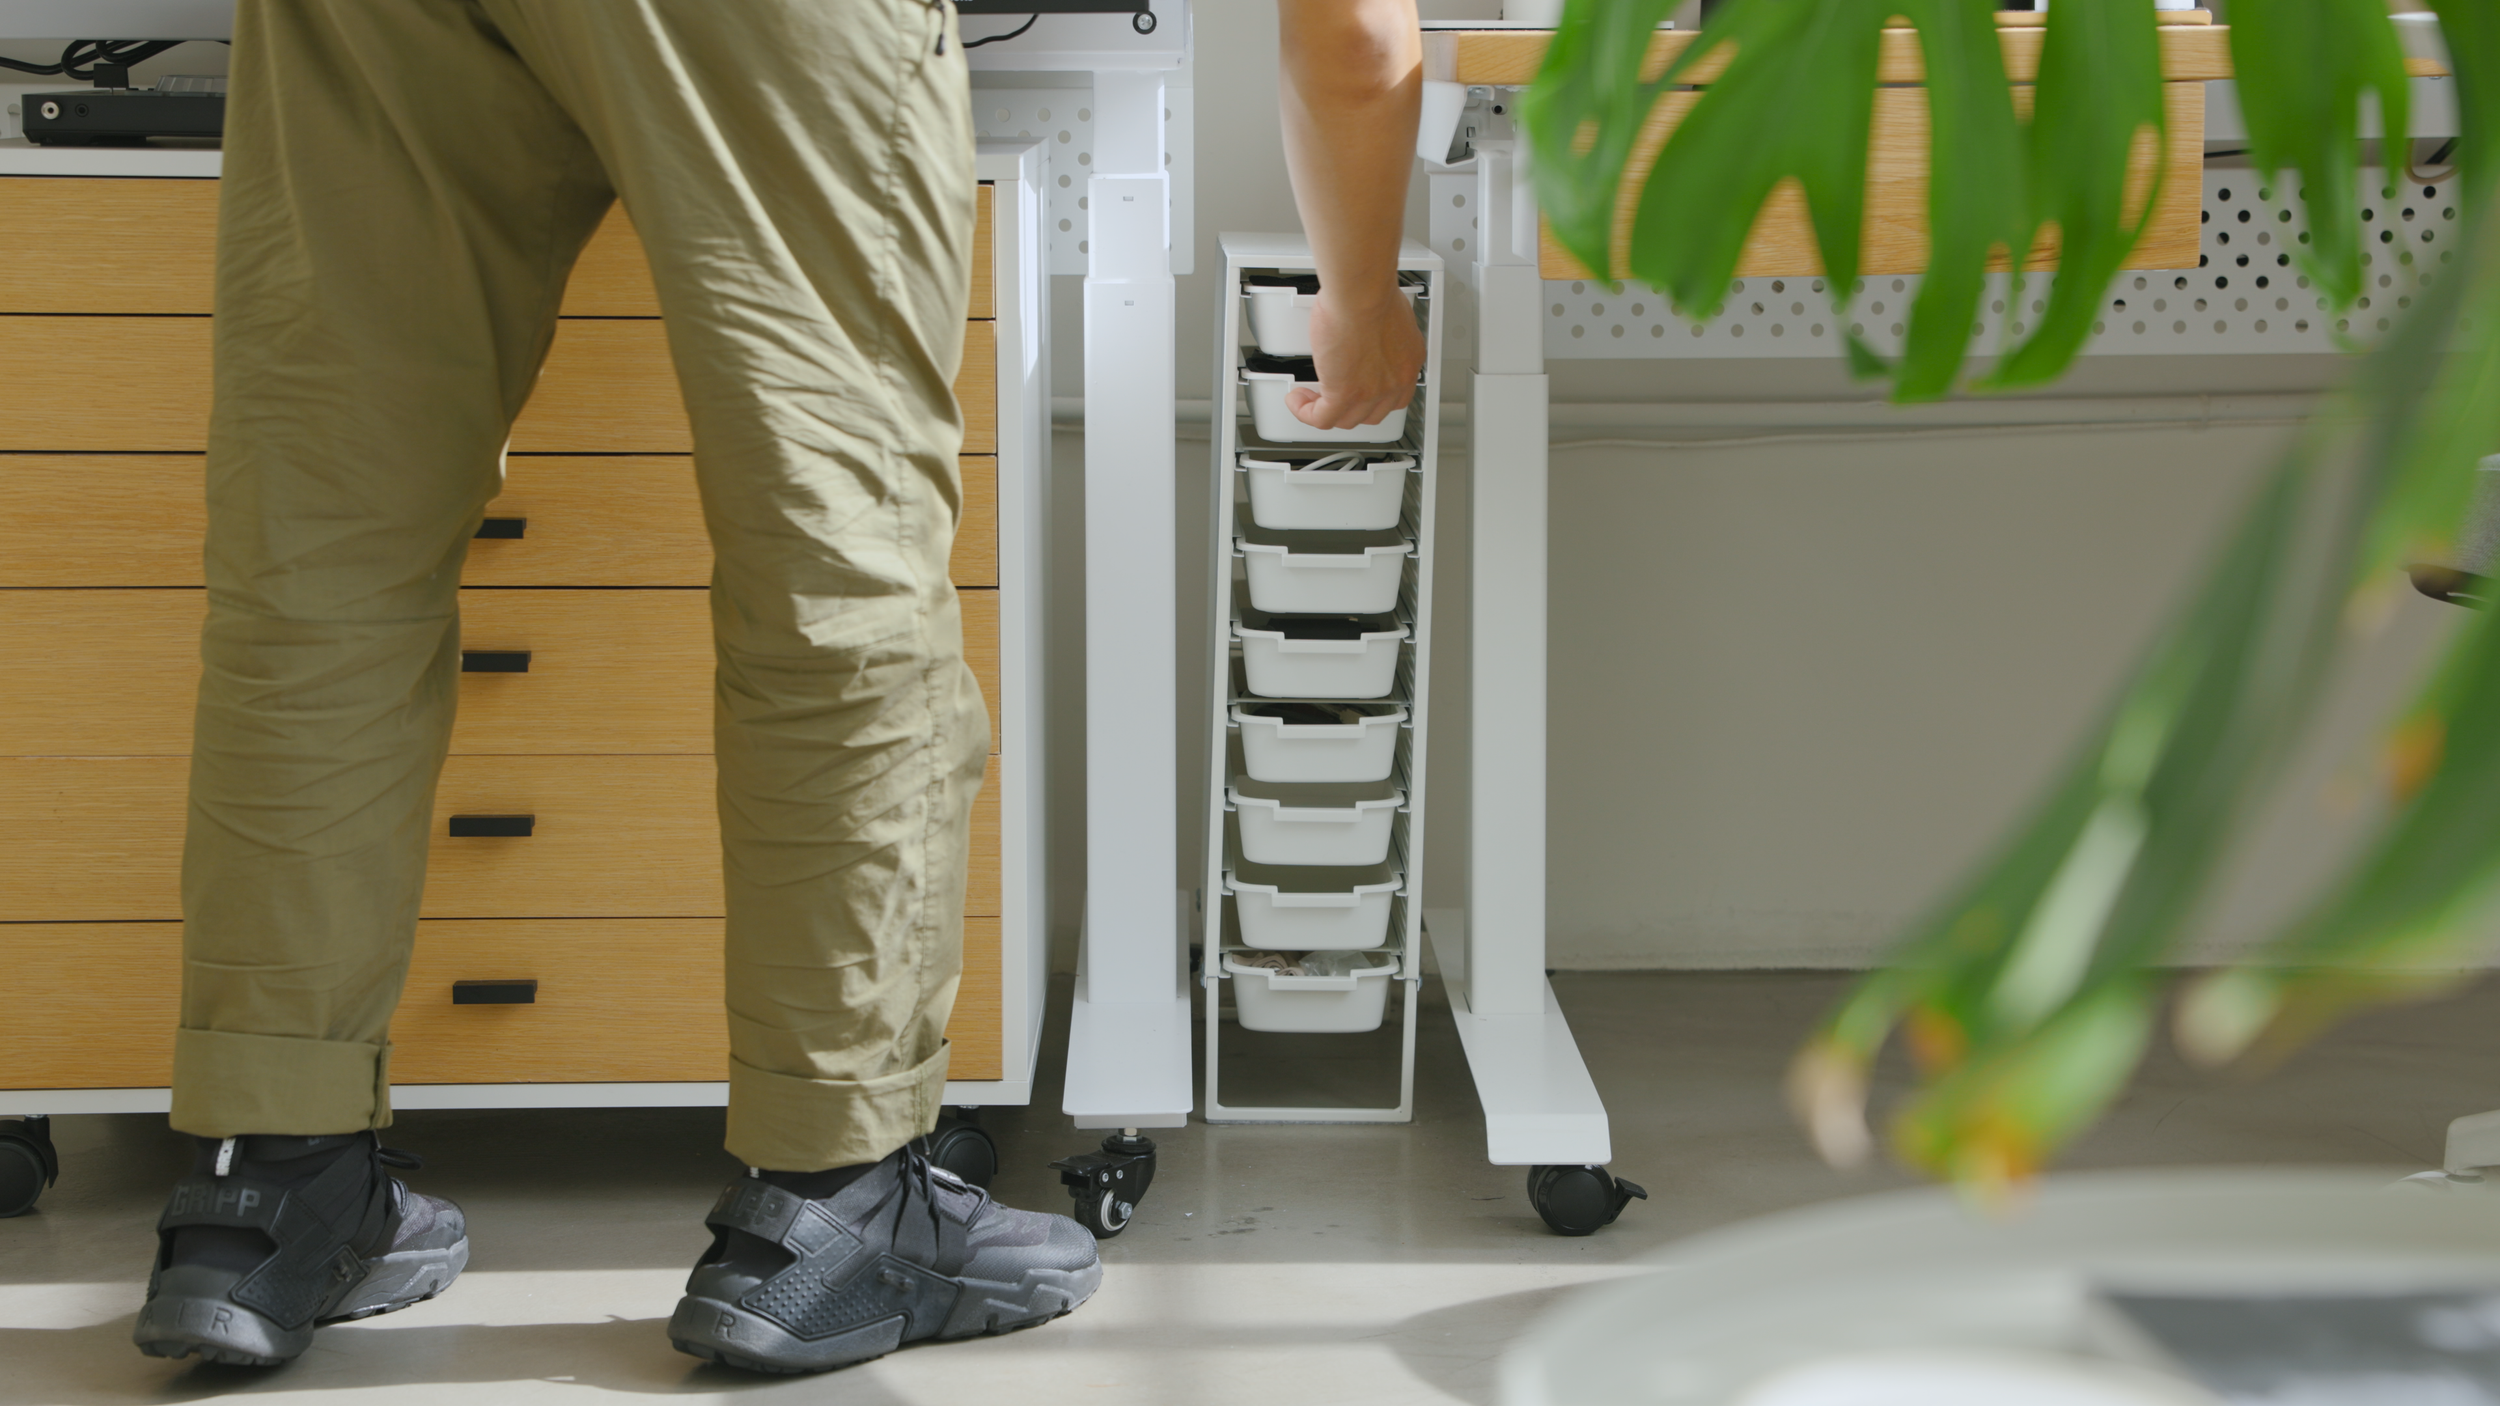
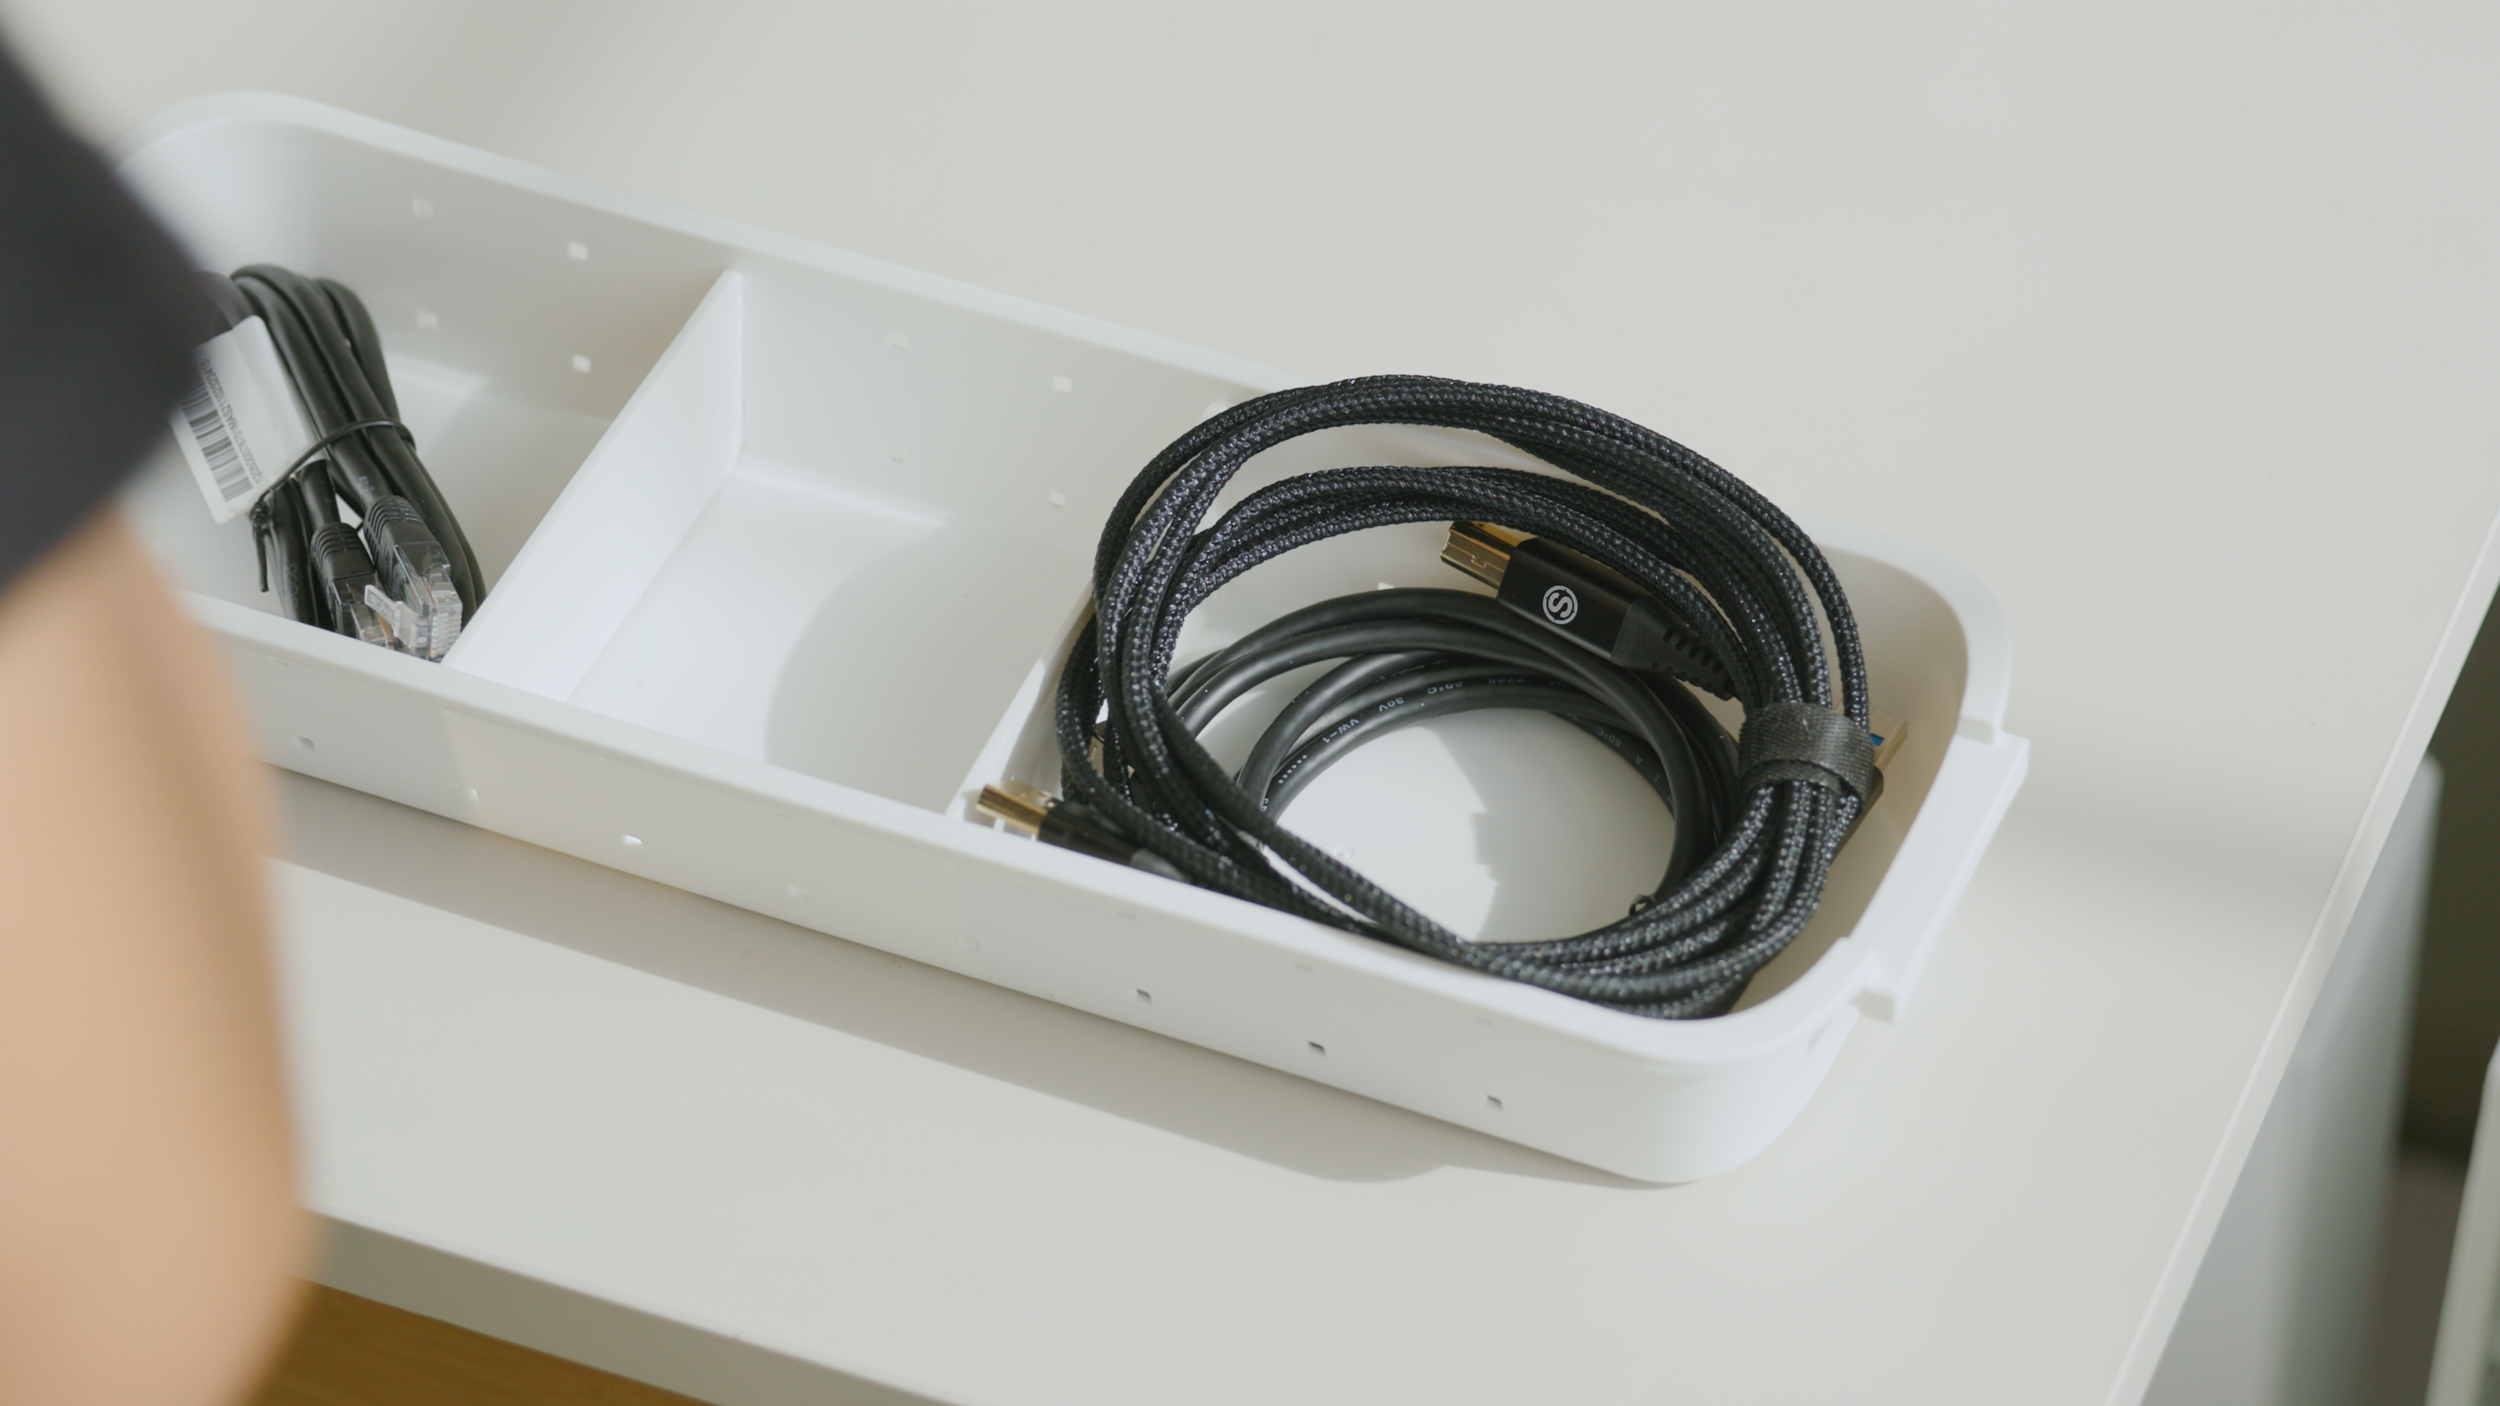
To store accessories, I have an Ikea Alex drawer, which I customized with white oak paneling to give it a unique look. I also have a slim Otis tower with pull-out trays for all of my cables.
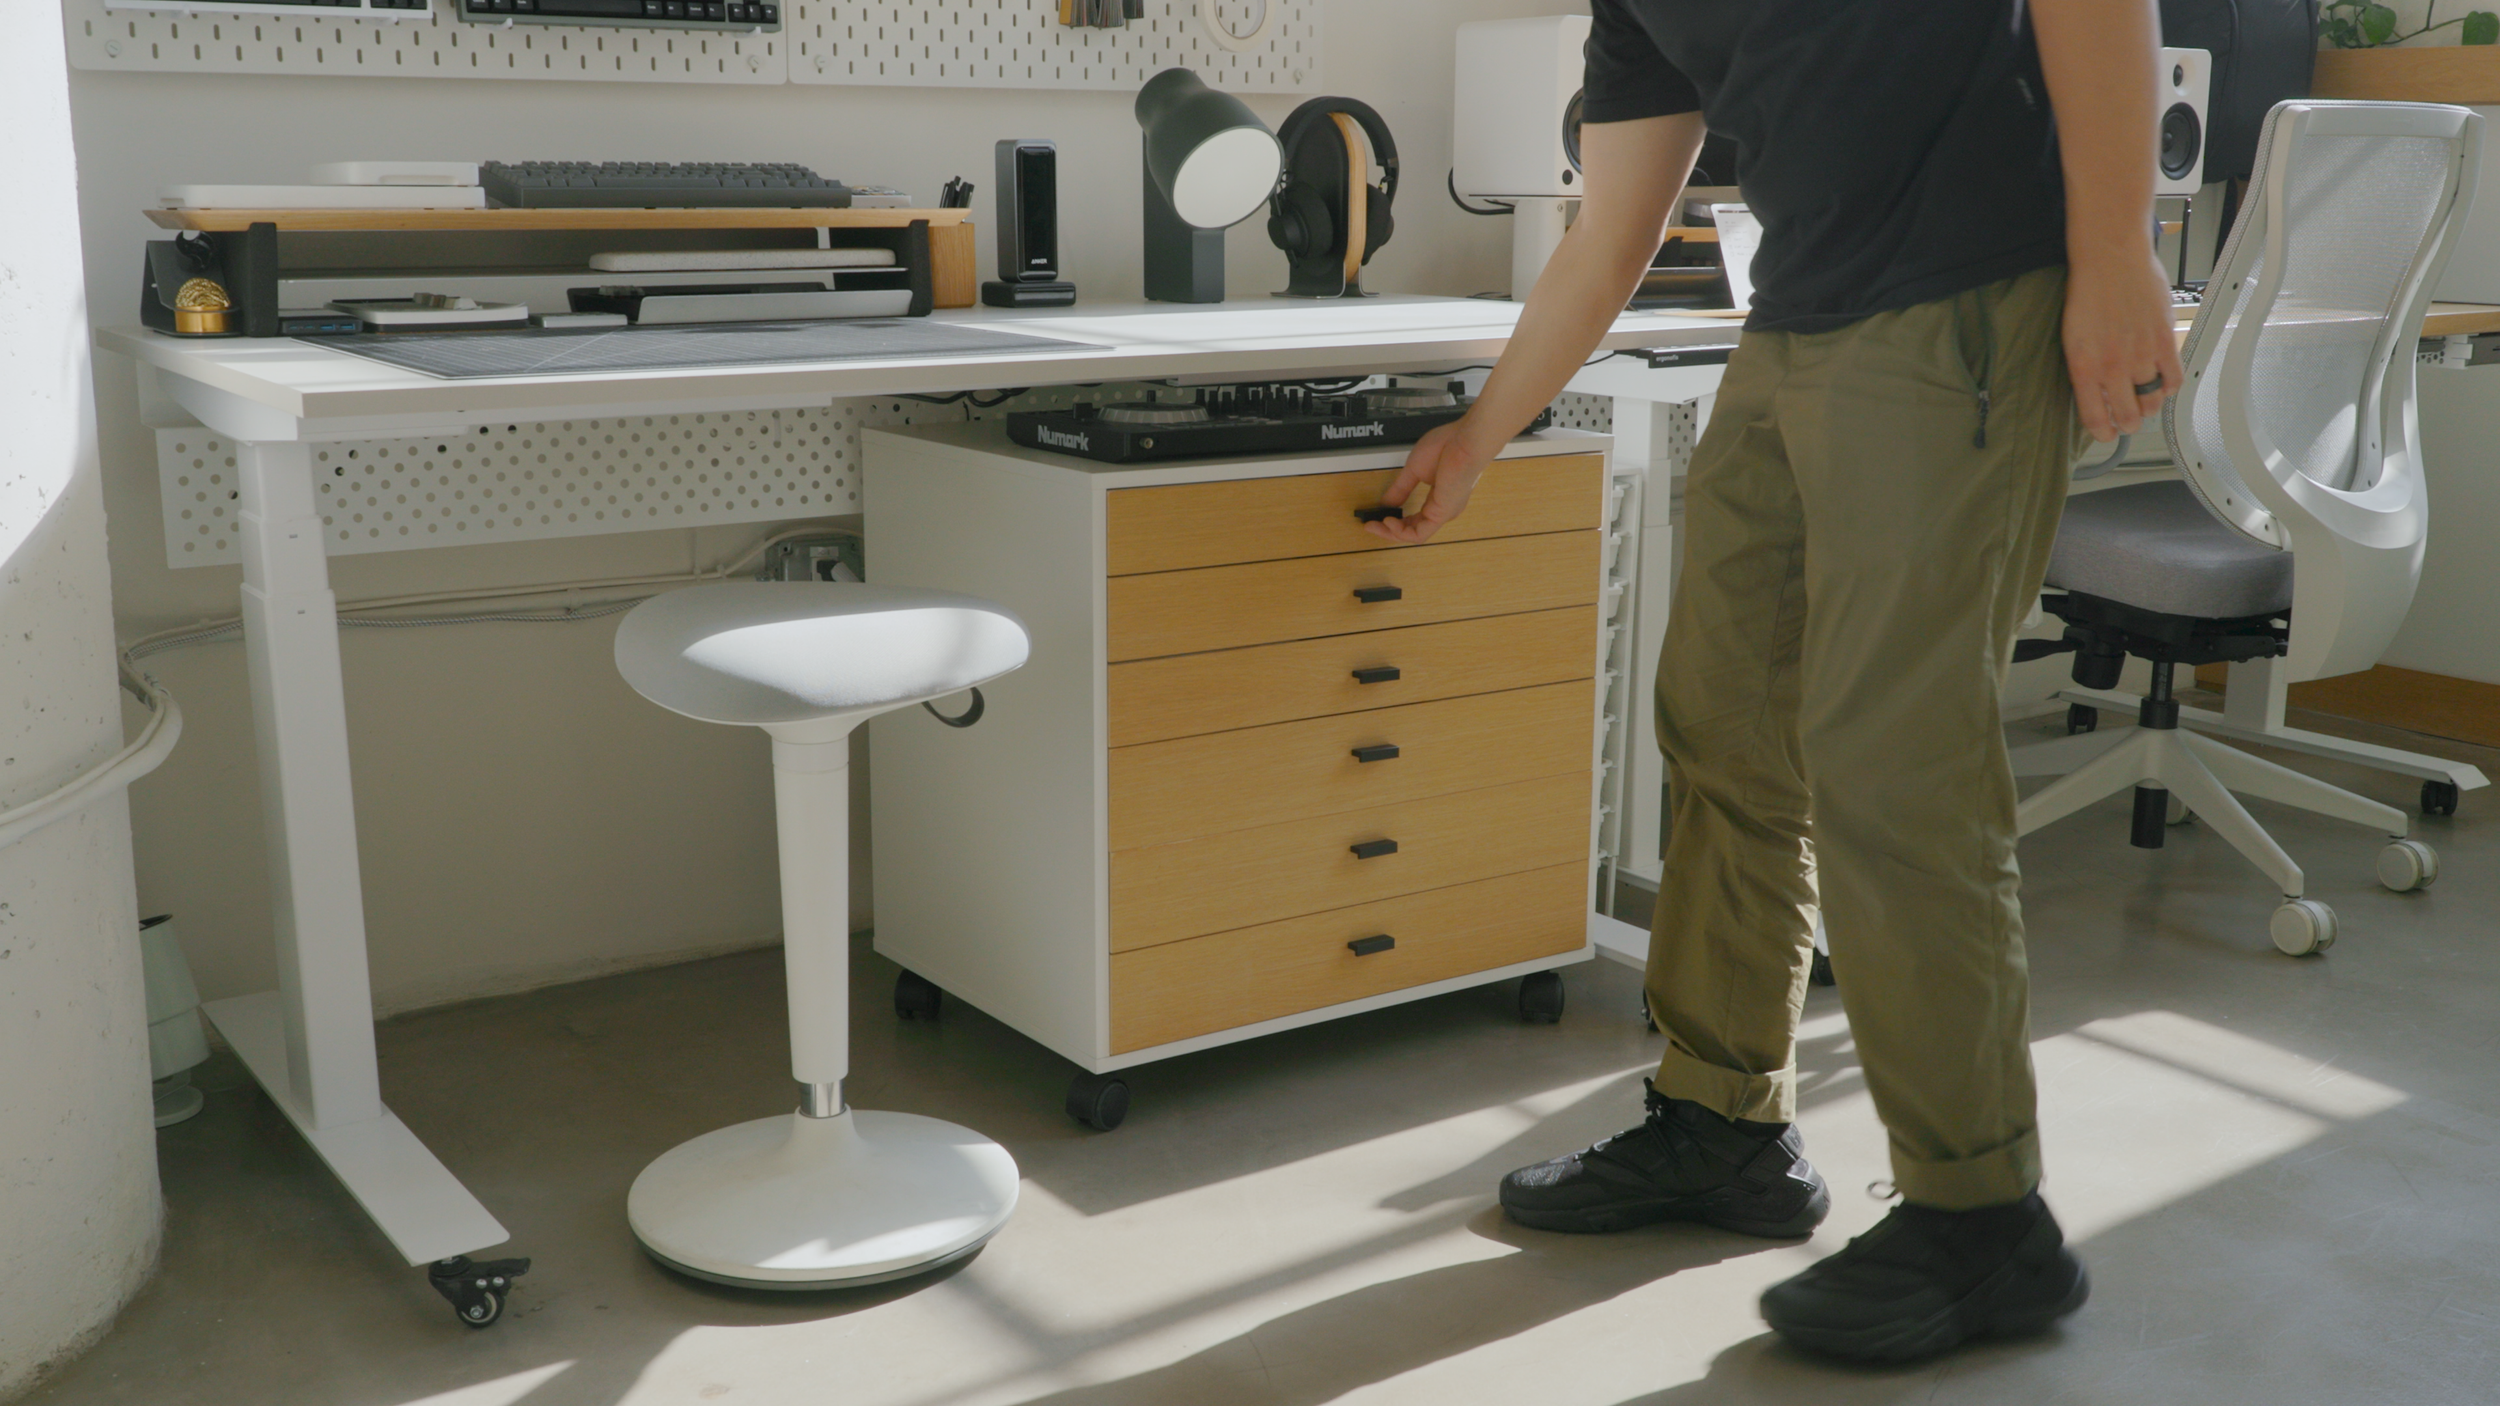
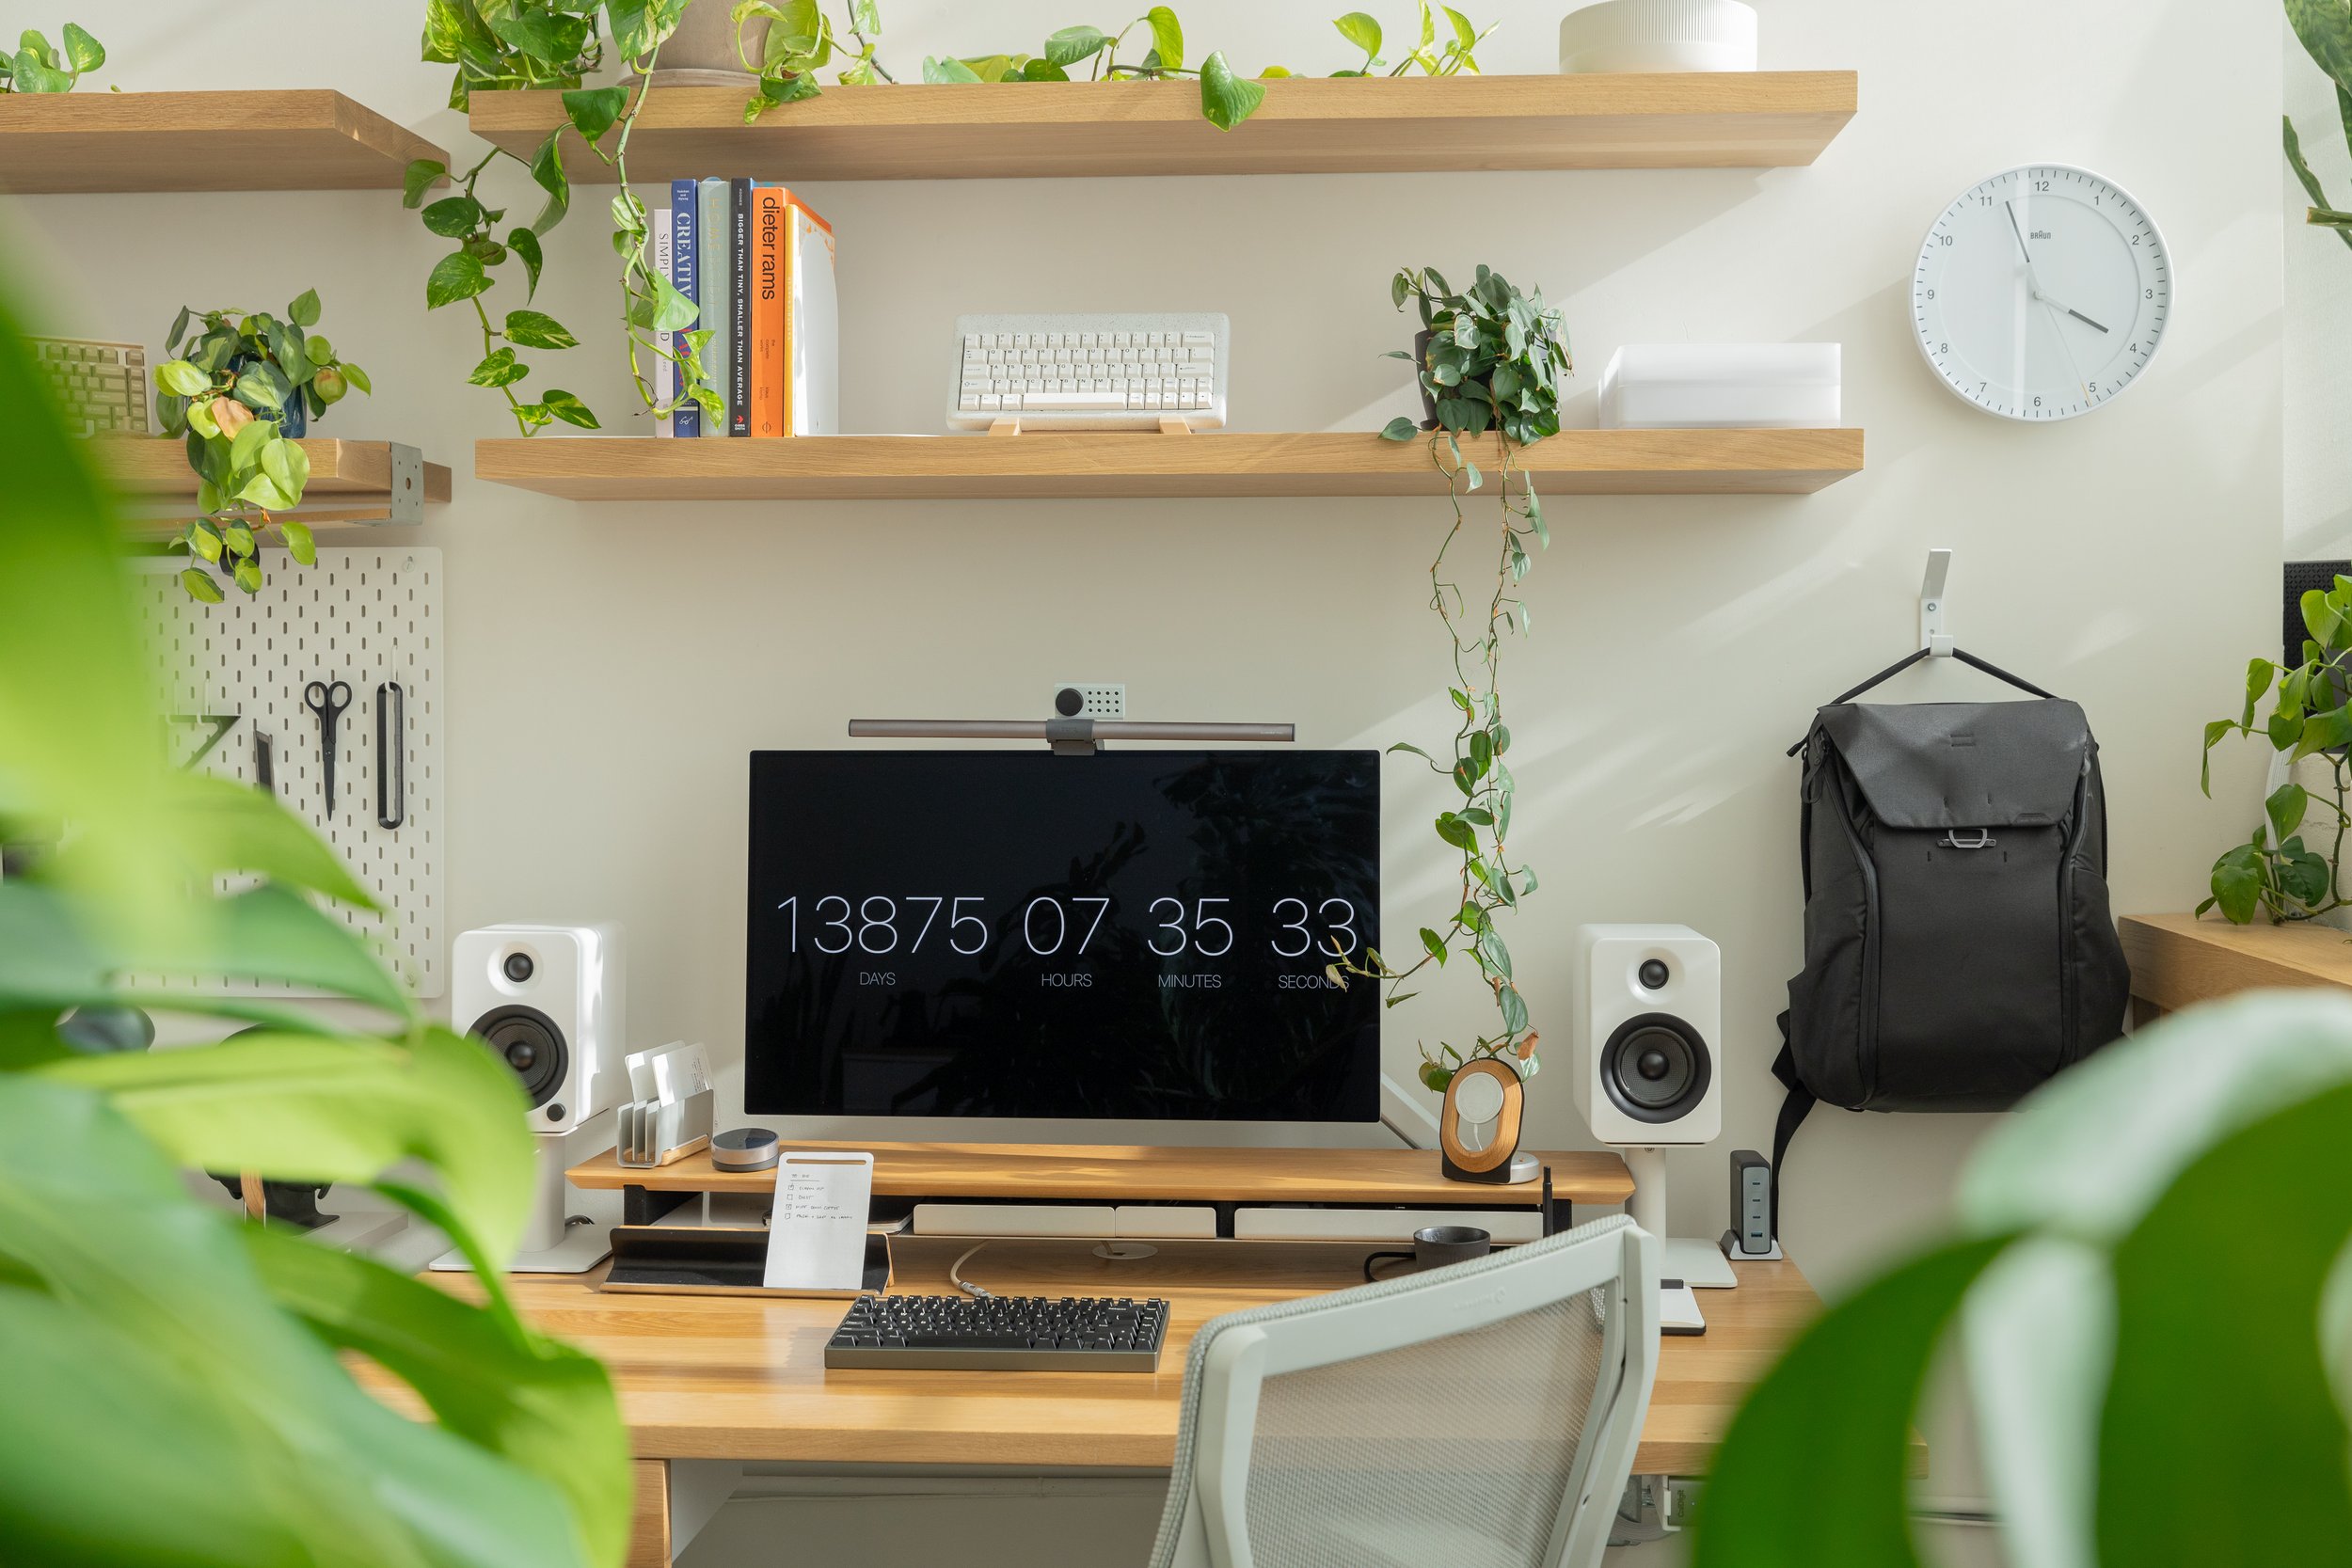
The desk on the right is where I do my digital work. It’s a white oak sit-stand desk with plenty of surface to work on. I’ve created detailed videos of my desk setup and the accessories I use which are linked below.
Desk Setup Links
Desks and chairs from Ergonofis
Update April 2026: It seems as though Ergonofis might have closed down. These days, I do recommend the Desk by Grovemade as a better alternative.For additional details and links, read my desk setup blog post
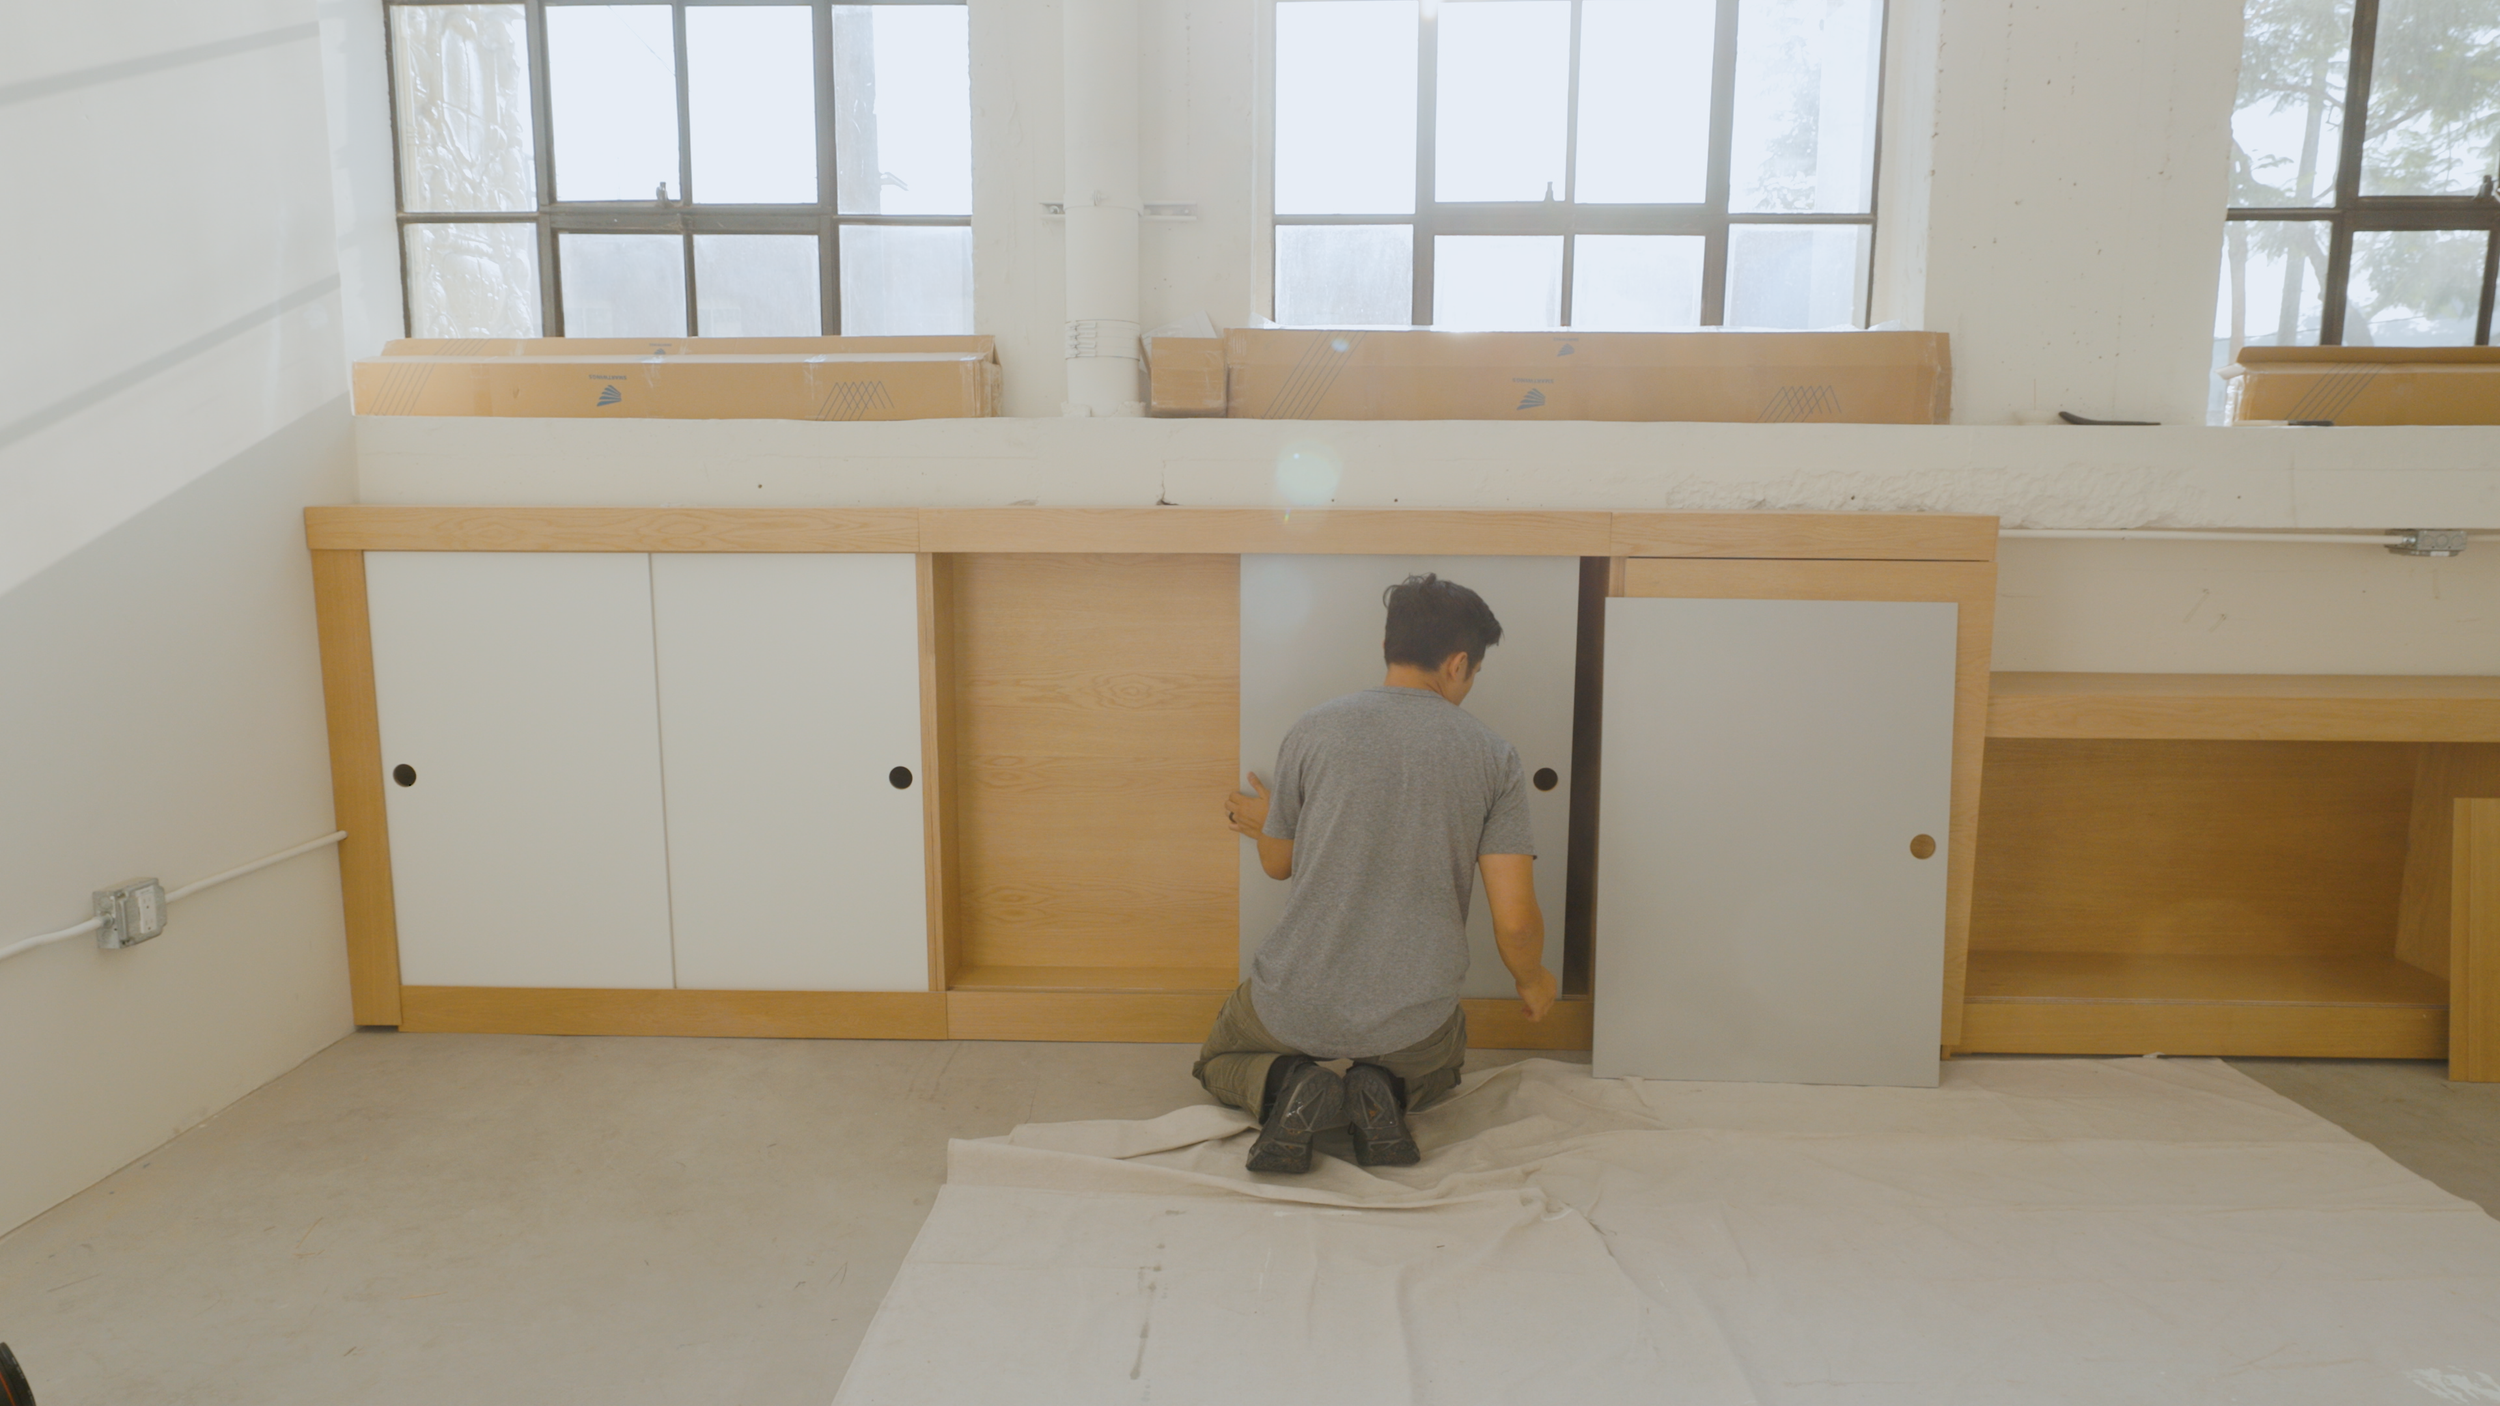
Custom-Built Storage
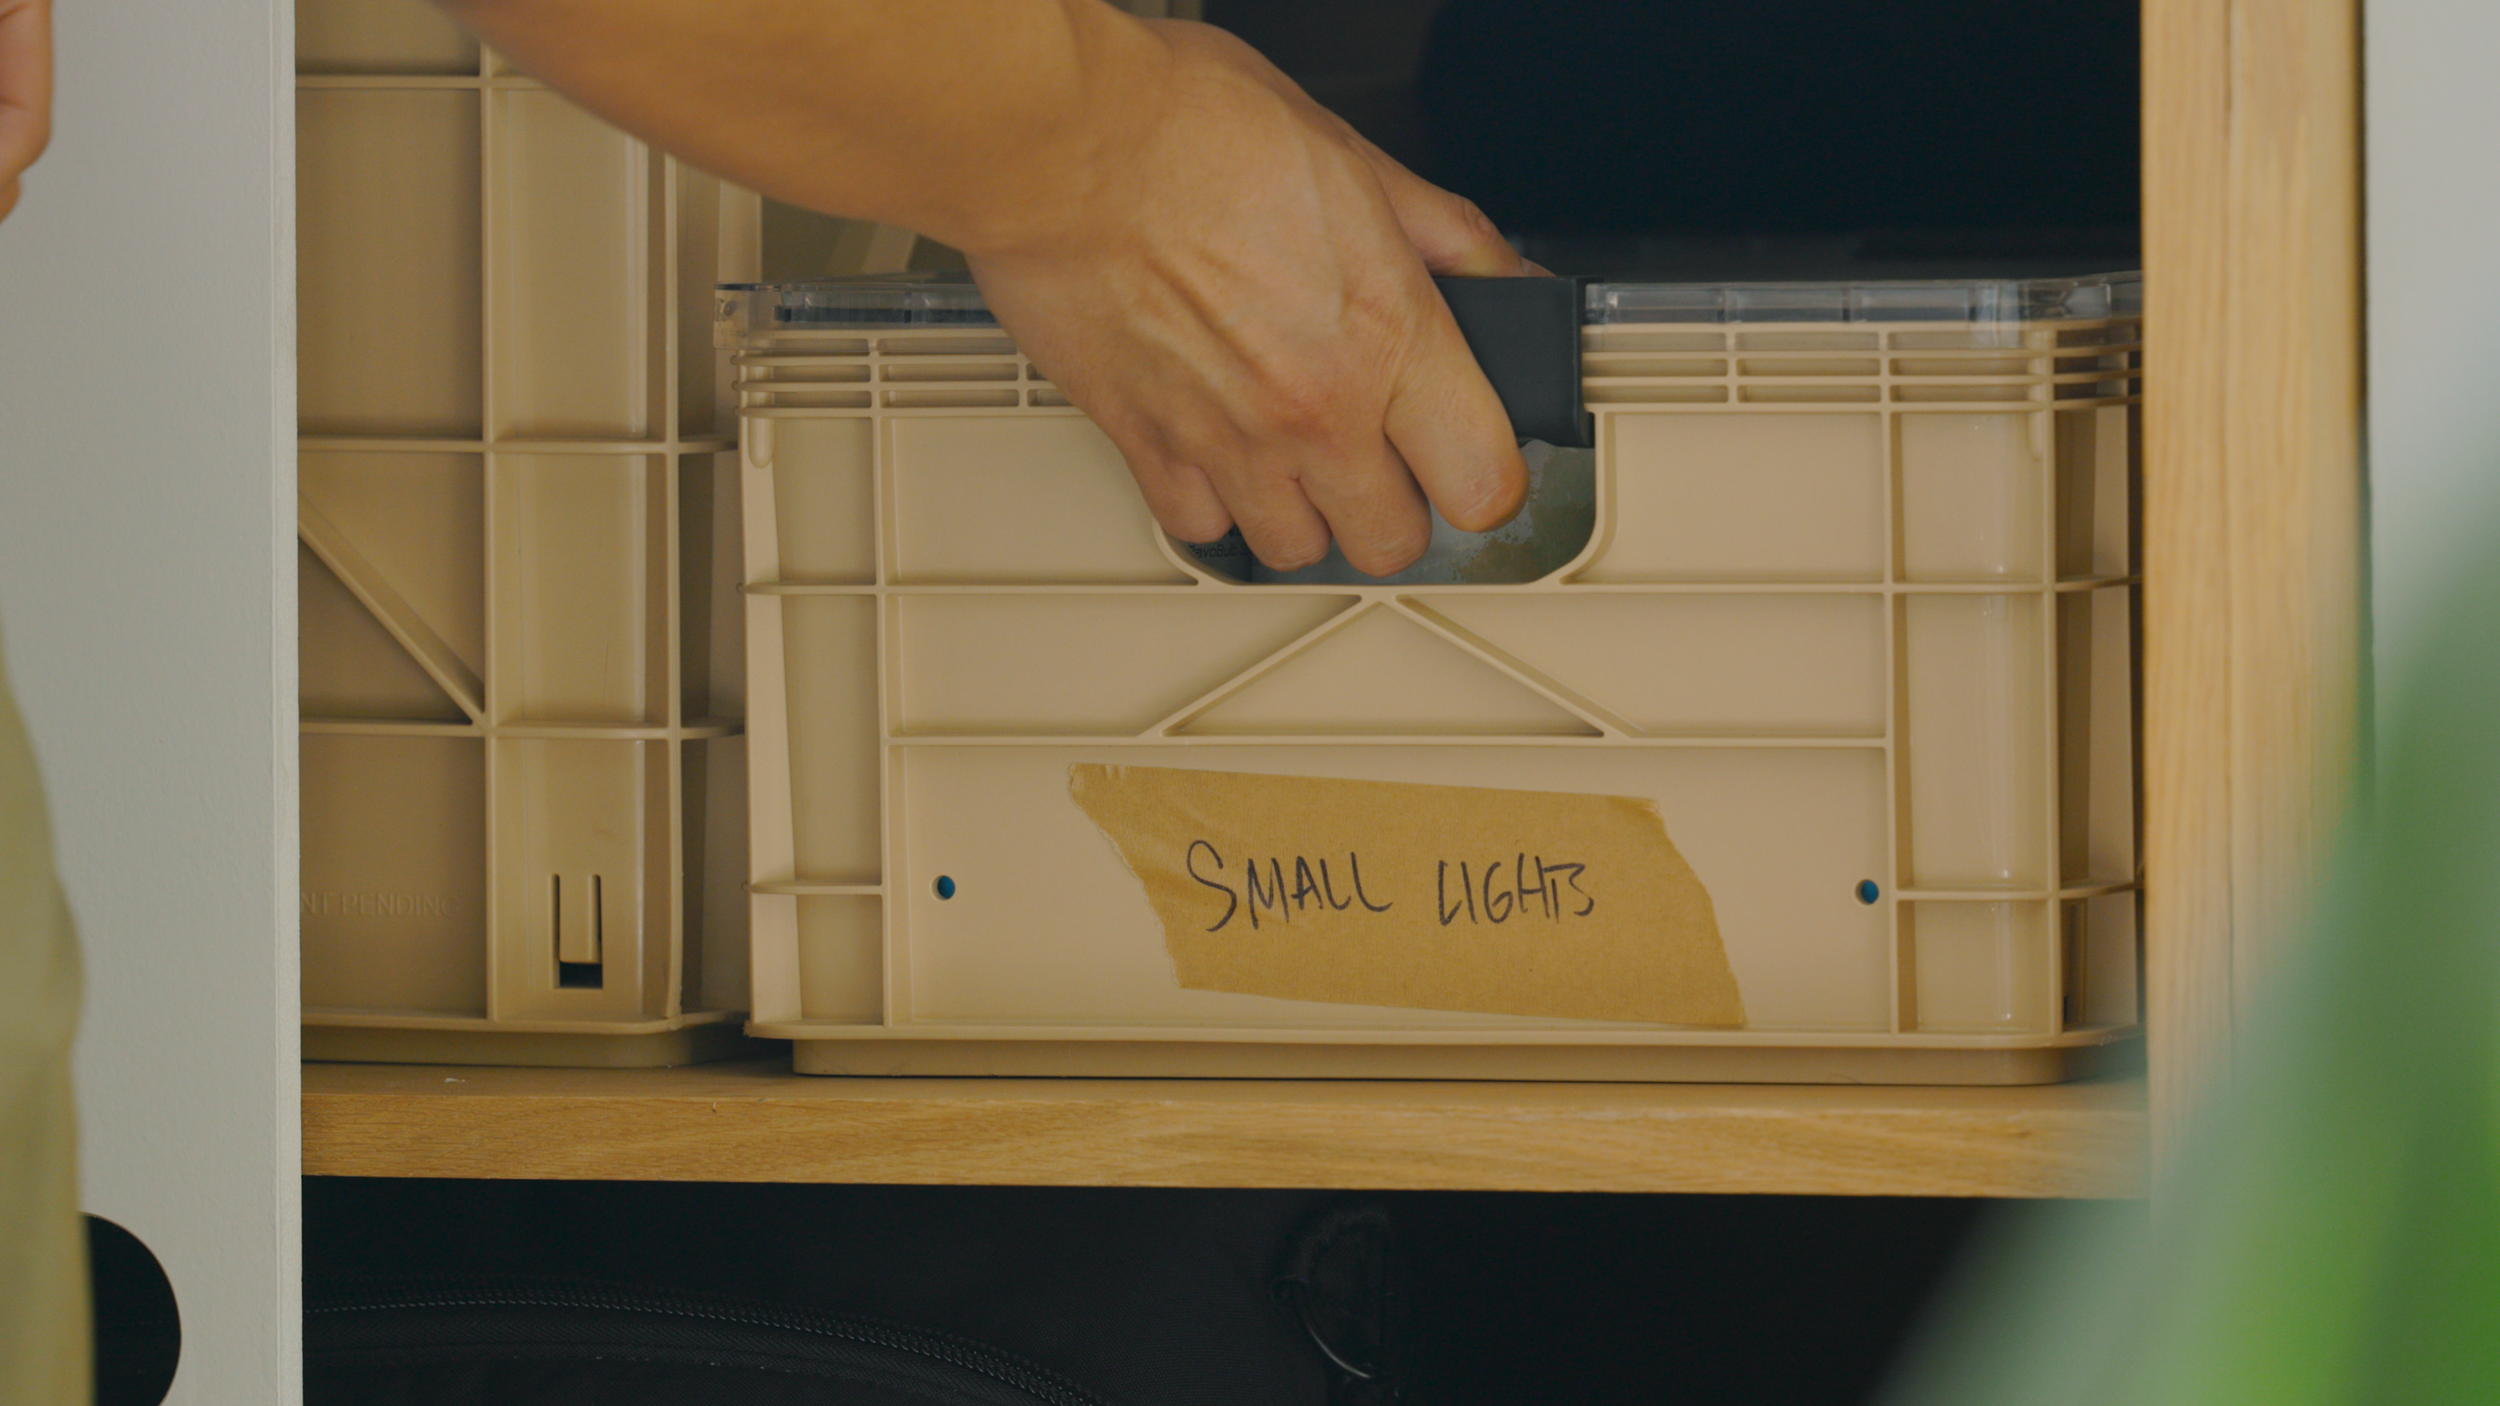
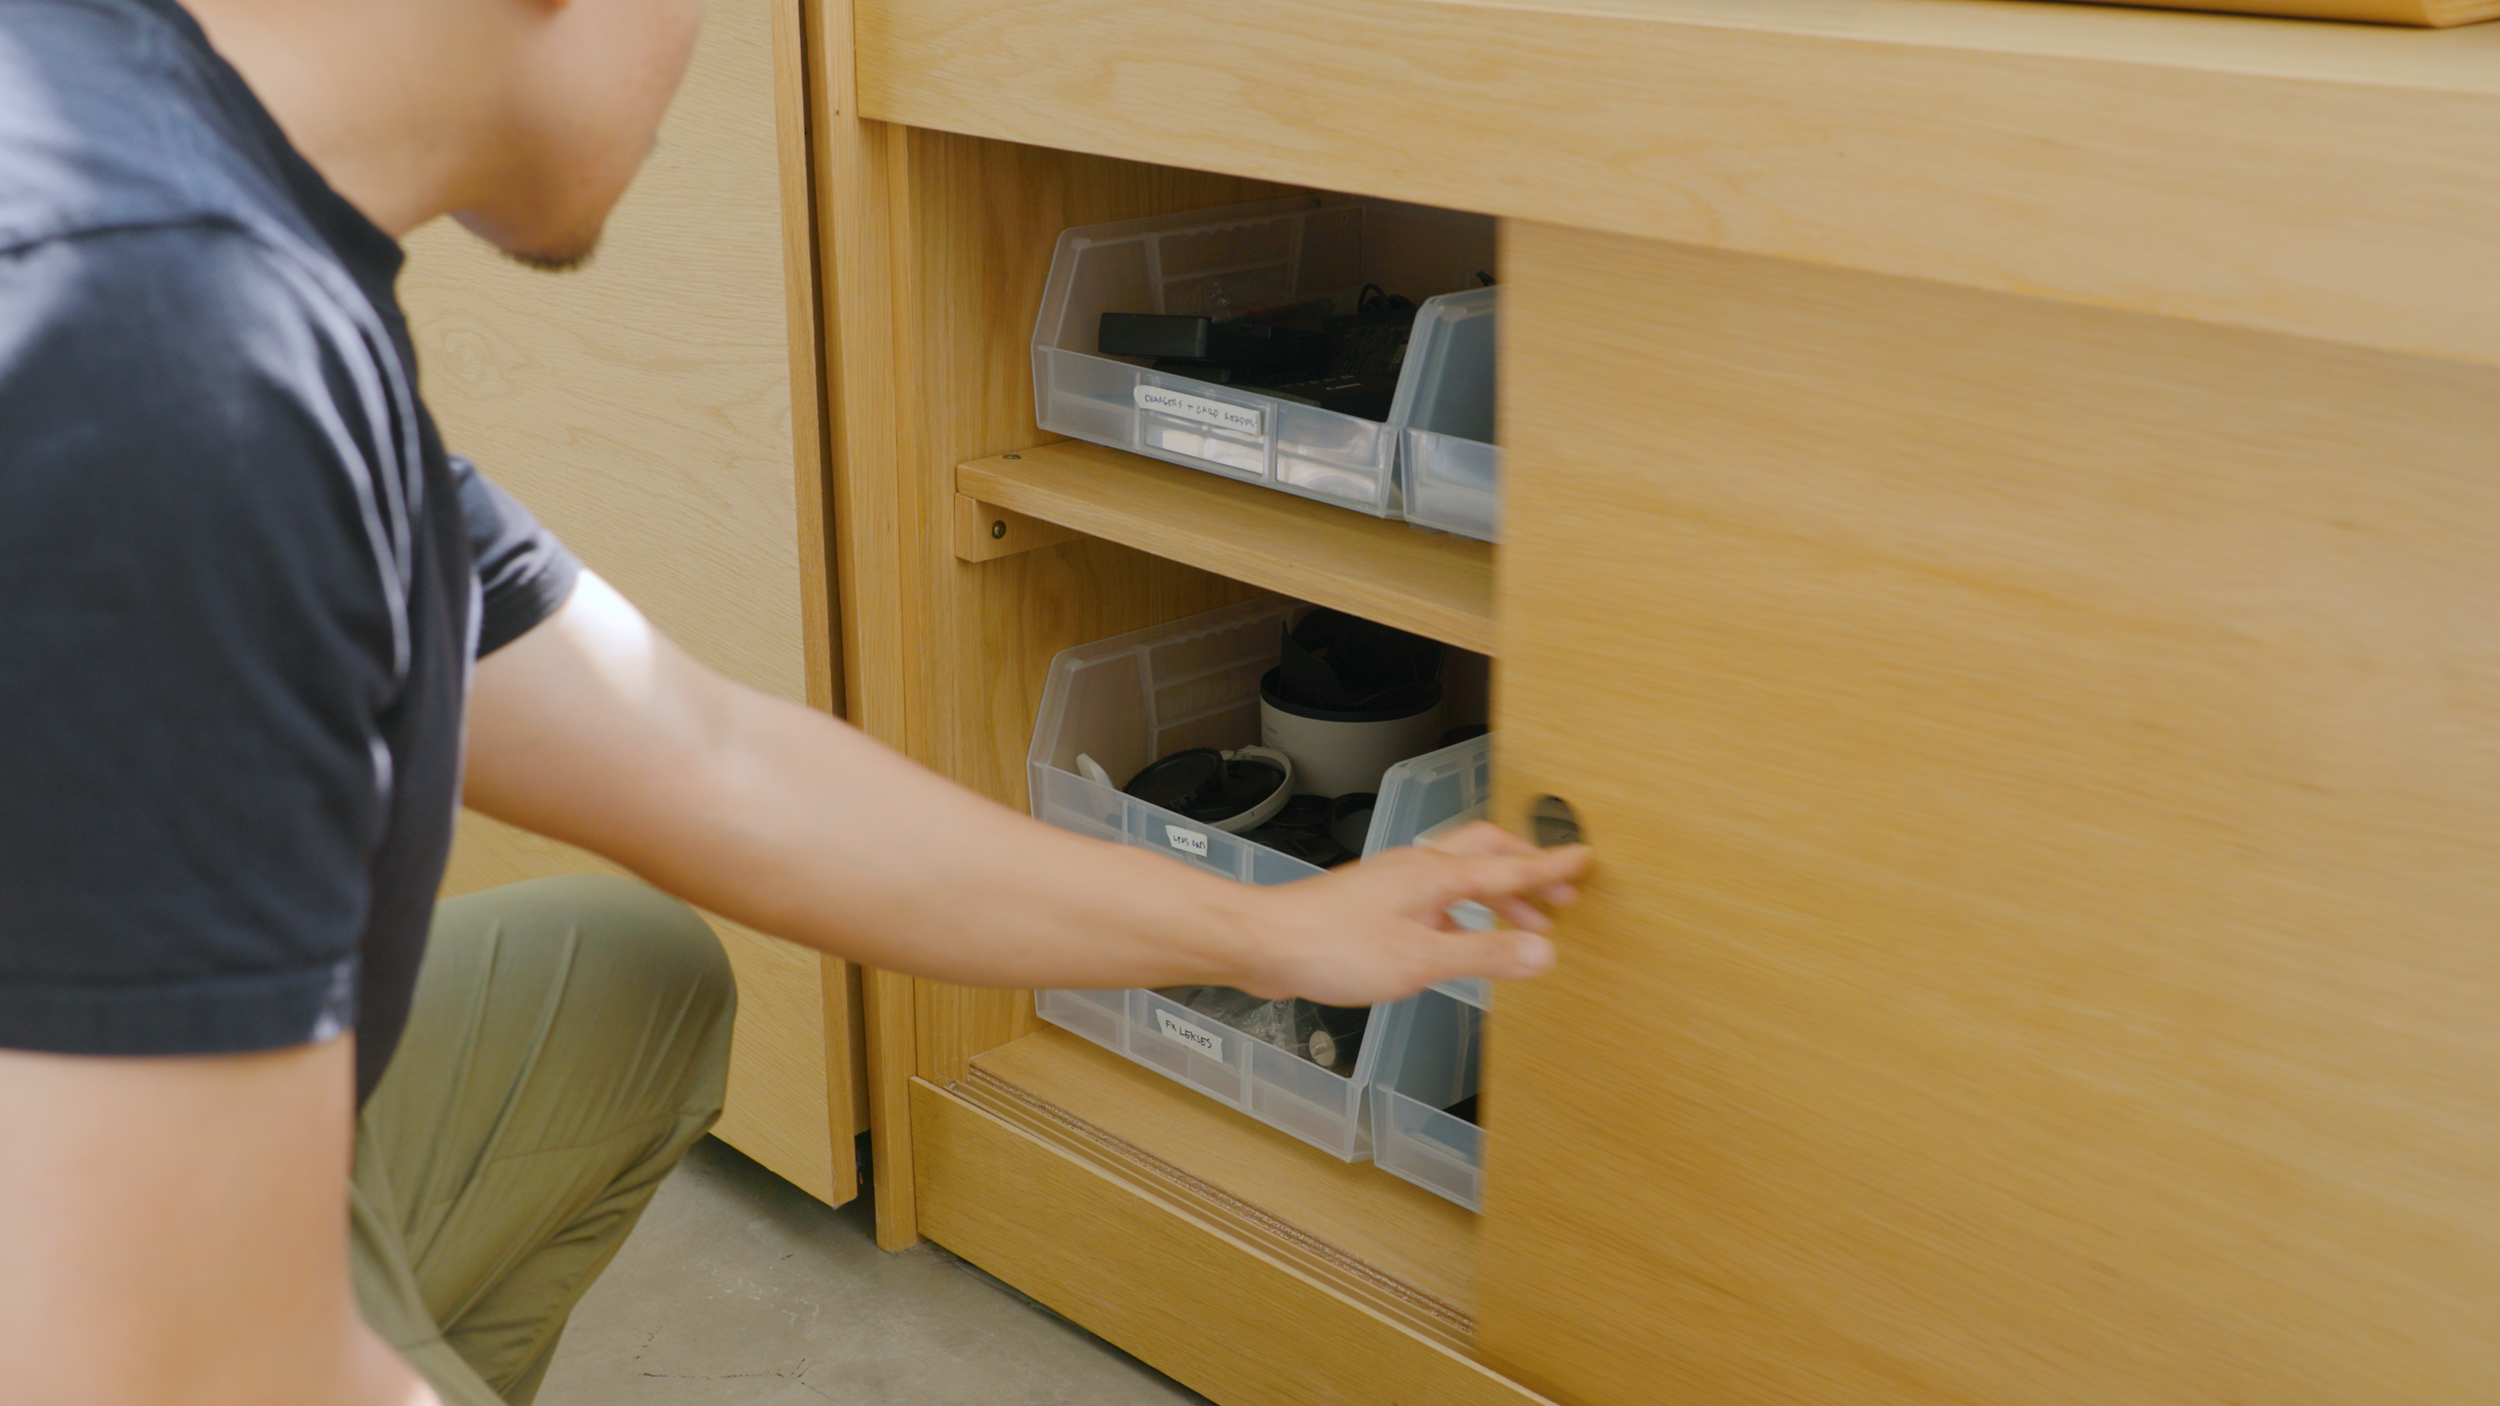
Next to my desks, all along the walls is a collection of custom-built cabinet storage units, which I designed around the unusual cavity beneath the windows. Here, I have deep storage for large items like lights and tripods, and I have shallow storage for small items like chargers, cables, and adapters.

The space had an unusual cavity under the windows that I had to figure out how to utilize.

I created a combination of deep and shallow cabinet units for storage.
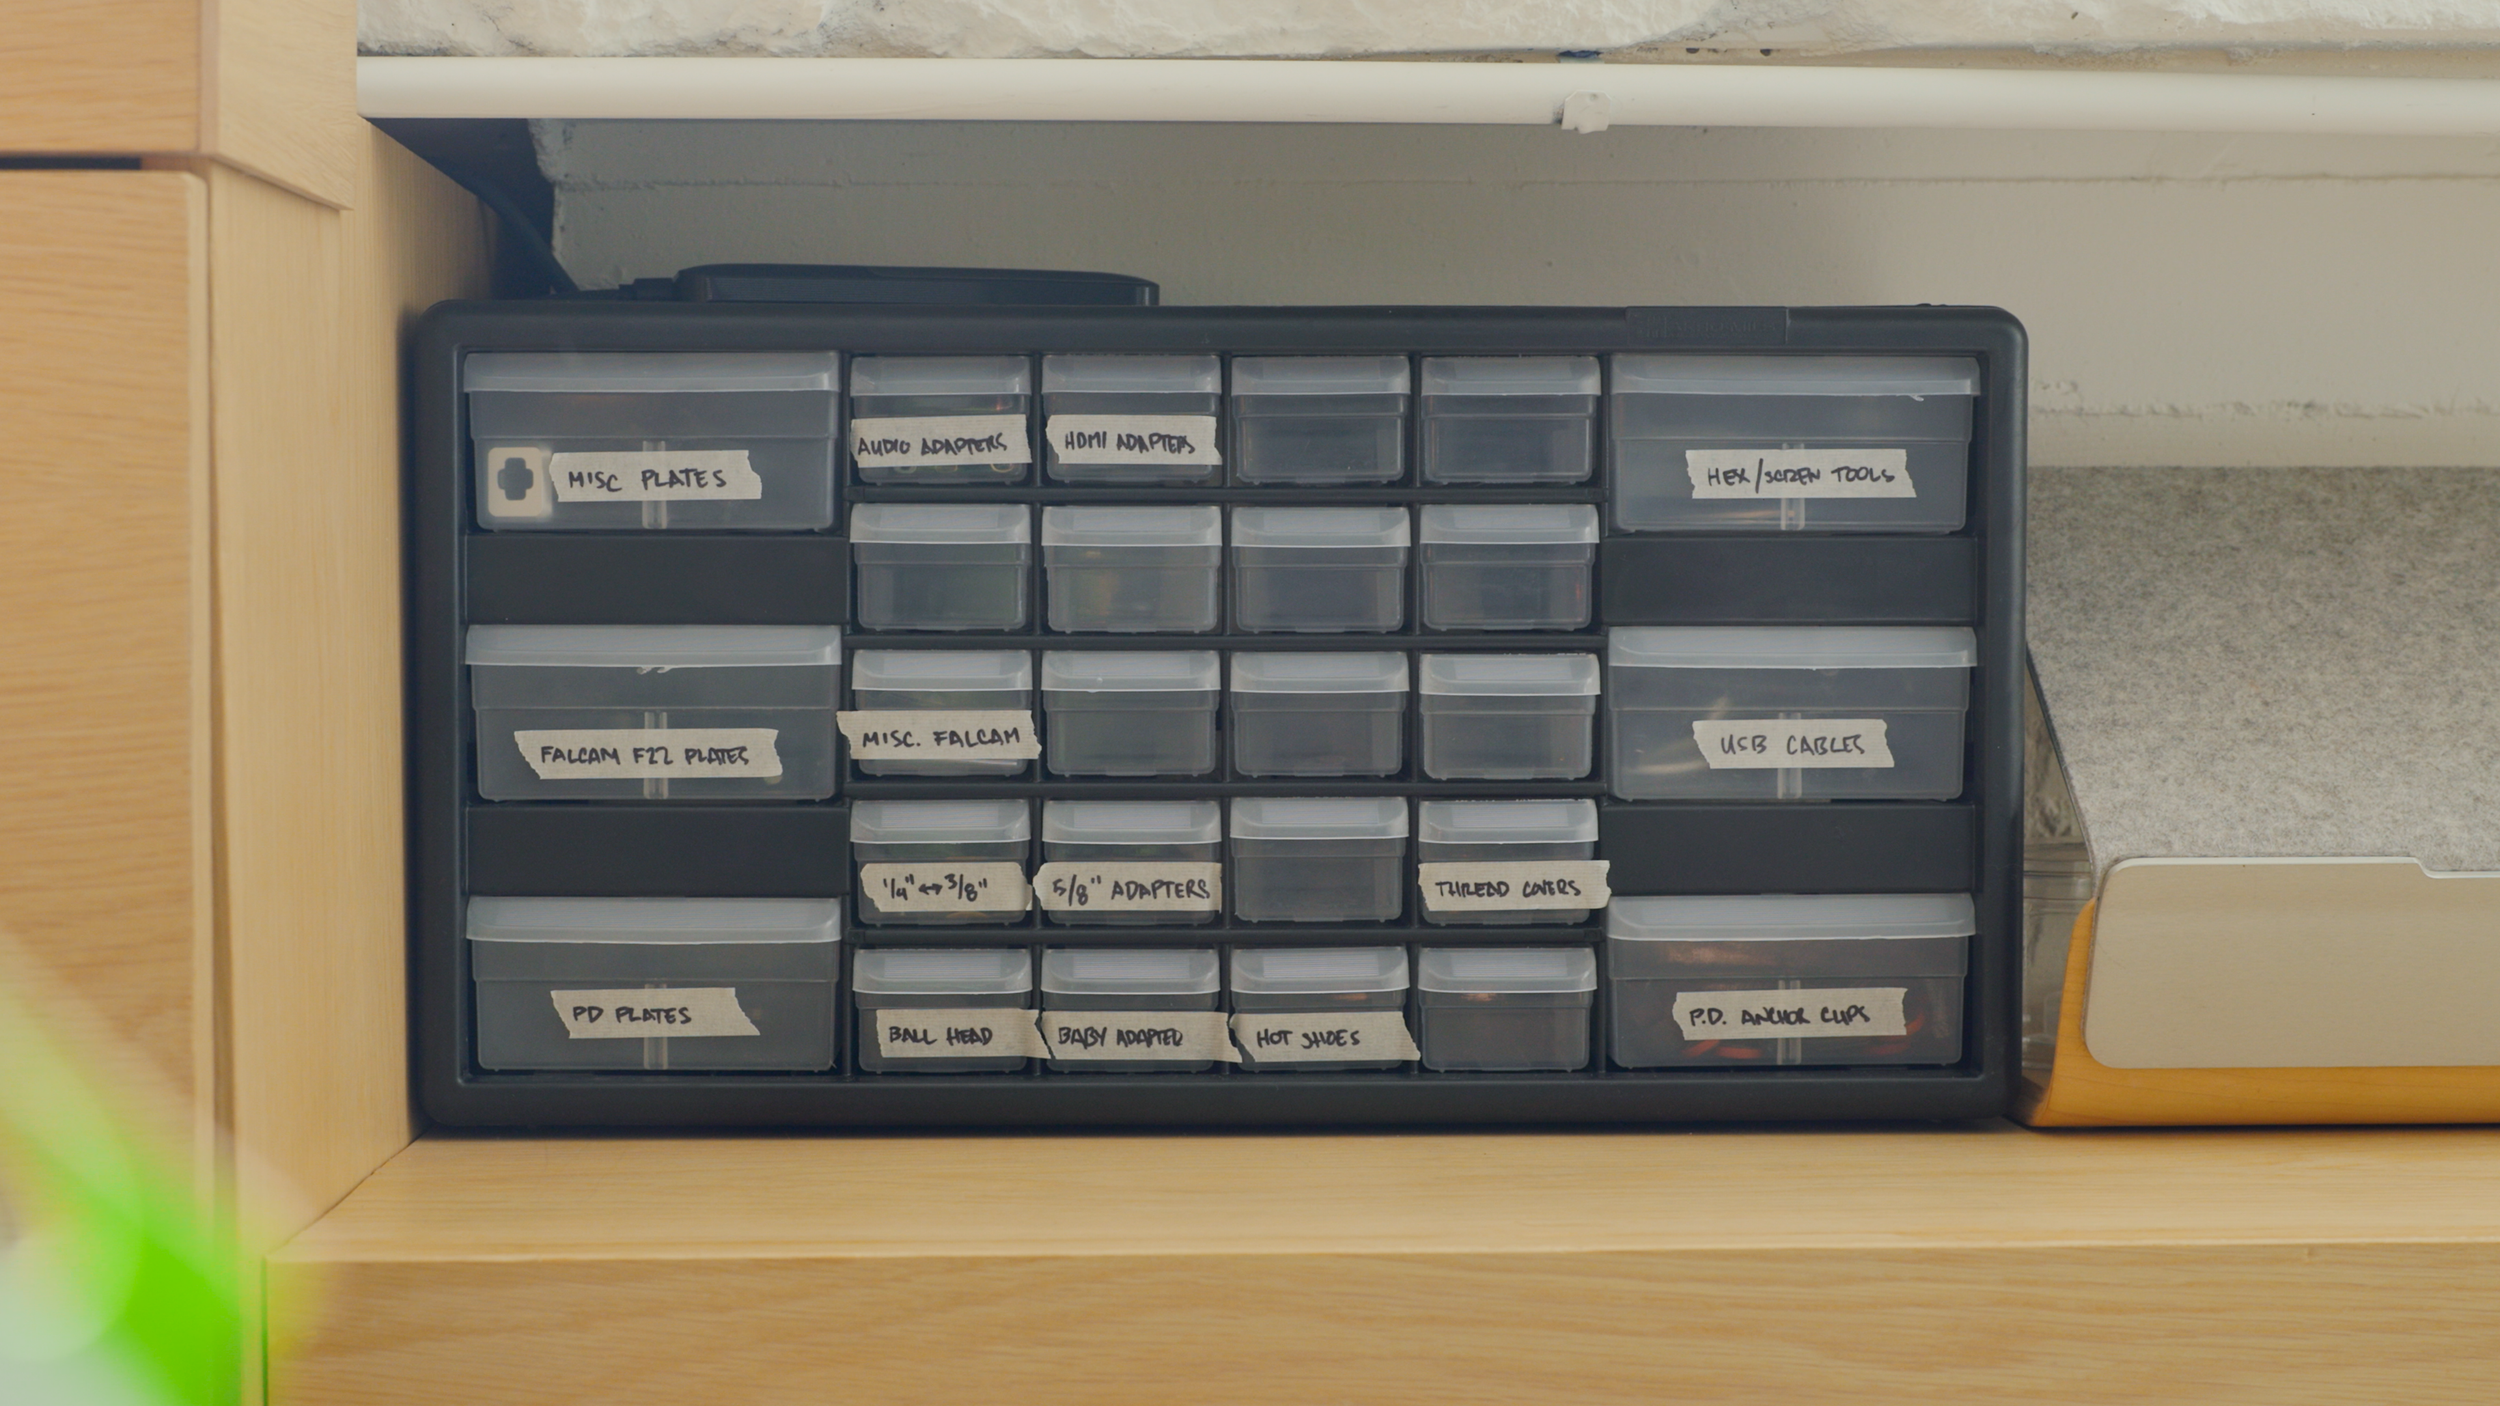
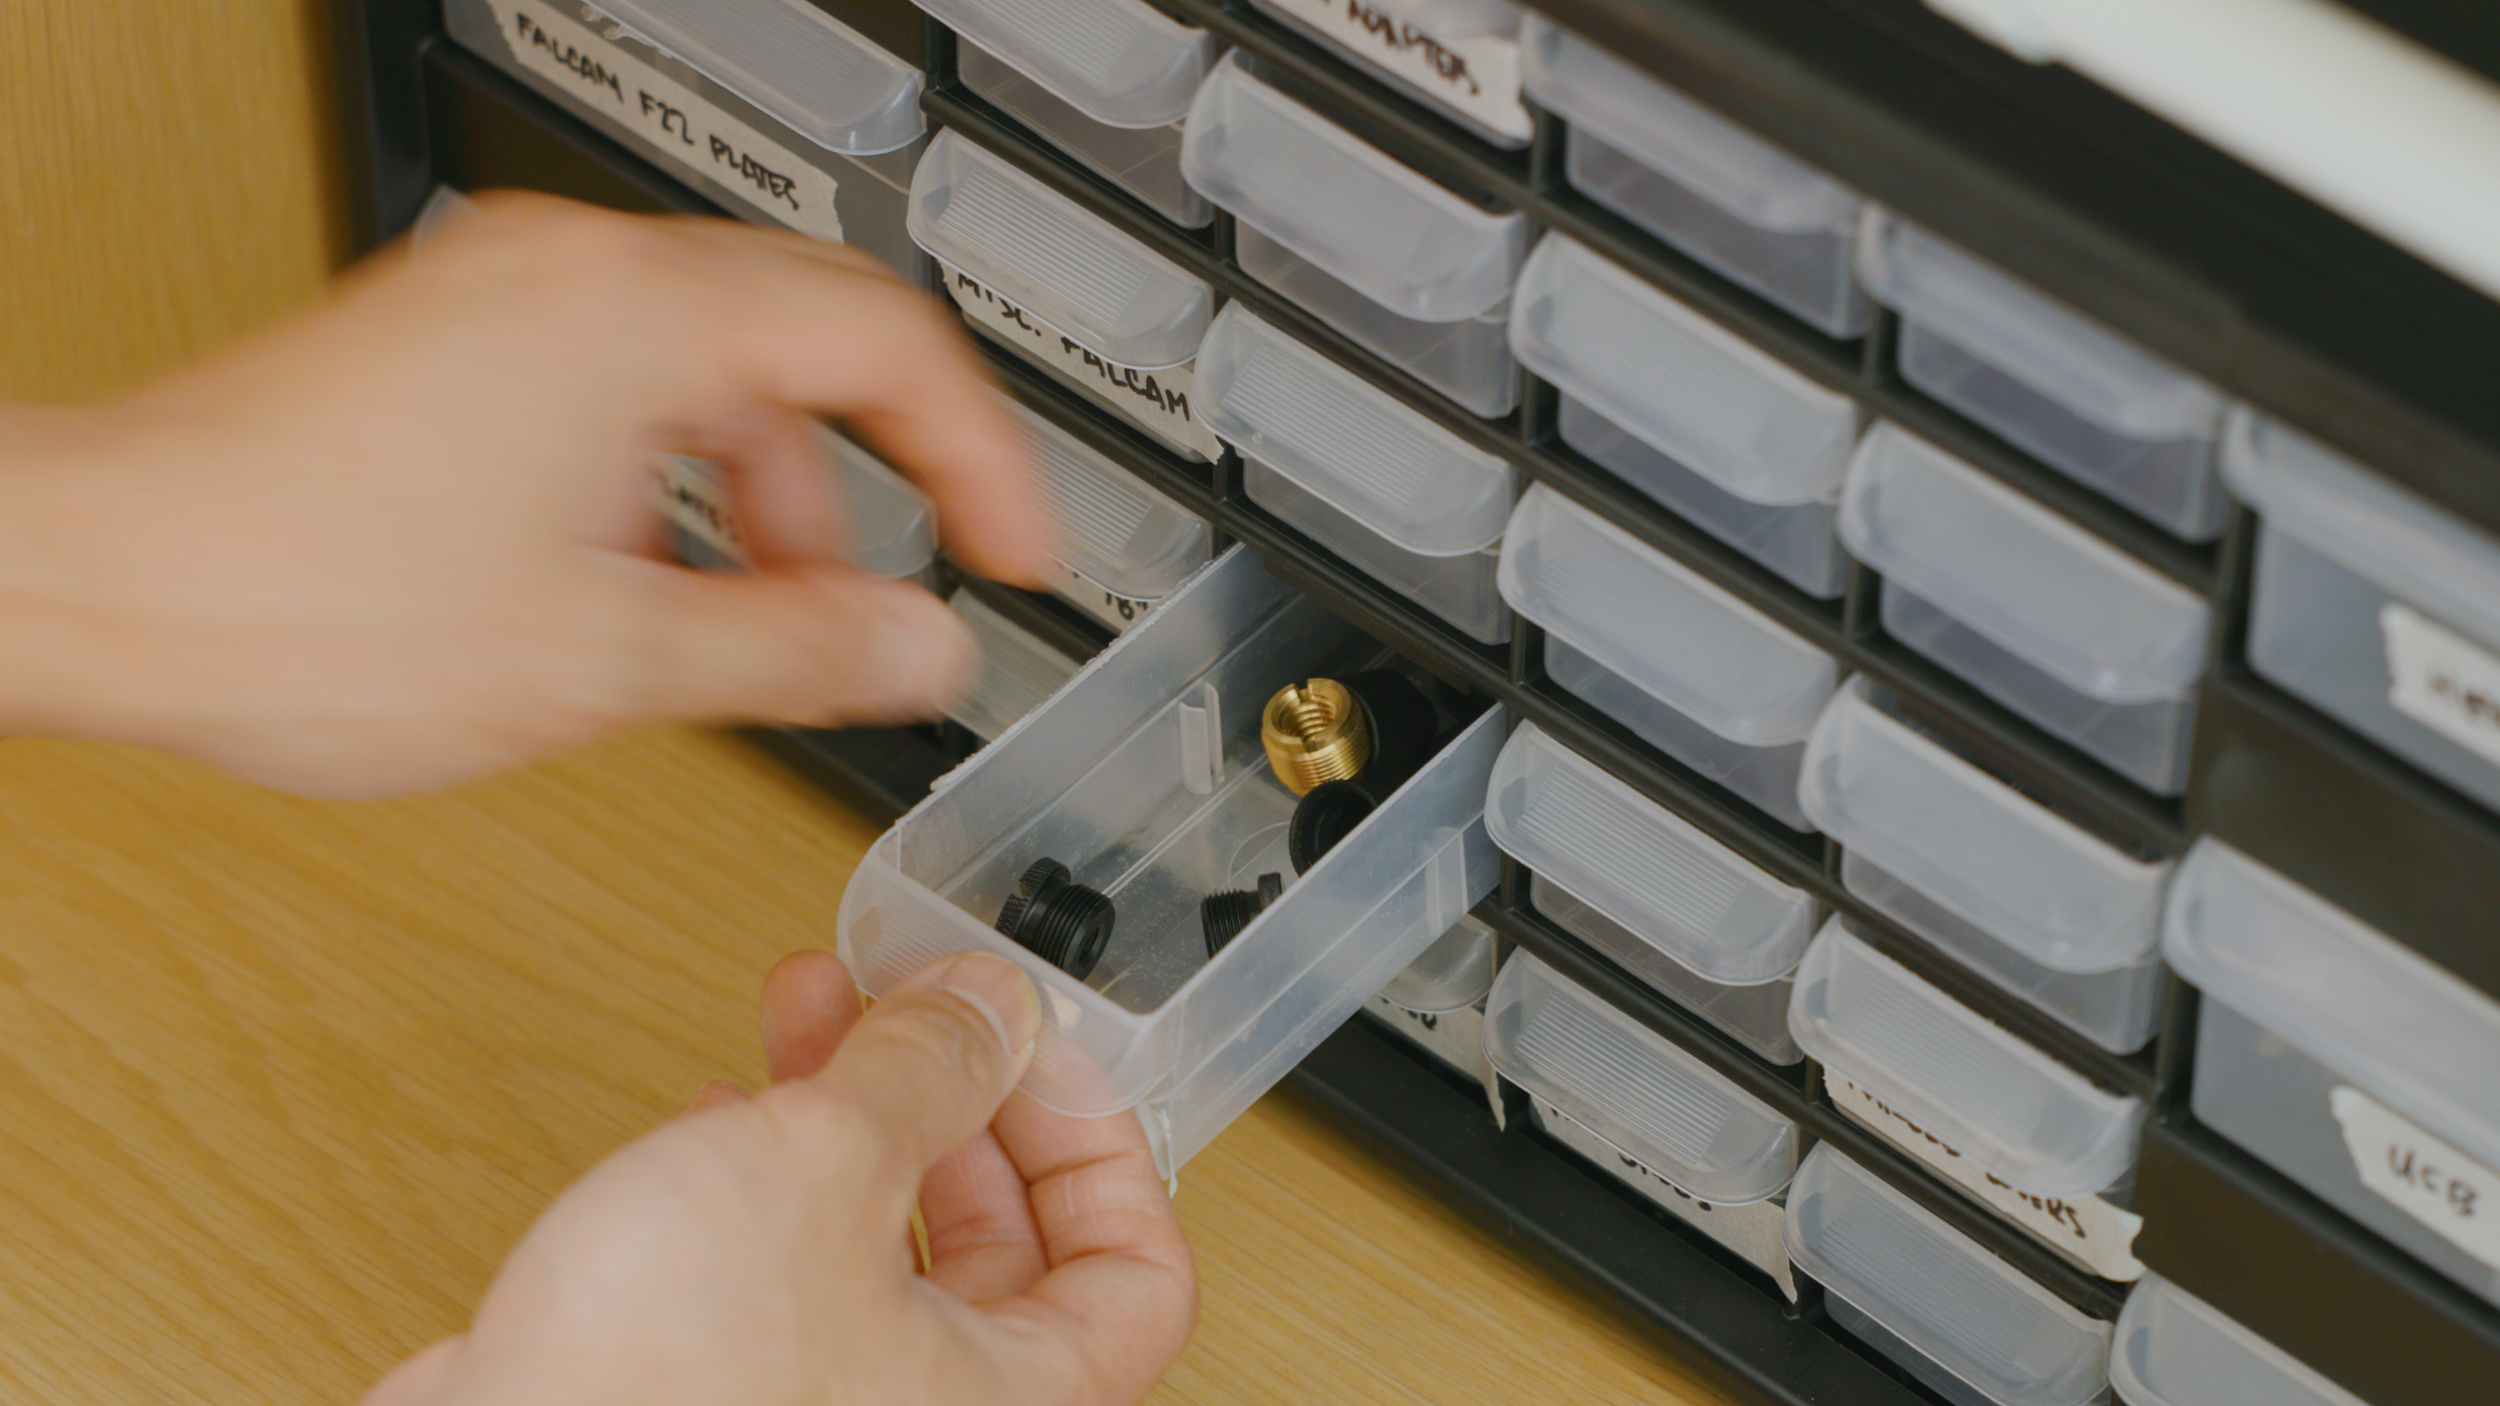
To organize things, I utilize the same stacking crates I have in my workshop, and a few other stackable bins to make the most of the vertical space inside the cabinets. For small camera parts, like adapters, I organize them in this plastic hardware drawer.
In the middle of this storage is a cart that is held in place with a magnet release. It can be rolled out completely if I need a cart to move things around.


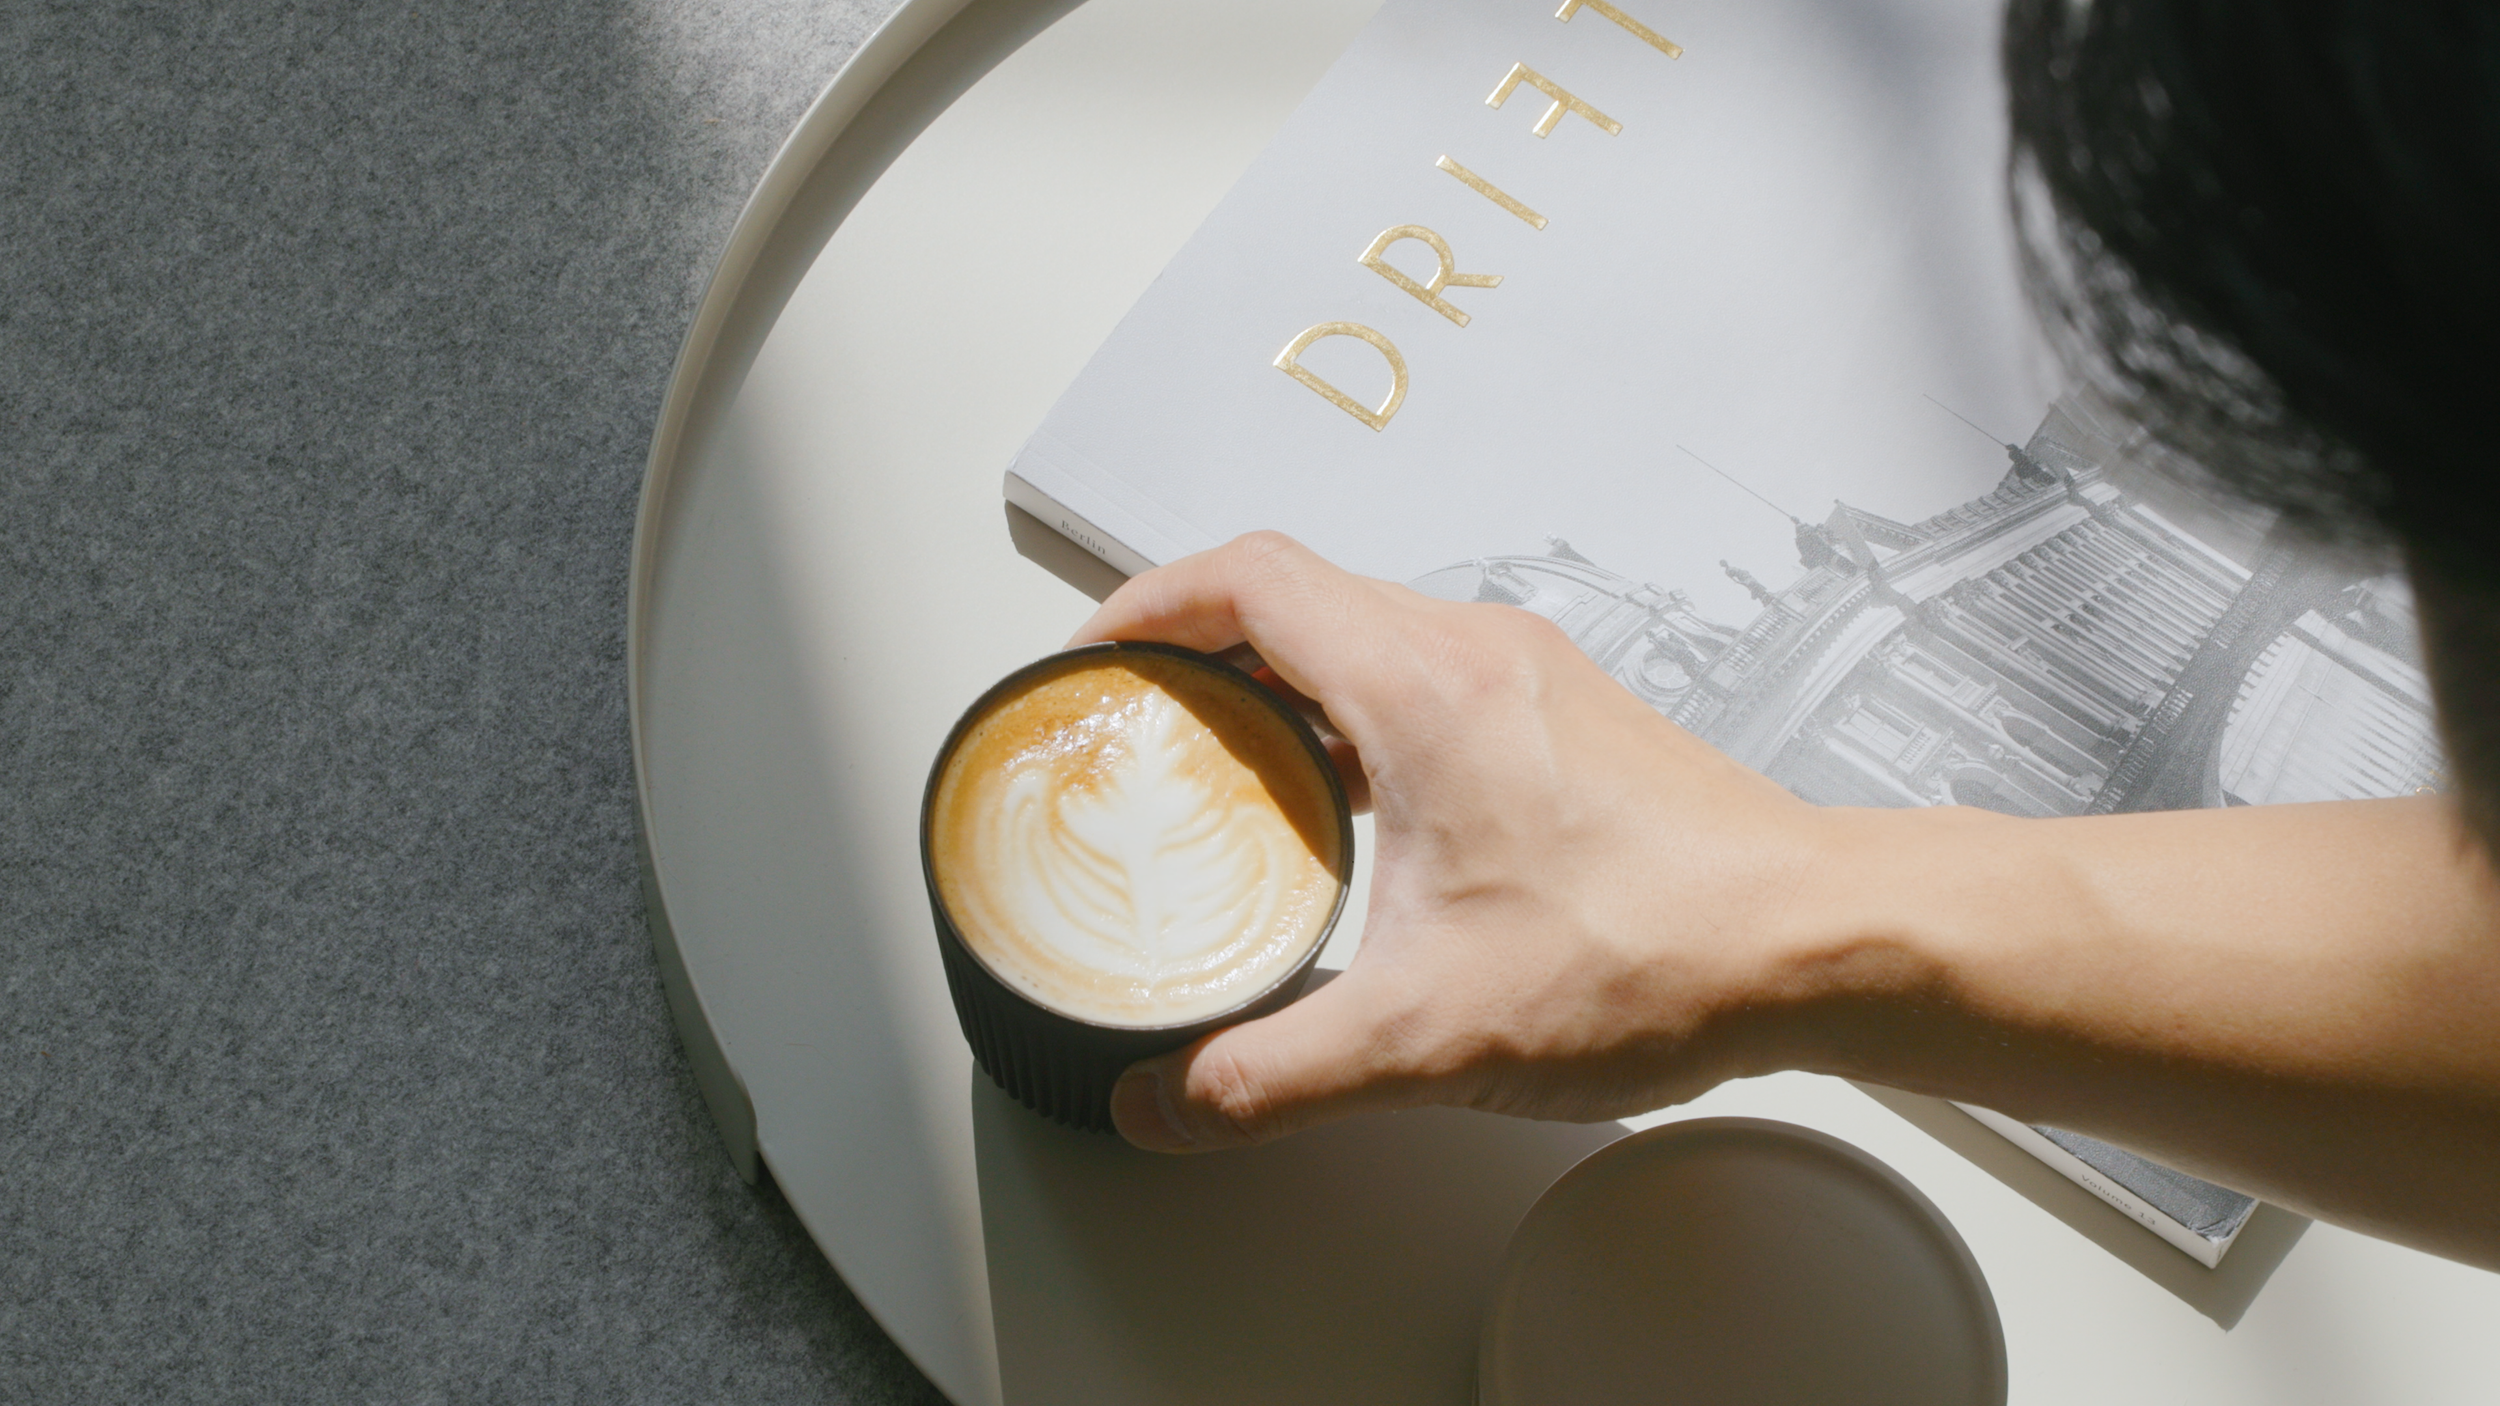
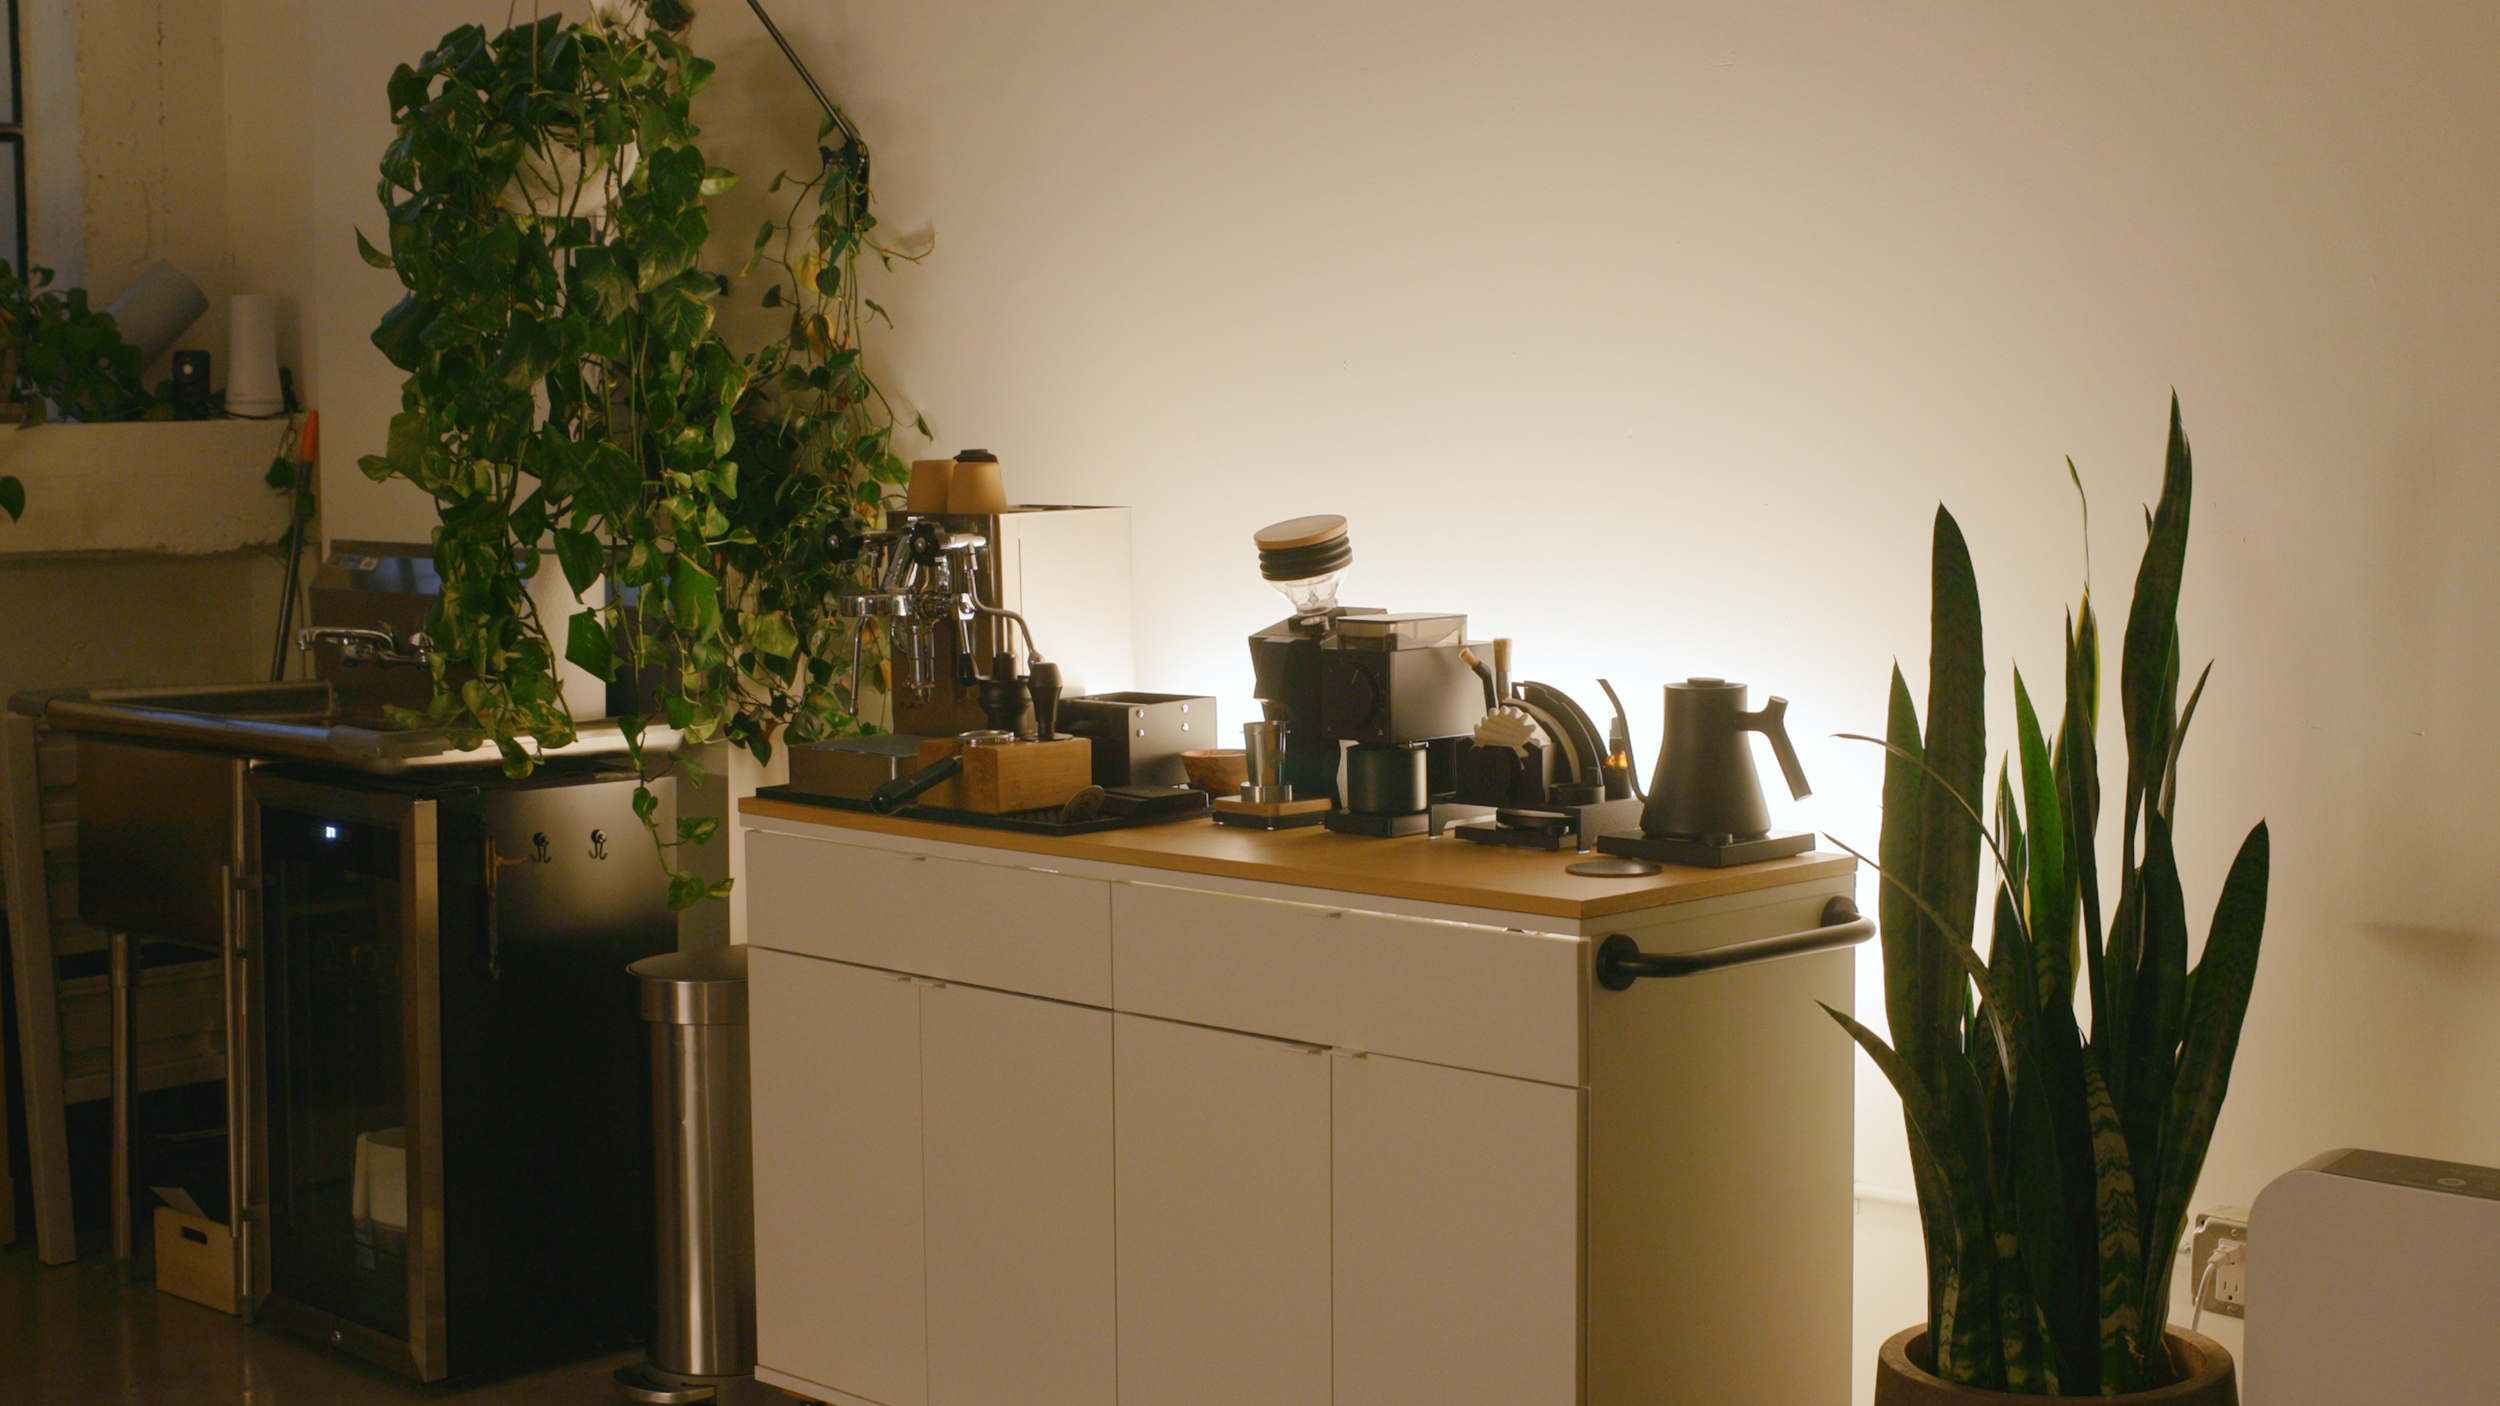
Espresso & Pour-over Coffee Bar
As you move across the room, you’ll end up at my coffee bar. It’s a mobile cart I made out of an Ikea drawer, to host my pour-over and espresso machine.

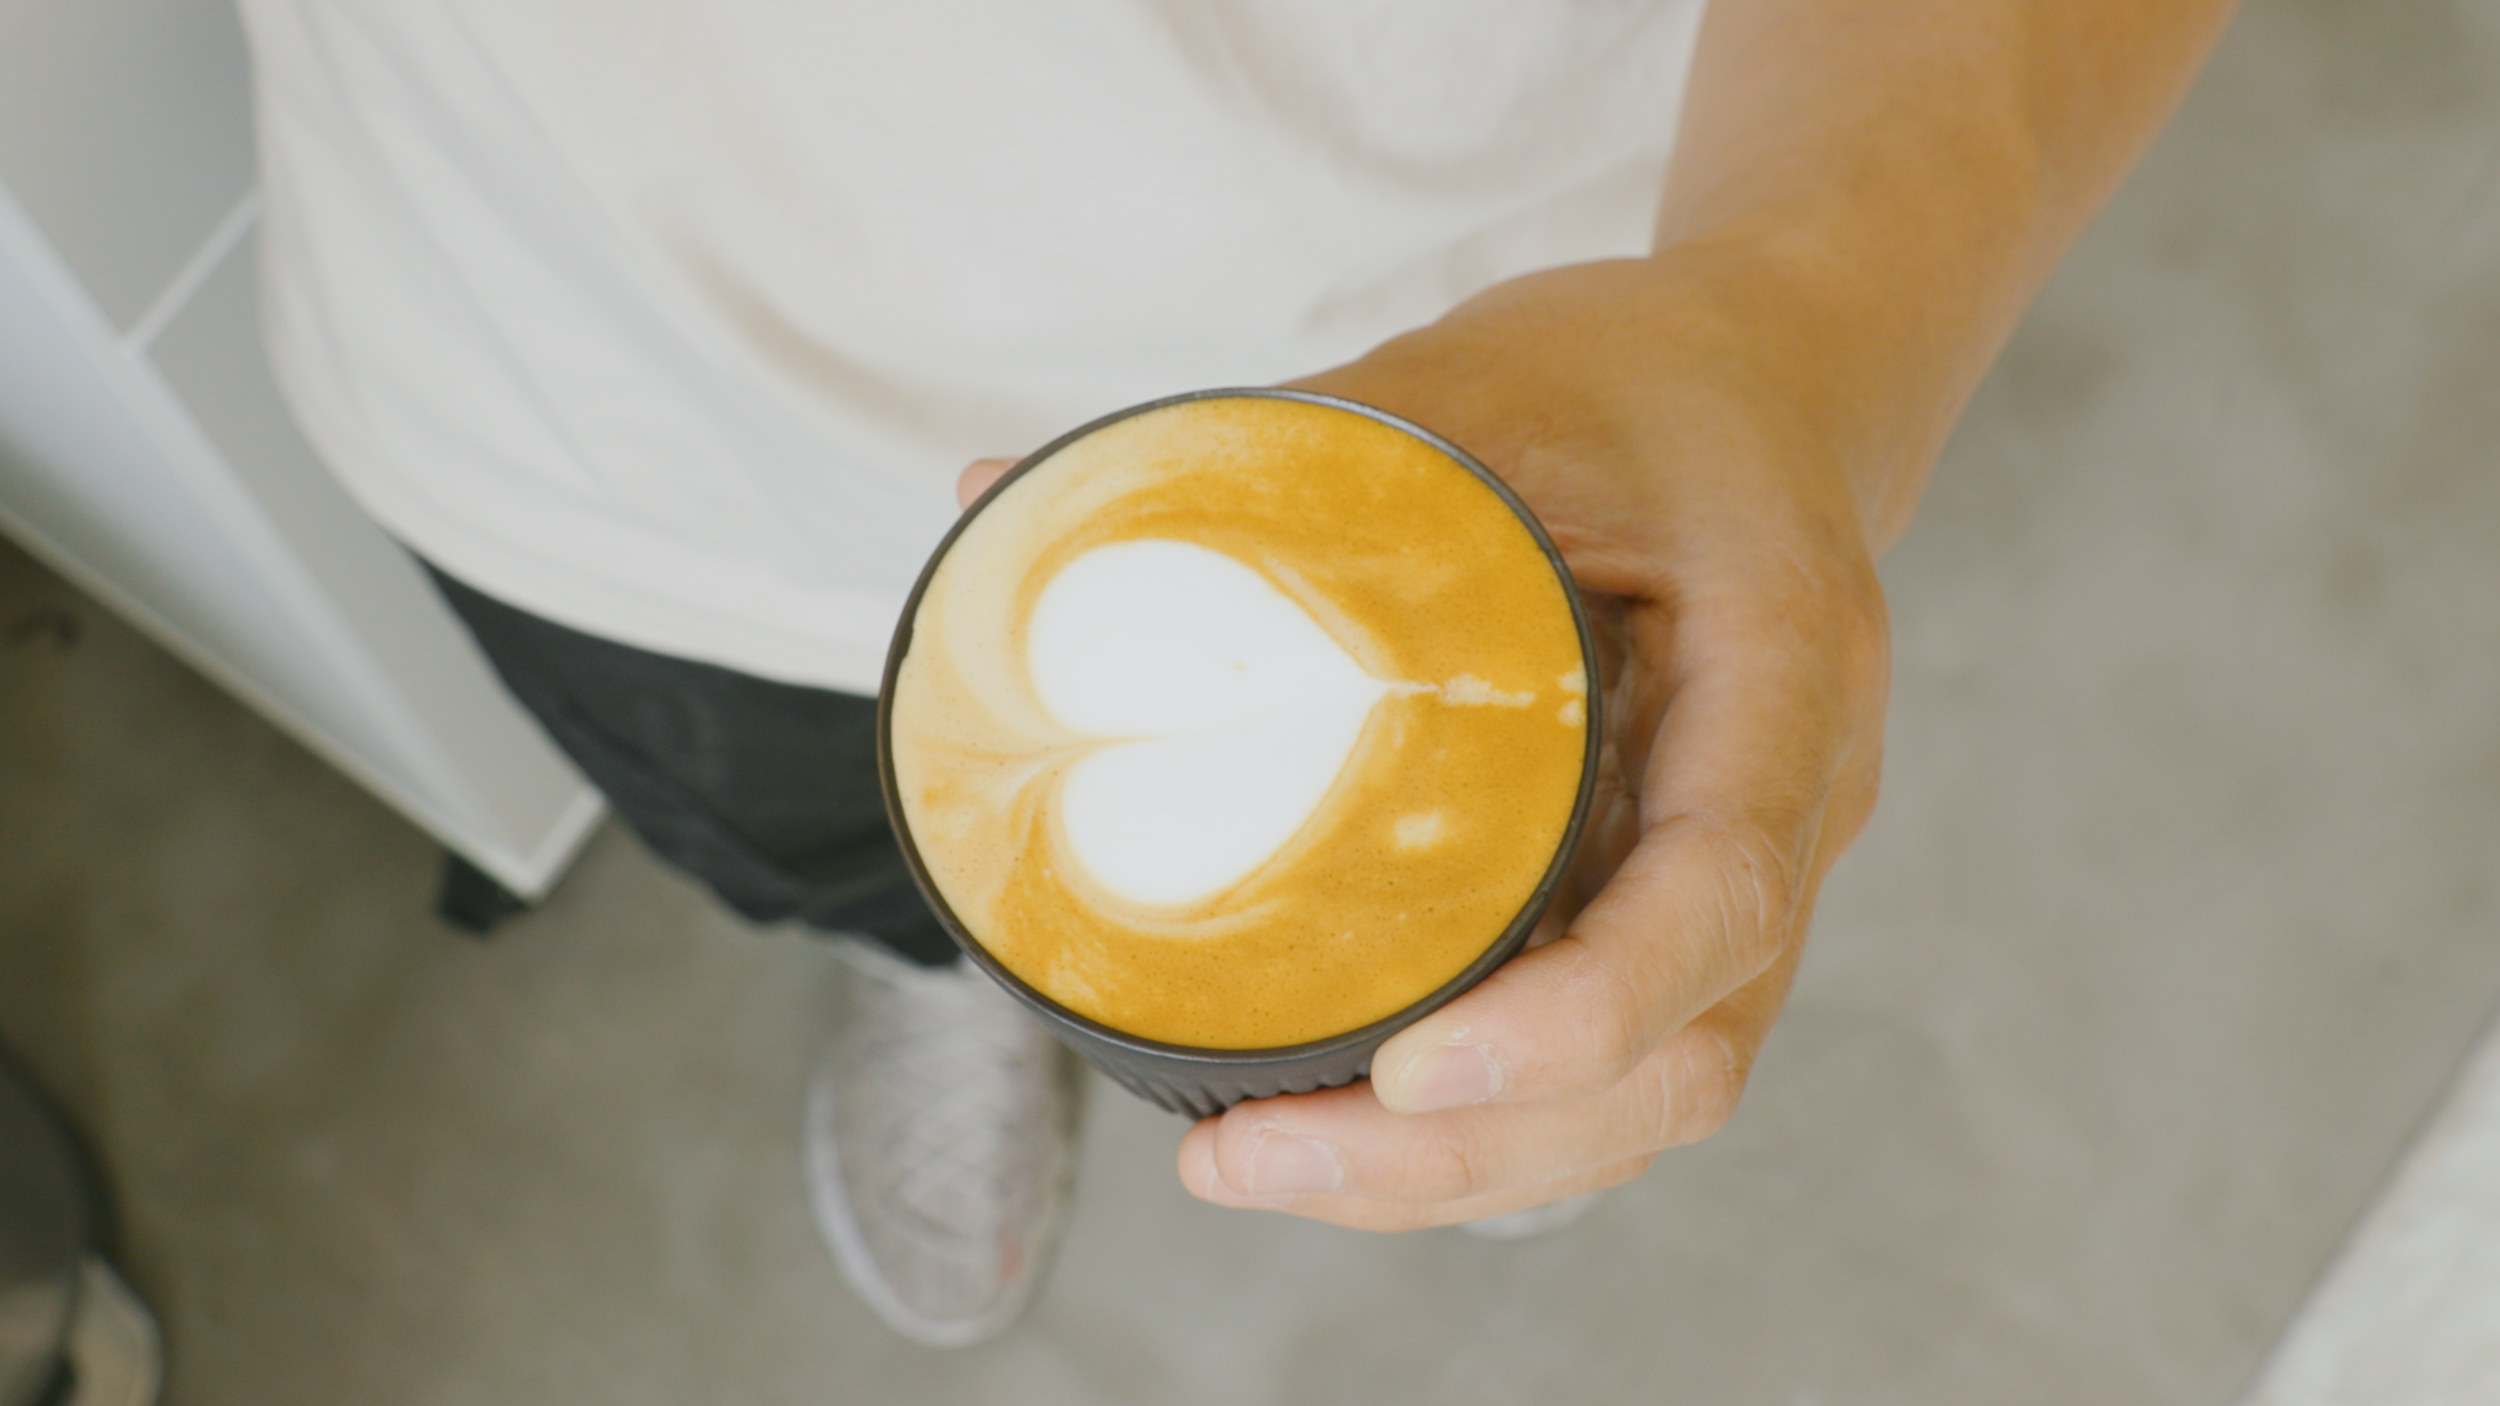


This has been one of my favorite additions to the studio. Taking a break to make a coffee in the afternoons is such a relaxing ritual. There’s something incredibly satisfying about trying new coffee beans, experimenting with extraction methods, and practicing latte art. Lately, I’ve felt confident in creating basic hearts, so I’ve moved on to practicing rosettas. It’s not consistent yet, but I am seeing improvement with time.
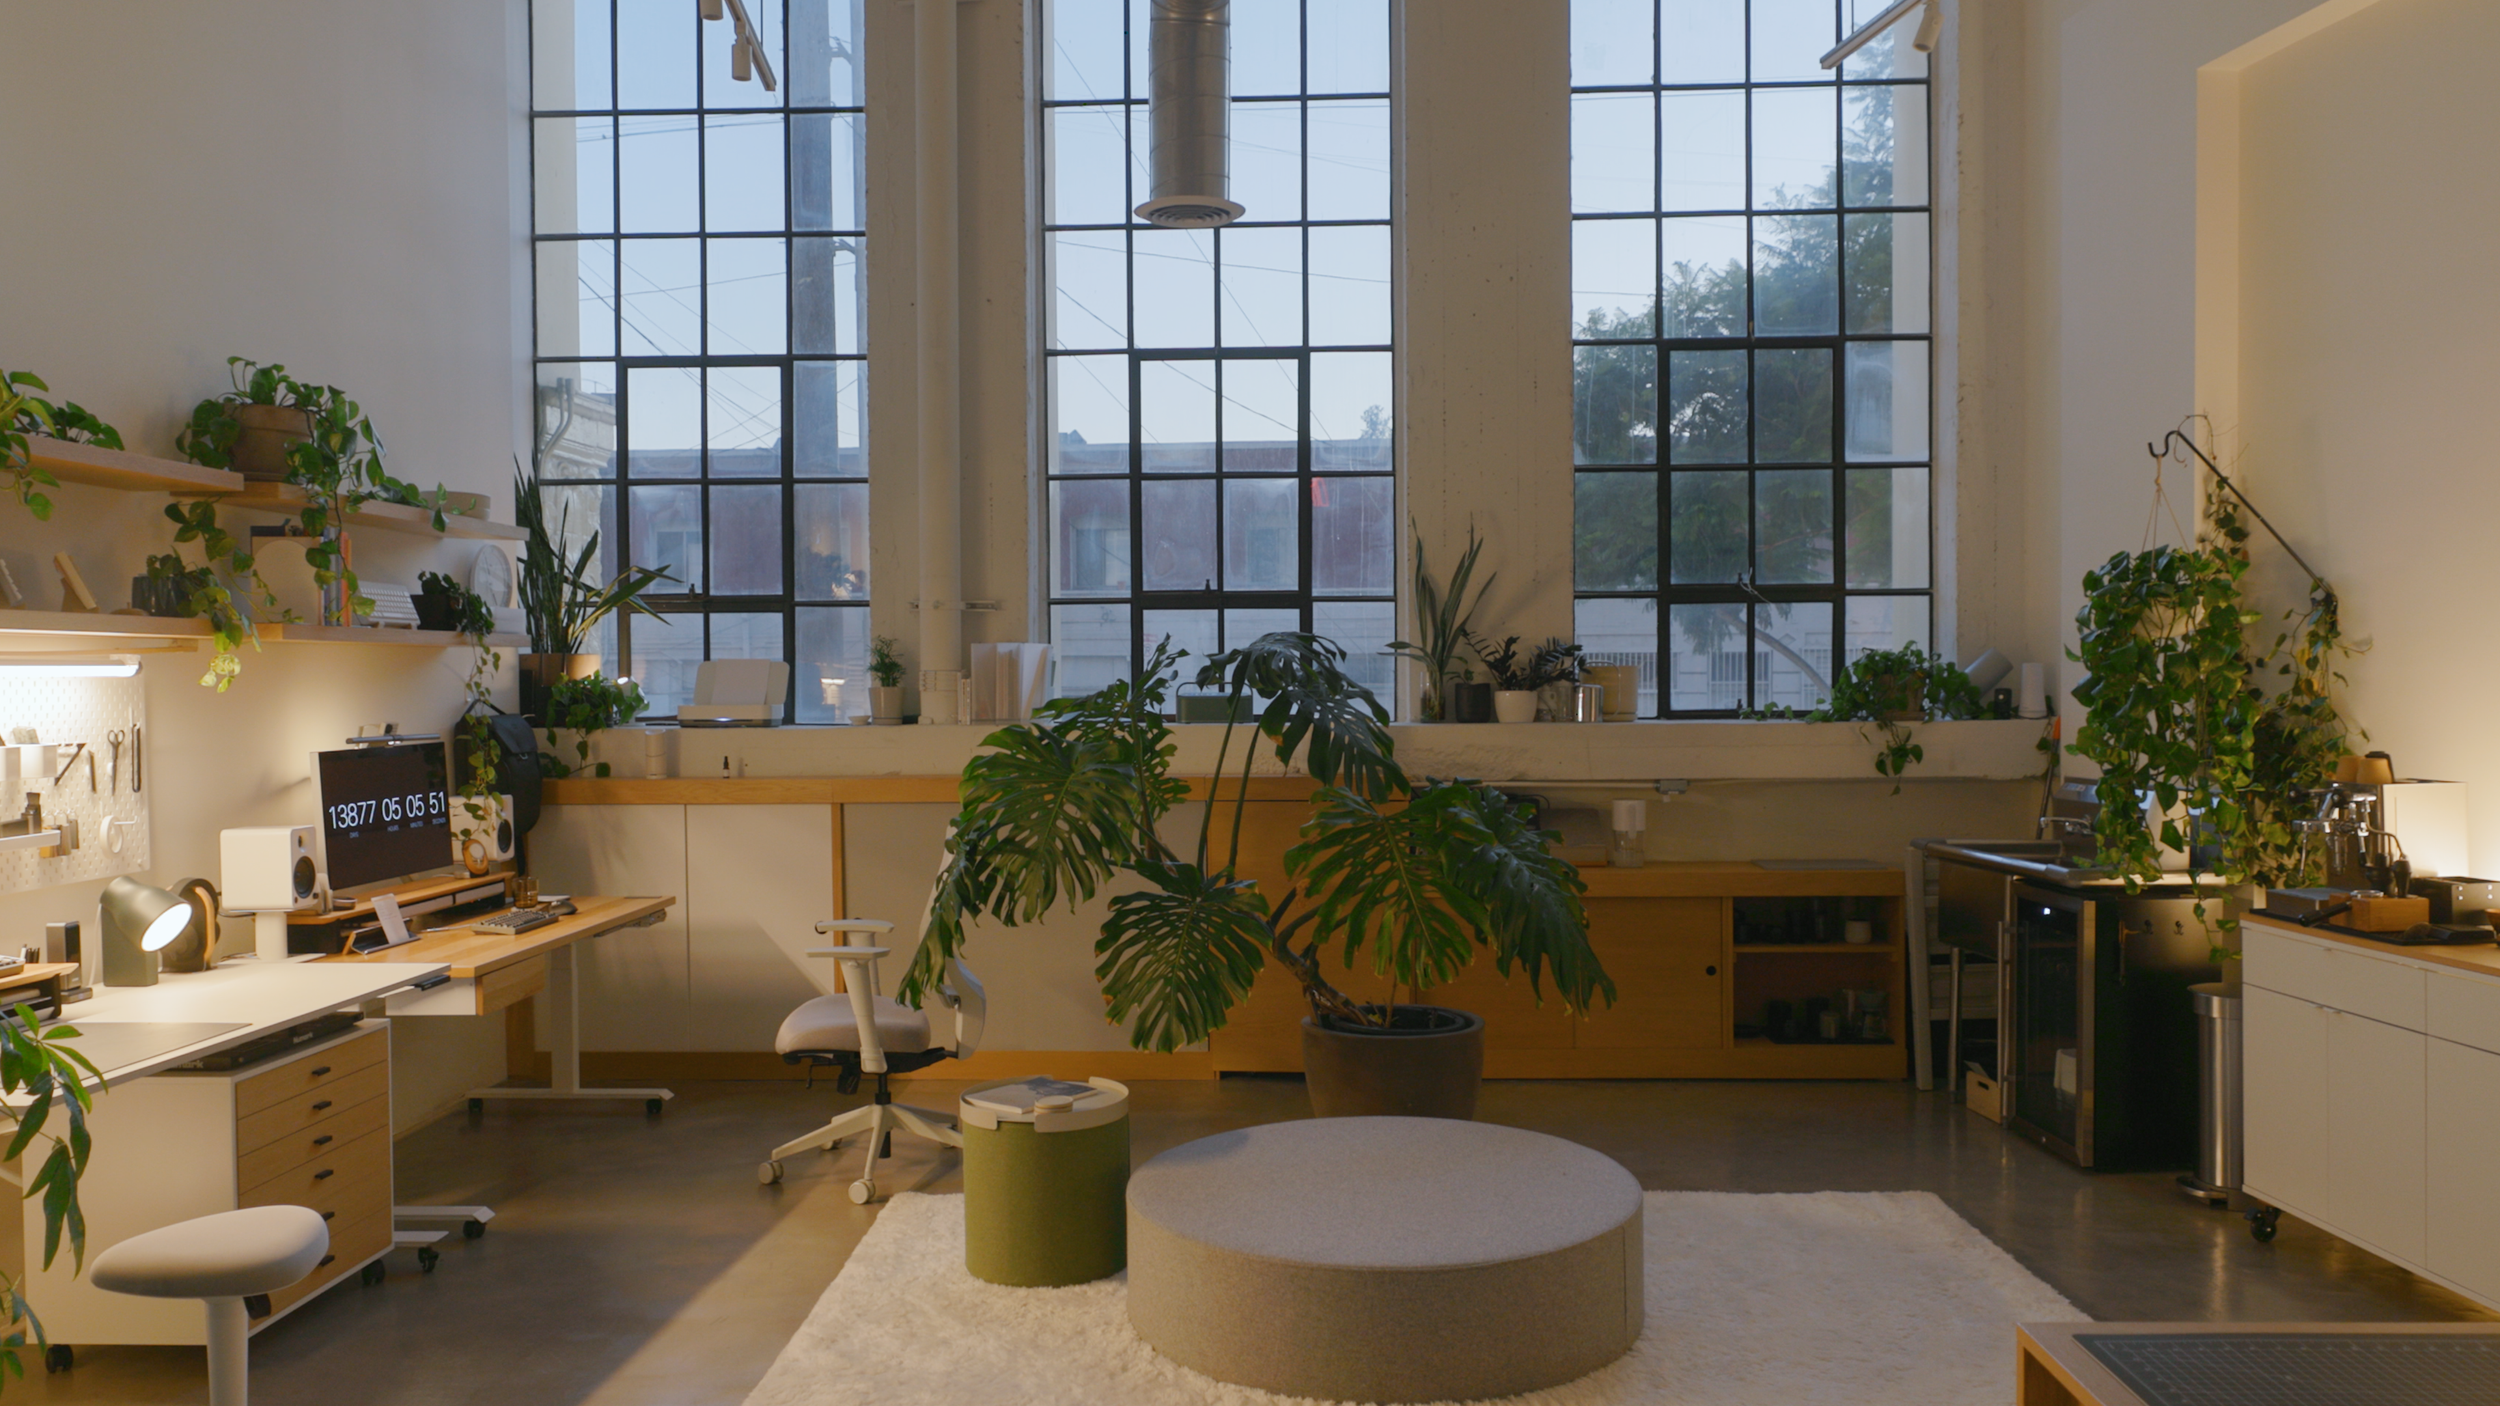
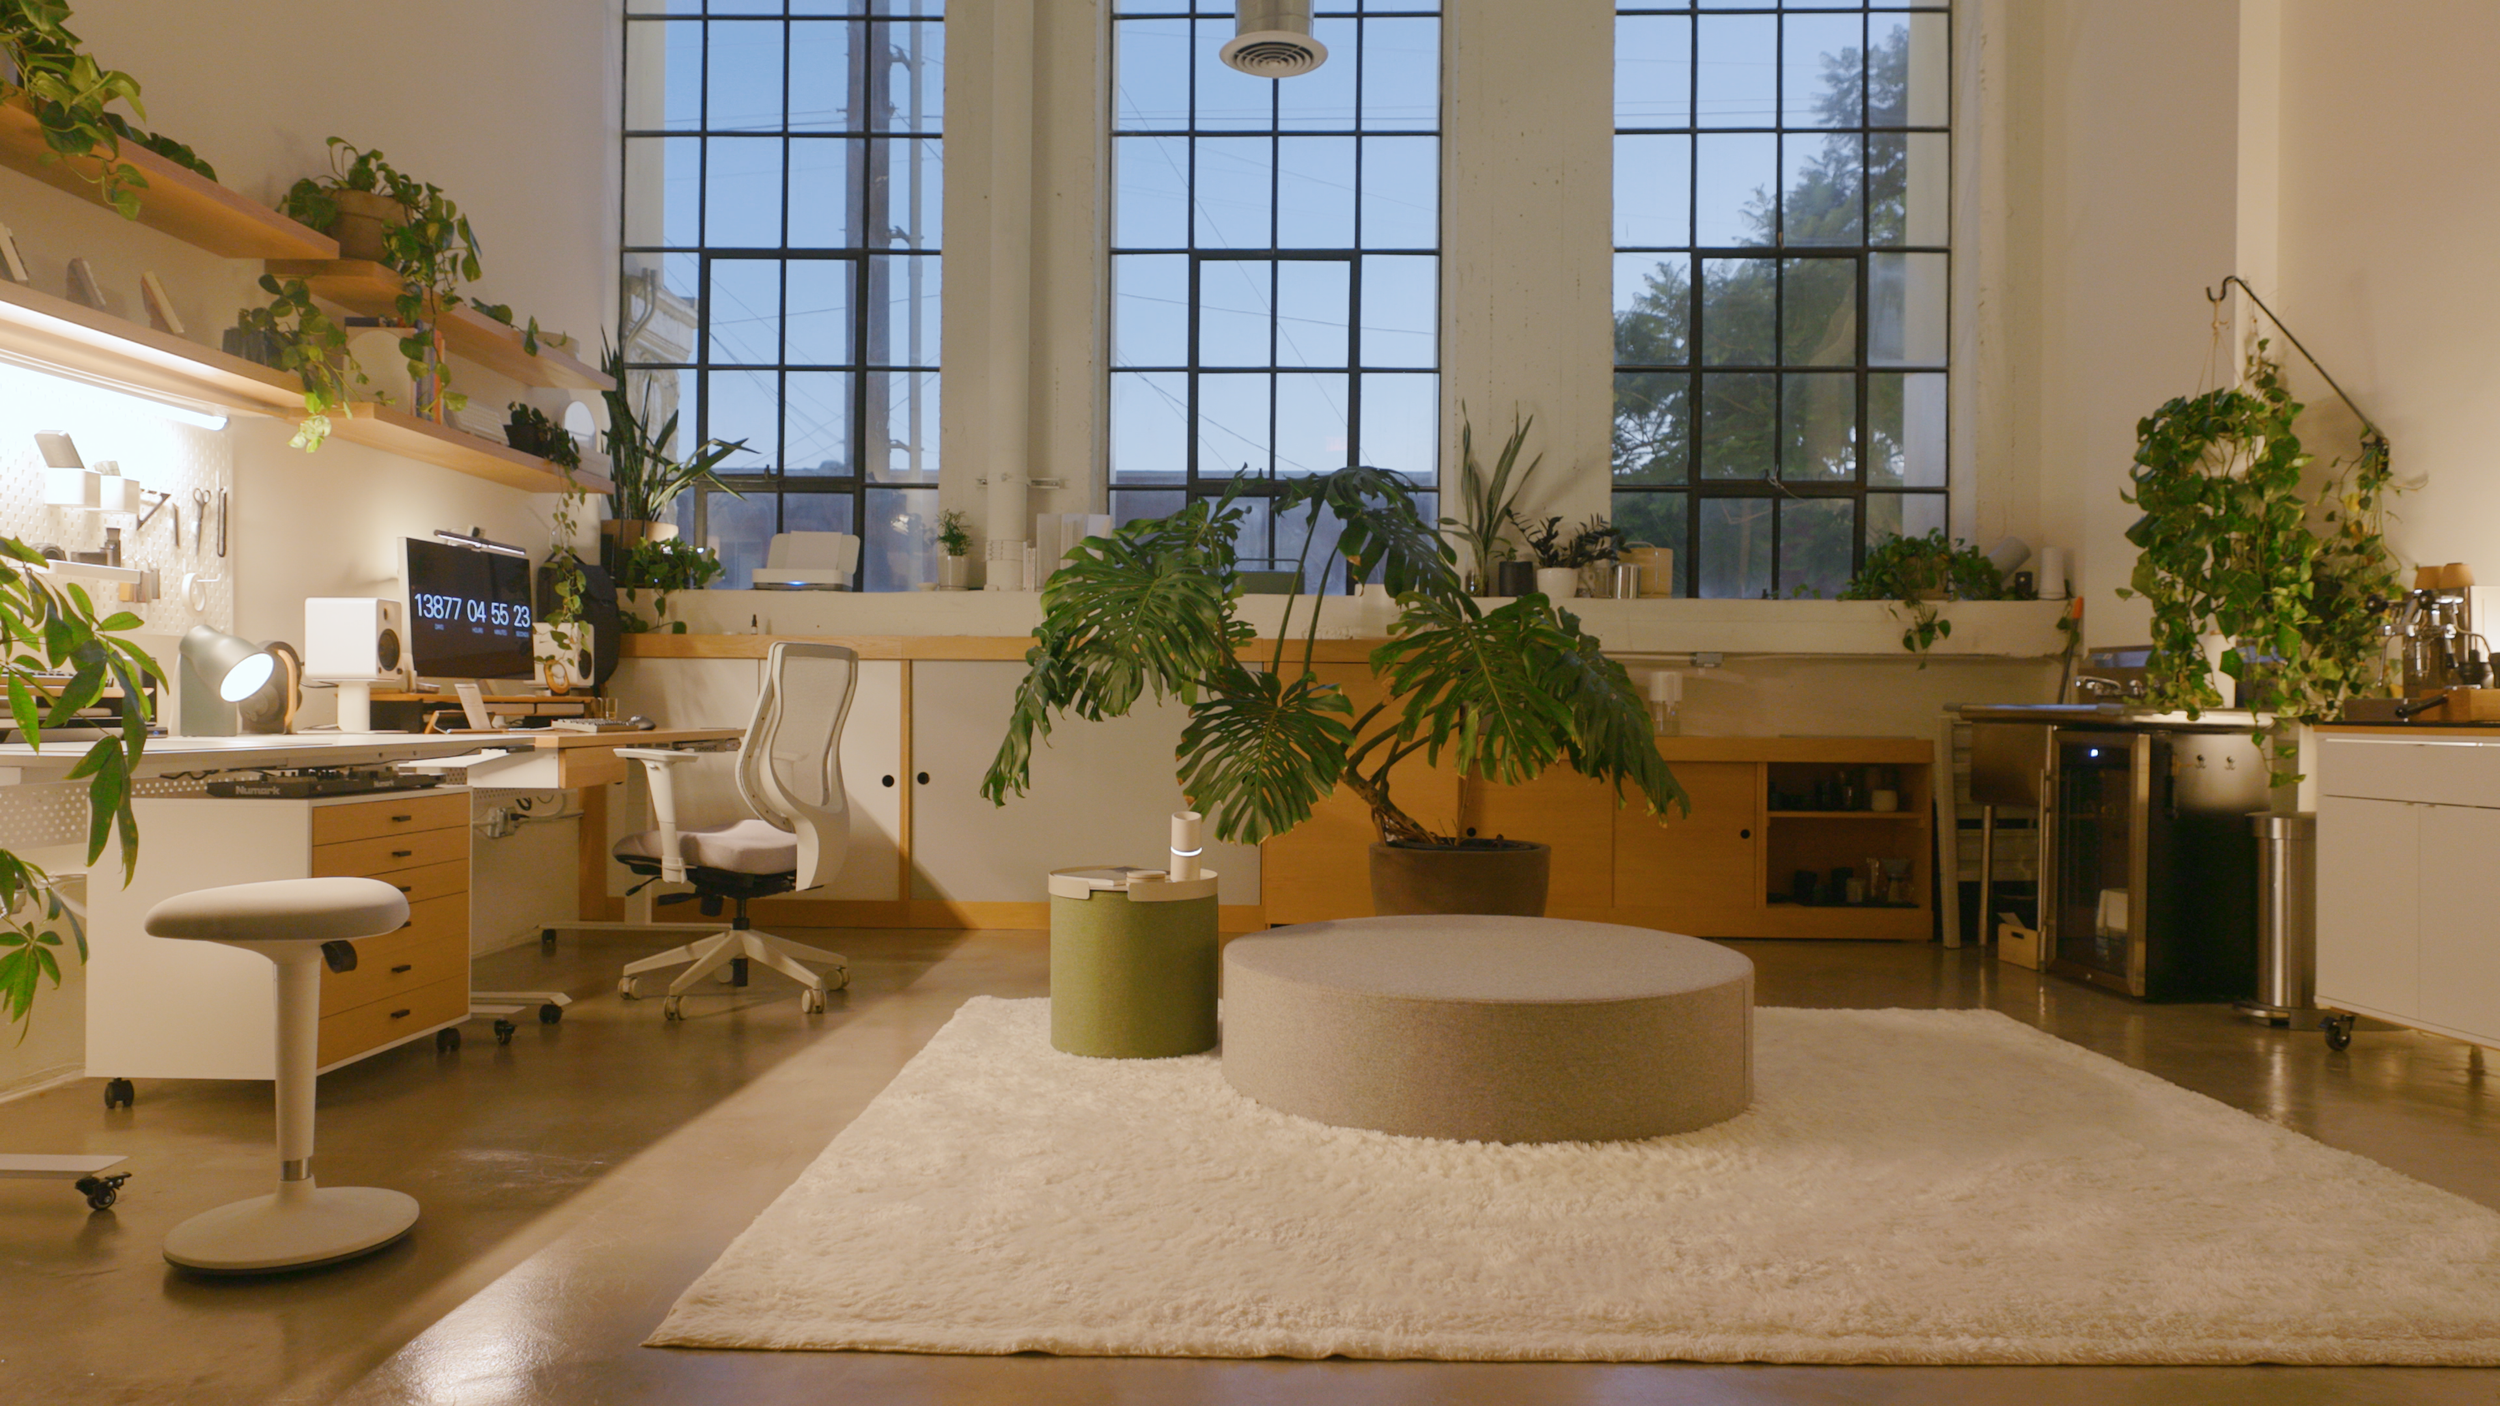
The Lounge Area
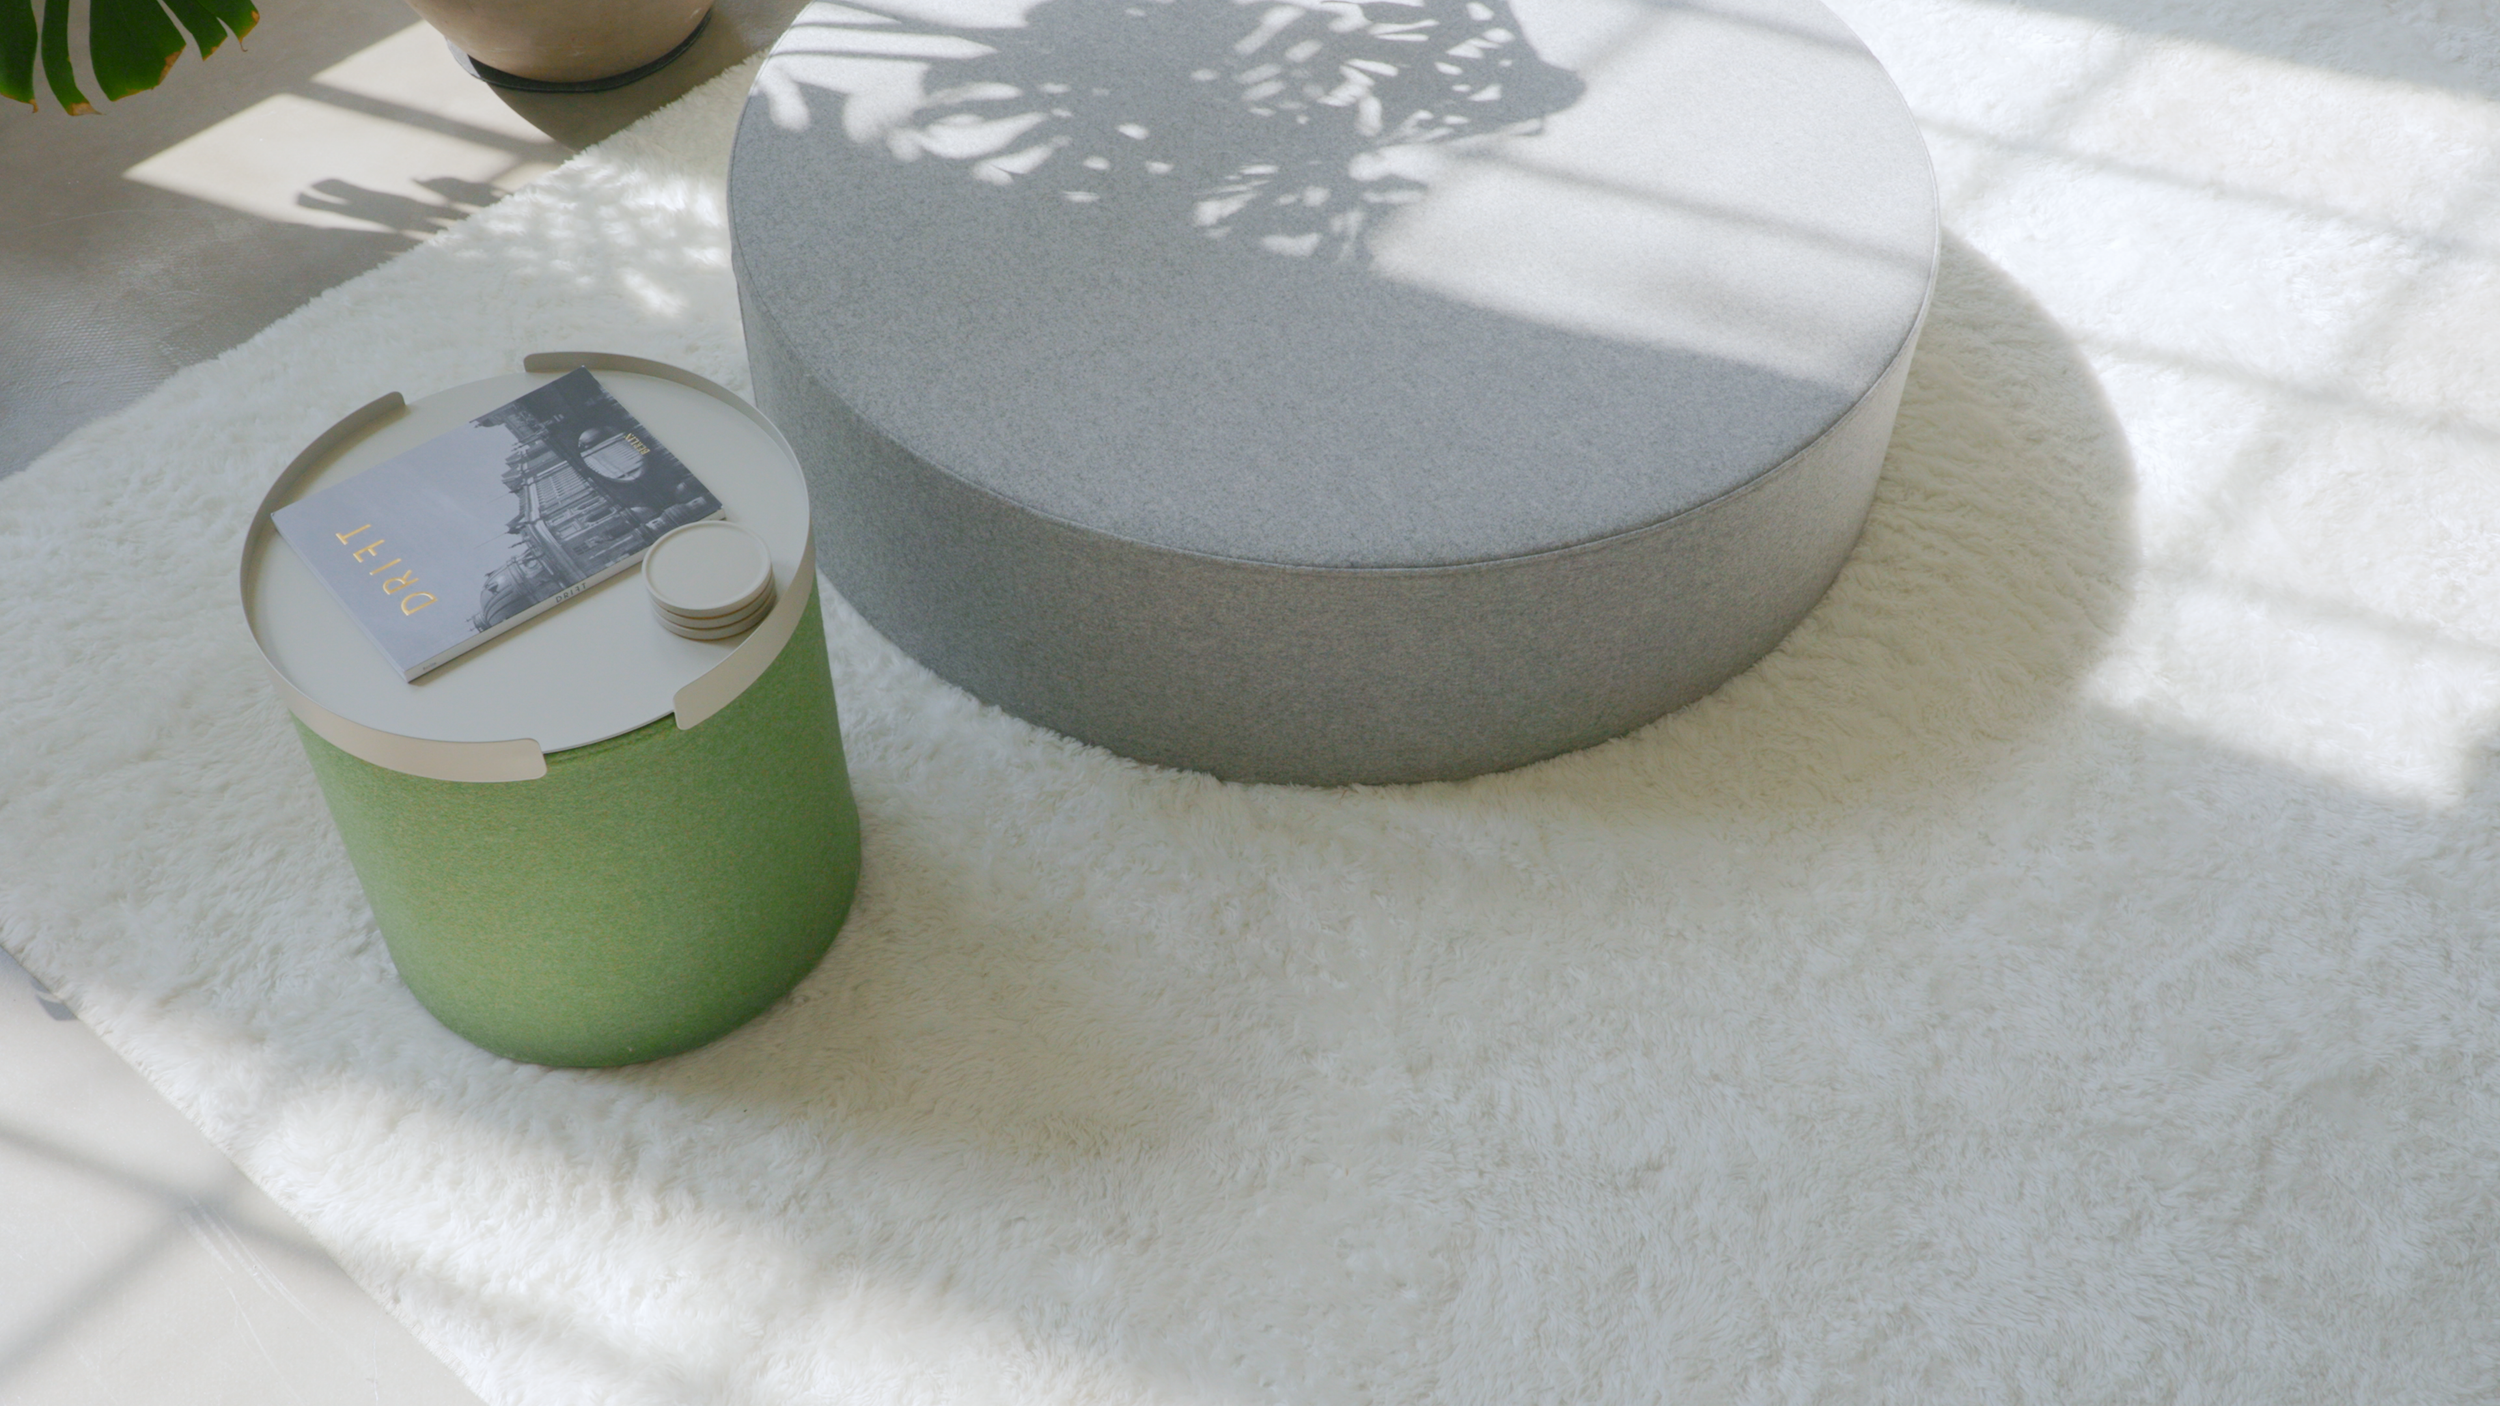
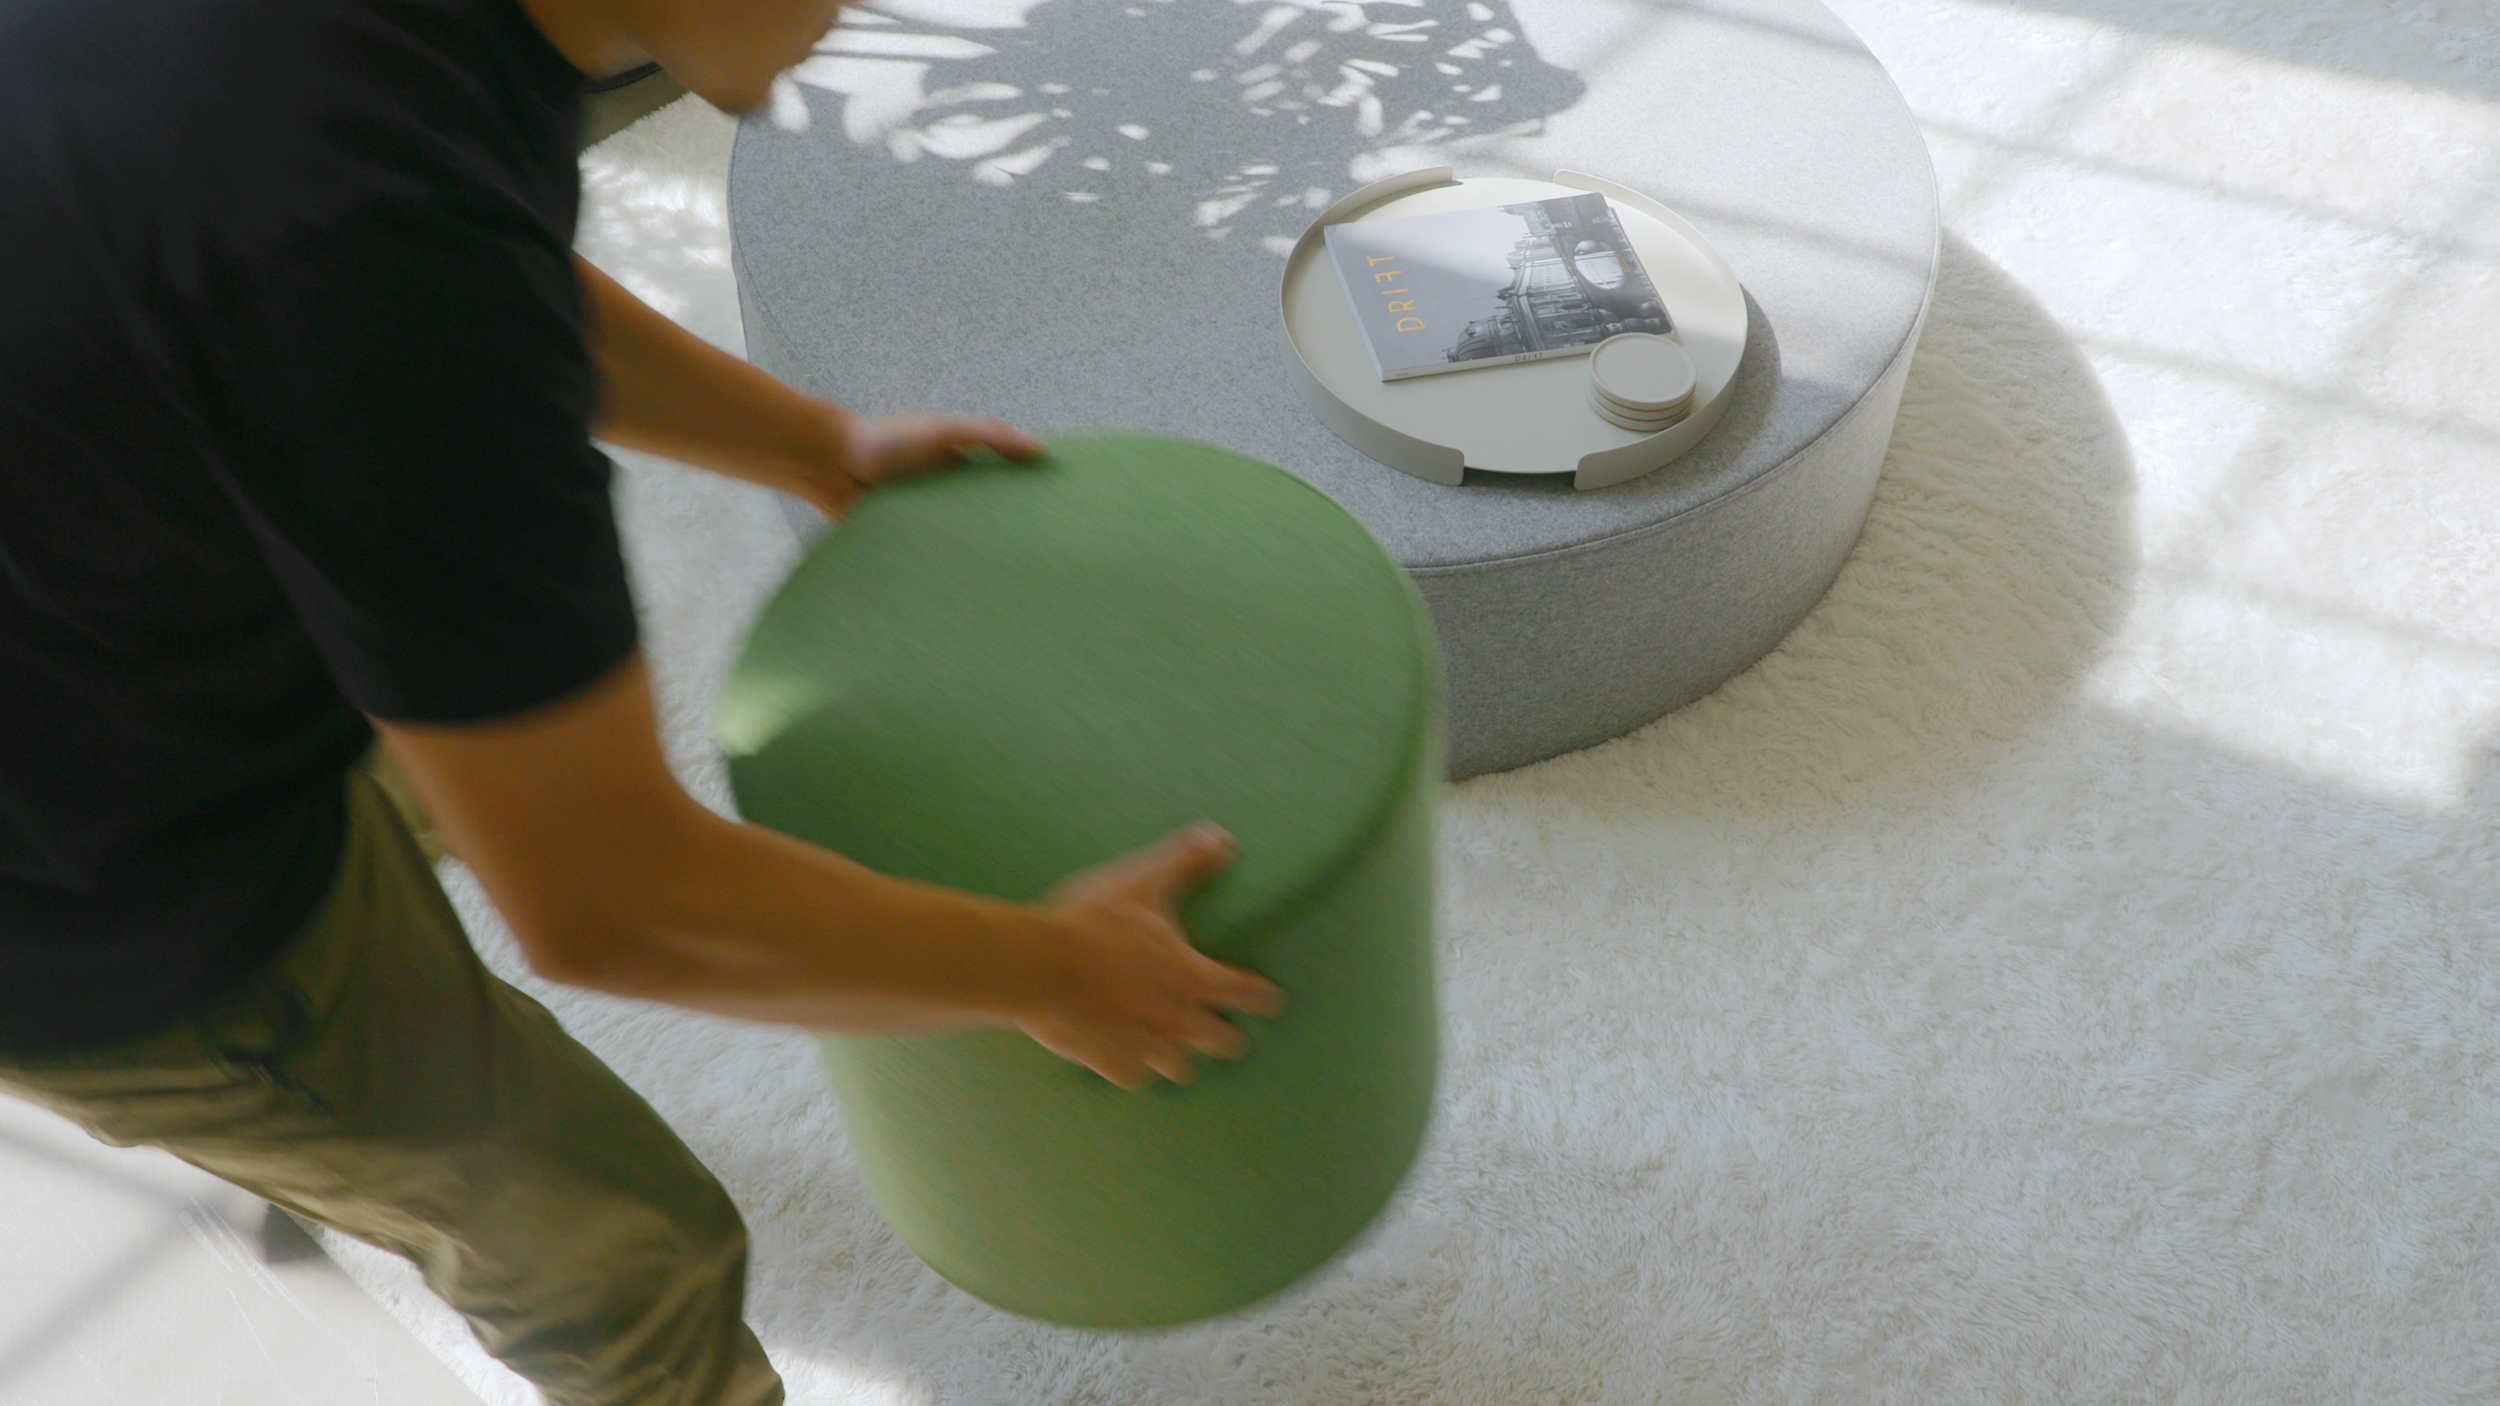
To enjoy that cup of coffee and to congregate with friends, I created this lounge area in the middle of the studio. I have a pair of ottomans on top of a large padded rug.

One of the ottomans has a steel top so I can use it as a side table, but can be removed if I want additional seating. The round shape of the ottomans keeps the floor plan feeling open and not boxed in, as a traditional couch would.
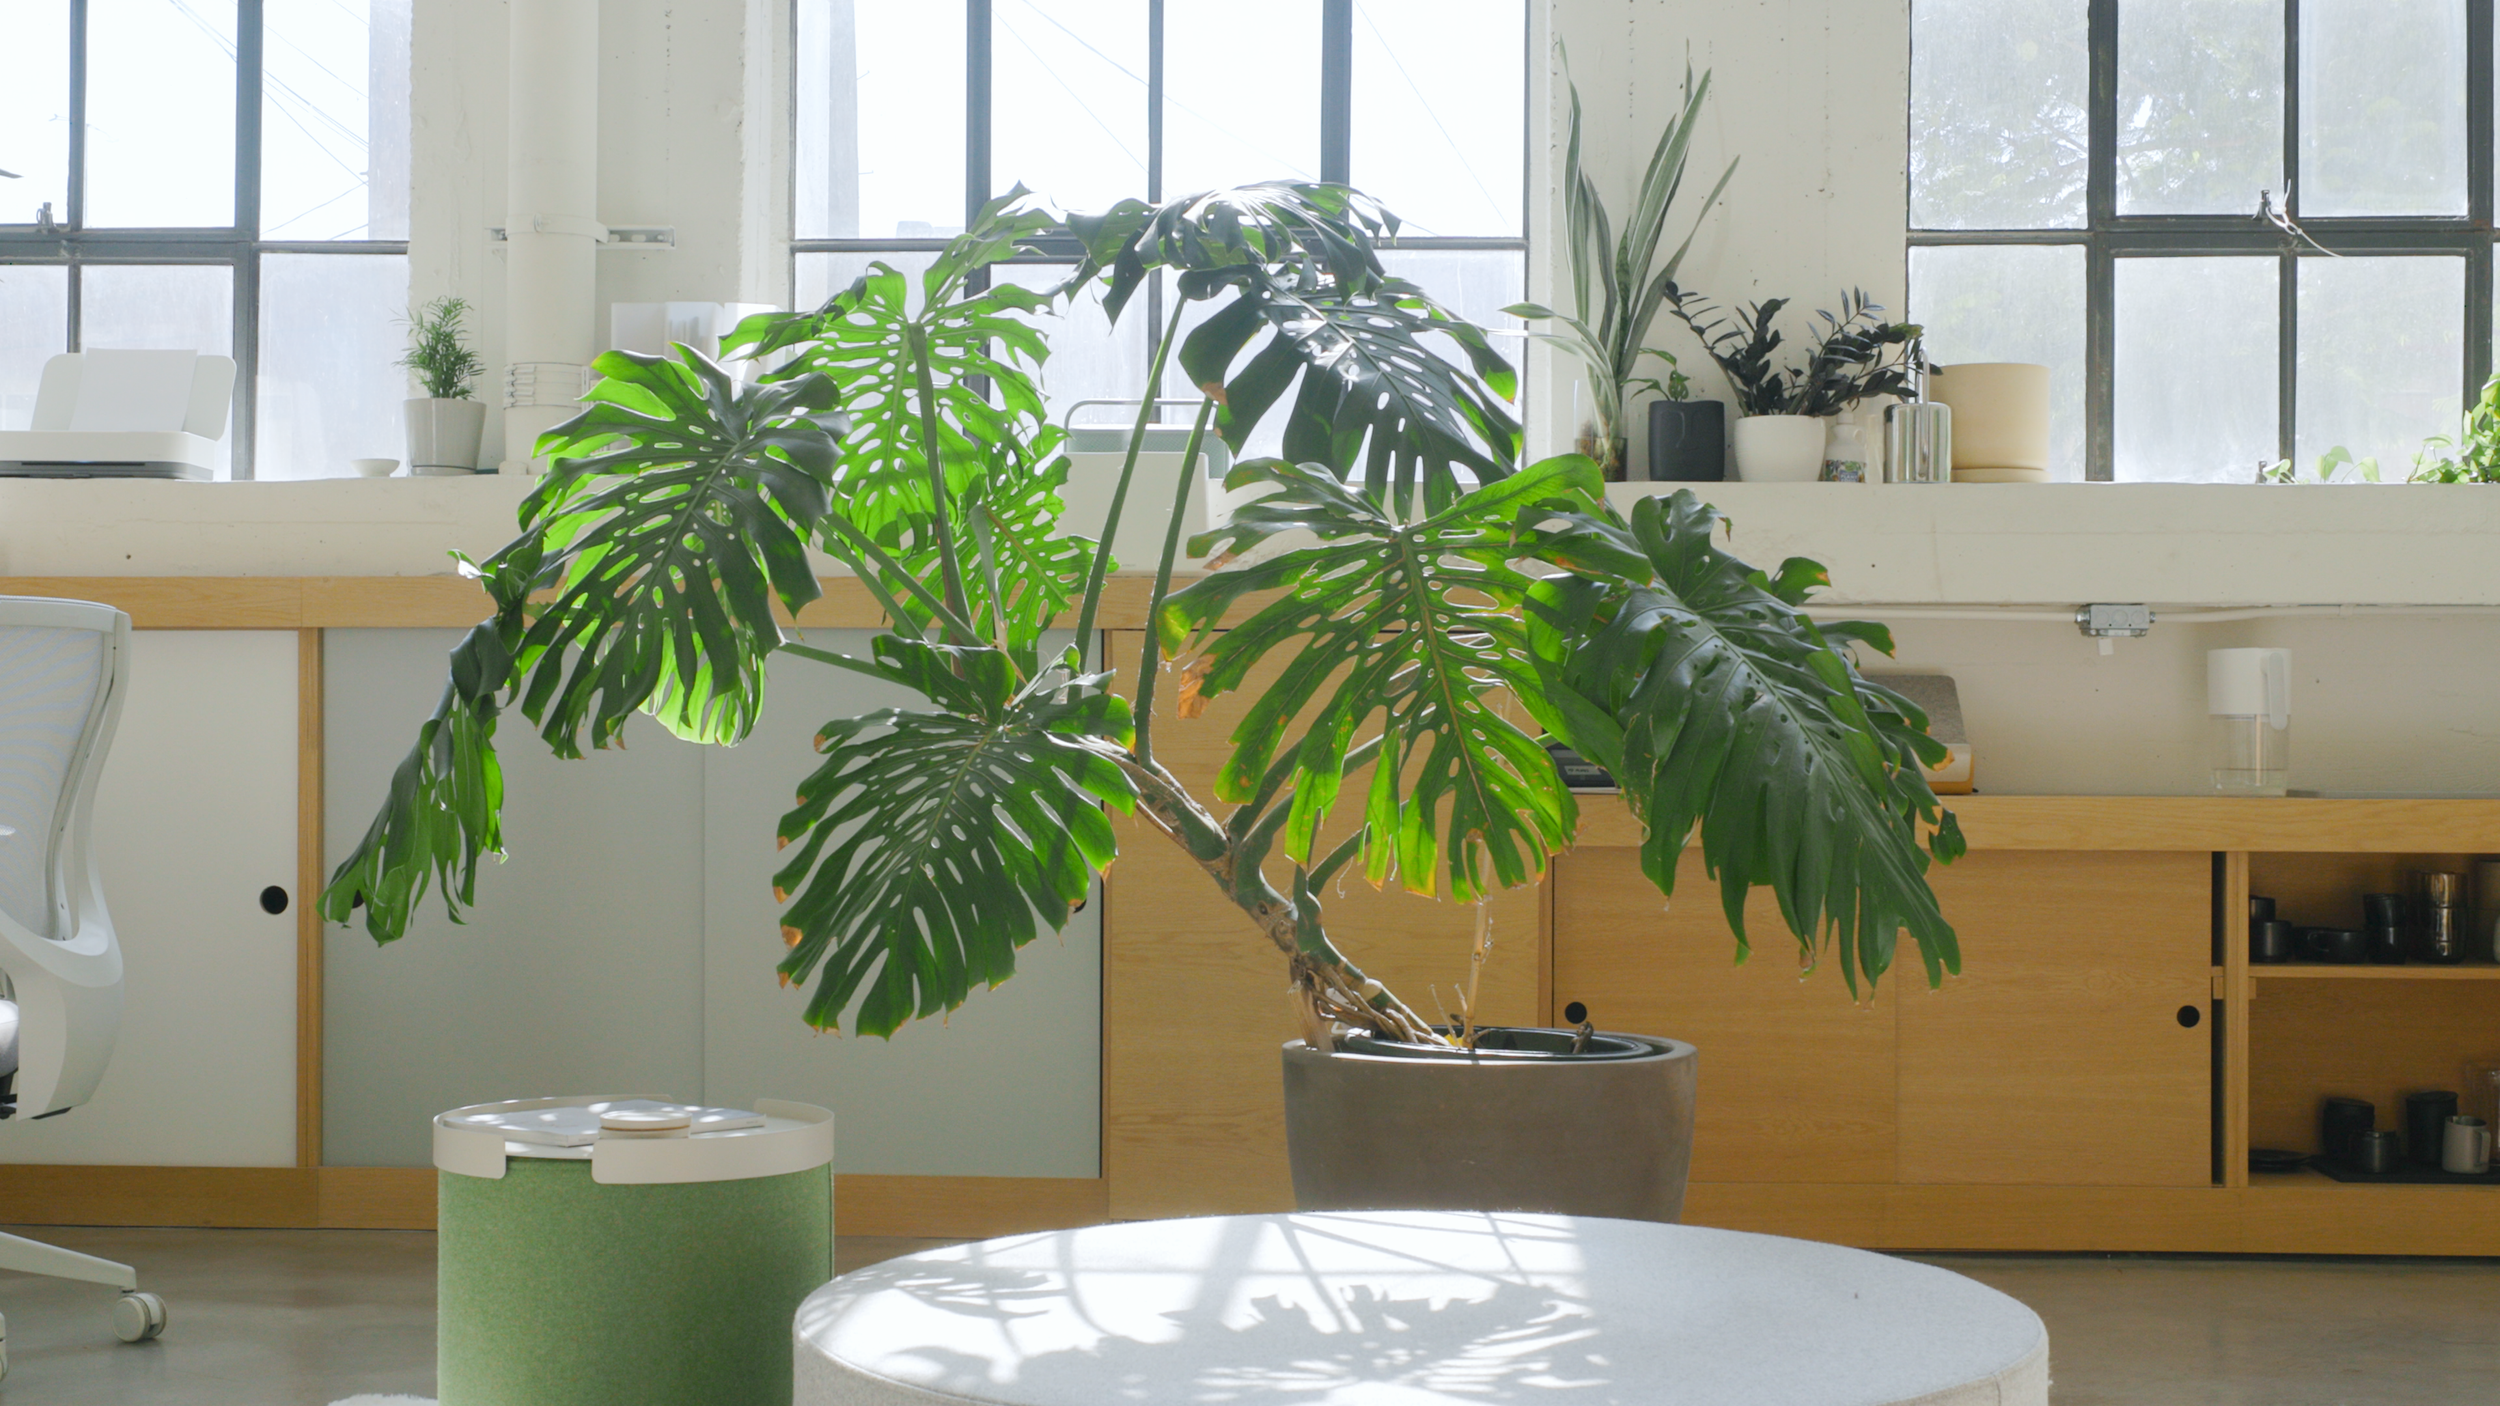
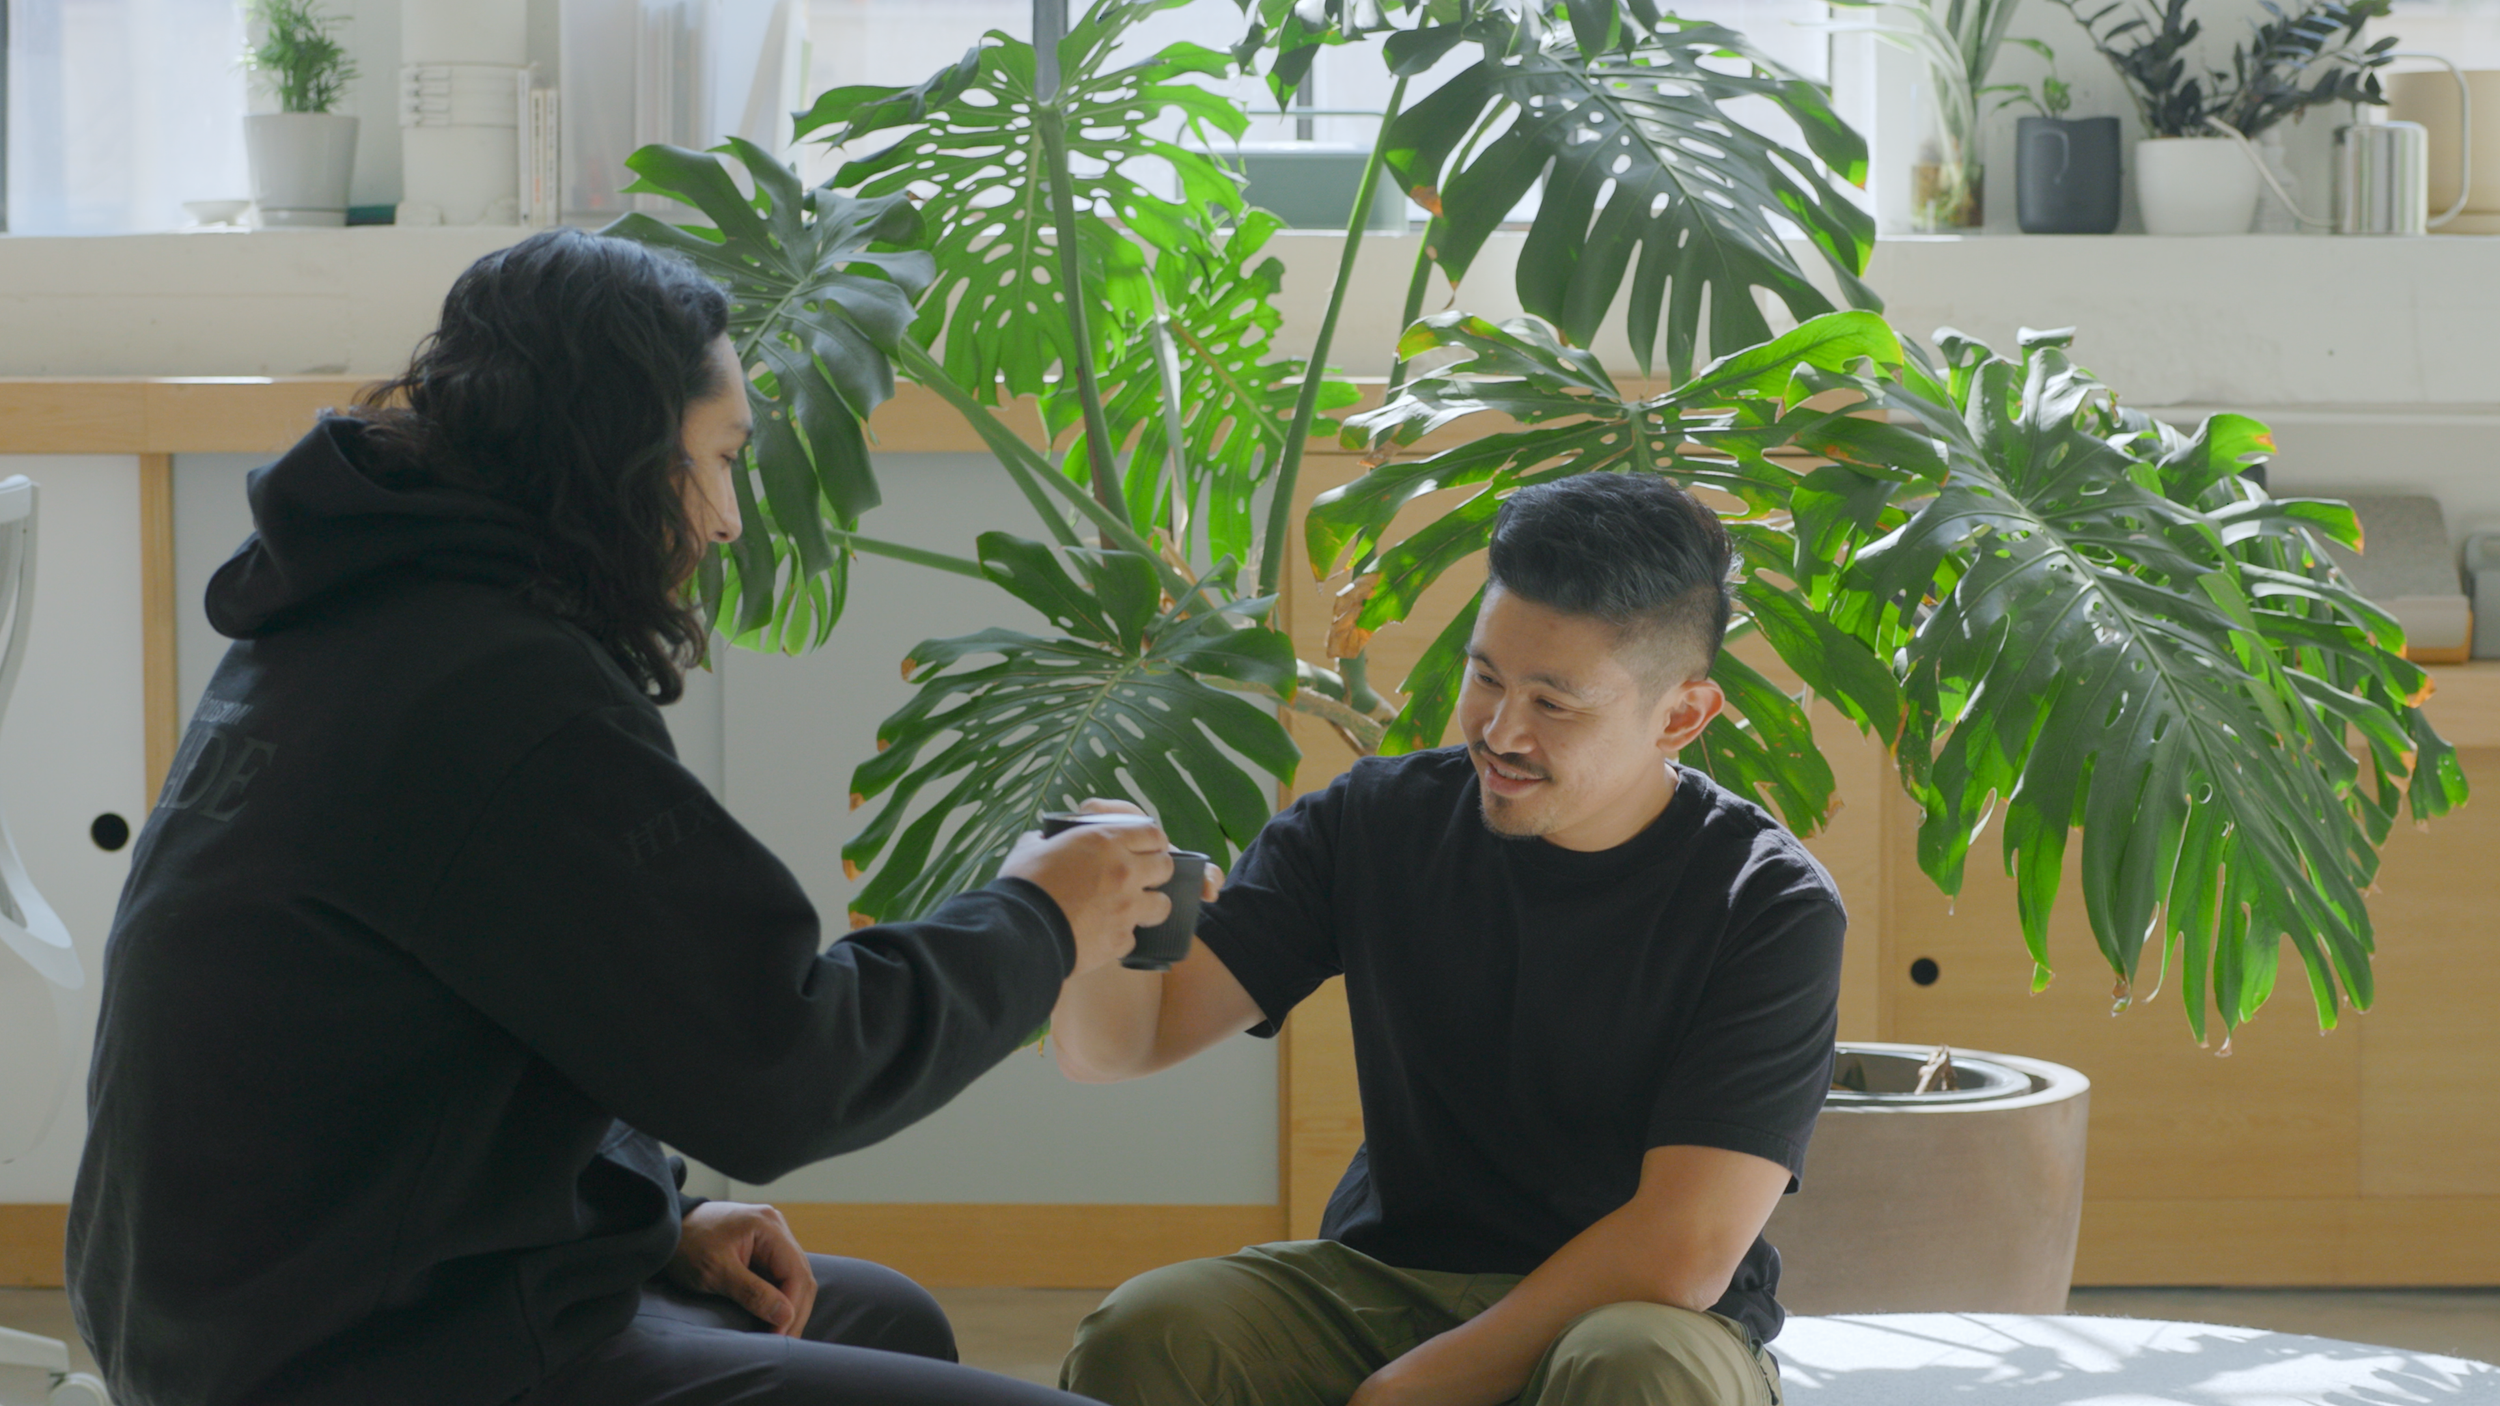

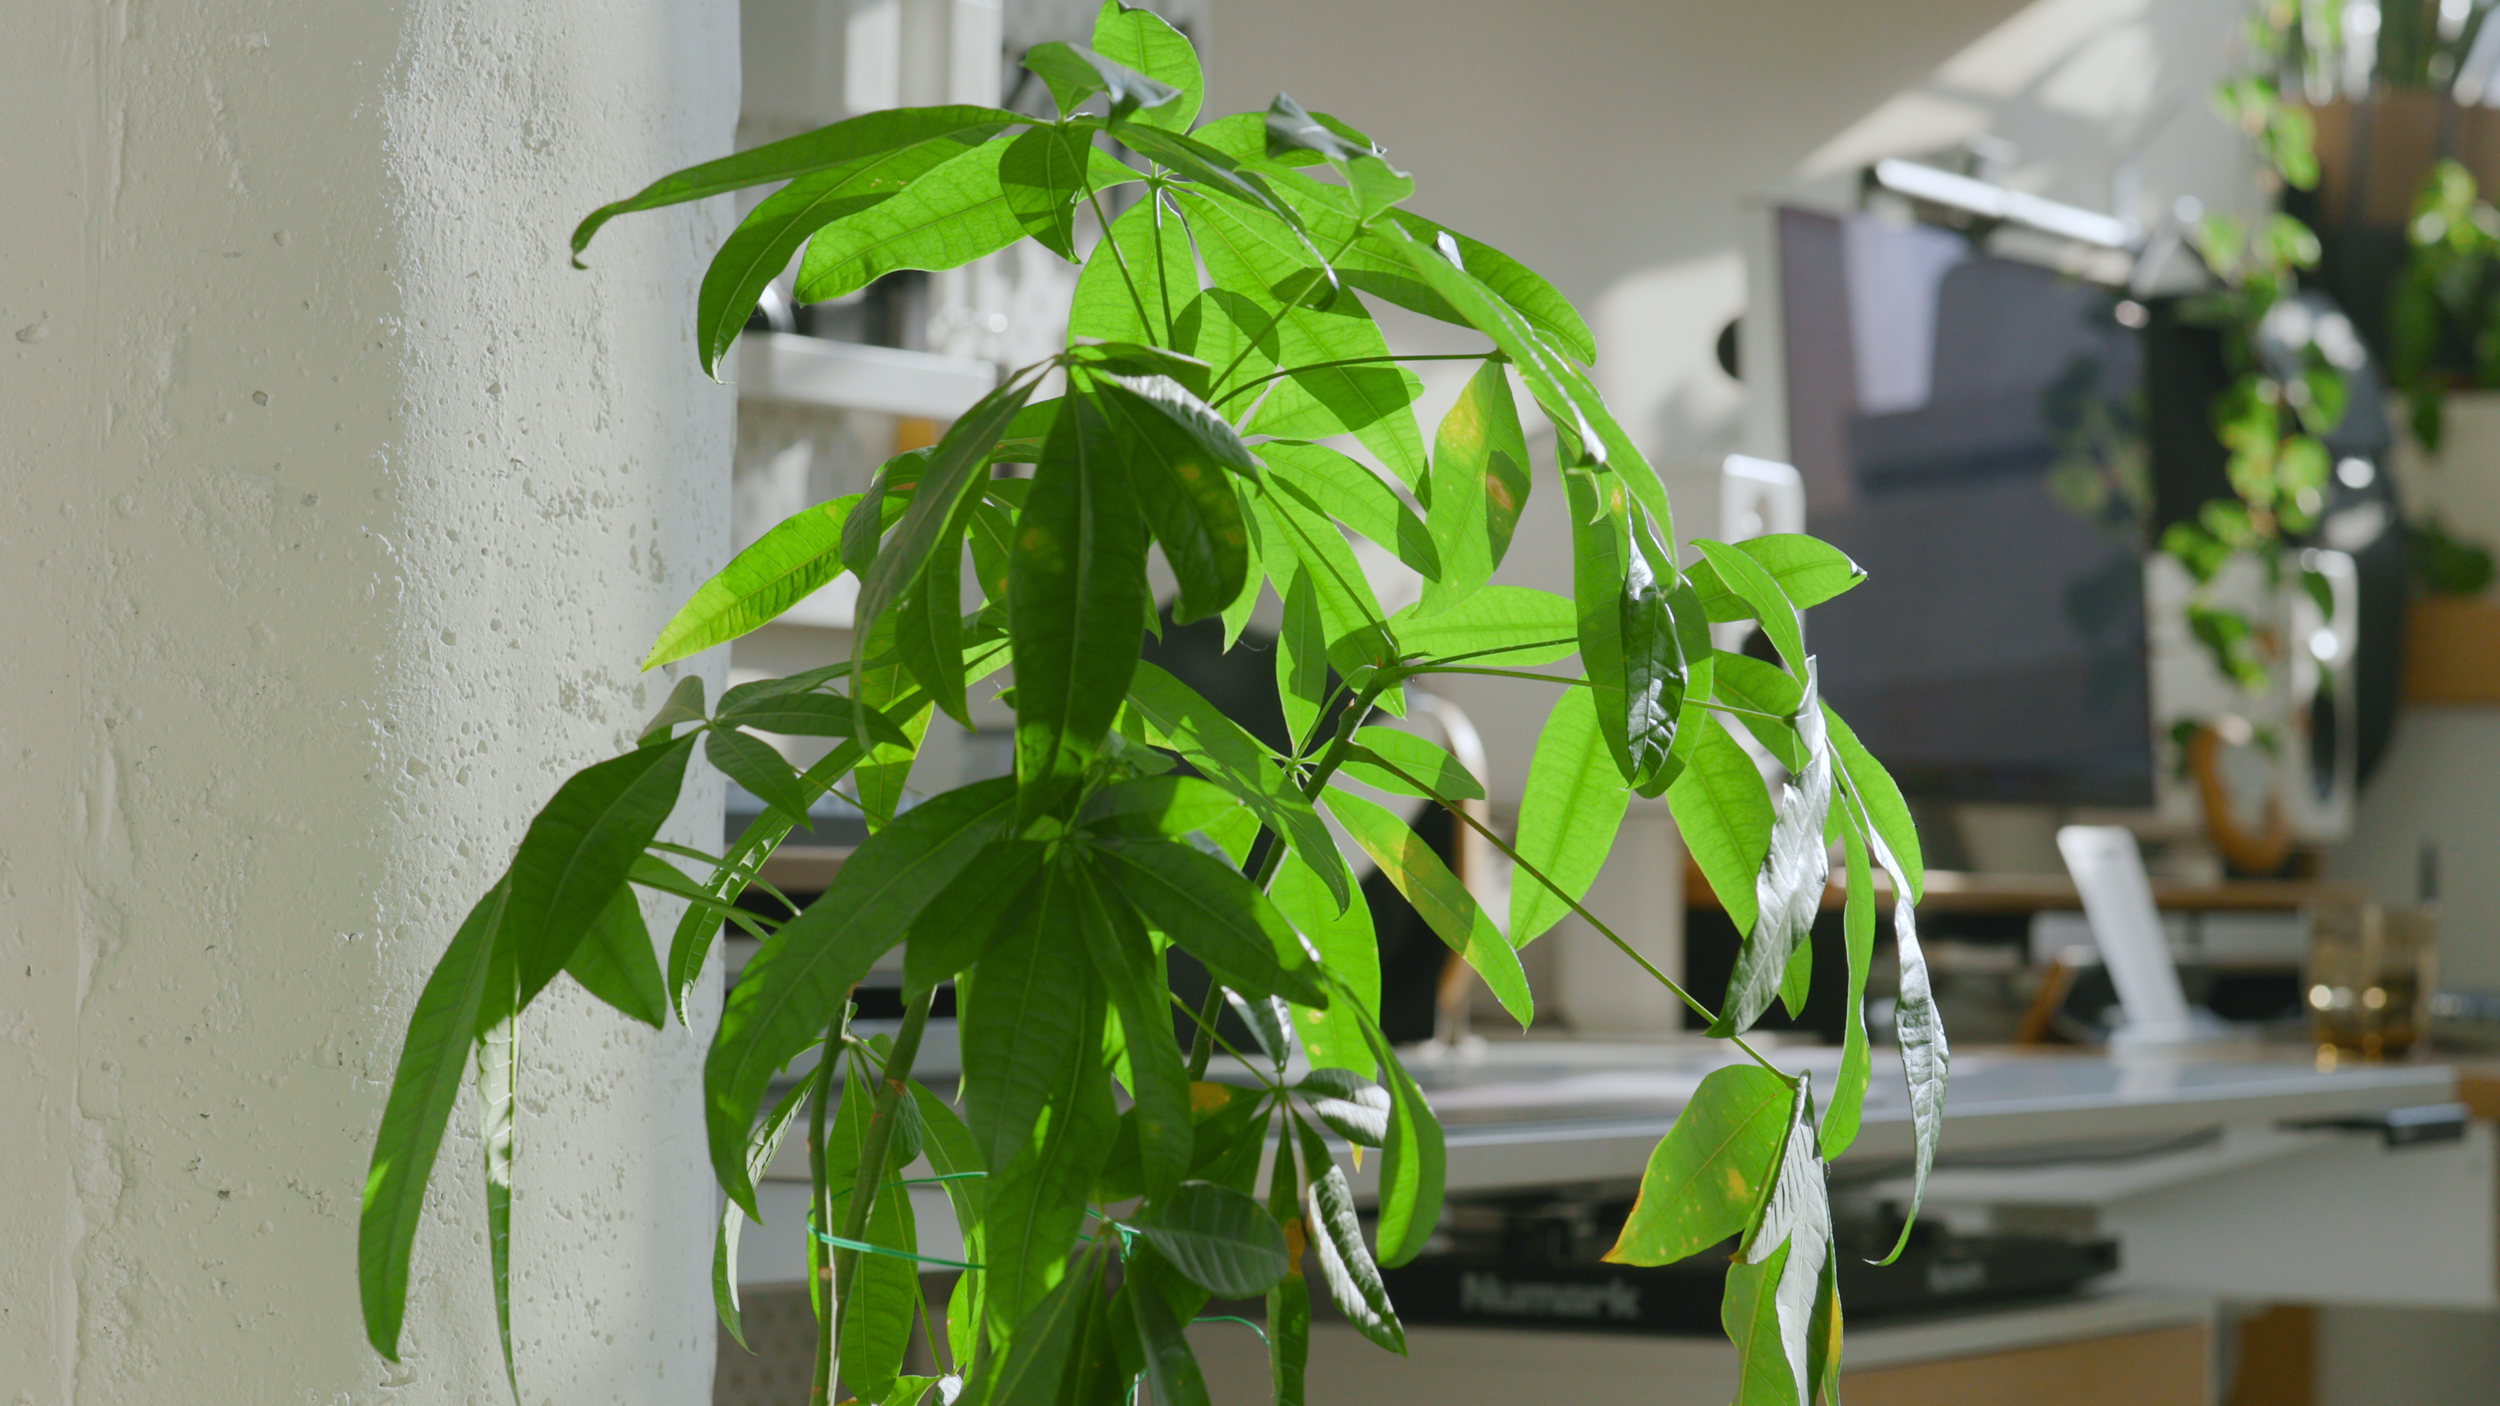
The centerpiece of the studio is a large 20-year-old Monstera I got from my parents. This, along with the other plants I’ve added to the studio, helps break up the rigid lines with organic shapes. Having all of this greenery and sunlight brings a palpable sense of calm to the space.
Lounge Area Links
Bludot Bumper Ottoman (XL Ottoman discontinued)
Lighting & Mood
One goal I had for this studio was for it to serve as a beautiful backdrop for my content, no matter the angle. When I shoot, I try to work with natural light as much as possible. The hard lighting coming into the space during the afternoons looks incredible– creating interesting shapes and casting long shadows across the environment.
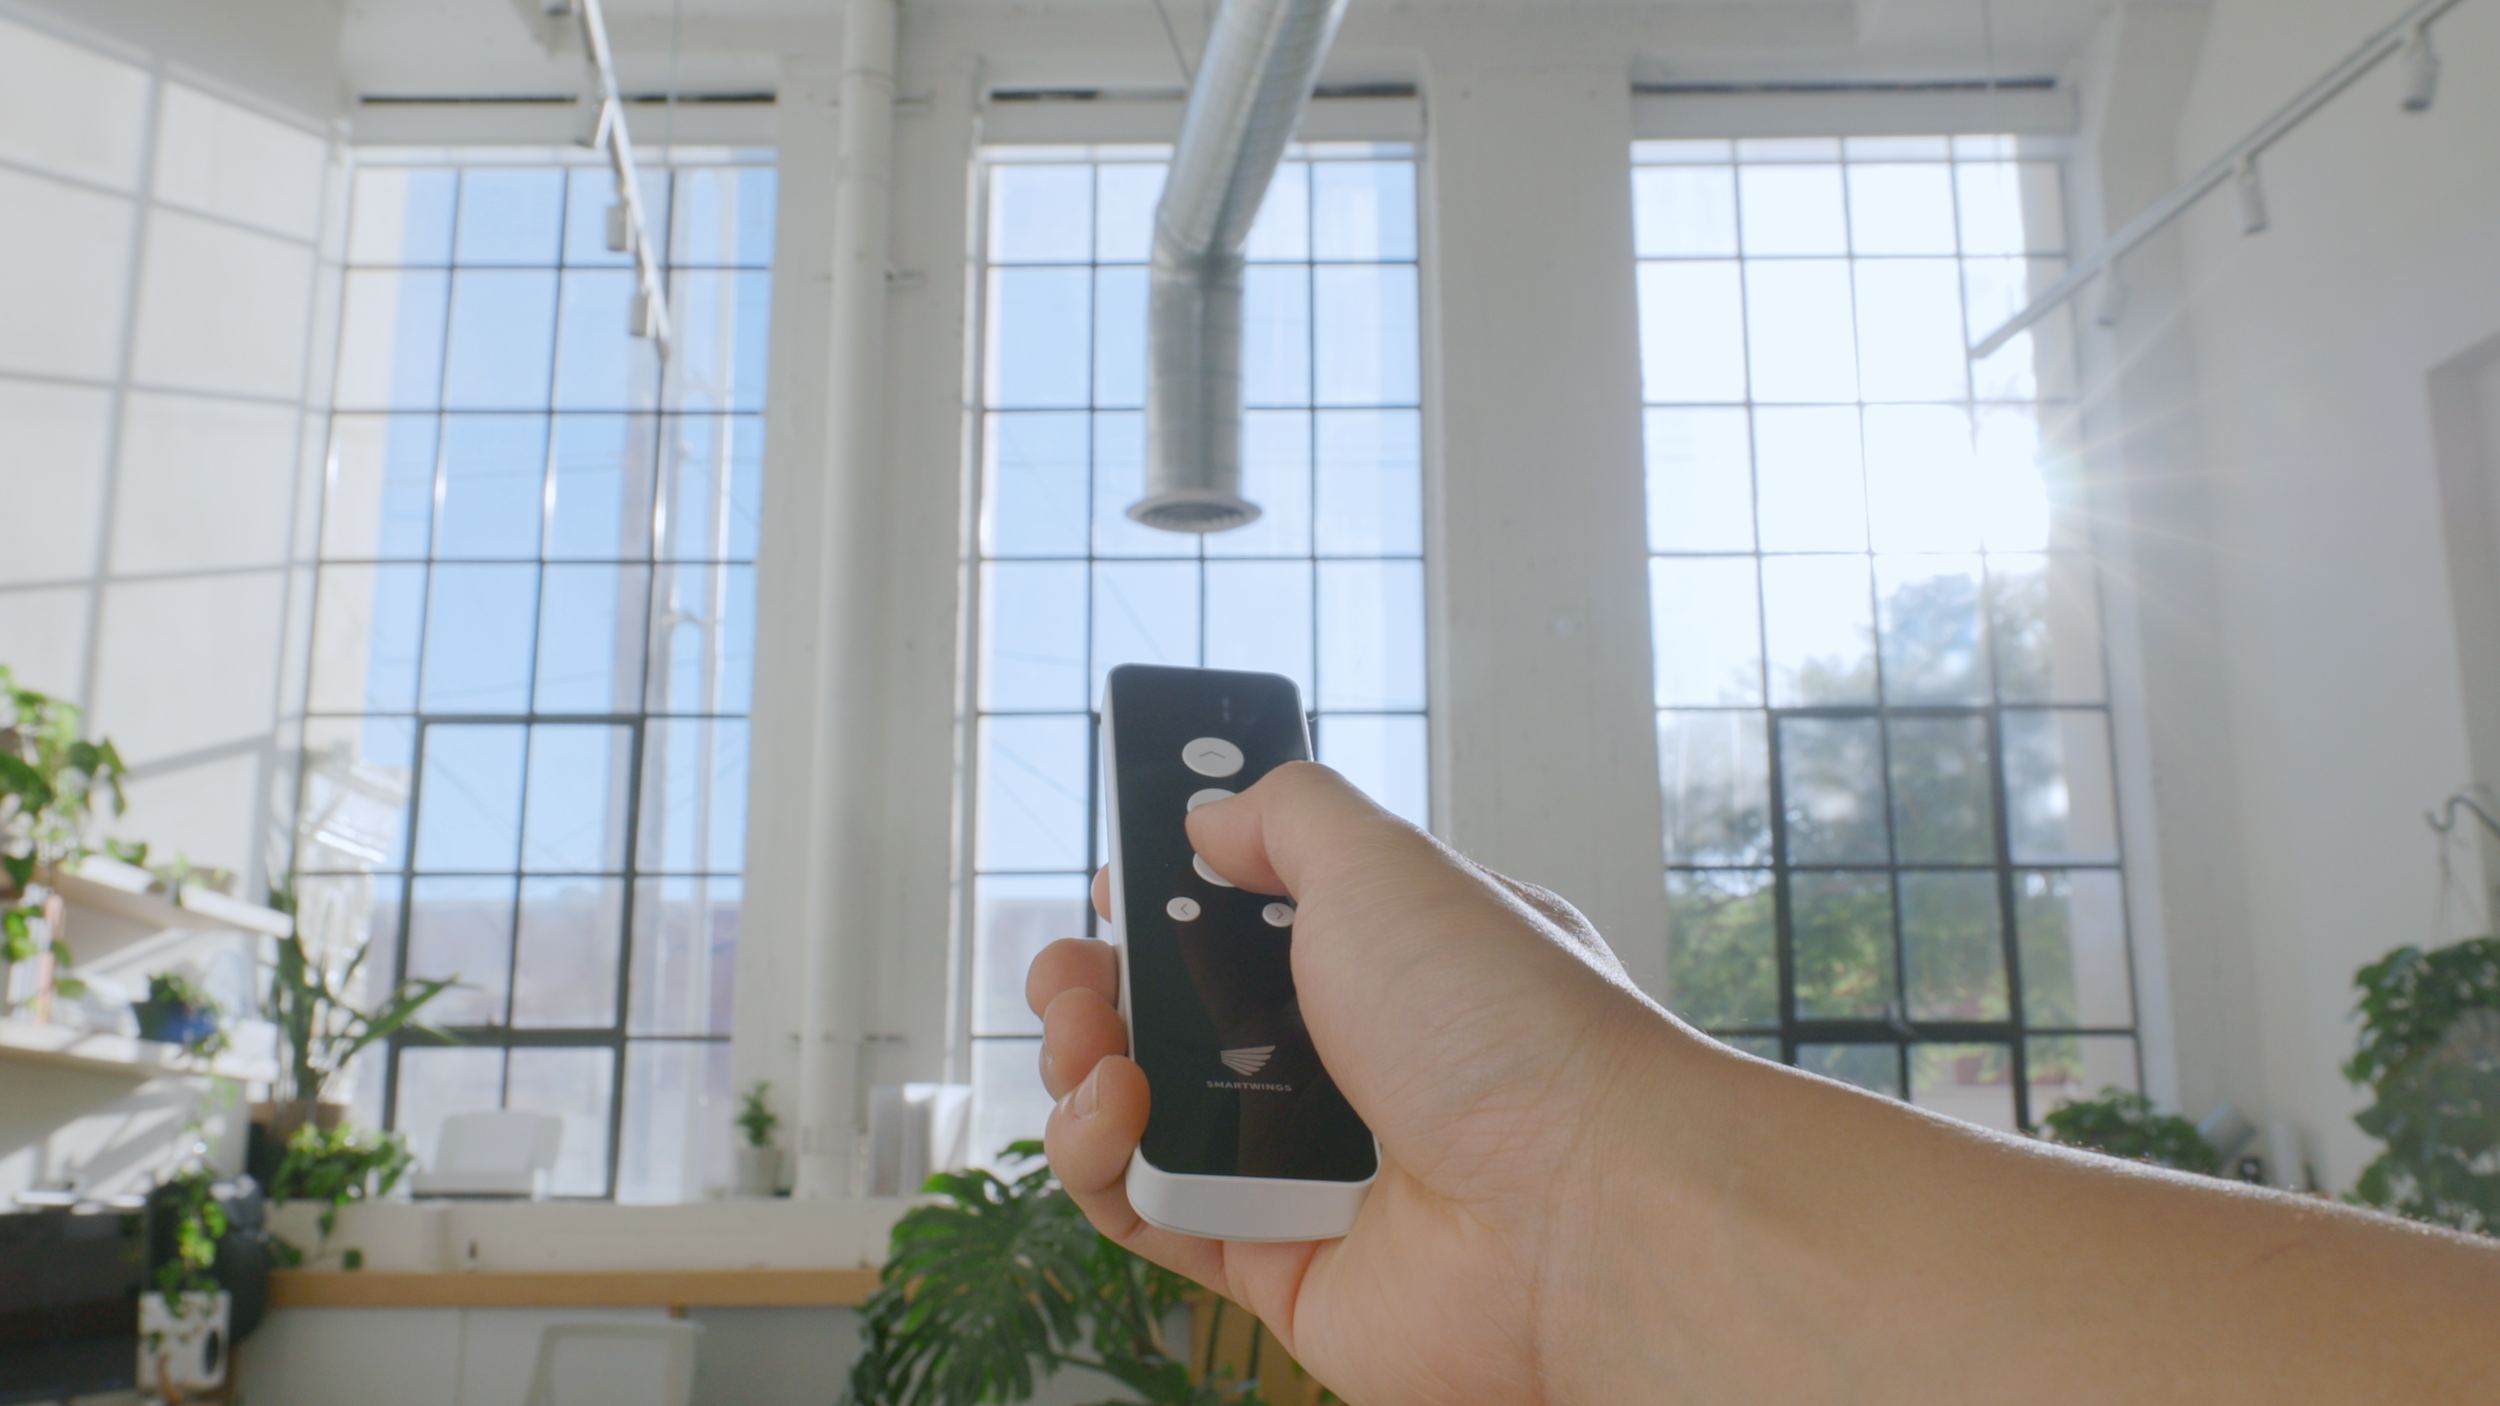
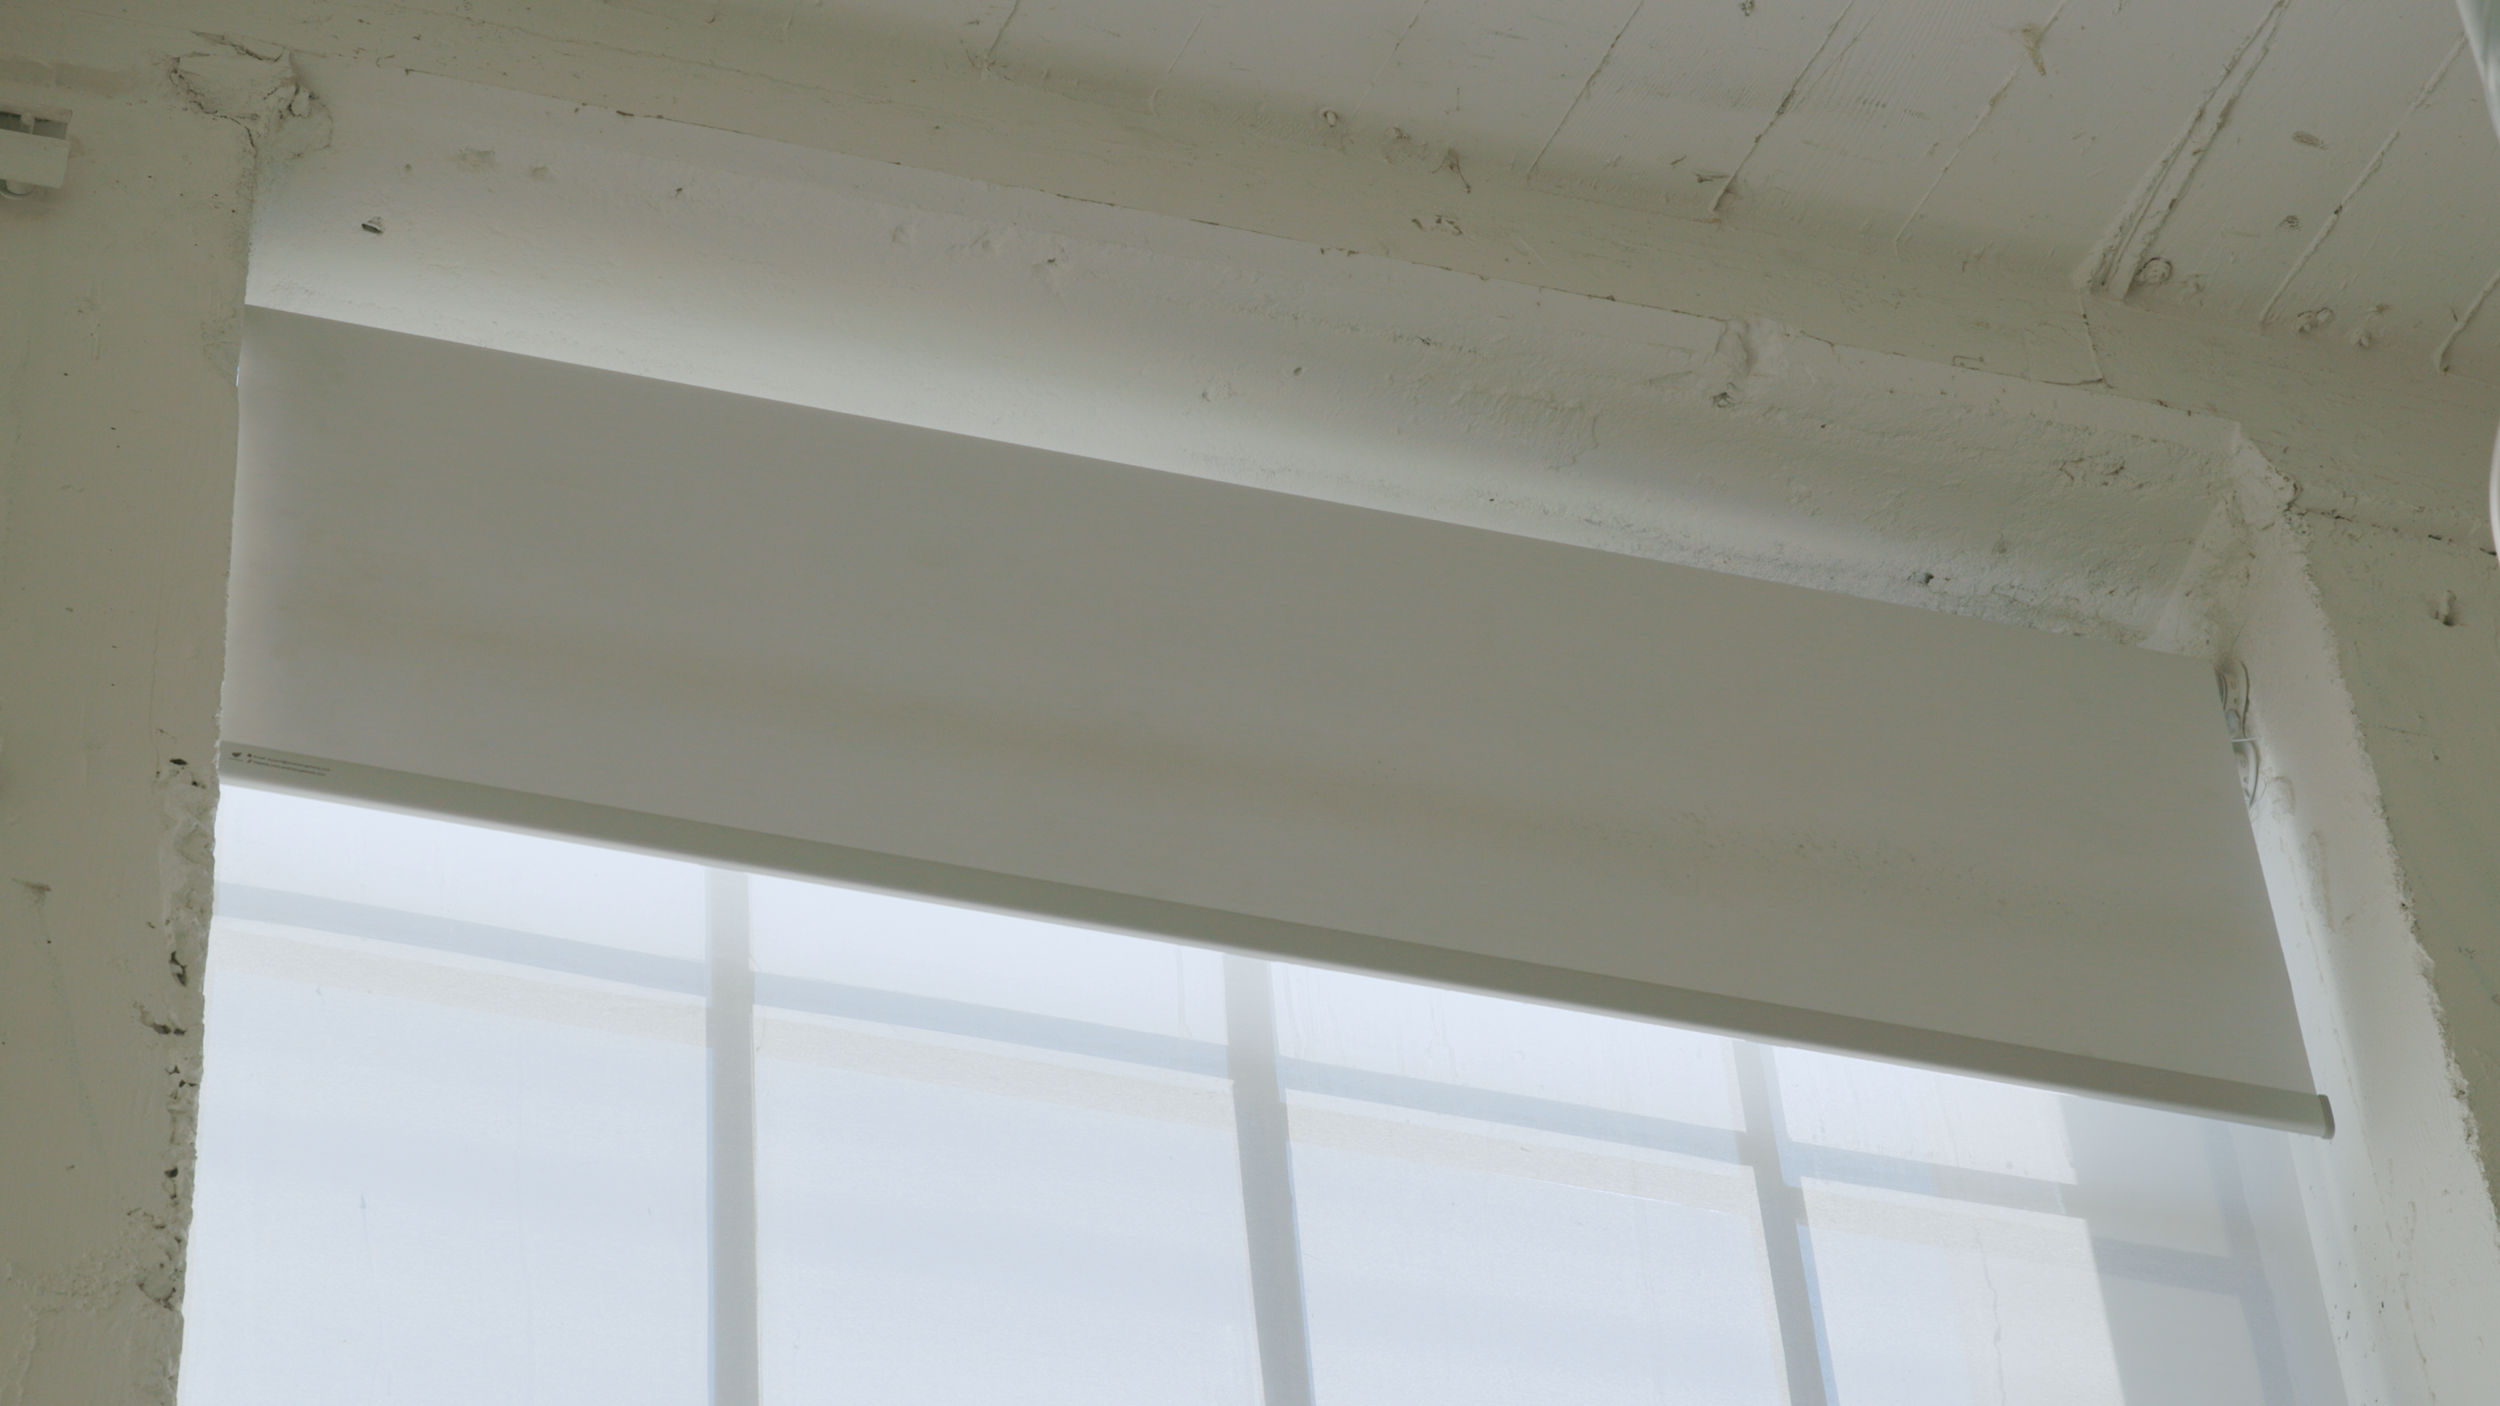
When the sun is too intense, I roll down my filtered shades to diffuse the light for a softer look in camera, and to minimize reflections on my monitor. And for complete control of the lighting, I can roll down my black-out shades.
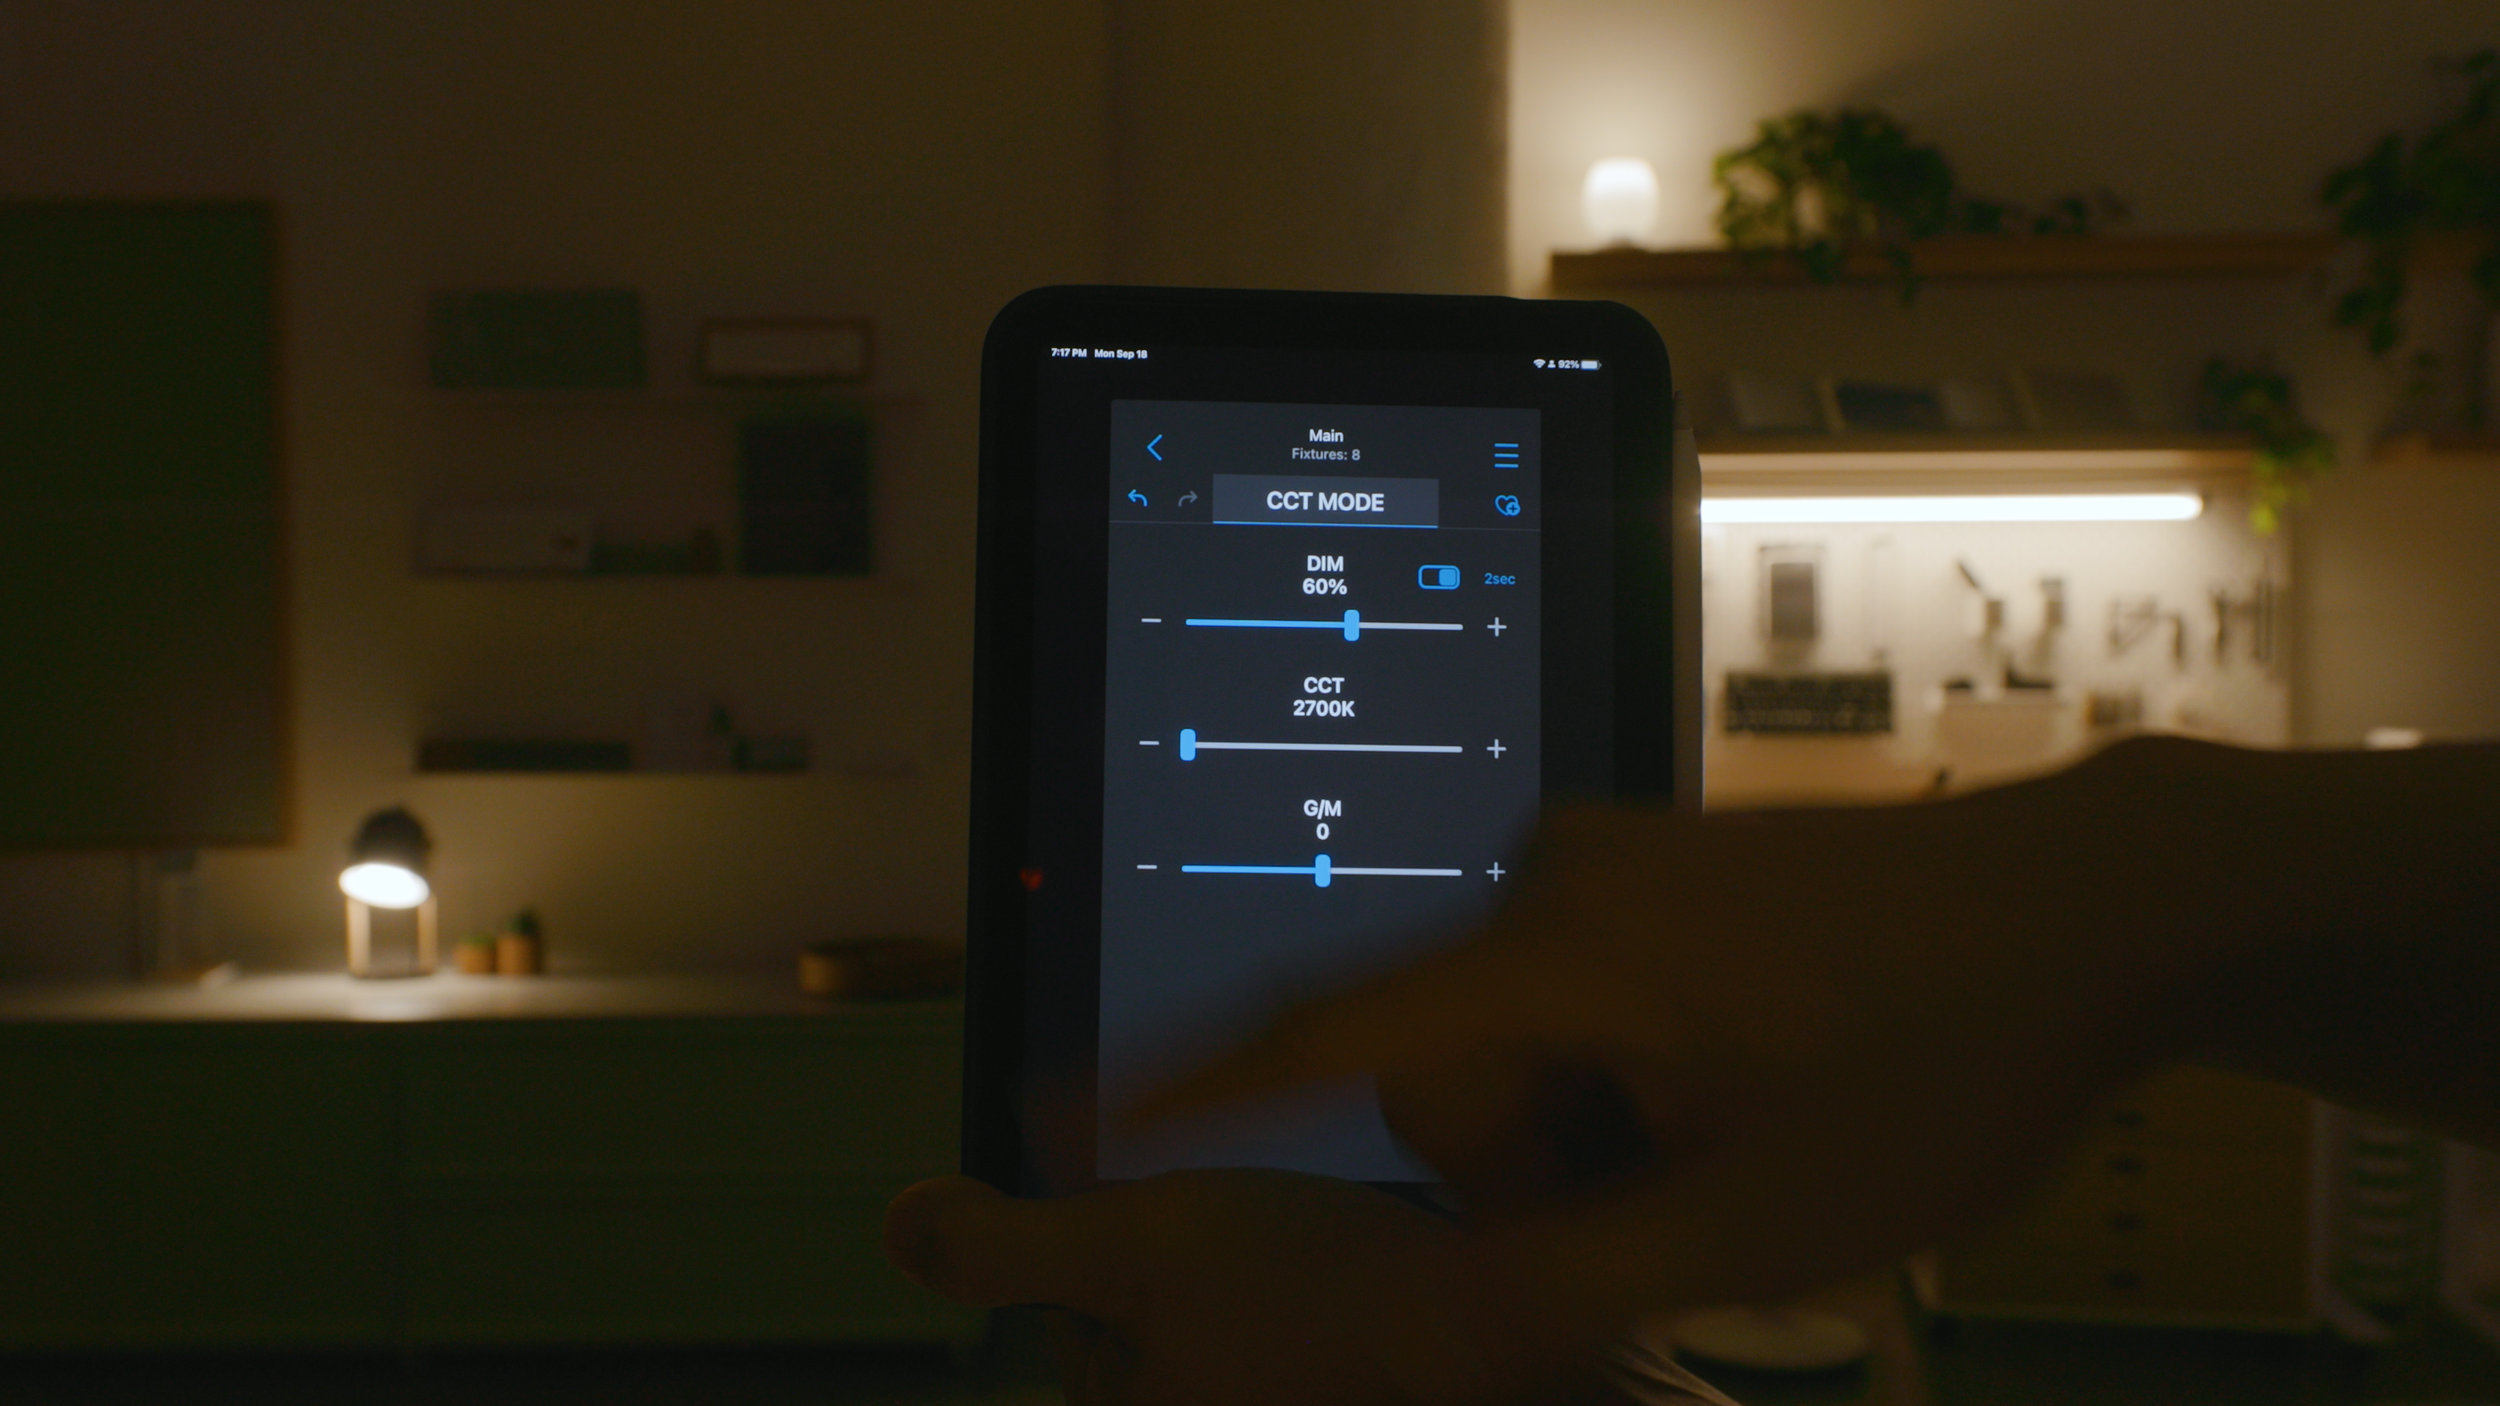
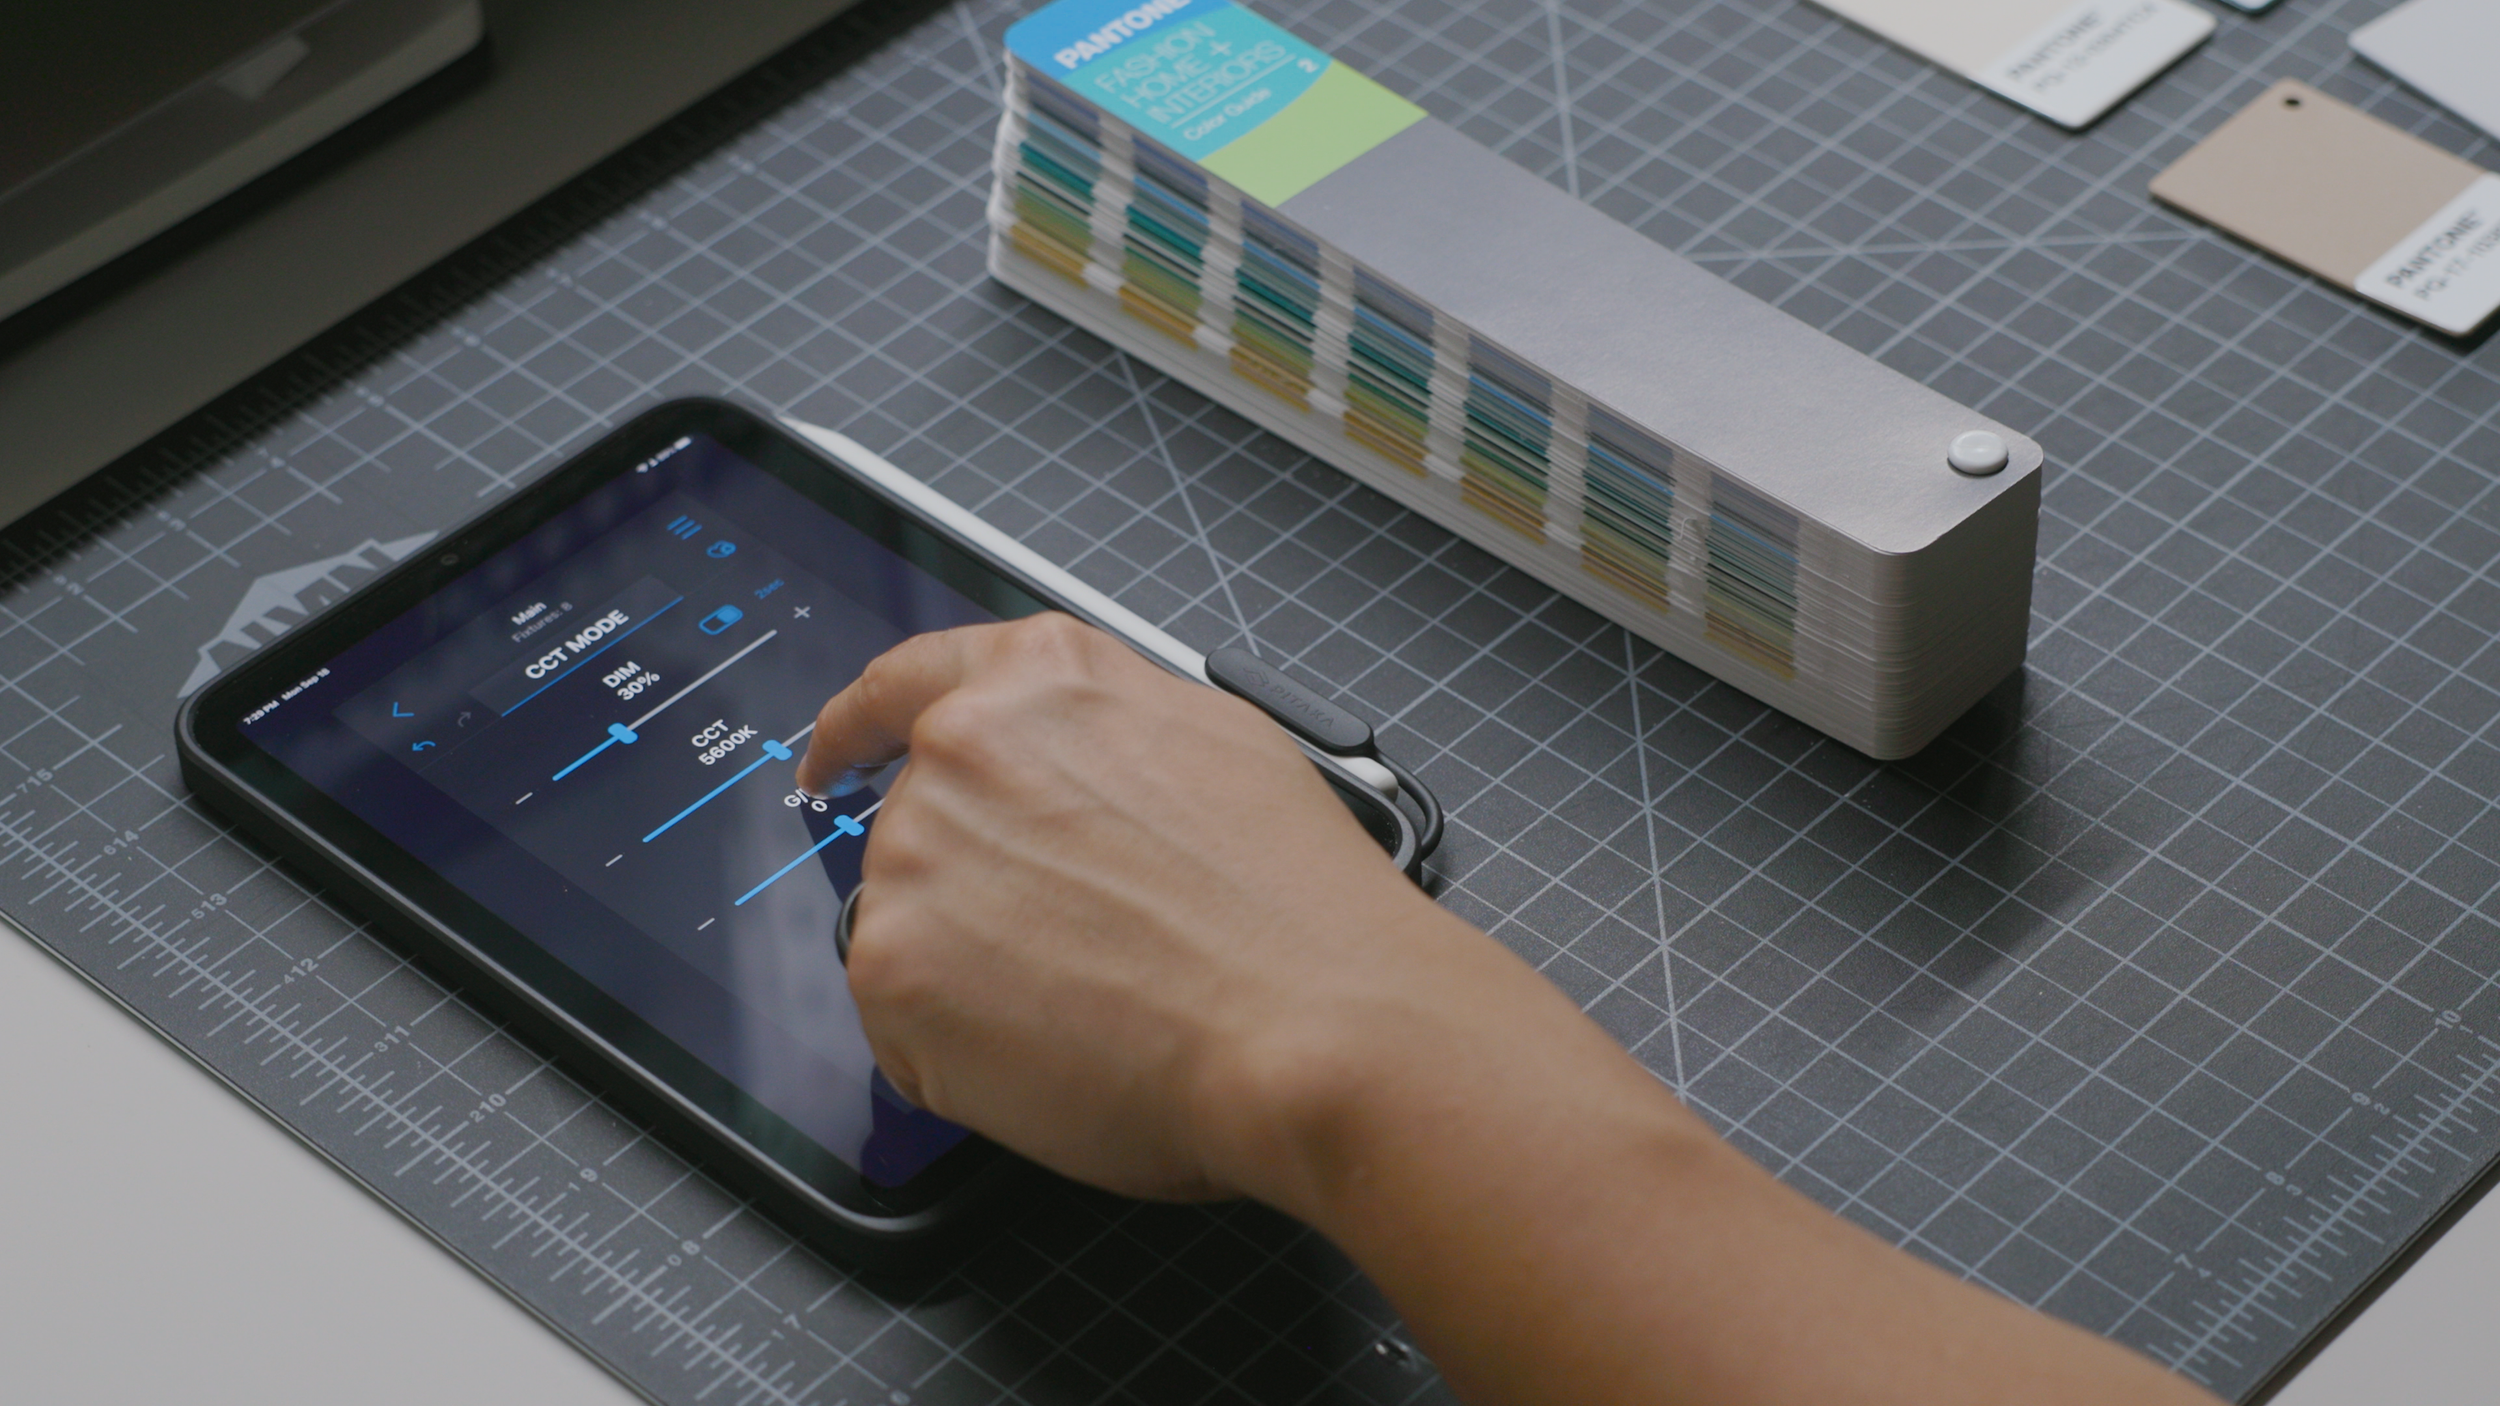
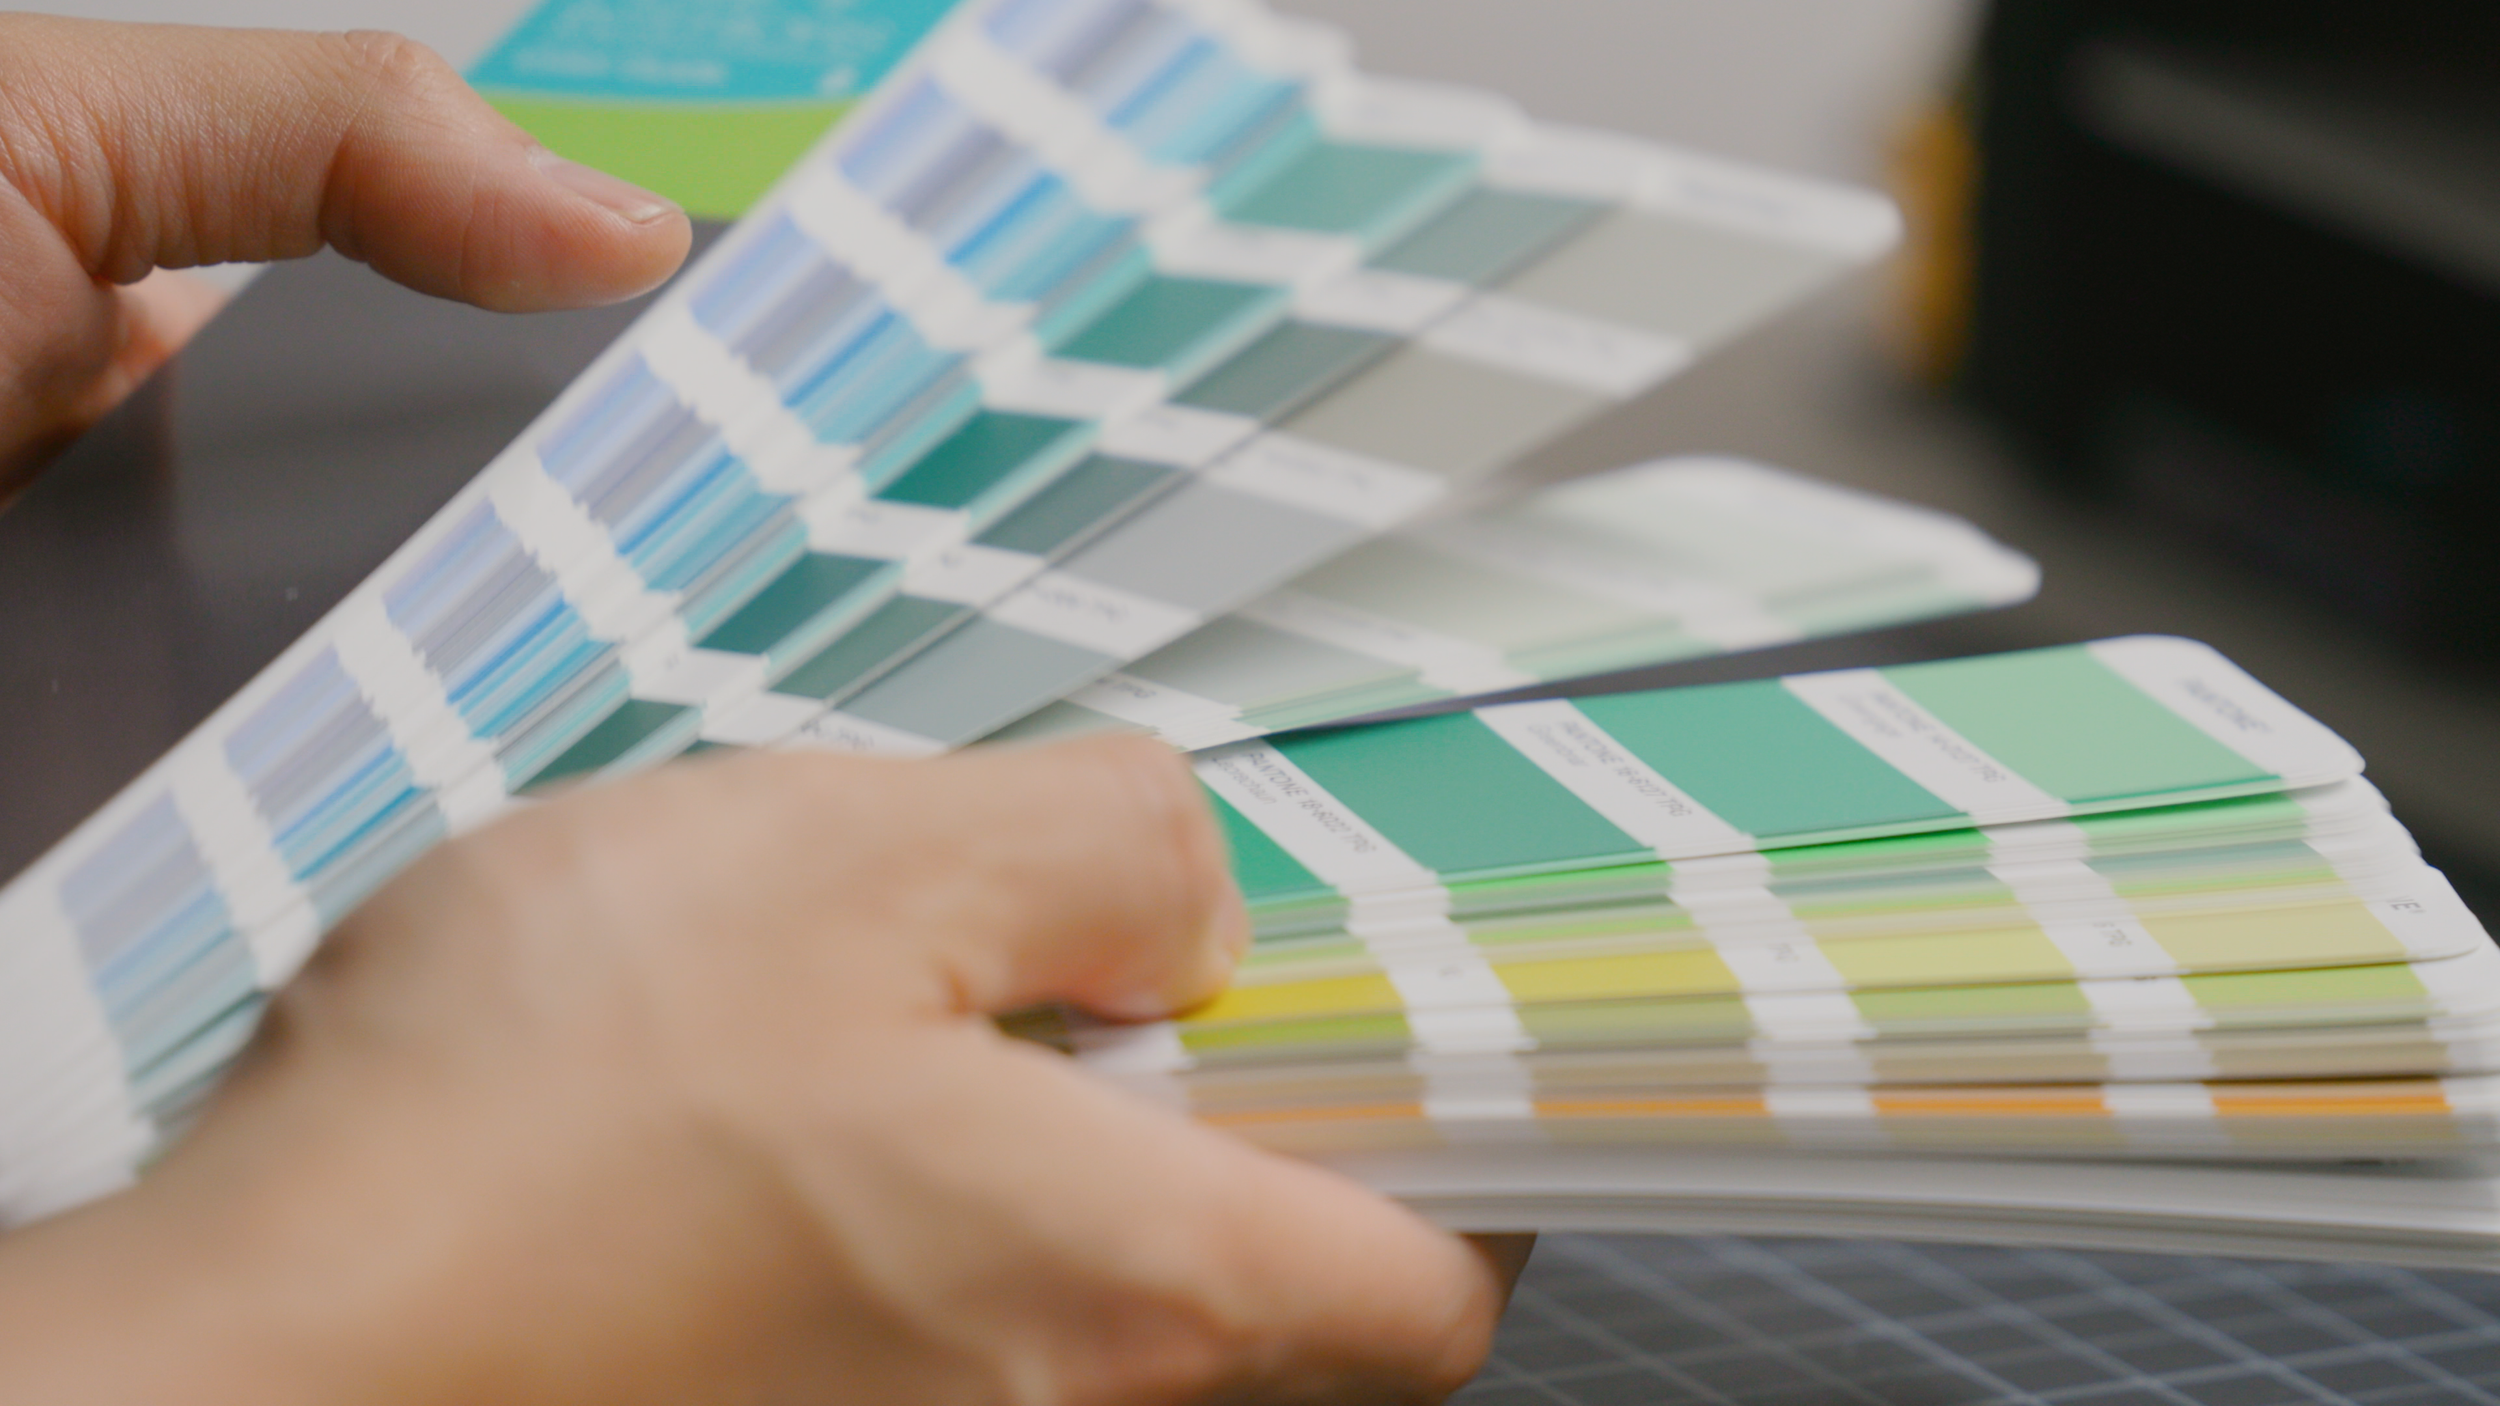
When it’s dark, I set up a network of lights throughout the office. They’re all made by Nanlite, a camera lighting company. These are fully adjustable across temperature and color, and can be controlled in the Nanlink app. I usually have mine set to 2700K to create a warm, cozy mood at night. But when I’m checking the colors of physical samples, I change the temperature of the lights to be daylight balanced at 5600K to ensure accuracy in my design work.


Lighting Links
When I’m doing less intense tasks, like spot-checking colors, I prefer to have ambient sounds in the background to keep me company. Sometimes I’ll play some chill beats through Spotify, which I control with my iPad and listen to through speakers that fill the room.


Music Setup Links
Pitaka Magnetic iPad Stand (customized with white oak veneer)
Soundcore X600 Portable Bluetooth Speaker
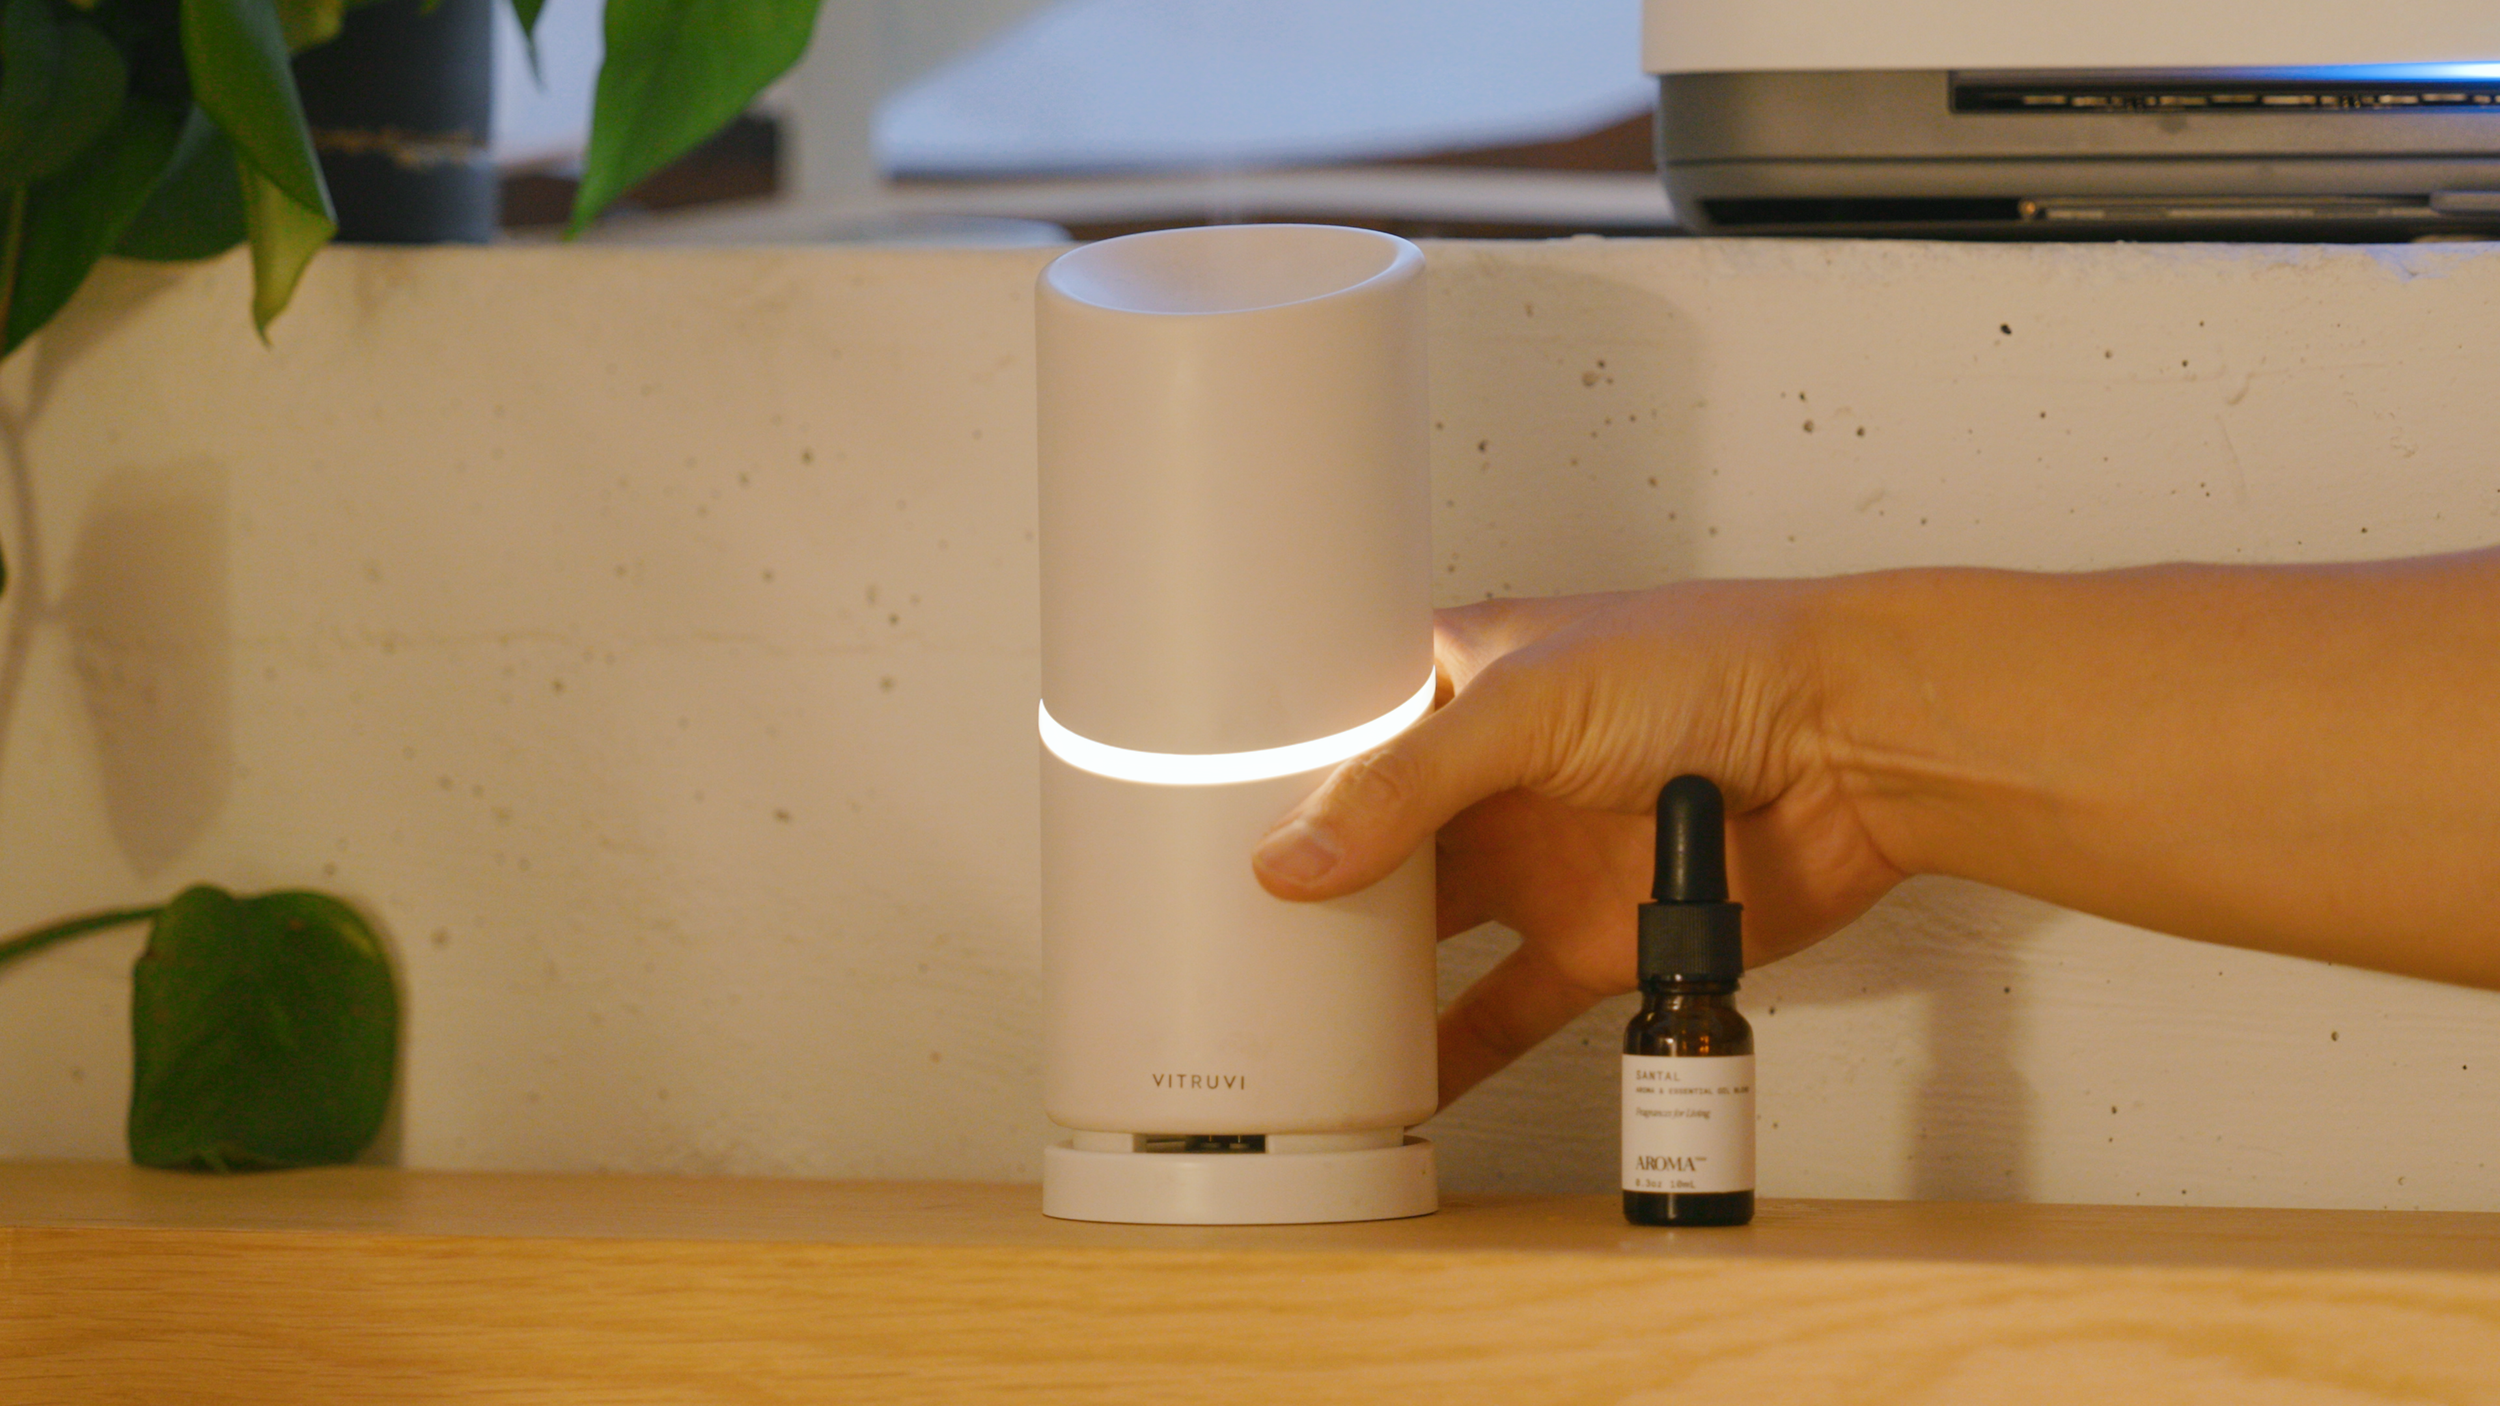
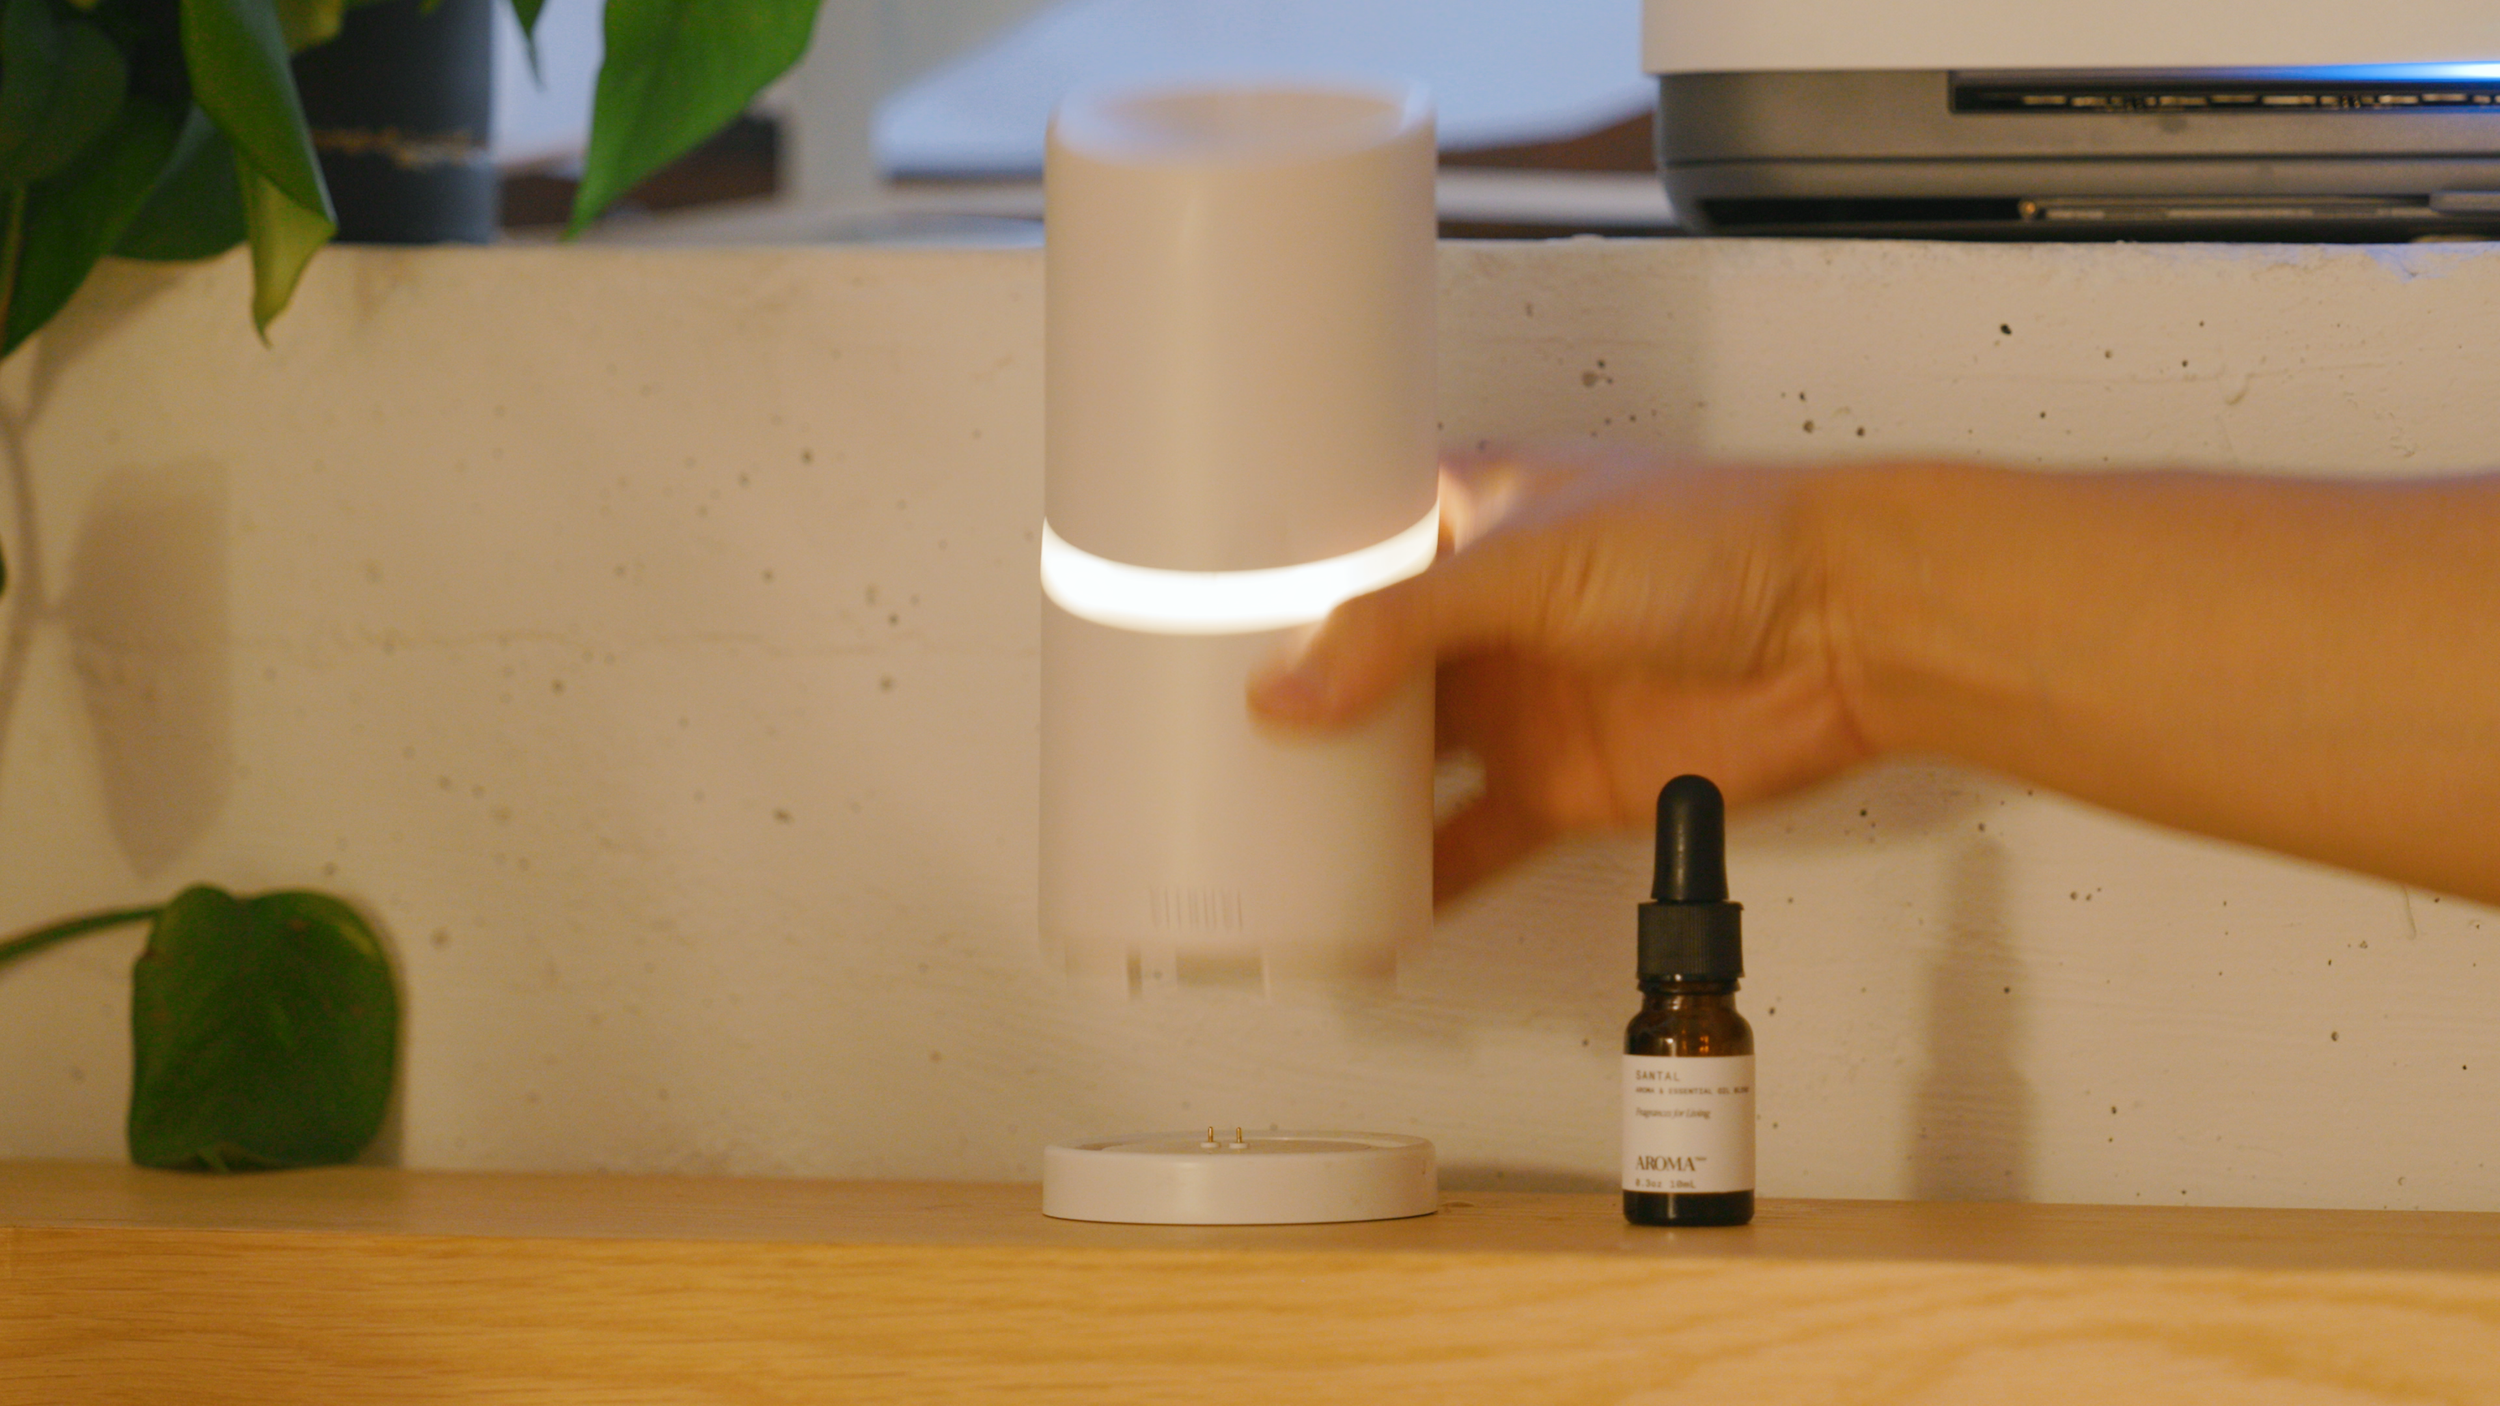
The last layer to my studio is scent. I’ve been using this wireless diffuser at the center of my office paired with this Santal fragrance. I get compliments on this, all the time, whenever I have visitors. This along with the lighting creates a welcoming and relaxing vibe for the environment.
Reflections
It’s been a joy to be able to design a place from scratch, and now, I’m even more excited to continue to work in it. I have a few interesting projects coming up on the channel, sharing my process and the products I’m designing, so subscribe if you’d like to follow along. And if there’s something you’d like to see more of, leave me a comment with your suggestions and questions.
Day 1 of getting the keys to the empty office.

One year later, Mod Musings Studio is complete.